
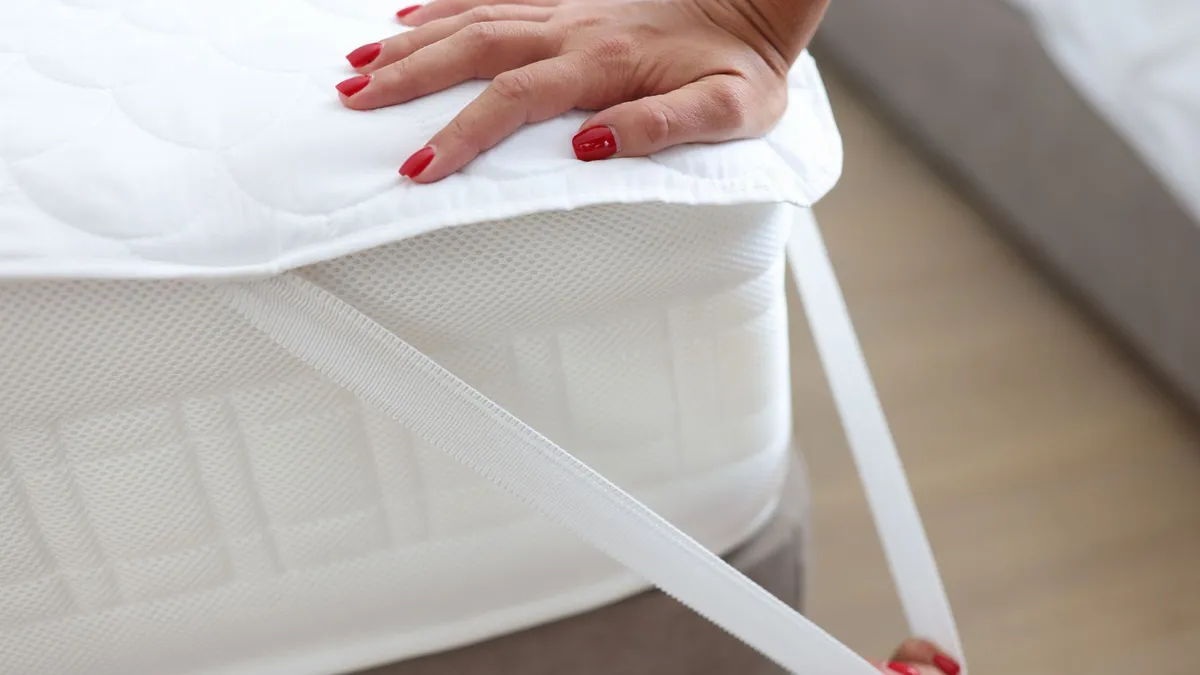
A clean and well-maintained bed is essential for a healthy and hygienic sleep experience. Mattress pads can add an extra layer of comfort and pressure relief to even the best mattress, but if your set up includes one, it's important to keep that clean too — even if you don’t sleep on it directly.
From spills and accidents to the build-up of dead skin cells and natural body oils, mattress pads can start to accumulate stains, odors and bacteria. But since they come in a variety of different materials such as cotton, down, wool and foam, there’s no one universal way to keep them clean.
If you’re looking at buying a new mattress pad, or even a new bed, now is a great time, since the Presidents’ Day mattress sales are now live, with epic savings on a variety of beds and accessories. But for now, here’s how to clean a mattress pad so your bed stays fresh!
The difference between cleaning a mattress topper and a mattress pad
Whilst mattress toppers and mattress pads might seem similar, when it comes to cleaning they are completely different due to their design and materials. Cleaning mattress toppers is often more involved than mattress pads.
Mattress toppers are often thicker, kind of like miniature versions of your mattress. This means they are made from materials including memory foam (some infused with cooling gels), latex or down. The materials used in the making of mattress toppers usually require spot cleaning or special care, plus, mattress toppers tend to be a lot bigger making them unsuitable for machine washing.
In contrast, mattress pads are a lot more maintenance-friendly. Pads are thinner and typically made from materials that are easier to clean such as cotton, wool, down or (non memory) foam. Regardless of whether you have a topper or a mattress pad, it’s always advisable to check your manufacturer's care labels for specific instructions before you embark on any cleaning, to ensure you don’t cause any damage.
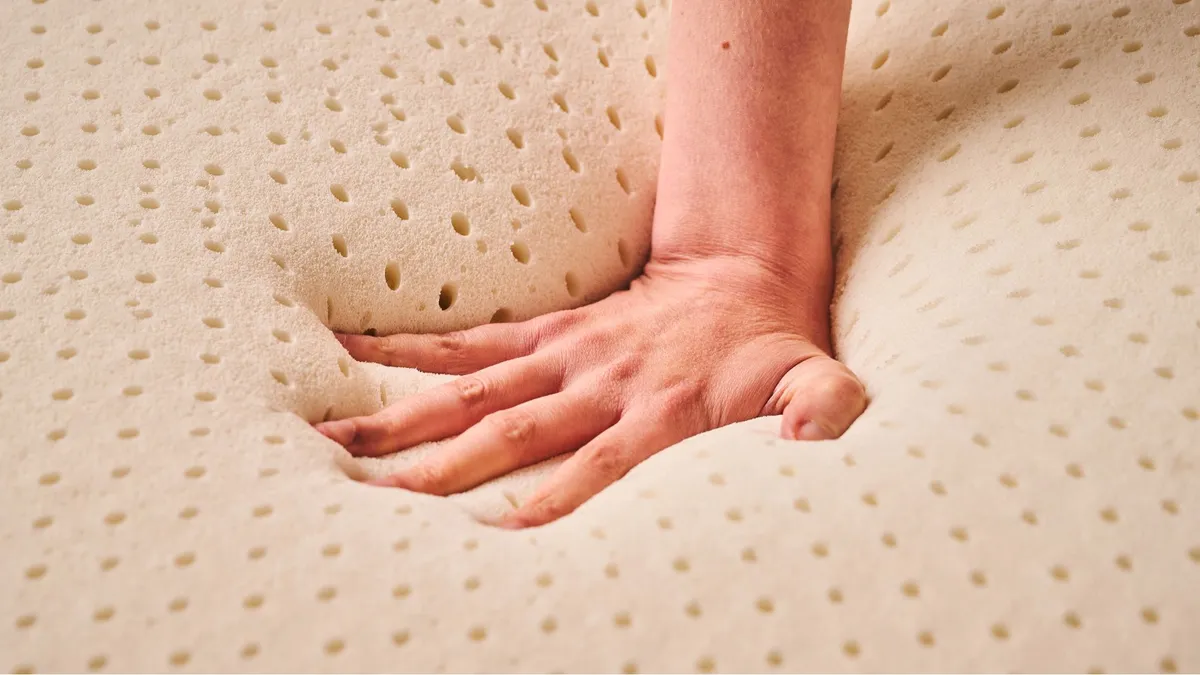
How to clean a foam mattress pad
Step 1. Prepare and spot clean
While we're not talking about cleaning a memory foam mattress here, all types of foam are more delicate that cotton or down pads, so extra care needs to be taken. That means you need to spot-clean the pad. First, you need to strip your bedding and then vacuum both sides of the pad. Vacuuming the surface will remove any dirt and debris that may have worked into the foam.
Next, make a solution using equal parts of water and white vinegar, you can also add in a small drop of mild detergent or lemon juice if the stains are stubborn. Apply the solution onto the area you’re spot-cleaning by dabbing it on using a clean cloth, being mindful not to oversaturate the area. Leave this solution to sit for around 20 minutes.
Step 2. Rinse and remove
Take a clean cloth and dip it in cold water before wringing out (remember, you don’t want to get the foam too wet). Dab at the area until you start to see the stain lift, this may take a little time, but be careful not to rub as you don't want to risk spreading the stain.
Next grab a clean, dry cloth and keep dabbing at the area to remove any excess moisture. Once the cloth comes back dry, you can move on to the next step.
Step 3. Allow to fully dry
Wet foam needs to be fully dried out before you reapply your bedding. If you don’t do this, you could create a breeding ground for mold and mildew. Allow the mattress pad to dry completely, open up windows or use a fan if you want to speed up the process but never apply heat as this could damage the structure of the foam. Turn the mattress pad occasionally to ensure it dries completely and evenly.
If you do need to clean the entire pad, then you can use a carpet cleaner to go over the surface. However, you do need to make sure the suction is strong enough on the cleaner to remove any excess water, as it’s really important not to allow the pad to get too wet. You'll still need to allow the pad to air dry as above, and this process will, of course, take a lot longer. So if you don’t have the right tools or even the time, you may want to consider just replacing the pad altogether.
How to clean a down mattress pad

Step 1. Check the care label and pre-treat any stains
First, like when cleaning a mattress, you need to check the care label for any specific instructions, then you can move on to pre-treating any stains. In general (though follow the instructions provided if the recommend a particular process), you can do that by dampening the stained area with cold water and applying a small amount of mild detergent (or dedicated stain remover suitable for down.)
Gently blot the area and leave to sit for around 20 minutes. If the stain is very stubborn, you can use this homemade stain remover solution which includes mixing 1/4 cup of hydrogen peroxide, two heaped tablespoons of cornstarch, two tablespoons of salt and one tablespoon of baking soda. Apply this to the area and again leave for 20 minutes before moving on to the next step.
Step 2. Place your mattress pad in the washing machine
The good news is that down mattress pads can typically be machine-washed. As always, do check the care label on your pad as some pads may have different limitations when it comes to temperature etc.
Put your mattress pad on a gentle cycle using cold water, as this will prevent any damage to the filling. You can add a little detergent to the cycle but make sure this is only a 1/4 of what you’d put in when doing a normal wash, as using too much could leave behind a residue that builds up over time and can actually trap dirt.

Step 3. Dry thoroughly
You can use your tumble drier to dry your down mattress pad. Place it in on a low-heat setting and remove often to shake the pad, this will ensure the filling doesn’t stick together and it’s drying evenly. A good tip is to add wool dryer balls or clean tennis balls to help fluff the down and prevent clumping.
Once the pad has been dried, air it out for a few hours before placing back on your bed. It's really important that you check that your mattress pad has no damp spots left and is fully dry, as sleeping on a damp mattress pad could lead to mattress mold growth and bacteria, and once that’s taken a hold, it’s tough to get rid of and could transfer on to your mattress.
How to clean a cotton mattress pad
Step 1. Machine wash
Like down mattress pads, cotton pads can also be machine-washed. Prepare by vacuuming your mattress pad to get rid of any loose dirt or debris that may be on the surface, using the upholstery attachment to avoid damaging the fabric.
If your mattress pad is heavily soiled then you will need to pre-treat any stains. To do this mix together some baking soda, water and a drop of mild laundry detergent and mix until it’s a paste.
Work this into the stain using gentle circular motions and leave it to sit for 20 minutes before removing the paste using cold water. Always use cold water as hot water may cause the stain to go deeper into the fibers.
Then, place the pad on a warm wash (don’t go any higher than 30º) using a gentle cycle.
Step 2. Rinse
Excess detergent doesn’t always rinse out of bedding completely, and can leave a thin film on the fabric. This doesn’t just make the fabric feel stiff and uncomfortable but can also trap more dirt. Plus, residual detergent can cause skin irritation or allergic reactions to those with sensitive skin.
To avoid having any laundry detergent still left on your cotton mattress pad, after the main wash, run the rinse cycle twice on your machine so that all detergent is completely gone.
Step 3. Tumble dry on a low heat
You can tumble dry your cotton mattress pad, so place it in the dryer on low heat until it’s fully dry. However, remember not to leave your mattress pad to sit in the tumble dryer once it’s done as this can cause wrinkles. Instead, remove it promptly and reshape if needed.
If you don’t have a tumble dryer then you can either line dry your cotton mattress pad or place it on a flat clothes horse in a space that is well ventilated. If you have one, place a dehumidifier close by to speed up the drying time.
Turn the mattress pad often so it dries evenly and once dry give it a good shake to restore its shape. Though this drying process takes longer, always make sure your mattress pad is fully dry before you place it back on your bed.
How to clean a wool mattress pad
Step 1. Spot treat stains
Just like the best organic mattresses made with wool, mattress pads of the same material can be a little more difficult to clean. This is because wool can only be washed if it’s gone through a special treatment that changes the way it interacts with water.
As a result, the best option is to spot-treat any stains rather than wash the whole pad. To do this, mix together a thick paste made up of baking soda and water. Spread this on the stain and leave to dry. Once dried, brush away the powder and gently wipe the area with cold water.
2. Place in washing machine (optional depending on care instructions)
If you do want, or need, to wash the whole wool mattress pad, then double-check the care labels first to ensure that it can go in the washing machine. Though many cannot, if yours can, then you should use either the hand-wash setting or a specific wool cycle. It must be on a cold wash and you should only use wool-specific detergent. Again, take care to follow the instructions on the label.
If the wool hasn’t been properly treated it can felt and shrink when not handled properly. It's important to rinse the wool to make sure all soap is removed, and when you take it out of the machine, gently press our any excess water. You should never wring or twist wool as this can damage the fibers and cause misshaping.
3. Air dry
Do not place your wool mattress pad in the tumble drier or dry in direct sunlight, since wool and heat don’t really work well together. Instead, reshape your mattress pad whilst it’s damp and allow to air dry completely, always laying it flat to dry and avoiding heat.
You may want to turn the pad over a couple of times throughout the drying process so that it dries evenly, and if you need to speed up drying, ensure all windows are open and try using a fan or dehumidifier.

How long do mattress pads last?
With proper care and regular cleaning, a quality mattress pad can last anywhere between two and ten years. The difference in lifespan comes down to various factors, such as the materials the pads are made from and how often they’re used. Foam mattress pads can last between three and seven years, with memory foam or polyfoam typically lasting the longest, though regular rotation is recommended.
Cotton mattress pads have a lifespan of between two and five years, although they are prone to thinning and losing shape over time, so you'll likely need to replace these sooner rather than later. Finally, a wool mattress pad can last anywhere from five to 10 years, this is because wool is naturally durable and retains its loft better than cotton or foam. Signs your mattress pad needs replacing are if it starts to flatten, becomes uneven or if you notice any tears or rips.
How often should you clean a mattress pad?
Regardless of what material your mattress pad is made from you always need to treat any liquid spills, accidents or stains as soon as you see them. Otherwise, how frequently you should clean your mattress pad depends on what type you have.
It’s recommended that you give your cotton mattress pad a full wash once a month if possible. For wool and foam, it's advisable to clean them every six months, but you can just spot treat stains and vacuum the surface using the upholstery attachment. The same goes for down mattress pads. This will remove any dead skin cells, dirt or dander that has found its way onto your mattress pad.
Finally, even with a mattress pad, it's still worth using one of the best mattress protectors. A mattress protector will help create a barrier between you and your mattress pad so there’s less chance of any moisture, dirt debris or even dust mites even making it onto the surface, which will reduce the amount of cleaning you’ll have to do.

