Tom's Guide Verdict
Design professionals and serious 3D-printer users will find the Ultimaker 3 well worth the high cost, thanks to its excellent print quality and support for a wide range of materials.
Pros
- +
Excellent print quality
- +
Support for a range of materials
- +
Excellent software
Cons
- -
Expensive
- -
Slow print times
Why you can trust Tom's Guide
The Ultimaker 3 comes from the Dutch 3D-printing giant, and this printer arrived with a big set of shoes to fill. We loved the Ultimaker 2, but the Ultimaker 3 offers more flexibility and dual extruder support that make it a very attractive 3D printer for serious users. It's not cheap, though: At $3,495 for the standard model and $4,295 for the extended model that offers a larger printing area, the Ultimaker 3 is a serious investment.
But for those who want cutting-edge fused deposition modeling (FDM) printing and flexibility in materials, the Ultimaker 3 is a sound investment and one of the best 3D printers still available today.
Design: A Sleek Machine
The Ultimaker 3 has the same white-plastic design as the Ultimaker 2, with built-in LED lights that give it a sci-fi look. The standard model that we looked at measures about 13.5 x 15 x 15.5 inches, so it will take up a fair chunk of your desk space.
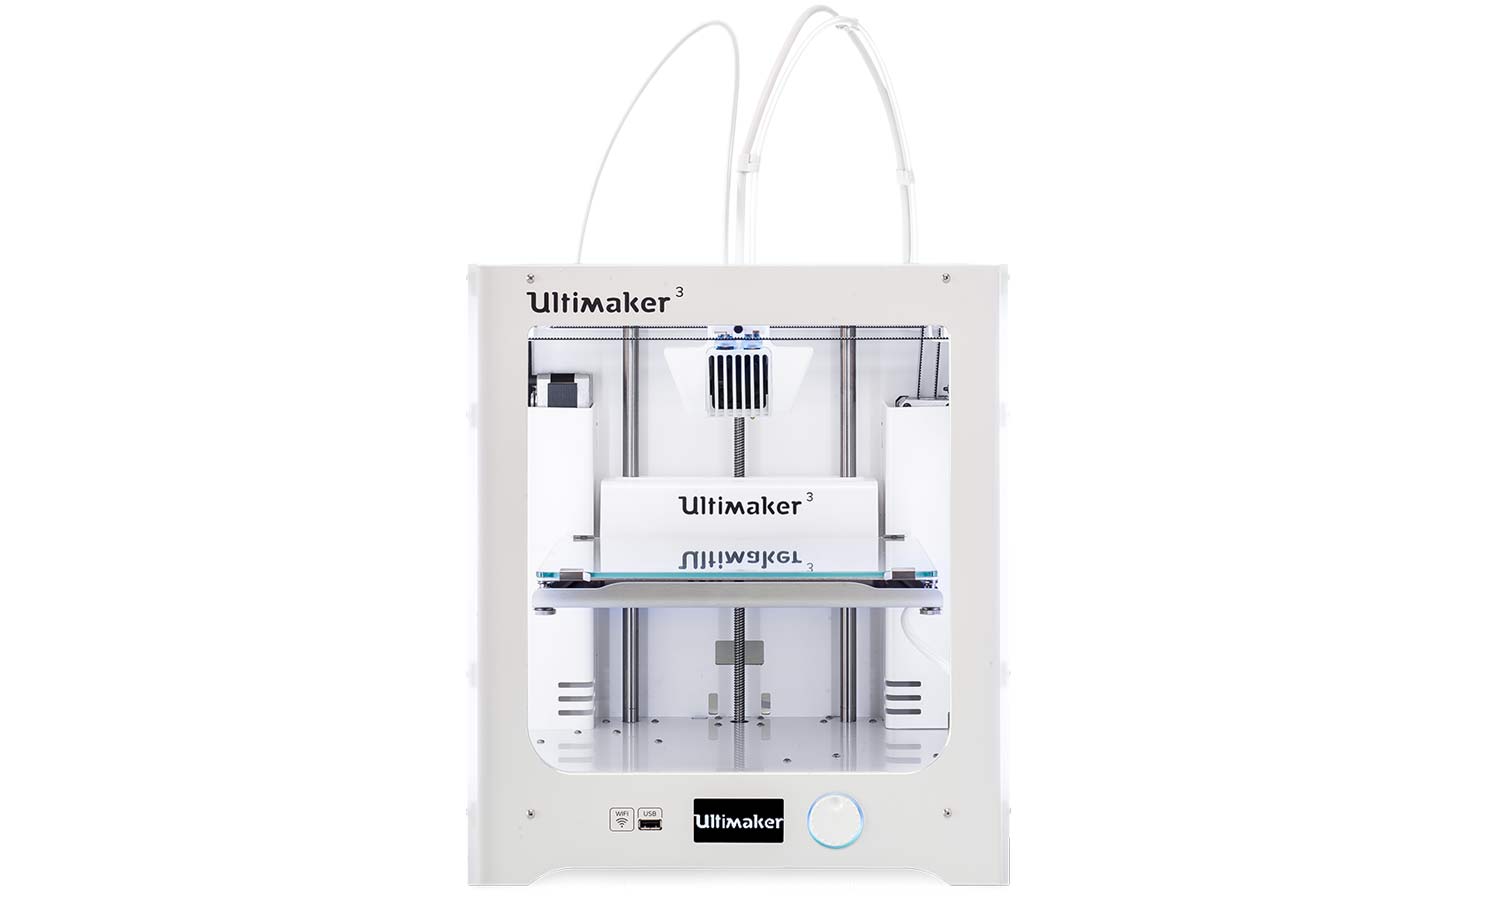
The build volume that this 3D printer offers is impressive for the size, though: It can print objects up to 8.5 x 8.5 x 7.9 inches — a total of 570 cubic inches. That's a touch bigger than the 555 cubic inches that the similarly priced MakerBot Replicator+ offers, but both are big enough for most print jobs. Most people will never want to print something that large, as it would take a long, long time.
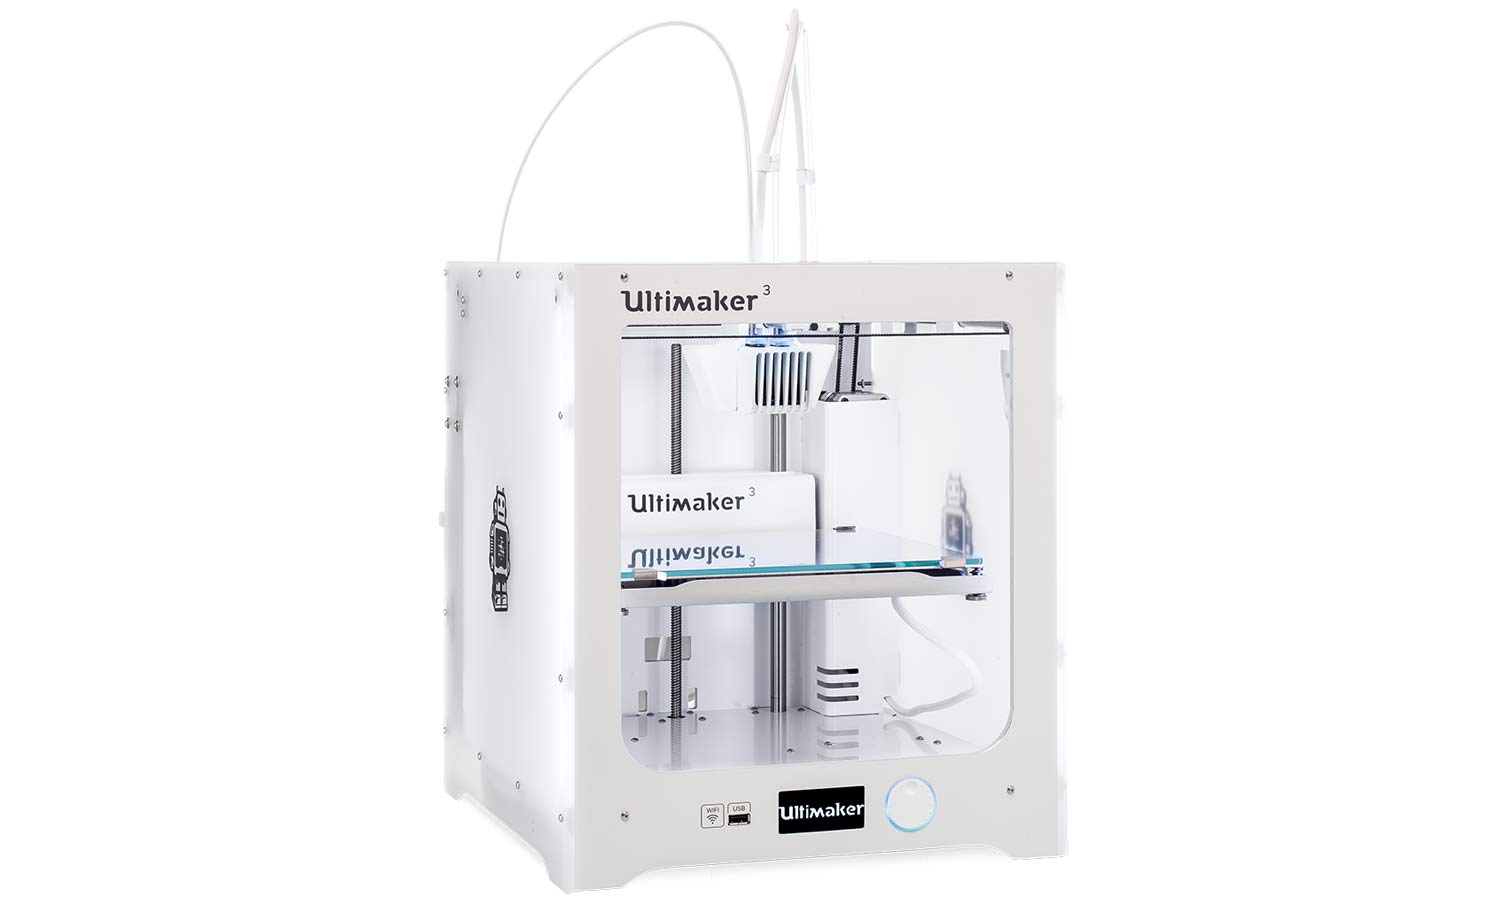
The Ultimaker 3 Extended model is taller than the standard one, measuring 19.3 inches high. This allows it to increase the printing area to 8.5 x 8.5 x 11 inches, though, for a total of 794.75 cubic inches.
The major innovation in the Ultimaker 3 is a redesigned printhead, which includes two swappable extruders. (Ultimaker calls these "print cores.") This means the Ultimaker 3 can print from two reels of filament at once, so you can print in two colors or with two different materials. The best use of this is the water-soluble PVA filament that Ultimaker offers (and a reel of which is included with the Ultimaker 3), which can be used to print supports. When printing with a single extruder and material, you have to manually remove the supports after printing. With PVA filament, you can print the object in one material and the supports in PVA, and then remove the supports with water.
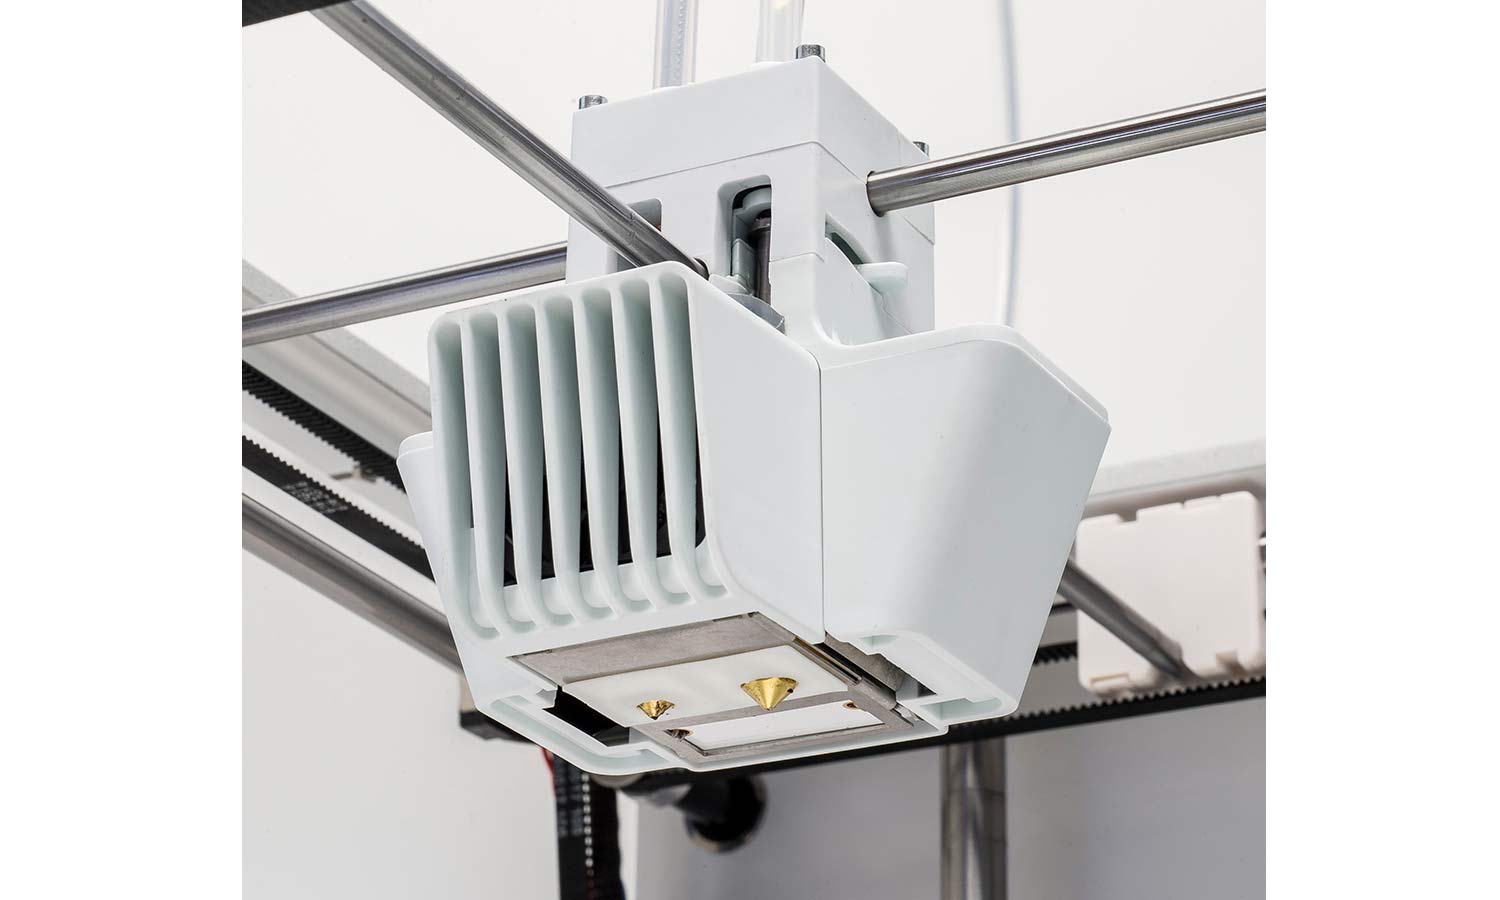
The redesigned print head also allows you to easily swap out the print cores for different materials. Three print cores are included: two that can be used with materials such as PLA and ABS, and one that can be used with the new PVA water-soluble filament. These print cores can be swapped in less than a minute, so you can quickly switch from printing with PLA and PVA to printing with two colors of PLA, then back again. Each of the print cores has an ID chip embedded in it, so you won't accidentally use the wrong one.
The Ultimaker 3's print bed features a glass sheet over a heating element that warms the glass. You can remove the glass sheet by undoing the two clips that hold it in place on the front of the print bed, which makes it easier to remove large prints. We found that most prints stuck to this print bed without issue, but painter's tape or white glue can be used and easily removed after the printing is complete.
MORE: Best 3D Printers
Print Materials: Lots of Support
Ultimaker has always supported a wide range of print materials, and the Ultimaker 3 continues this tradition. Out of the box, the Ultimaker 3 can print with standard materials, such as PLA and ABS, plus more exotic ones, like nylon and copolyester (CPE), that require higher temperatures. The printer doesn't support flexible filaments such as NinjaFlex, but Ultimaker does offer an alternative called TPU 95A that is as flexible as rubber. The extruder can reach a maximum temperature of 536 degrees Fahrenheit (280 degrees Celsius), and the print bed can reach 212 degrees F (100 degrees C).
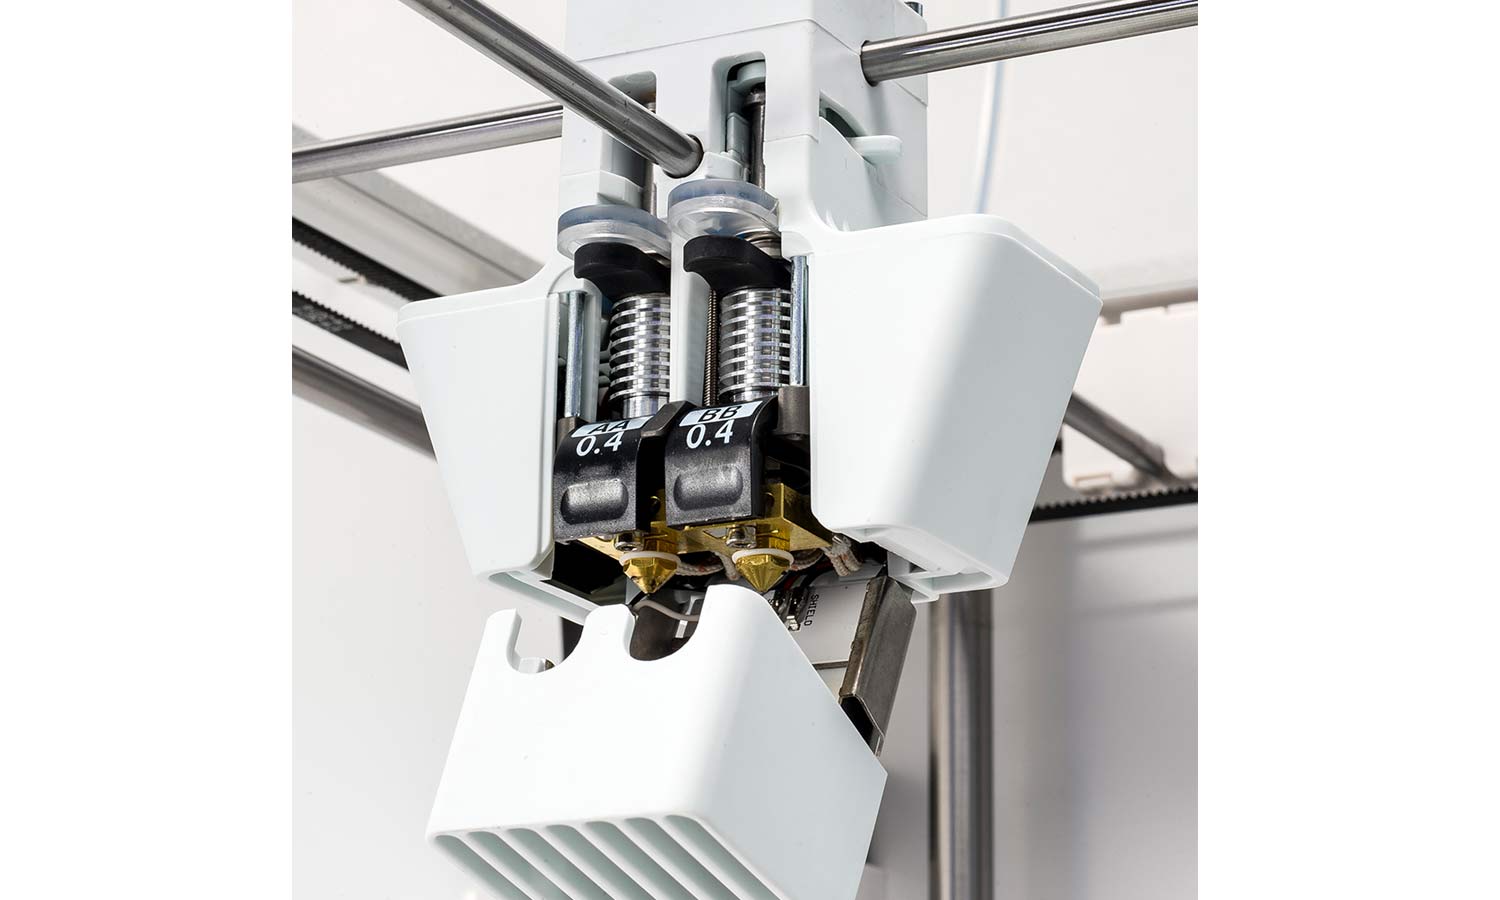
The Ultimaker 3 uses 3-millimeter (0.2 inches) filament, which is thicker than the 1.75-mm (0.7 inches) type used in many FDM 3D printers. Reels of this material bought from Ultimaker cost about $50 and include an NFC tag that identifies the type and color to the printer. Unlike printers from the likes of XYZprinting, though, this doesn't stop you from using other manufacturers' materials. The printer will work with filament without an NFC tag, and the material type can be selected manually on the printer or in Cura easily.
Setup: Getting Started with Ease
The Ultimaker 3 comes mostly preassembled, so setting it up is simple. You remove some tape, install the print spool holder and connect a cable, and the Ultimaker 3 is ready to go. The printer includes a Wi-Fi interface, which you set up using the Ultimaker app, available for both iOS and Android. This app can also monitor and control prints. We were up and printing about 30 minutes after opening the box.
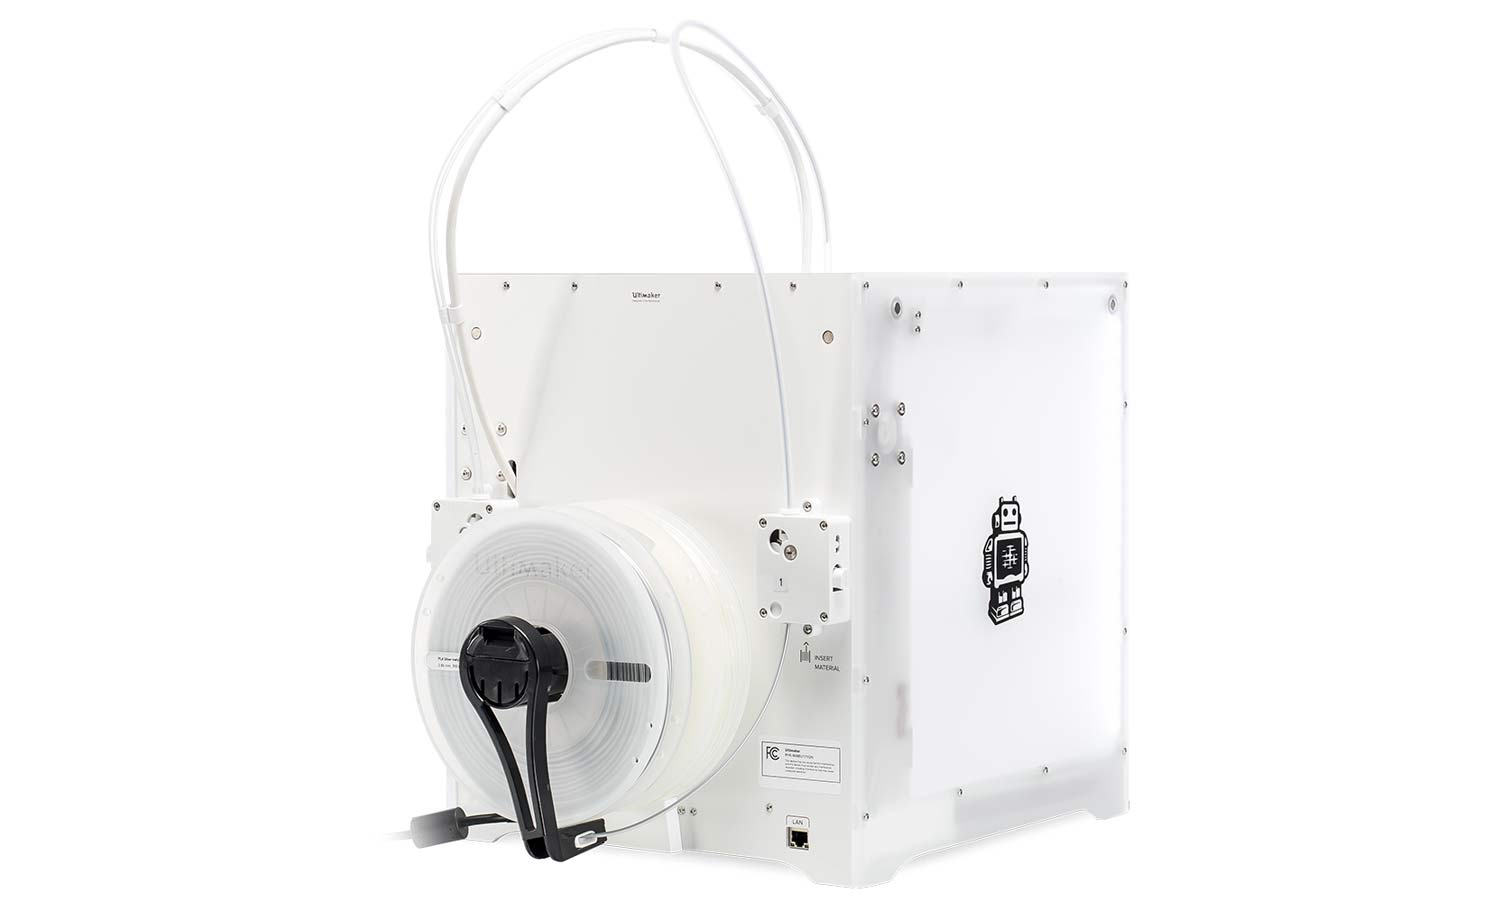
All printers require bed leveling, where the distance between the print bed and the extruder is set to make sure that the first level of the print is nice and thin. The Ultimaker 3 does this automatically at the start of every print with a process called automatic leveling. During this process, the printer uses the printhead, moving it over the print bed and lowering it until it touches the print bed and triggers a switch. Doing this at six points on the print bed ensures the print bed is level. This can also be done manually using a piece of paper if required, but we found that the automatic process performed flawlessly.
Interface: Filled with Features, But Easy to Use
There are three ways to control the Ultimaker 3: the onboard controls, the Cura program running on a computer, and the mobile app.
The straightforward onboard controls include a small OLED screen and a combination dial and button. From here, you can start a print, monitor print progress or control the printer options, such as changing filaments or print cores. It's a simple system that works well; you can print from a USB thumb drive with just a couple of clicks of the dial.
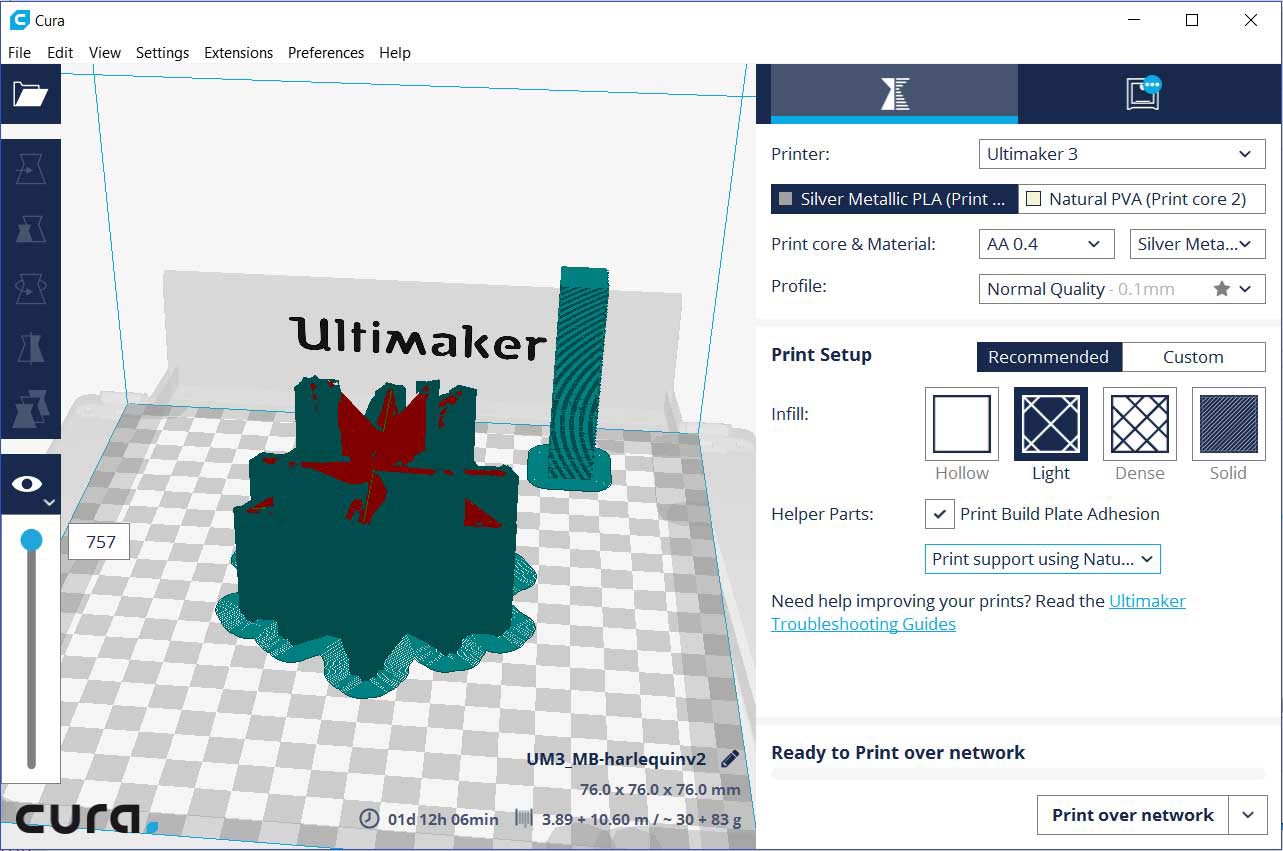
The Cura program is how most users will control this printer. This open-source app is available for macOS, Windows and Unbuntu Linux, and can control the printer over a USB or network connection. Cura can read most 3D-model formats, and then slice and prepare them for printing. You can't create new models, but you can do basic editing actions, such as scaling, moving and combining multiple models into one print. Cura also converts the model into the layers that will be printed (called slicing) and creates the file that is sent to the 3D printer. Finally, it sends this file to the printer and sets it working. You can monitor the print from Cura, and see images from the small camera built into the printer body.
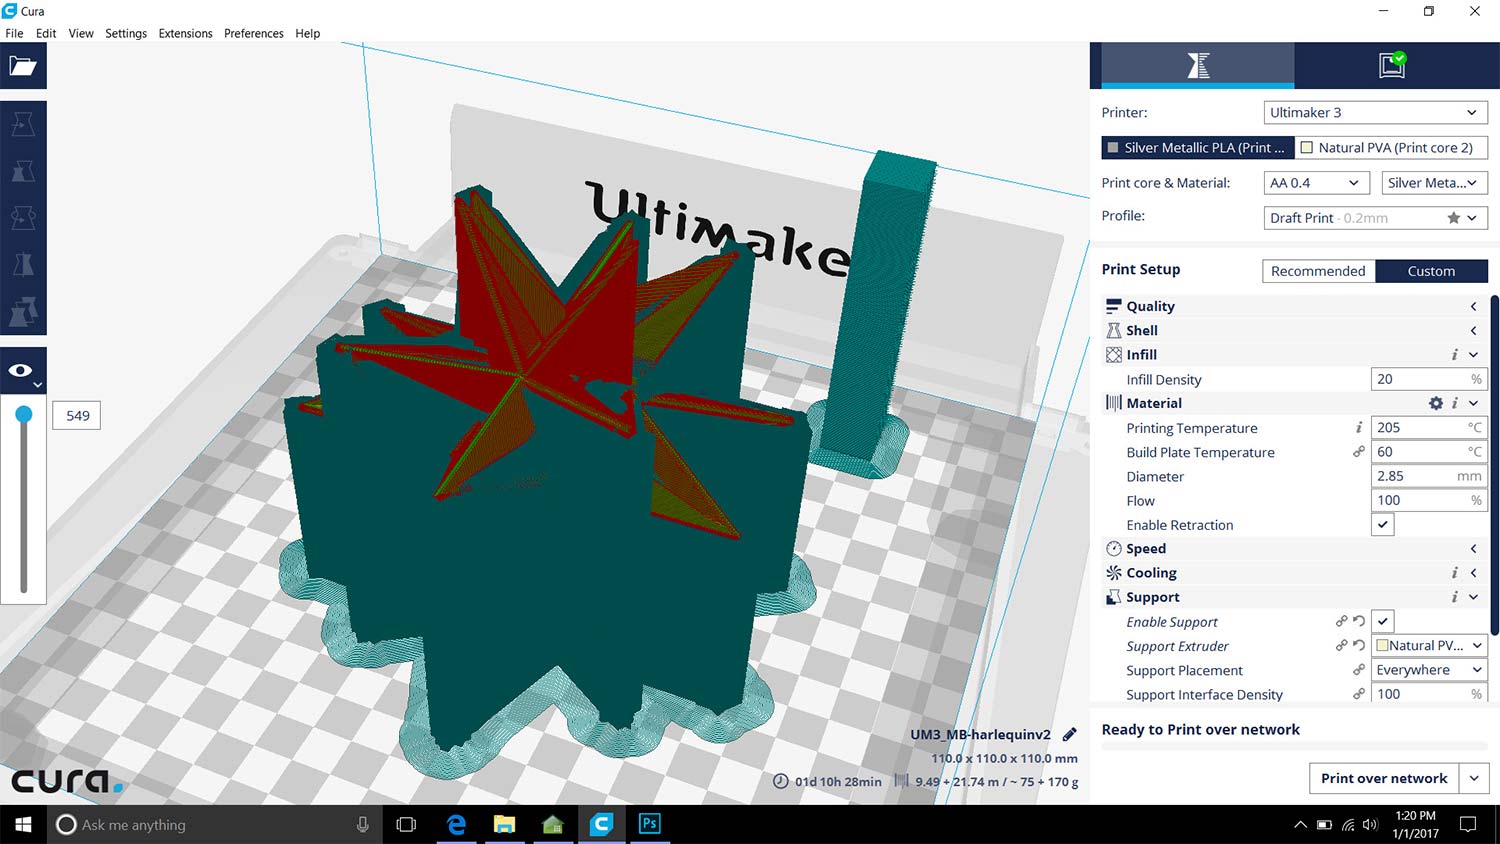
Cura is a fairly simple program to use, providing a 3D preview of the model that you can move around. It also provides access to the numerous settings that control how the print is created, including how much material is used to support the inside of the model (called infill) and how the model is supported during printing. Using the NFC tags inside the Ultimaker print reels, the printer itself tells Cura which material is loaded, so you aren't going to accidentally use the settings for ABS with PLA filament.
MORE: How to Buy a 3D Printer
Finally, the Ultimaker mobile app allows you to load and print models directly, using the slicing engine built into the Youmagine.com site that Ultimaker runs. It also lets you monitor the print from the printer's built-in camera.
Print Process: Straightforward with Few Failures
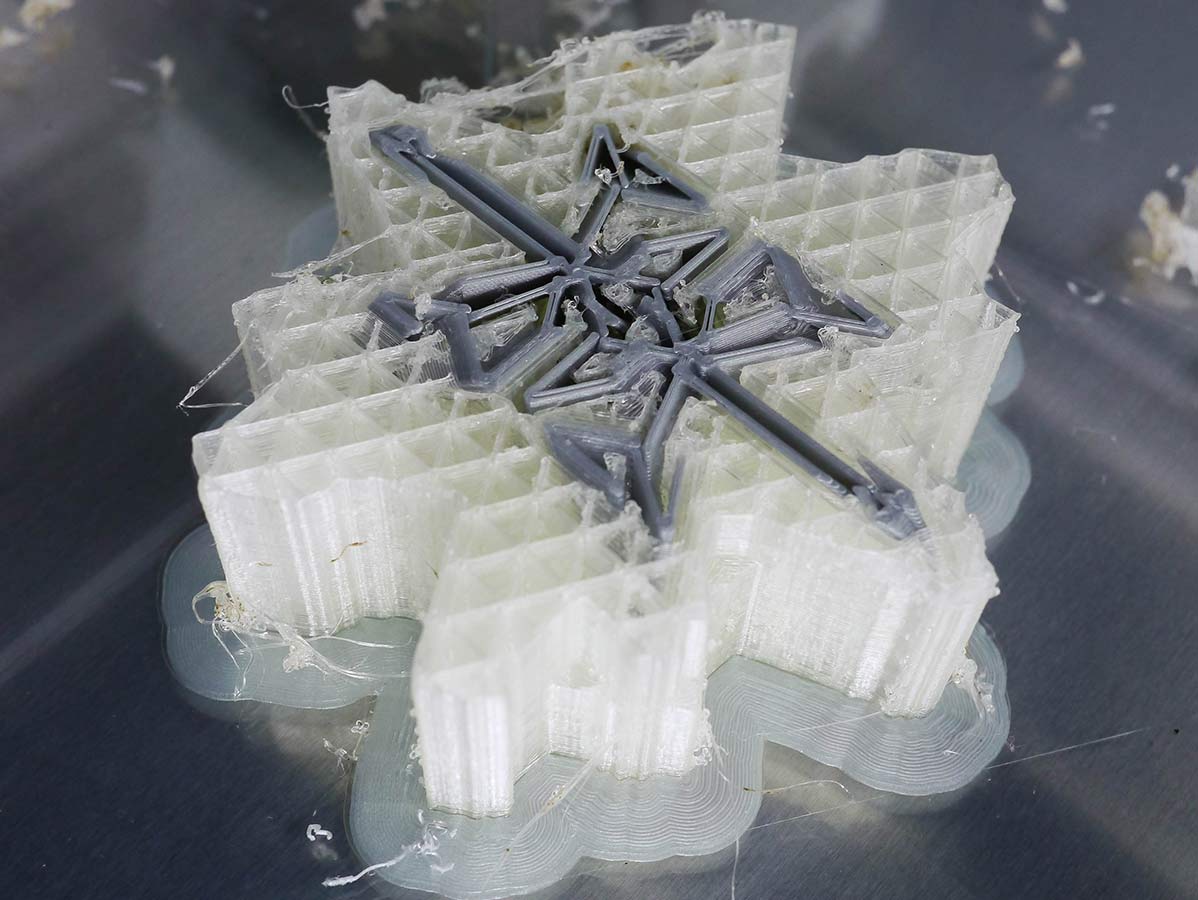
The Ultimaker 3 proved to be a very reliable printer, with few problems occurring in our test prints. None of our prints failed completely. All of the prints that we did with PLA, ABS and the water-soluble PVA material stuck nicely to the print bed and didn't wobble or fall during printing. We found that parts of the PVA supports had a tendency to fall off or become loose, leaving bits of material lying around the print bed. However, this didn't cause the print to fail; precisely for this reason, Cura builds more supports than are needed.
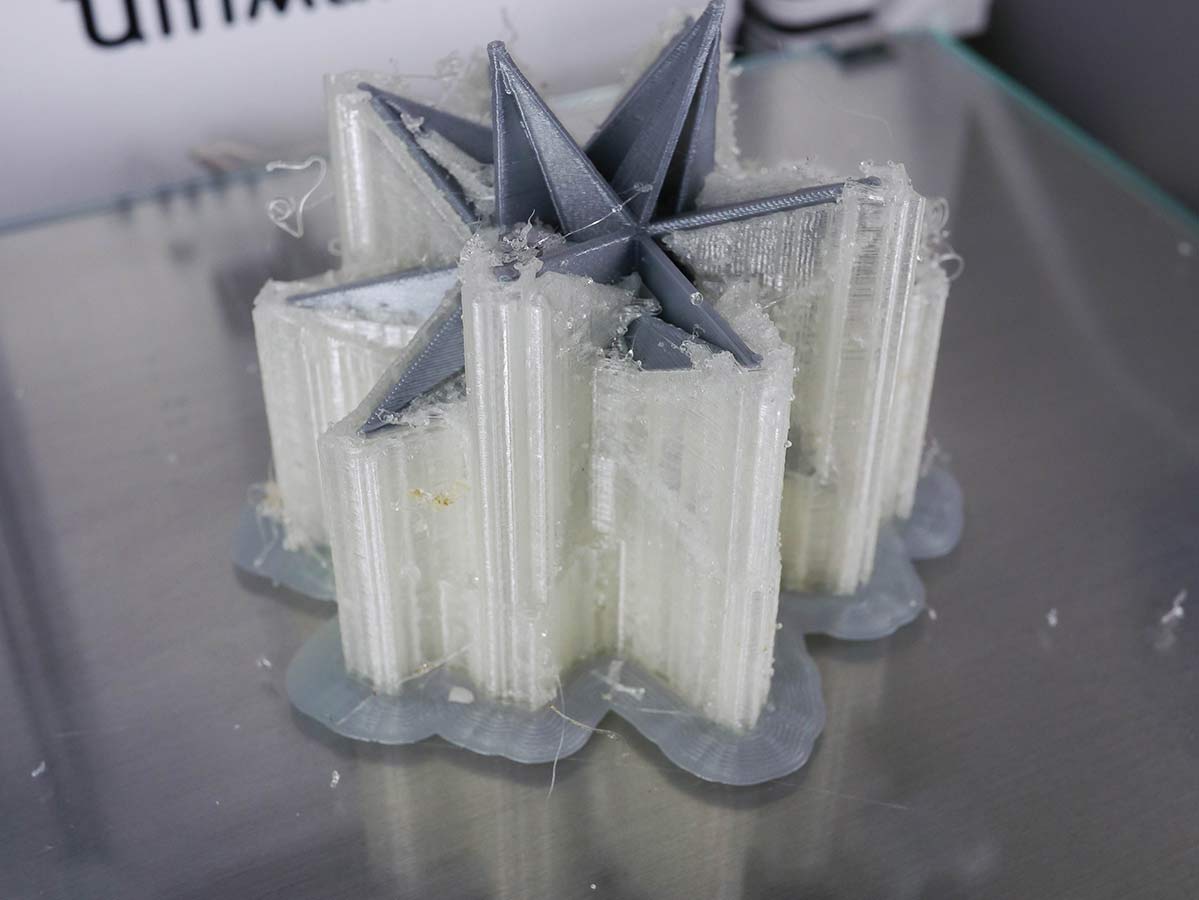
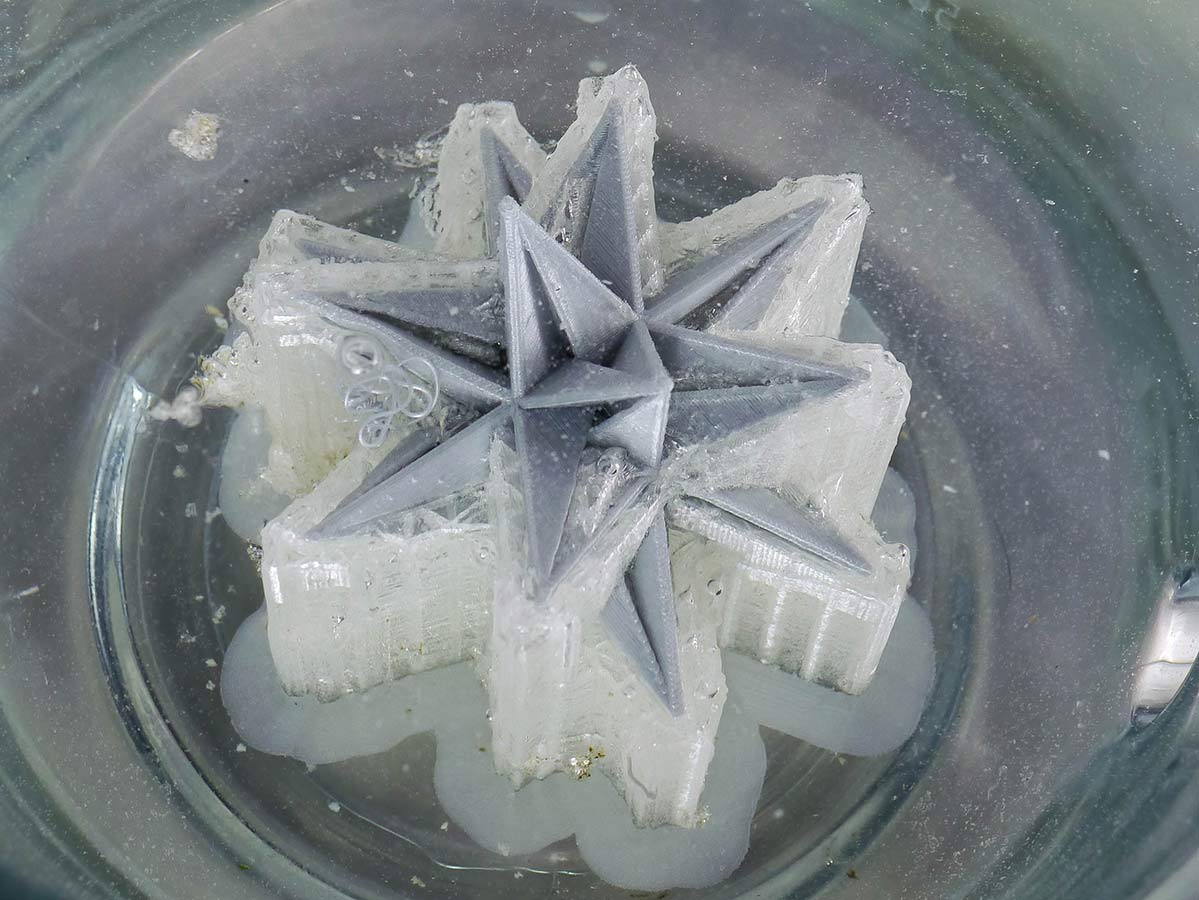
The print process can also be monitored from Cura or the Ultimaker 3 app through a small camera built into the printer. The printer isn't overly noisy, but it is definitely an advantage to be able to monitor it from another room.
Once the print is complete, you have to remove it from the print bed. This does require some force, as both PLA and ABS stick to the glass print bed too well. We found the best technique was to use the included paint spreader to lift a corner of the print and then slowly push this under the print until it lifted off. It works (and it doesn't damage the tempered glass print bed), but it does require some brute force.
Print Speed: Very Slow
The Ultimaker 3 is a rather slow printer; we found that it took anywhere from 6 hours and 6 minutes in draft mode to a little more than 24 hours in best-quality mode to print our 3.5-inch tall "The Thinker" test model. That's a lot slower than some printers; for example, the MakerBot Replicator+ could crank out a similarly sized draft print in less than 2 hours, or about one-third of the time the Ultimaker 3 took. The Ultimaker 3's print quality was superior to that of the Replicator+, though, even in draft mode.
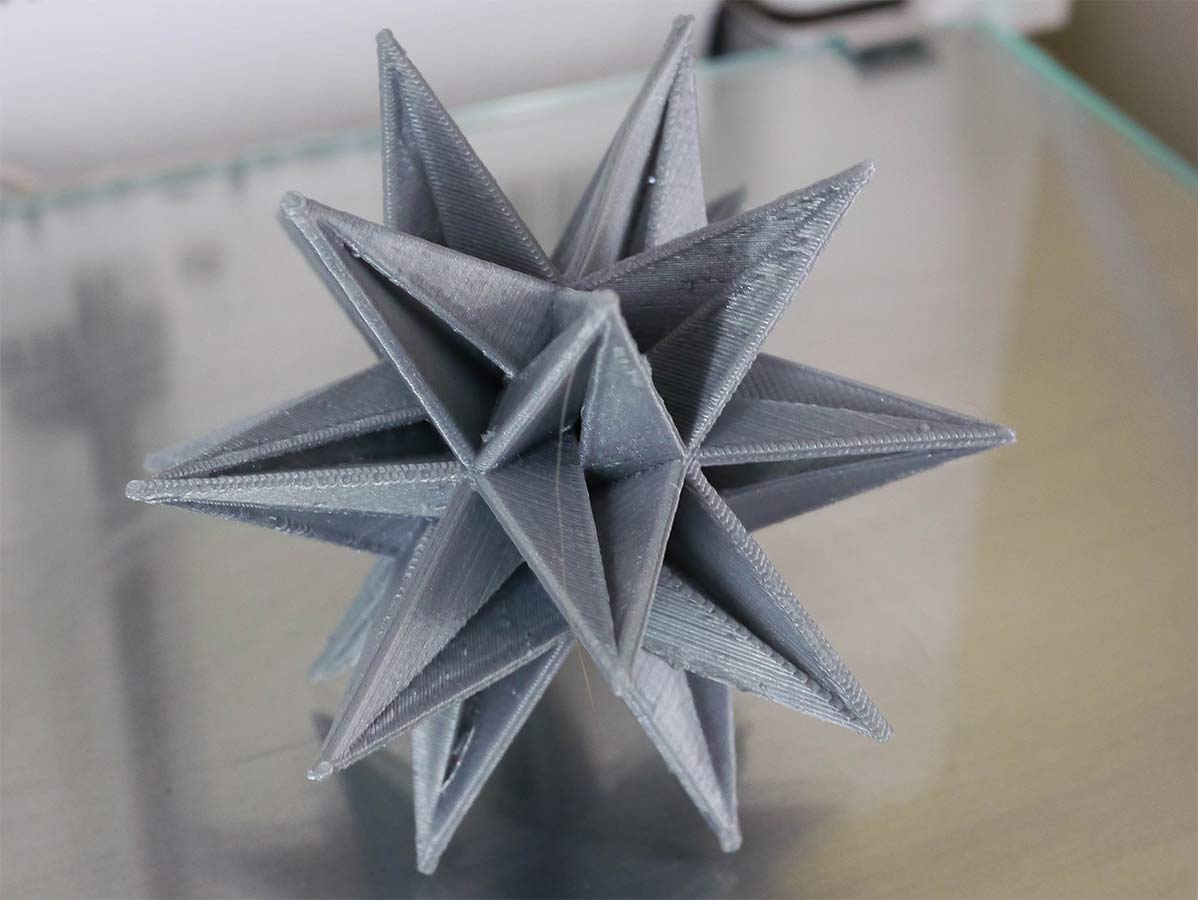
Notably, although using the PVA filament to build water-soluble supports definitely makes it easier to clean prints, it also adds time. It took about 14 hours to print our geometric sculpture model in normal mode with supports printed in the same PLA material as the model itself. In comparison, it took a little more than 28 hours — twice as long — to print the same model with soluble PVA supports. That's a huge time difference, which means you'll probably end up using PVA supports only when you absolutely have to.
The MakerBot Replicator+ could crank out a similarly sized draft print in about a third of the time the Ultimaker 3 took. The print quality of the Ultimaker 3 was superior, though, even in draft mode.
Ultimaker told us that it is working to improve the printing speeds for PVA, and the company releases regular updates to Cura and the printer firmware that will speed up the process somewhat. However, the company notes that printing with multiple materials will be slower than with a single material, as it involves heating two materials and shifting between the extruders. Ultimaker is not wrong in that regard, so be warned that using this feature will probably always result in slow printing even as it opens up new possibilities for 3D printing.
Ultimaker offers the example of a 3D-printed sculpture of freely spinning spheres inside each other, where each sphere is printed inside another and held in place with dissolvable supports. This means that the spheres can be printed at one time with soluble support between them, rather than being printed as multiple parts that are glued together. This means the whole object can be printed in one pass, with the supports removed later with water, leaving the spheres to move independently.
MORE: 8 Awesome 3D Printing Trends to Watch
Print Quality: Some of the Best We've Seen
We were very impressed with the Ultimaker 3's print quality. The printer handled all of our difficult test models smoothly, producing very attractive prints with great detail and smooth, clean surfaces. Even in the fastest draft mode, we found that the prints looked great, with very few glitches or problems.
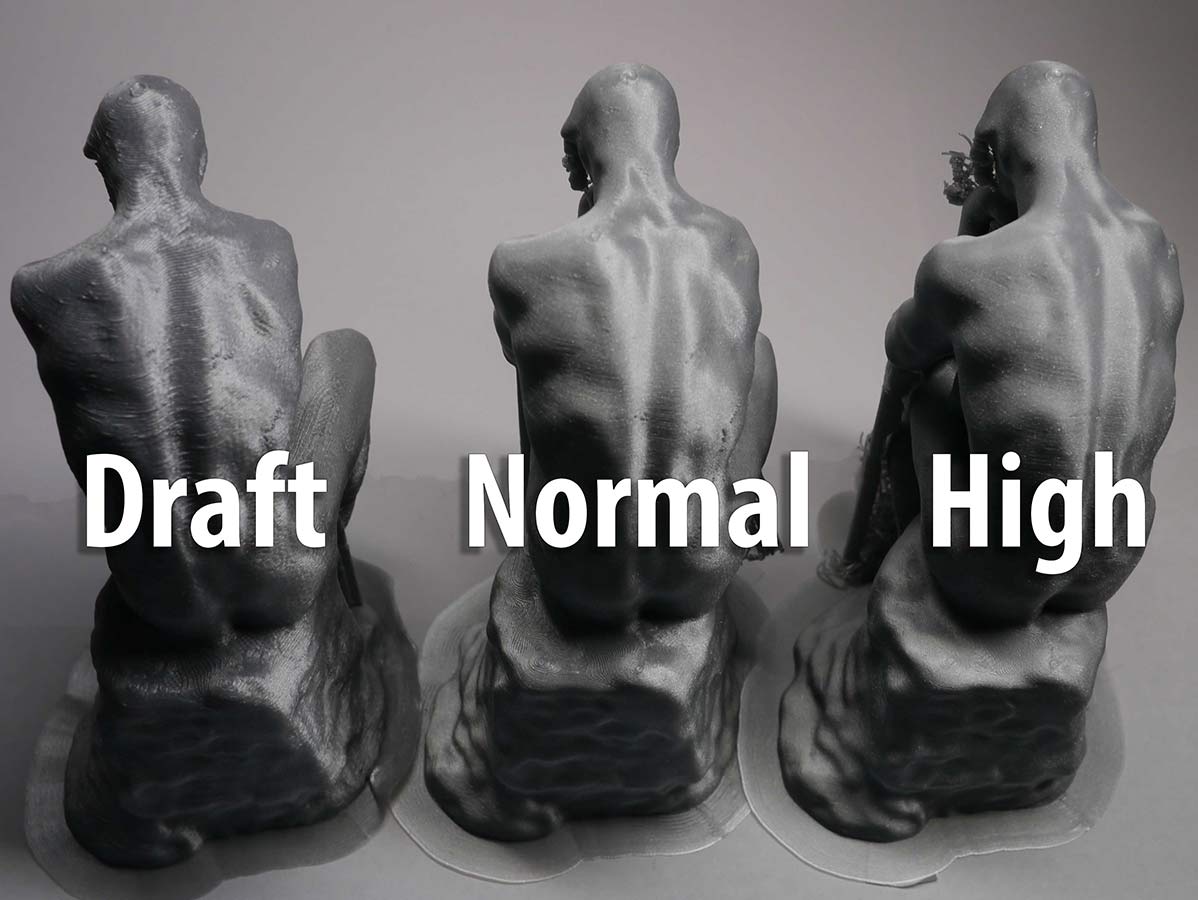
In our tests using the 3D scan of Rodin's "The Thinker" sculpture, the Ultimaker 3 produced some of the best-quality prints we have ever seen, with a very smooth surface and excellent detail. In fact, we saw very little difference between the Normal and High-Quality print modes; both prints were of excellent quality and had barely visible layers.
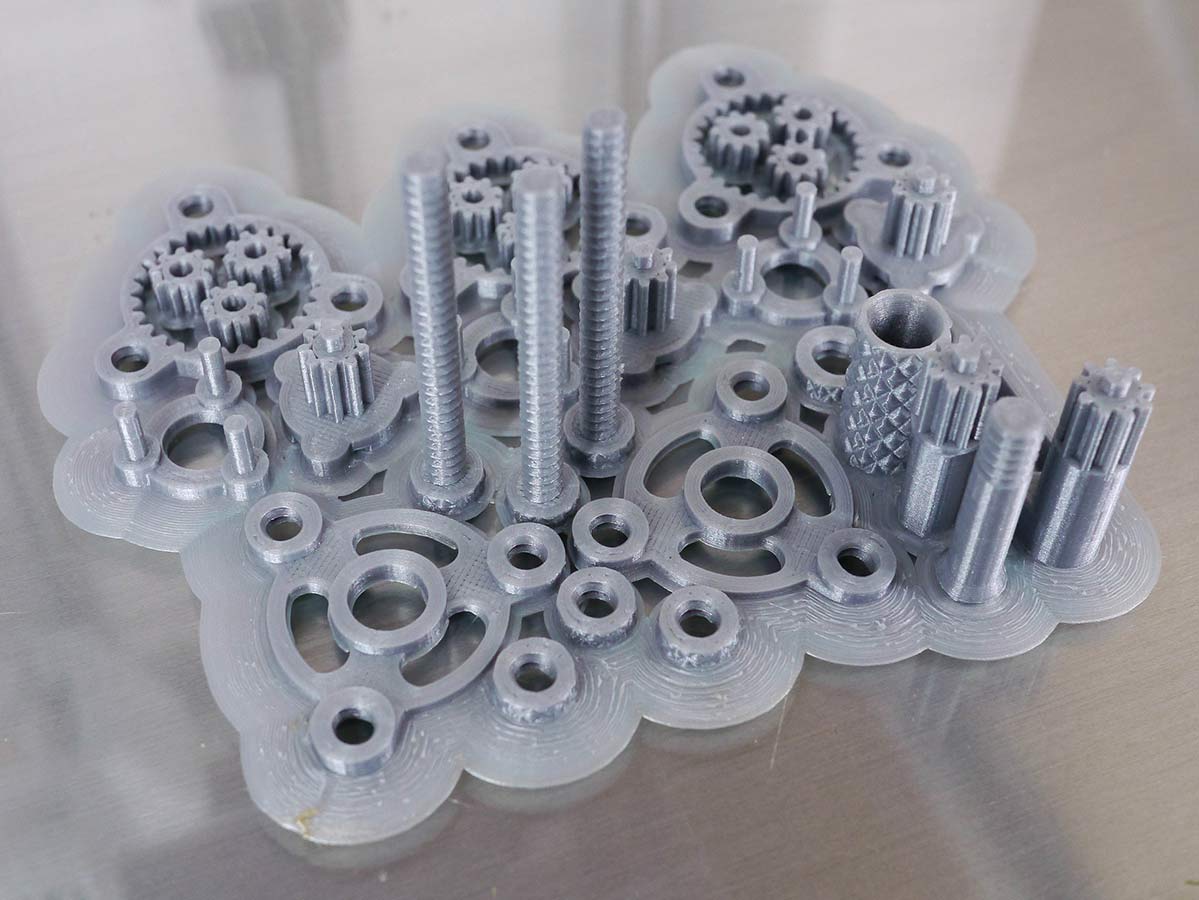
We saw the same excellent print quality with our other test models. The geometric sculpture was accurately printed with clean, sharp edges and points. Meanwhile, our geometric gears set printed cleanly and required only minimal cleaning before we could fit the whole mechanism together.
Bottom Line
The Ultimaker 3 is a class act — a very solid 3D printer that can produce excellent-quality 3D prints. It's also easy to set up and print with, supports a lot of materials and has flexible, easy-to-use software. New features, such as the dual material support and camera for monitoring prints in progress, are welcome additions that increase the usability of the printer.
Still, that $3,495 price is kind of scary, and the printer is rather slow. These factors certainly rule out the Ultimaker 3 for those only casually interested in 3D printing, or educational users who want to produce lots of prints quickly. But the Ultimaker 3 will be a great pick for users who want a flexible, top-draw 3D printer that can produce stunning quality in a great range of materials and that can grow with them as they experiment with 3D printing.
Richard Baguley has been working as a technology writer and journalist since 1993. As well as contributing to Tom's Guide, he writes for Cnet, T3, Wired and many other publications.
