How to DVR Shows and Movies on Sling TV
Here's how to record content on Sling TV's service using the Cloud DVR feature.
Sling TV’s streaming service offers one of the more appealing options for those who want to cut the cord and back away from cable and satellite TV subscriptions.
To help the service expand its appeal, Sling on June 14 announced Cloud DVR. The feature, which is available to those who use the app on a slew of devices, including Apple TV, Roku, Xbox One, and others, lets you record up to 50 hours of programming for watching later on.
However, there are some caveats to consider. For one, the service costs $5 per month. Additionally, the DVR function is available on some, but not all, of Sling TV's channels. So, there might be cases in which users want to record shows but they cannot.
Still, a large number of television shows and movies streaming through Sling are available to record and watch at a later time through its DVR. Here's how to use the feature.
1. Boot up your Sling app on a supported device. Sling is currently offering DVR support on select devices, including Apple TV, iPhone, and Android devices. Here’s a full list:
- Roku set-top boxes
- Roku TVs
- Amazon Fire TV
- Amazon Fire tablets
- Android TV
- Android phones and tablets
- Apple TV
- iOS-based devices
- AirTV Player
- Windows 10
- Xbox One
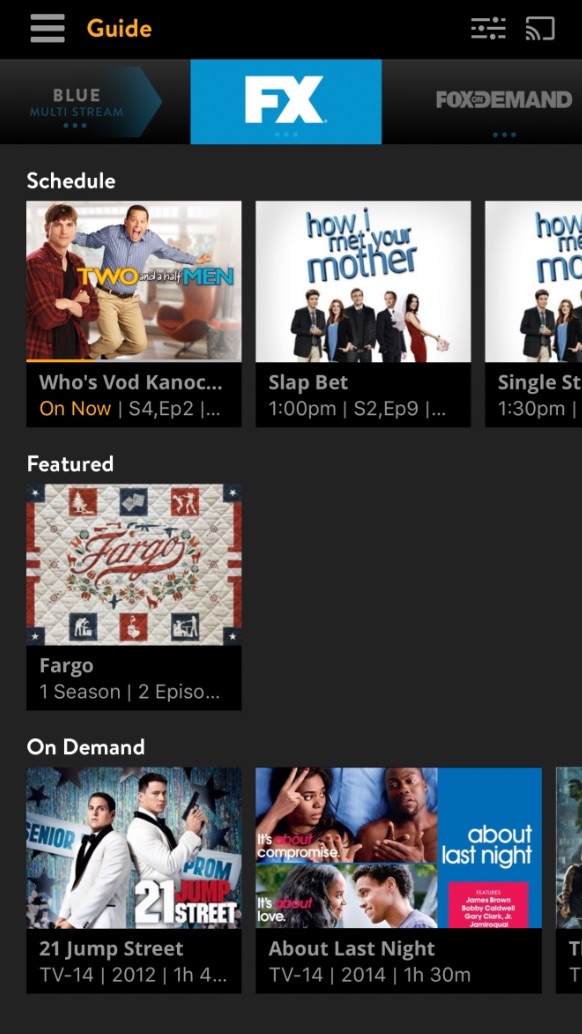
2. Click the tab at the top-left of the screen, and choose your Guide to see what’s coming up soon.
3. Pick the channel from the Guide you might be interested in watching.
Sign up to get the BEST of Tom's Guide direct to your inbox.
Get instant access to breaking news, the hottest reviews, great deals and helpful tips.
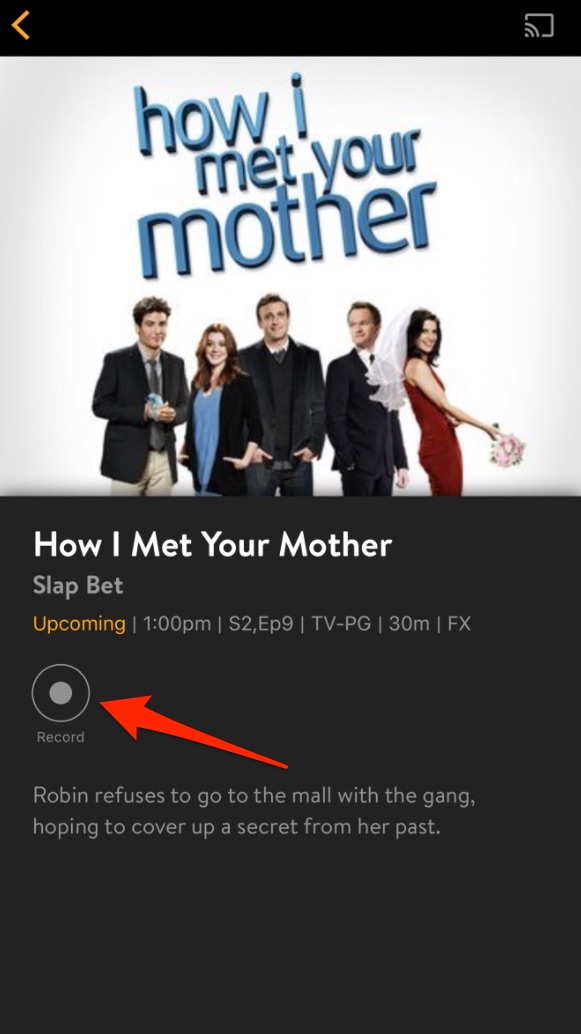
4. Choose the show you want to watch from the Guide to bring up its description. Here, you’ll see everything from its name, to its description, to its runtime. You’ll also see a record button.
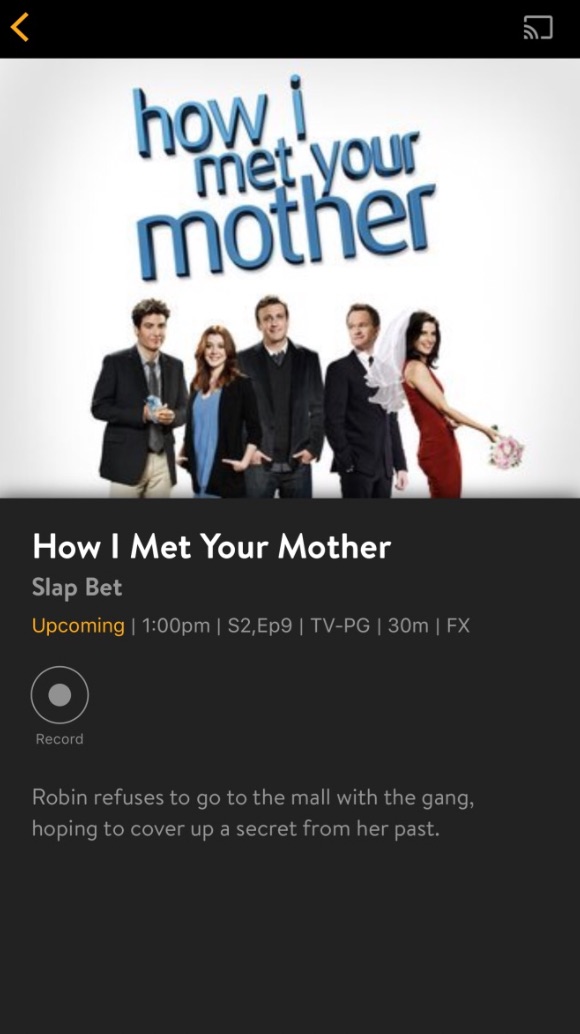
5. Tap the Record button.
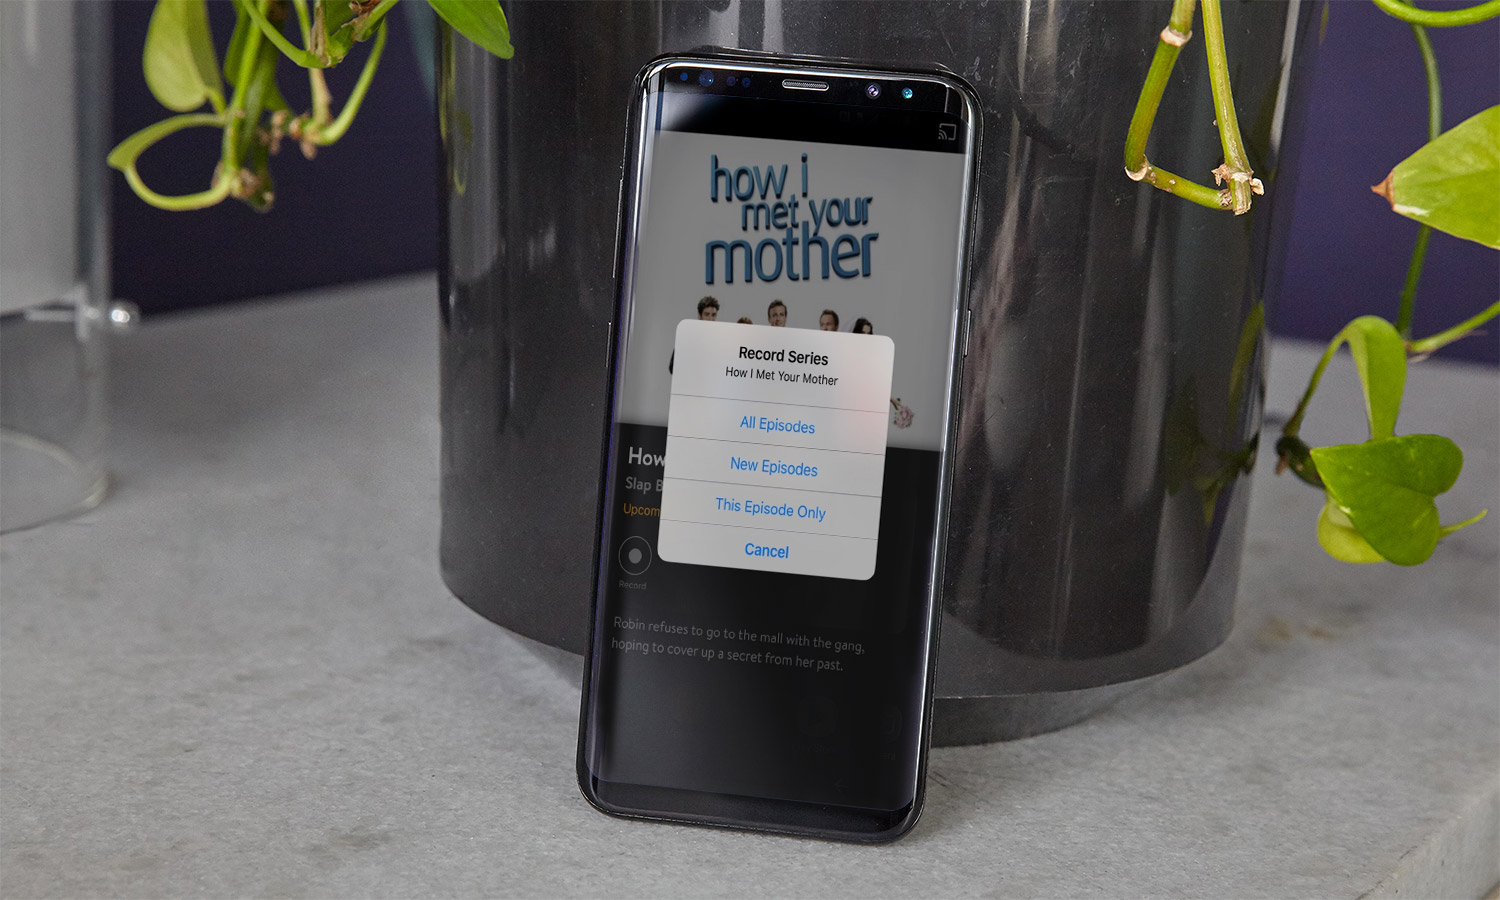
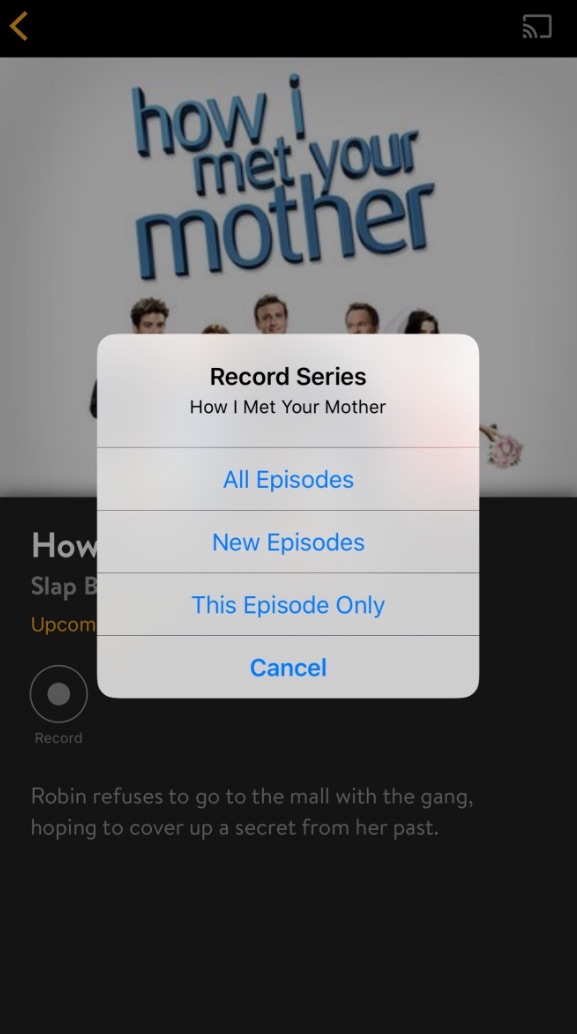
6. After you tap the Record button, Sling gives you the option of choosing all episodes, new episodes, or only this particular episode. You can also cancel the recording if you mistakenly chose the wrong episode.
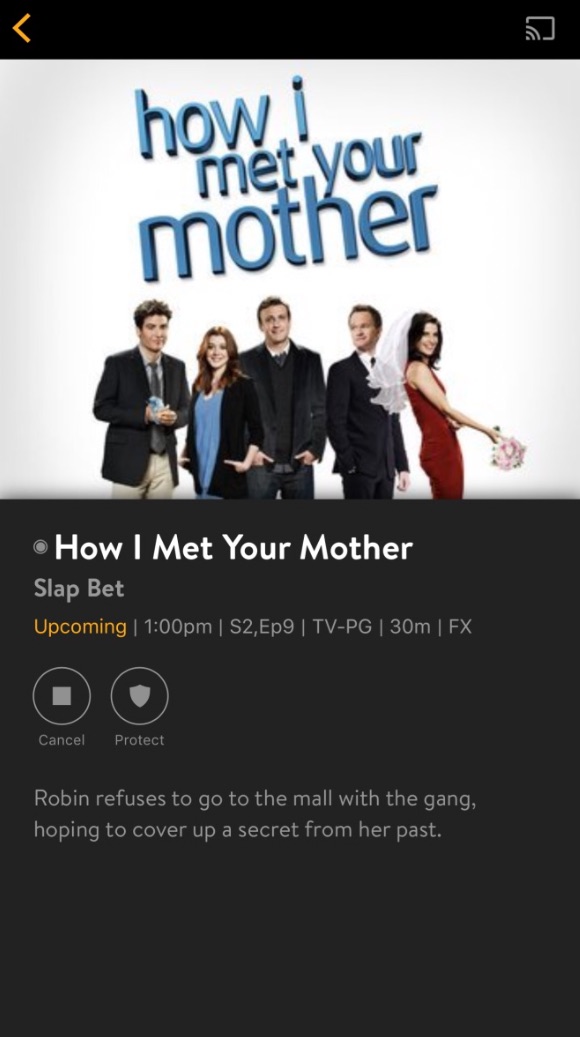
7. The episode description page will now change to give you the option of canceling the recording. If you don’t cancel, the show will be recorded.
Now, what if you want to come back and find that recording to watch later? Luckily, it’s simple.
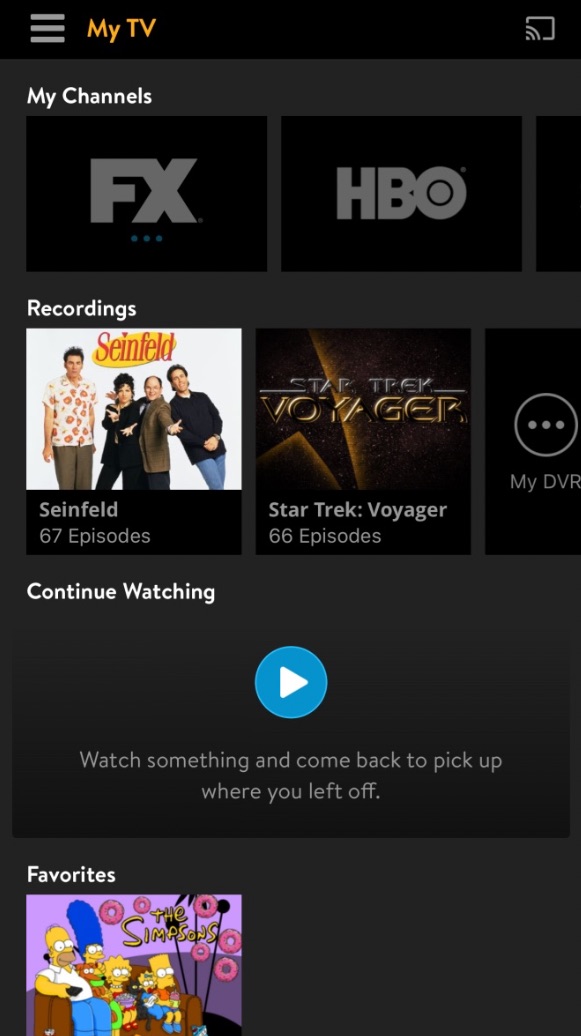
1. Click the tab at the top and choose “My TV.”
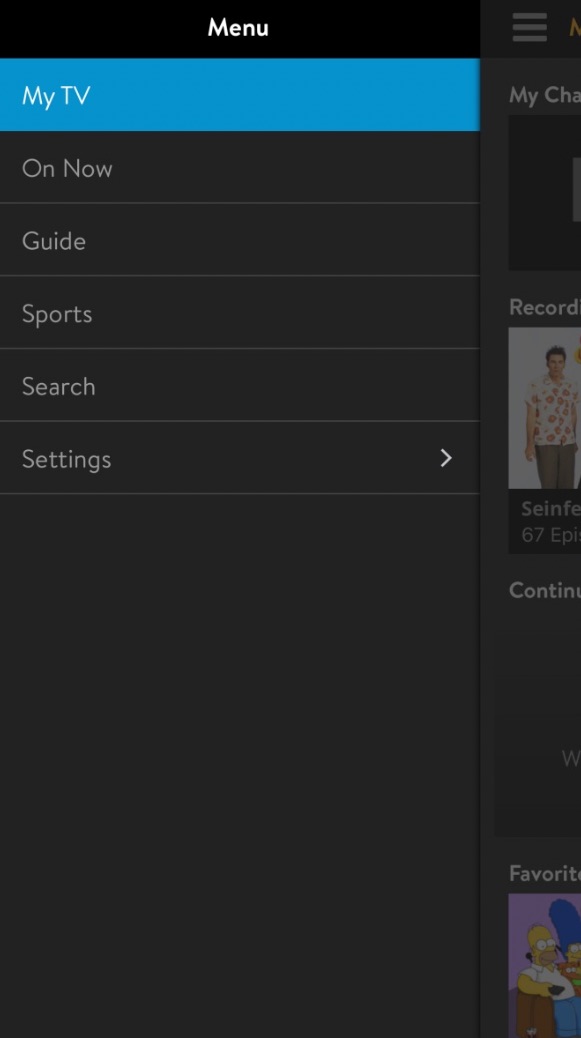
2. Once there, you’ll see a list of channels you like best, as well as another row filled with your Recordings.
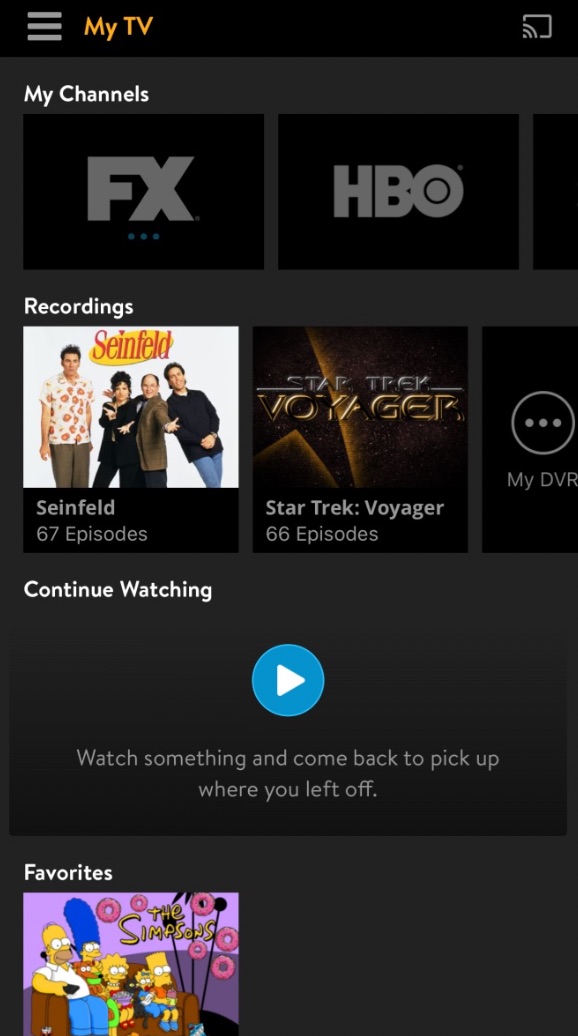
3. Tap on the show you want to watch and you’ll see a full list of all the recordings for the particular series.
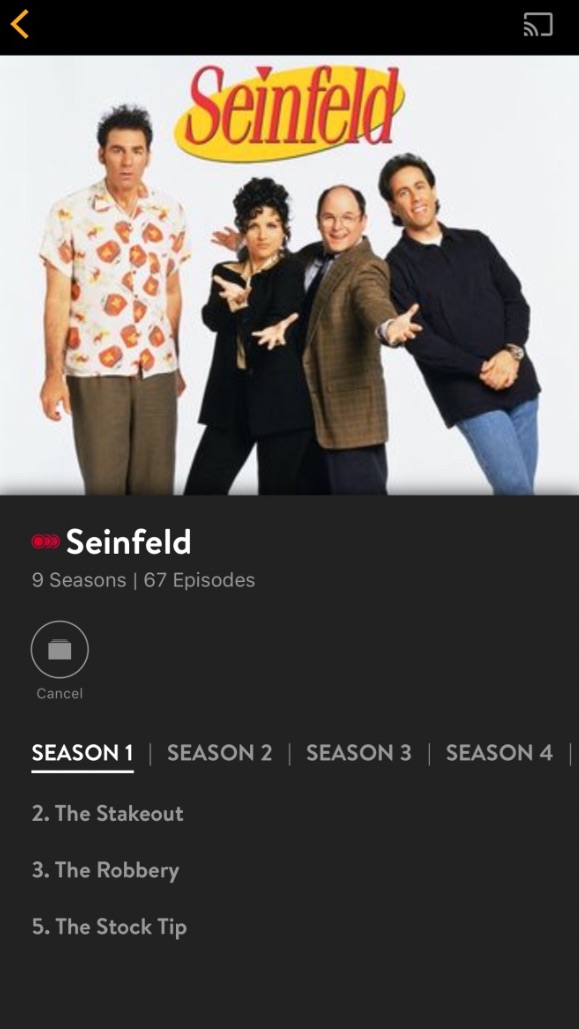
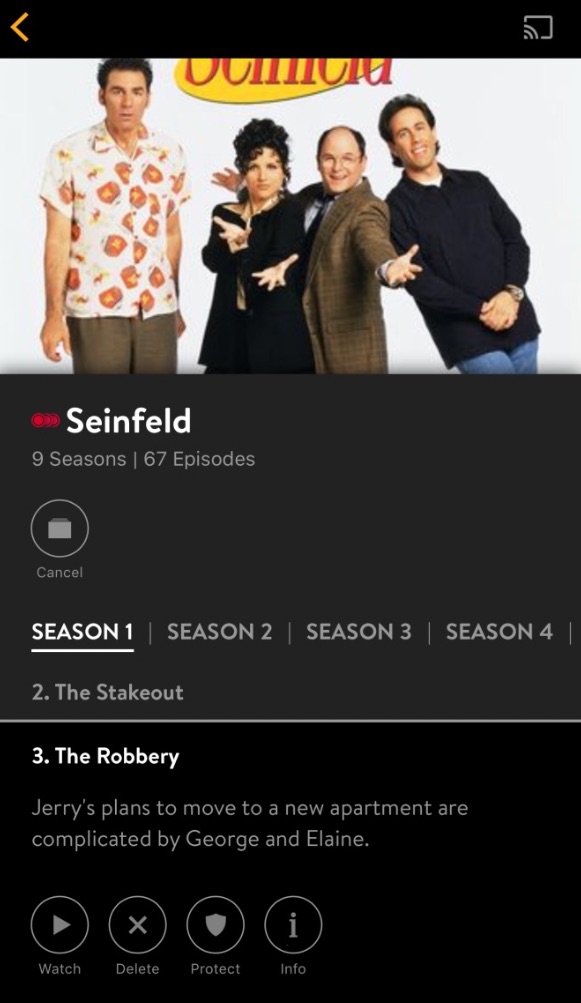
4. When you tap on one of the episodes you’ve recorded, you’ll have the option to watch it or delete it. Choose the watch option.
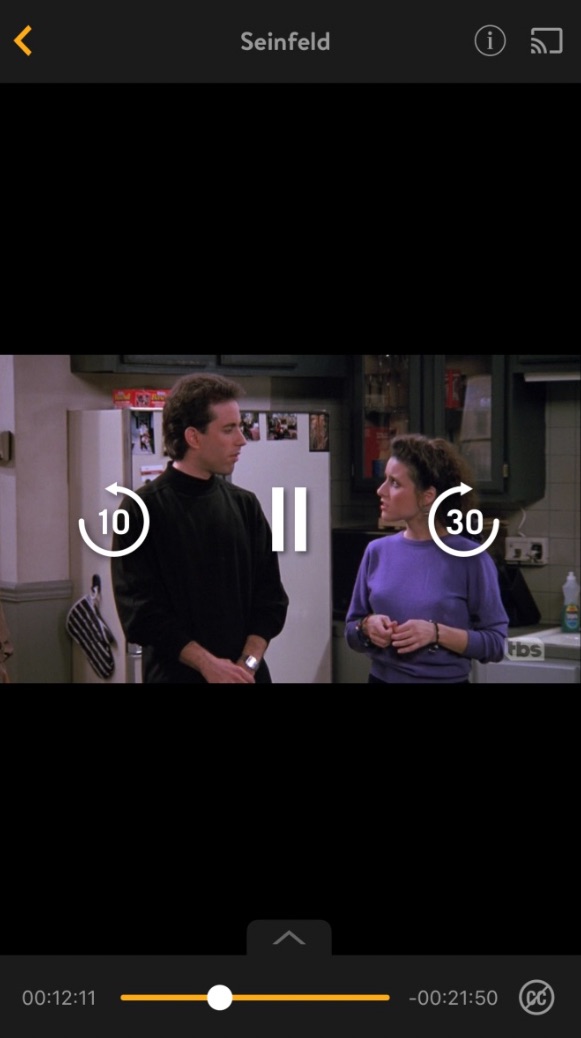
5. Now, your show will start streaming and you’ll be good to go.
Don Reisinger is CEO and founder of D2 Tech Agency. A communications strategist, consultant, and copywriter, Don has also written for many leading technology and business publications including CNET, Fortune Magazine, The New York Times, Forbes, Computerworld, Digital Trends, TechCrunch and Slashgear. He has also written for Tom's Guide for many years, contributing hundreds of articles on everything from phones to games to streaming and smart home.
