27 Essential iPhone 7 Tips and Tricks
Make the most out of the new iPhone 7 and 7 Plus features, while also getting a refresher on other iPhone tips you may have forgotten about.
Get More From Your iPhone
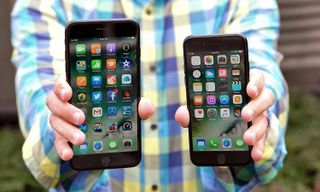
Looking at the iPhone 7 and iPhone 7 Plus, you might think not much has changed from the iPhone 6s and 6s Plus. But that's definitely not the case. There's a Home button you can customize, a handy Portrait mode on the dual-camera iPhone 7 Plus and more. And Apple's updates to iOS 10 have added even more features to the phone.
Here’s a look at how to make the most of some of the best features you’ll find in the iPhone 7 and iPhone 7 Plus, along with a refresher on some other iPhone tips, such as adding widgets to your lock screen and using the phone's 3D Touch features. Already playing around with the iOS 11 public beta? Check our our iOS 11 tips as well.
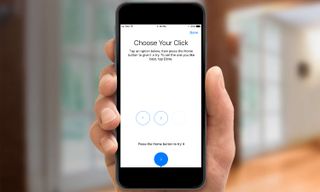
Adjust the iPhone 7's Home Button
One of the first things you’ll notice with the iPhone 7 — well, maybe right after that missing headphone jack — is the fact that the Home button doesn’t move at all. Instead, it’s a trackpad-like cutout that responds to when you press on it. The Home button uses haptic feedback to simulate the feel of a button.
You can adjust the Home button to three different levels of feedback to find the one that feels most natural to your finger. Simply go to Settings > General > Home Button to find the right level of feedback.
MORE: Get Step-by-Step Instructions on Adjusting the Home Button
Restart Your iPhone 7
No moving parts on your Home button means the method for forcing an iPhone restart changes with the iPhone 7 and 7 Plus. Instead of holding down the Home button and power button simultaneously as you did with previous iPhones, now you press and hold the power and volume buttons at the same time. It takes some getting used to, especially if you’re iPhone user with a long muscle memory, but it’s a pretty simple tip to master once you know where to press.
MORE: Get Step-by-Step Instructions on Force Restarting Your iPhone

Use the Depth of Field Effect with Your iPhone 7's Camera
The iPhone 7 Plus features two lenses on its back: One of the 12-megapixel cameras features a focal length of 28mm, while the other has a 56mm focal length. That lets the iPhone 7 Plus zoom in on objects with less distorition than you get from a phone with only digital zoom. With the latest version of iOS 10, you can shoot photos using a depth-of-field effect that keeps the subject in sharp focus while artfully blurring the background. (This is also known as a bokeh effect in the photographic world.)
You access the effect — called Portrait Mode by Apple — the same way you’d take a panoramic shot or switch between video and still photos. Portrait appears as an option in the carousel of different camera modes. Just swipe to select it, and the iPhone 7 Plus does the rest of the work, with the 56mm lens shooting a close-up of your subject while the other lens captures background information to be blurred by the iPhone’s image processor.

Use the Optical Zoom on the iPhone 7 Plus
Here’s something you can do with your iPhone 7 Plus right out of the box: Use its dual-camera setup to zoom in on objects. Apple makes accessing this feature as simple as possible.
From within the camera app, find the 1x button on the iPhone’s screen. Tap that button to zoom in to a 2x view; tapping the button again takes you back to 1x. For more of a zoom, just tap and press the 1x button and a semicircle will appear; from there you can drag the button to get up to a 10x zoom. Just note that anything beyond 2x incorporates digital zoom, which can degrade image quality (though not as much as phones that have to rely completely on digital zoom, our testing has found.)
And if you’re the sort of person who lives and dies with pinch-to-zoom gestures, you can still use those to zoom in and out on a shot, though without the precision you’d get from the other methods for controlling your camera’s zoom.
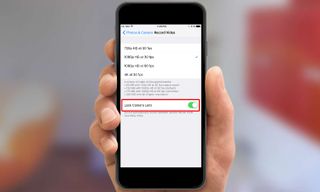
Lock in the Zoom on the iPhone 7 Plus
The addition of Zoom capabilities has added a new option to the Photos & Camera settings: You can now lock the camera lens when you’re recording video. This will prevent you from switching between the wide-angle and telephoto lenses on your iPhone 7 Plus as you record video and also stop the flickering image that can result as you switch between lenses.
In Settings, select Photos & Camera, and then tap on Record Video. You’ll find the Lock Camera Lens option there next to a slider.
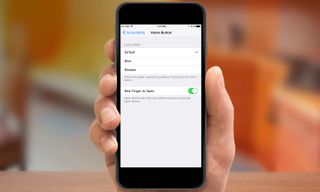
Enable iOS 10's Rest Finger to Unlock Phone Feature
iOS 10 changes the way you unlock your iPhone with Touch ID, requiring you to press the Home button instead of just resting your finger there. That can be a bit of a shock, particularly if the first time you encounter this change is when you’ve upgraded to a new iPhone 7 or 7 Plus. Fortunately, it’s easy to go back to the old way of doing things, so long as you know where to look.
Head to Settings > General > Accessibility, and find the Home Button option. From there, you can move a slider to turn on the Rest Finger to Open feature.
MORE: Get Step-by-Step Instructions on Enable the Rest Finger to Unlock Feature
Find the Camera Shortcut
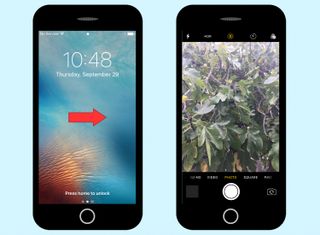
This is another iOS 10-centric tip that could come as a surprise if you haven't really explored the iOS Apple launched last fall. iOS 9’s lock screen used to feature a camera icon that allowed you to access your phone’s camera without having to first unlock it — ideal for grabbing a quick photo you don’t want to miss while fumbling to unlock your phone and launch the camera app. That icon’s gone in iOS 10, though Apple has made it easier to jump straight to your camera.
From the lock screen, simply swipe left. The camera app will launch on your iPhone, ready to take any photo you want with the iPhone 7’s vastly improved camera.
Turn Off Raise to Wake
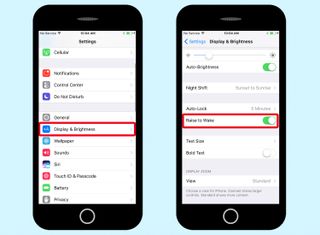
We think the addition of raise to wake, in which your lock screen springs to life the minute you pick up the phone, is one of the best additions to iOS 10 and the new iPhones. But maybe you prefer your iPhone only turning on when you want it to. If so, it’s easy enough to disable the raise-to-wake feature. Again, head to Settings, only this time select Display & Brightness. Just below the area where you can adjust your phone’s auto-lock time, a slider lets you turn Raise to Wake on or off.

Turn Your Keyboard Into a Trackpad
This isn’t a new feature for the iPhone 7 or 7 Plus, but it’s still a pretty handy one for 3D Touch-capable iPhones. When you’re typing a note, email or message and want to move the cursor either to correct a typo or select a word, you could place your finger where you want the cursor to be. But that option lacks precision, and it can be hard to see exactly where your cursor is, since your finger is in the way. Instead, just do a hard press on the on-screen keyboard: the keys will disappear, and you’ve got a MacBook-style trackpad.
Now you can slide your finger around to move the cursor anywhere on the screen. Once the cursor is hovering over the word you want, hard press again to select that word; hard-pressing twice selects the whole sentence.
Add Widgets to Your Today Screen
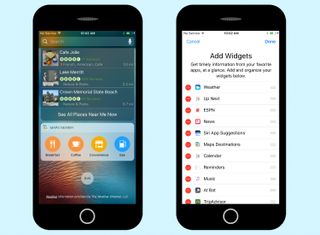
iOS 10 gives the Today screen a new home and new look for any iPhone, but you’ll want to customize what appears on that screen once you get your hands on a new iPhone 7 or iPhone 7 Plus. From either your lock screen or home screen, swipe right to see the Today screen. By default, it will include widget showing current weather conditions, upcoming calendar events, headlines from the News app, Siri app suggestions and Maps destinations for upcoming appointments.
But you’re not stuck with this view. Scroll down to the bottom of the Today screen and tap Edit to customize what widgets appear. You can delete the ones that are there by default or add others with a tap. And you’re not confined to widgets from Apple’s built-in apps: if a third-party app installed on your phone has been updated to have an iOS 10 widget, it will appear as an option for you to add in the More Widgets section.

Avoid Water Damage
Both the iPhone 7 and 7 Plus can withstand a splash of water in ways that past iPhones could not. Apple says the new phones have an IP67 rating for water resistance meaning you don’t need to panic if your iPhone gets dunked in 1 meter (about 3 feet) of water for 30 minutes. In our testing, we were able to spill water on the phone and even drop it in a pitcher of water with no ill effects.
Even with the iPhone’s newfound water resistance, you’re going to want to wipe down your damp iPhone before using it and avoid charging it after any unexpected dips. Apple has built another feature into its new phones that warn you when any moisture is detected. That’s your alert to unplug the phone and keep it turned off until the iPhone has a chance to dry out.
Change Your Video Resolution
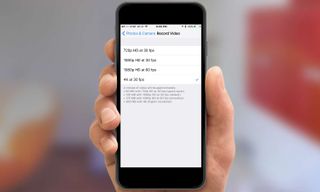
You may not even have a 4K TV in your living room yet, but some day you probably will. And when you do, your iPhone 7 can already shoot video in the ultra high-definition format. Open Settings and go to Photos & Camera, then scroll down to the Camera section. You’ll see a Record Video option — tap it to choose from a variety of different resolutions, starting in 720p at 30 frames per second, and going all the way up to 4K.
Be aware, though, that all that extra resolution comes at the cost of disk space. As iOS warns you, a minute of video at 4K will cost you 350MB — nearly 6 times more than the same amount of time in the lowest (but still high-definition!) resolution.
Take a Live Photo
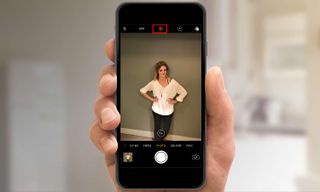
The iPhone 6s introduced the idea of Live Photos: animated pictures that you can snap with your iPhone’s camera that include a few seconds of video before and after the photo itself. If you’re upgrading to the iPhone 7 from an iPhone 6 or earlier, you may need a refresher on how to shoot a Live Photo.
Live Photos is enabled by default. You can confirm that it’s turned on by finding the bullseye icon just above the view finder in the Camera app. If the icon is yellow, Live Photos is on; tap the icon if you want to turn the feature off. With Live Photos enabled, you camera captures 1.5 seconds of video and audio before and after you take the shot. After you tap the shutter button, the word “Live” will appear for 1.5 seconds on the view finder to let you know the camera is still recording. If you wait for the “Live” to disappear before putting your camera down, you won’t end up with a blurry Live Photo.

Edit Live Photos
Now that you’ve taken Live Photos with your new iPhone 7, you can tweak how they look. Starting in iOS 10, you can also edit Live Photos using the built-in Photos app. Select the photo in question and tap the Edit button at the bottom of the photo and you can crop, straighten, adjust lighting and color, or even add a filter without losing the animation. And just as with still photos, the edits are non-destructive, so you can still revert back to the original.
Disable Touch Feedback
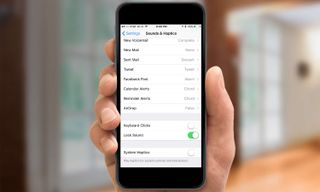
With the iPhone 7, Apple has bumped up the Taptic Engine—the hardware that the phone uses to create vibrations. As a result of the more precise capabilities of the device, Apple’s integrated touch feedback into its entire operating system. When you spin a dial, you’ll actually “feel” it; same for pulling down the Notification Center sheet, swiping to delete messages in Mail, and many other actions.
But if those little blips and buzzes are distracting, don’t worry: you can deactivate them. Fire up Settings and go to the newly christened Sounds & Haptics section. Scroll all the way down to the bottom and you’ll see a new option for System Haptics. Switch it to off and you’ll no longer be bothered by all those touchy-feely sensations.
Disable Flashy Messages Effects
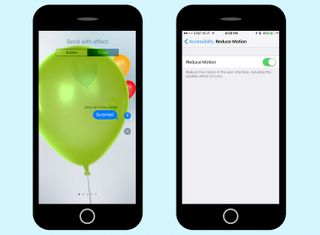
One of the big new features of iOS 10 is, of course, the additions to Messages that let you send your texts with a wide variety of flashy bubble and screen effects. Perhaps those effects aren’t for you, whether you’re particularly sensitive to onscreen motion or simply don’t care for them. That’s cool: the good news is you can easily disable them, so that no balloons or confetti will ever accompany a congratulatory text sent your way.
Just go into Settings > General > Accessibility > Reduce Motion and turn the feature on. Not only will this disable message effects, but it’ll also reduce motion-based effects elsewhere in iOS. (Tip: If you’re finding that you can’t send message effects, it may be because you already have this feature turned on.)
Enable the Magnifier
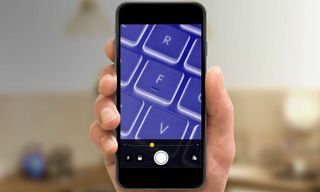
Sometimes it’s handy to be able to look at things close up, whether it’s because of a visual challenge or simply out of curiosity. iOS 10 adds a new option to its Accessibility toolbox by introducing a magnifier. Go to Settings > General > Accessibility > Magnifier and turn the Magnifier switch to On.
To trigger the magnifier, triple tap the Home button (you may need to adjust the Accessibility Shortcut option in the Accessibility settings to make sure the Magnifier is selected). This opens up a camera interface with a zoom slider that lets you zoom in far more closely than the default camera. You can lock focus by tapping the padlock button, activate the flash to shed some light on the subject, or even snap a freeze frame if you don’t want to hold the phone still. There’s also a series of high-contrast filters that can make it easier to discern details, and which you can apply either to the live image or a freeze frame.
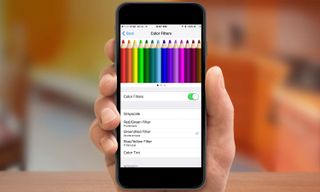
Enable Color Filters
No matter how bright the screen on the new iPhone 7 is, if you suffer from some form of color blindness, it can be challenging dealing with a device’s display. iOS 10 attempts to help out by adding in a variety of new filter options to help those who have trouble distinguishing certain colors. Under Settings > General > Accessibility > Display Accomodations > Color Filters, you can choose from a variety of different options, including Grayscale, a Red/Green filter, a Green/Red Filter, and a Blue/Yellow Filter to help those with Protanopia, Deuternaopia, and Tritanopia respectively.
If none of those quite does the trick, you can also set a color tint for the whole screen, choosing a particular Hue and Intensity that you find helpful. A variety of color graphics on the screen help you get an idea of how a particular filter will affect the display.
Clear All Notifications at Once
Ah, Notification Center, our old friend. It’s gotten a slight revamp in iOS 10, but the best addition is exclusively for users of the iPhone 6s and iPhone 7 phones. On previous iPhones, you had to clear notifications on a day-by-day basis, each time tapping the ‘x’ button at the top of the section and then tapping Clear.
But on a 3D Touch-enabled phone like the iPhone 7 or 7 Plus, you just force press on the ‘x’ at the top of the list and you’ll see an option to Clear All Notifications. Tap that and all your unread notifications with vanish, leaving you with a nice clean Notification Center.
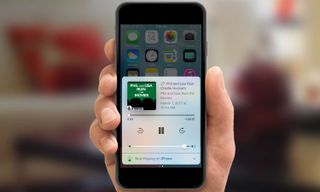
Control Your Media Playback
You probably know about the Command Center, which you access by swiping up from the bottom of your screen. But Command Center gives you more than just quick access to your flashlight, calculator and phone's airplane mode. Swipe left and you can access media playback controls for music and podcasts.
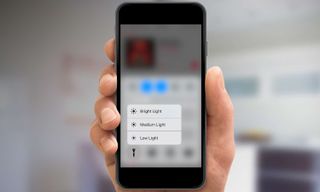
Control Center Shortcuts
Speaking of Control Center, 3D Touch opens up a number of handy shortcuts there. Swipe upward from the bottom of the screen on your iPhone 7 to bring up the panel. As before, the buttons at the bottom let you quickly access frequent features like a flashlight, timer, calculator, and the camera. But in iOS 10, force-pressing on each brings up additional options.
For example, you can force press the flashlight button to bring up different intensities for the flashlight: bright, medium, and low. Force pressing the timer lets you quickly start a timer for a common duration, like an hour, twenty minutes, five minutes, or one minute. On the calculator, force press to copy the last calculation result. And the camera icon lets you quickly jump to the photo, slow-motion video, normal video, or selfie views in the Camera app.
Get a Weather Report in Maps
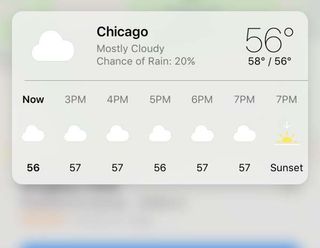
Wondering what the weather's going to be like where you're headed? You don't have to leave the Maps app to look up a forecast. The iOS 10.3 update added a new 3D Touch feature to your iPhone and 7 Plus where you can press the temperature to have a 7-hour forecast pop up; keep pressing and you'll jump directly into the built-in Weather app's full forecast for that location.

Queue Up the Next Song
iOS 10 features a redesigned (yet again) Music app, and the new version has a lot of features that can be accessed via your iPhone 7's 3D Touch feature. One of the handiest among them is integration with the Up Next feature. When you’re listening to a track, but suddenly know exactly which song you’d like to come on next, just find that track in the Music app and force press on it. You’ll get a handy pop-up menu with options to remove the download, add it to a playlist, share the song, and love or dislike the track. Just tap Play Next to have it slotted into your Up Next queue. You can do it all without ever lifting your finger from the screen. (It also works on albums and playlists.)
Personalize Your App Icons
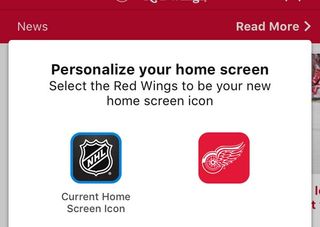
You can now give your home screen a personal look, assuming makers of your favorite apps play along. As of iOS 10.3, developers can now offer a choice of app icons. Thus far, MLB.com At Bat and the NHL app are the most notable apps to adopt this feature, letting your turn their app logos into the logos of your favorite team. We're hoping to see additional apps follow suit.

Quickly Switch Apps
We all know you can switch between apps by double-clicking the Home button and choosing what you want from the multitasking interface. But users of 3D Touch-enabled phones like the iPhone 7 have an easier quicker shortcut to switch to the most recently used apps.
Just force press on the left edge of the screen; if you hold that press for a second, the multitasking interface will open. But if you quickly swipe right instead of holding the press you can just slide aside the current app and jump immediately to the most recent app. (The key is to wait until you get the taptic feedback from a 3D Touch, otherwise you may just go up a level in whatever app you’re already in.)

Pay with Your iPhone
If you’re upgrading to the iPhone 7 from anything earlier than the iPhone 6, this will be your first exposure to Apple Pay, Apple’s mobile payment system that lets you pay for things by tapping your iPhone at any pay terminal that supports Near Field Communications. (You’ll usually see a handy Apple Pay logo at stores that support Apple’s payment system.)
To set up Apple Pay, just launch the Wallet app on your iPhone and follow the steps for entering in a payment card. (Apple keeps an updated list of participating banks.) In addition to using your phone to make payments in stores, iOS 10 adds the ability to use Apple Pay for buying things from within the phone’s Safari web browser at participating sites.
See Your iCloud Storage at a Glance
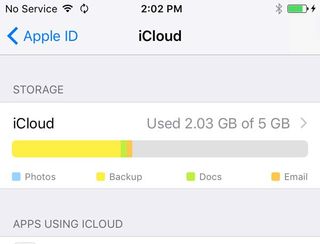
Wondering just how many photos, files and emails you have stashed in iCloud? Just head to Settings, tap on your Account ID at the top of the screen and select iCloud. You'll see an at-a-glance view of your iCloud storage usage. Tap it to see how much room you have left, manage your storage y removing things or buy additional storage.
Dan Moren is the author of multiple sci-fi books including The Caledonian Gamibt and The Aleph Extraction. He's also a long-time Mac writer, having worked for Macworld and contributed to the Six Colors blog, where he writes about all things Apple. His work has also appeared in Popular Science, Fast Company, and more
