How to Install the Nyko PS4 Data Bank
Nyko's PlayStation 4 Data Bank peripheral lets you expand your PS4's storage space with an inexpensive 3.5-inch hard drive.
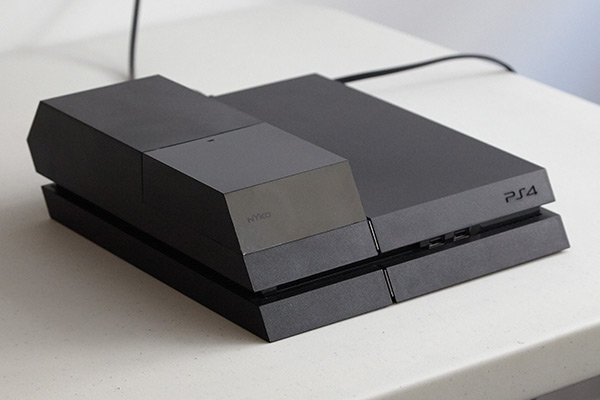
The PlayStation 4's default 500 GB hard drive may sound like a lot, but you'd be amazed just how fast it can fill up with games, videos and system files. If you're running low on space, you can always swap out the default hard drive for a bigger one, and Nyko's Data Bank peripheral lets you do it with an inexpensive 3.5-inch hard drive.
By default, the PS4 takes 2.5-inch hard drives, and while this is the ideal way to add more storage space, it's not always the cheapest. Hard drives that are 3.5 inches are much cheaper, especially when dealing with up to 6 TB of space (there's not much point in buying a drive that's smaller than 500 GB, after all).
MORE: Most Anticipated Games
Enter the Data Bank from Nyko, which allows you to attach a 3.5-inch drive to the system with a minimum of effort. All you need to accomplish the job is the data bank, your preferred 3.5-inch drive, a screwdriver (included), a 2 GB flash drive (not included) and a little patience (probably not included).
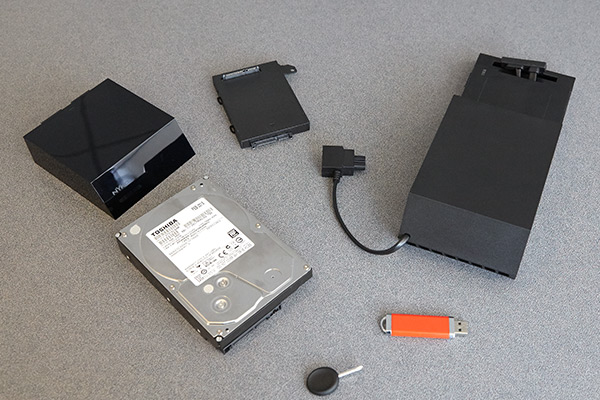
The Data Bank comes with comprehensive instructions, but if you want to see firsthand how to install the device, Tom's Guide has photographed the entire process from start to finish.
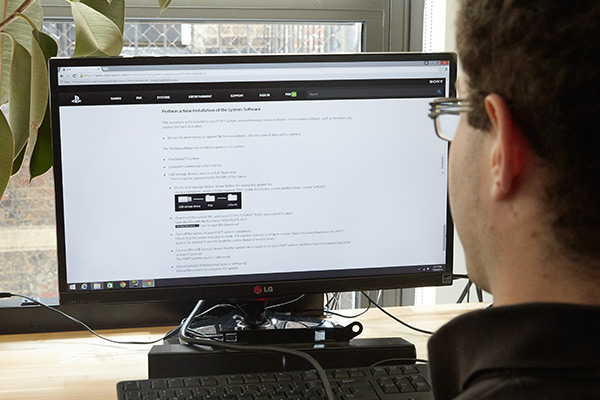
1. Download the PS4 system software to a flash drive.
The Data Bank's instruction manual has thorough instructions on how to download the latest PS4 system update software and save it to a flash drive. The short version: Visit thePS4 system software website and download the PS4UPDATE.PUP file. Format a flash drive with at least 2 GB storage. Create a folder on the flash drive called PS4, and a folder called UPDATE within that one. Then add the PUP file to UPDATE. You're done!
Sign up to get the BEST of Tom's Guide direct to your inbox.
Get instant access to breaking news, the hottest reviews, great deals and helpful tips.
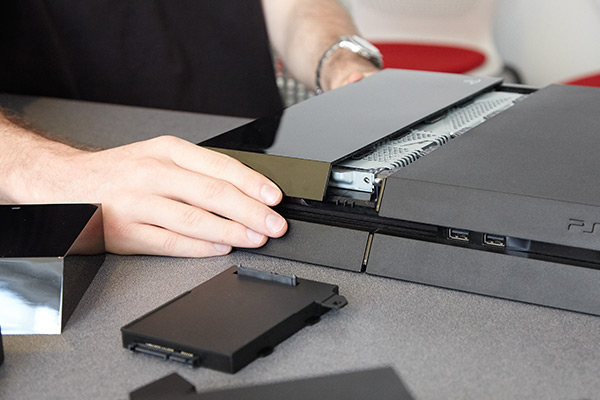
2. Remove the PS4's cover.
Slide the shiny black cover off of the top of the PS4. You'll encounter a little resistance, so don't attack it, but don't be absurdly gentle, either.
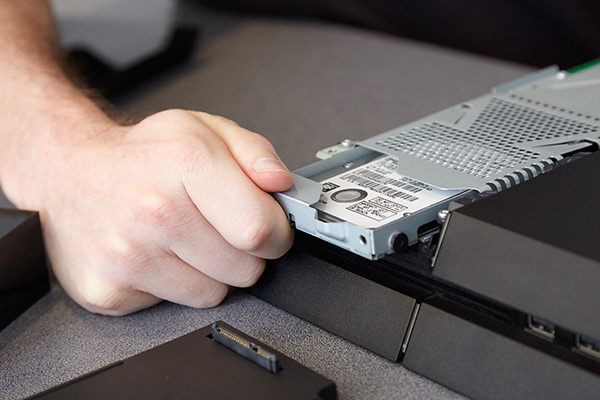
3. Remove the hard drive.
The Data Bank comes with a screwdriver, which you'll need to remove the screw that holds the 2.5-inch hard drive in place. (Keep the screw handy; you'll need it again in about 10 seconds.) After that, just slide it out and put it somewhere safe.
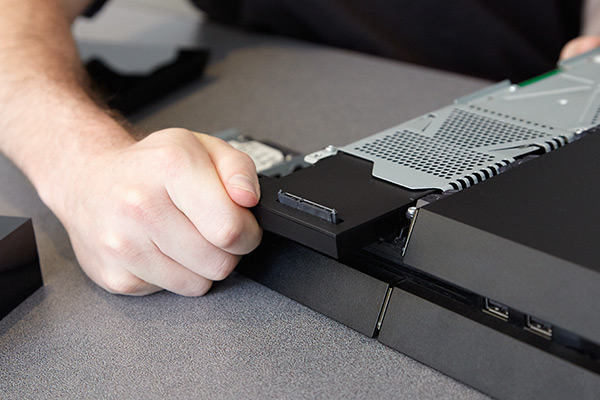
4. Add the placeholder.
Like the cover, you don't have to be too forceful with the hard drive replacement, but make sure it fits firmly before you continue. Then, secure it with the screw you just removed.
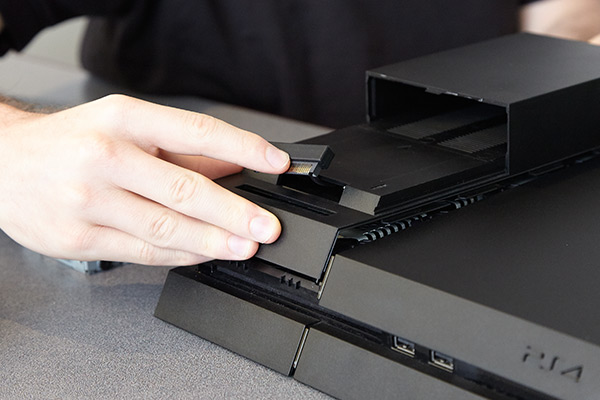
5. Attach the data bank.
Place the data bank on top of the exposed section of the PS4. You will need to attach it from above, then slide it into place. When it's secure, attach the male port to the female port.
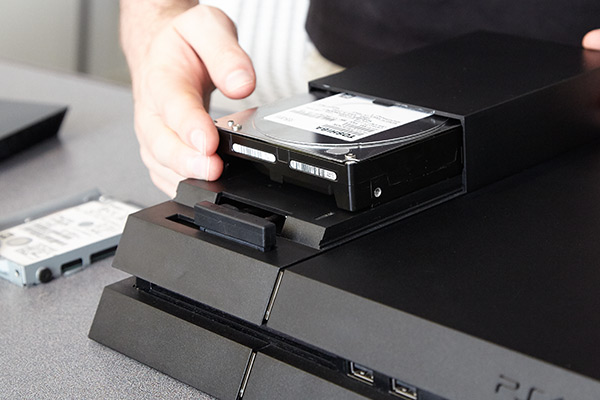
6. Slide the hard drive in place.
Take your 3.5-inch hard drive and slide it in. It won't click, but once it's firmly attached, it shouldn't come out easily.
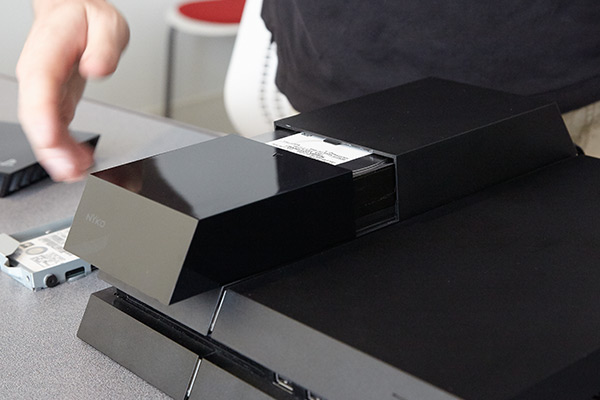
7. Attach the cover.
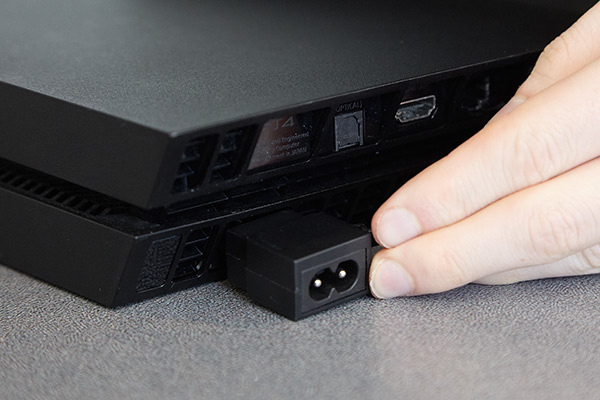
8. Connect the power adaptor.
A 3.5-inch hard drive requires some power of its own, so plug the adaptor into the power port on the back of the PS4. This will power both the data bank and the console.
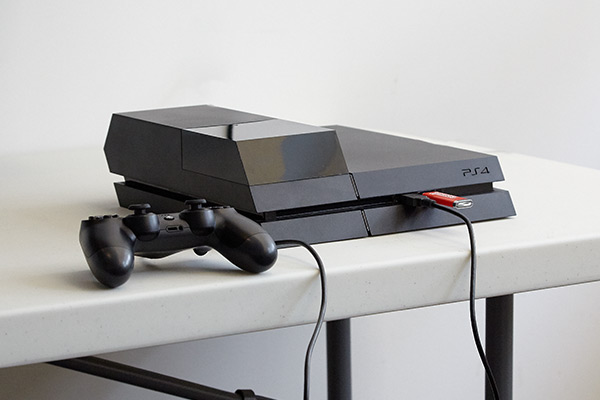
9. Hook up the console.
In addition to plugging in the power and HDMI cables, connect the flash drive from earlier as well as your controller. (For this step, your controller does need to be hardwired; it will not function wirelessly until after the initial setup.)
10. Start the PS4 in Safe Mode.
Hold the power button down until it beeps twice, then let go. This will take about five seconds.
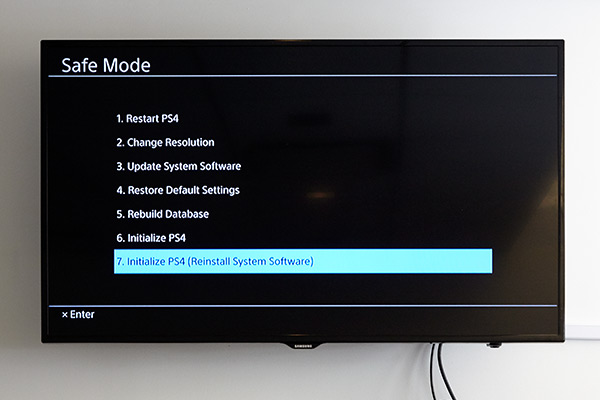
11. Select Initialize PS4 (Reinstall System Software)
This process will take a few minutes, so be patient.
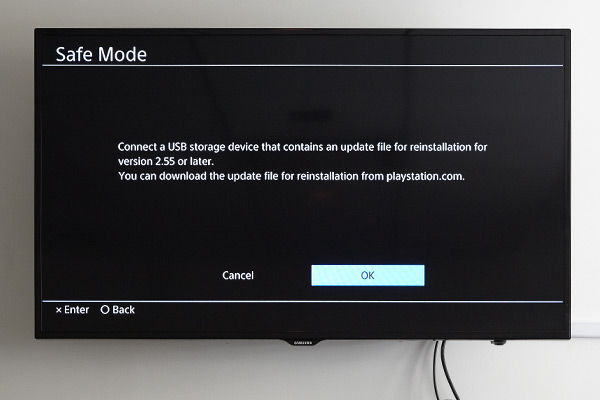
12. Click "OK" on the next screen.
13. Go through the initial PS4 setup.
From here, setup is exactly the same as booting up a PS4 for the first time. Simply sign in, orcreate a profile if you need a new one.
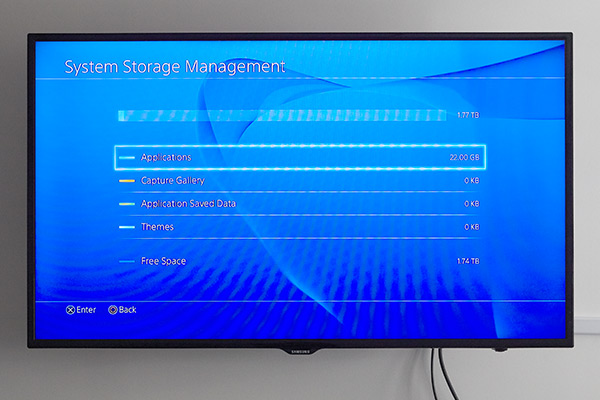
You can check Settings and System Storage Management to see how much space you have available on your new hard drive. You'll have to redownload or reinstall any new games you want to play, as well as transfer over save files via either USB stick or PlayStation Plus uploads. You did back up your saves, right?
Marshall Honorof is a senior writer for Tom's Guide. Contact him at mhonorof@tomsguide.com. Follow him @marshallhonorof. Follow us @tomsguide, on Facebook and on Google+.
Marshall Honorof is a senior editor for Tom's Guide, overseeing the site's coverage of gaming hardware and software. He comes from a science writing background, having studied paleomammalogy, biological anthropology, and the history of science and technology. After hours, you can find him practicing taekwondo or doing deep dives on classic sci-fi.

