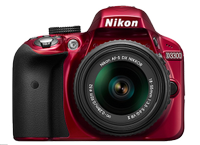
How to Take Great Pictures with the Nikon D3300
Want to get more out of your new D3300 DSLR? Here are some simple tips for better shooting with this feature-packed camera.
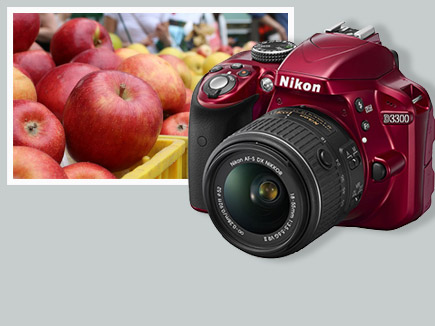
The successor to the very popular Nikon D3200, the D3300 is a powerful DSLR with a lot of features to improve your photos over those taken in Auto mode. But these features can also hurt your photos if you don't use them correctly. Here are the main controls for the Nikon D3300 and how you can harness them to get better pictures. (Note: The sample photos in this article were shot on a variety of cameras and are meant to illustrate how the process works on any camera.)
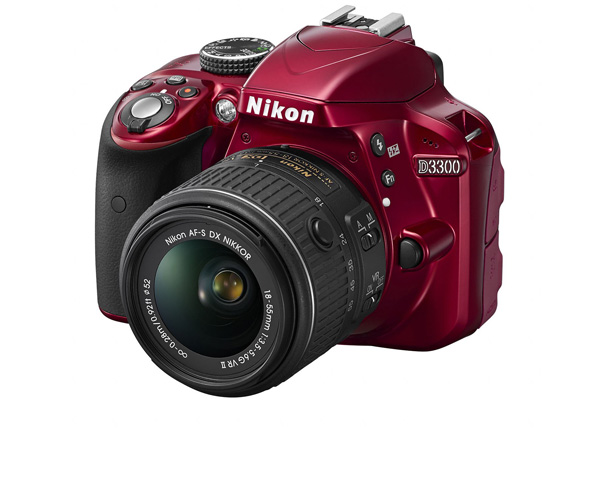
Update: These tips will also work on the successor to the D3300, the Nikon D3400, as well. To see a full review of Nikon's latest entry-level DSLR, click here.
What are the most important controls on the D3300?
First, we'll give you a quick tour of the key controls, and then we'll explain how to use them for different effects.
Mode Dial
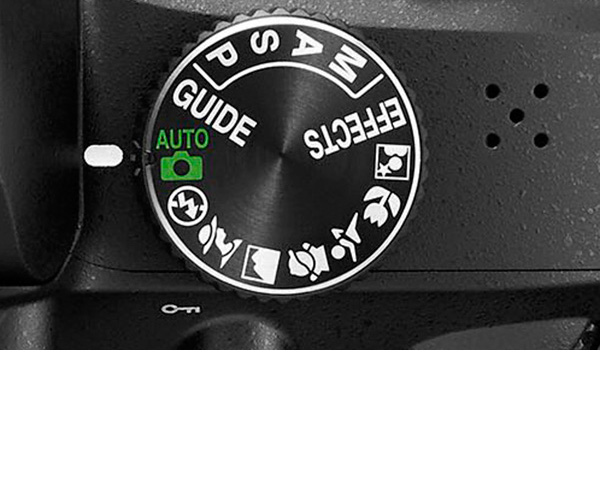
Starting at the top of the camera, you'll find a dial on the right side for a range of shooting modes. These are the ones you need to know:
AUTO – Auto: The camera makes all the decisions.
P – Program: This mode is best for general shooting. The camera adjusts the shutter speed and aperture, and gives you the option to adjust a few other settings (which we'll explain).
Sign up to get the BEST of Tom's Guide direct to your inbox.
Get instant access to breaking news, the hottest reviews, great deals and helpful tips.
S – Shutter Priority: You set the shutter speed using the Command dial on the back of the camera, where your right thumb rests. The camera will adjust the aperture (size of the lens opening) to insure you get a proper exposure.
A – Aperture Priority: You set the aperture using the Command dial, and the camera sets the shutter speed.
M – Manual: You set both shutter speed and aperture. The camera will warn you if the exposure is off, but it won't stop you. If you are a novice, this mode often does more harm than good. However, as you get more comfortable with photography, Manual mode can help you get difficult shots in which you want a particular effect that the camera can't execute on its own.
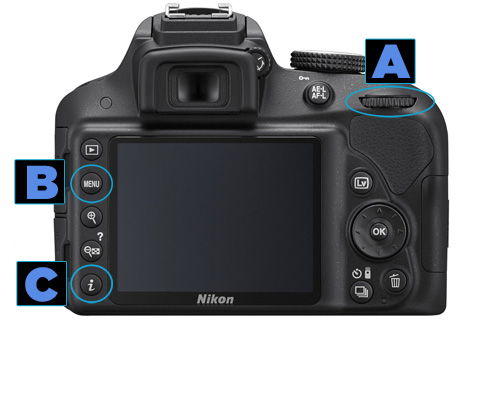
Some key controls on the D3300 include the Control dial (A), MENU button (B) and "i" button (C).
Effects
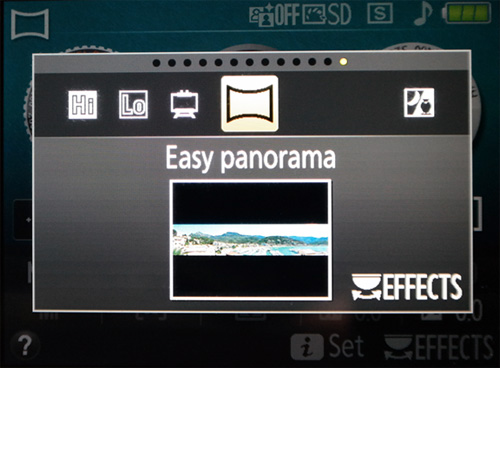
The D3300 offers a number of special Effects shooting modes, such as Super Vivid and Miniature. The one we found most useful was the Easy Panorama effect, which automatically stitches together multiple images you have shot into a wide, panoramic photo.
MORE: How Many Megapixels Do You Really Need?
ISO Light sensitivity and Noise Reduction
You control the D3300's sensitivity to light with the ISO setting. Use the lowest number you can that provides adequate exposure. You can raise the ISO in dim or dark lighting situations, but this produces graininess, called noise, in the images, so proceed with caution.
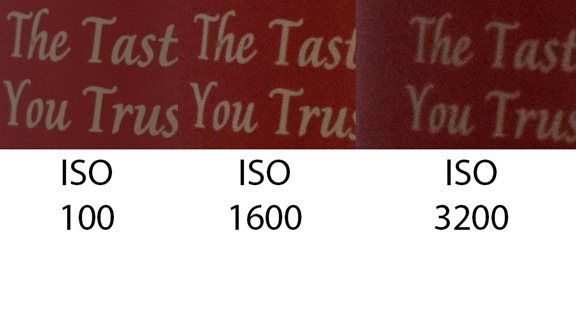
We recommend using the Auto ISO setting. (Go to: Menu>Shooting>ISO Sensitivity Settings, and turn the Auto ISO sensitivity control to On.) But lower the Maximum Sensitivity to 3200.
If you decide to set the ISO manually, try to go no higher than 1600 for everyday shooting, and no higher than 3200 for low light and evening shooting. You adjust ISO manually by pressing the "i" button, then selecting ISO from the settings menu.
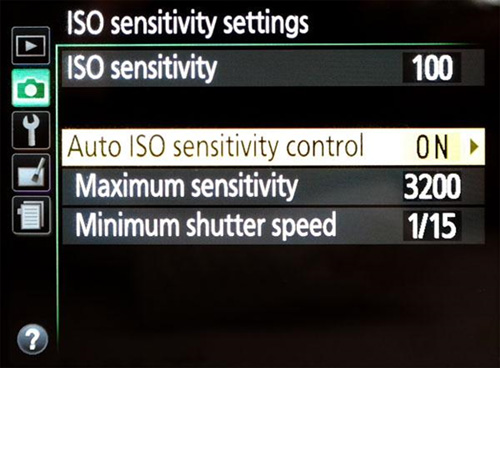
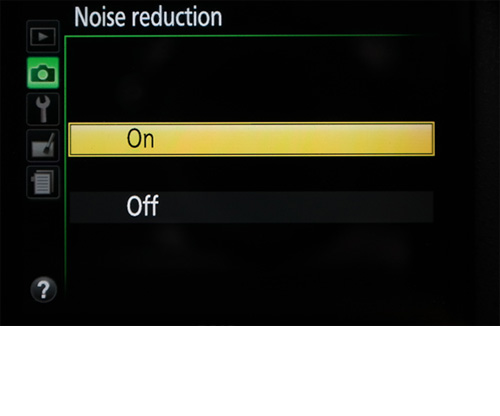
In either situation, you should also turn on Noise Reduction (Menu>Shooting>Noise Reduction).
How can I capture action photos?
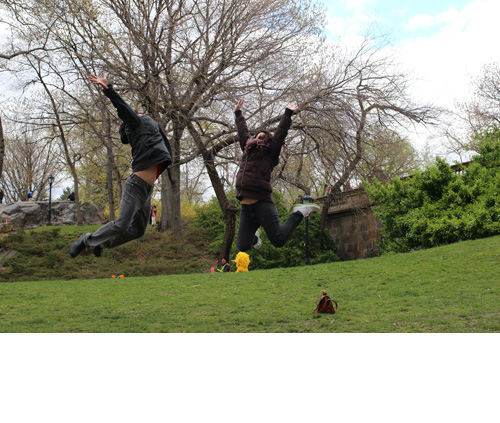
Use Shutter Priority and set the shutter speed to 1/100 second to freeze most action. Some action requires higher settings.
MORE: Why Autofocus Is the New Megapixel
How do I take portrait shots?
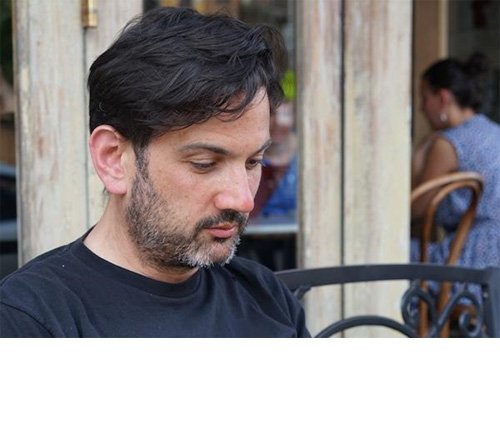
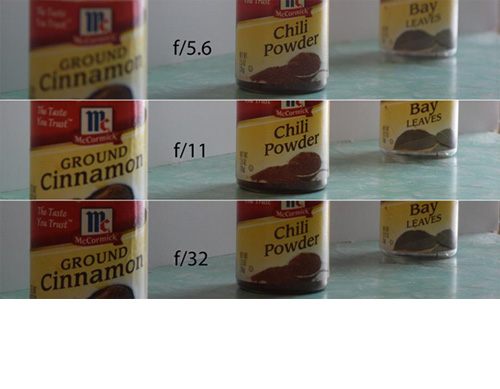
Set the zoom lens to about 35mm, and use Aperture Priority to control depth of field. An aperture of f5.6 or lower produces a shallow depth of field that blurs out the background, keeping focus on your subject. You set aperture by turning the rear Control dial.
How do I take landscape photos?
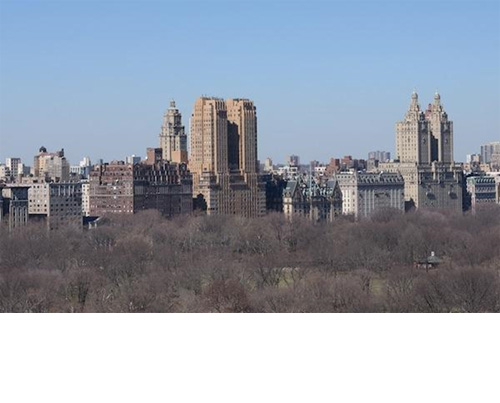
Using Aperture Priority again, go for a higher setting of f9 or greater to produce a deep depth of field. Having more of the scene in focus is also useful when shooting a group of people or any scene with important subjects at varying distances from your camera.
How do I take photos in low light?
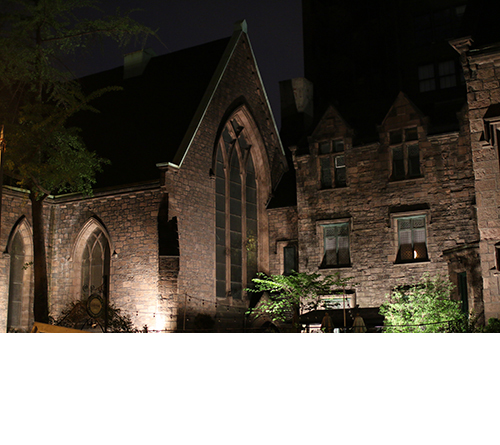
When shooting hand-held, use Shutter Priority and turn the rear Control dial to set the shutter speed at 1/30 of a second or faster. (It's best to use 1/60 of a second or faster.) If you set it slower, the VR (Vibration Reduction system, where part of the lens moves to counteract shaking) won't be able to compensate.
How do I meter light for proper exposure?
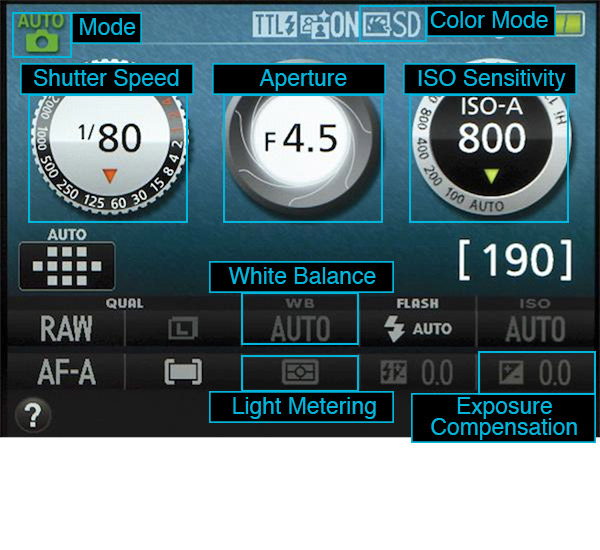
The D3300 has three light-metering modes, controlled from the settings menu that is accessed by pressing the "i" button. Most of the time, you can leave this on Matrix mode, in which the camera judges the light in several parts of the image and picks the settings for an even exposure. If Matrix isn't giving you the results you want, you can try Center Weighted or Spot Metering mode, or adjust the exposure compensation.
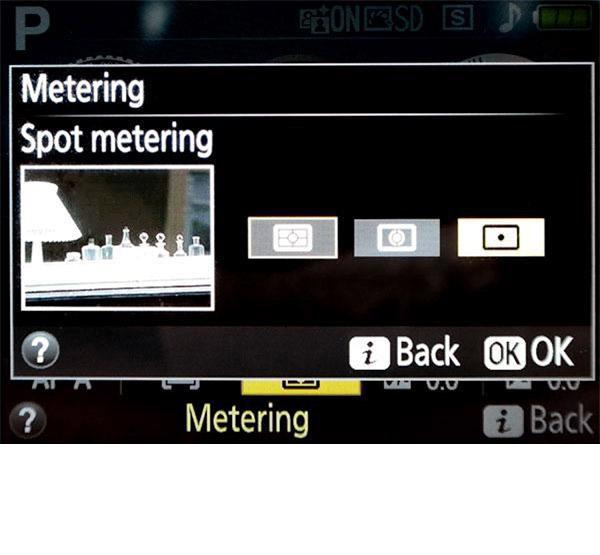
Center Weighted
This option pays more attention to the center of the image, but also considers the rest of the picture.
Spot Metering
Use this to have the camera measure just a small spot in the center of the image, ignoring the rest.
Exposure Compensation
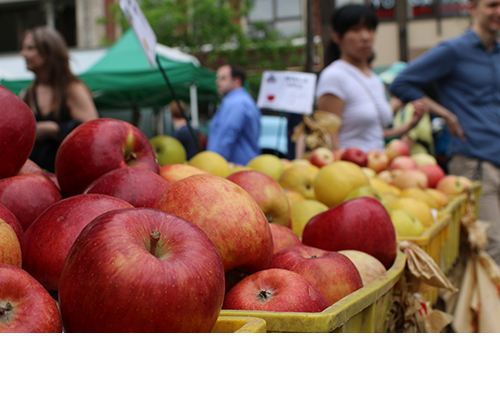

This control can lighten or darken the entire photo, regardless of the metering mode you use. To activate it, press the "+/-" button near the shutter and turn the rear Command dial. The "+" numbers lighten the exposure, and "–" numbers darken it. Use this control sparingly. Even one or two clicks in either direction can have a big effect.
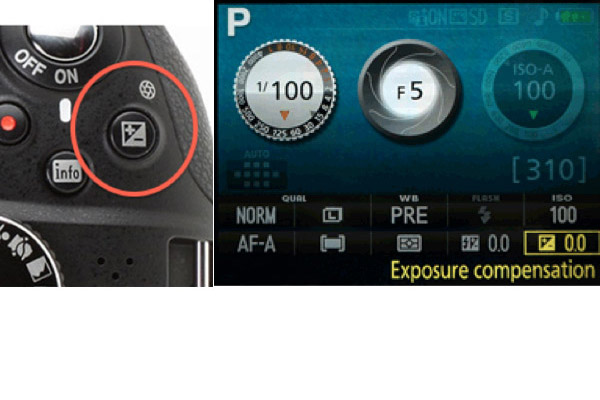
The Exposure Compensation button, and an Exposure Compensation set to the default of zero.
How do I adjust color?
Three settings — White Balance, Picture Control and Retouch — determine how colors appear in your photos.
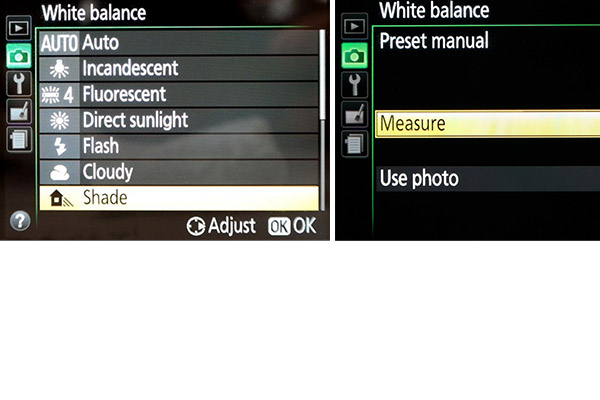
White Balance judges the overall color of the light in a scene in order to interpret colors accurately. The D3300 does this pretty well using its Auto White Balance mode. But in low light, photos can have an orangey cast that you can fix using a custom white balance. Activate this option by pressing the MENU button and going to White Balance>Preset Manual>Measure. Then point the camera at a white or gray object, such as a piece of paper, and press the Shutter. (Do this under the same lighting in which you will be shooting.) The camera will measure the white balance from the card and use this custom measurement to adjust the look of colors. Just remember to switch back to Auto White Balance or measure a new white balance when you move on to a different setting.
Picture Control determines the intensity of colors and also applies special effects. Turn the Mode Dial to EFFECTS and then press the MENU button to access the Picture Control settings. We recommend staying with the default SD (Standard) setting, as this produces the most-accurate and true-to-life colors.
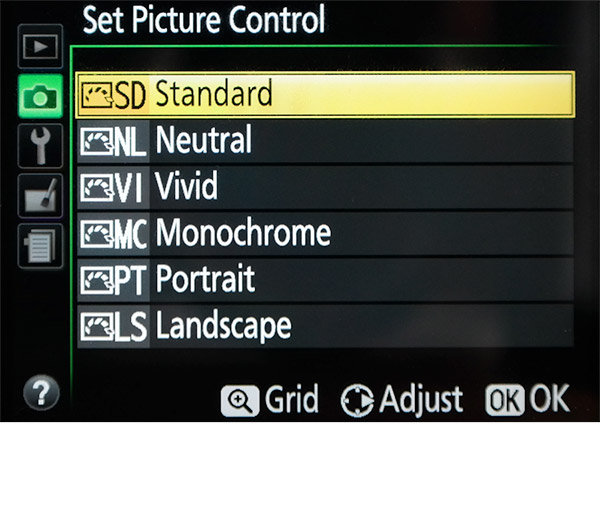
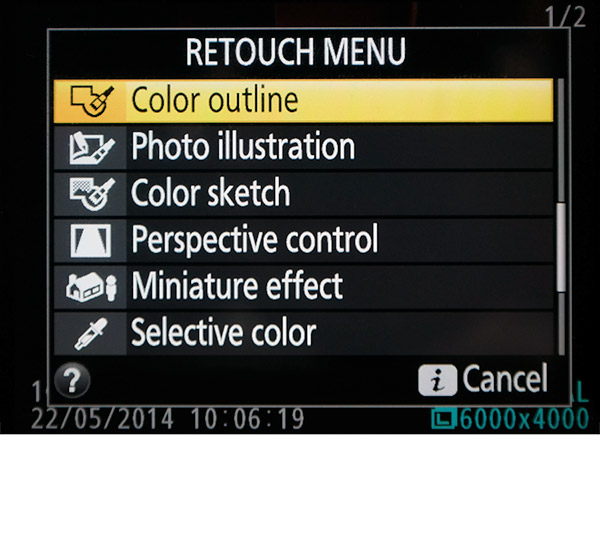
Retouch is a better way to use color effects, as it applies them to a copy of the photo, leaving the original unaltered. Access it by pressing the "i" button while viewing a photo. Then select Retouch to apply effects like Monochrome and Color Sketch, plus Filter effects that can enhance some (or all) colors. If you don't like the result, you can go back to the original and try again.
What are the best lenses for the D3300?
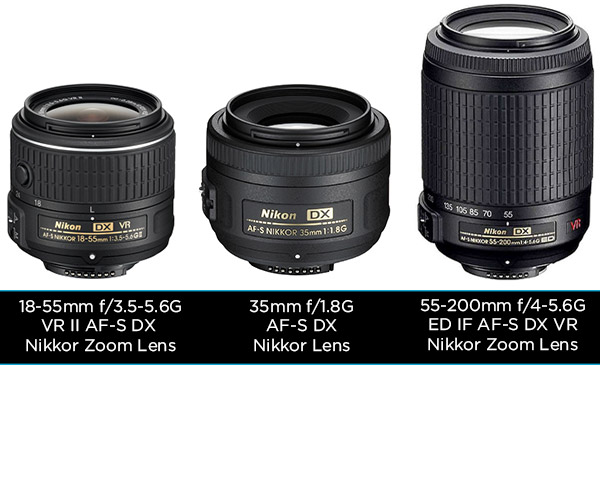
The Nikkor 18-55mm f/3.5-5.6G VR II AF-S DX NIKKOR Zoom Lens that comes with the Nikon D3300 kit is good for general shooting, but one of the advantages of a DSLR is that you get access to a huge range of other lenses. Here are two low-cost options.
MORE: A Guide to all of Nikon's Lenses
We'd recommend that aspiring shooters consider adding the $199 Nikon 35mm f/1.8G AF-S DX Lens as a good prime lens (which means it has a fixed focal length with no zoom) for candids, street shooting and portraits. It's large aperture lets in plenty of light for shooting in dim conditions and for creating very shallow depth of field.
A longer zoom lens like the $250 Nikon 55-200mm f/4-5.6G ED IF AF-S DX VR Nikkor Zoom Lens will help you get closer in to distant objects, although the lack of image stabilization means it should be used carefully. A small amount of hand shake can make an image blurry, so you should keep the shutter speed above 1/60 of a second if possible (raising the ISO as needed), or use a tripod.
Follow Richard Baguley @rbaguley or on Google+. Follow us @TomsGuide, on Facebook and on Google+.
Richard Baguley has been working as a technology writer and journalist since 1993. As well as contributing to Tom's Guide, he writes for Cnet, T3, Wired and many other publications.
-
DominicanaOffroad simple, usefull, practical, understandable and easy, excellent guide Im put in practice when I bouth my D330.Reply
Thanks for your help -
Valeron the information really nice and useful. But if you want to make cool pictures you should teach how to do it.Reply -
NewsView I bought the Nikon D3300 camera almost a year ago. I wish I would have found this guide. It cuts out the 100s of pages typical of user manuals and dedicated photography books, and gets straight to the point.Reply
One thing I would like to better understand about the D3300 is why under extremely bright light it will use a higher-than-expected ISOs (~320)? In similar conditions I would see 100 ISO or even 80 ISO on a P&S — and even shooting into shadow ISO 200. In an auto mode on the D3300 I'm seeing ISO values that don't add up for the lighting.
In one review for this model I note a comment that the camera in AUTO mode is set to assume the flash is ON regardless of whether it actually fires, and that zooming in when this is the case can result in blurry photos. It is true to my experience that with the kit zoom lens, even in very bright light (not backlit), I'm having a horrible time getting the camera to focus short of leaving it in sports mode or mounting it on a tripod. It is with this particular lens that I observe unexpected AUTO ISO values. Does this suggest a faulty lens, faulty metering or both?
One type of shooting scenario that seems particularly difficult with this camera pertains to shooting birds. When shooting into a tree with foliage or branches, no matter what the focus method (3D tracking, center weight) I will see focus/defocus (shallow depth of field) even at 200mm zoom. This makes it nearly impossible to capture a bird in a tree in focus short of a completely unobstructed view. If I use the sports mode to photograph a hummingbird buzzing around flowers, every other branch/flower is out of focus (including the bird). I've tried various focus methods and the results are identical. Unless the bird is sitting perfectly still and I use the center-point method, I don't get good focus shooting into a tree even when the subject is brightly lit.
Does the aforementioned difficulty have to do with the fact that the D3300 apparently has only ONE cross-lined AF sensor (at the center)?
Generally I find that with any subject using any other AF method other than center point is lacking. Taking a bird in a tree off the center AF where the cross-link is located generally results in loss of focus quality! At any zoom, I'm finding this camera inadequate for birdwatching (quick but clear snaps of small subjects among many possible focus targets — e.g. branches/leaves). I've had better luck with P&S cameras in this regard.
Any suggestions? -
bertogator Good Grief.....I think this is great....I just purchased a 3300 and the little manual is really hard to work with..They need a real manual full size that is in color with highlights...All of these sub menus are very tough to understand without alot of frustration!!!!Reply -
Marie_22 Thanks! This is perfect. I am very new to taking pics with a good camera. I bought it so I could take pics of the kids but everything was looking orangy. This was very helpful!Reply -
jack357 Thanks, I just purchased the Nikon d3300 and admit I'm confused. I'm "old school" , used cameras with film, developed them myself and had a great time. Now being semi retired I want to free lance again. It's a lot of fun and rewarding as well. I've taken a photo of my grandson with this camera and it is sensational. Everyone loves it. Had it reproduced on t shirts, coffee mugs, blankets, even a 48" x48" wall hanging. Thanks once more for your time and advice. Jack, Ottumwa, IAReply -
Sharon_85 thank you for the information. I really needed it. Any advice on how I can get my pictures to stop looking so blurry. I even have it on auto.Reply
Thanks.
