How to Make a Beautiful Photo Card with Mixbook
Over the past few years, Mixbook has received our Editors' Choice as the best of the online card-creation services. Here are some tips for making a truly personal, beautiful photo card using Mixbook.
You want to create a greeting card, invitation or marketing postcard that's fully personalized with your unique photographs and individual style. But how can you avoid the hassles and simply have fun easily designing a beautifully customized card that will make a deep impression? We're here to help.
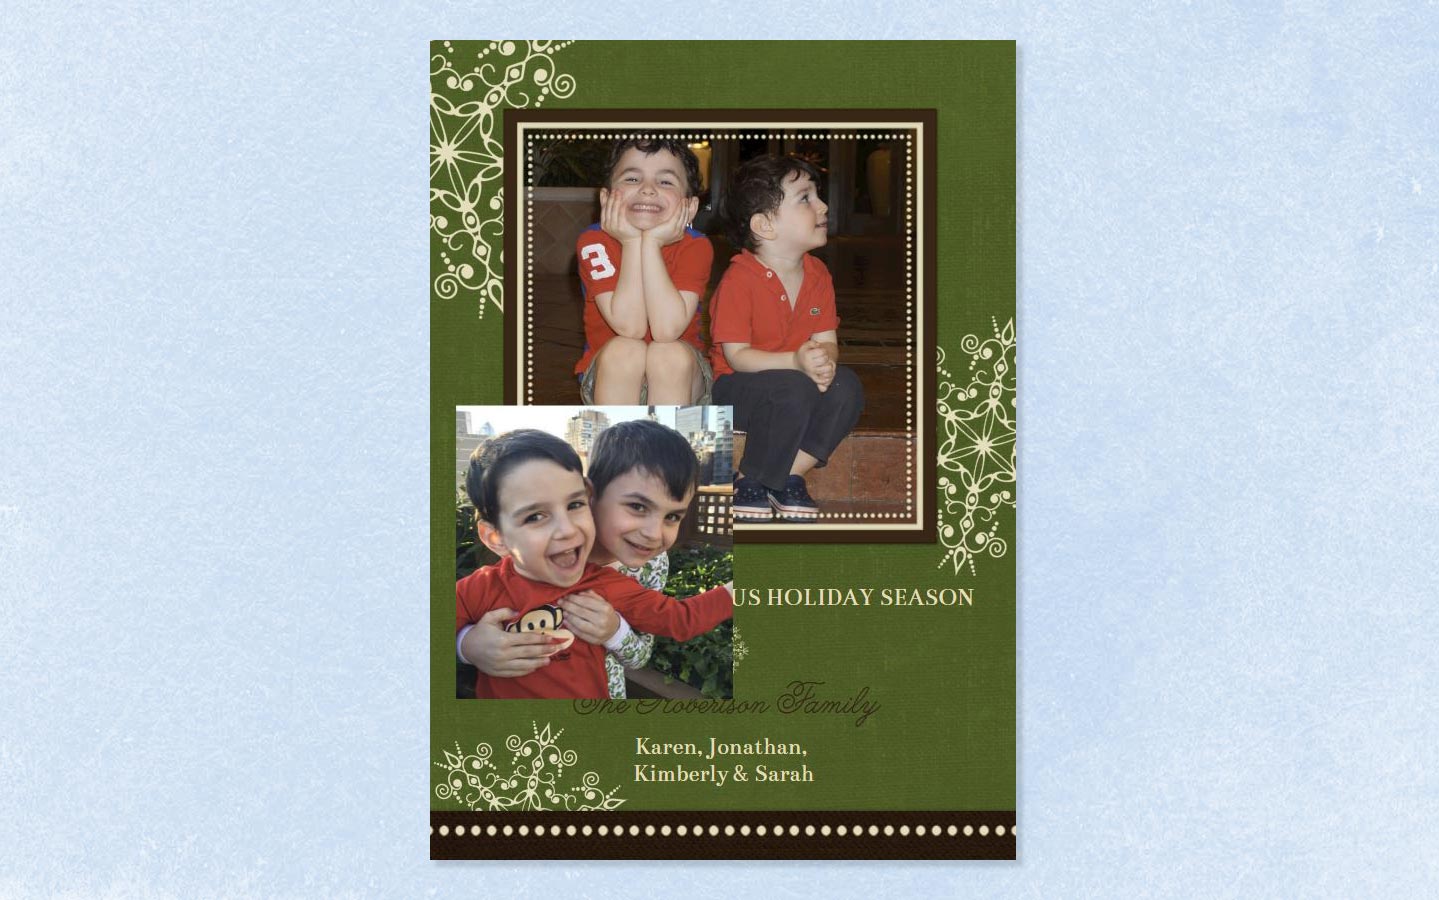
Over the past few years, Mixbook has received our Editors' Choice as the best of the online card-creation services. We particularly enjoy how much fun it is to just let loose and explore your own creativity with Mixbook, using the great variety of powerful but easy-to-use tools and content. What's more, Mixbook has your back with readily available Undos and Redos, and it automatically saves your card as you work.
Here are some tips for making a truly personal, beautiful card with Mixbook.
10 quick tips for creating a photo card
- Choose your card's format (flat, folded, foil or magnet), orientation (horizontal, vertical or square), trim (square, rounded or specialty shape) and size carefully. They're the only aspects you can't change while designing your card.
- If you see a template that appeals to you but is for the wrong occasion—say, you like a birthday template, but have a graduating nephew—select it anyway. You can change all clip art, backgrounds, text and photo placement so that the card fits exactly what you need.
- Before uploading your photos, be sure they have high enough resolution, or else they won't look good when printed on a card. Mixbook says photos should be at least 4MB at 300 dpi, but no larger than 15MB.
- Have fun and experiment with Mixbook's various tools, layouts, clip art and backgrounds. The Undo button is always available to reverse any mistakes. And Redo can undo your Undos.
- Need help? Click the small Chat icon in the lower left to talk to a customer service representative.
- Remember to work on the design of all the pages of your card. Even a flat card has both a front and a back. Use the navigation arrows under your card to move from page to page.
- To make your card truly personal, consider uploading your own photos and illustrations to use as backgrounds and customized "clip art."
- Proofread your card carefully, and double-check all elements of your design before you click to order it.
- Keep an eye on how much your paper choice adds to your cost. While the more expensive papers have a finer texture and richer thickness, Mixbook's less expensive papers are quite nice.
- Be sure to order your card well before you need to send it out. Even if you pay for Express shipping, it takes time to print and the card won't arrive for at least a week.
Choose your template
The first step with any online printing project is to choose a template. Essentially, this sets the canvas on which you'll work. It can be initially intimidating to browse through Mixbook's many hundreds of flat and folded card templates. However, the site makes it comparatively easy to narrow down your selection.
After you choose an occasion or purpose, such as Holiday Photo Card or a Wedding Save the Date, you'll make check-mark choices on the following:
- Number of photos
- Format (a flat, folded or foil card, or a magnet)
- Trim (square or rounded corners or other shapes)
- Size
- Color
- Orientation (horizontal, vertical or square)
- Style
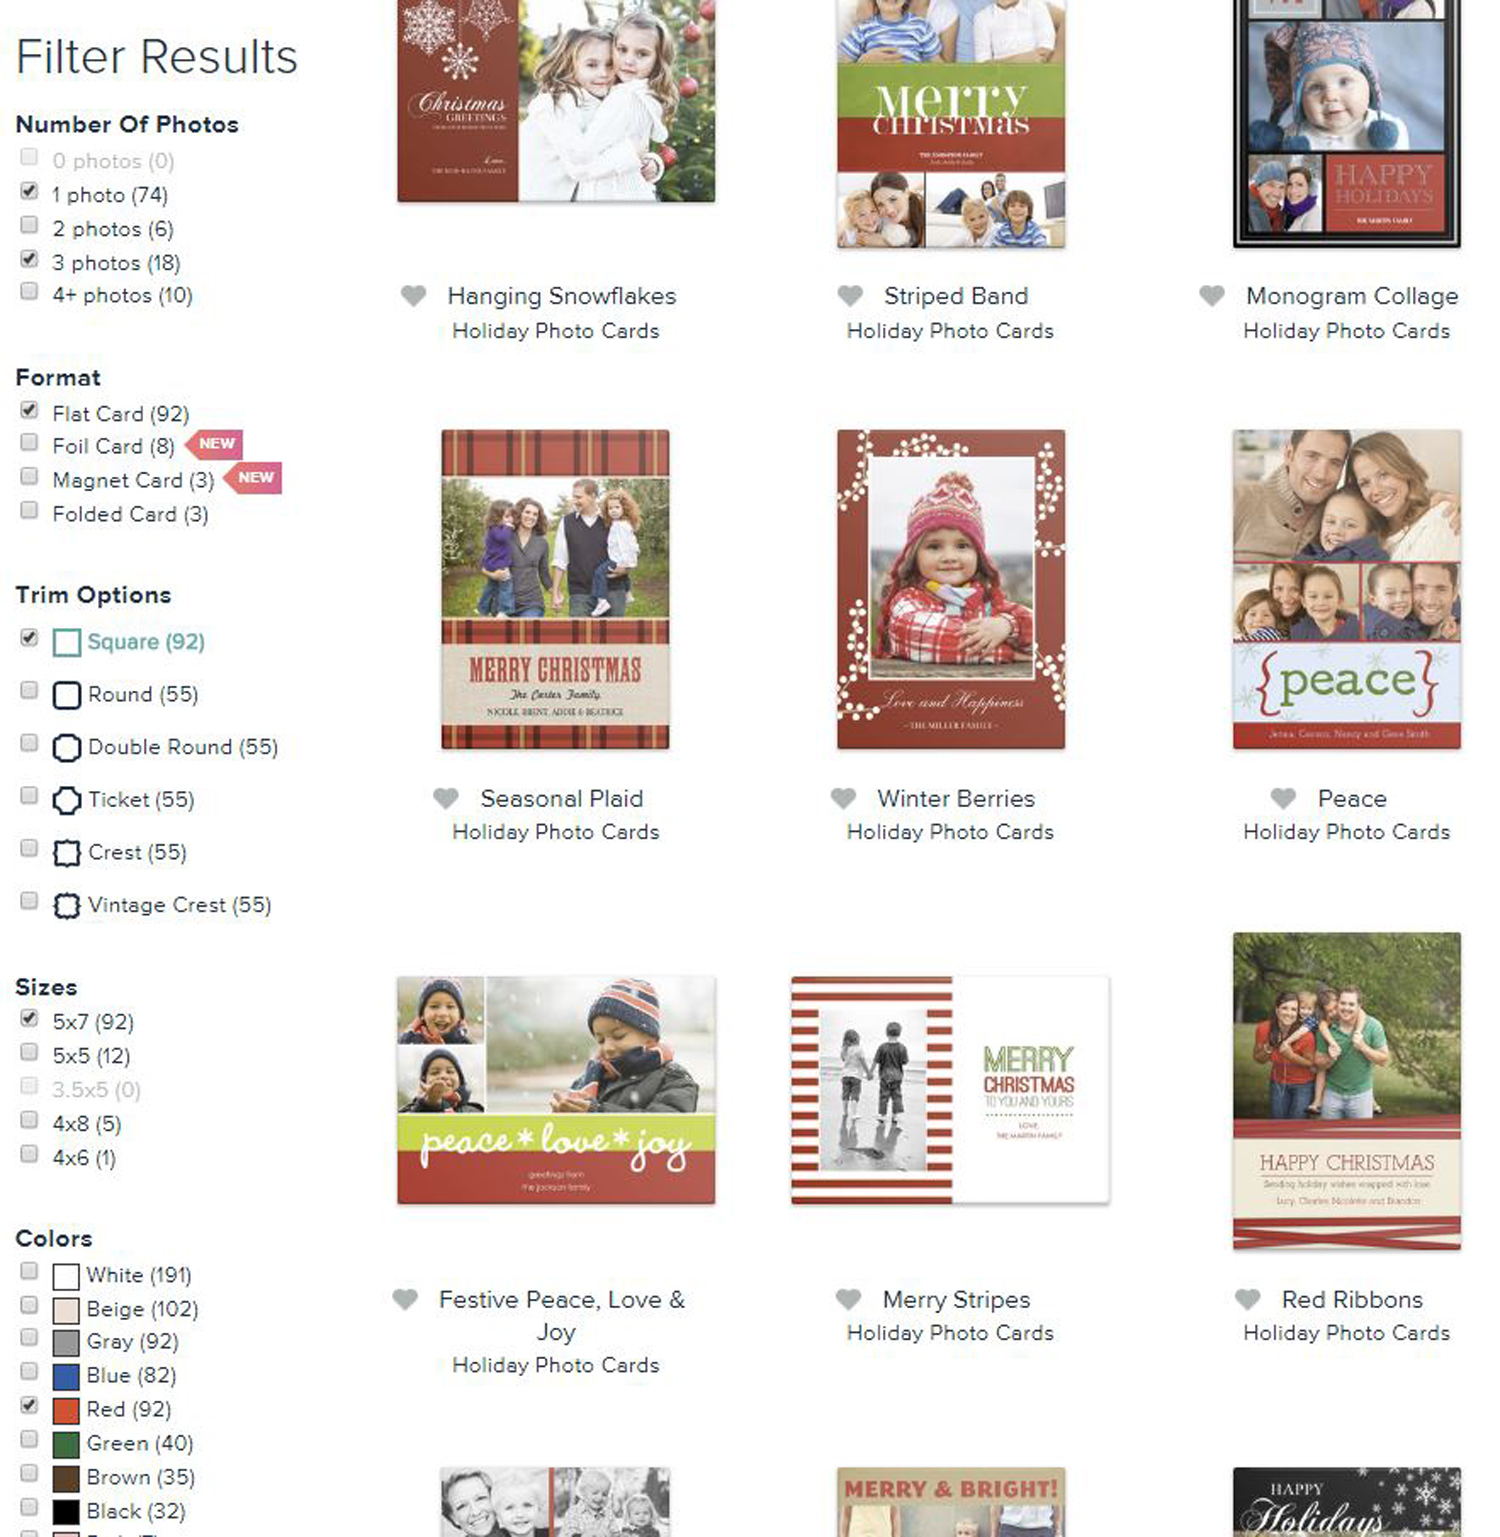
Don't worry about the number of photos, color or style; these can be changed as you create the card. In fact, you can start with a blank template. However, you must choose your format, trim, orientation and size, which are fixed.
Upload your photos
As your template (or blank card) loads, you'll be prompted to upload your photos.
Sign up to get the BEST of Tom's Guide direct to your inbox.
Get instant access to breaking news, the hottest reviews, great deals and helpful tips.
You can add photos from three sources:
- Your computer
- Your previous Mixbook projects
- Your accounts on Instagram, Facebook, Google Photos or SmugMug
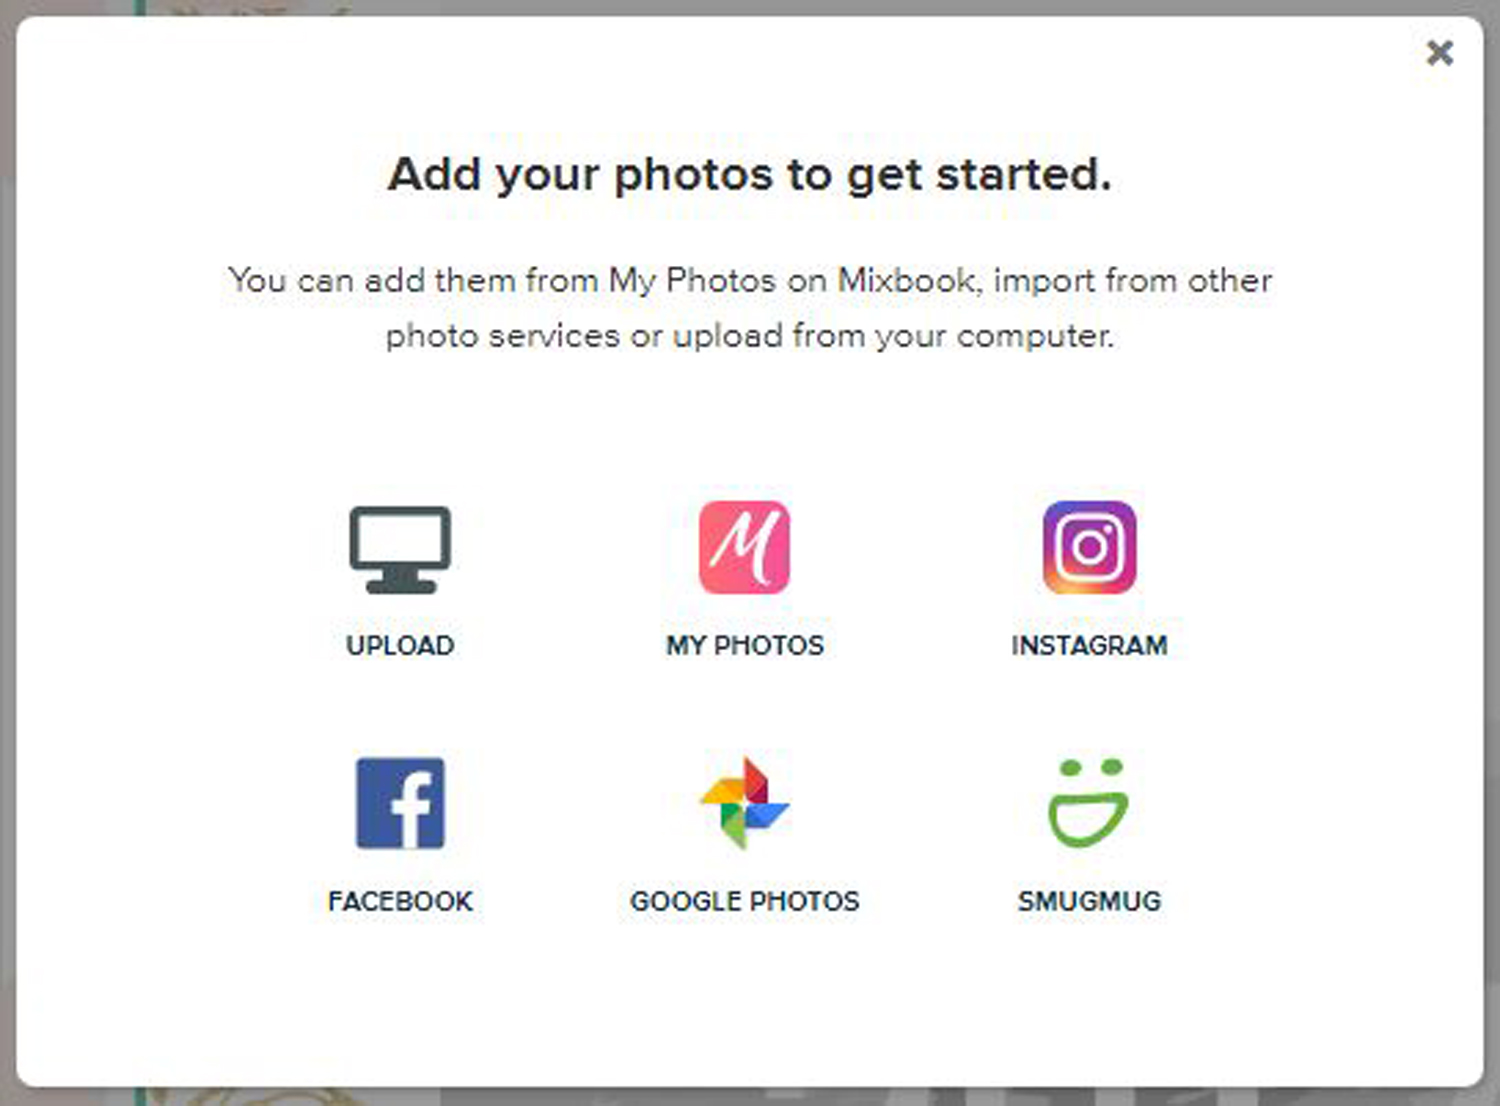
That will place your photos in the left sidebar of the workspace. If you want to add more photos to your project, click on Add Photos at the top of the sidebar.
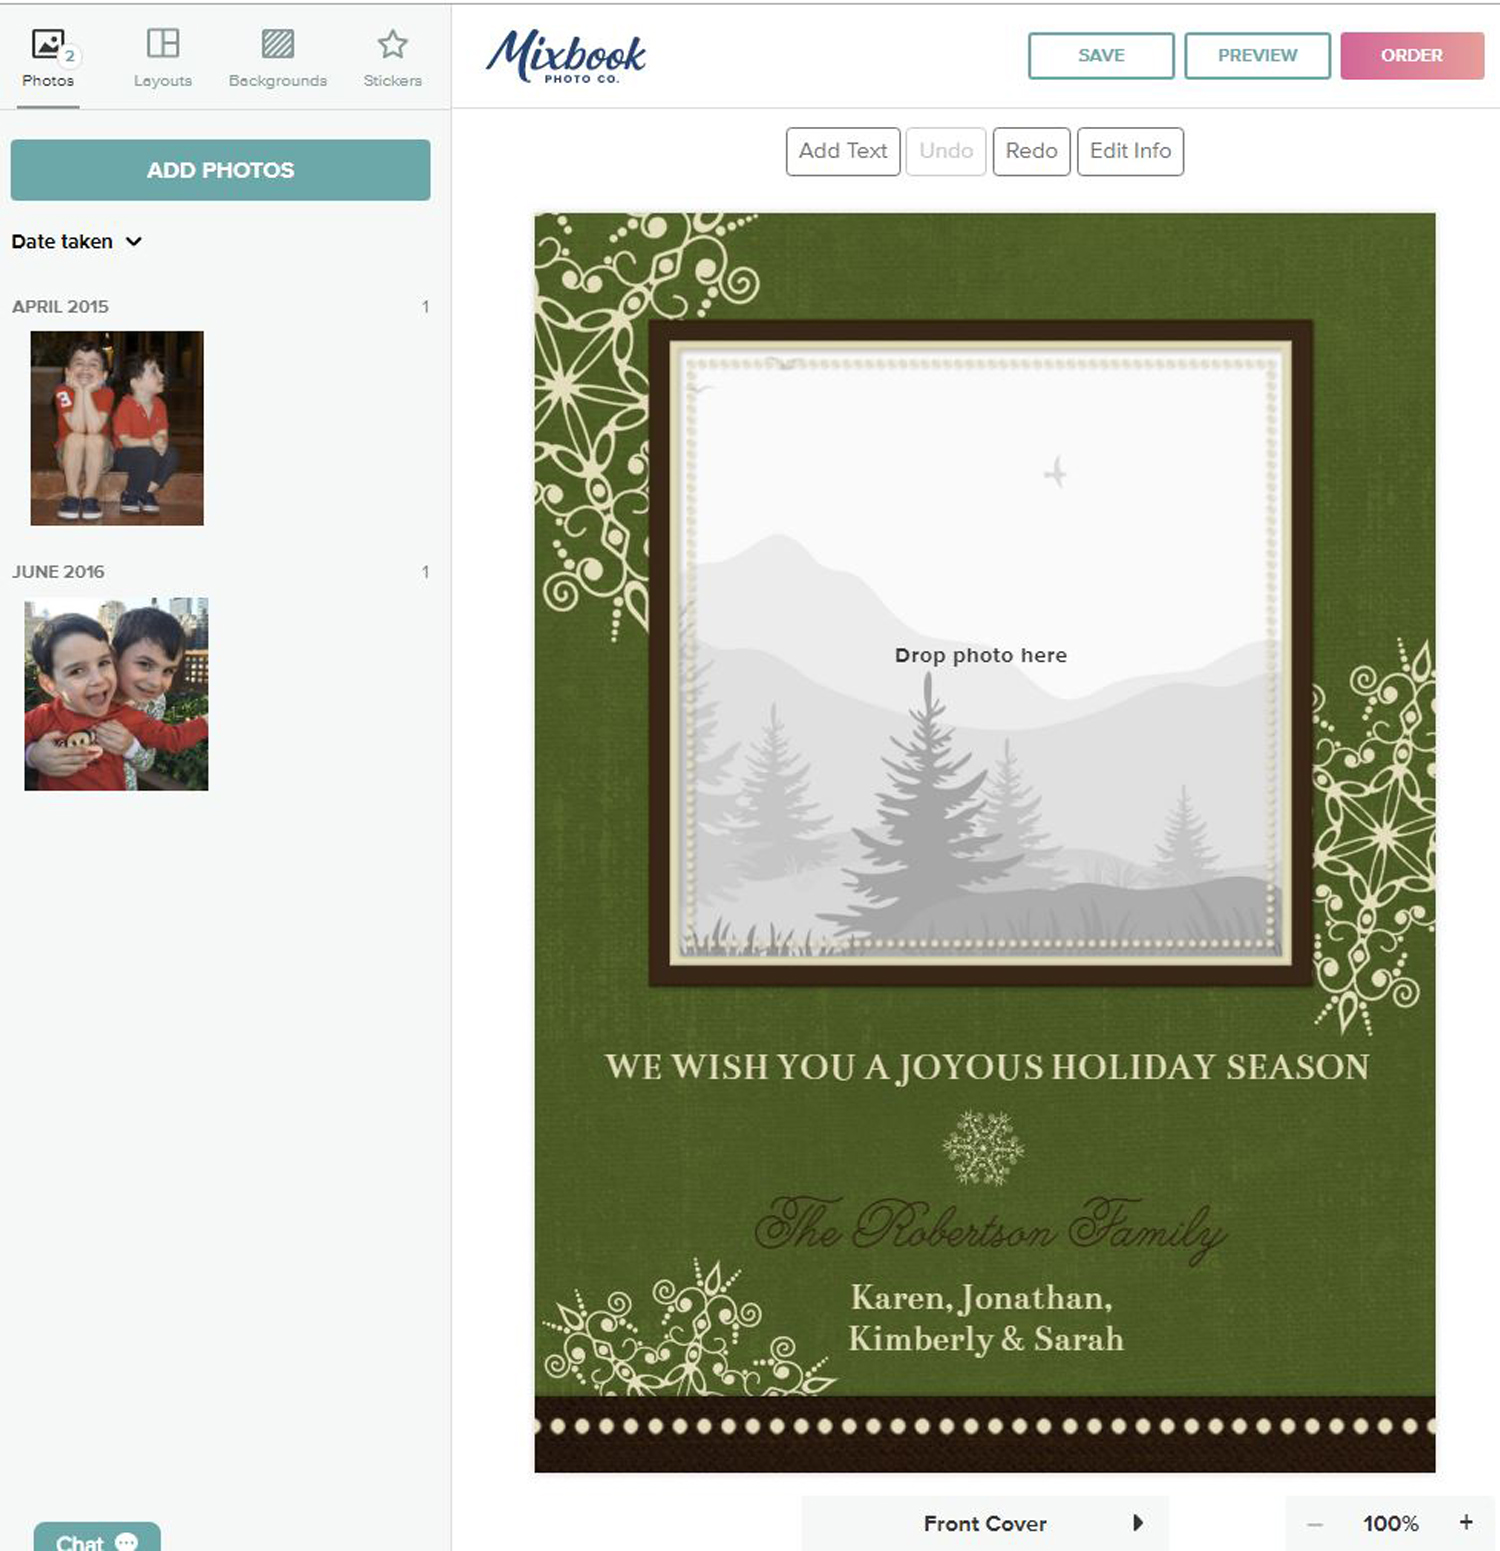
Take a quick tour of your photo-card interface
The Mixbook interface is intuitive and easy to navigate. When your project opens, the front of your card fills the main workspace. Below that is a navigation arrow pointing to the right. Click on it to view the other pages in your card. When viewing pages other than the front, click on the left arrow to move back to previous pages.
Above the workspace are four buttons: Add Text, Undo, Redo and Edit Info. Remember that the Undo and Redo are always there, which means you can have fun experimenting with the various options and tools Mixbook offers without worry of making a permanent mistake.
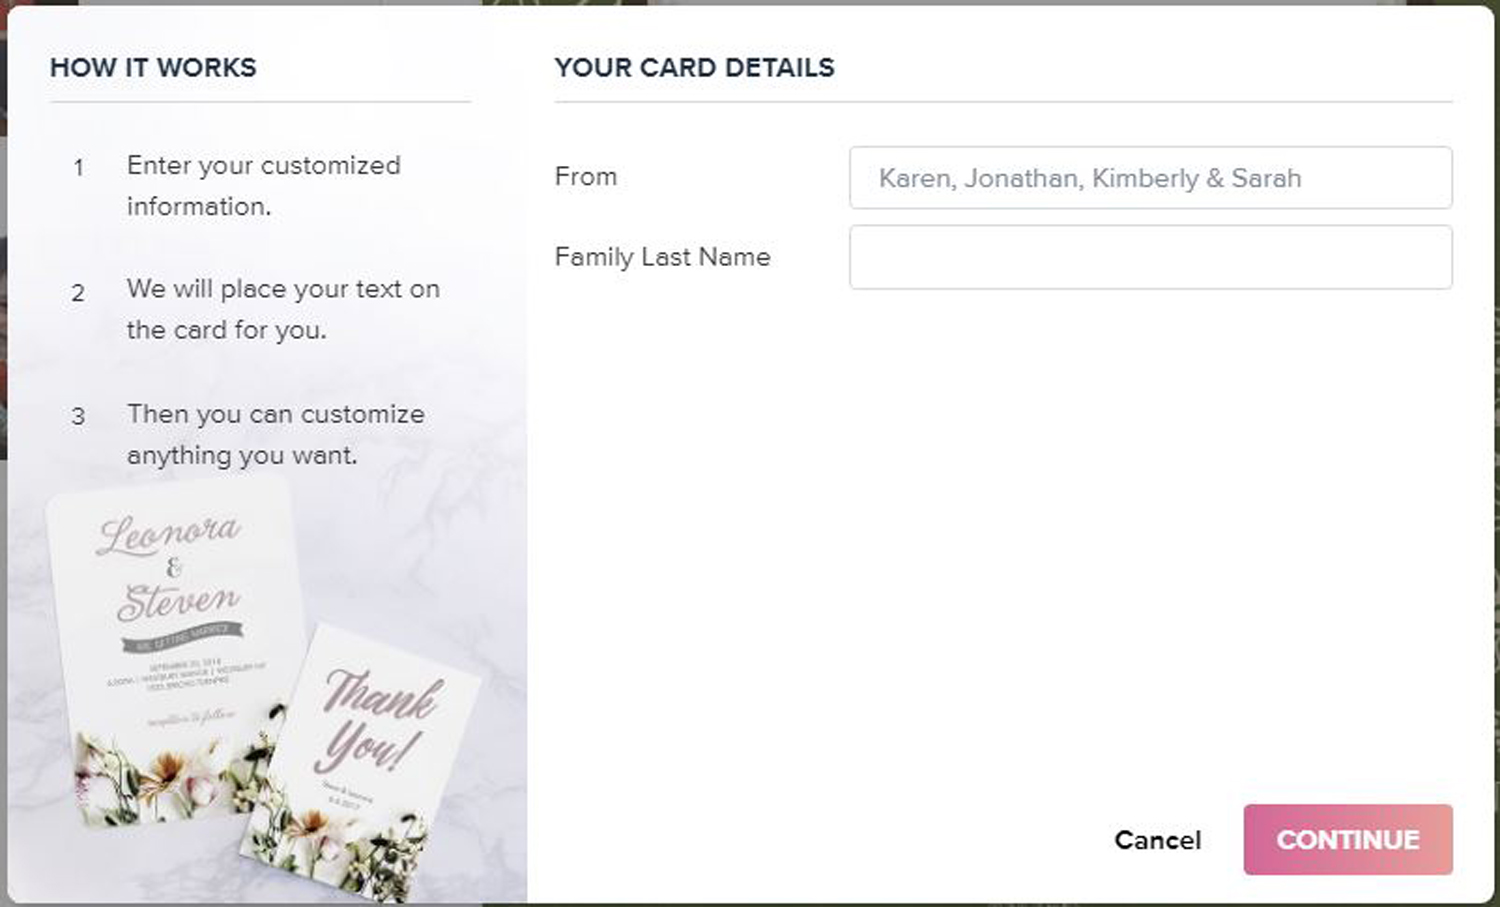
The Edit Info button opens a window where you can provide your names, which Mixbook will insert into the card for you. We'll discuss Add Text below.
In the tabbed left sidebar, you'll find the content you can use to customize your card: Your Photos, Page Layouts, Backgrounds and Stickers.
Choose a layout
Layouts are page designs with photo and text placeholders which provide beginning points for your design. Two kinds of layouts are available in the sidebar: Theme (full designs with the background, text and clip art based on your template) and Page (outlines of placeholders only). For flat cards, you can ignore the Theme layouts, because they typically contain only the front and back designs already applied to your card.
To select a Page Layout, click on the number of photos you think you'll be using (or click on Select All to scroll through the entire library of layouts). Then, click on a layout to apply it to the page of the card currently displayed in your workspace.
Regardless of what layout you choose, you have full control over the placement, size, shape and rotation of all elements on your card.

Add photos to your card
Click on the Photos tab in the sidebar.
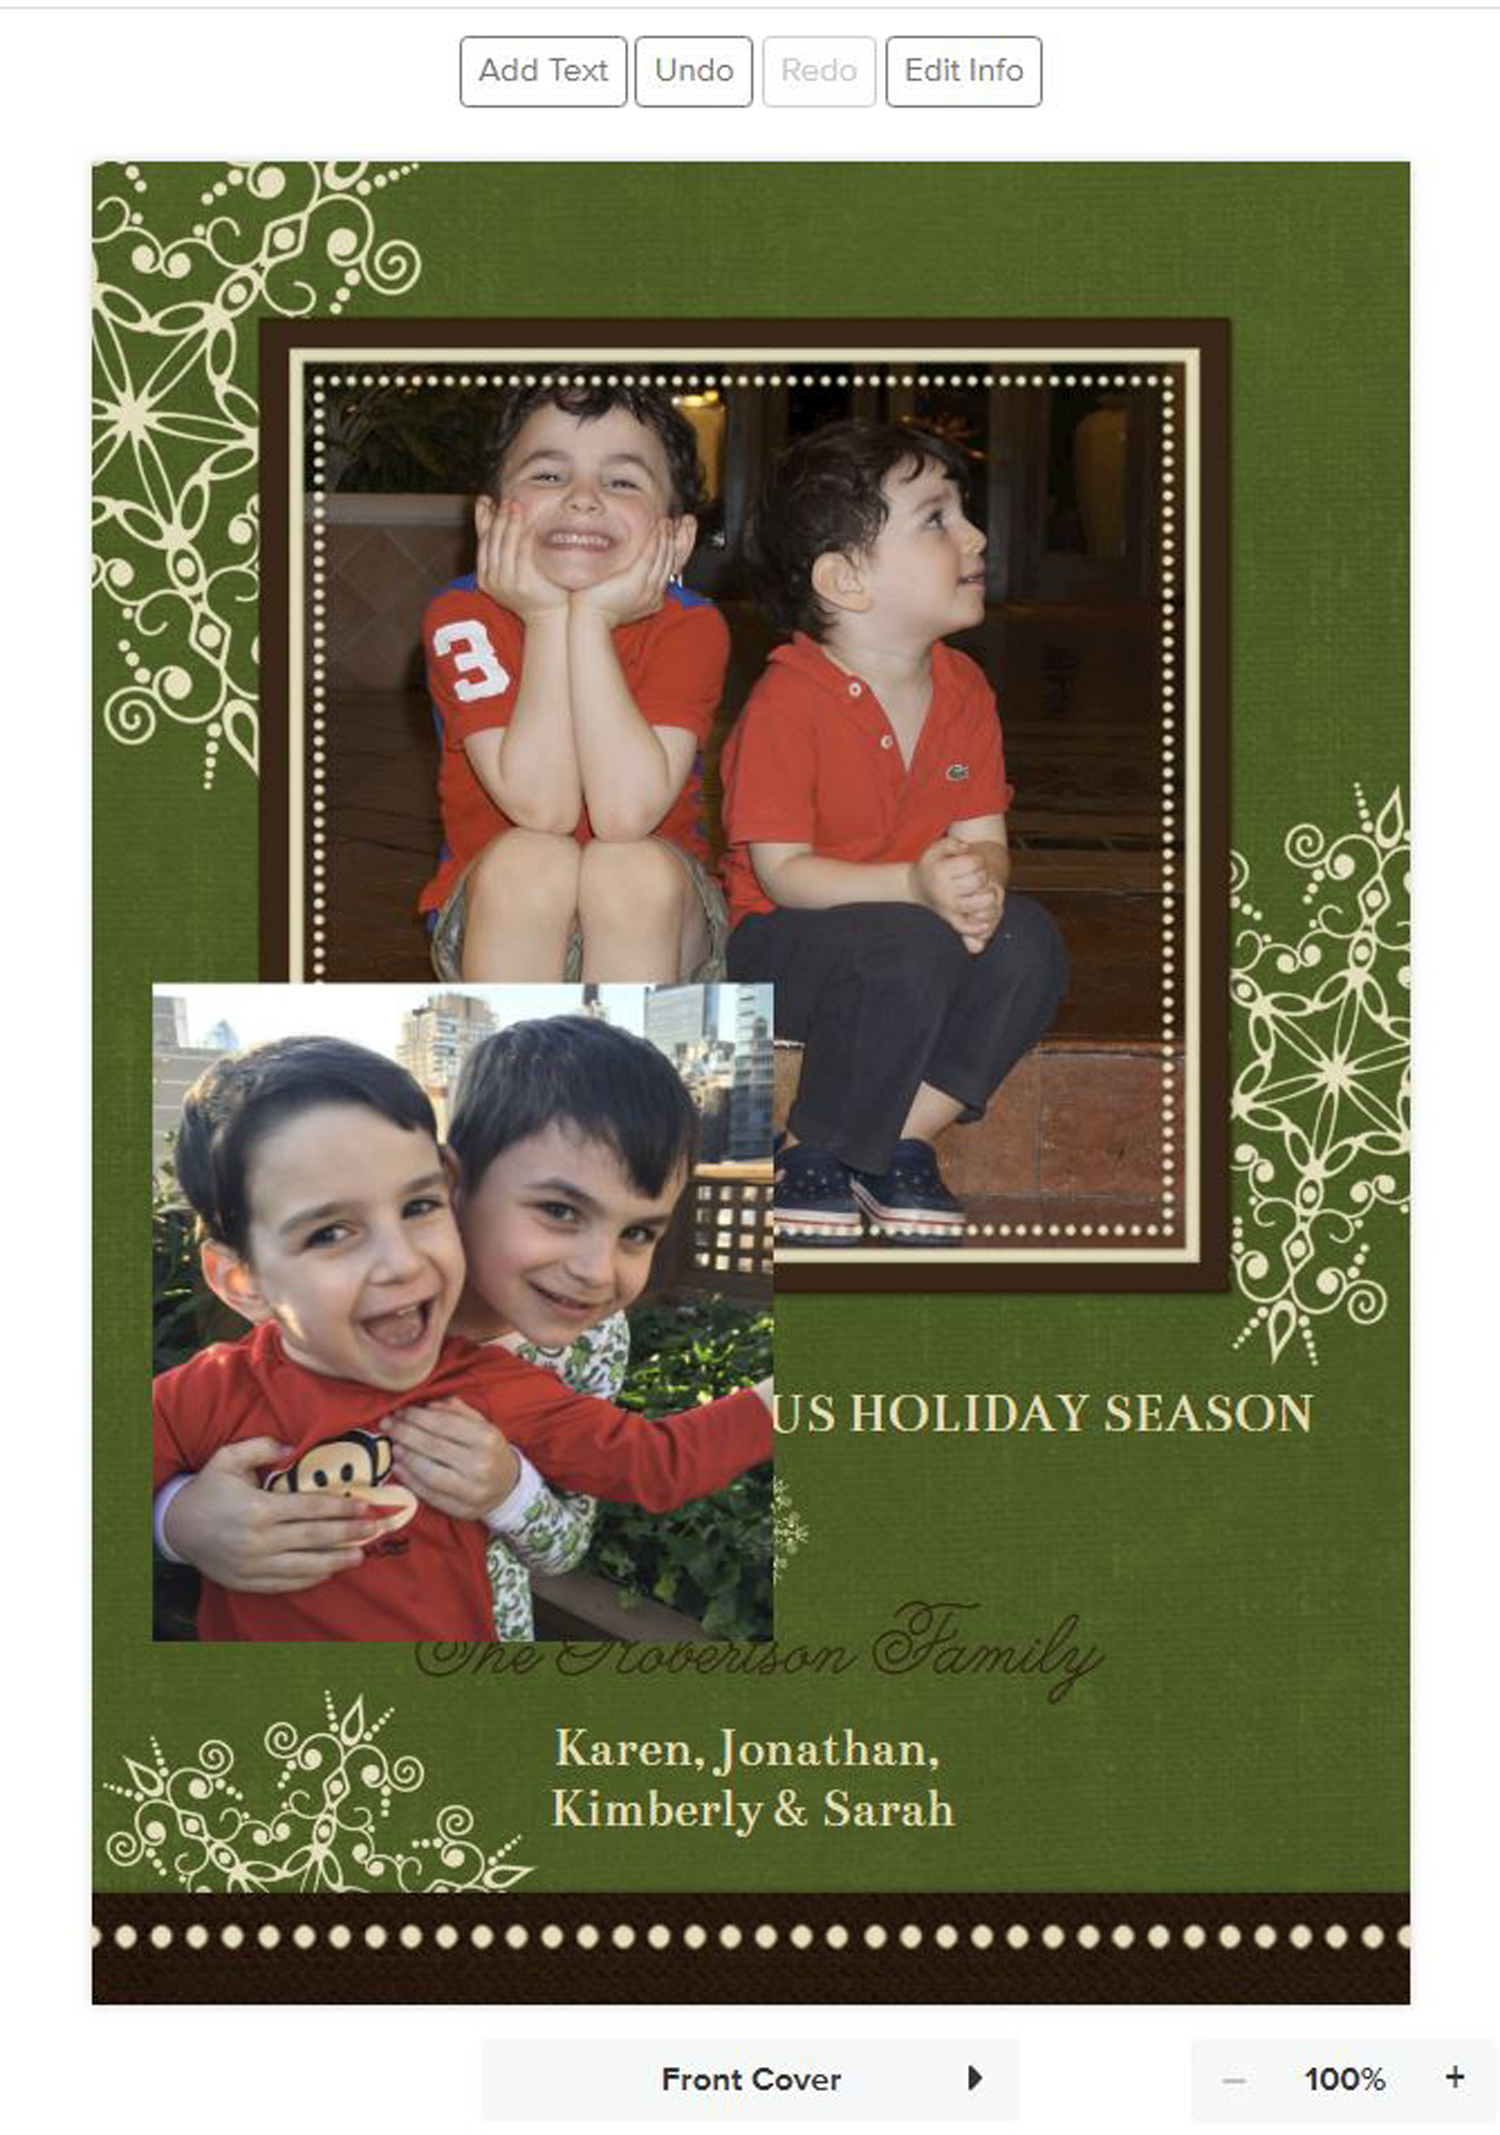
The designers of templates and layouts use photo placeholders to indicate where they think you should place your pictures. However, with Mixbook (as with a few other printing sites), the placeholders are suggestions only.
To place a photo, click and drag it into a placeholder — or anywhere you want.
Edit photos
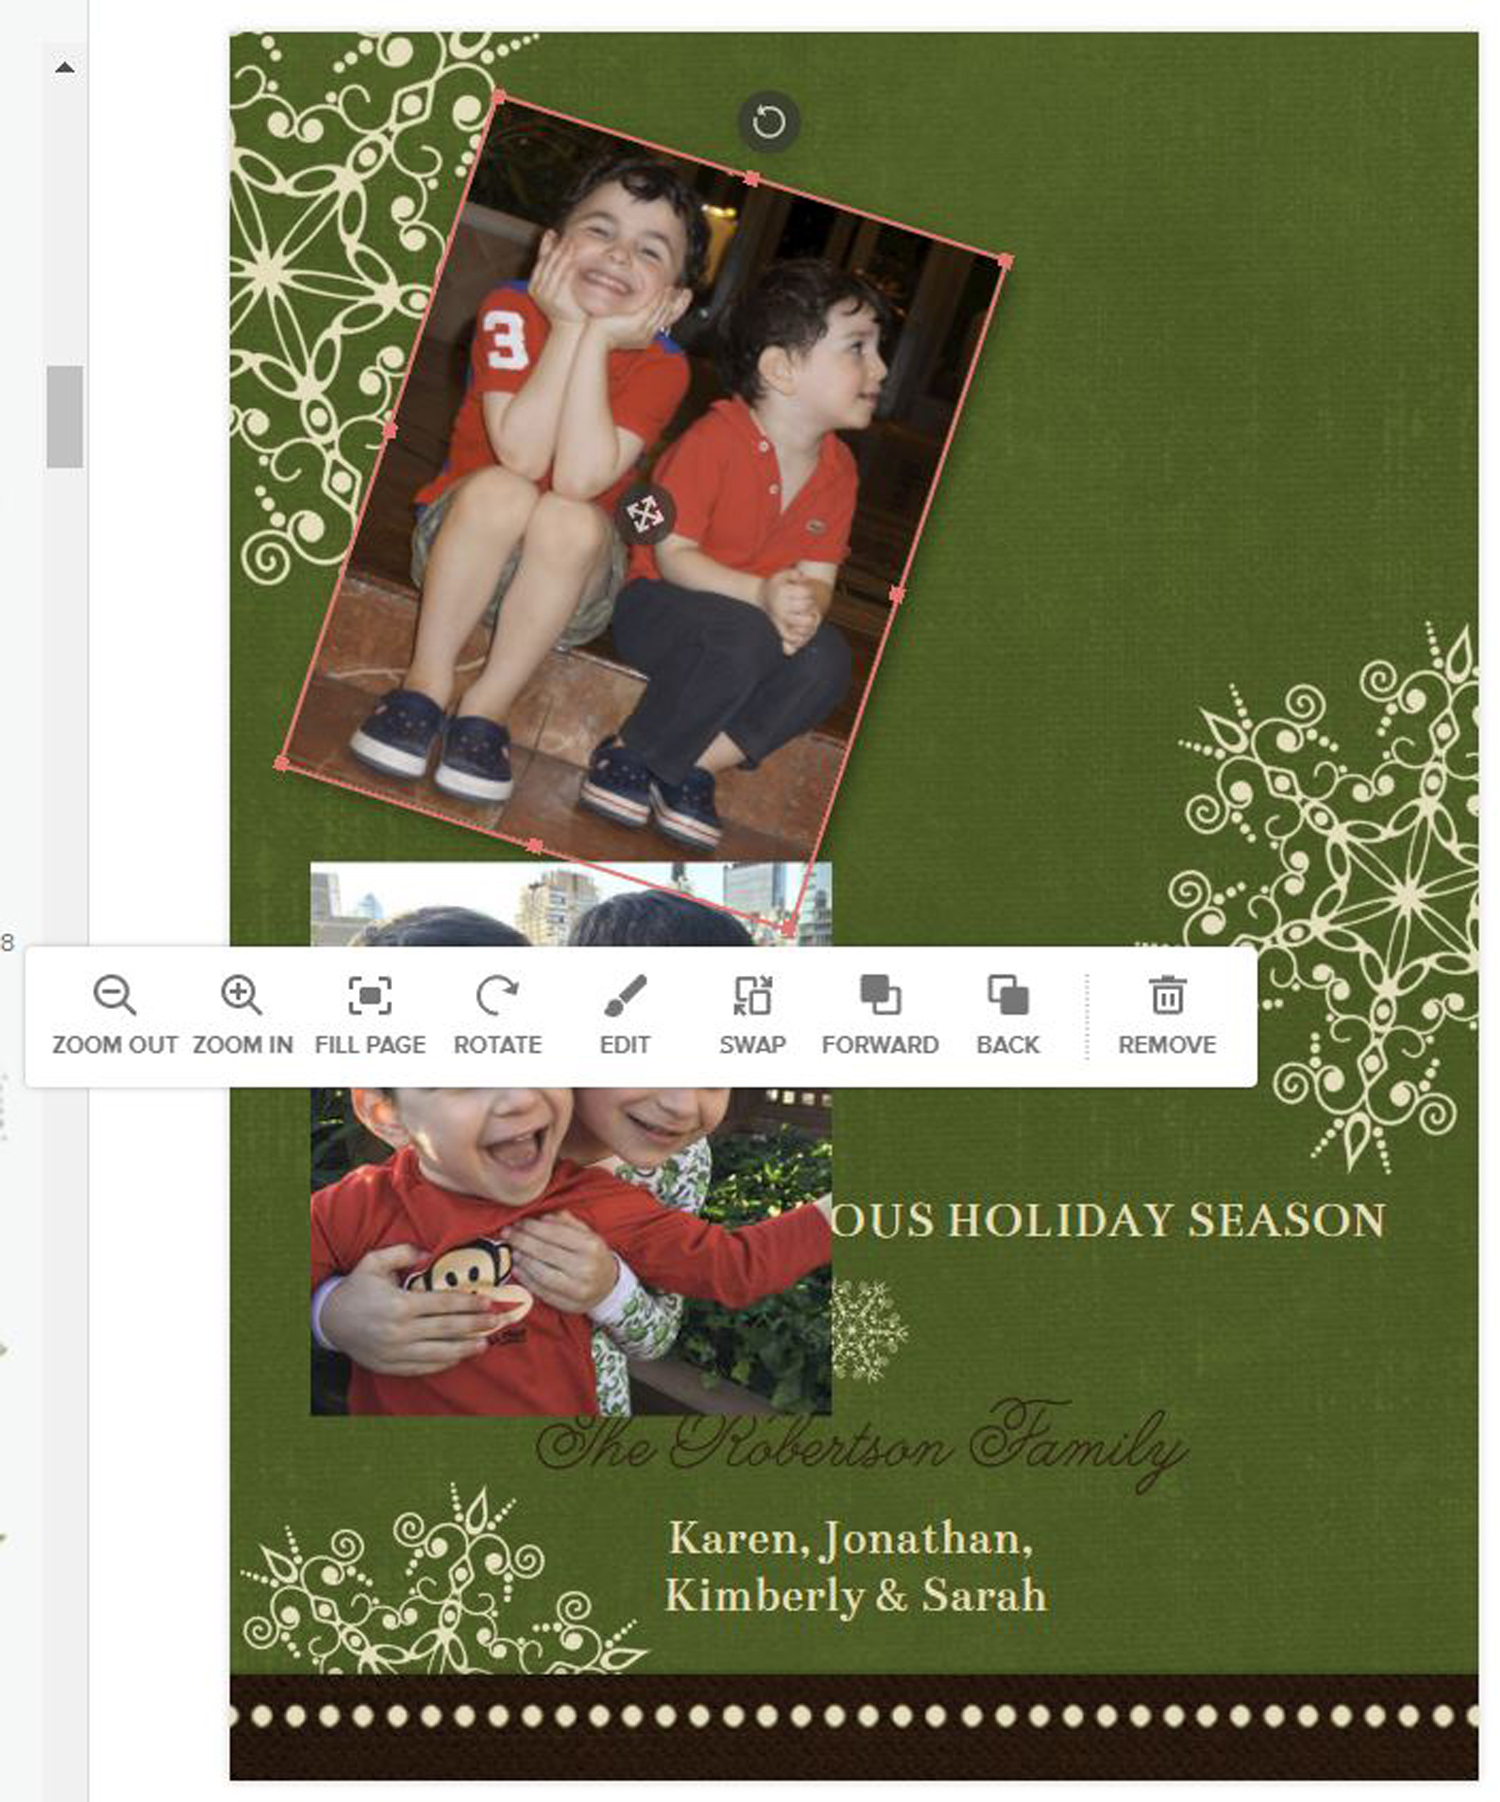
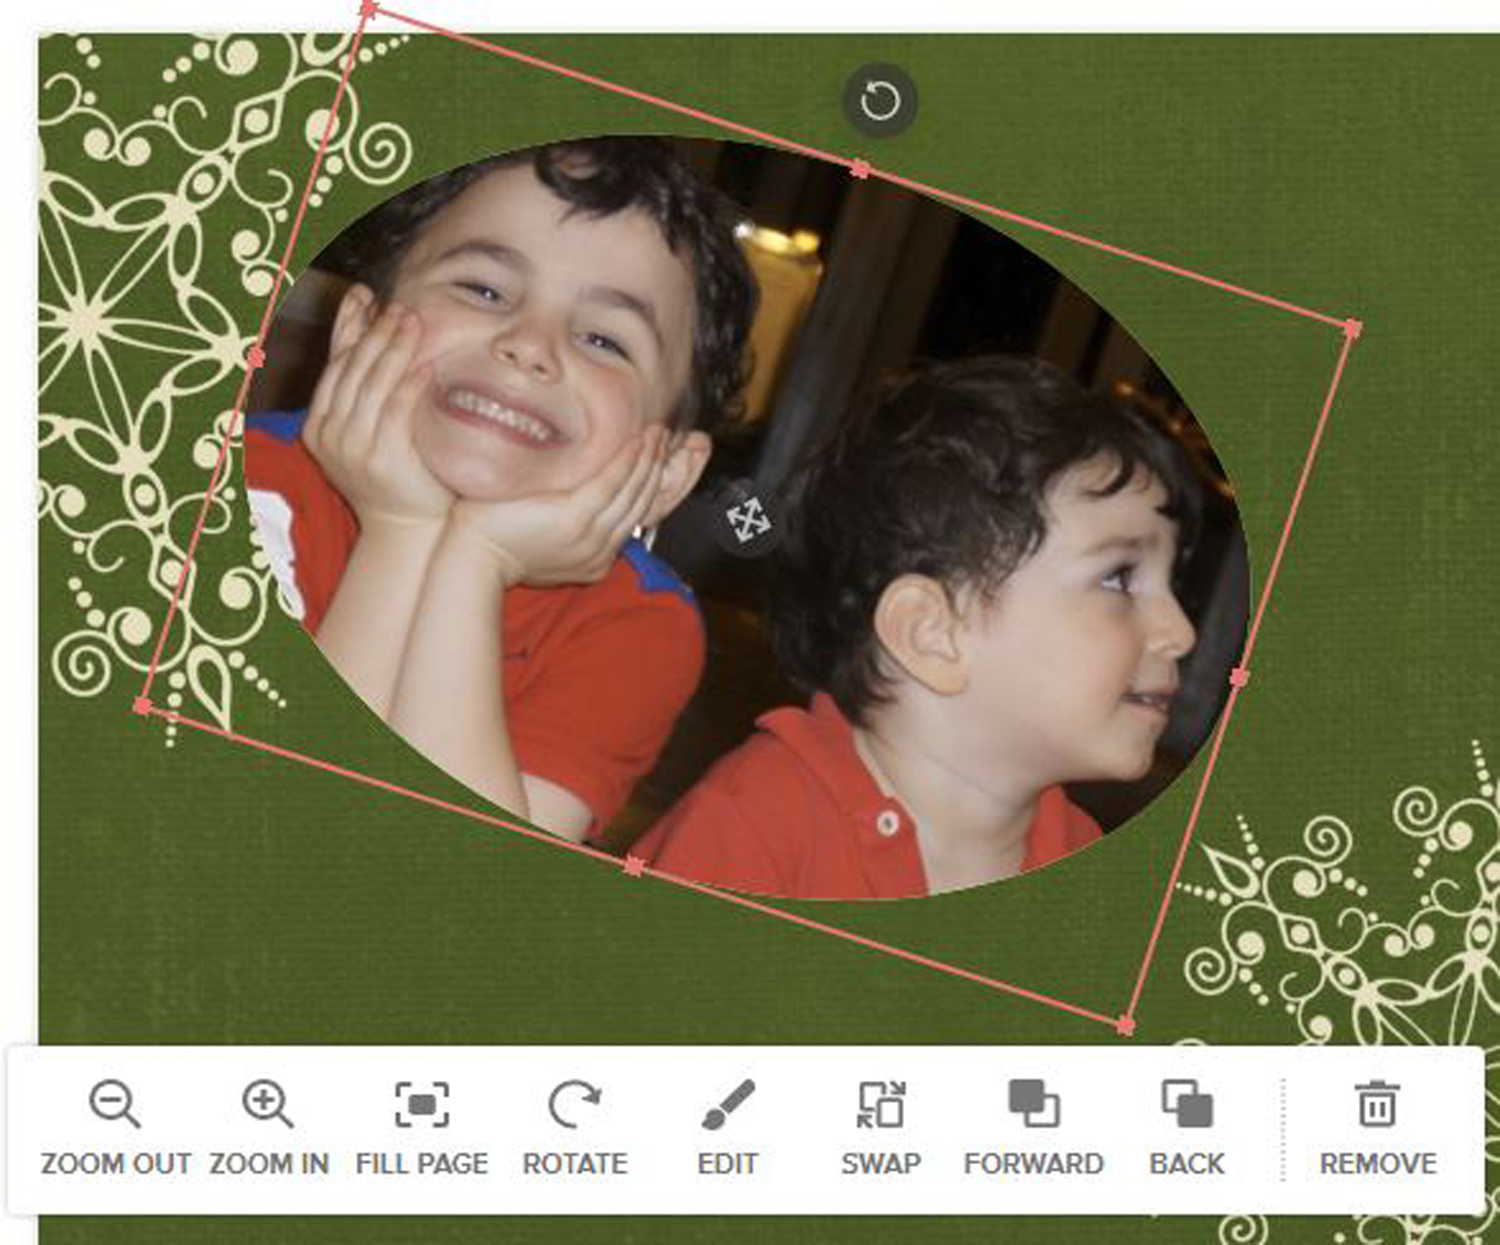
When you click on a photo, you will see the tools you can use to alter and edit the image:
- A red outline around the photo that has eight small "handles" (tiny squares in the corners and in the middle of the sides)
- A Rotate icon above the photo
- A pop-up menu
- A Move icon in the middle of the photo
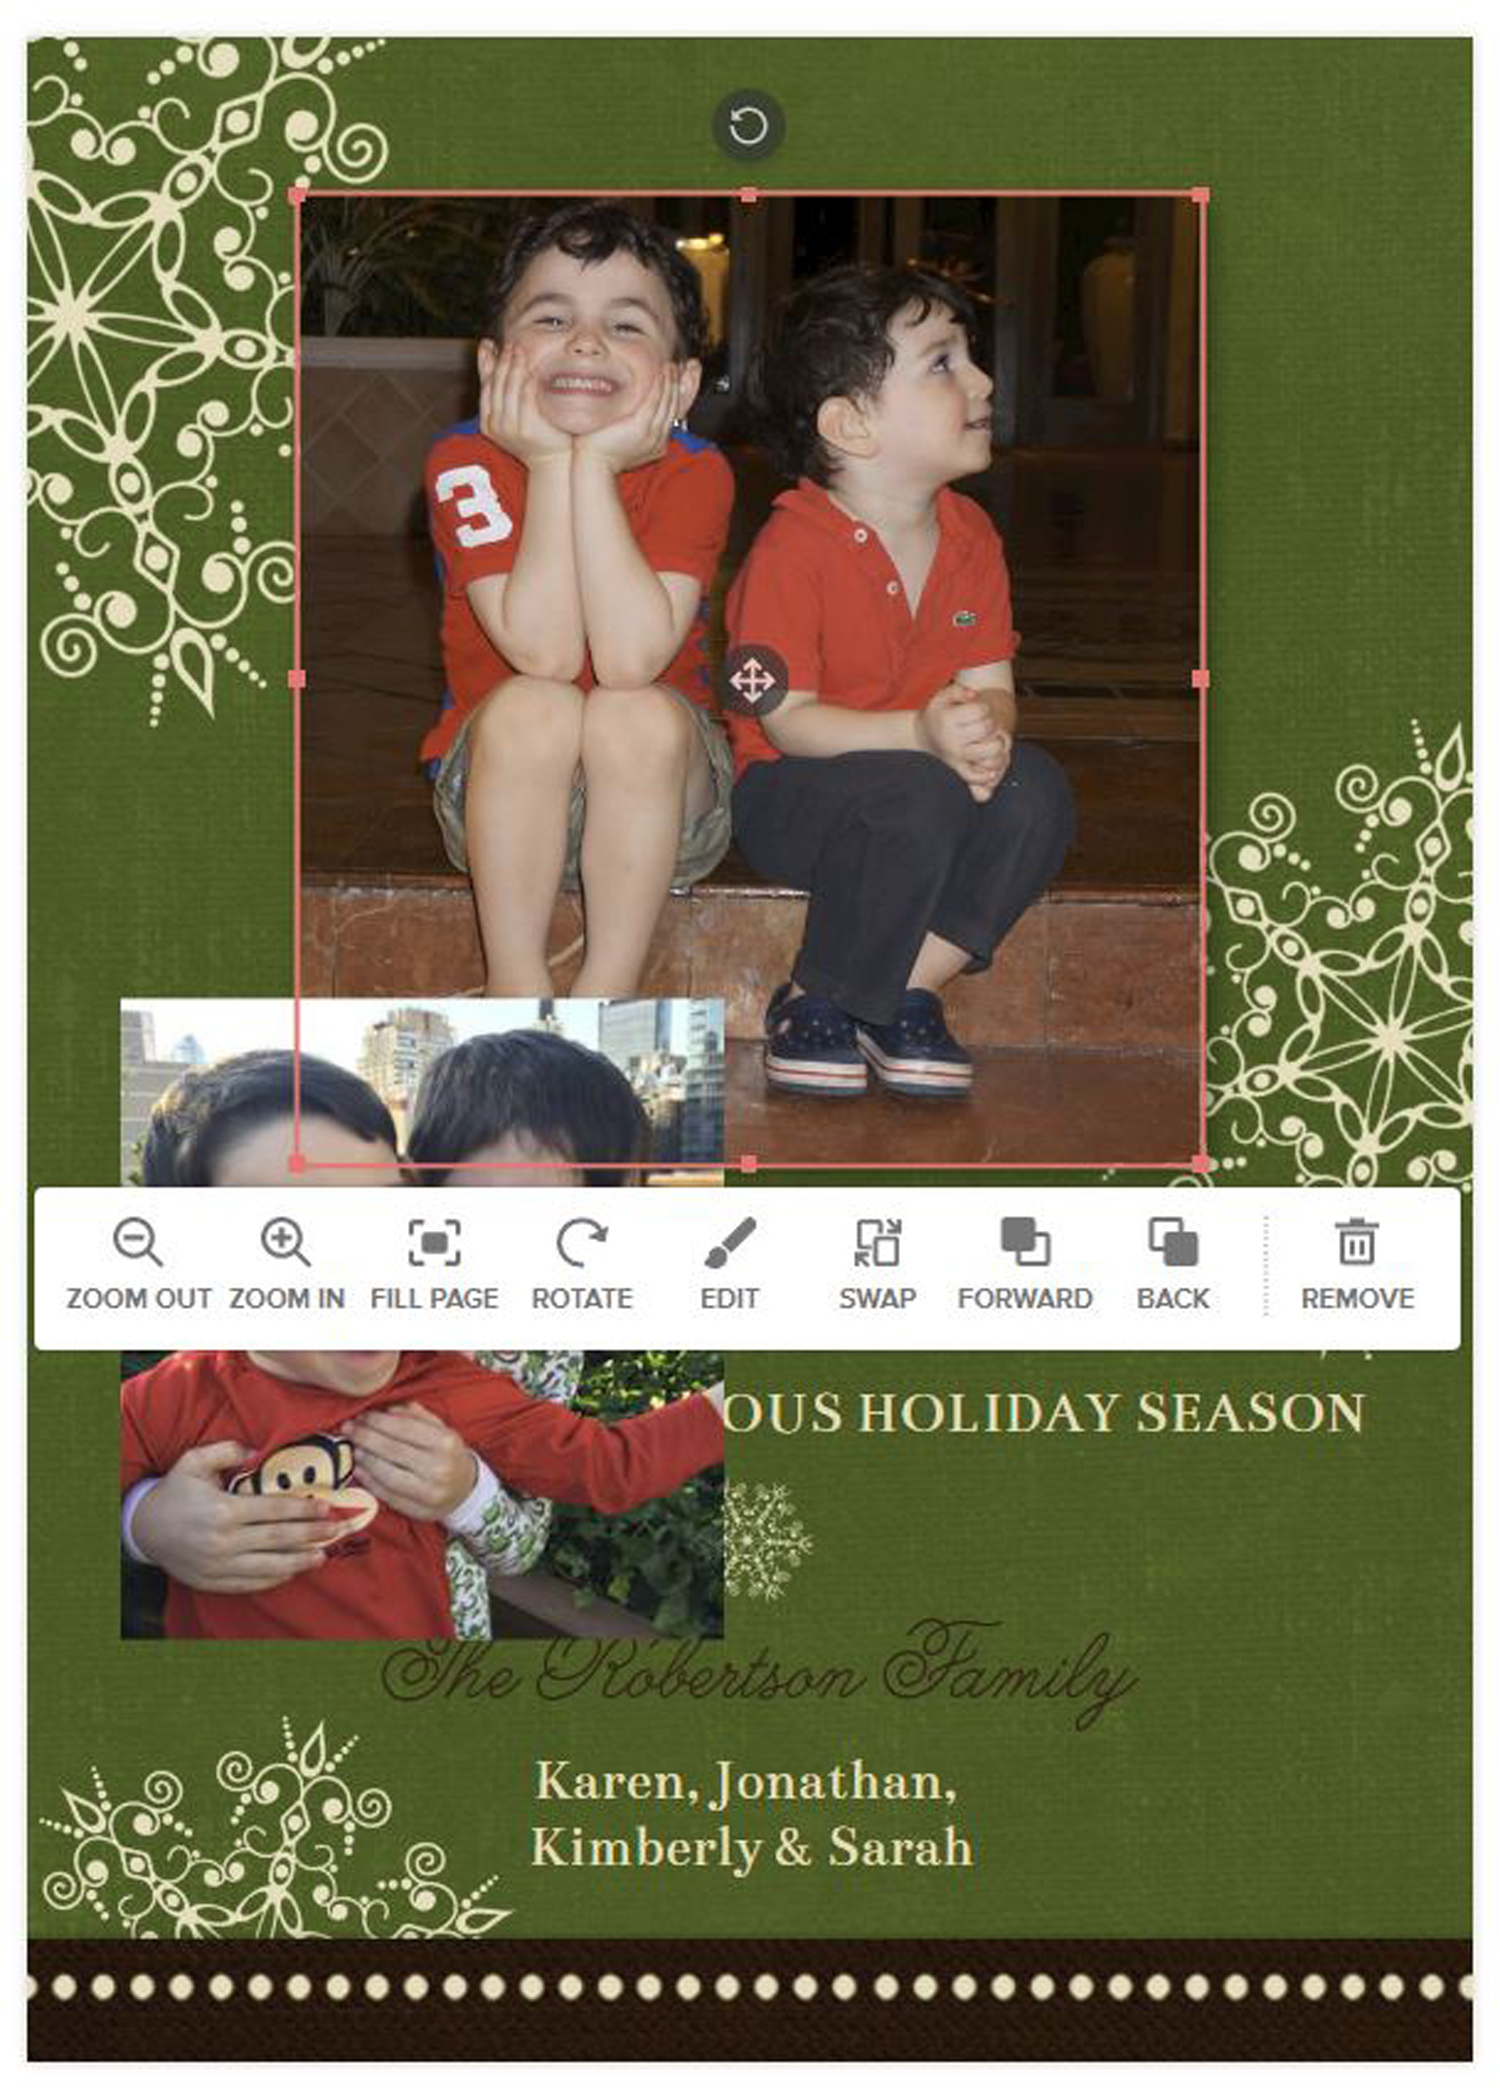
To move, resize, reshape and rotate a photo, click and drag on the red outline's handles.
To move a photo to another place on the card, click anywhere inside the photo (except on the move icon) and drag it to the desired position.
To rotate a photo, click and drag on the rotate icon.
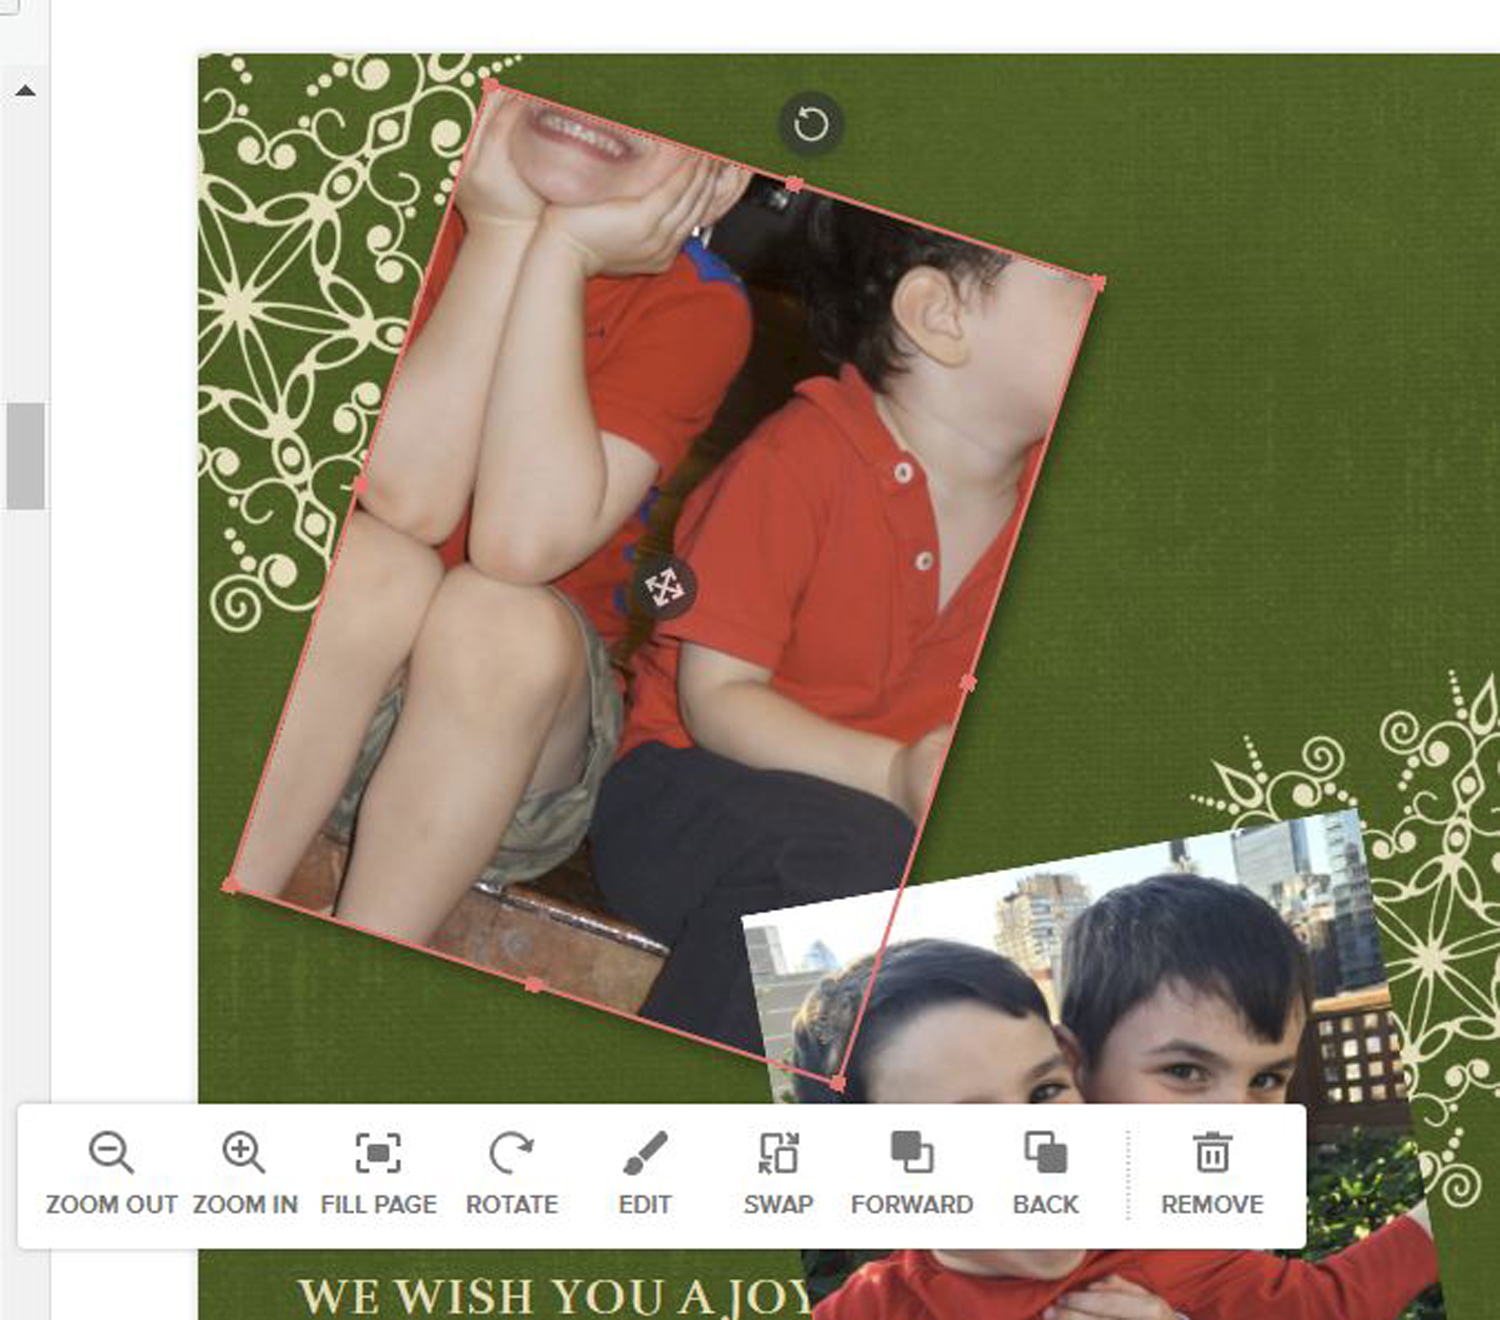
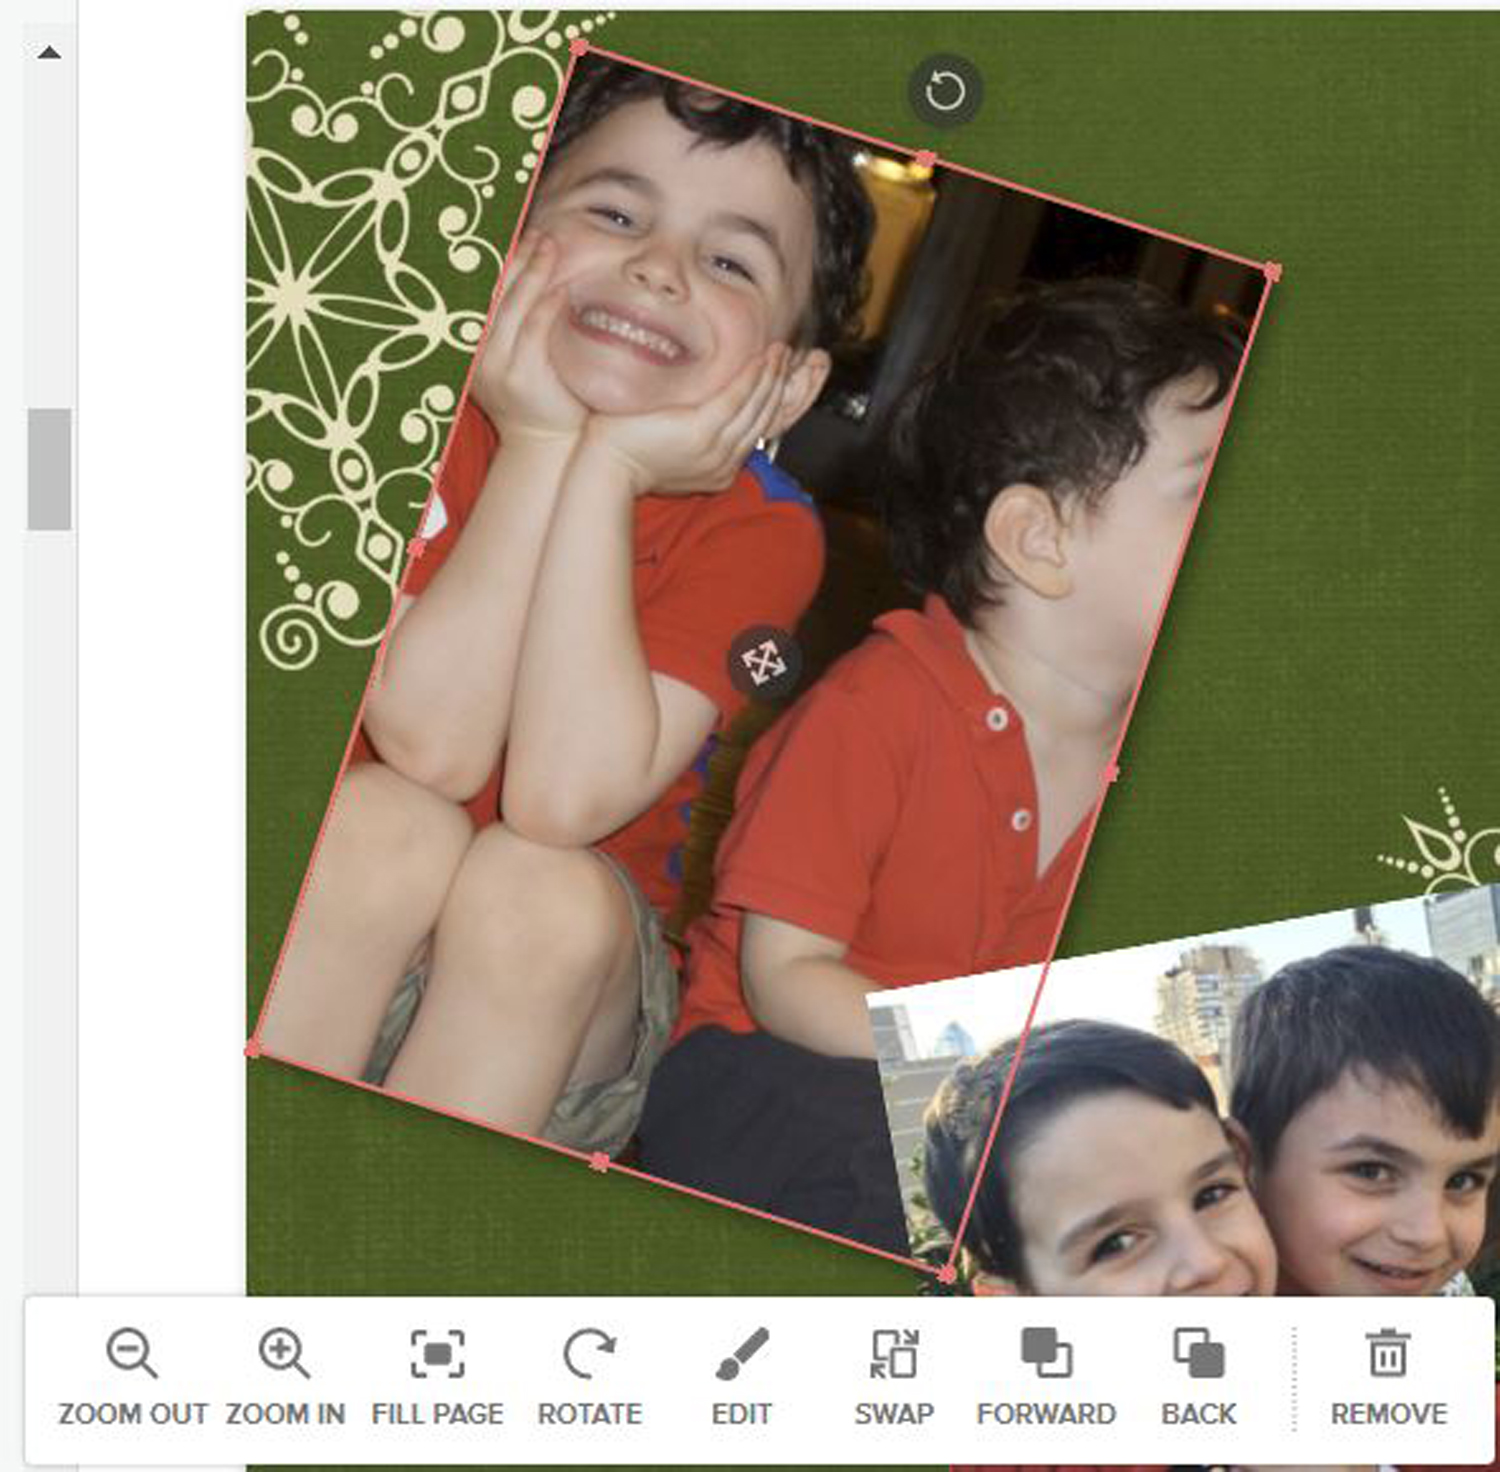
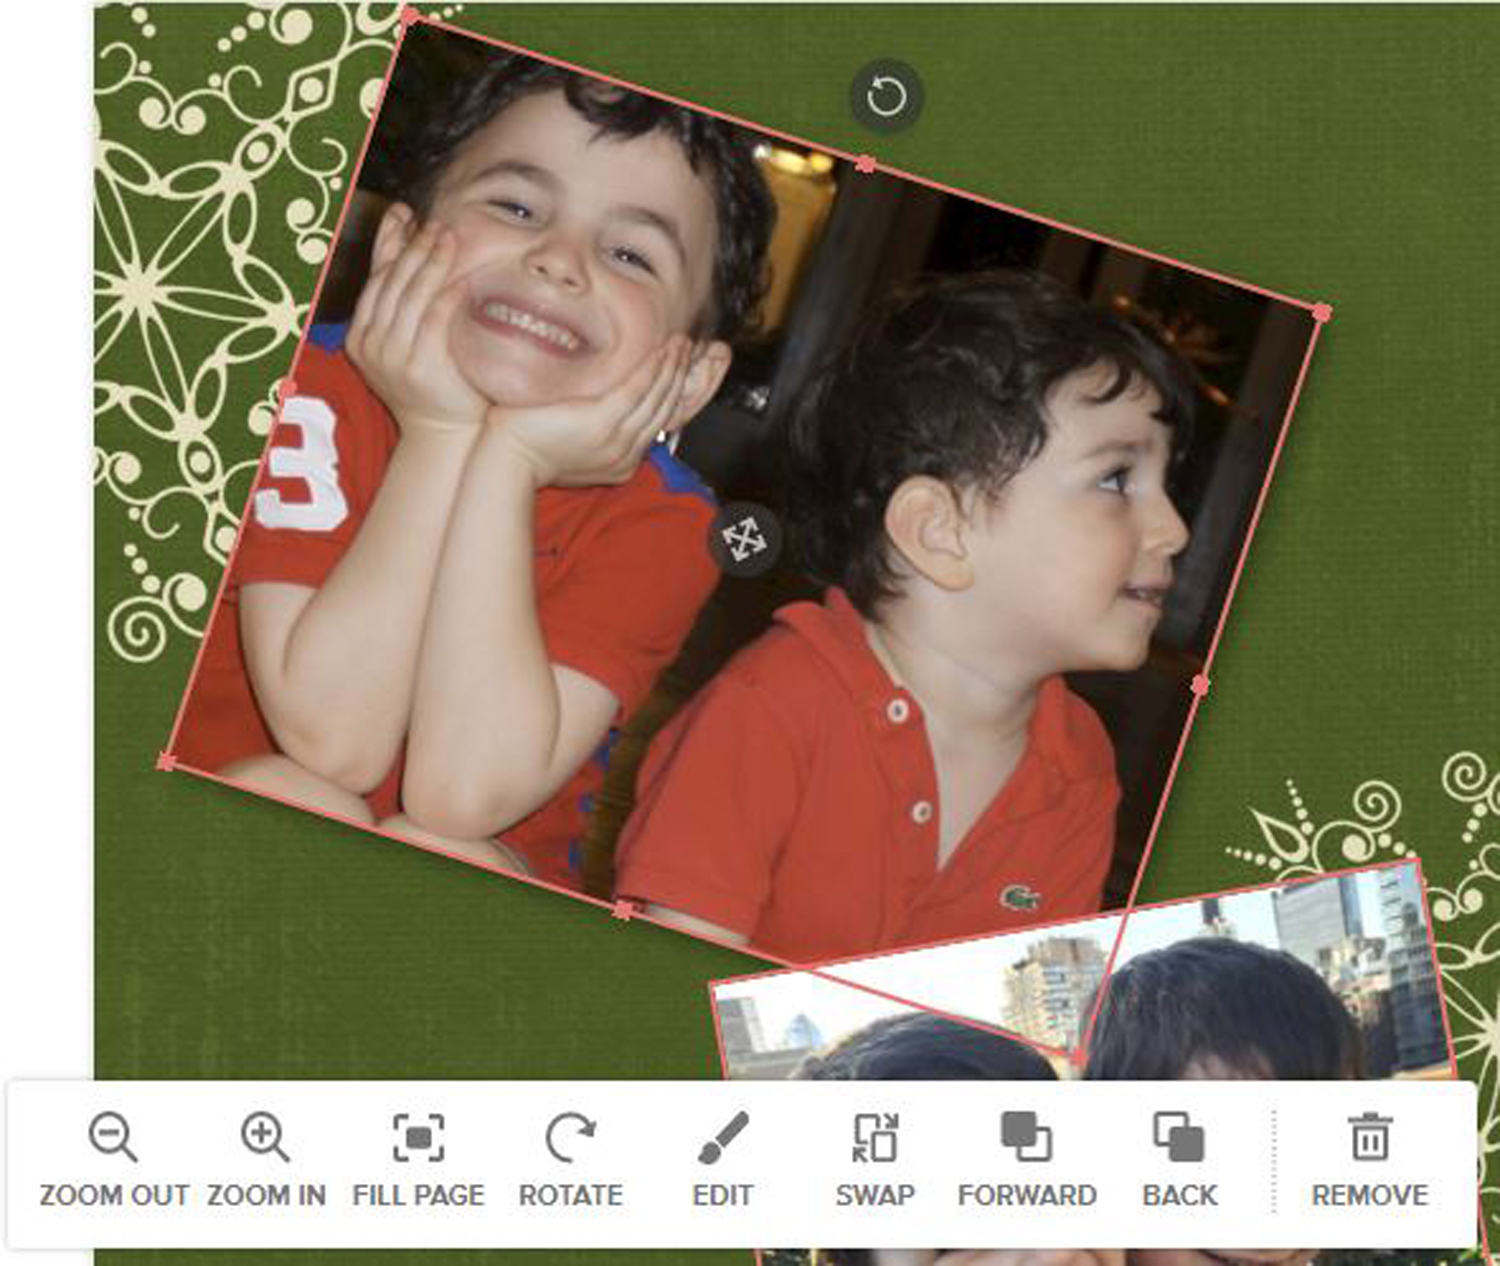
To magnify a photo within its box:
- Click on the Zoom-In icon in the popup menu until your photo is at the magnification you want.
- Click on the Move icon in the middle of the photo to adjust what portion of the zoomed-in photo will be shown.
- Click and drag on the handles in the red outline to fine-tune the shape of the photo and adjust how much of the photo is displayed.
Reorder photos
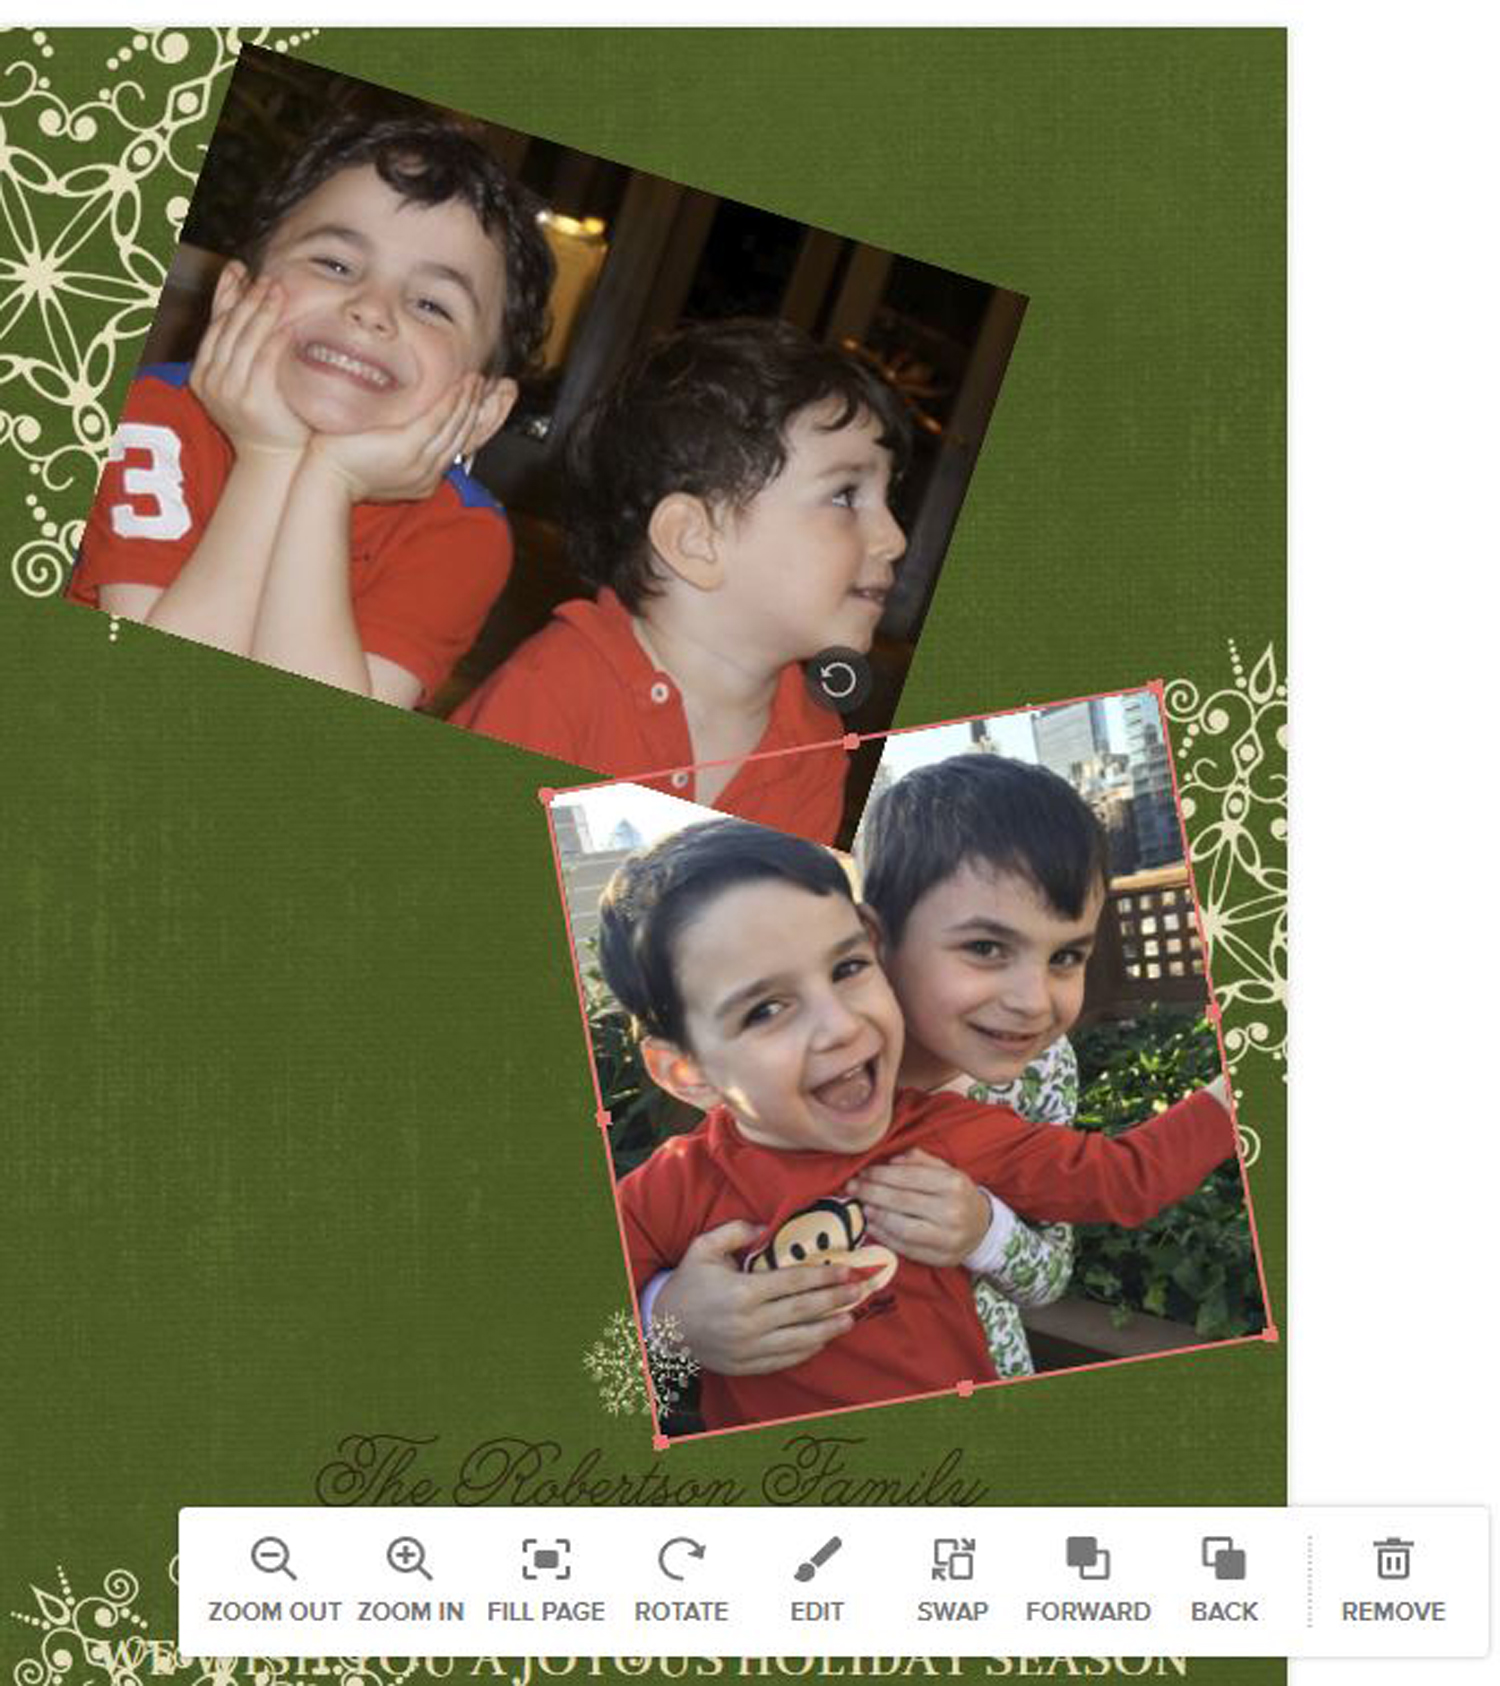
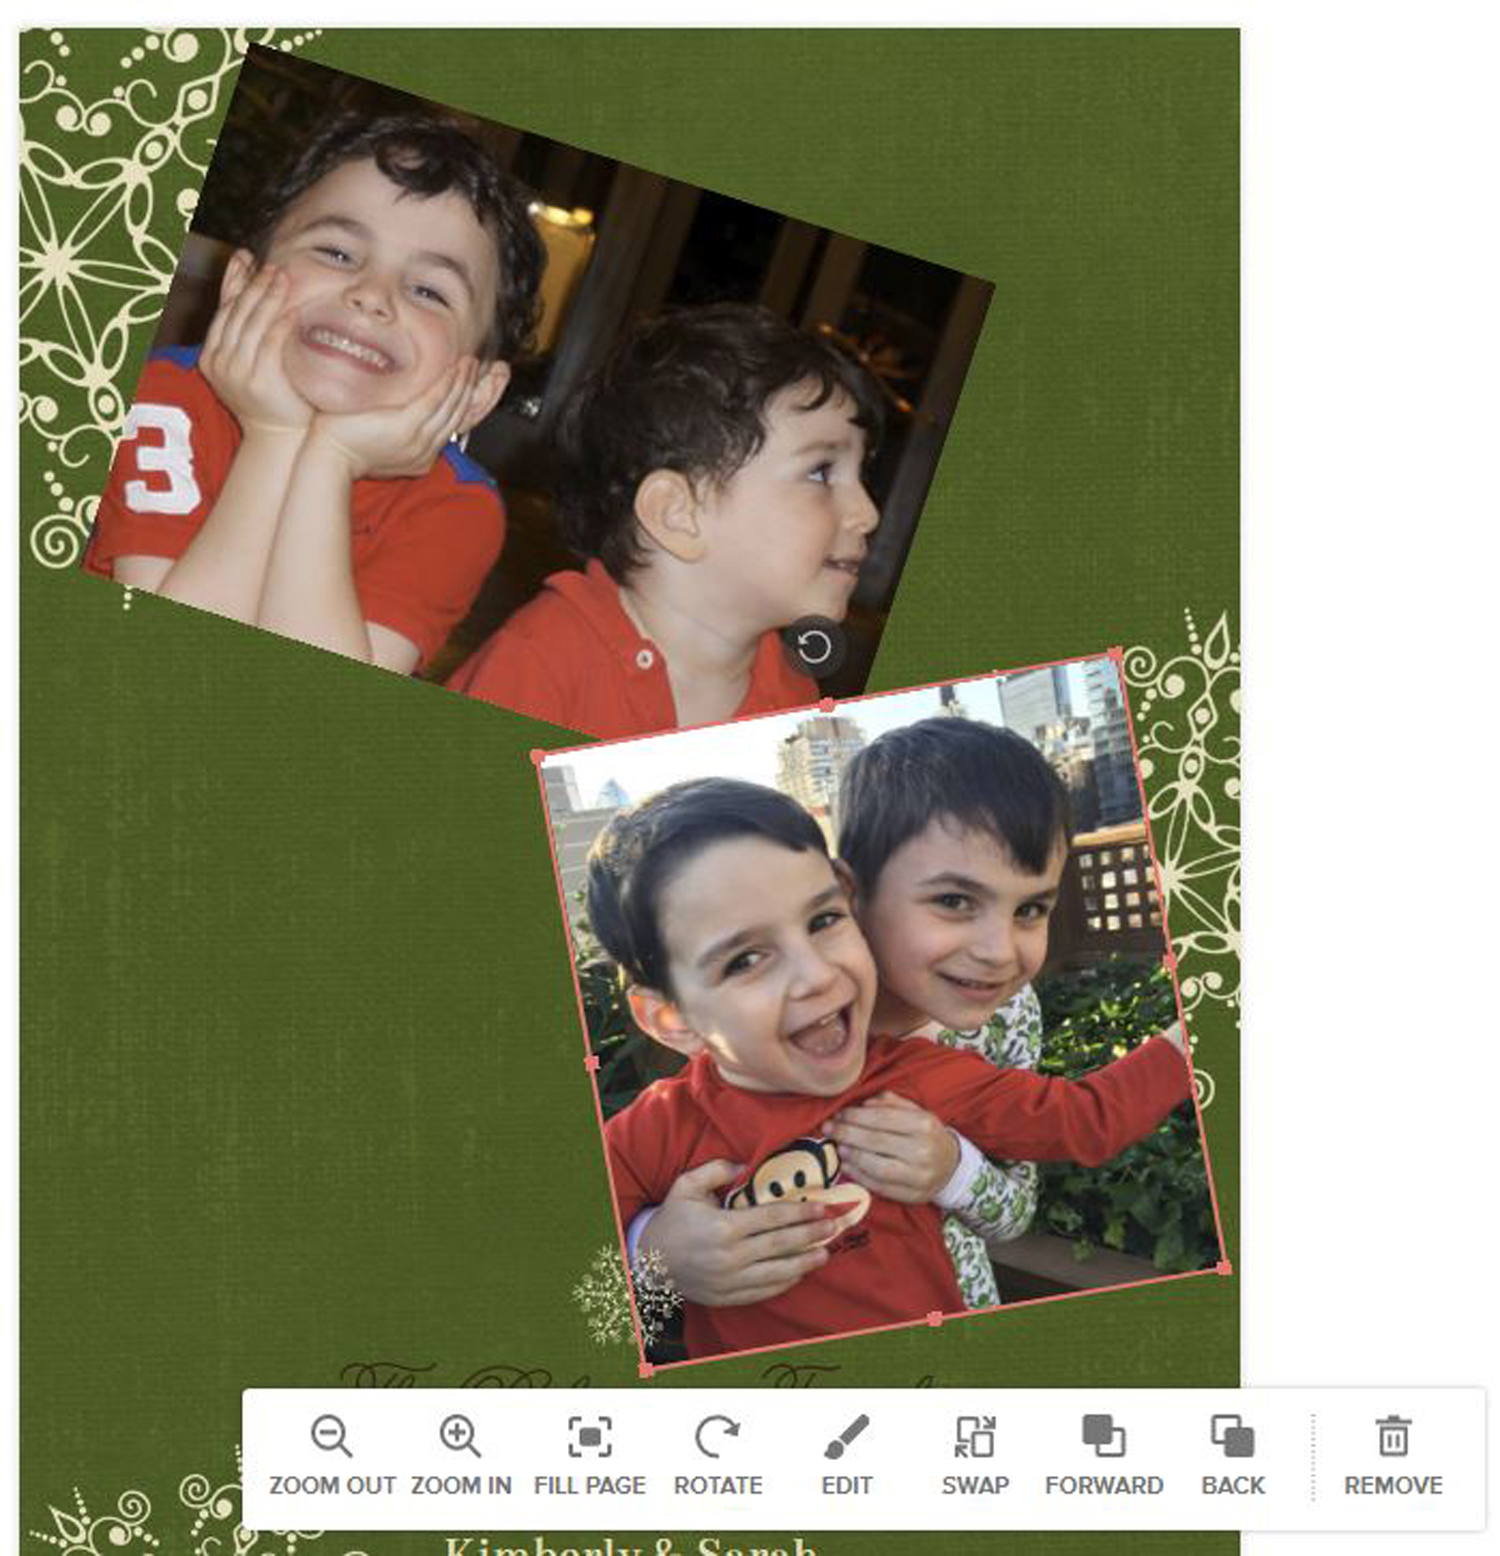
If your photos (or other elements in your design, such as clip art or text) overlap each other, you may want to change what is on top or below the others.
- Click to select the photo you want on top, and click Forward.
- Or, if you want the selected photo behind other elements, click Back.
Because you may have several items one on top of the other, you may need to click Forward or Back a few times until the photo is in the position that you want relative to other elements.
Additional Edit Tools
Click on Edit in the pop-up menu to access other photo tools, such as filters, drop shadows and borders. As you experiment with these, you can always click on the Reset button (or No Effect in the filters) to immediately undo the edit.
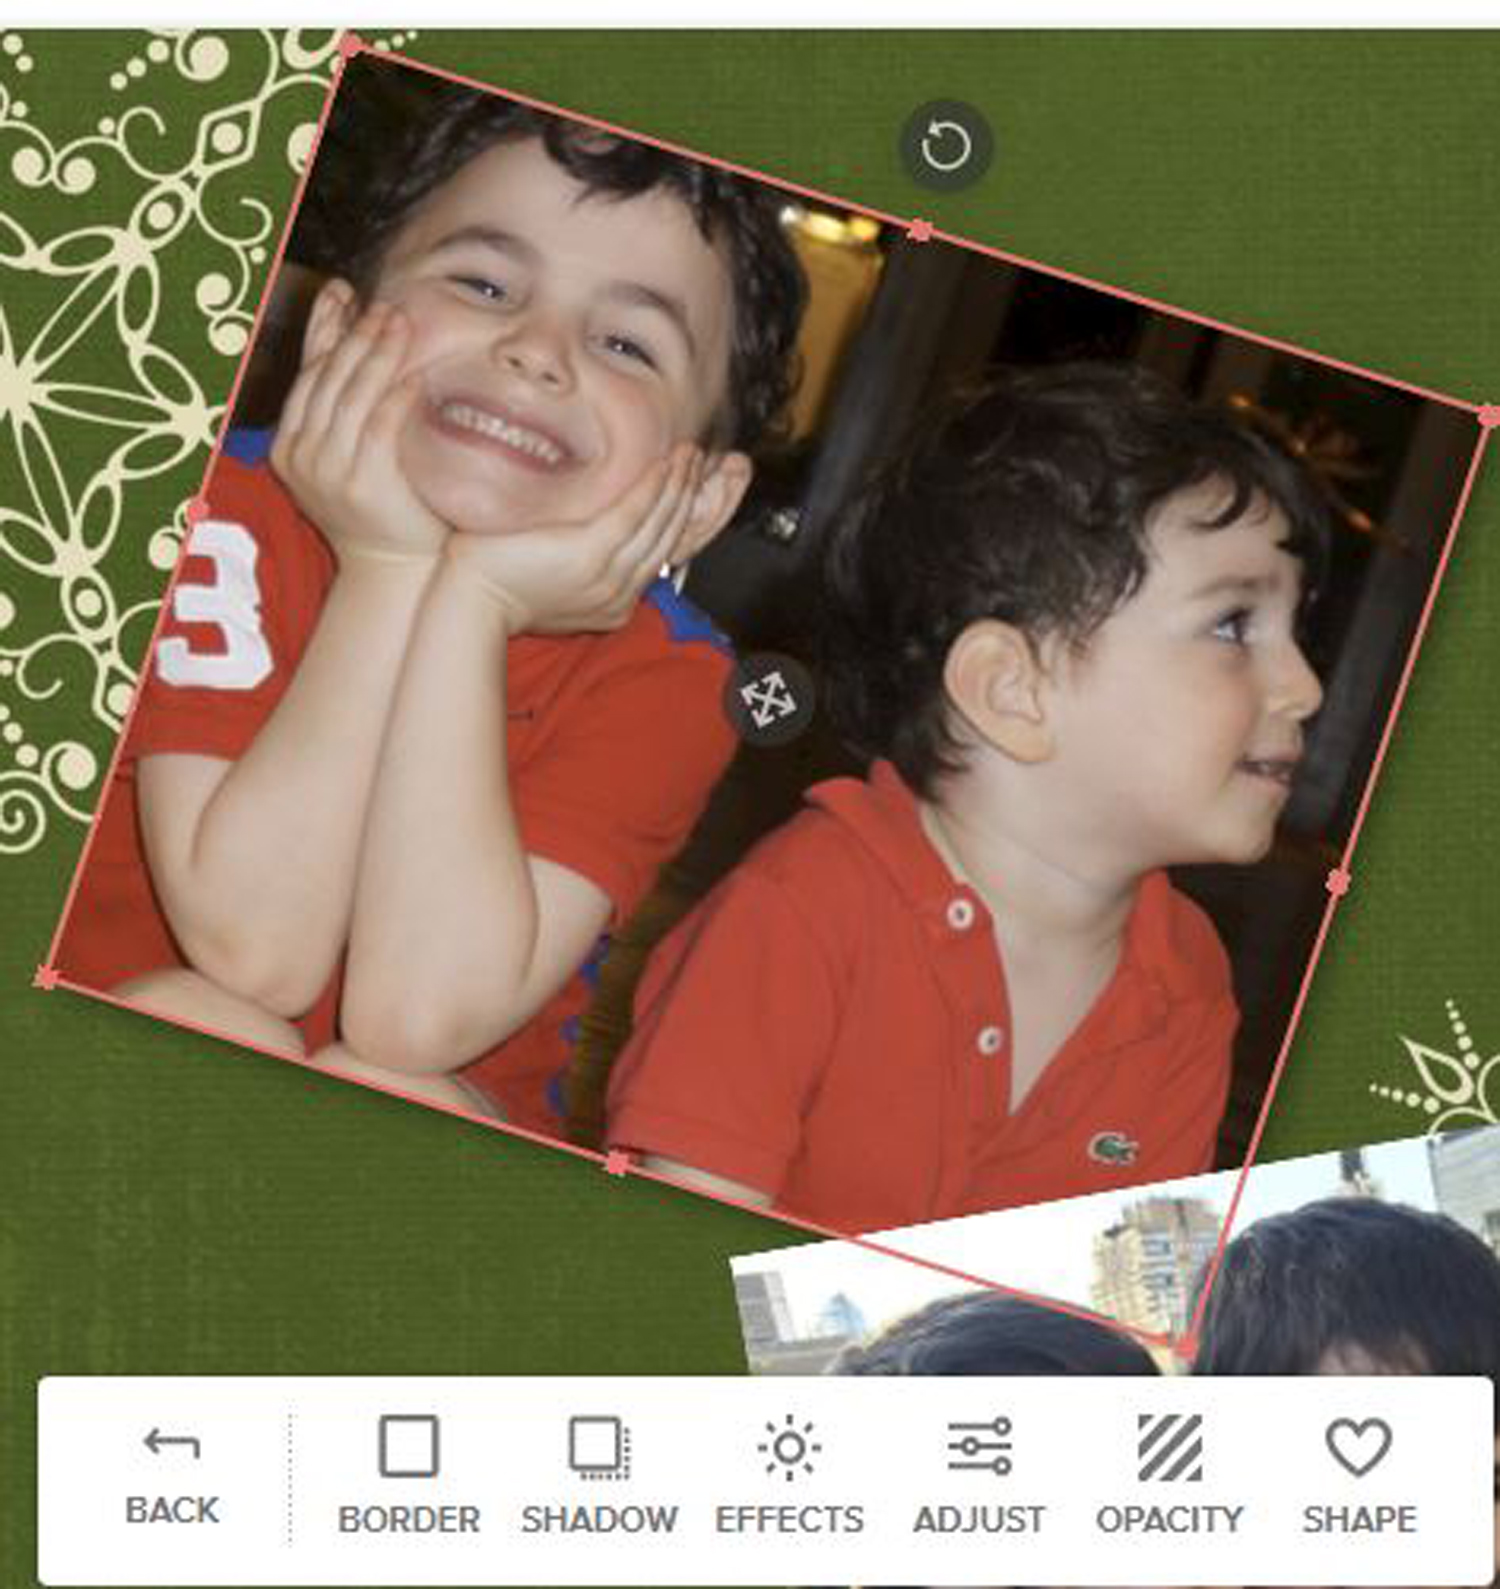
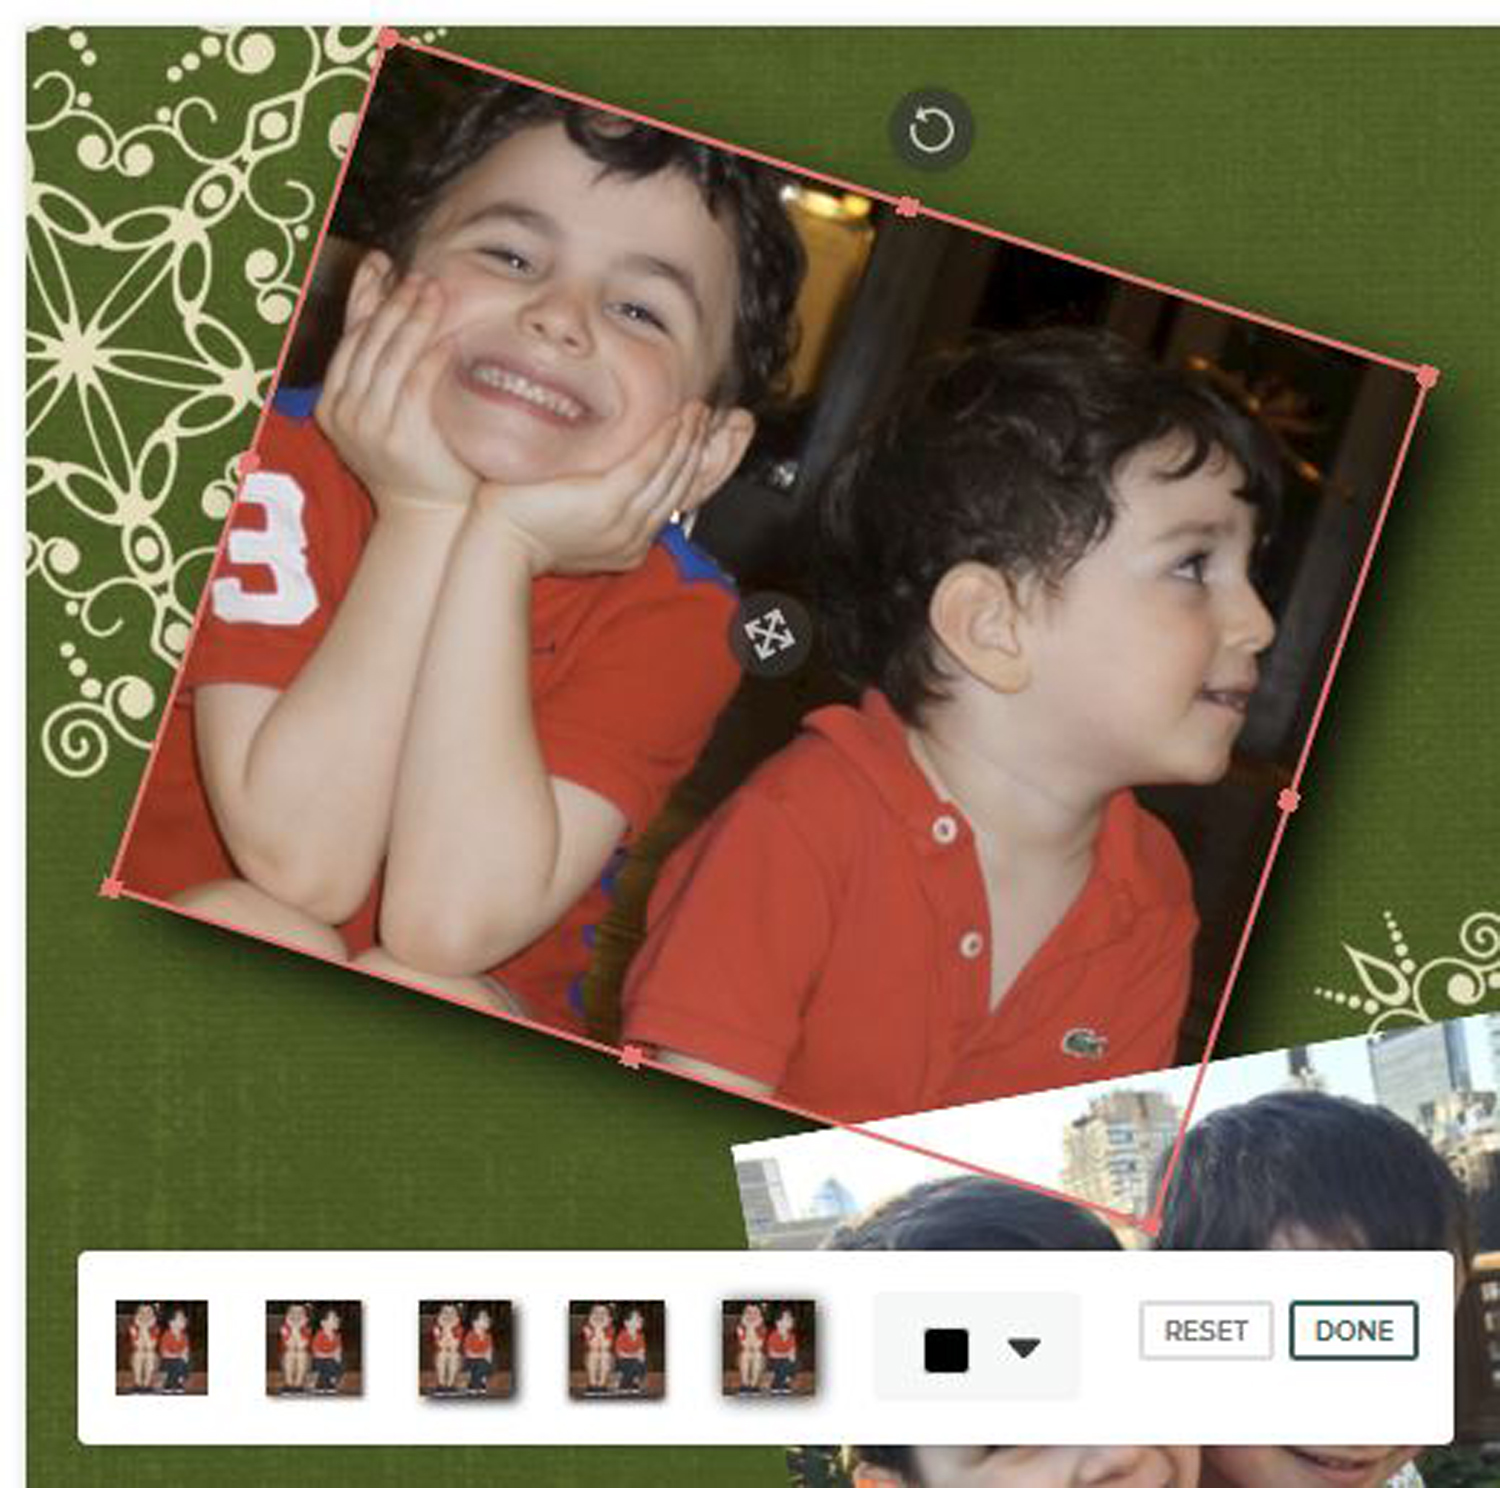
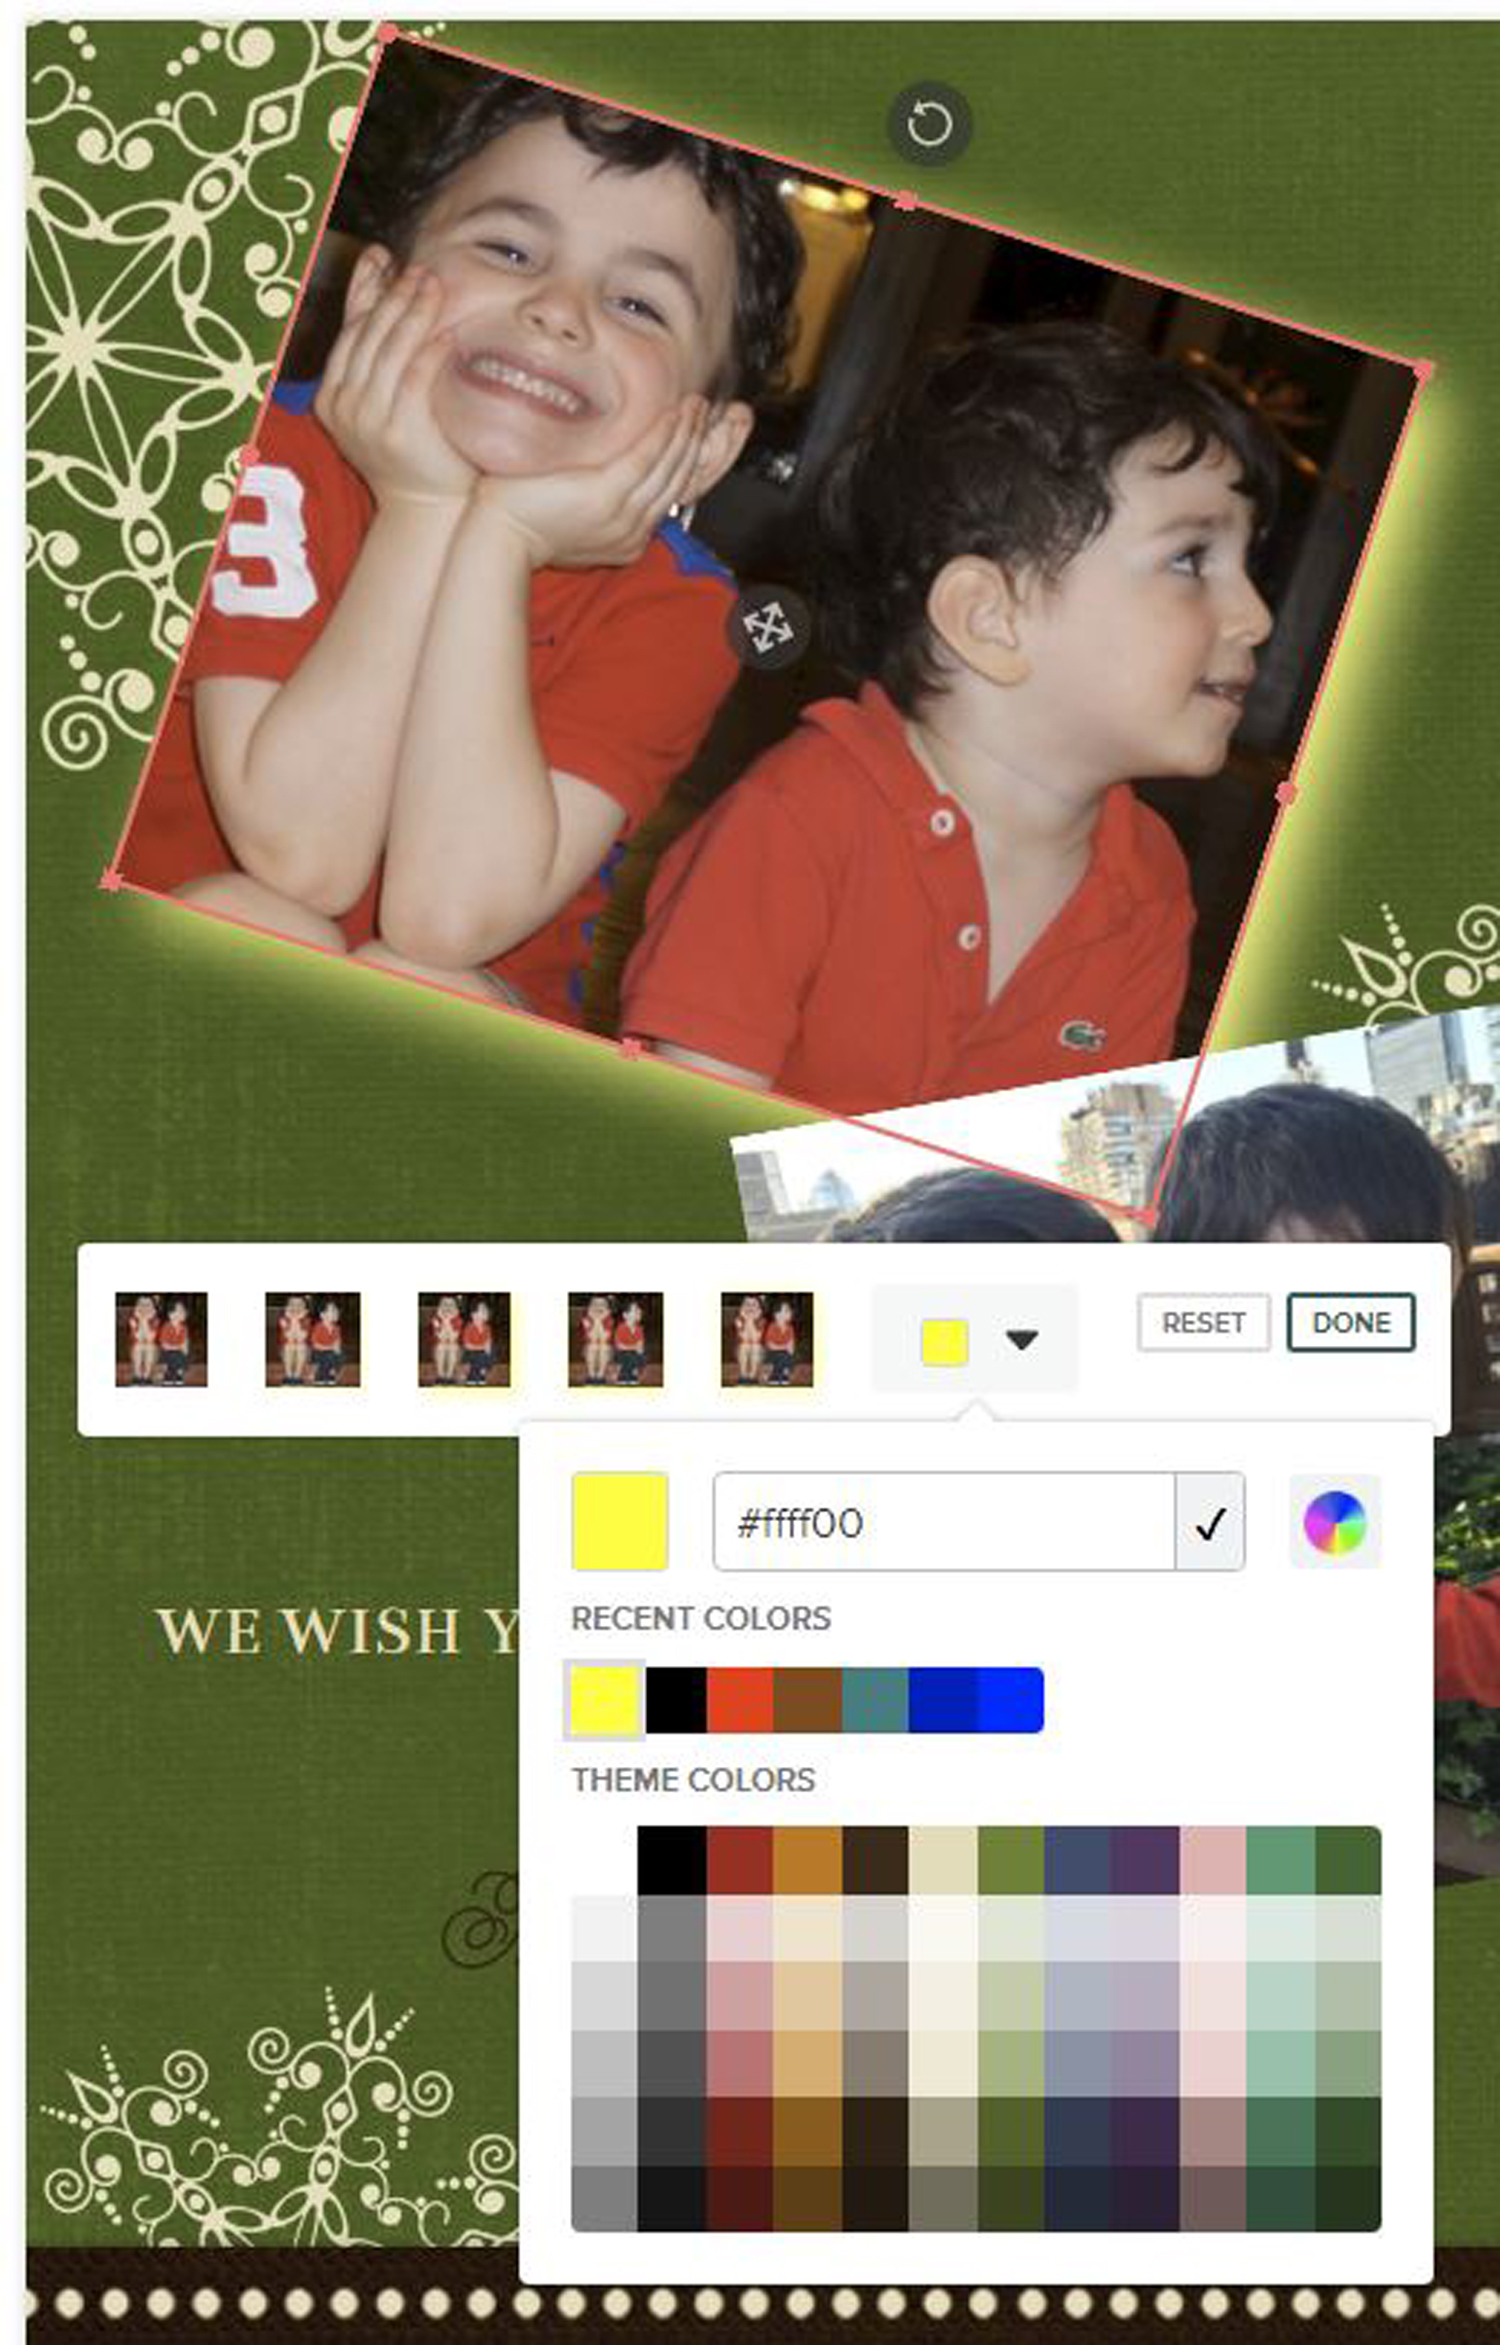
To apply a drop shadow
- Click on Shadow.
- Click on each of the thumbnail options to see how they affect your
Picture. - Click on the black box in the shadow options to select a different shadow color or to create a highlighting effect.
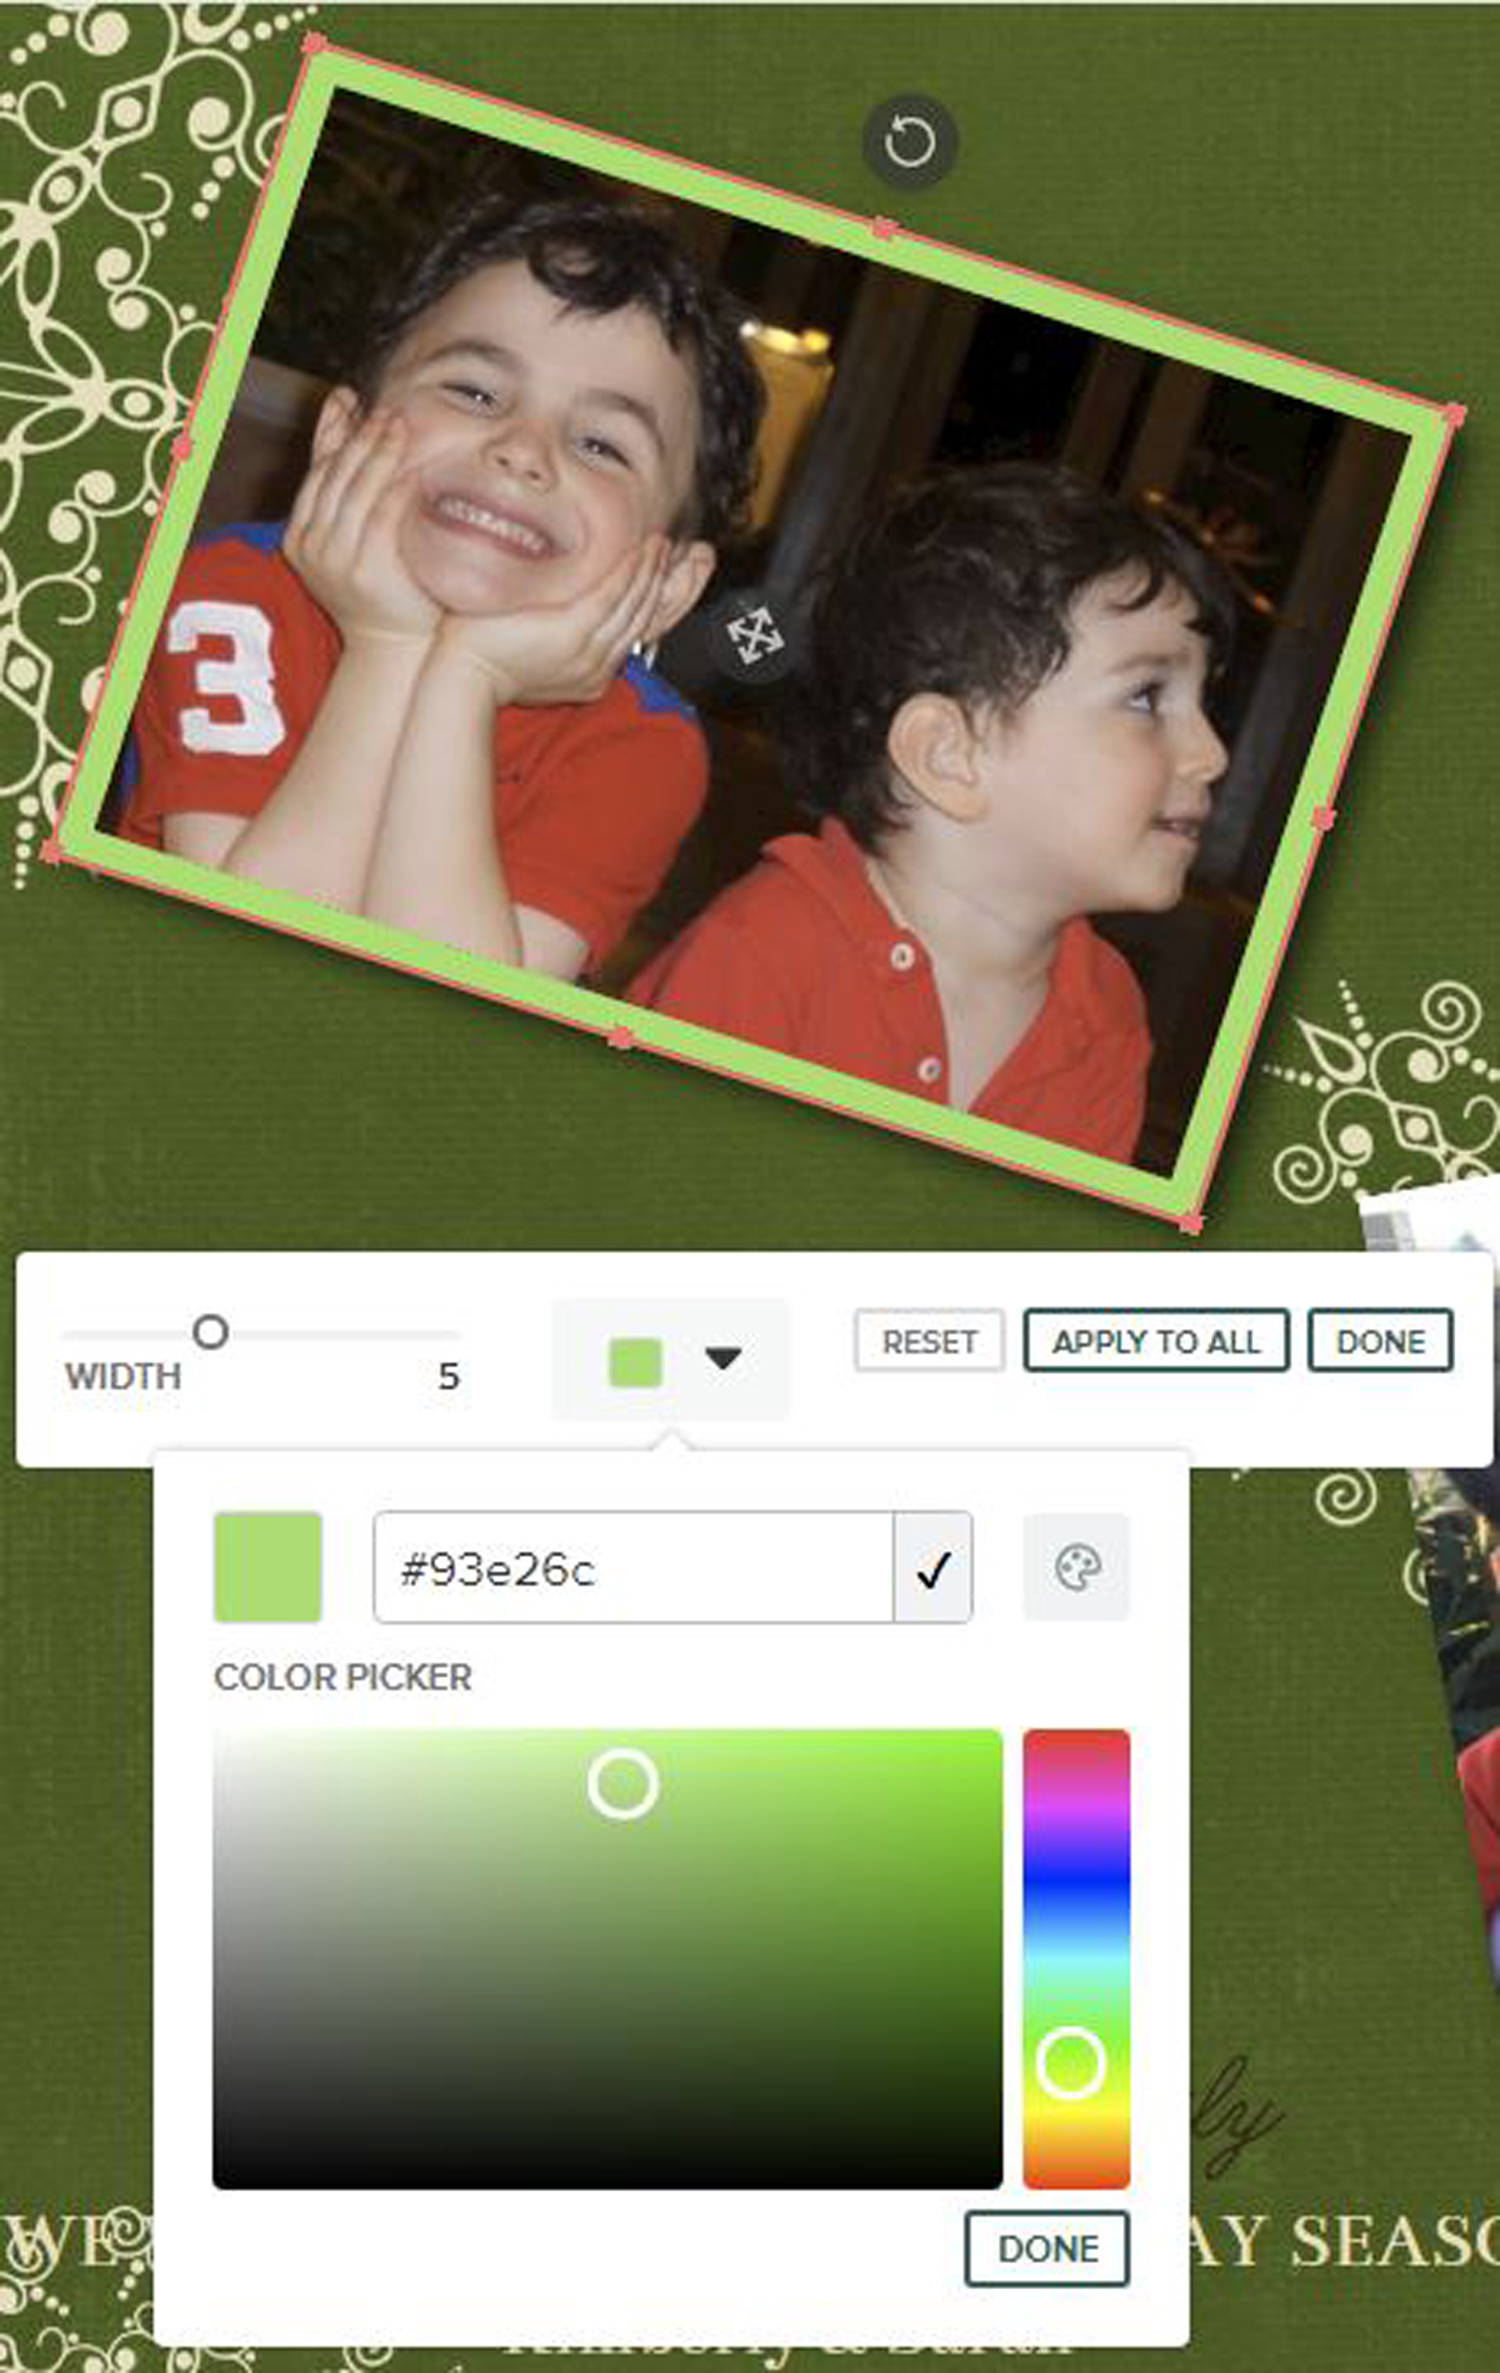
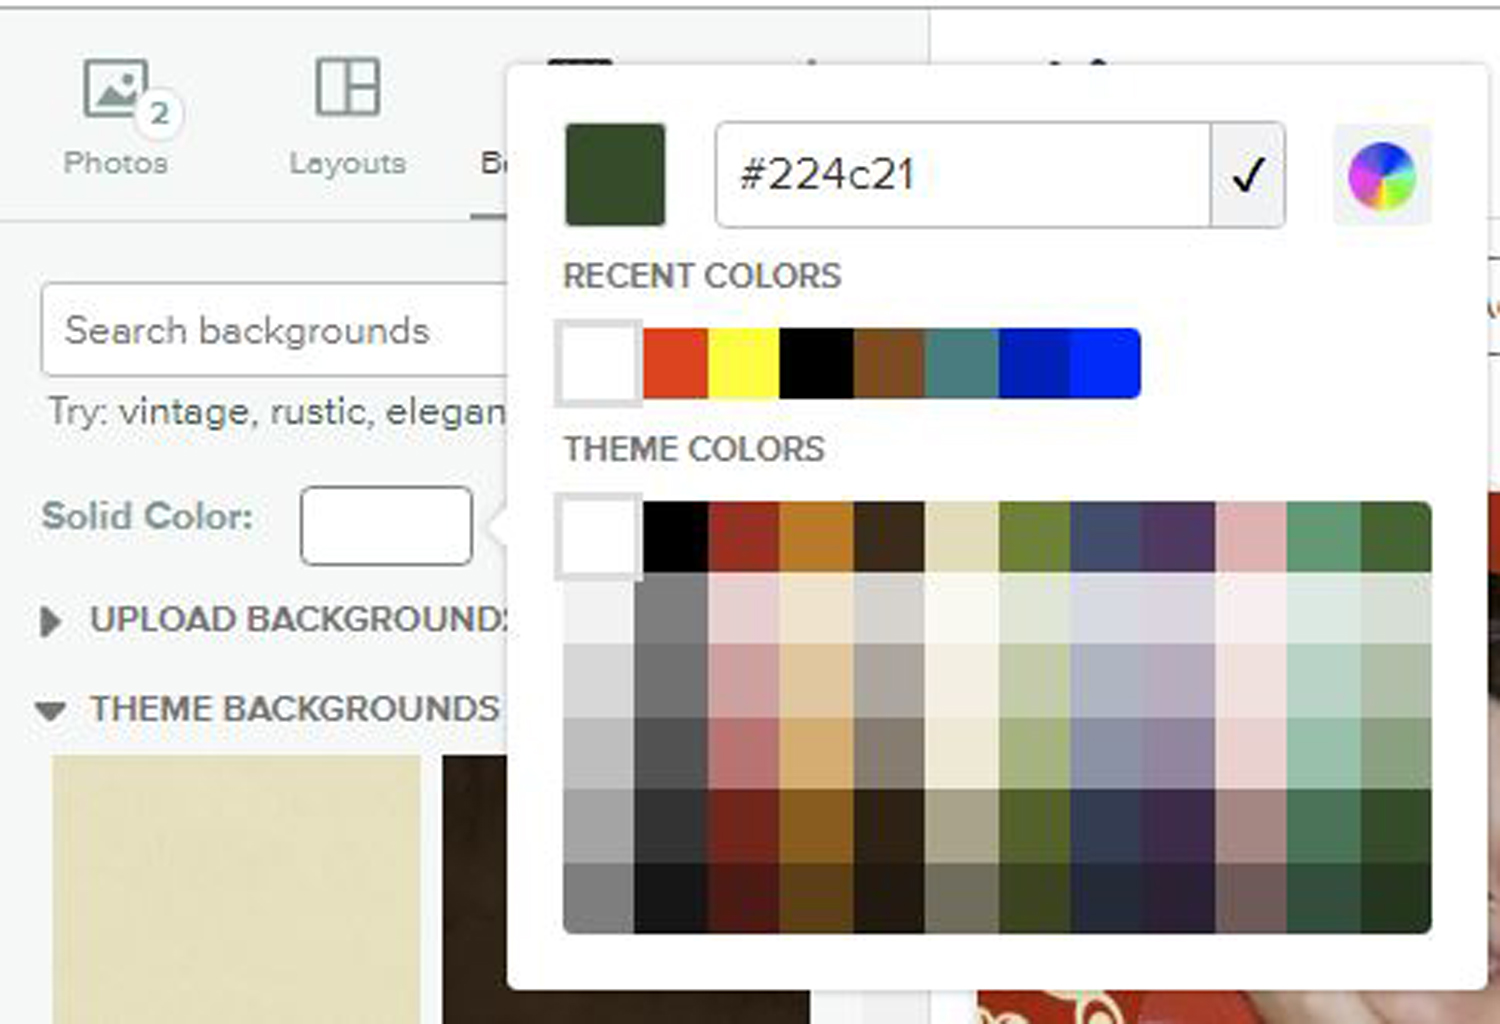
The Color palette has three ways to select a color: Click on one of the squares (of recent or theme colors), input a hex color value, or click on the color wheel (next to the hex field) to select from a full 24-bit palette.
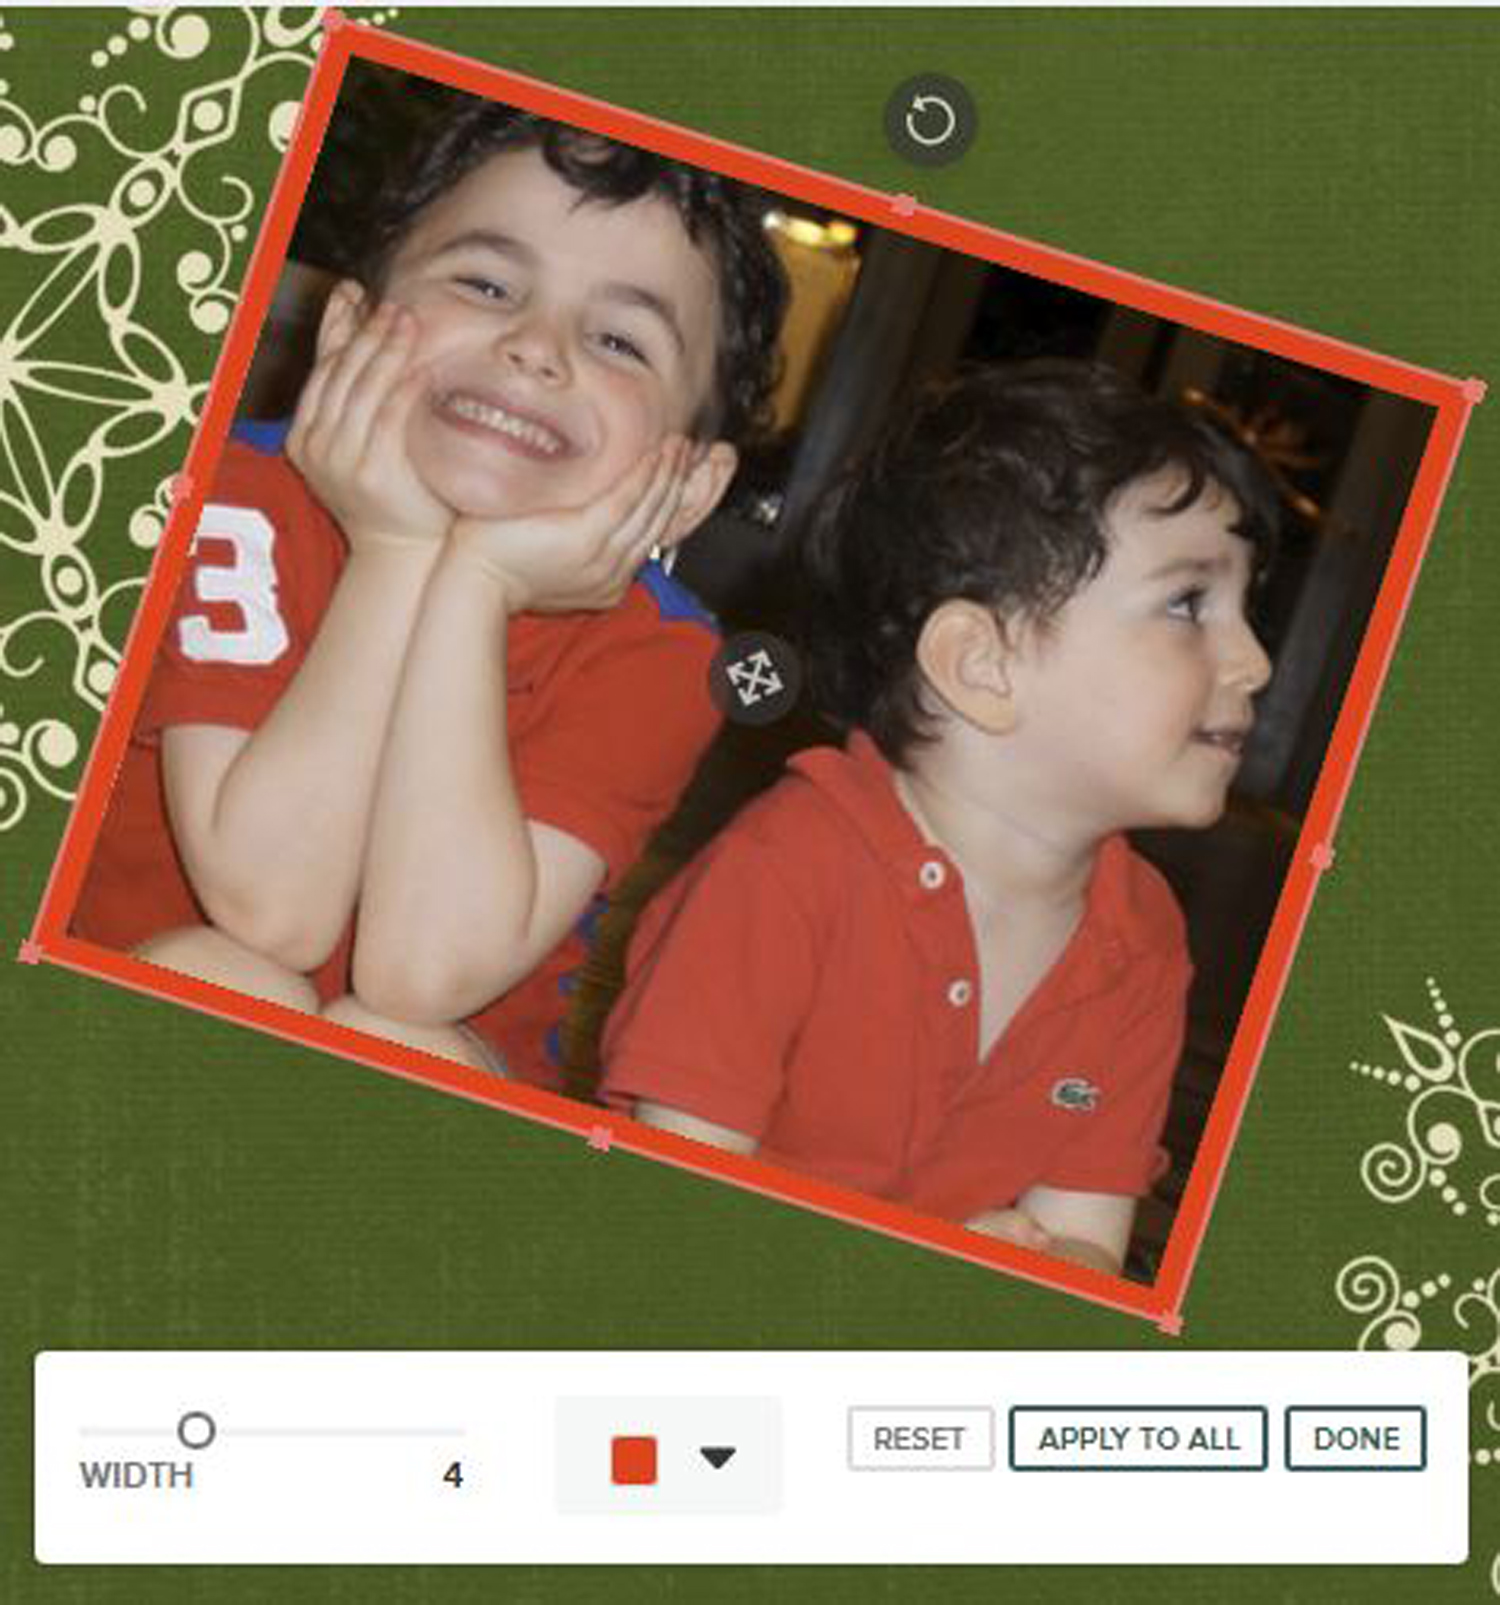
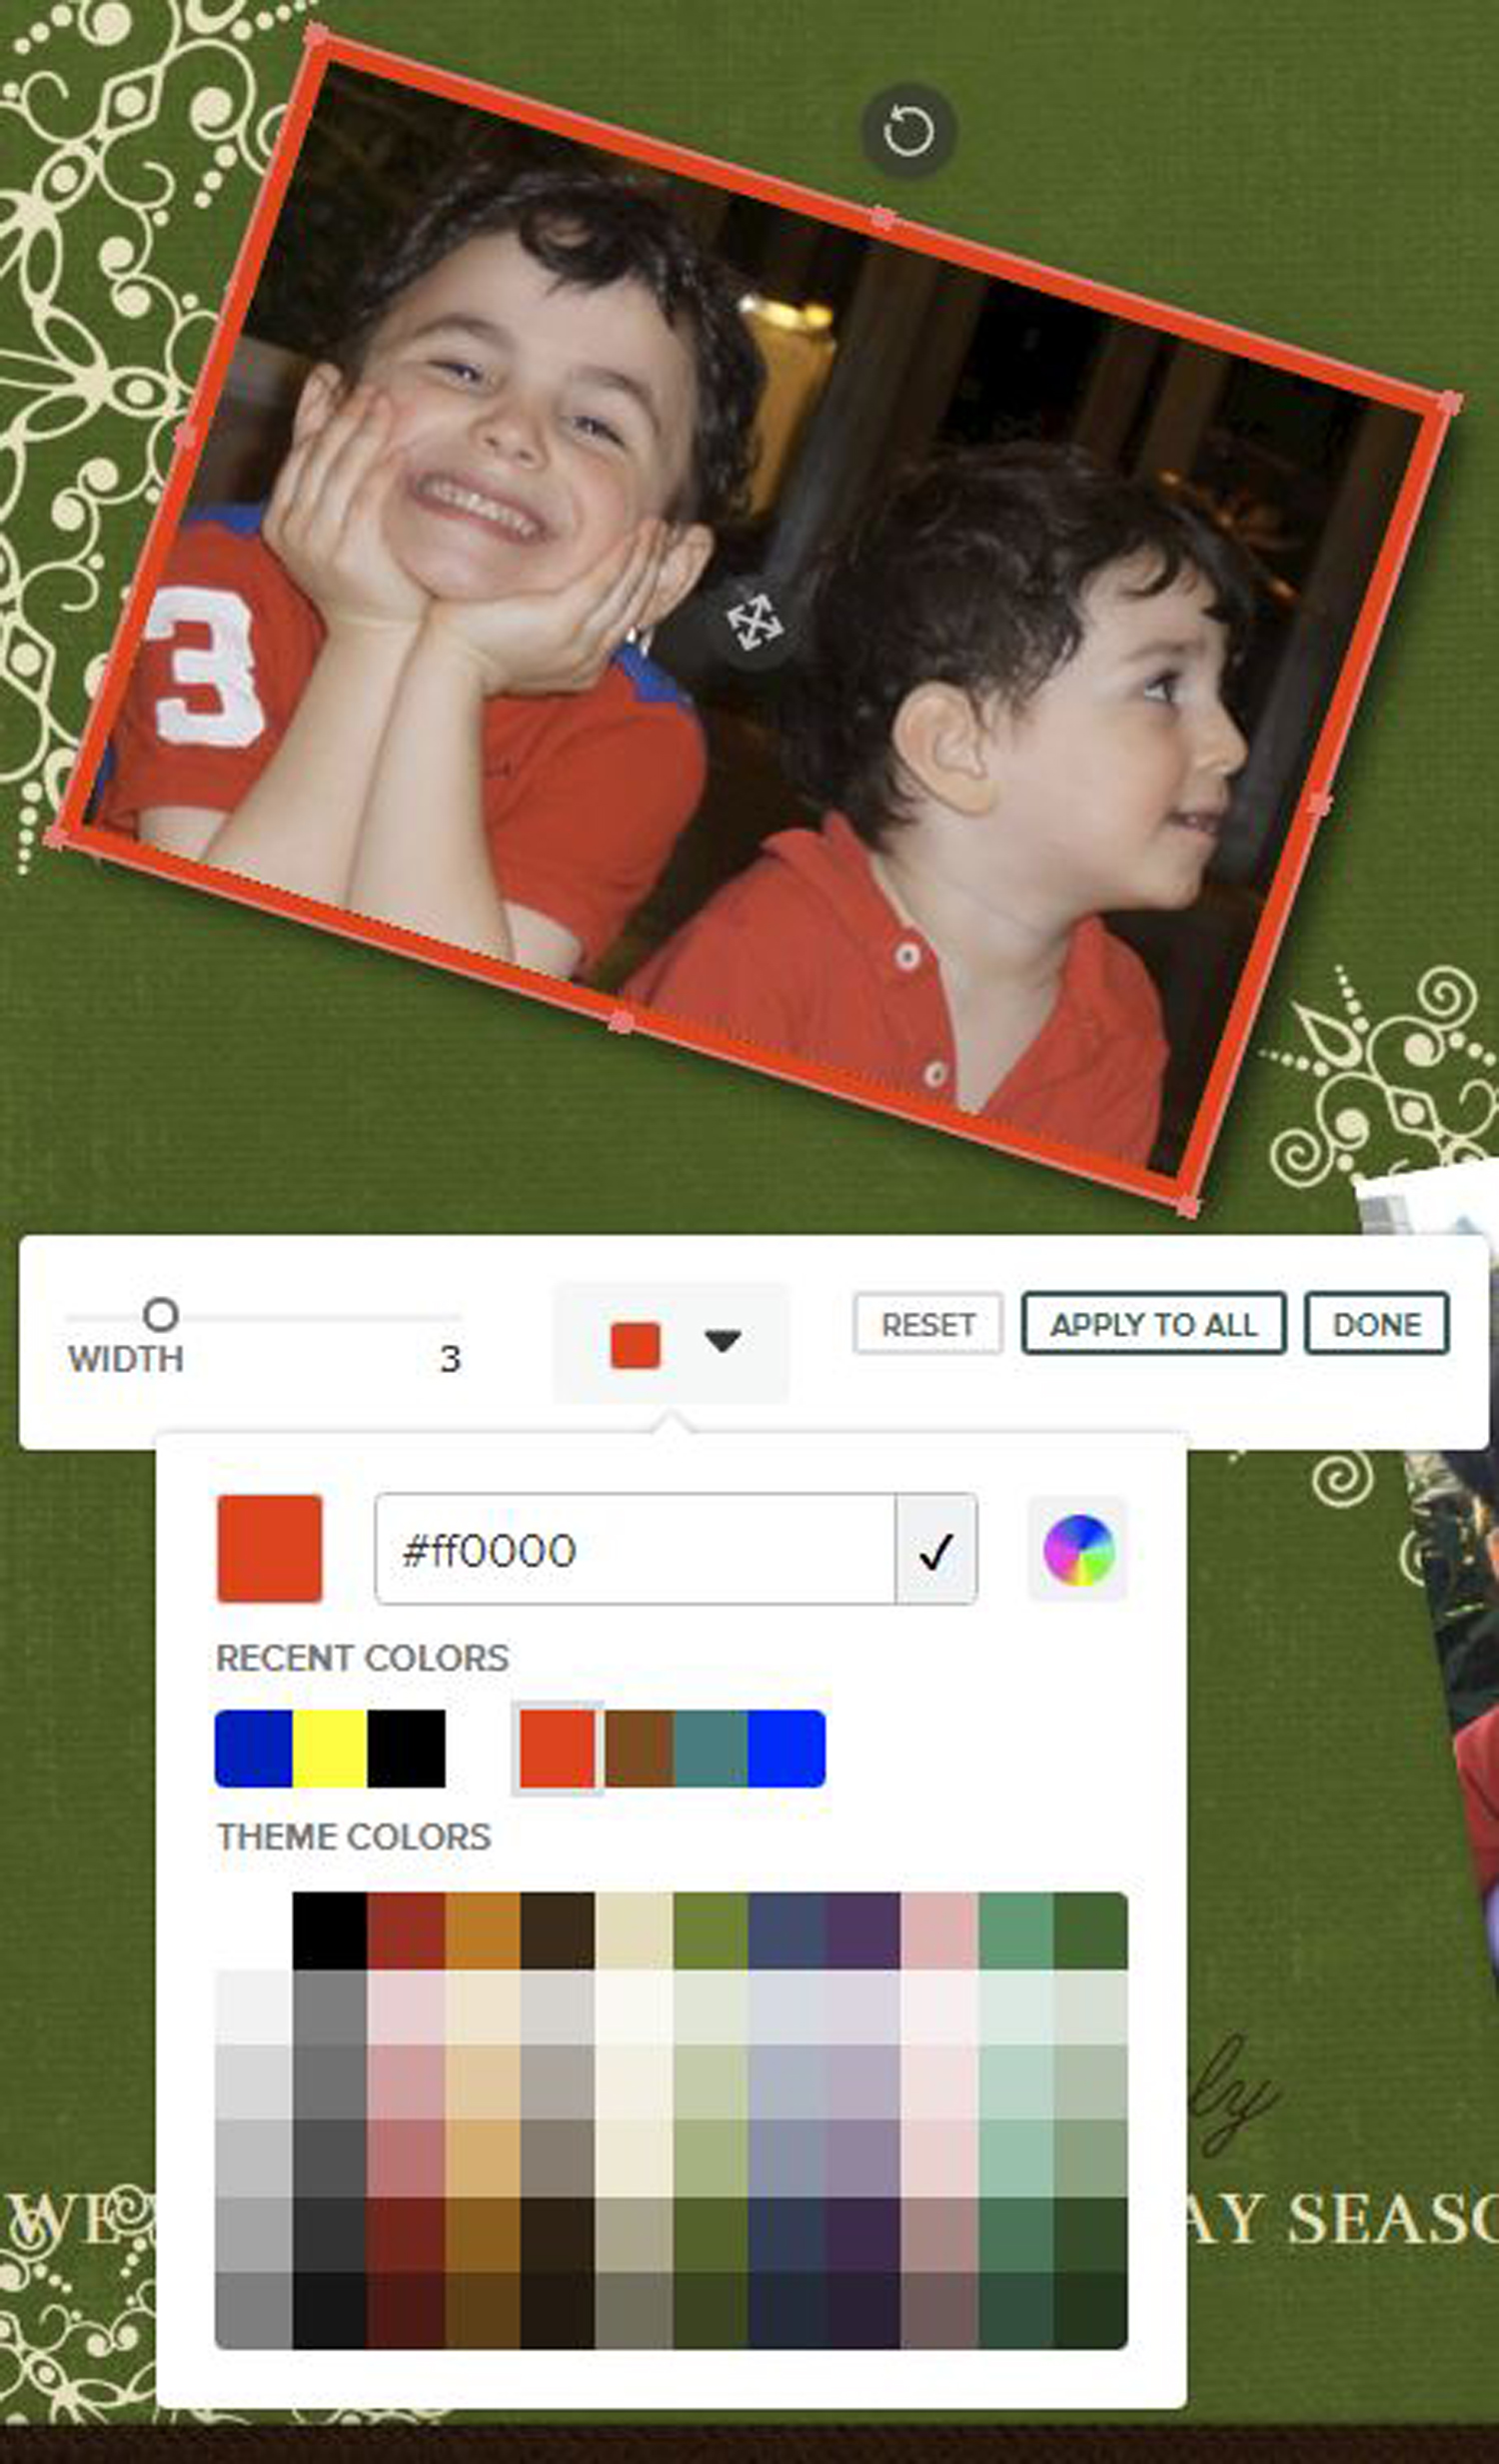
To add a border to a photo
- Click on Border.
- Use the Width slider to adjust the thickness of the border.
- Click on the black square to choose another color for your border.
- If you wish to use the same border on all your project photos, click on Apply to All. If you want it on only the current photo, click on Done.
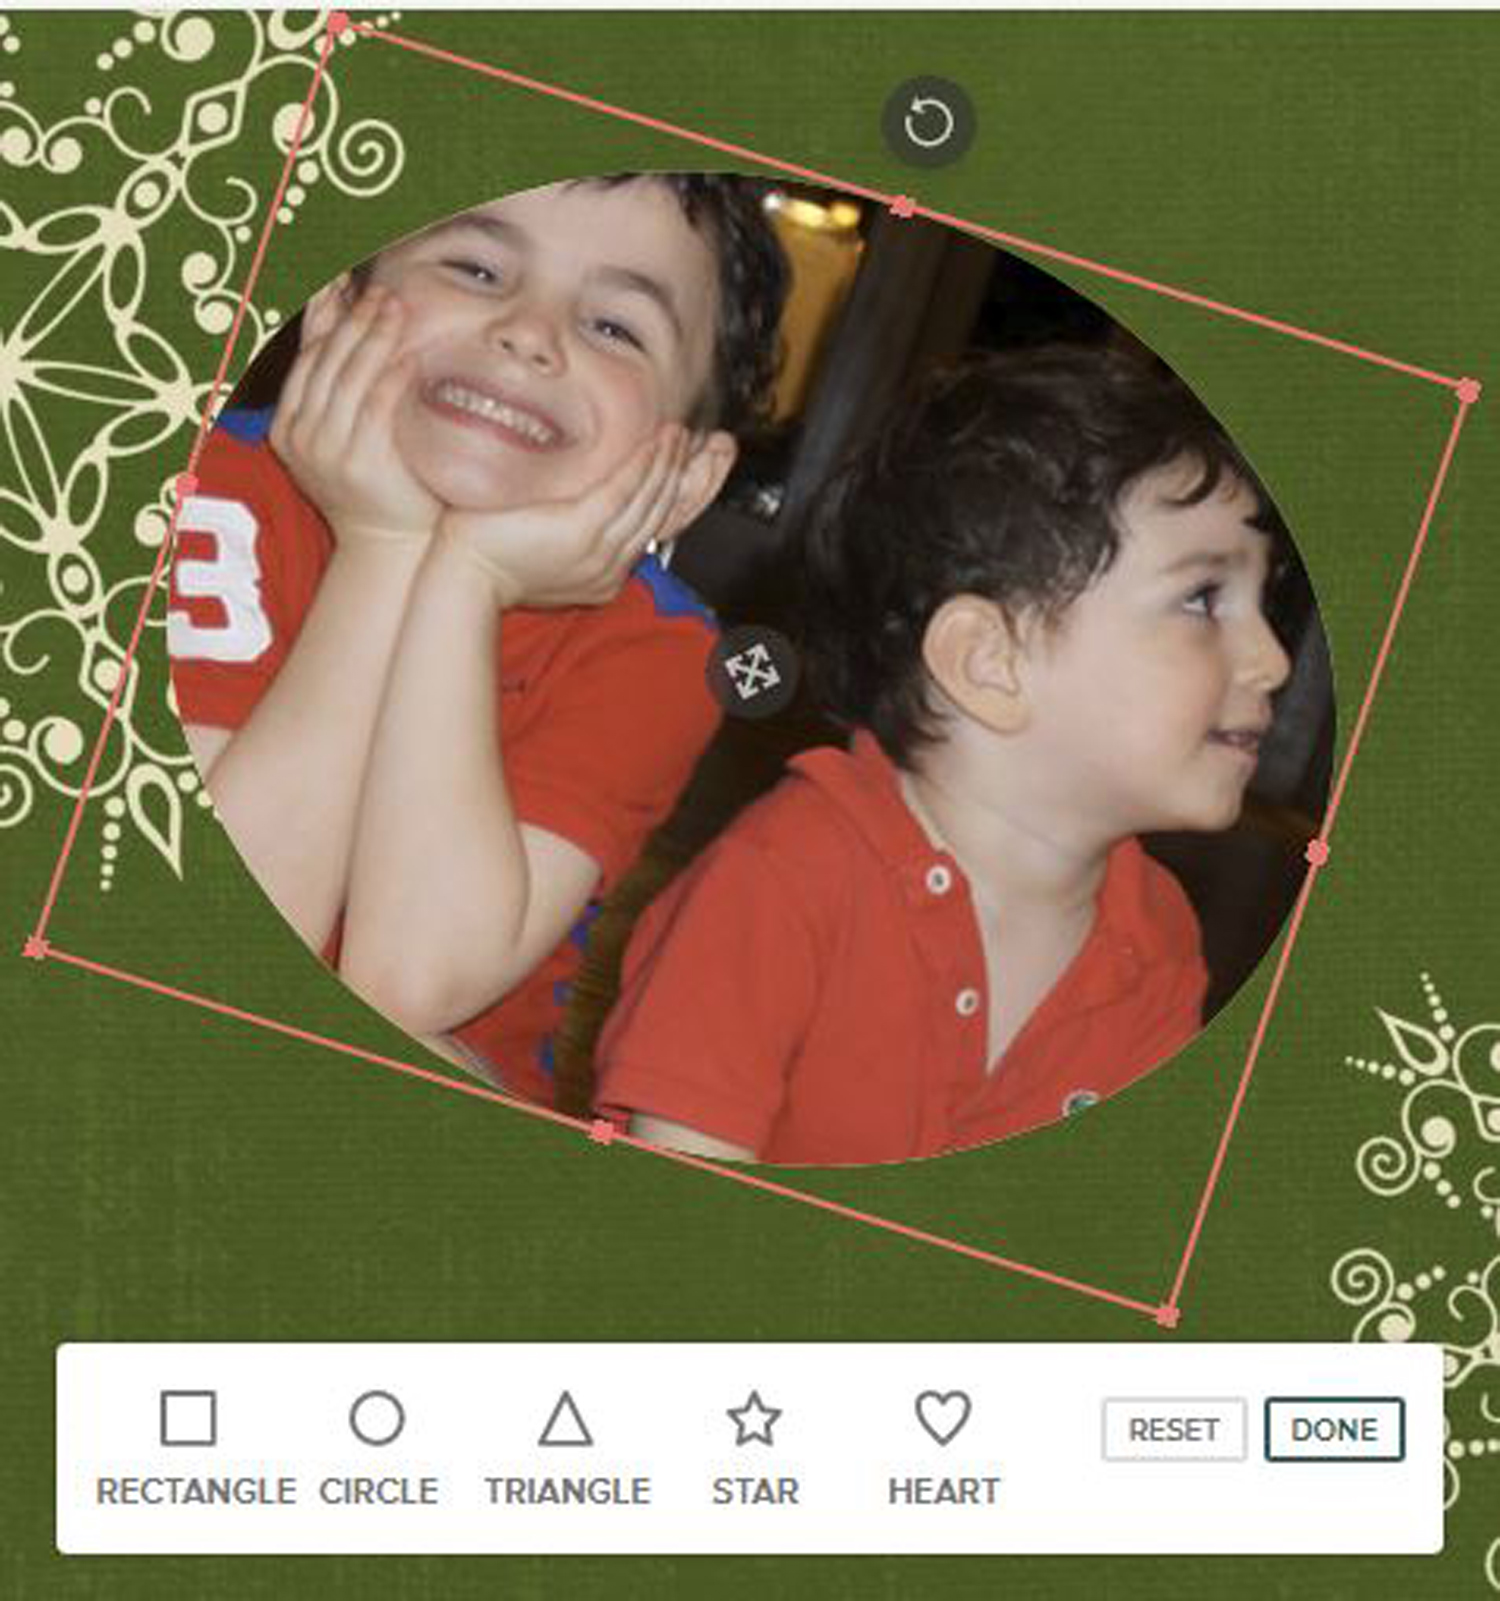
To use a shape (like a star) as a photo border
- Click on the heart Shape icon.
- Click to try the various Shapes (Circle, Triangle, Star and Heart) on your photo.
- Click Done to apply one of the Shapes to your photo.
- Click and drag on the handles on the red outline around your photo to resize the photo to better fit the shape.
- Click on the Back icon in the pop-up menu, then click on the Zoom-In or Zoom-Out icon to adjust the magnification of the photo, if necessary.
- Click on the Move icon in the middle of your photo to adjust what portion of your photo is displayed within the shape.
Change backgrounds
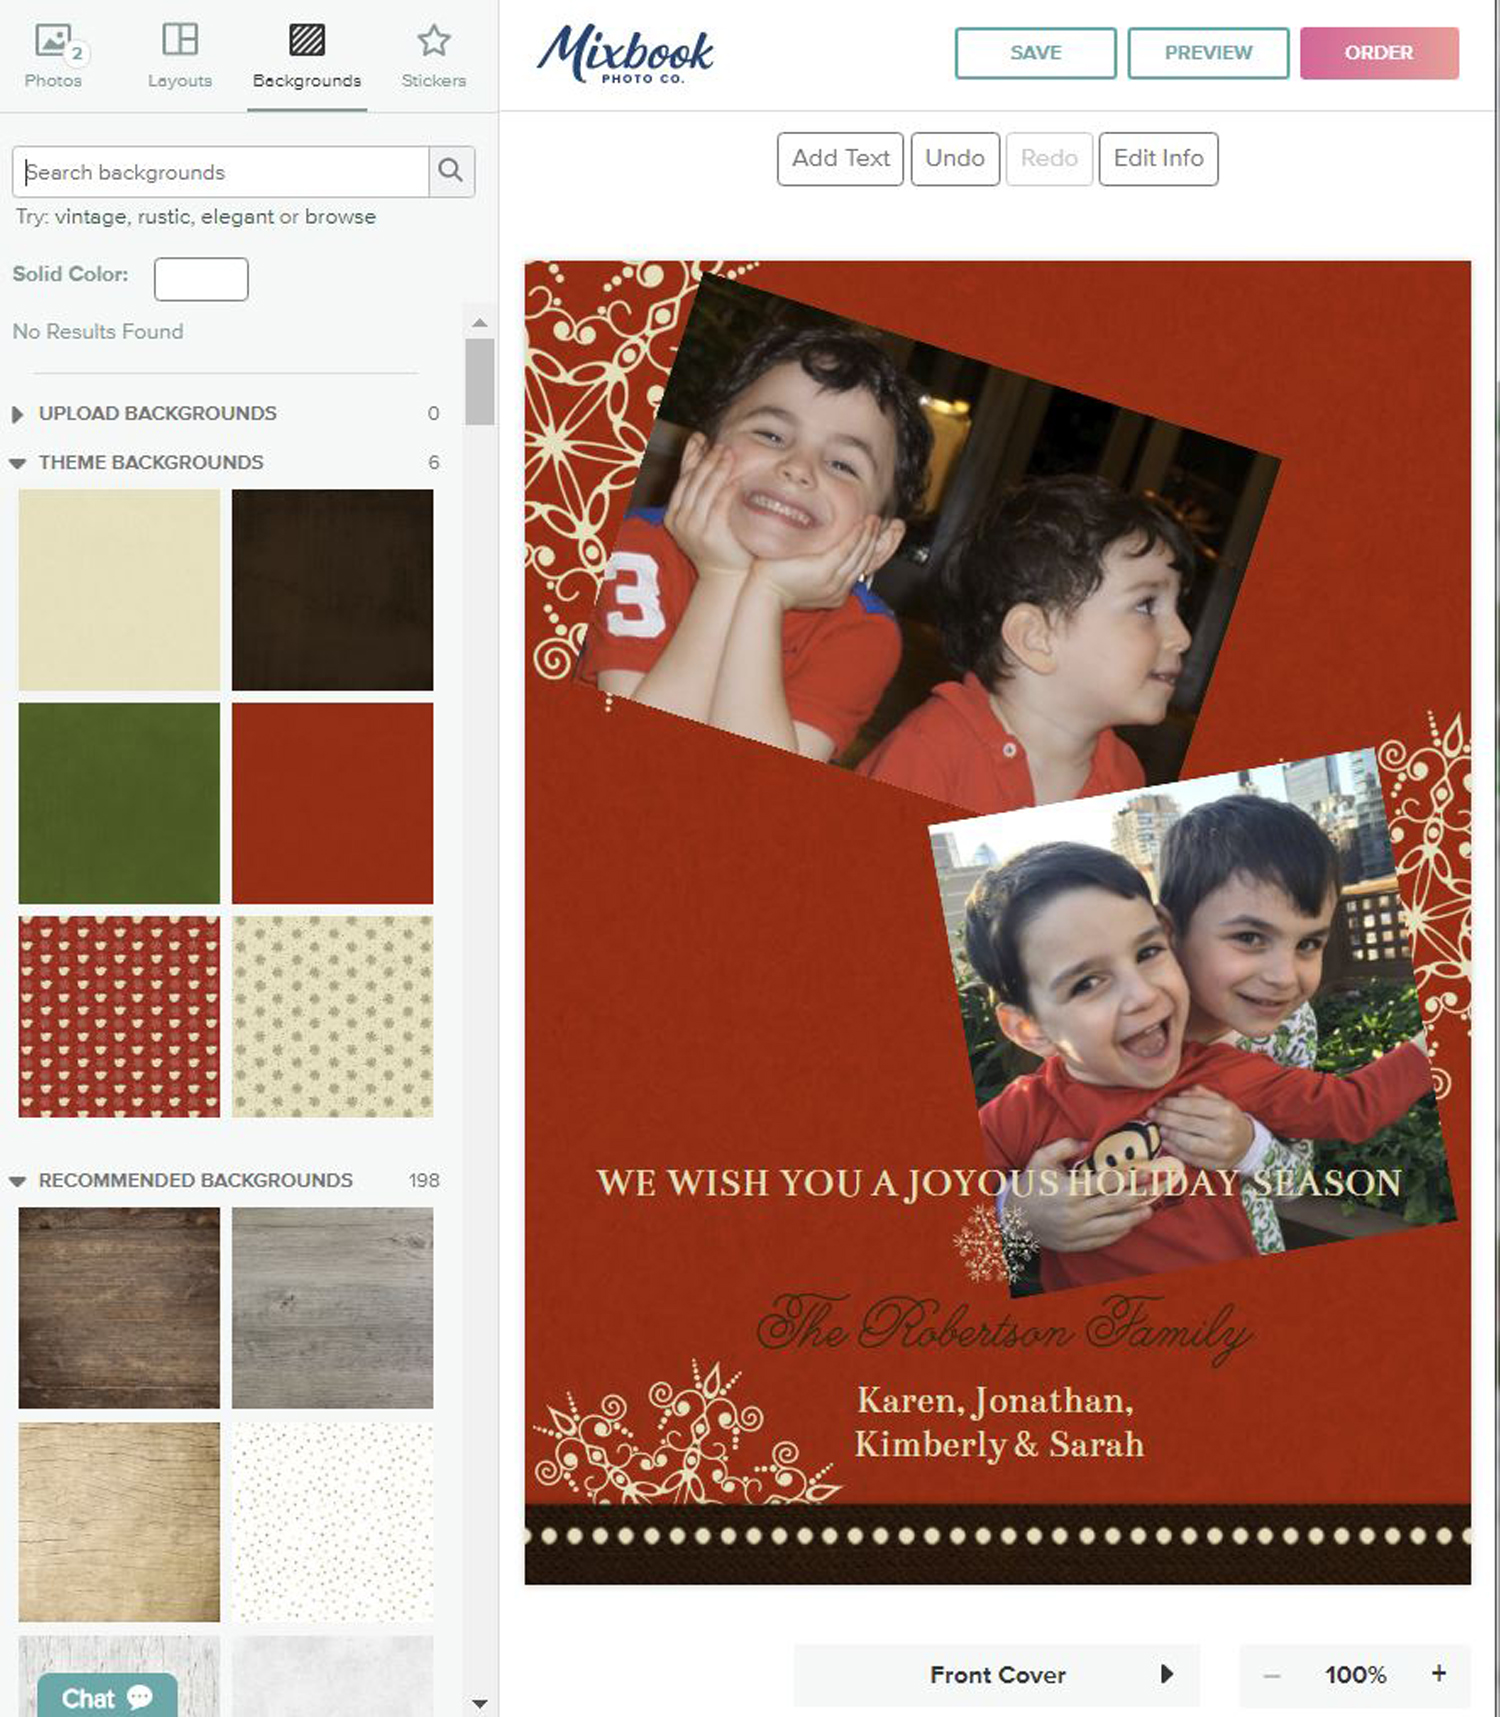
When you first click on the Backgrounds tab in the sidebar, it will show two categories: Theme Backgrounds (those that are part of your template's design) and Recommended Backgrounds (those that Mixbook's designers have determined would fit your template).

You can also upload your own photos or illustrations, or apply a solid color to the background. Once you have used a background in your card, it will be displayed under a new category: Project Backgrounds.

Click on a background to apply it to the currently displayed page of your card.
Add and edit stickers
Click on the Stickers tab in the sidebar to access Mixbook's clip art library, which is organized quite similarly to how the Background options are set up. The one difference is that the Stickers tab has Shapes: rectangle, circle, triangle, star and heart.

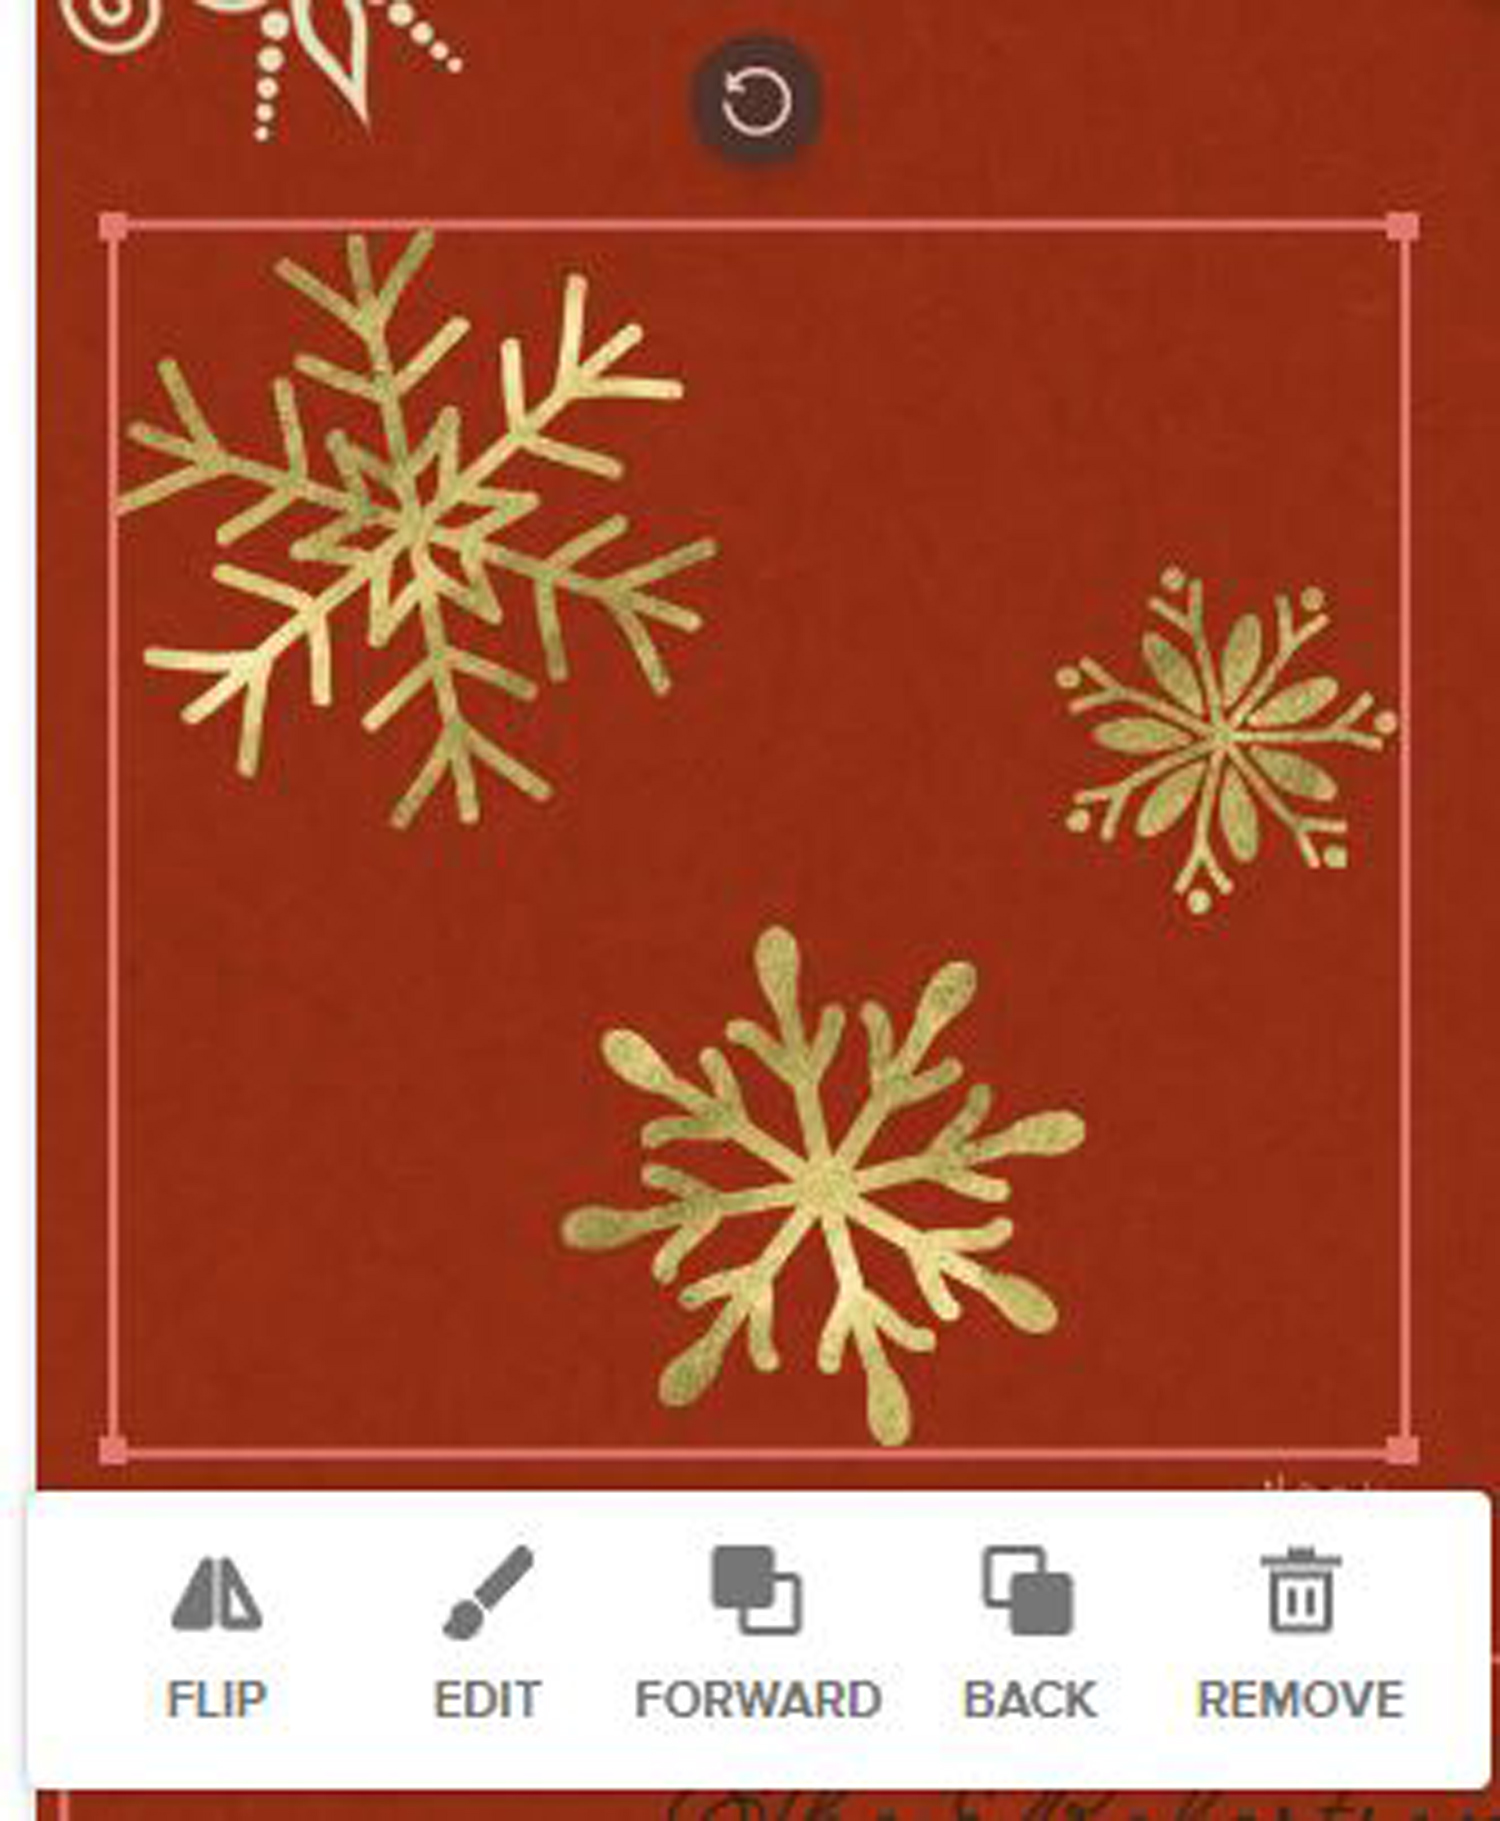
To place a Sticker on your card, click and drag the sticker into place. You can move, resize, reshape, rotate and delete clip art, and move it forward or back, just as you would with a photo. And as with photos, when you click on a placed Sticker, all the tools you can use to alter and edit it are displayed: a red outline with four corner handles, a rotate icon and a pop-up menu.
Add and edit text
Many of Mixbook's templates have pre-placed text blocks. To save time and effort, it makes sense to work with these existing blocks before creating new ones.
To edit a text block:
- Click on it to select it. That will open the text pop-up menu.
- Select all the text in the block.
- Type your message. (That will automatically replace the selected template text.)
- Select all the text.
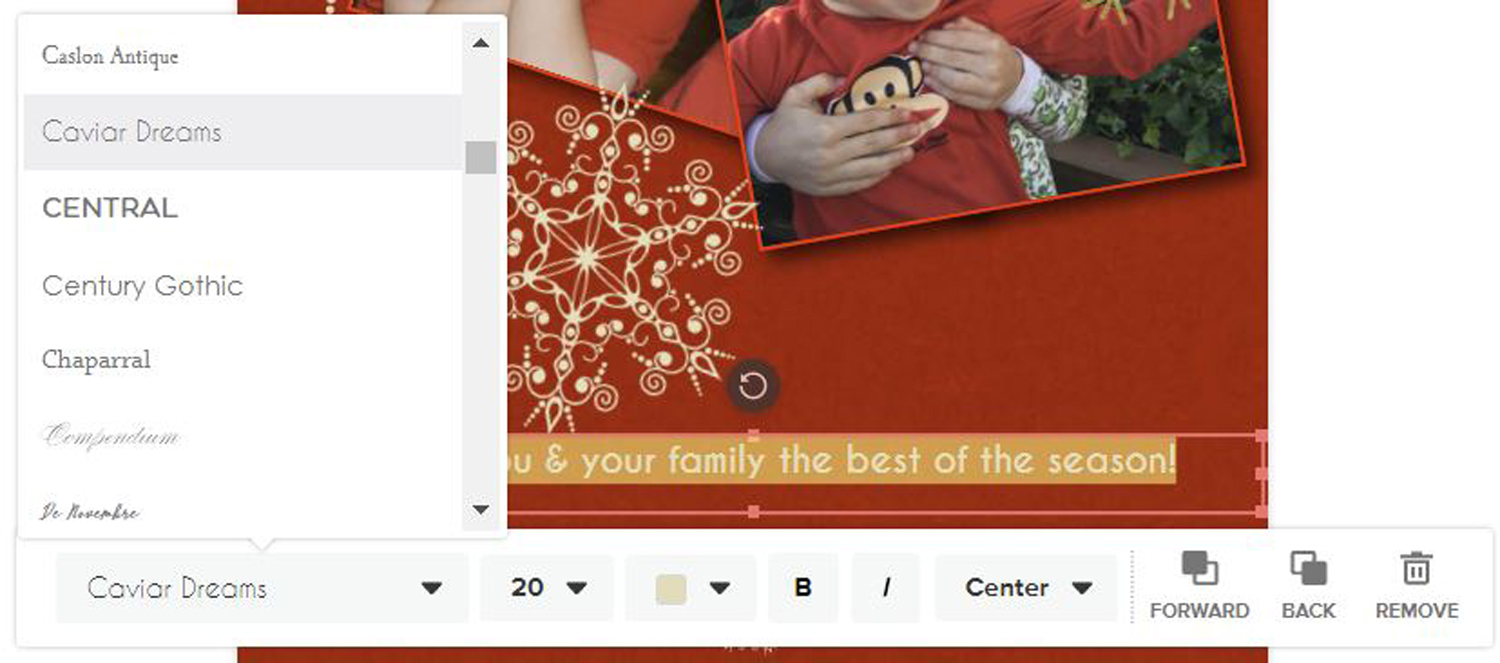
- Use the Font, Size and Color drop-downs, and click on B (bold) or I (italics) to change the type. Click on the drop-down that says Center, and choose your text alignment from among Left, Center, Right or Justify.
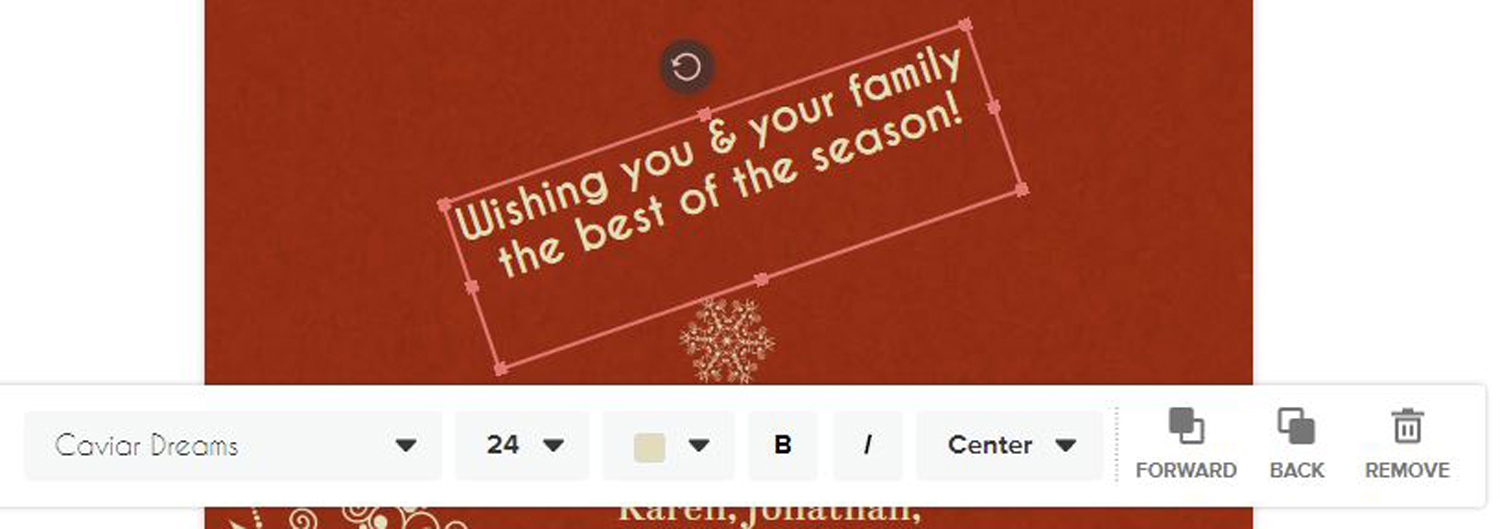
- As with the photos and clip art, use the red outline's handles to move and reshape the text block. This is also how to turn a single wide line of text into a narrower block of two or more lines.
- Use the rotate icon to slant the text.
If you want to remove a block of text, simply click on it to select it, then press Delete on your keyboard or click on the Trash icon in the pop-up menu.


Proofread your card
Before ordering your card, check all the pages carefully.
- Are your photos, clip art and text exactly where you want them?
- Are all the colors what you expect?
- If you see an exclamation mark on a photo, that means the picture doesn't have a high enough resolution to print well. If you resize the image to make it smaller, the exclamation mark may disappear. Otherwise, you should replace it with a higher-resolution photo.
- Are there any remnants of the template that you forgot to edit or delete?
- Proofread your text for typos, misspellings, grammatical errors or factual errors.
Order your card
When you order your card, you'll have two decisions to make:
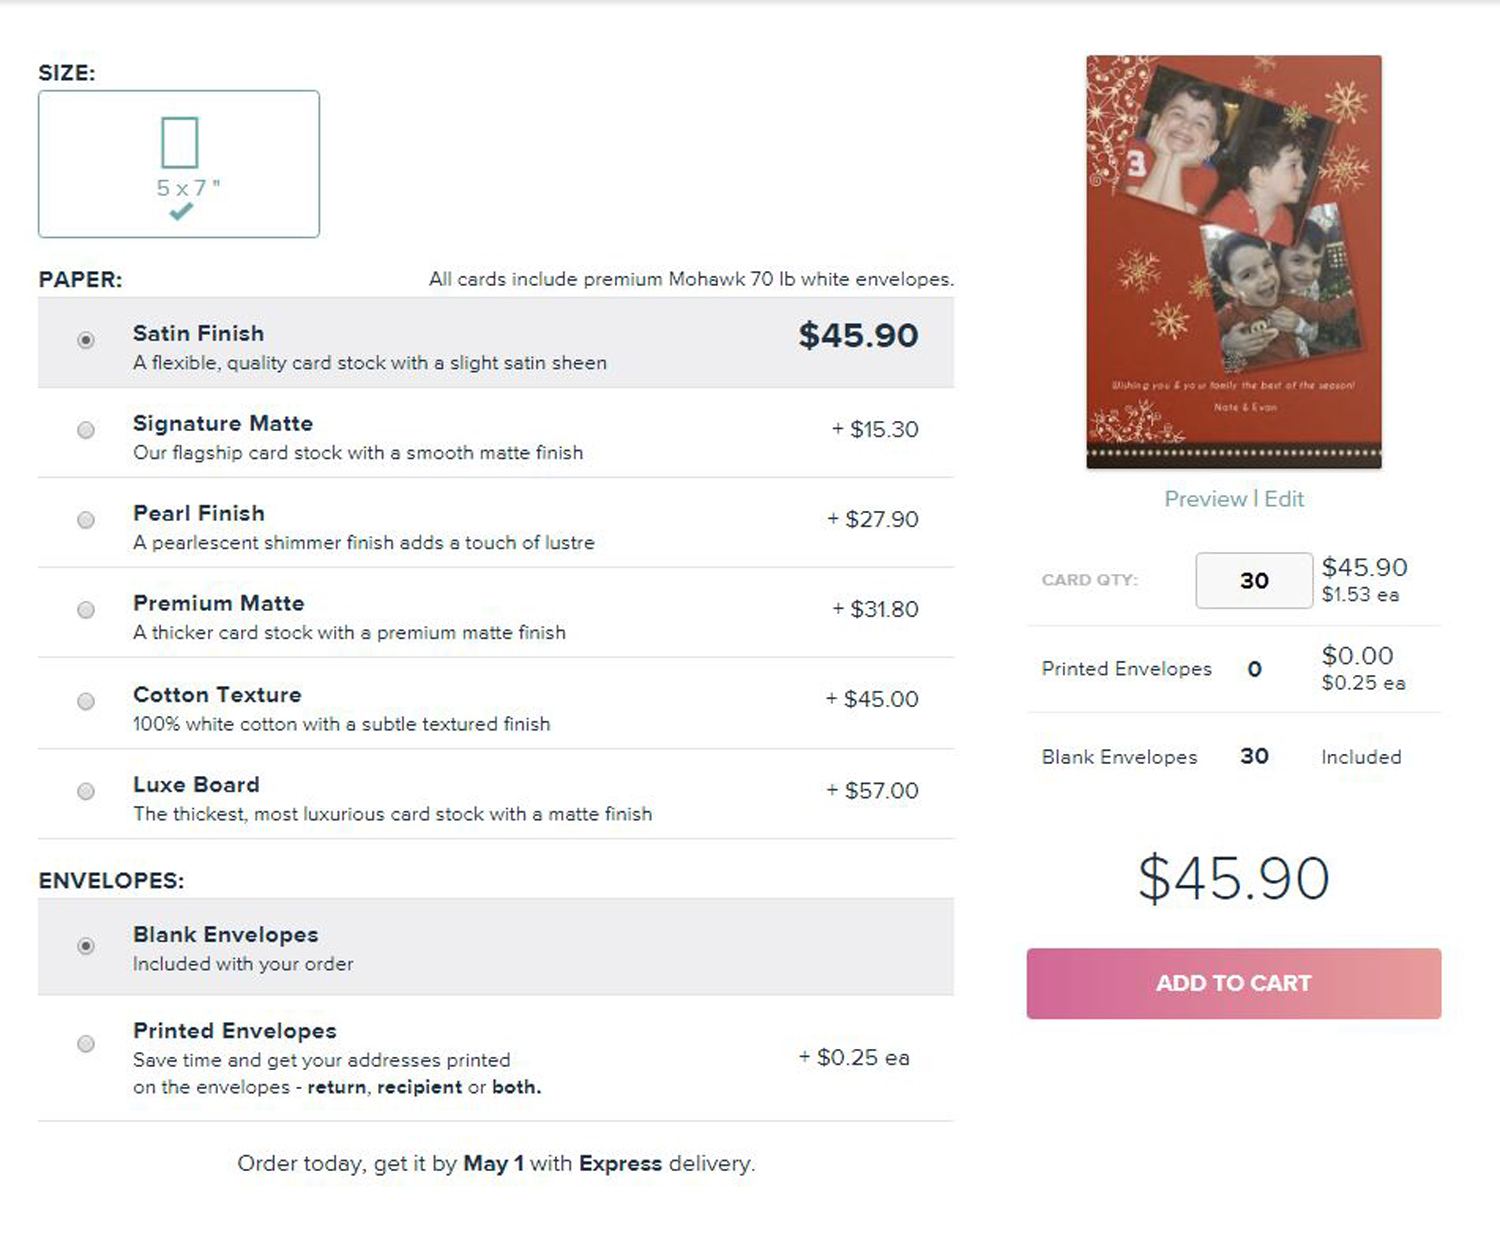
- What quality of paper do you want your card printed on? The more expensive the paper, the thicker the stock and the finer the texture and finish. However, for most cards, we've found that the less expensive Mixbook Signature Matte is an appealing weight and texture.
- Do you want printed envelopes (with your return address, the recipients' addresses or both), or will you be satisfied with the included blank envelopes?
Check one last time...
Before you order your card, click on Preview (under the thumbnail of your card) to check things over one last time, just in case you missed something. Then, click on Add to Cart, place your order and take pride when you send out your beautifully personalized card.
Credit: Tom's Guide
Sally Wiener Grotta is the president and lead analyst of DigitalBenchmarks test lab (www.DigitalBenchmarks.com). The scripts she created for various tech publications for testing and evaluating digital cameras, image quality, software and related technologies have become industry standards. Among her numerous books is the first major volume on image processing “Digital Imaging for Visual Artists” (McGraw-Hill), co-authored with Daniel Grotta. Her hundreds of reviews, stories and columns have appeared in scores of magazines, journals and online publications.

