How to Take Great Pictures with the Canon EOS Rebel T7i
Want to get the most out of your Canon T7i? Here are some simple tips for better shooting in a variety of situations.
Getting Started With Your Canon EOS Rebel T7i
The latest model in Canon’s entry-level Rebel DSLR series, the T7i, is a great entry-level camera with plenty of room for you to grow your skills. In this guide, we’ll go into detail about what settings to use in specific shooting situations. If you’re just starting out, be sure to explore some of the more advanced settings — they’re easier than you think!
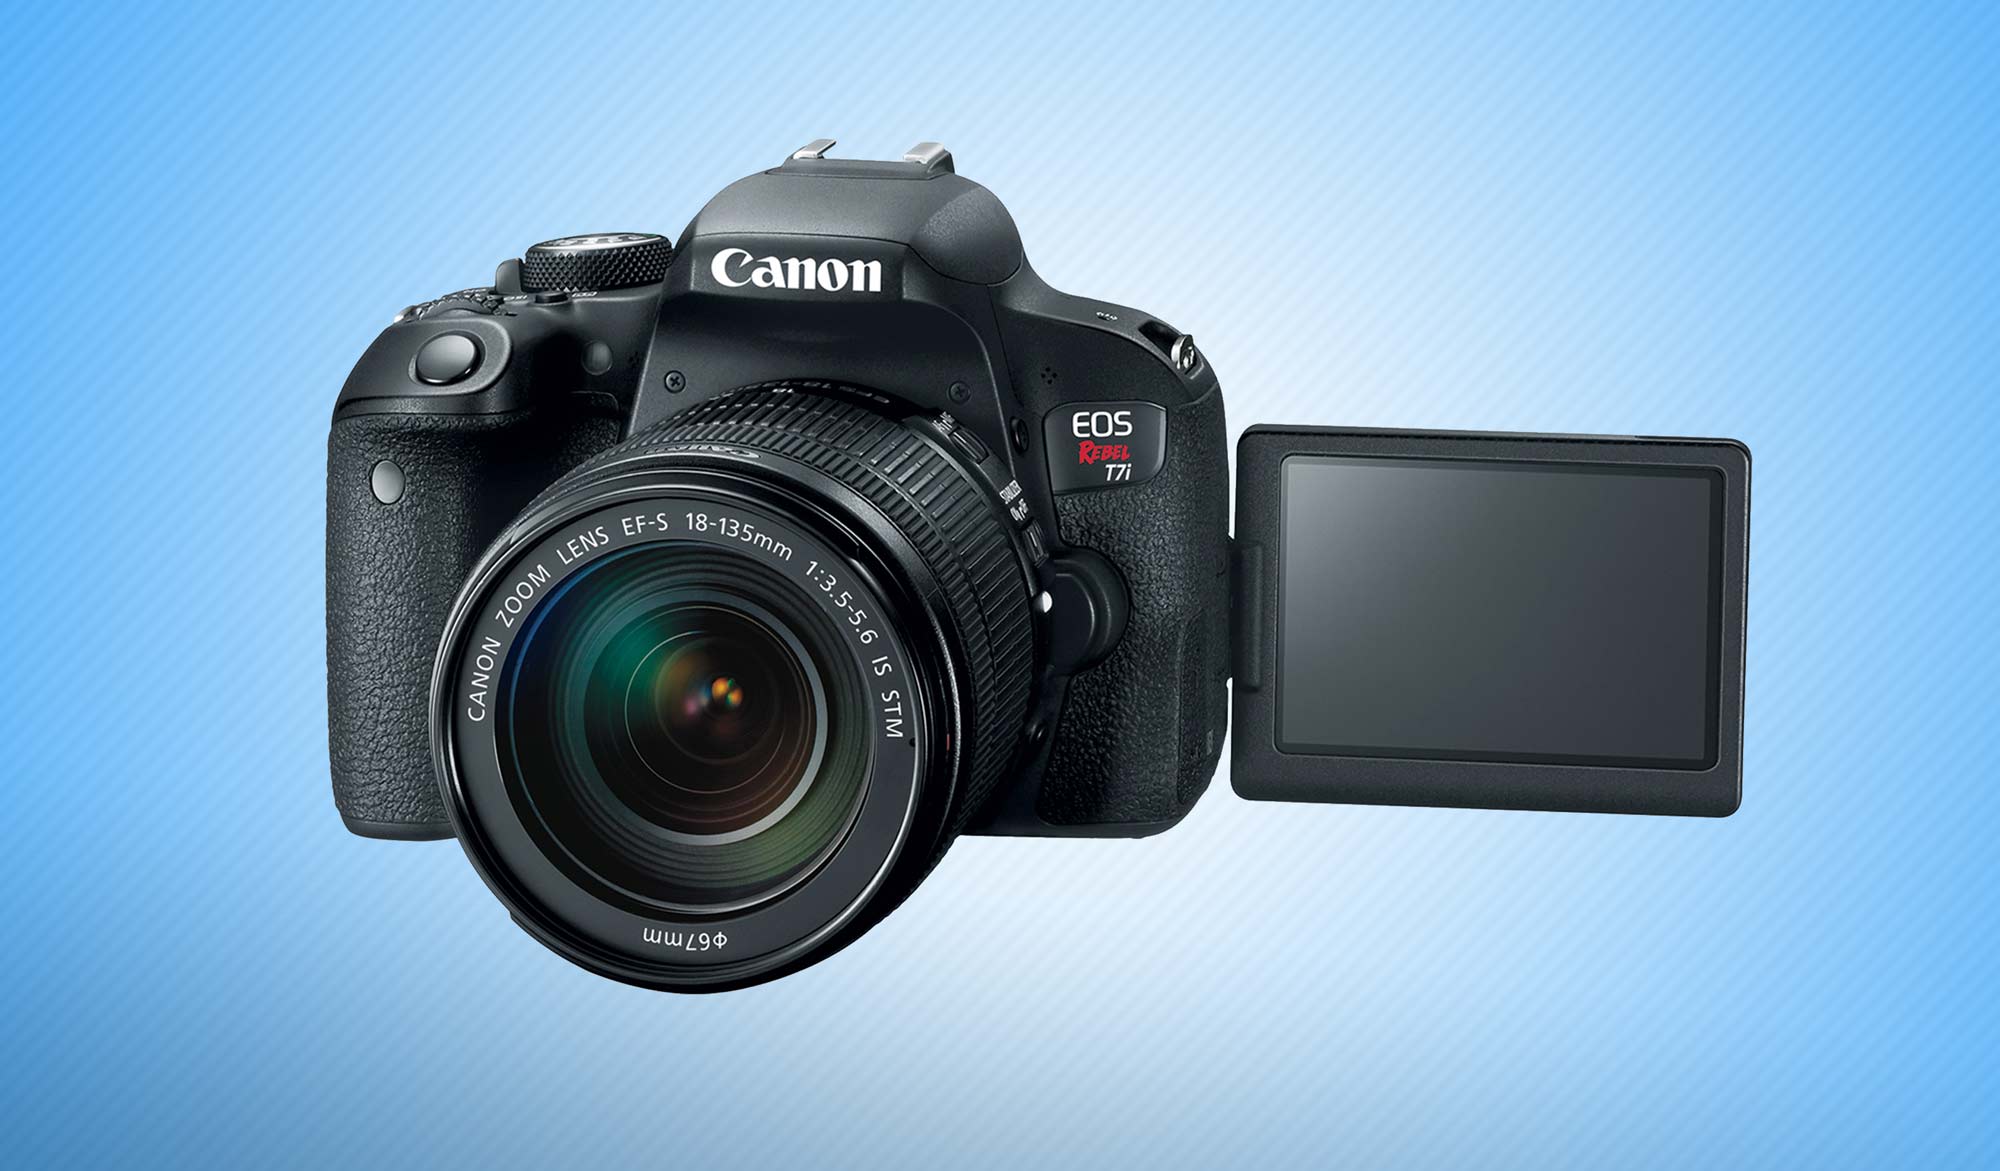
For basic picture-taking guidance, check out this article about taking great pictures with the Canon EOS Rebel T5, an earlier model with many of the same specifications and features.
Getting Started
If you’re just starting out, we suggest you use the T7i’s default settings and built-in help system. Go to Menu>Function Settings (yellow tab with a wrench)>Menu 4>Clear Settings>Clear All Camera Settings. Press the Set button on the back of the camera to confirm. This will bring everything back to the camera’s default settings. Be sure to write down any special settings you’ve used before this so you can go back to them later on.
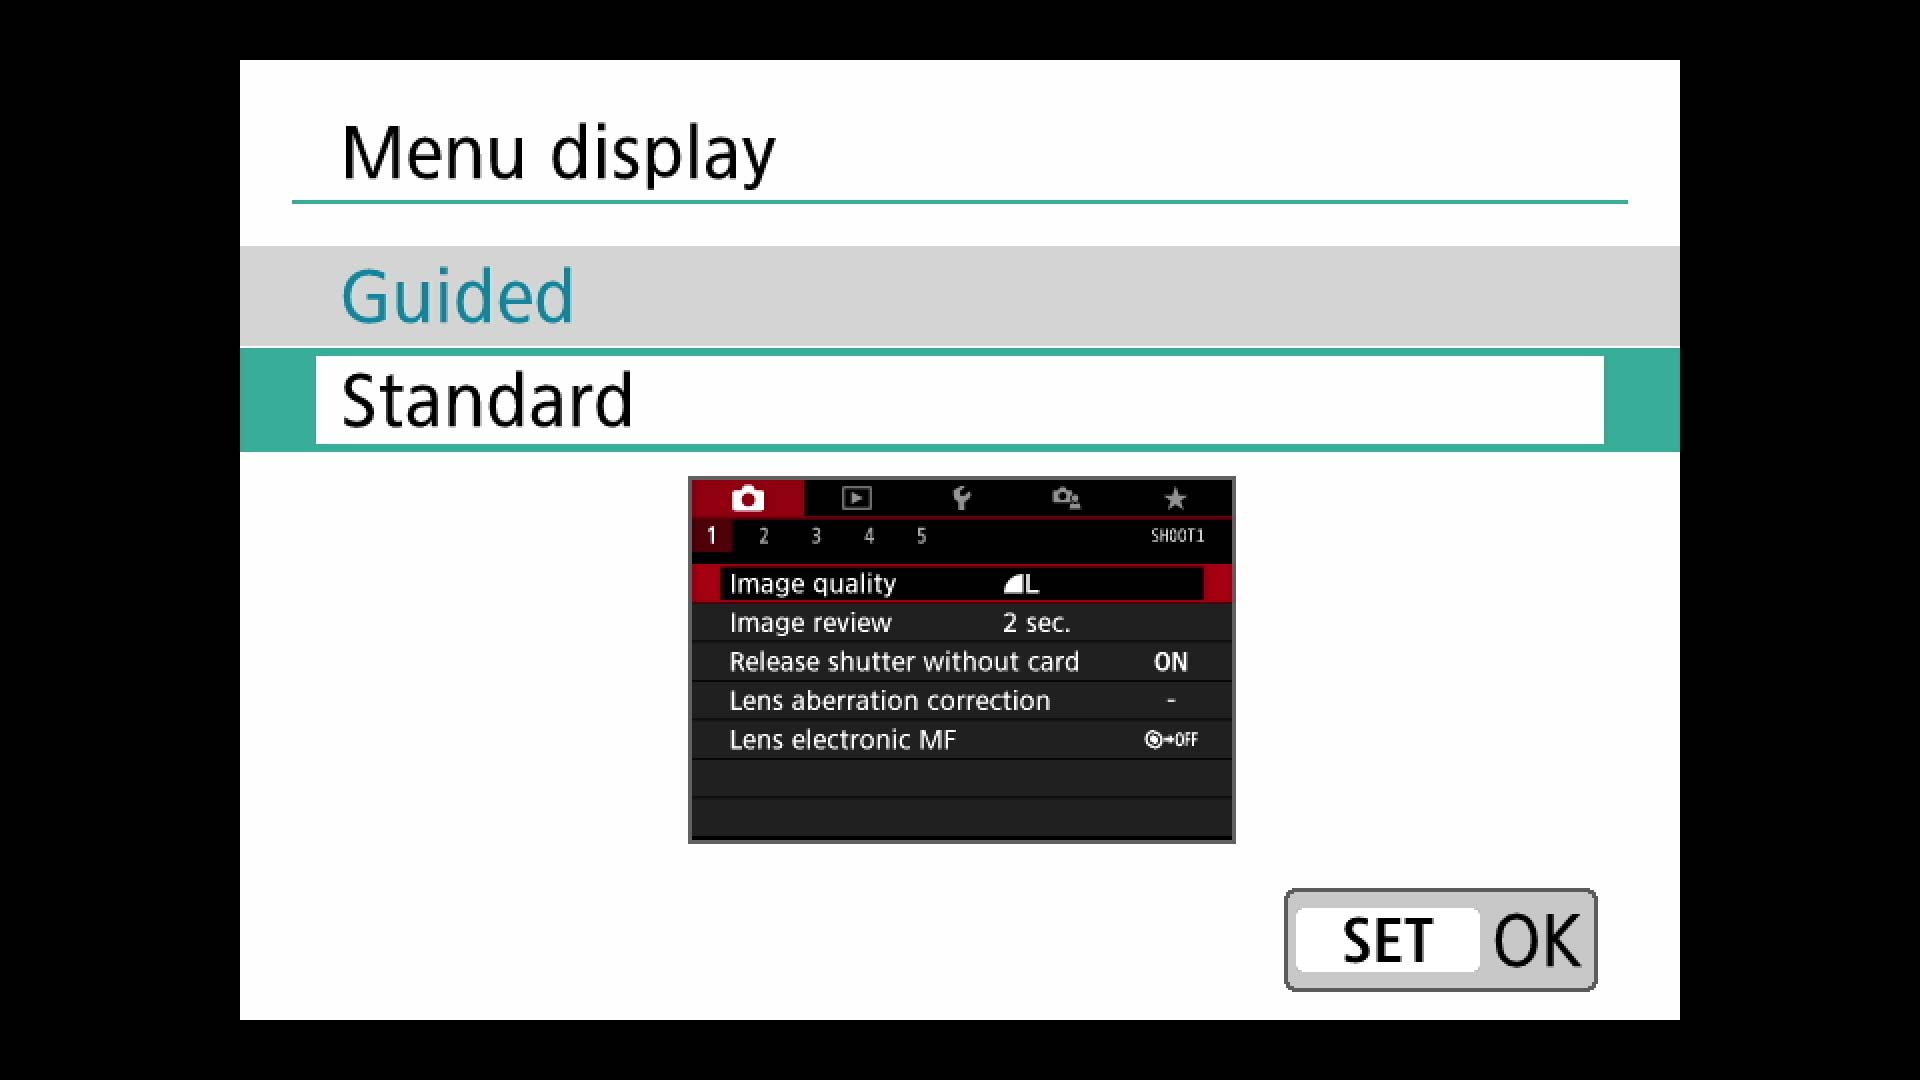
Note: The Standard menu offers more menu options than the Guided menu. Feel free to explore these other options once you’ve mastered the methods below.
MORE: How Many Megapixels Do You Really Need?
Battery charged? SD card in the camera? Great -- let’s go take some pictures!
For each scenario, we’ve provided instructions for those new to photography, as well as for those with a little more experience.
Sign up to get the BEST of Tom's Guide direct to your inbox.
Get instant access to breaking news, the hottest reviews, great deals and helpful tips.
If you get confused by any of the terms, please refer to our camera glossary.
Portraits
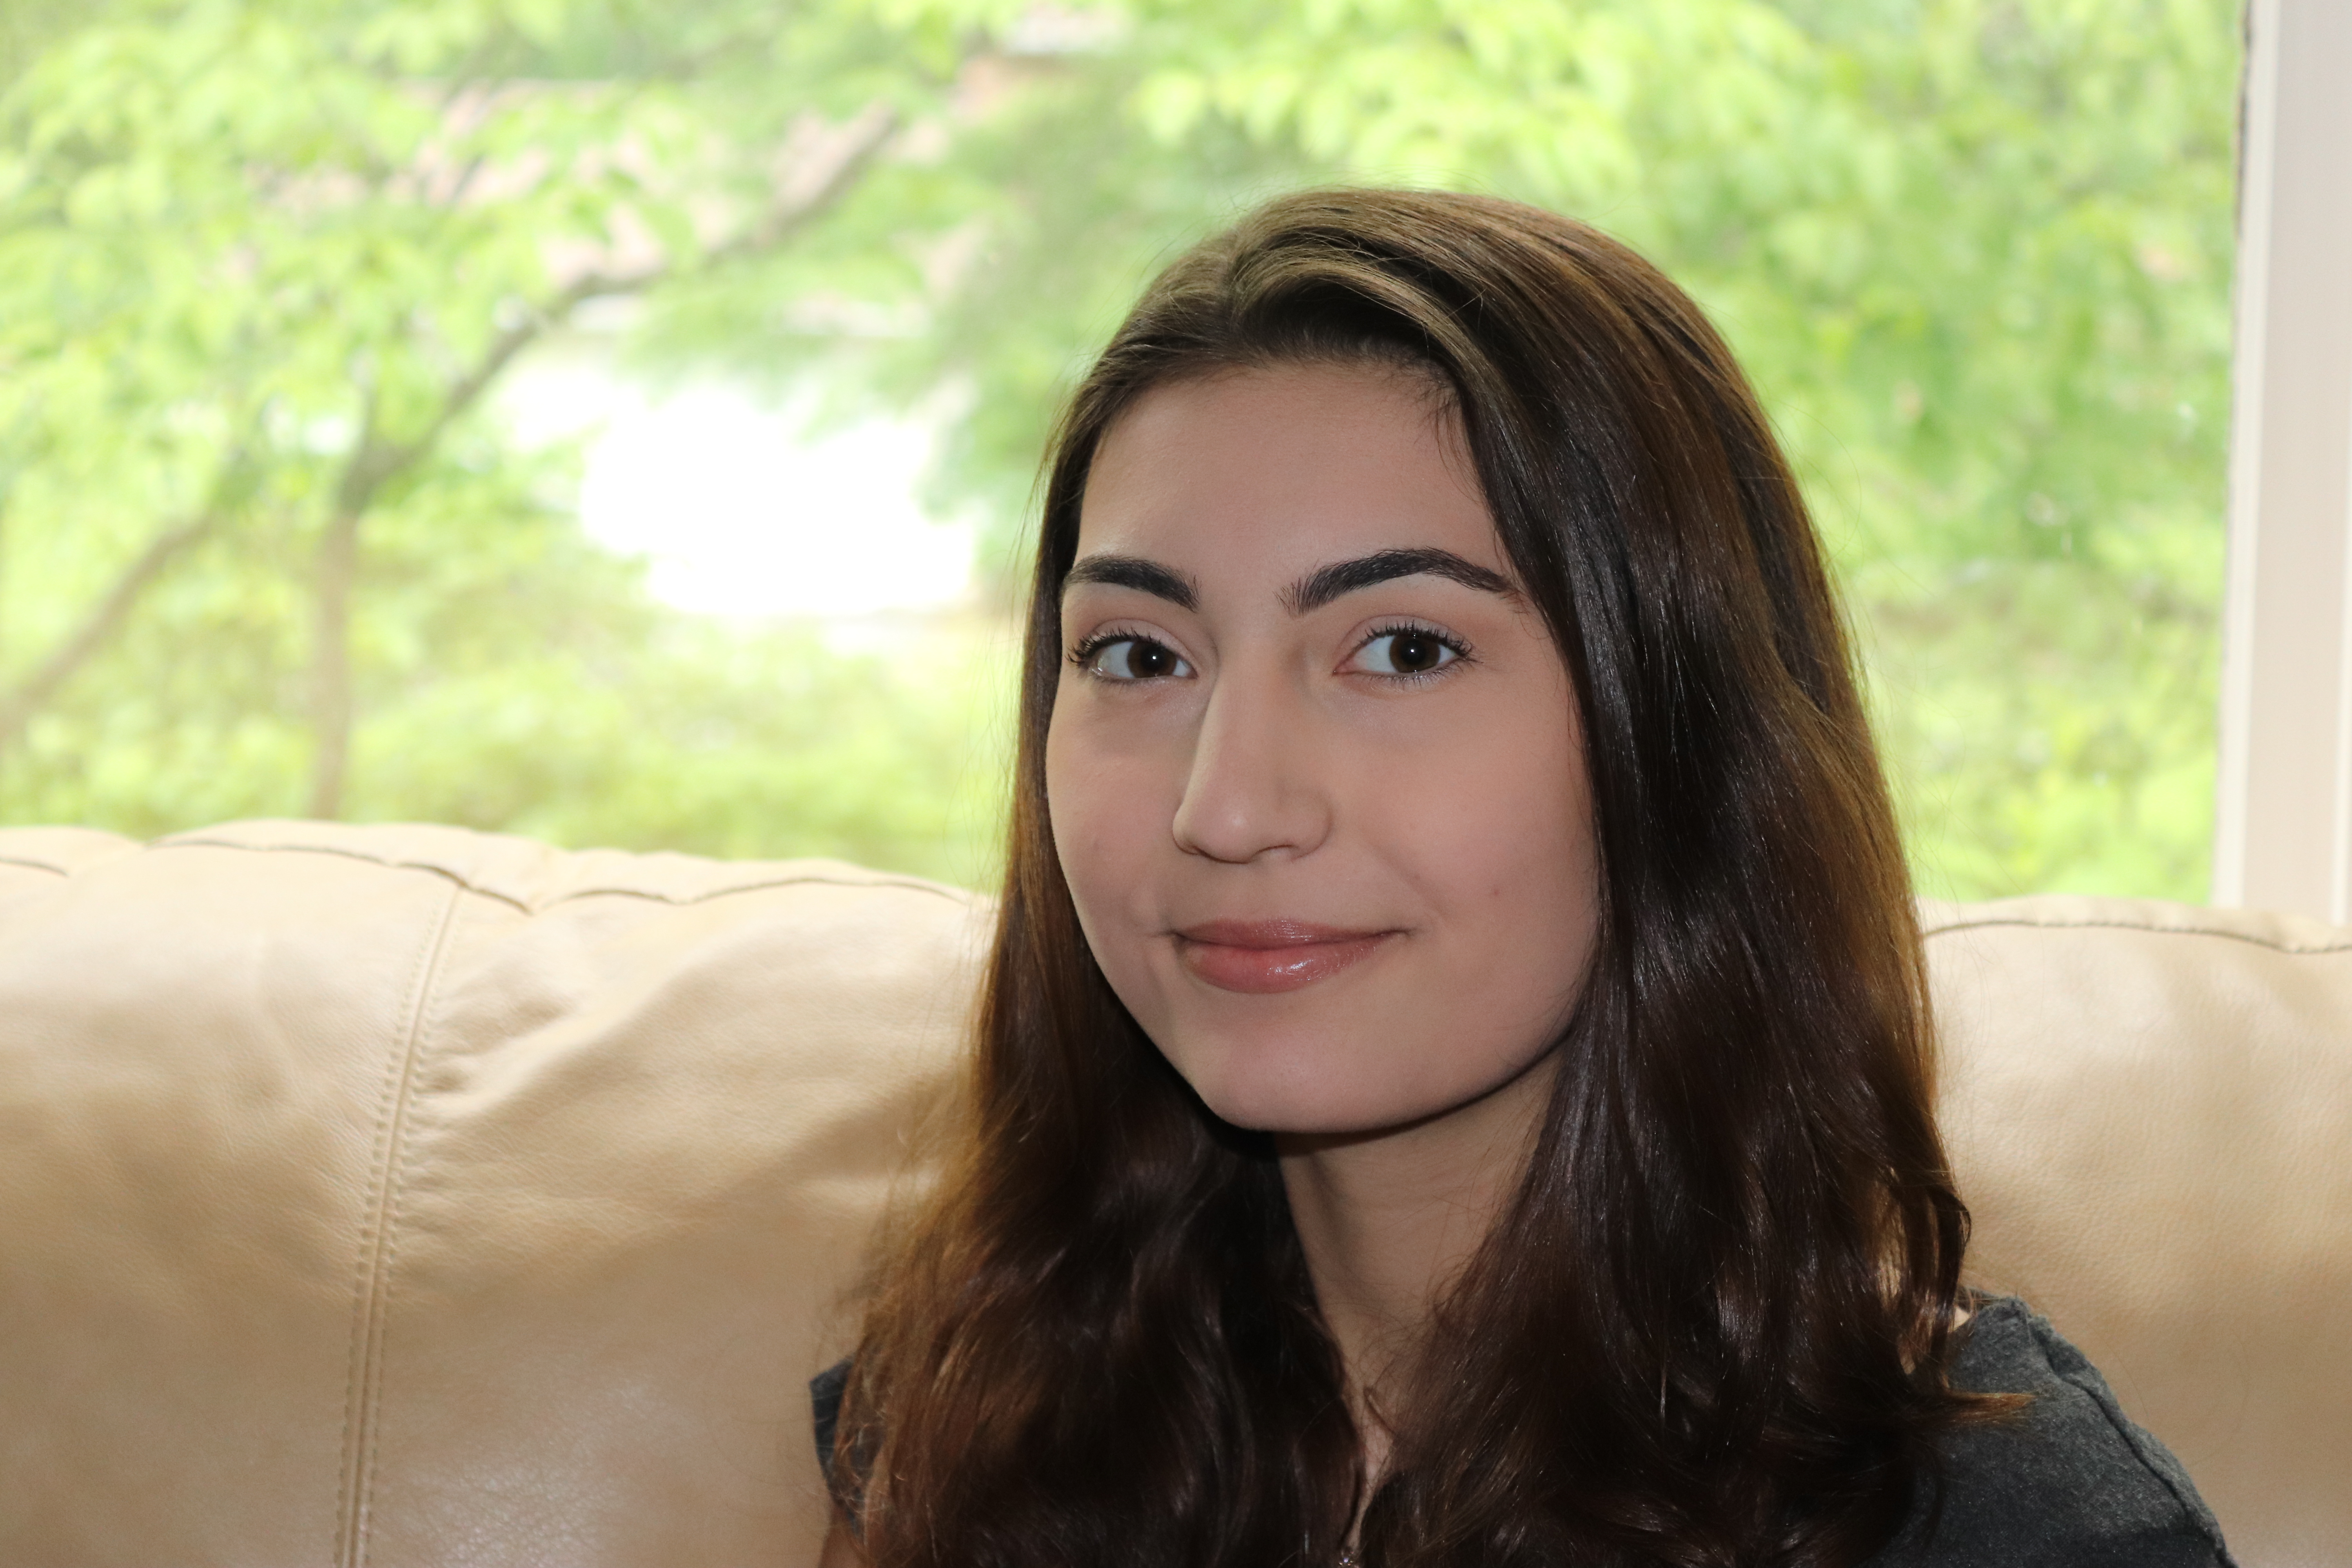
The ideal portrait draws attention to the subject by creating a shallow depth of field (the distance over which the image appears in focus). This results in a soft, out-of-focus background called bokeh. Here are two ways to achieve a lovely portrait. Set your 18-55mm zoom lens to 55mm (zoomed all the way in, if possible). A wide-angle setting, such as 18mm, might distort the person’s face.
Easy:
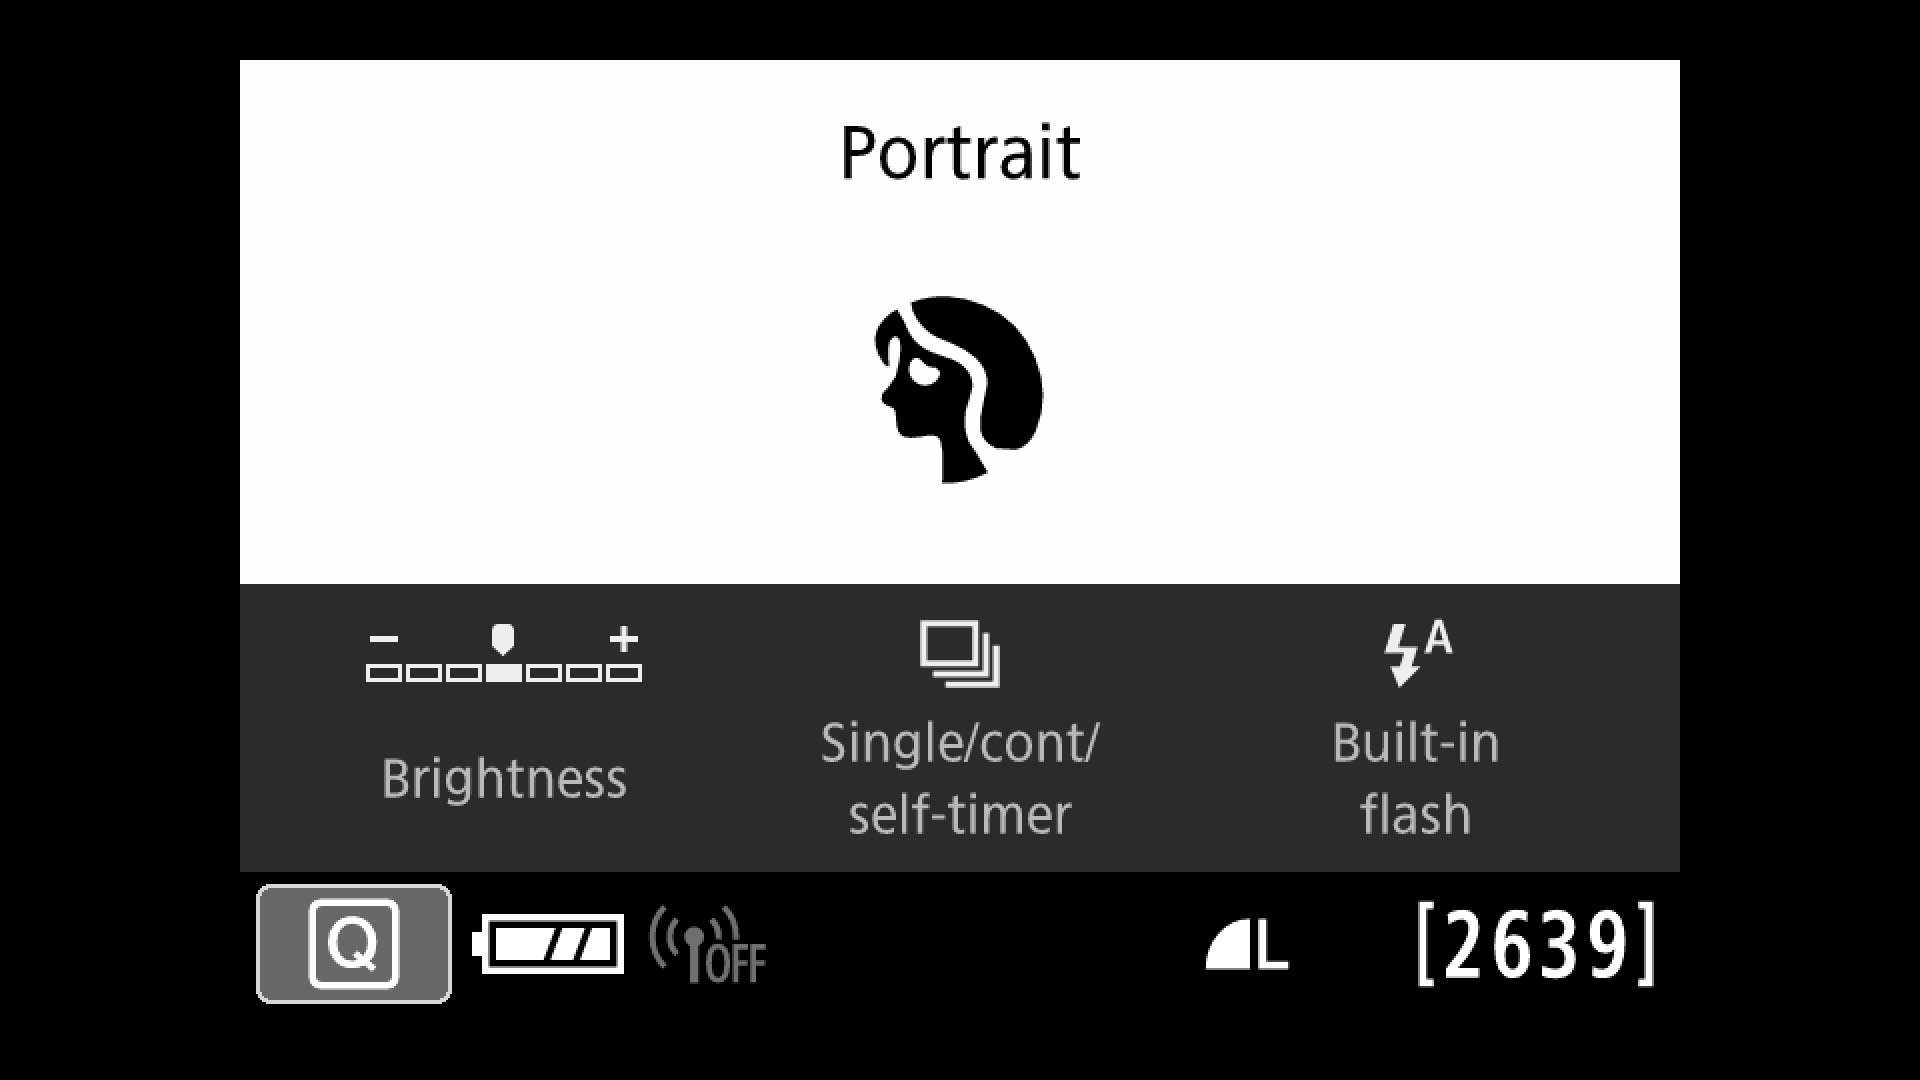
1. Set the mode dial to the Portrait icon. The camera automatically sets the exposure, blurs the background slightly and softens the skin and hair. By default, the camera is set to low-speed continuous shooting and Auto flash. If your subject is backlit, try the Backlight Control Scene Mode (under SCN).

Options:
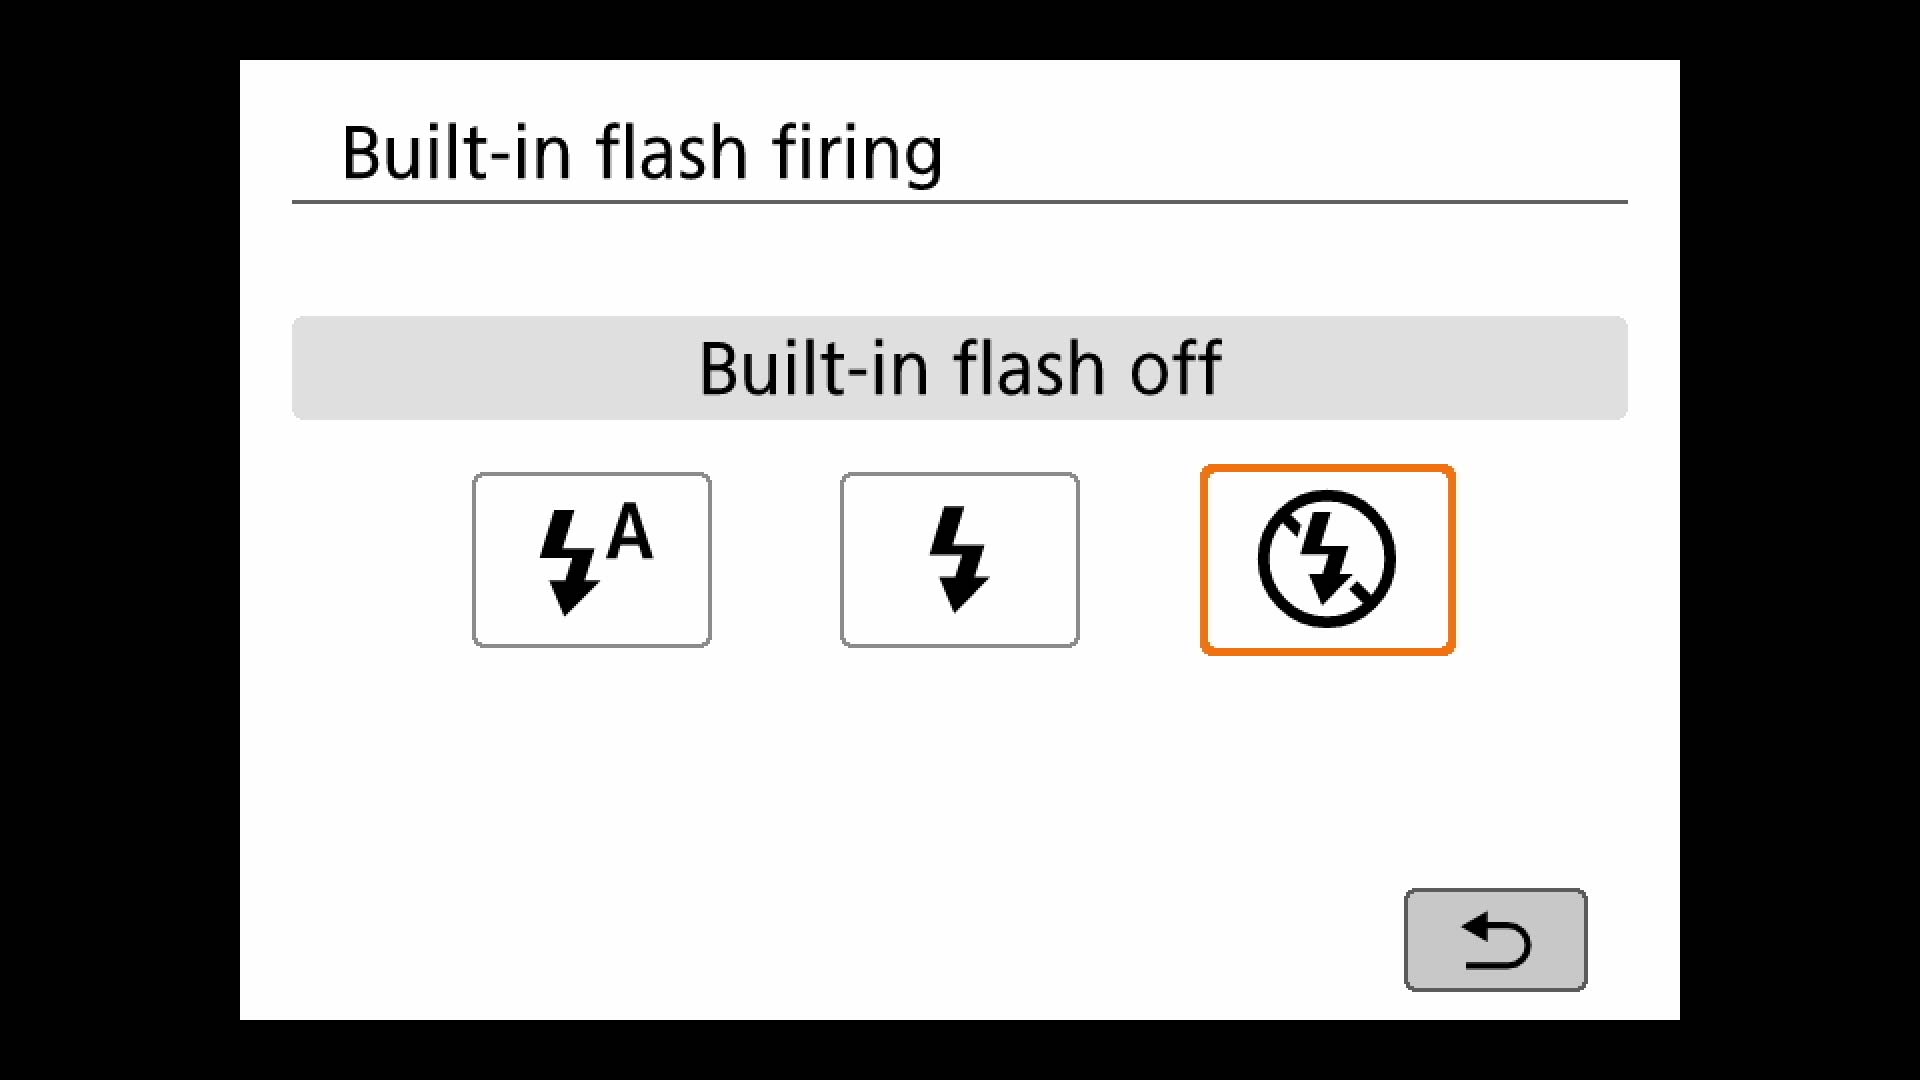
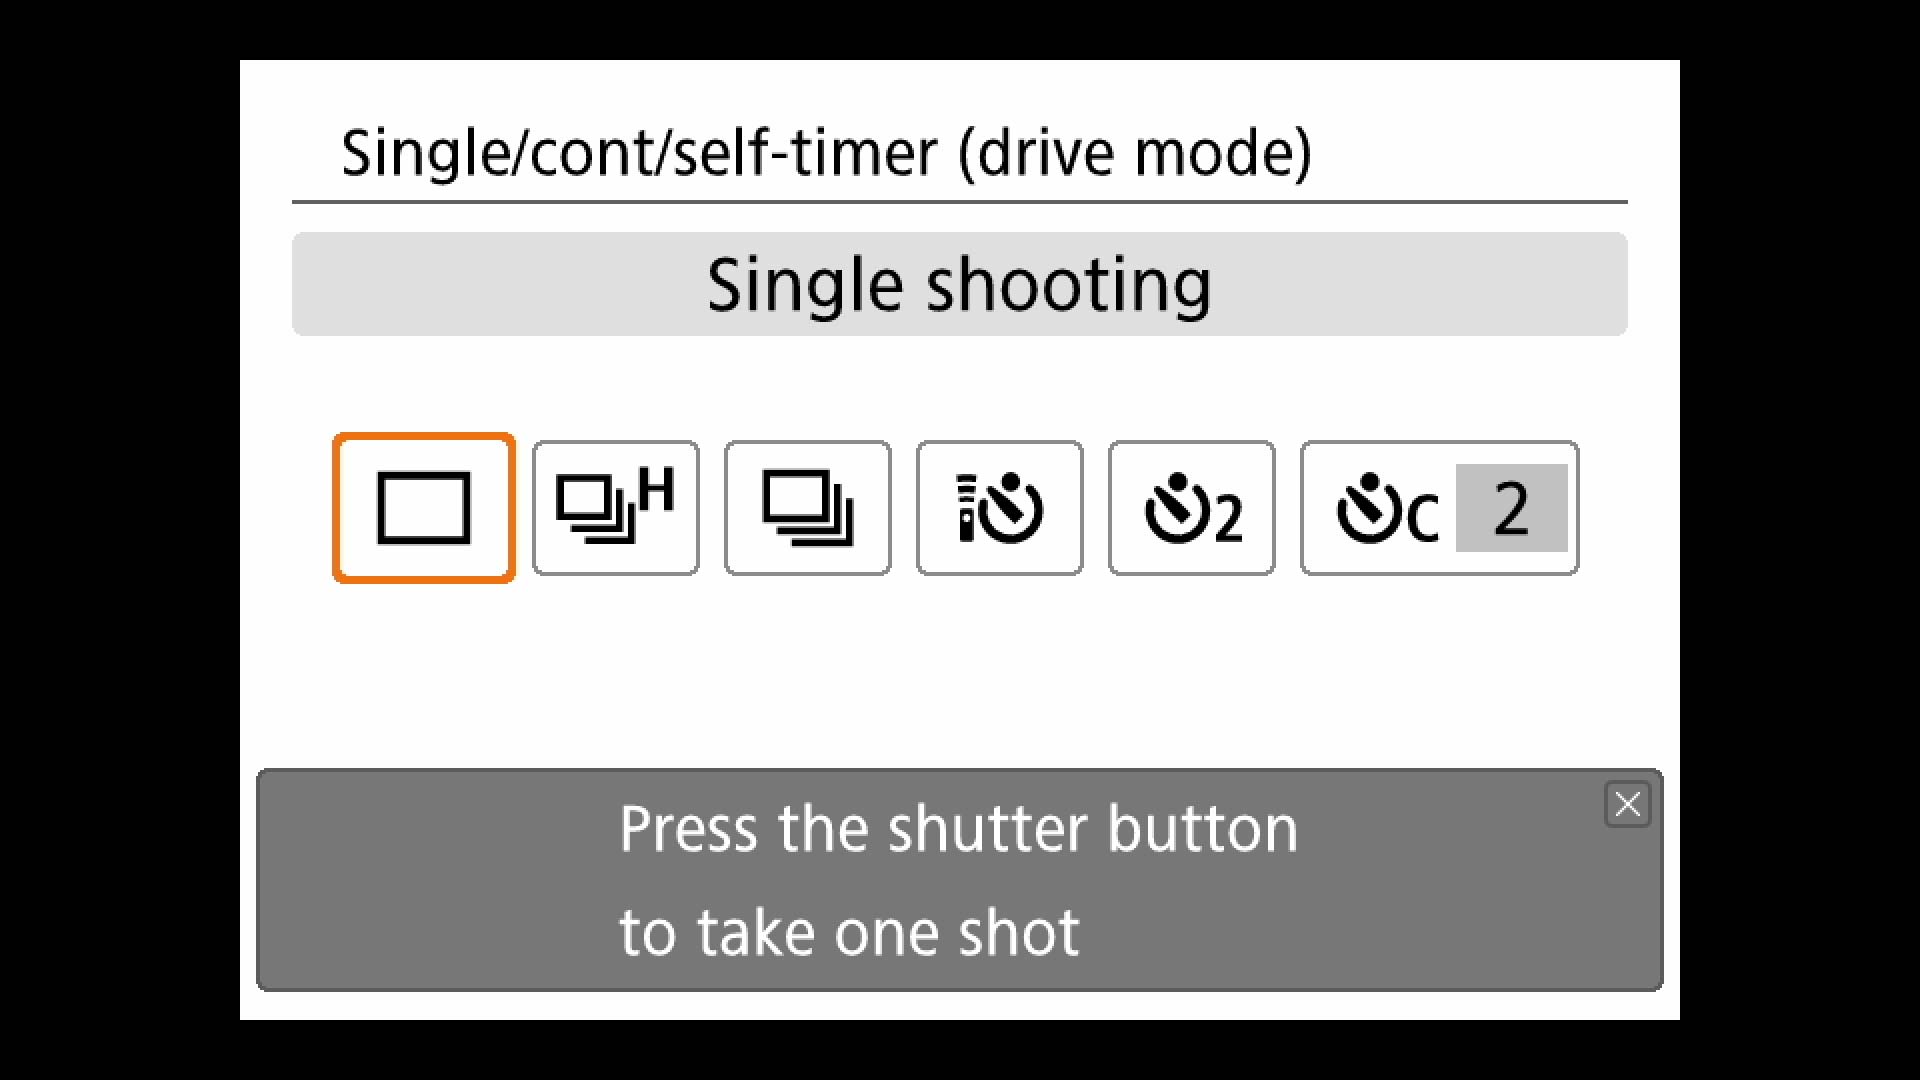
Press the Q button to turn off the flash if you’re in a museum or other setting where flash is prohibited. Set the camera to single shot if you want to save space on your SD card.
Intermediate:
1. Set the mode dial to Av (aperture priority).
2. Use the main dial to set the f-stop (aperture). Set a low f-stop number to create a shallow depth of field (the distance over which the image appears sharp). With the kit lens, the lowest f-stop number you can choose ranges between f/4.5-5.6 (f/4.5 in wide angle; f/5.6 in telephoto). This won’t blur the background as much as a lens with an f/2.8 aperture, but it will still soften the area in front of and behind your subject.
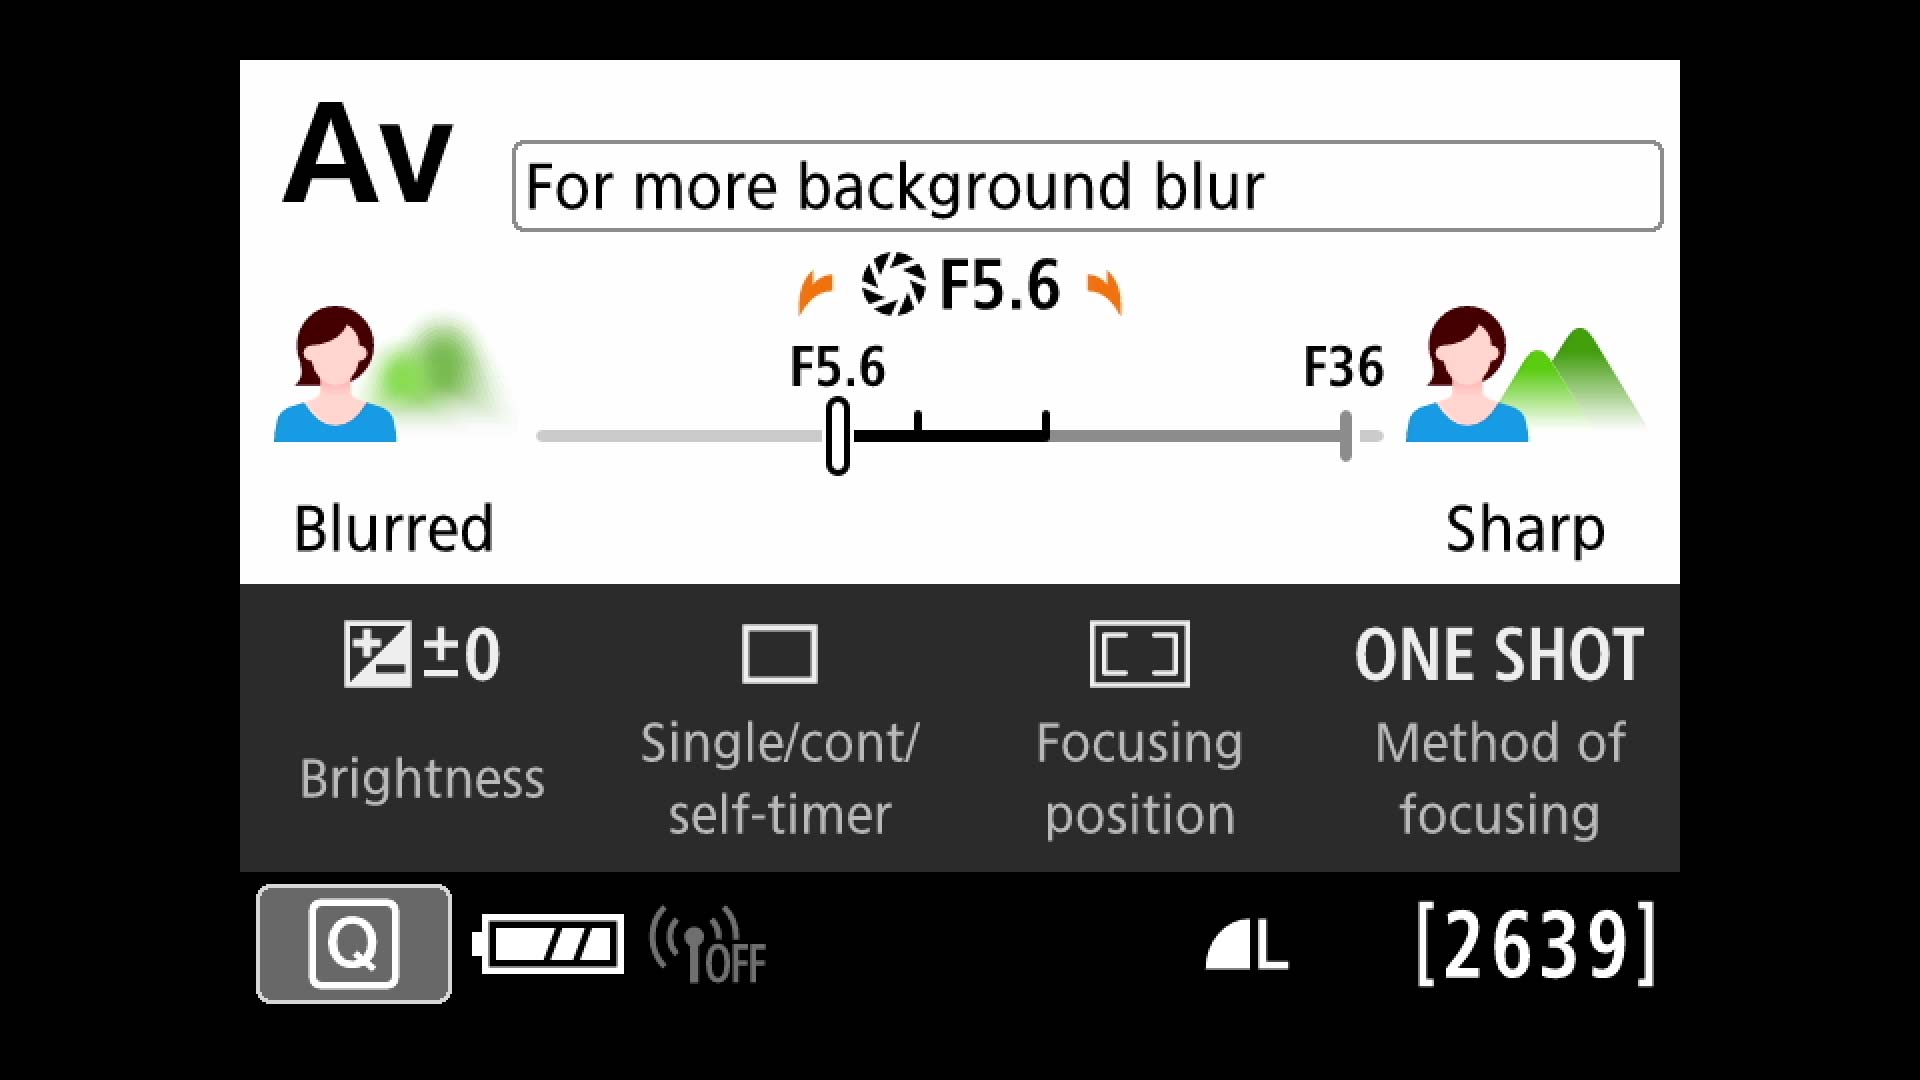
3. Make sure the shutter speed is fast enough (at least 1/80th econd) so that you can hold the camera in your hand, and not worry about the picture being blurry. If not, increase the ISO using the button in front of the mode dial until you obtain a faster shutter speed. If the exposure is too light or too dark, press the Q button, select Brightness (exposure compensation). Rotate the Main Dial to the right to make the picture brighter; to the left to make it darker.
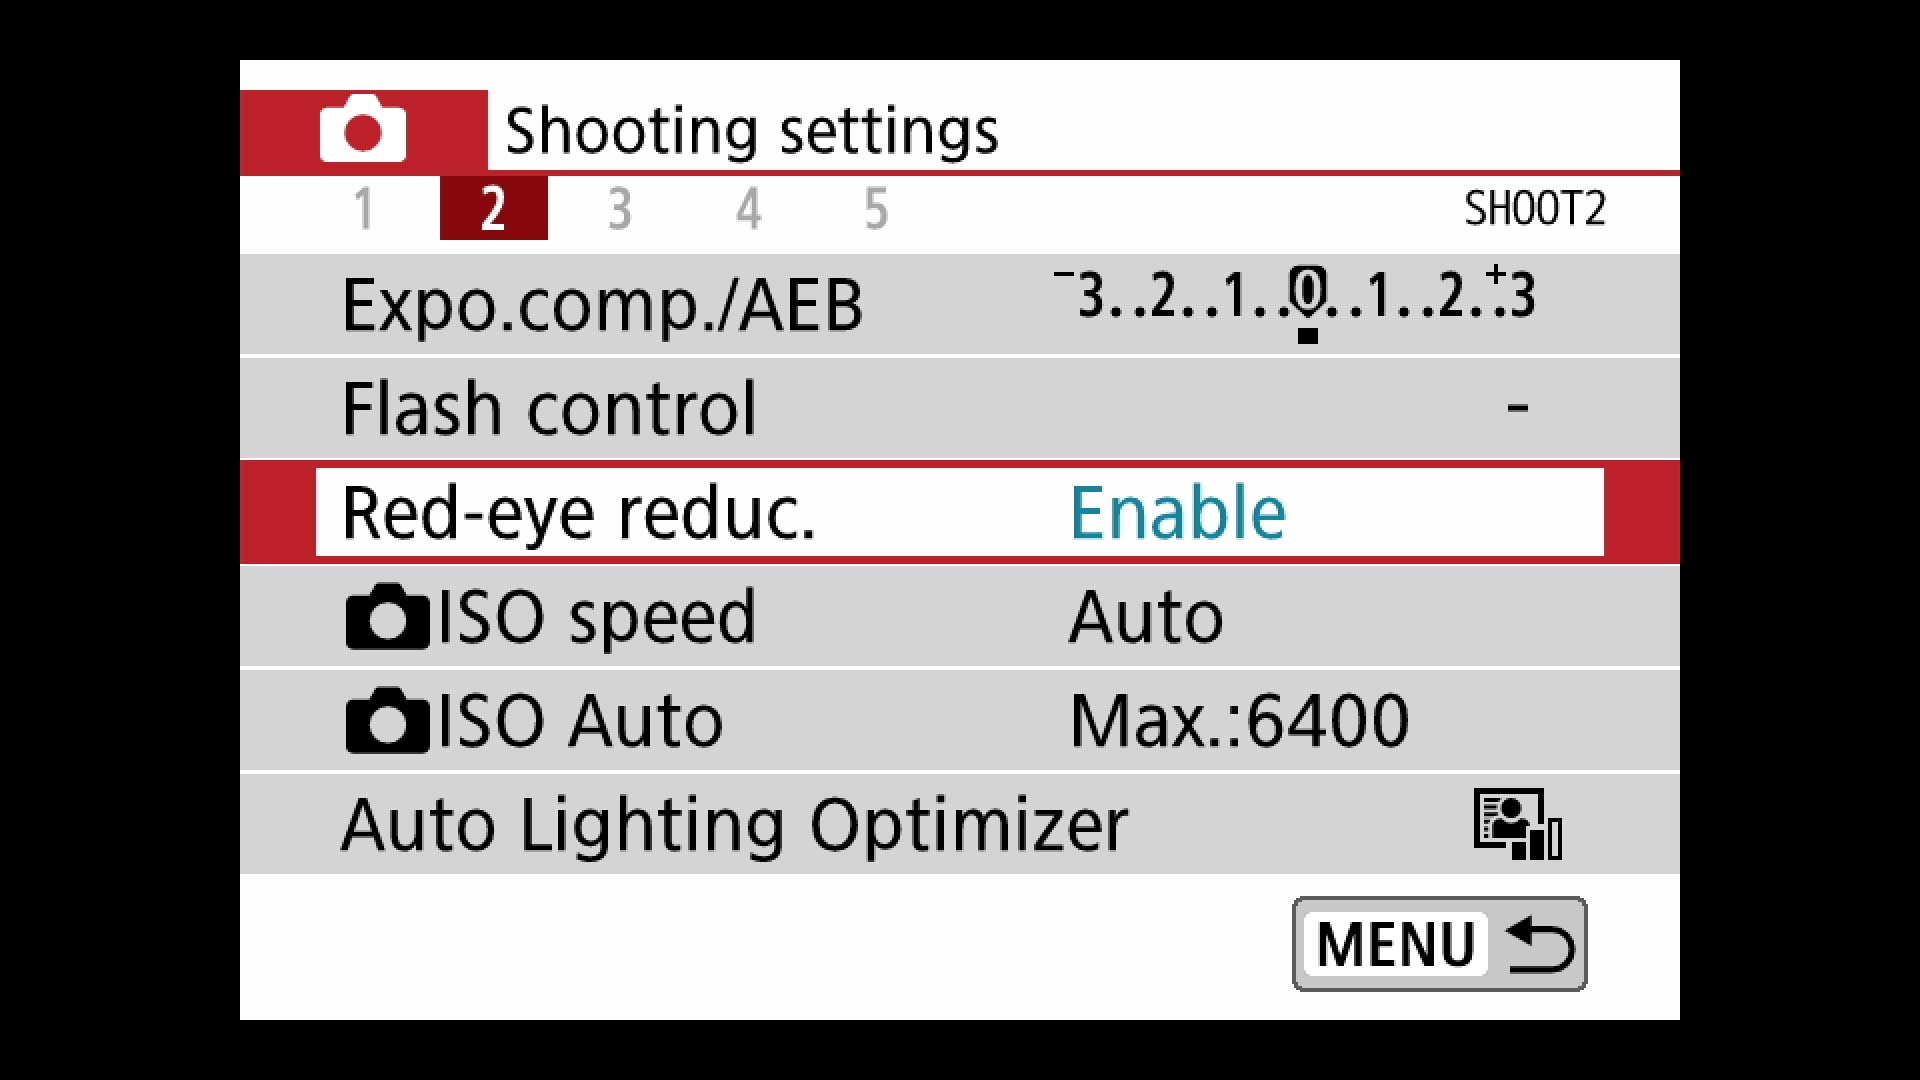
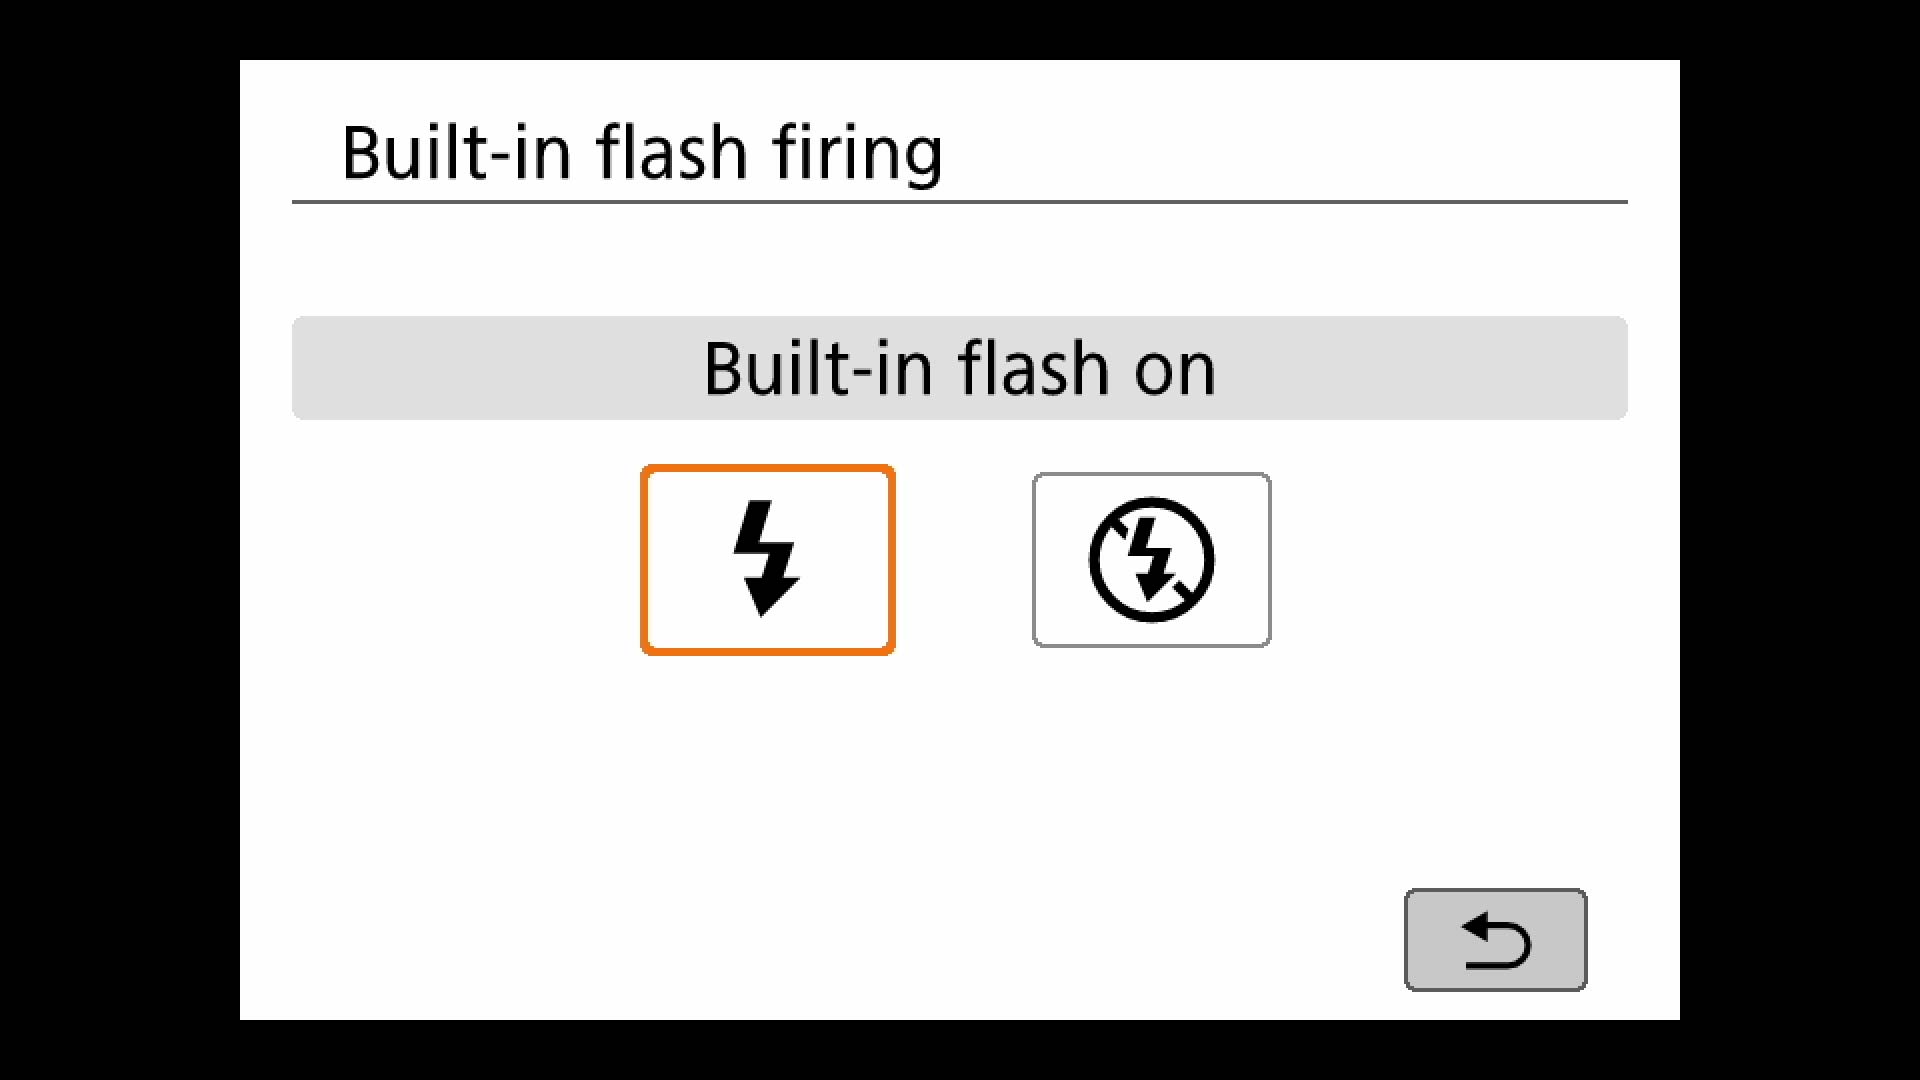
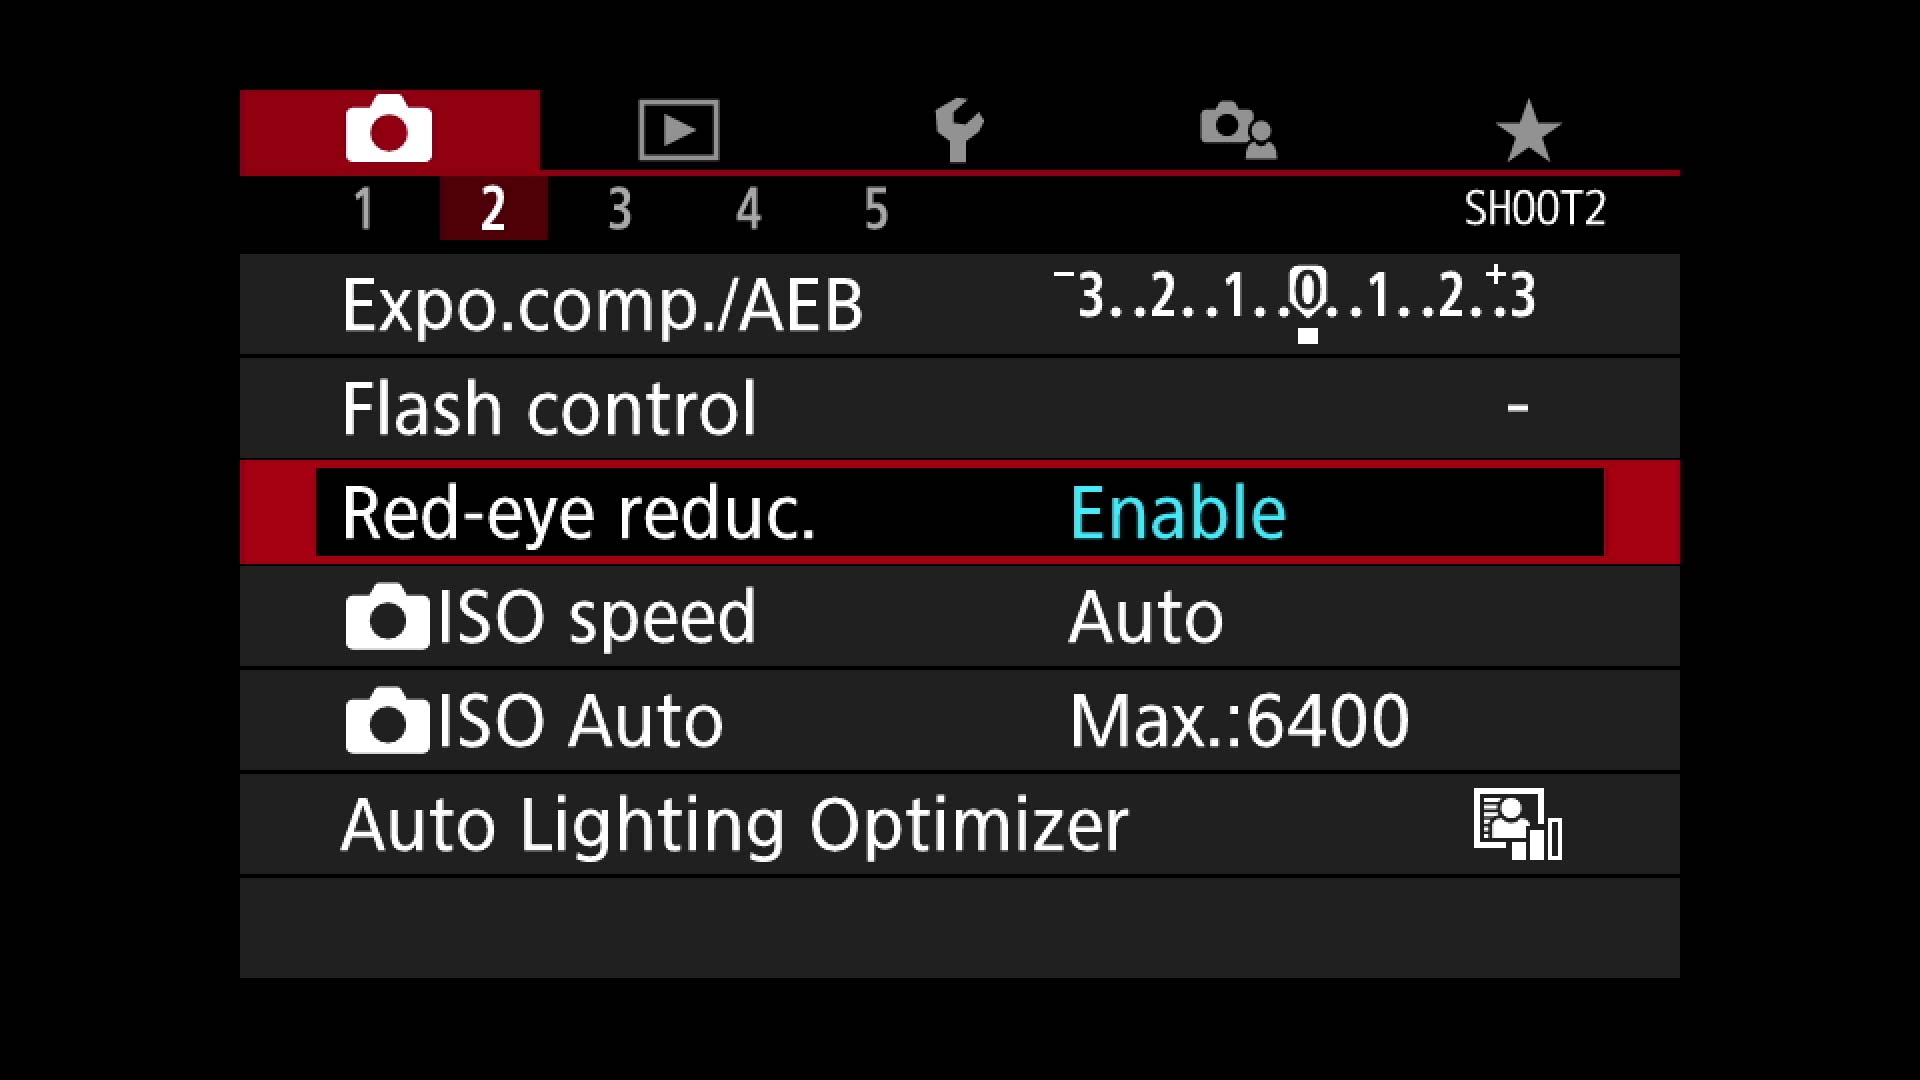
4. Enable red-eye reduction if you’re using flash: Menu>Shooting Menu 2. Also, see the Flash section in this article to learn how to adjust flash intensity via Flash Exposure Compensation if your subject is overexposed or underexposed.
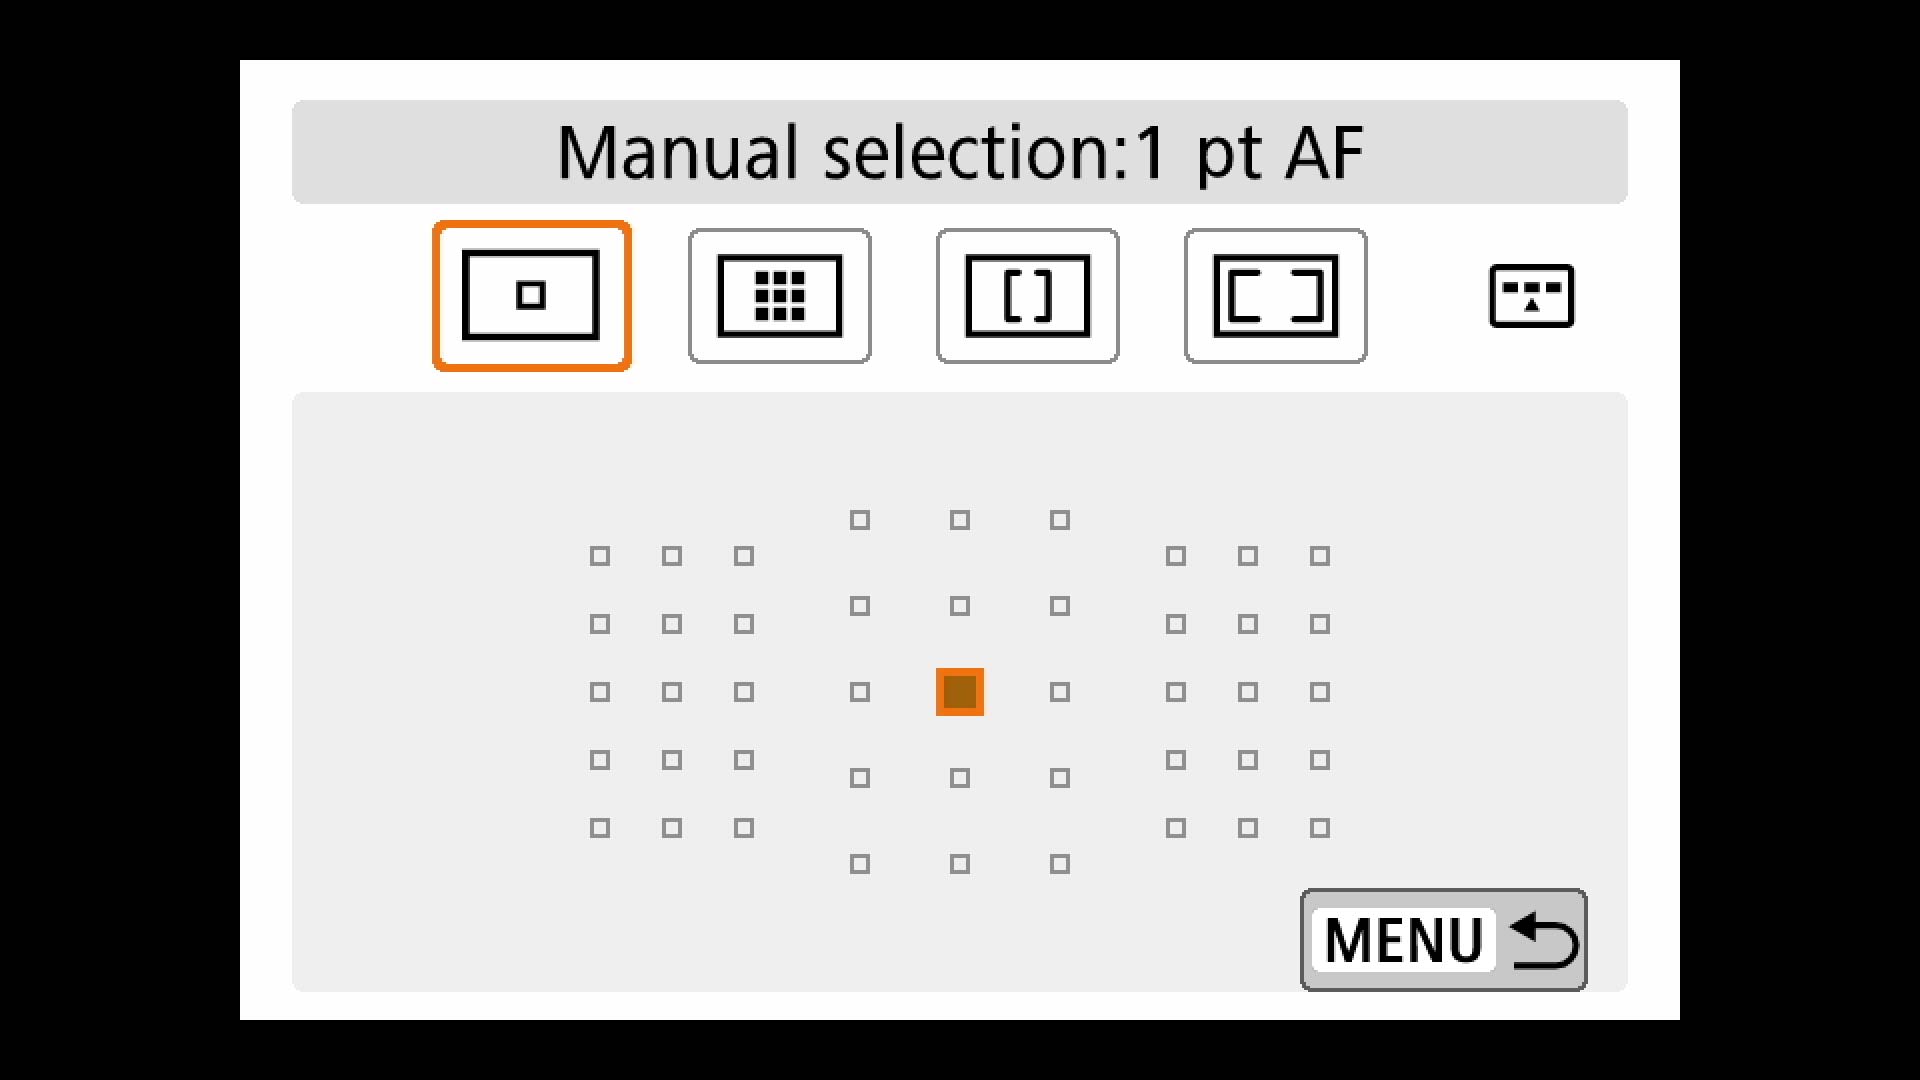
5. Press the Q button and set Focusing Position to Manual 1 pt. When you’re ready to shoot, press the focus point selection button (forward of the Mode dial) and use the main dial or cross keys on the 4-way controller to position the AF focus point over your subject’s eye (the one closest to the camera).
6. To check the depth of field, press the Depth of Field Preview button on the front of the camera.
Landscape Photos
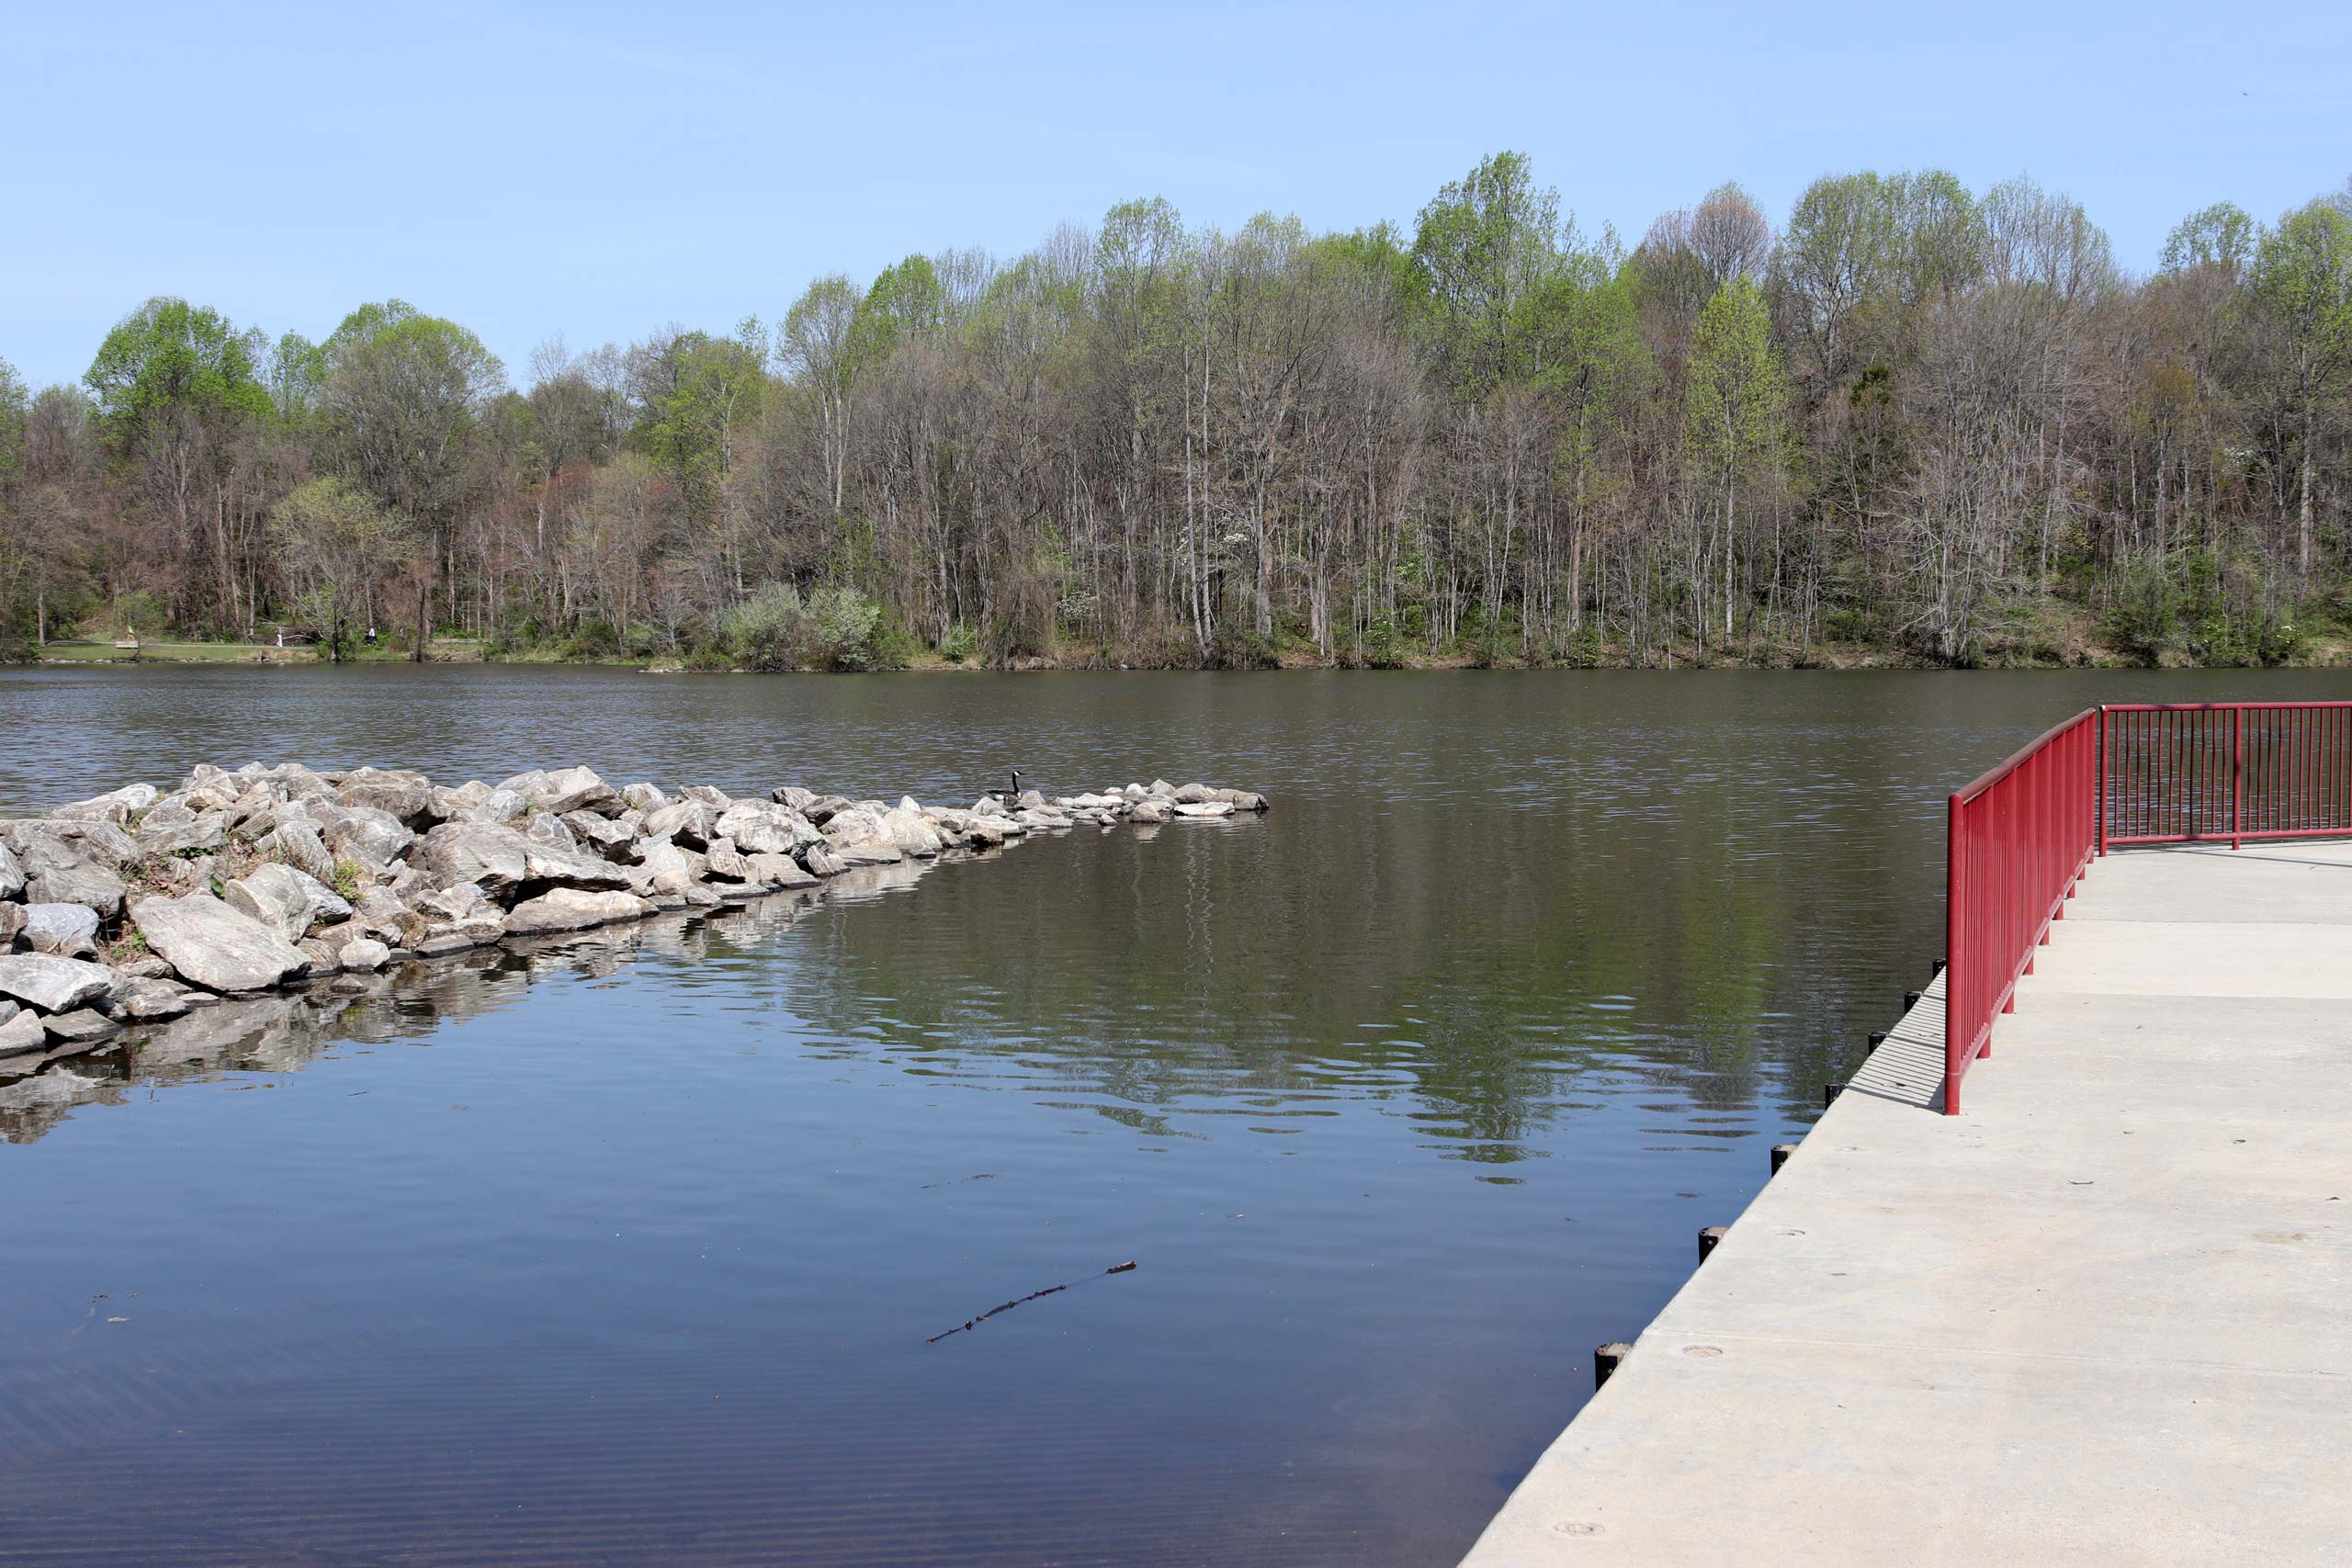
Wide-angle lenses work best for natural vistas and even cityscapes. In general, you also want to get as much of the image to appear sharp (broad depth of field). Bright, sunny days are best for colorful landscapes but don’t ignore misty and foggy conditions — you can capture beautiful, moody images when the weather is overcast.
MORE: How to Take Great Landscape Photos
Easy:
1. Set the Mode Dial to Landscape (the icon looks like two mountains and a cloud; it’s next to the Portrait icon).
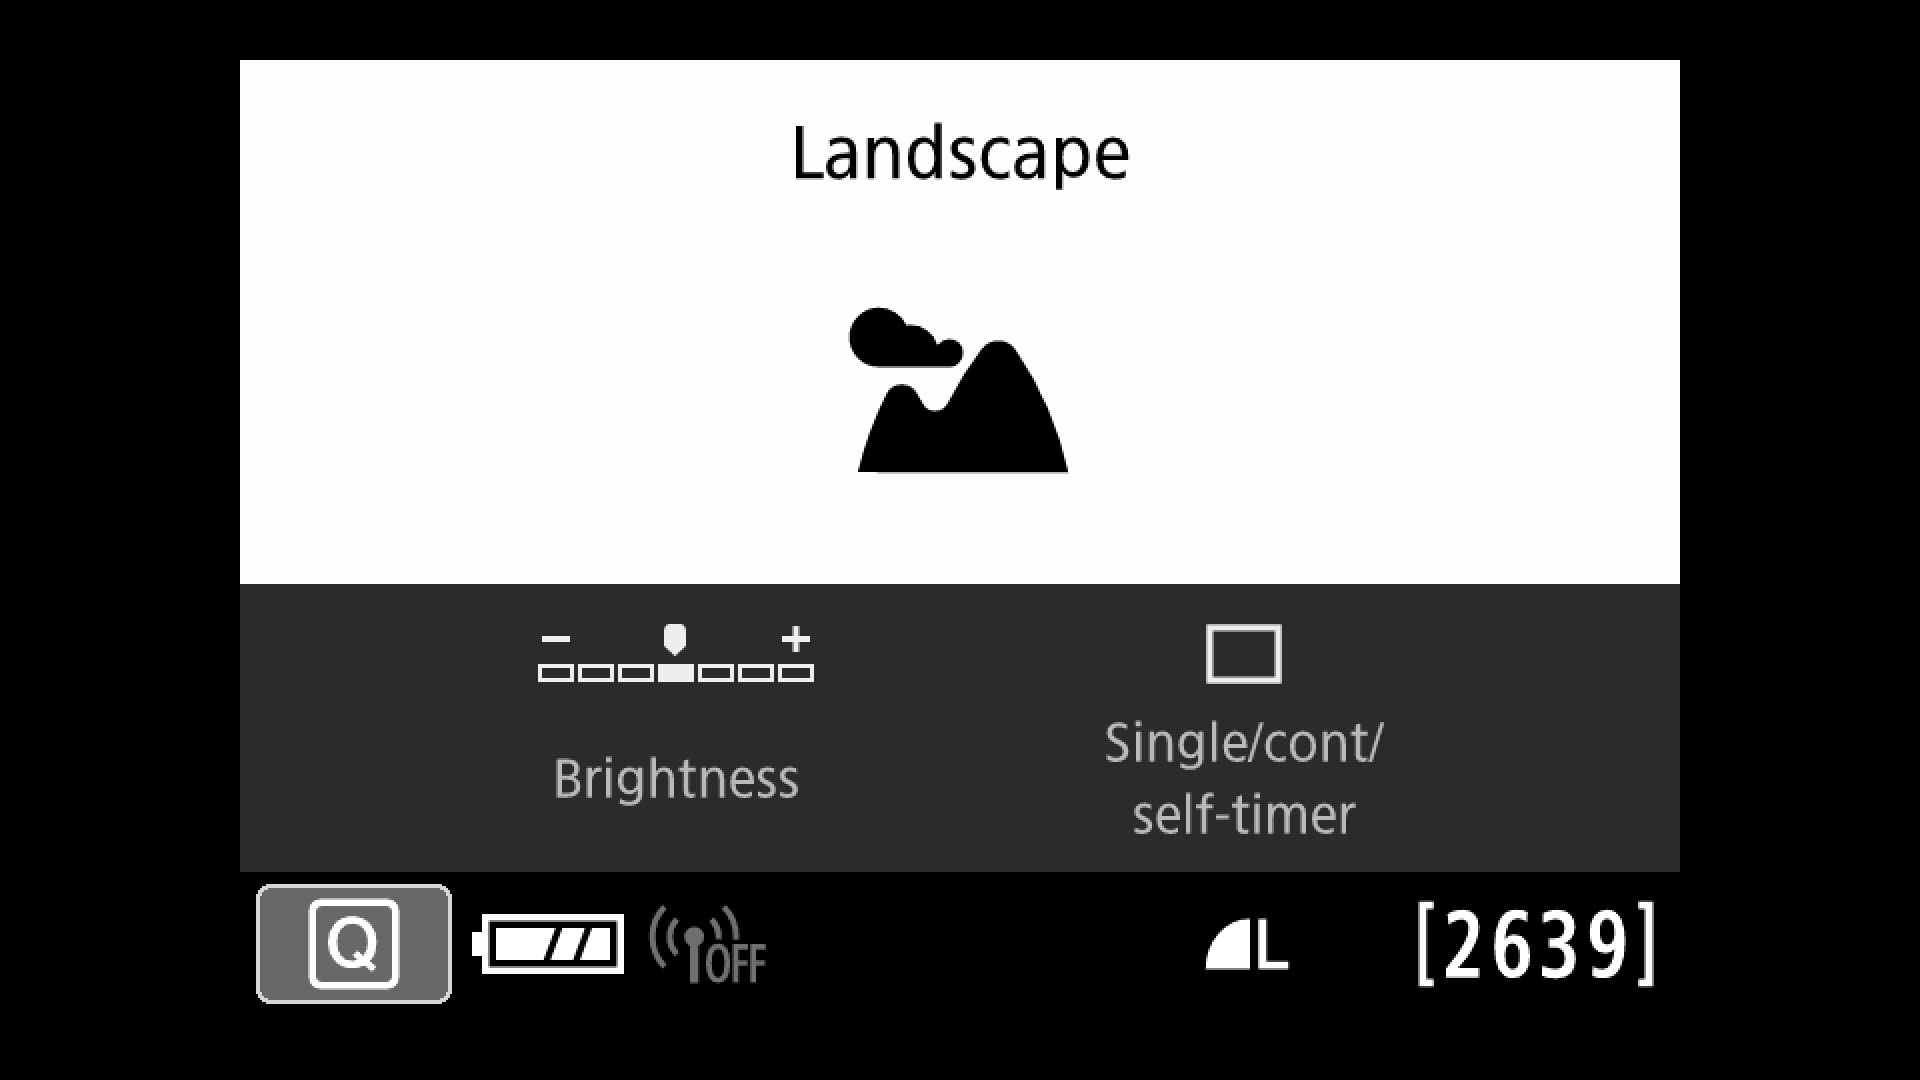
2. This setting delivers a broad depth of field (the image appears sharp from near to far) and it intensifies blues and greens.
3. Zoom out to the widest setting on your lens (18mm for most kit lenses), focus and shoot!
Intermediate:
1. Set the Mode Dial to Av (aperture priority). Use the Main Dial to set the aperture to a high value (f/8 or higher) for a broader depth of field.
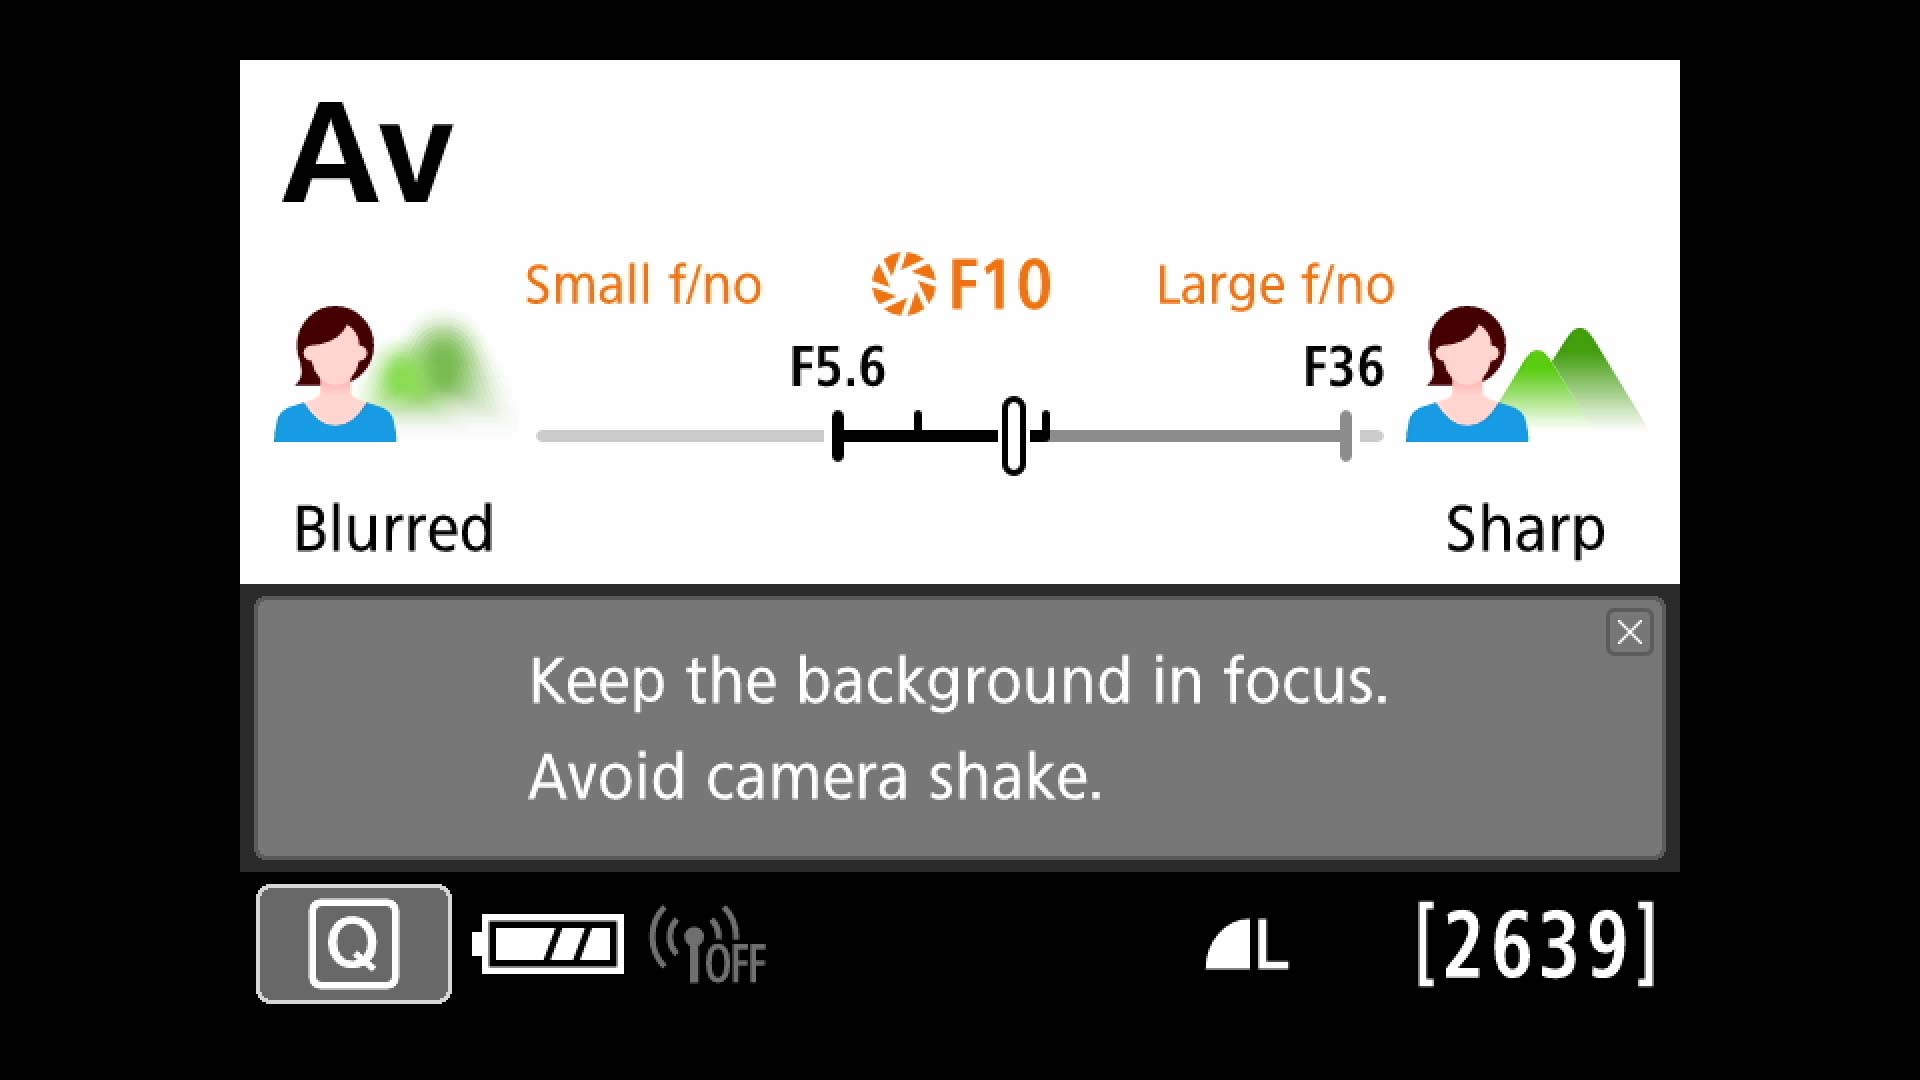
2. Check the shutter speed. If it’s too slow to hold the camera (typically, less than 1/60th second) and you don’t have a tripod, lower the aperture number or increase the ISO until the shutter speed increases.
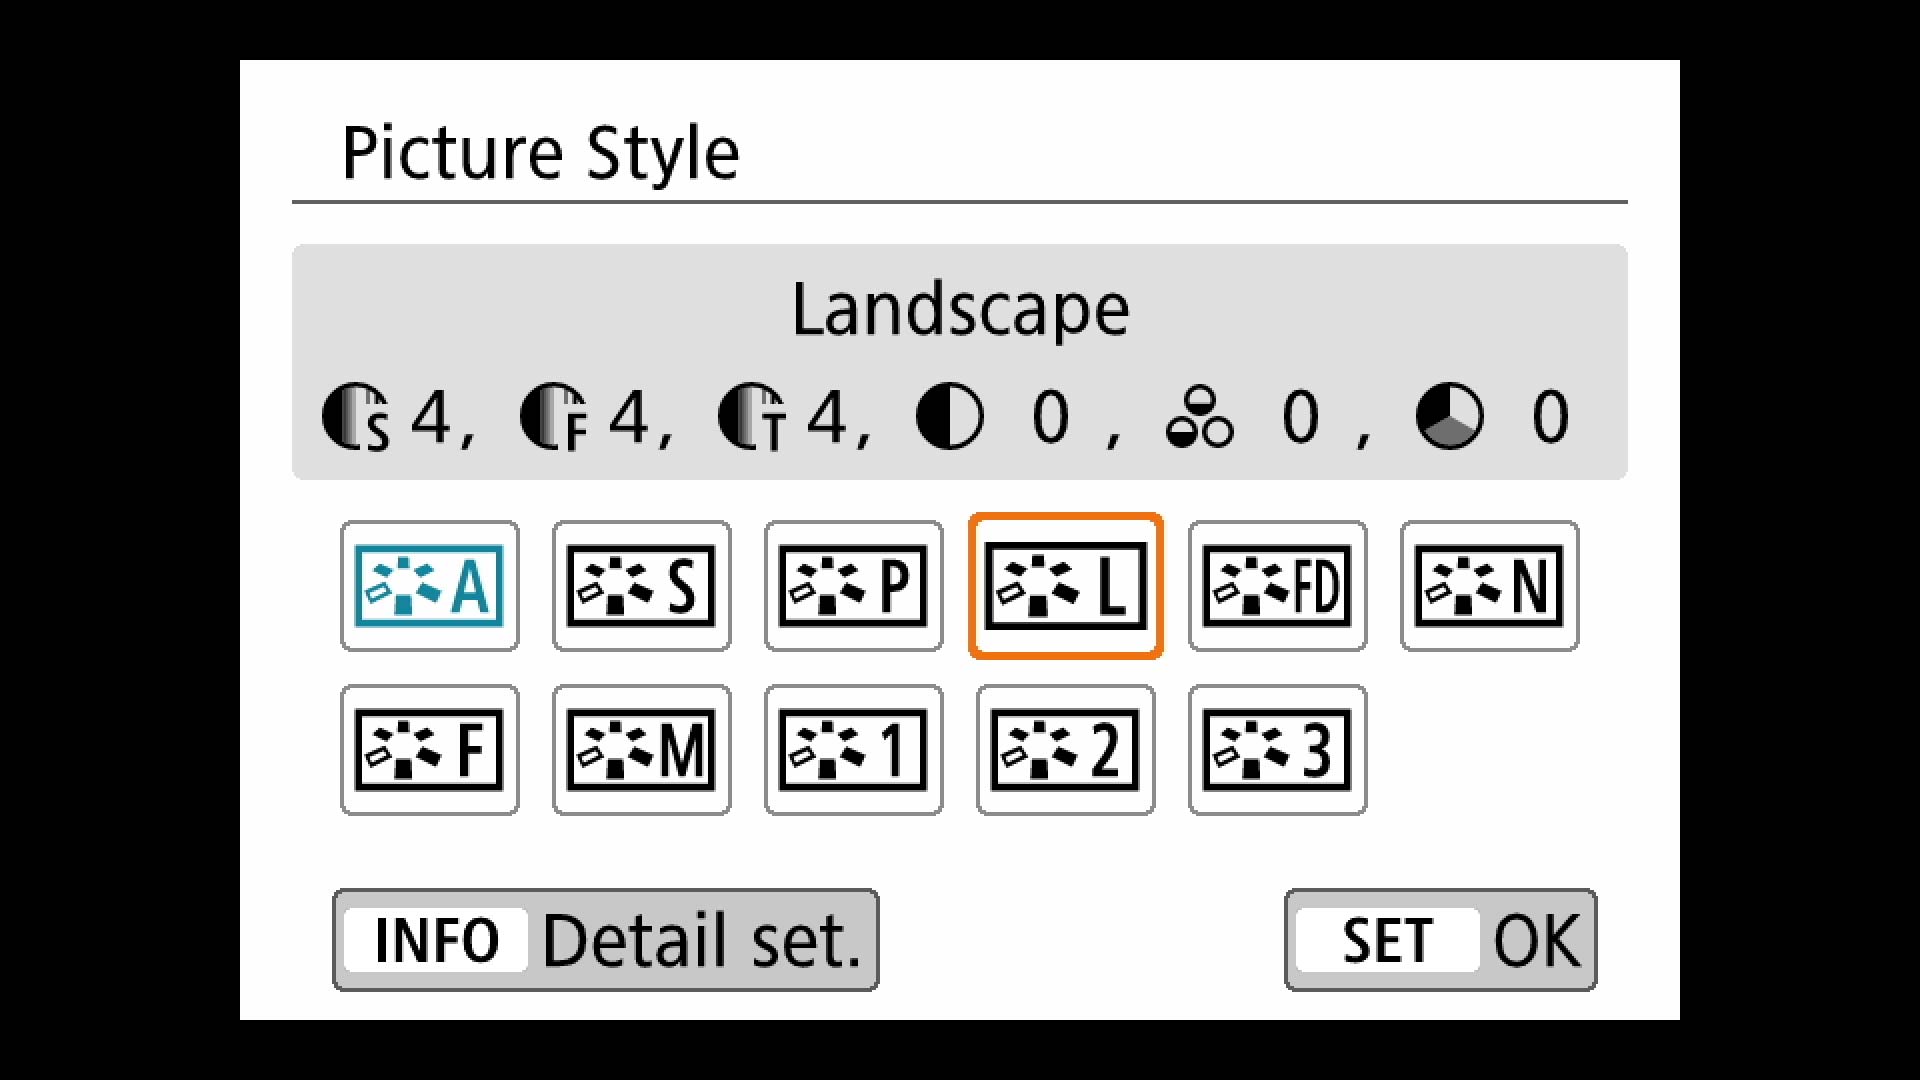
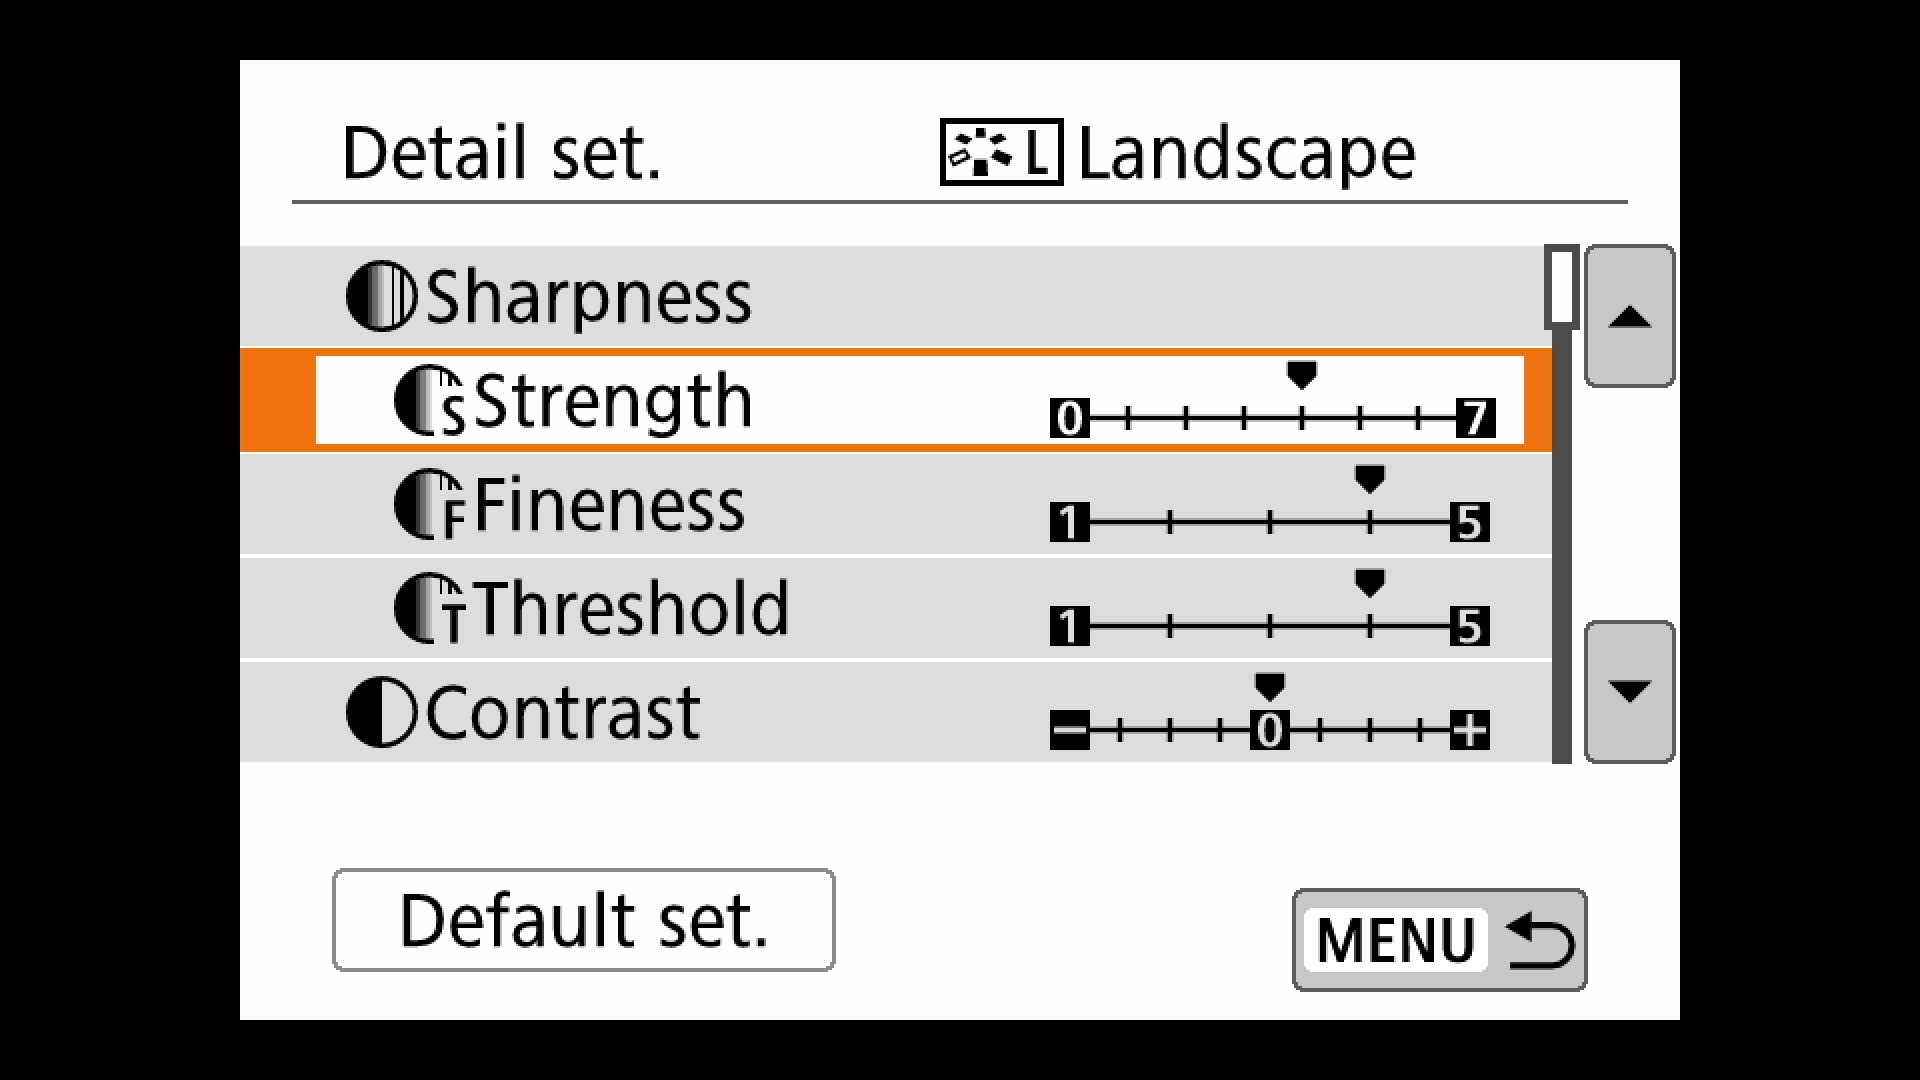
3. Press the down cross key on the 4-way controller on the back of the camera. Select the L (Landscape) Picture Style. To further customize the style, adjust sharpness, saturation, contrast and other parameters by tapping Info/Detail Set in the lower left corner of the LCD.
Nighttime/Low Light Photos
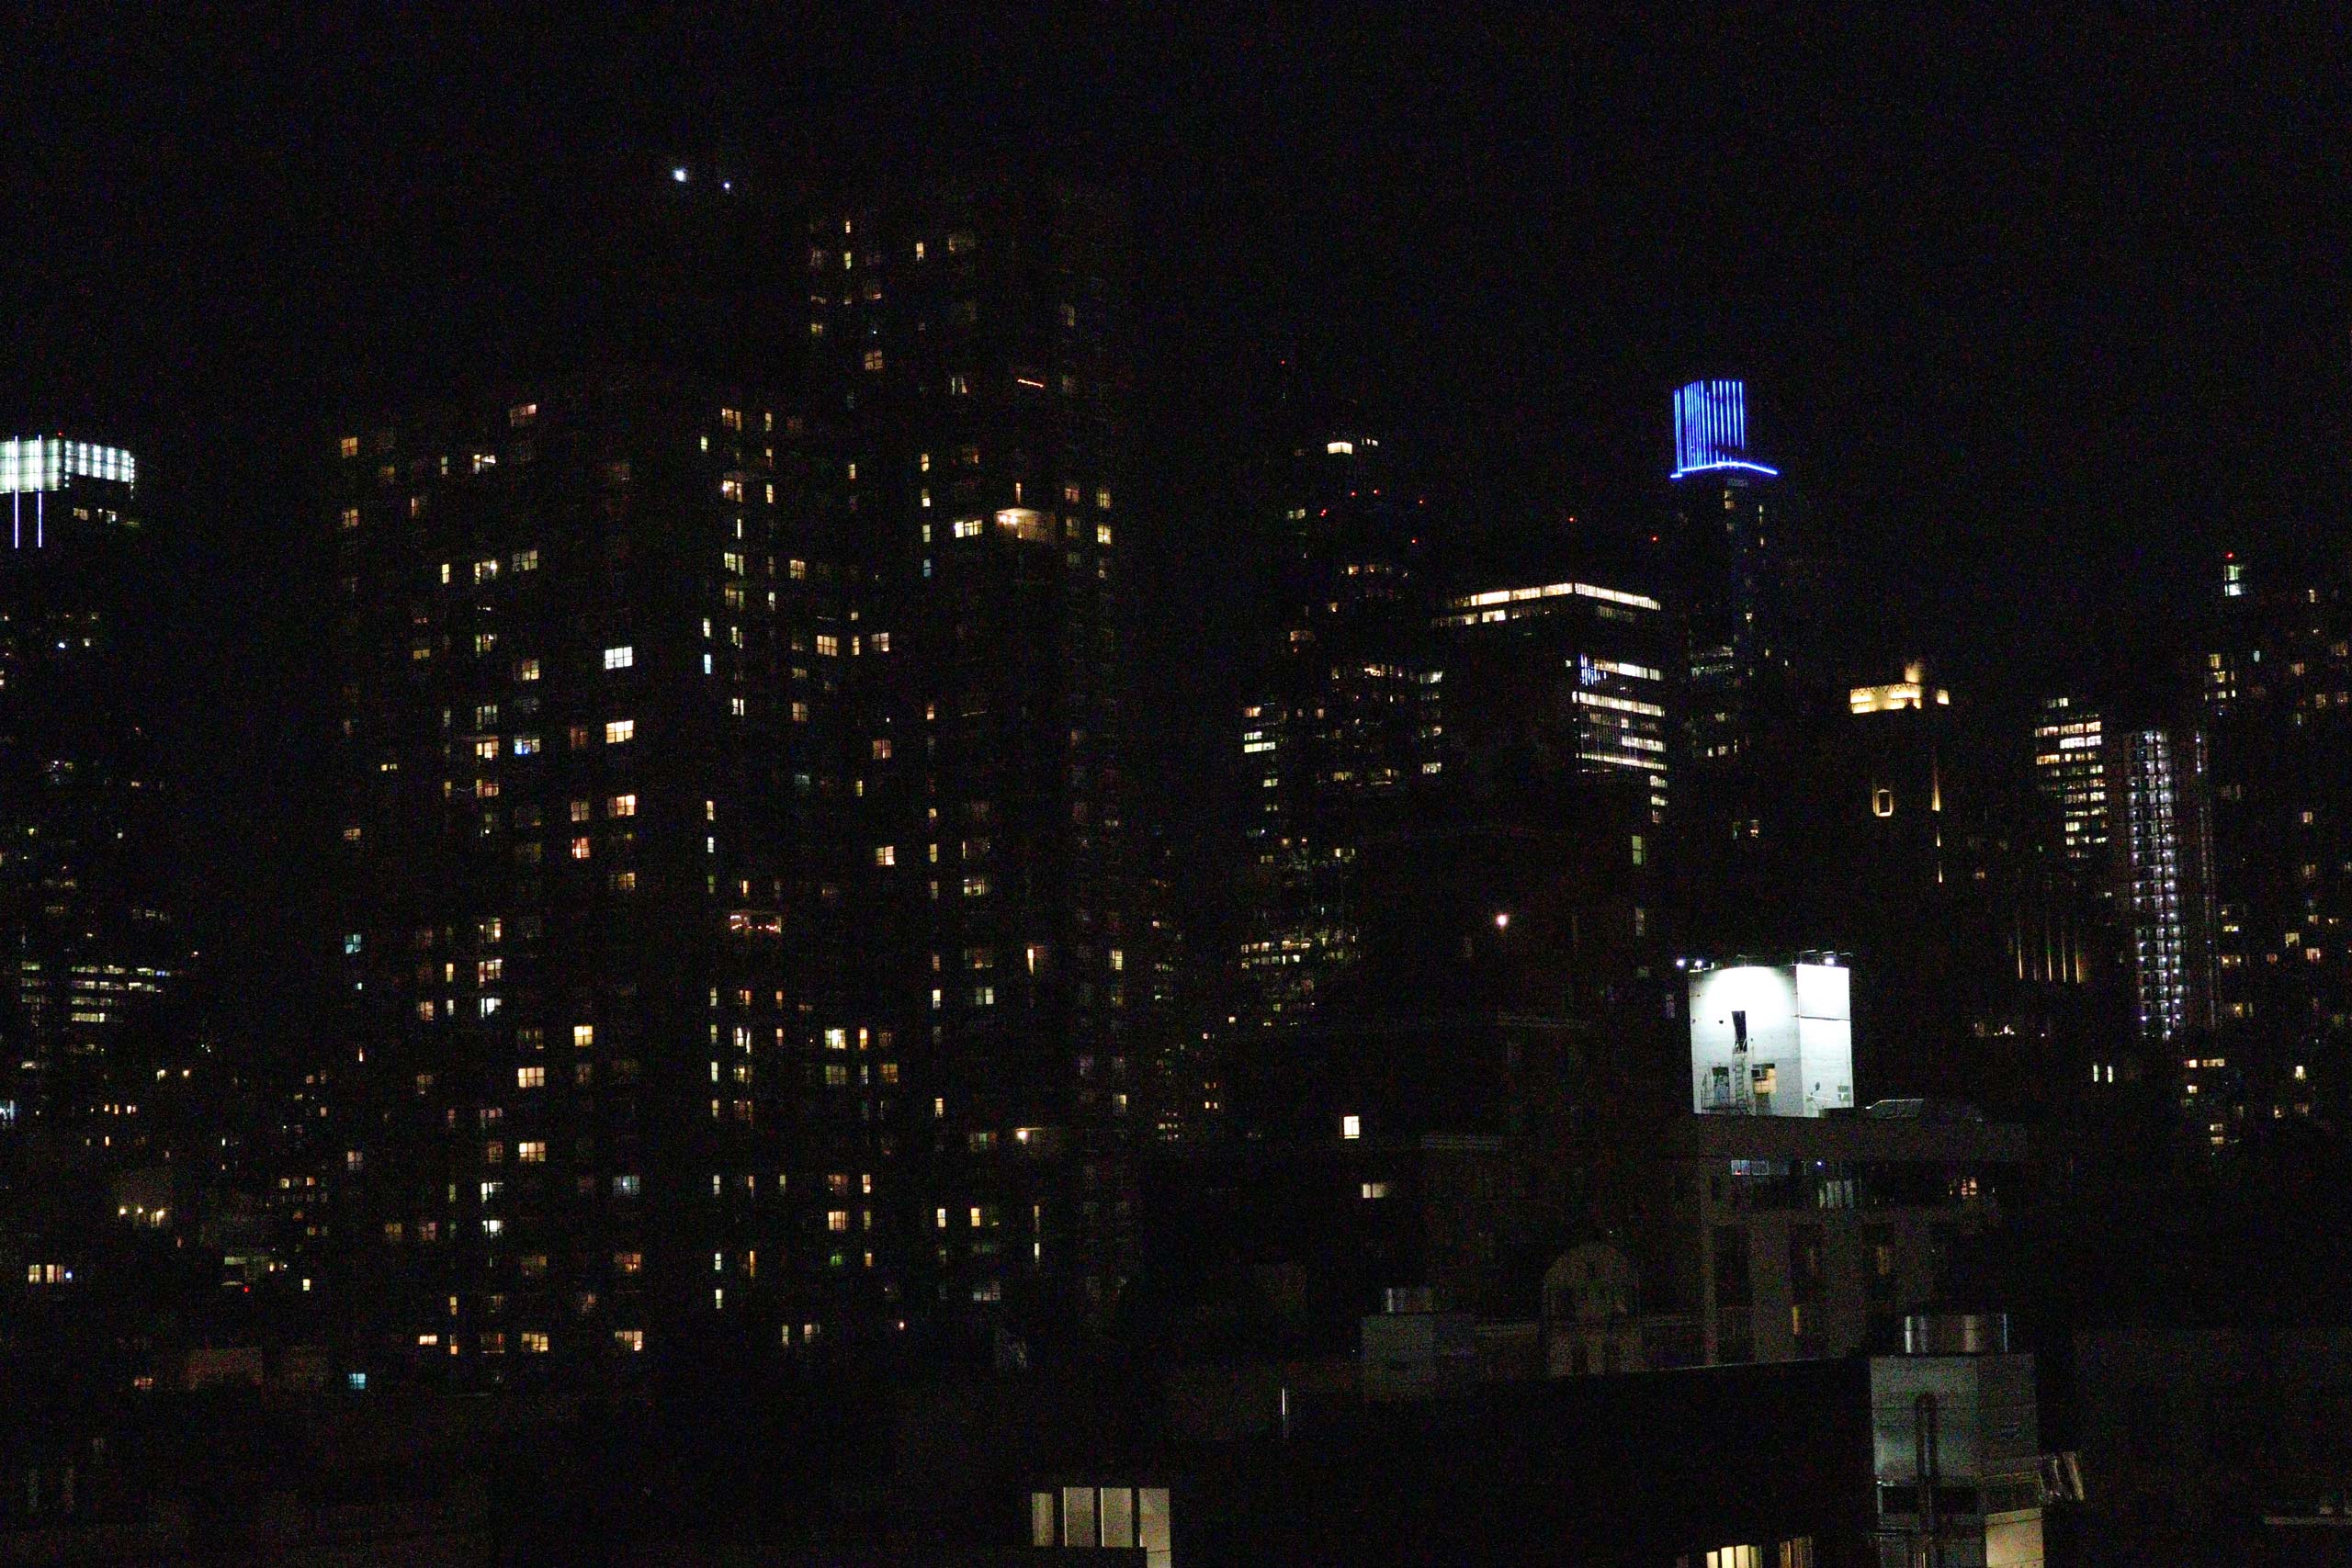
Nighttime photography may take a little juggling between shutter speed and ISO settings. A tripod or a very stable mount for your camera opens up a world of options, as you’ll be able to take advantage of slow shutter speeds for beautiful long exposures, with streaks of light.
Easy:
1. Turn the mode dial to the scene (SCN) mode. Scroll to Handheld Night Scene.
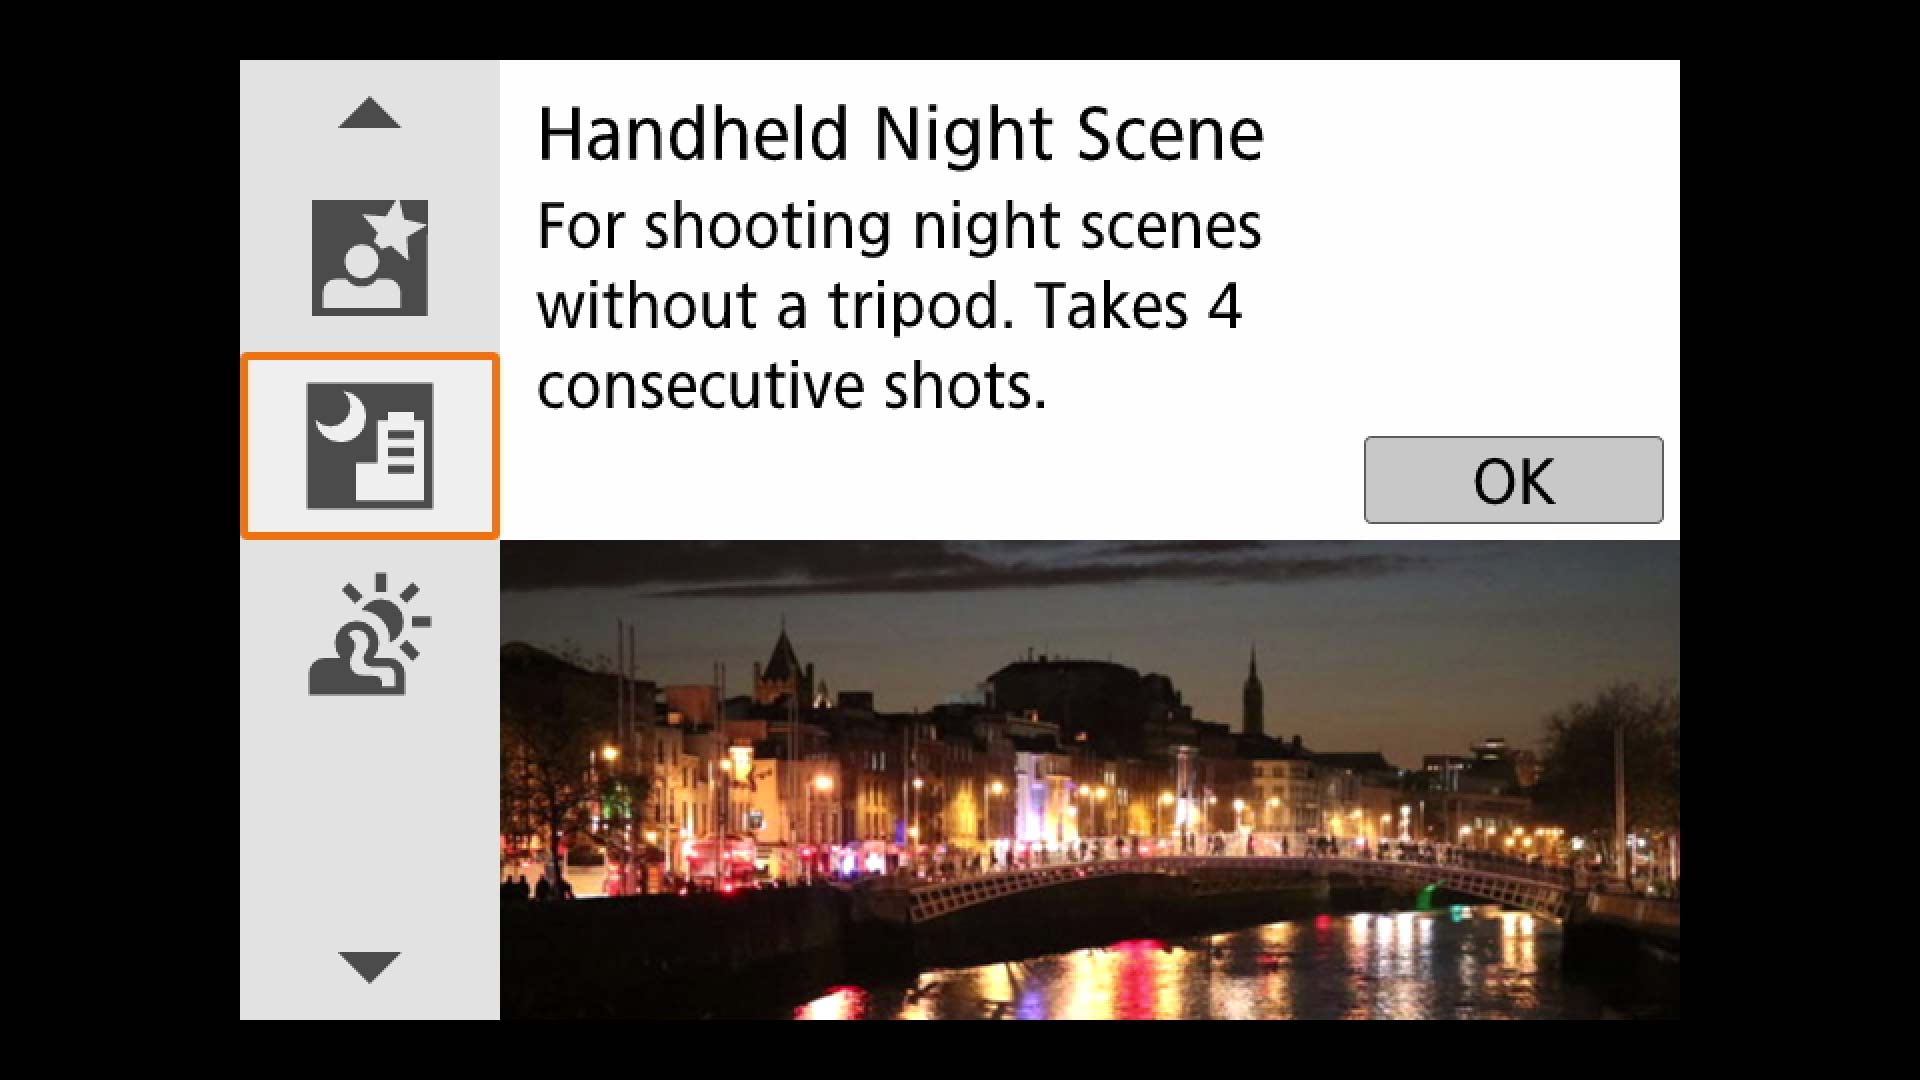
2. Hold the camera steady, press the shutter button halfway to lock the focus and gently squeeze the shutter button. Hold the button down until four images are captured. This option works best with static scenes/subjects, since the camera merges the four shots in the camera. If anything moves (including the camera), you may notice ghosting where the combined images don’t line up. The flash is set to off by default in this mode.
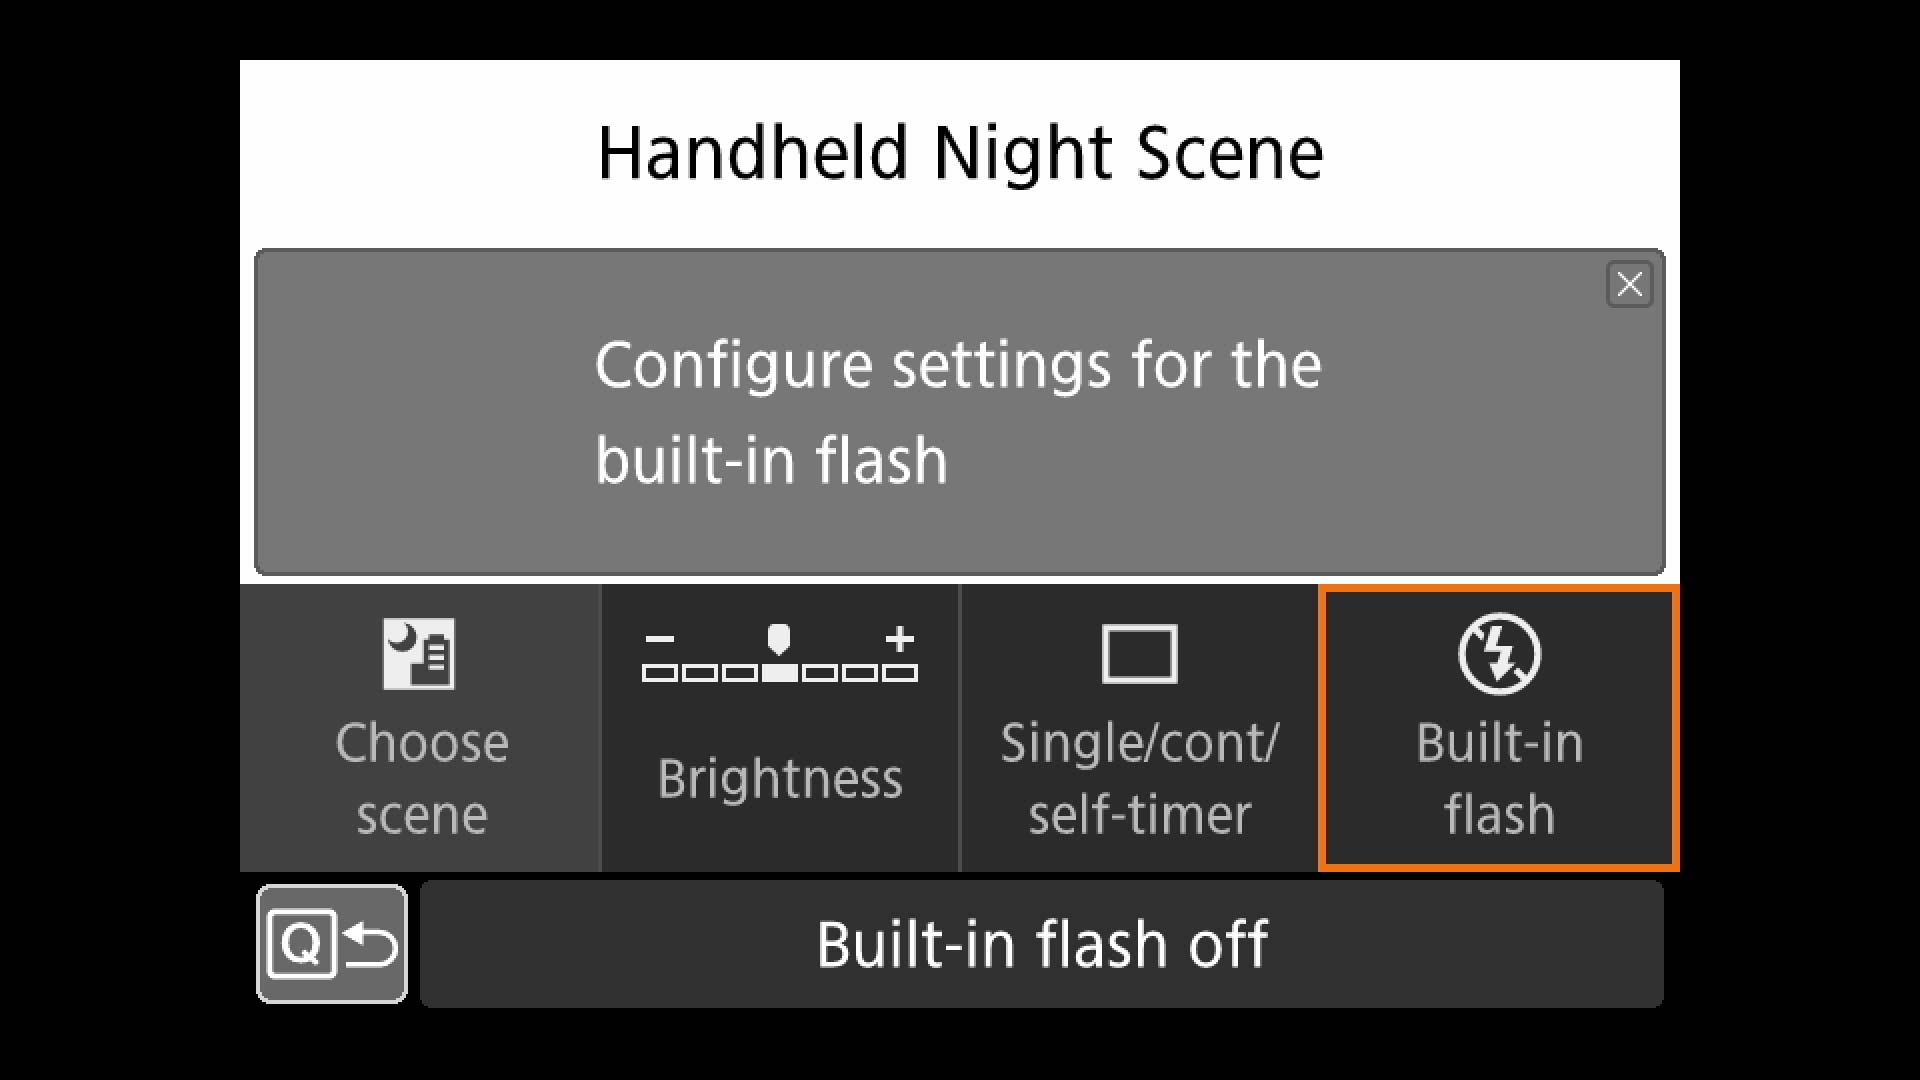
4. If there are people in your shot, ask them to stay very still until all four shots are captured. You can turn the flash on via the Q button — it will fire on the first shot only; your subject(s) need to stay still until the end of the four-shot sequence.
MORE: How to Photograph Fireworks
Intermediate: Long Exposure
1. Place the camera on a tripod or find a solid surface to rest the camera on.
2. Set the mode dial to Av (aperture priority). Set the aperture (f-stop) to a moderately high number (around f/8) to get a broader depth of field (more of the image appears in focus).
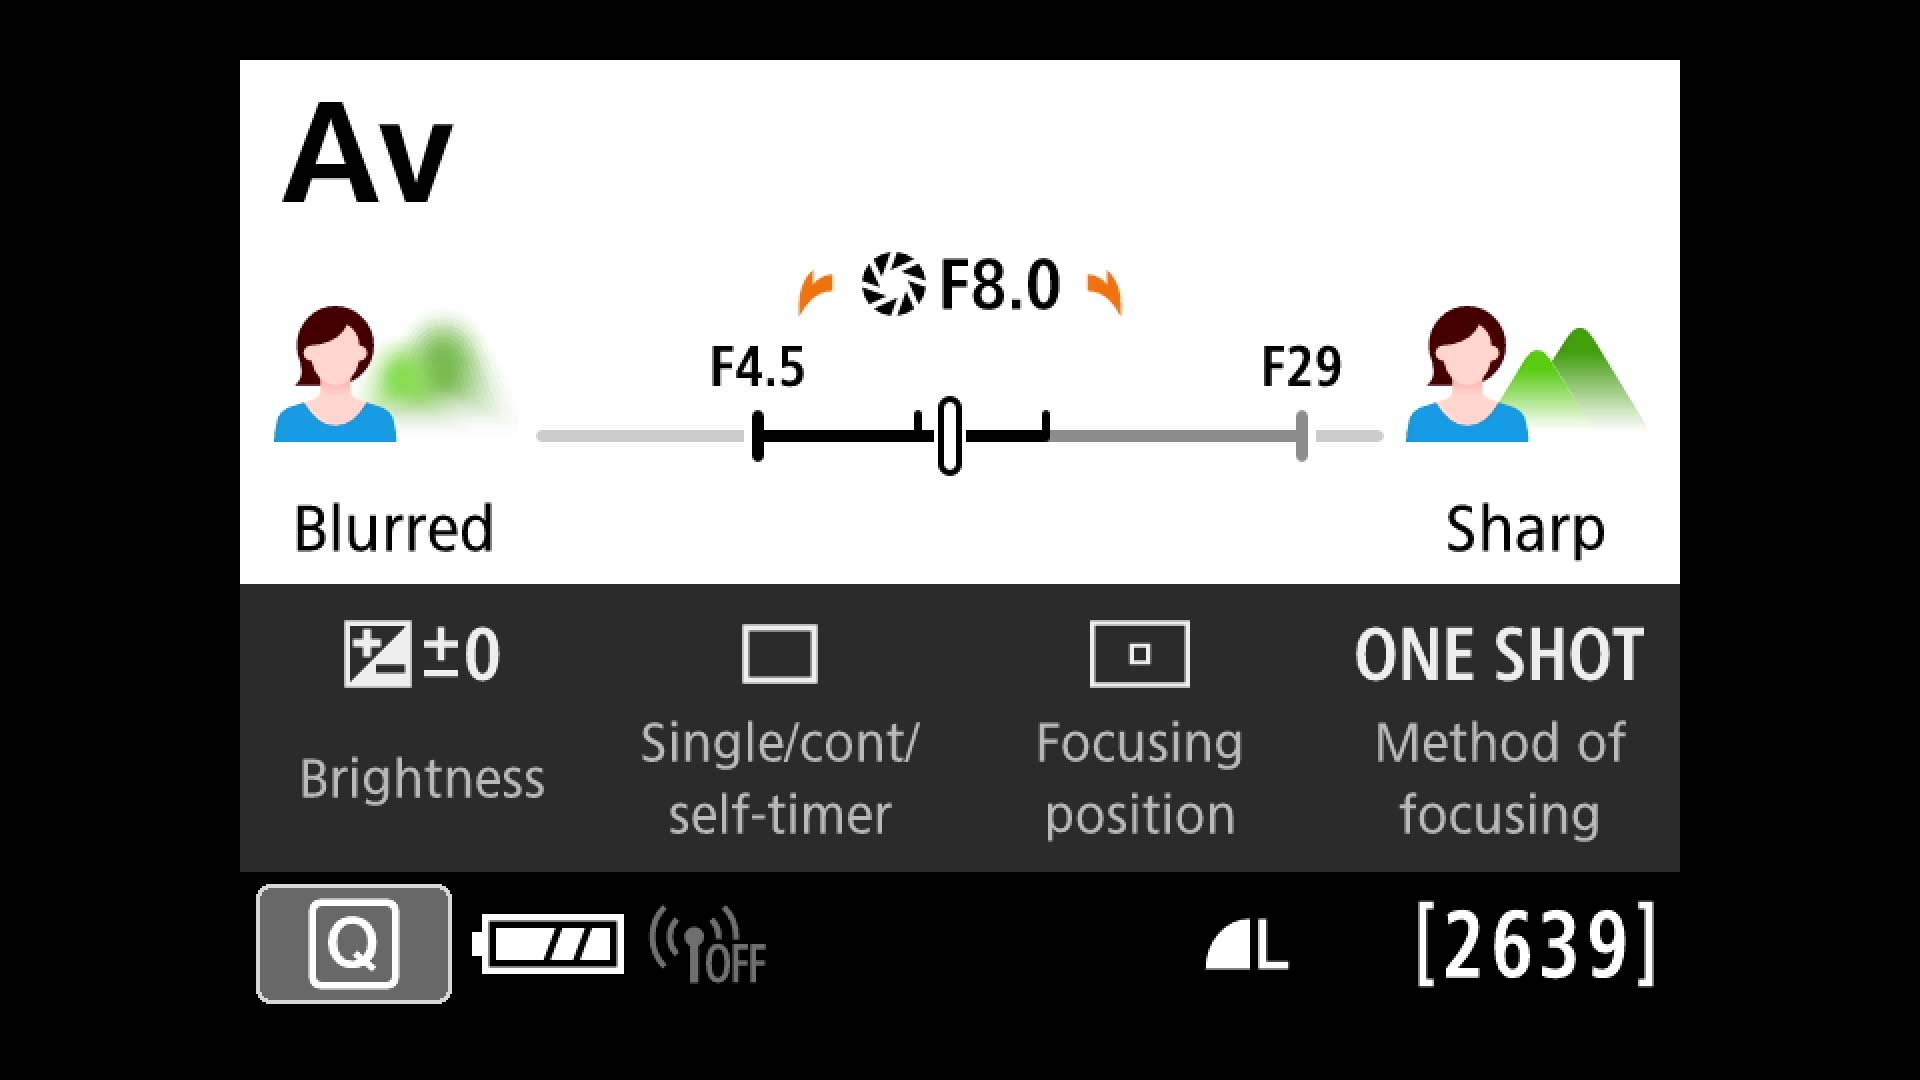
3. Set the ISO to between 100-400 to help minimize image noise (if possible). Check the corresponding shutter speed. If there are no moving subjects in your scene, the shutter speed can be as long as necessary. Alternatively, a long exposure — about 1/30thsecond or longer — creates a blur from moving objects such as car taillights for unusual and beautiful images.
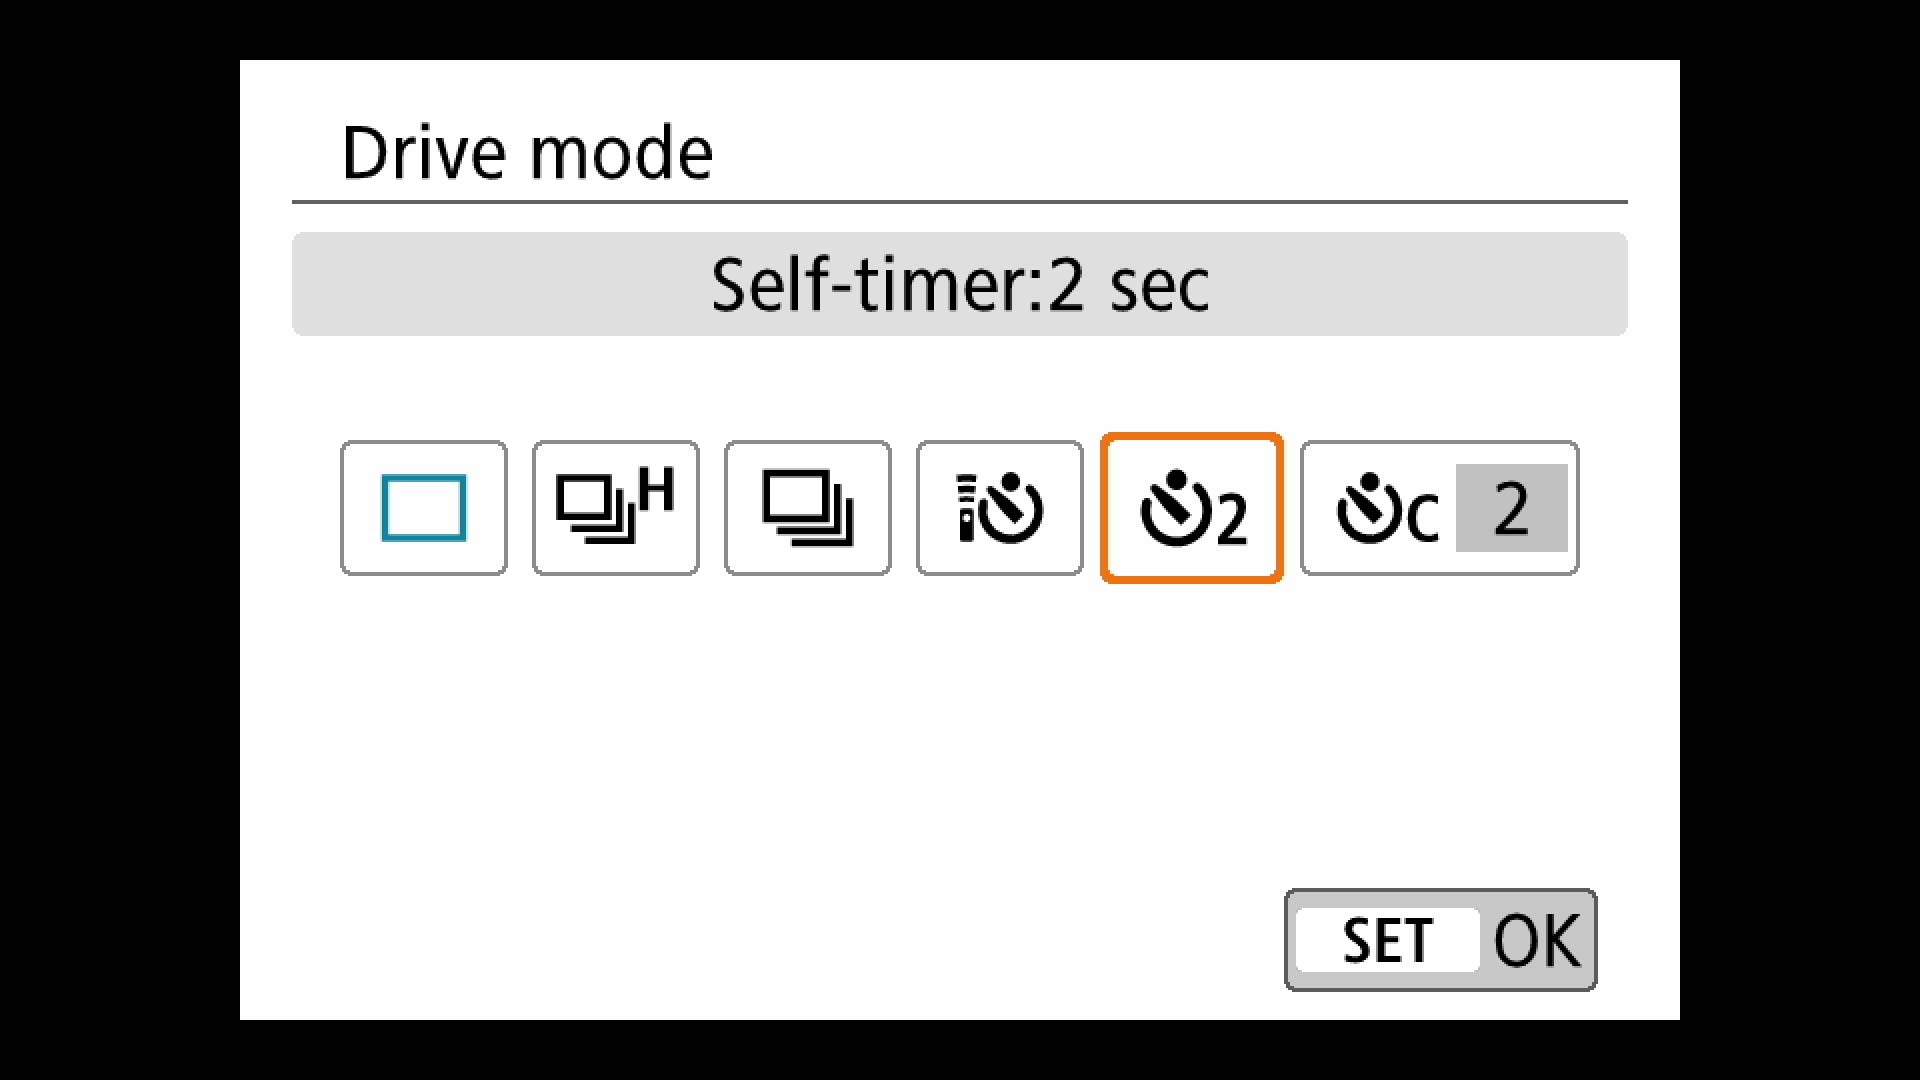
4. Use the self-timer to capture the image (there’s less chance of camera shake). Press the left arrow on the 4-way controller to open drive options.
5. Alternatively, use your smartphone and the Canon Camera Connect app or the optional remote control to trigger the shutter.
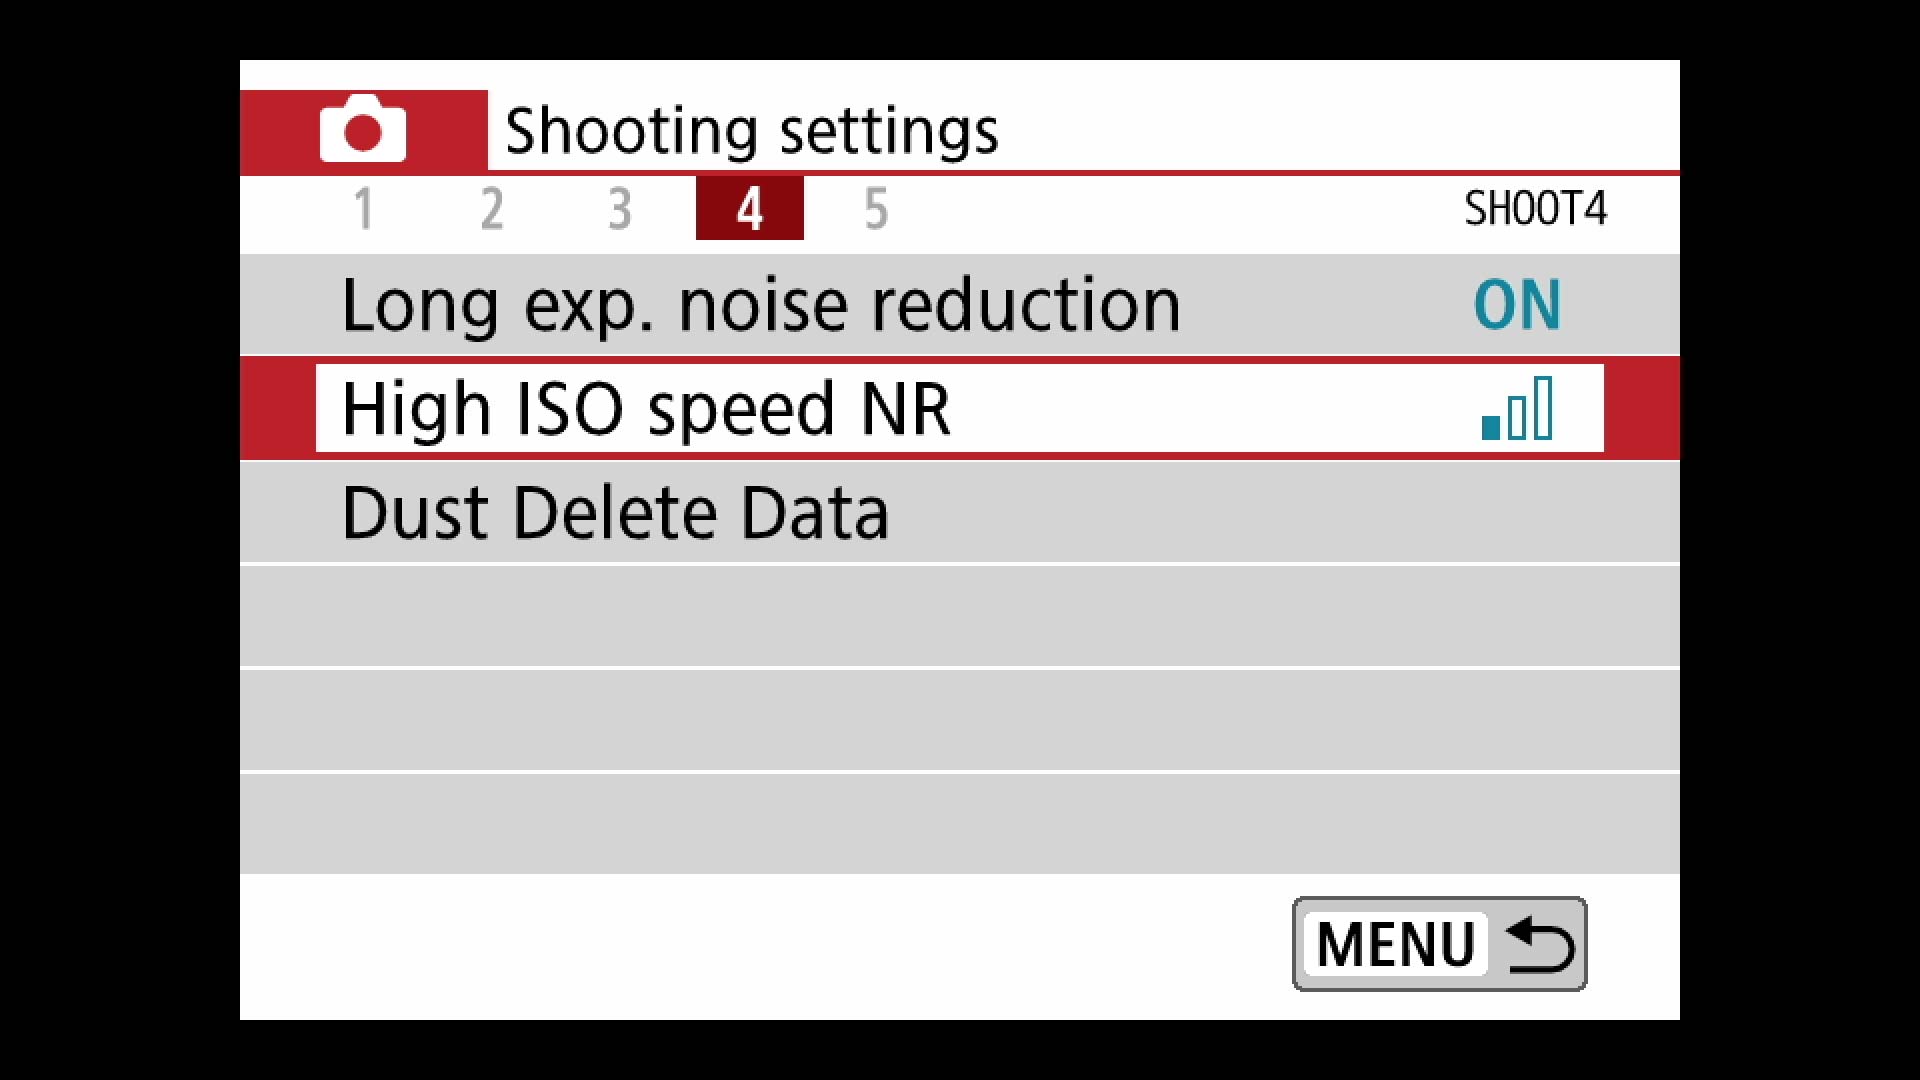
Tip: Your best bet is to shoot in RAW or RAW + JPEG and use a software program like Affinity Photo or Adobe Photoshop to reduce noise in post-processing. If your exposure is 1 second or longer, enable the camera’s Long Exposure noise reduction (Auto or On) and, if your ISO is 1600 or above, set High ISO noise-reduction to Low. (See Menu>Shooting Menu 4.)
Action Photos
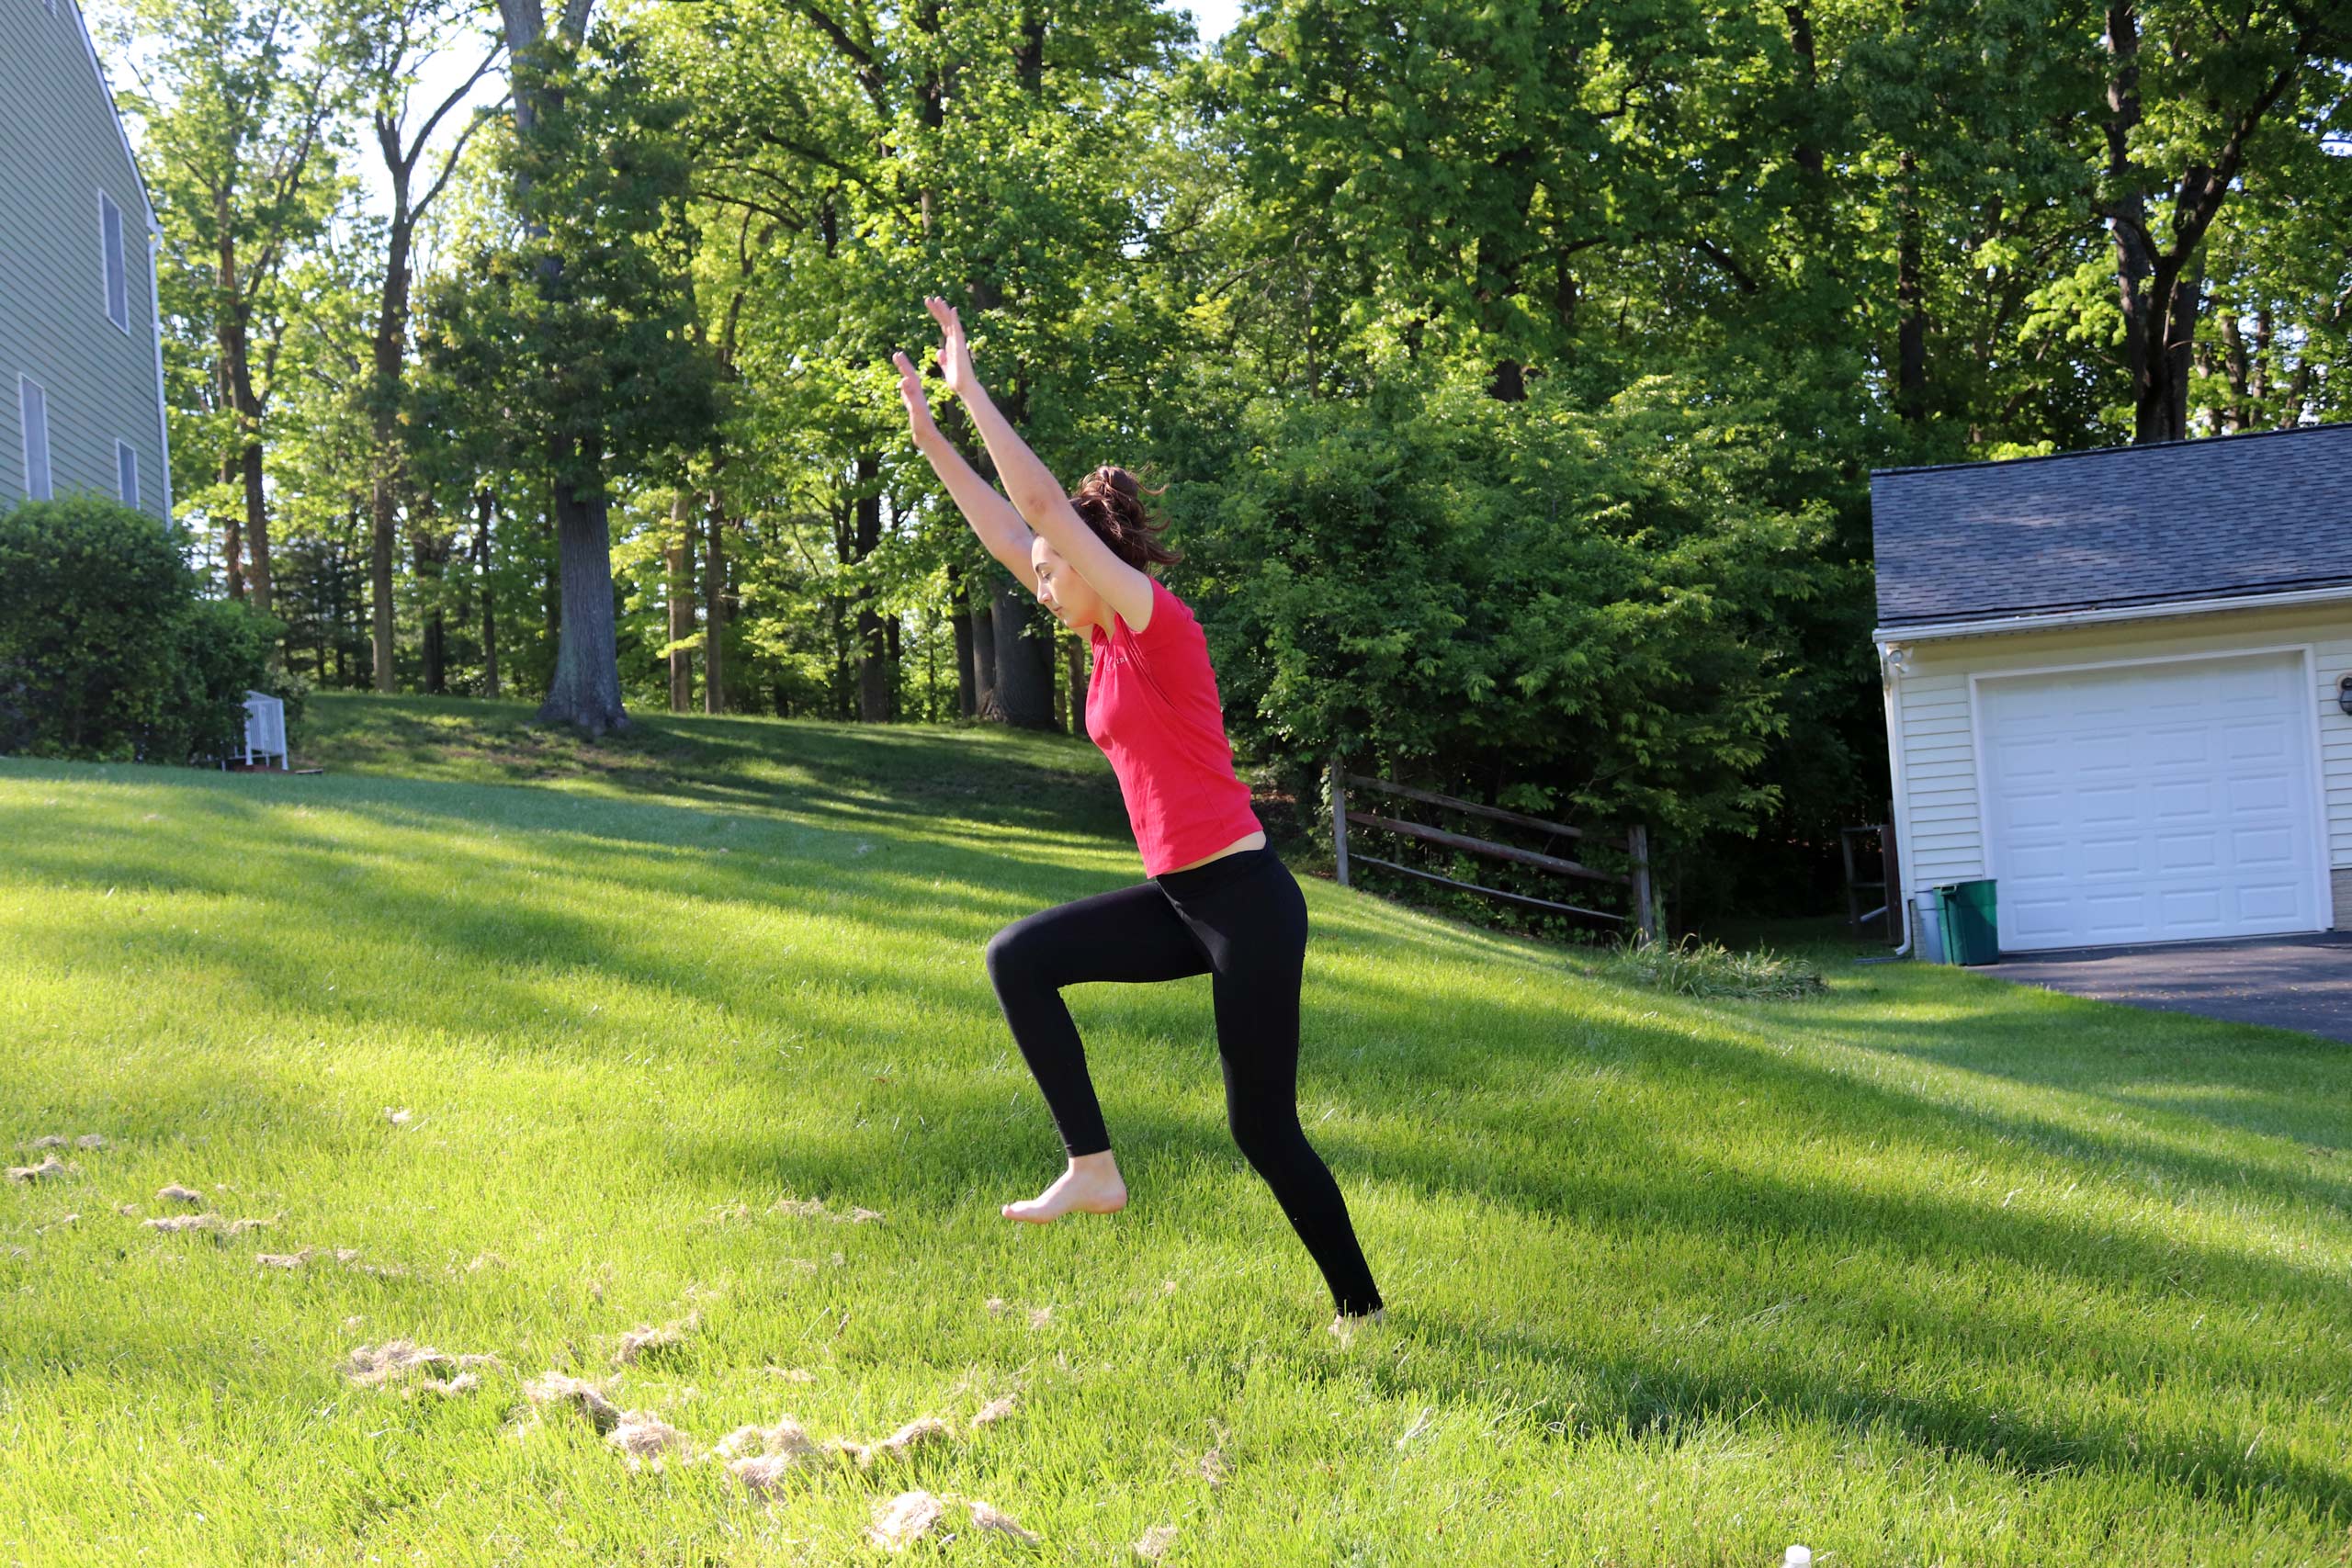
Action sequences are best captured with continuous shooting and continuous autofocus, but a single-shot stopping action is equally as compelling. Keep the shutter speed high and your reflexes sharp to catch that perfect moment.
Easy:
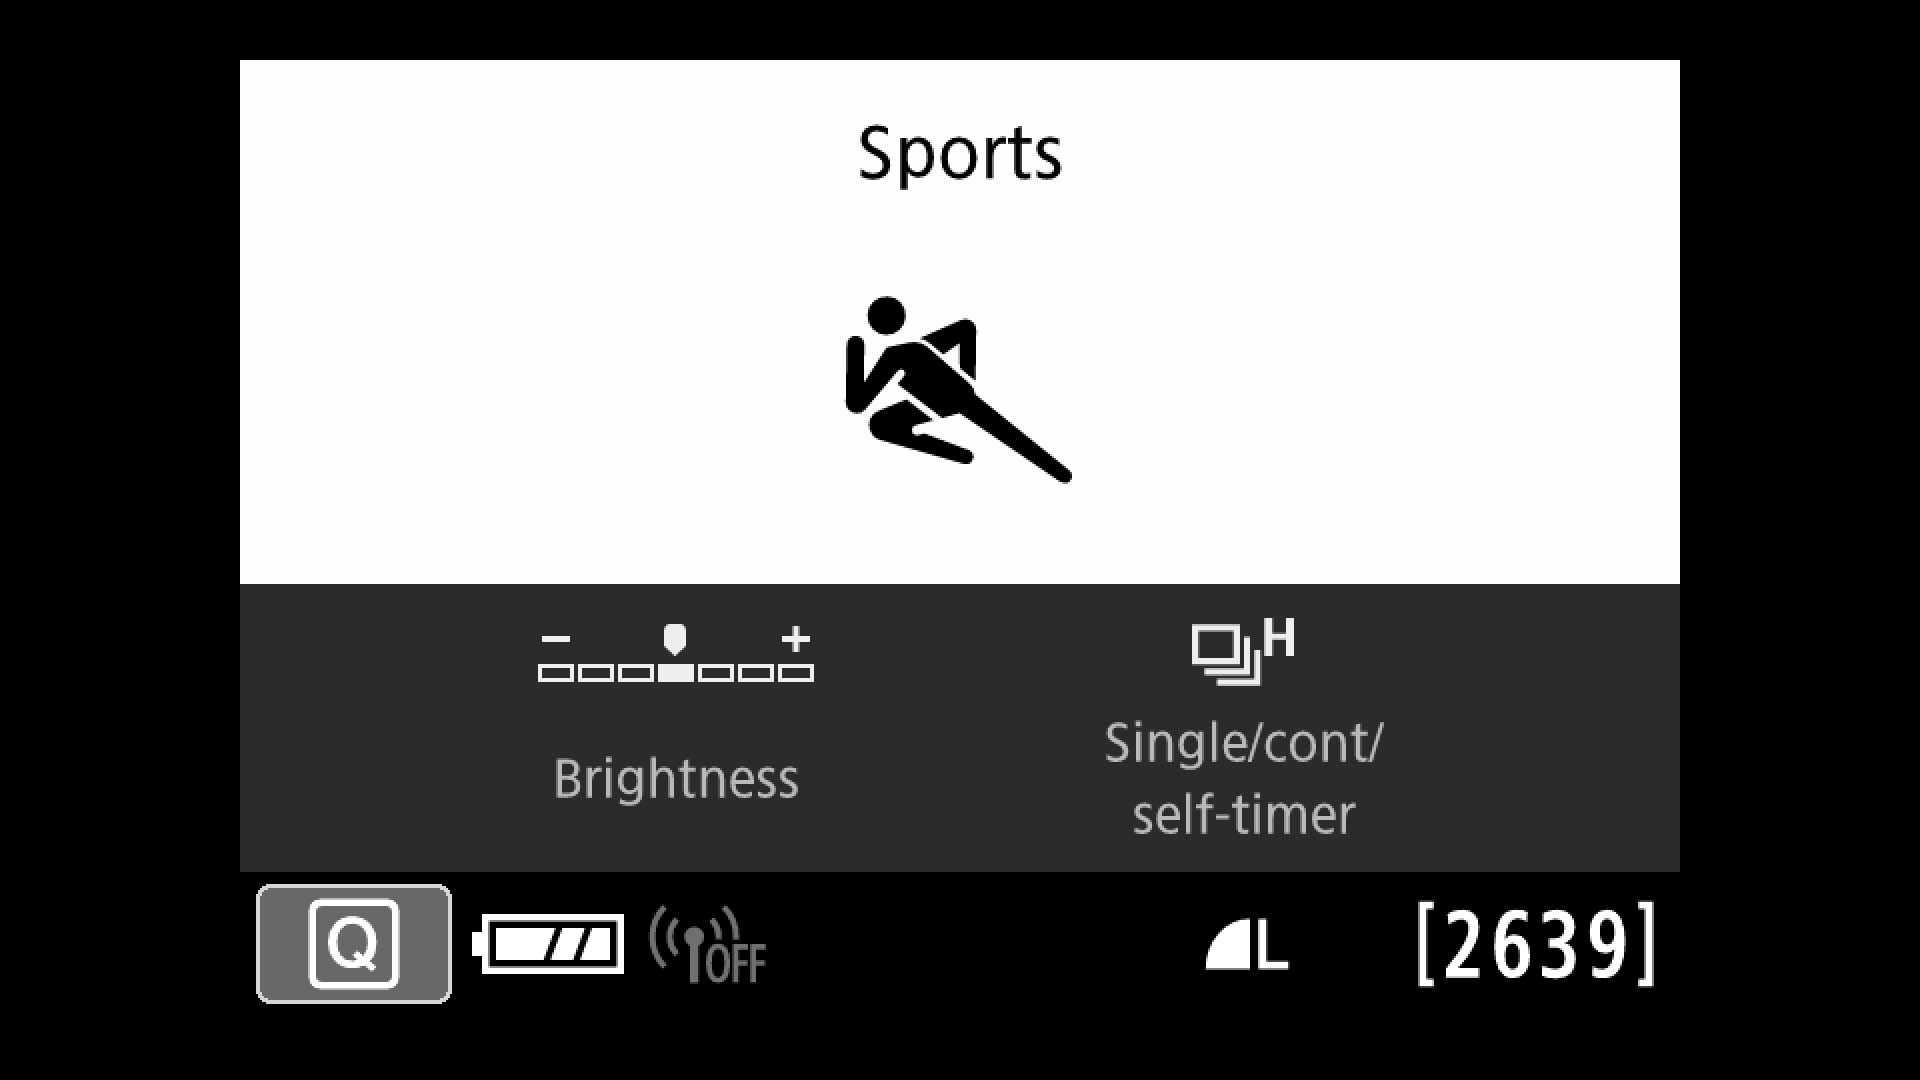
1. Switch the mode dial to the Sports scene mode (icon of a person running). Focus on the subject and shoot. Keep the shutter button depressed to capture multiple images; the default in this mode is high-speed continuous shooting
Intermediate:
1. Set the mode dial to TV (shutter speed priority). Use the control dial to set a shutter speed of 1/250-1/4000 second. The former should be fast enough to capture a running child; but you’ll need a faster shutter speed for stopping the action in a football game or motorcycle race. If the aperture (f-stop number) blinks in the viewfinder, the camera cannot achieve a good exposure. Lower the shutter speed or increase the ISO until the f-stop number stops blinking.
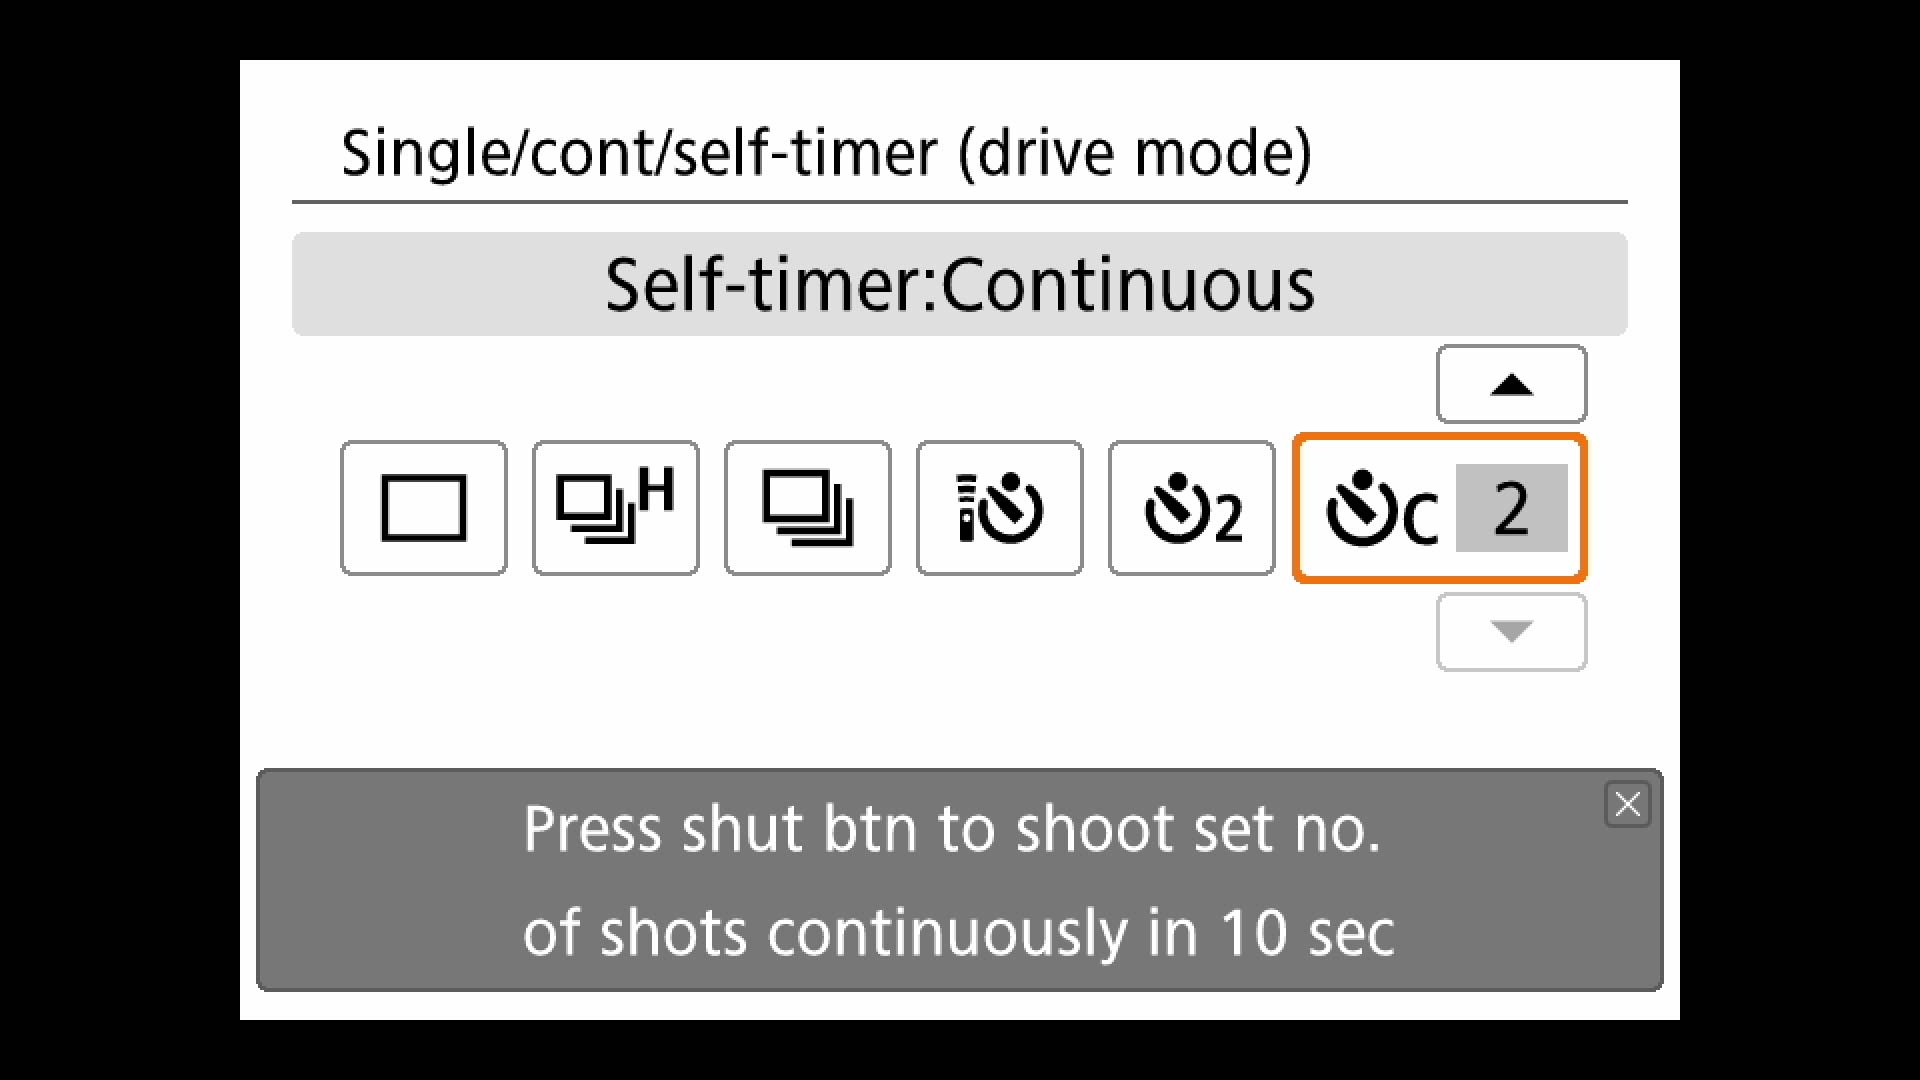
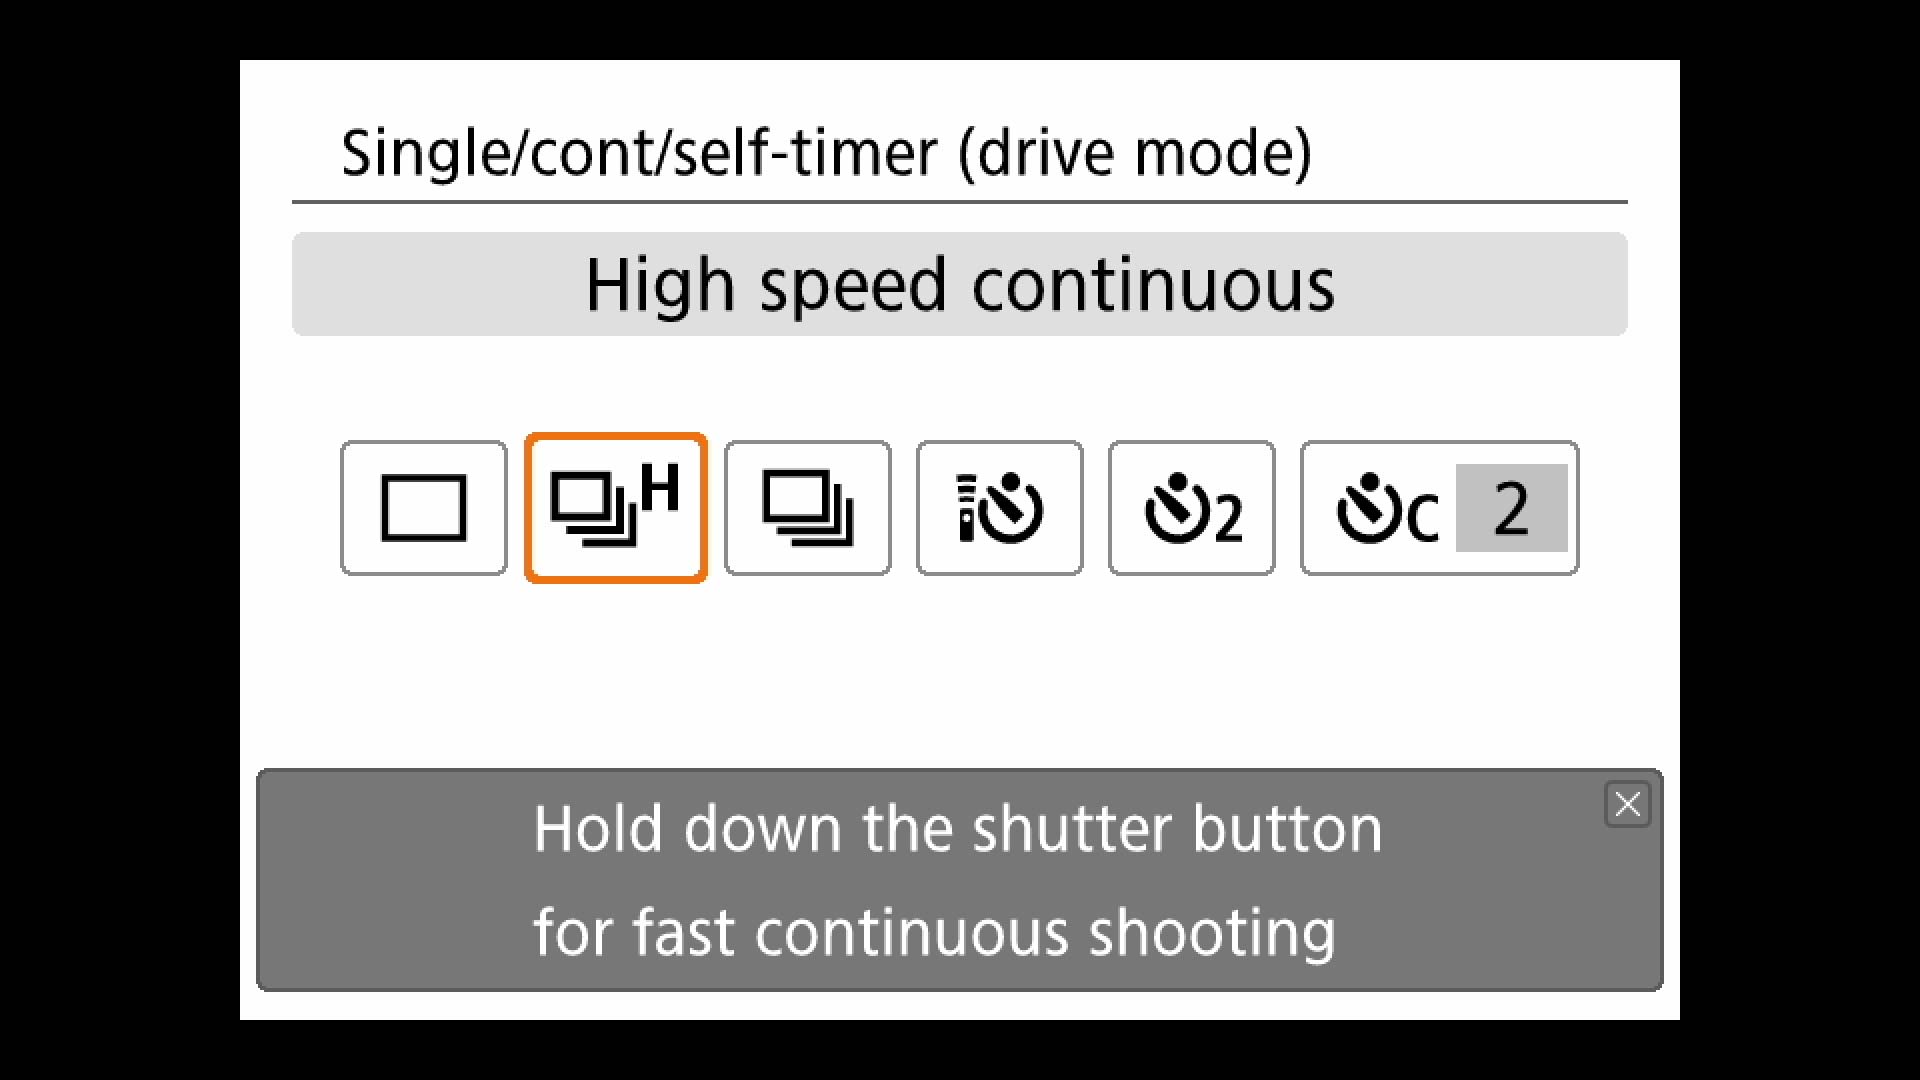
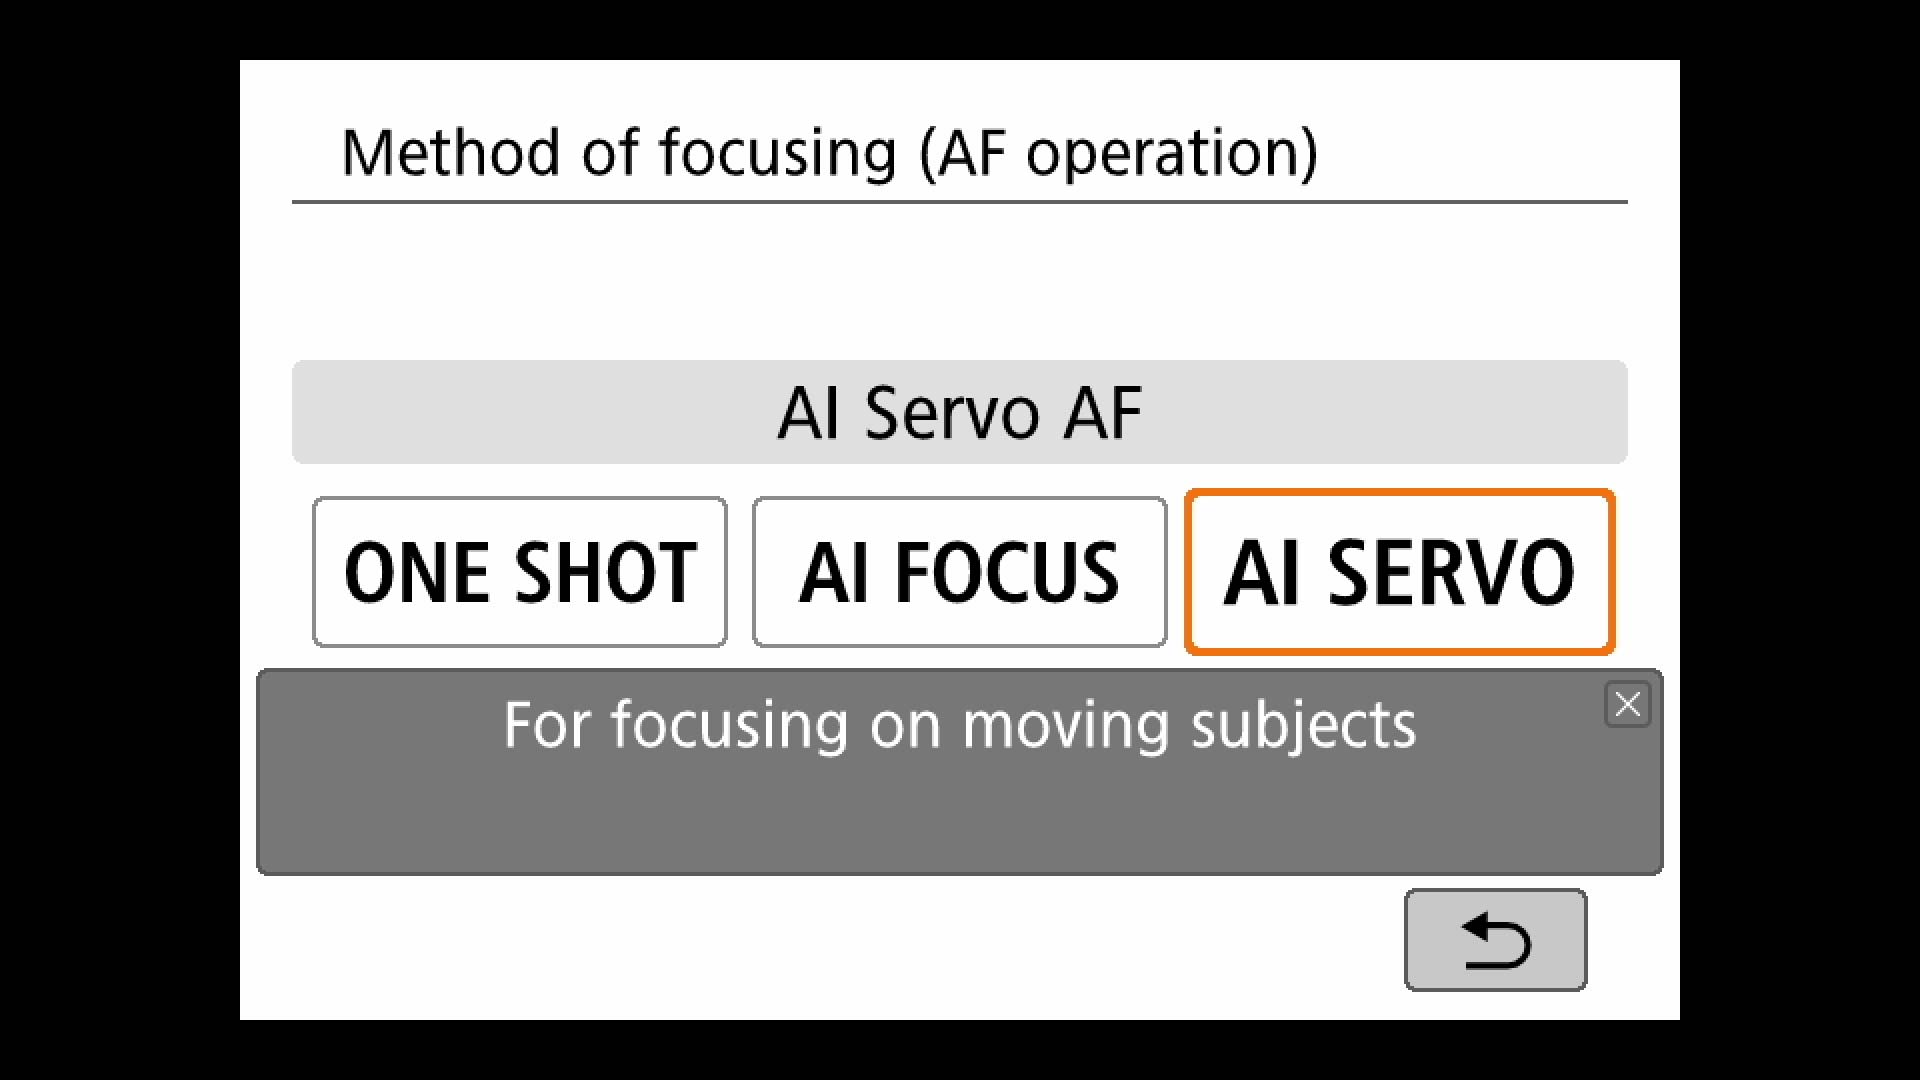
2. Press Q; set the second icon from the left to High Speed Continuous. Change Method of Focus to AI Servo for continuous autofocus (make sure the lens is set to AF). Keep the shutter half-pressed for continuous AF while you follow your subject with the camera; depress the shutter fully and hold it down to take a series of images.
HDR Photos
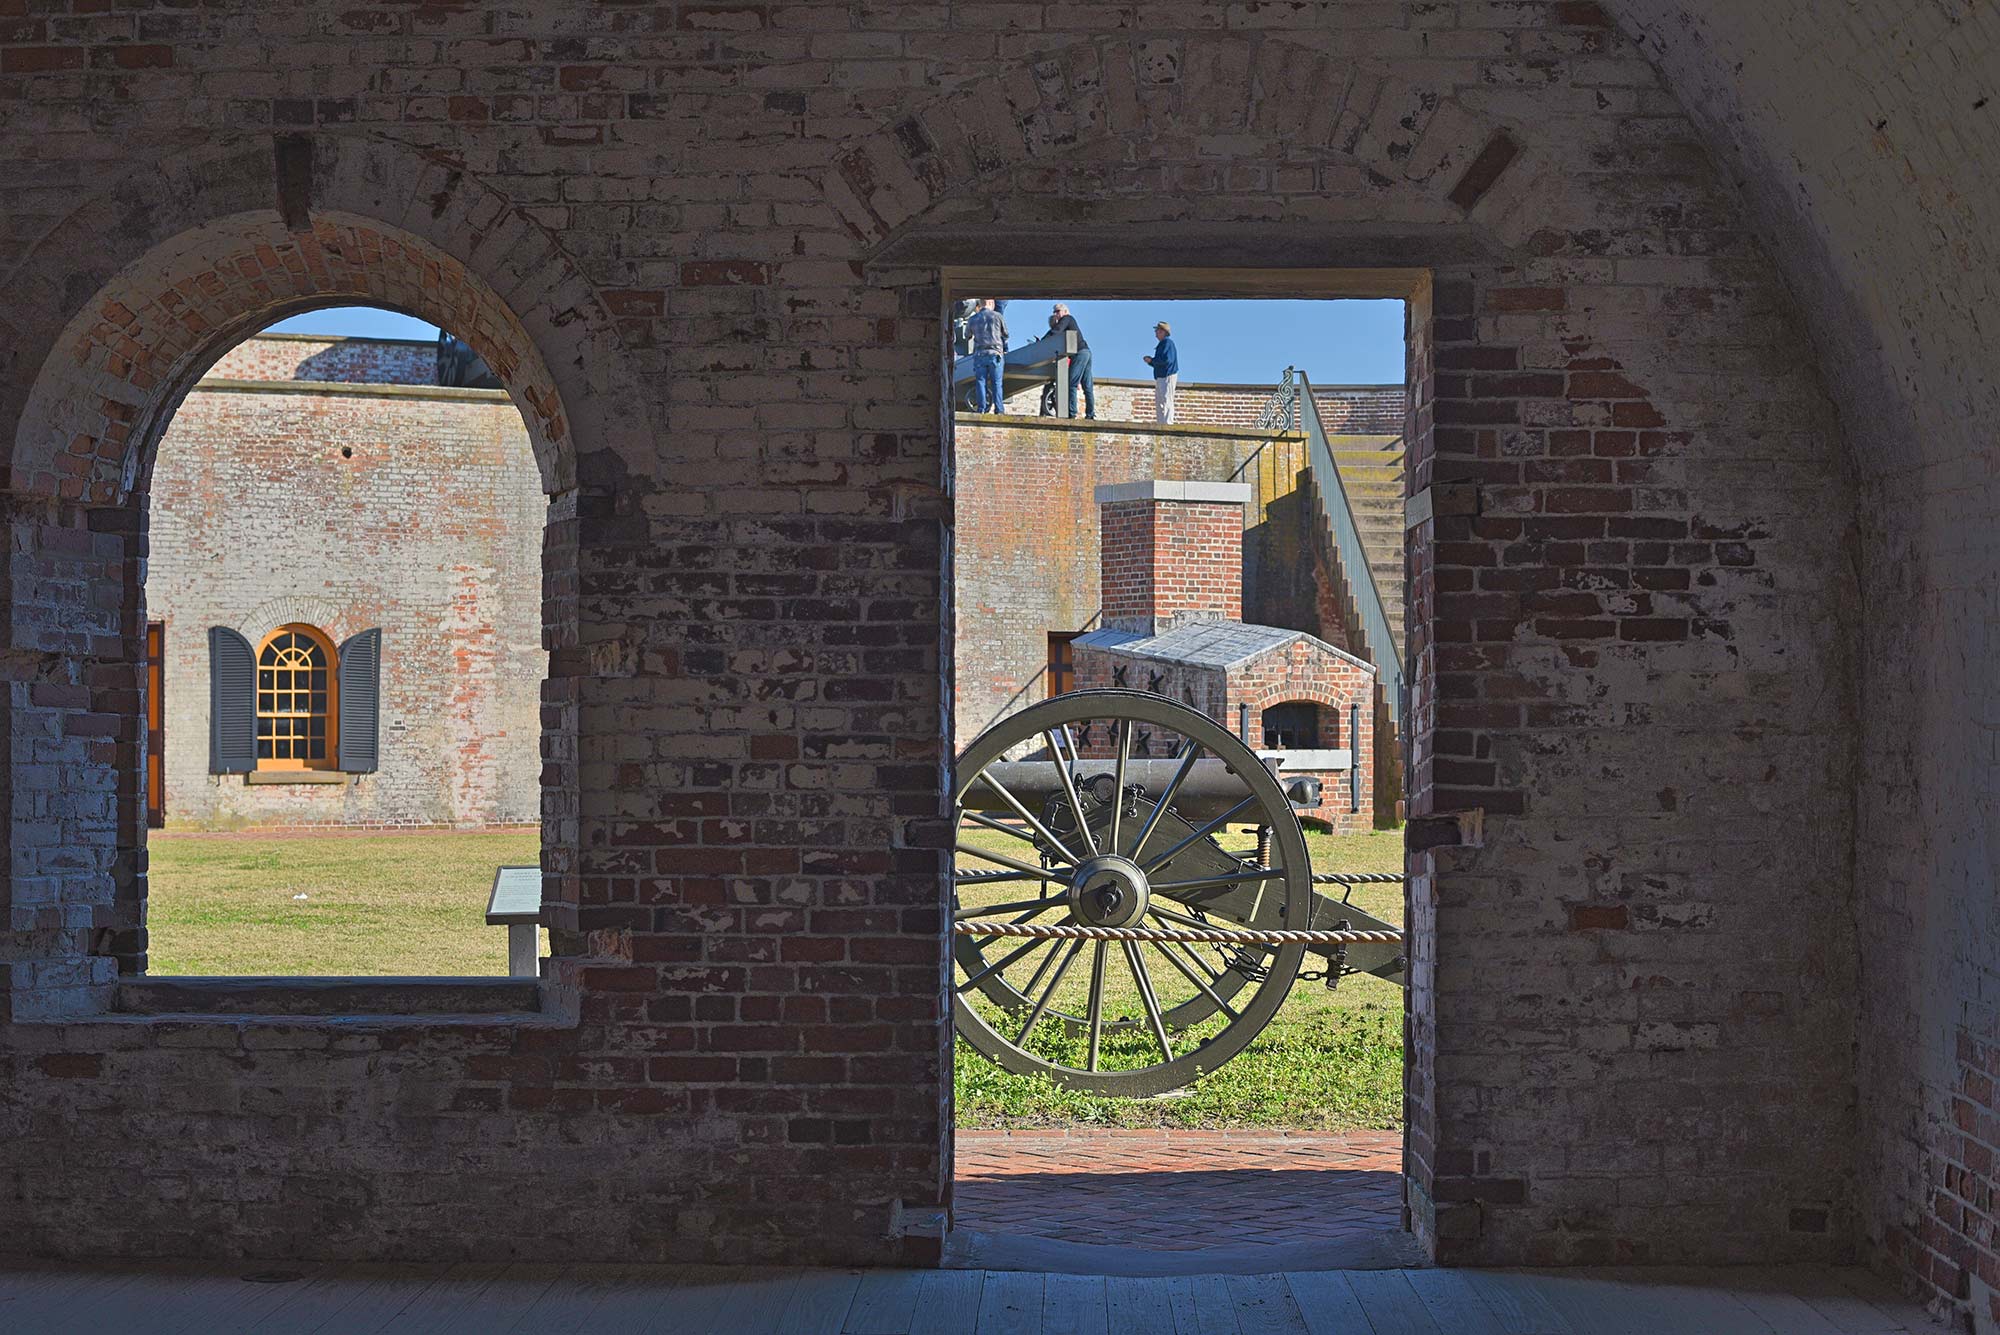
HDR stands for high dynamic range, a technique that gives an image a broader distribution of highlights, midtones and shadows. It’s best used for high-contrast conditions such as a backlit scene; for example, if your subject is in shadow while the background is bright. It works by combining images of different exposures so HDR works best for static scenes. Any movement in the scene makes it more difficult to align and can result in ghost-like apparitions of the moving elements.
Easy:
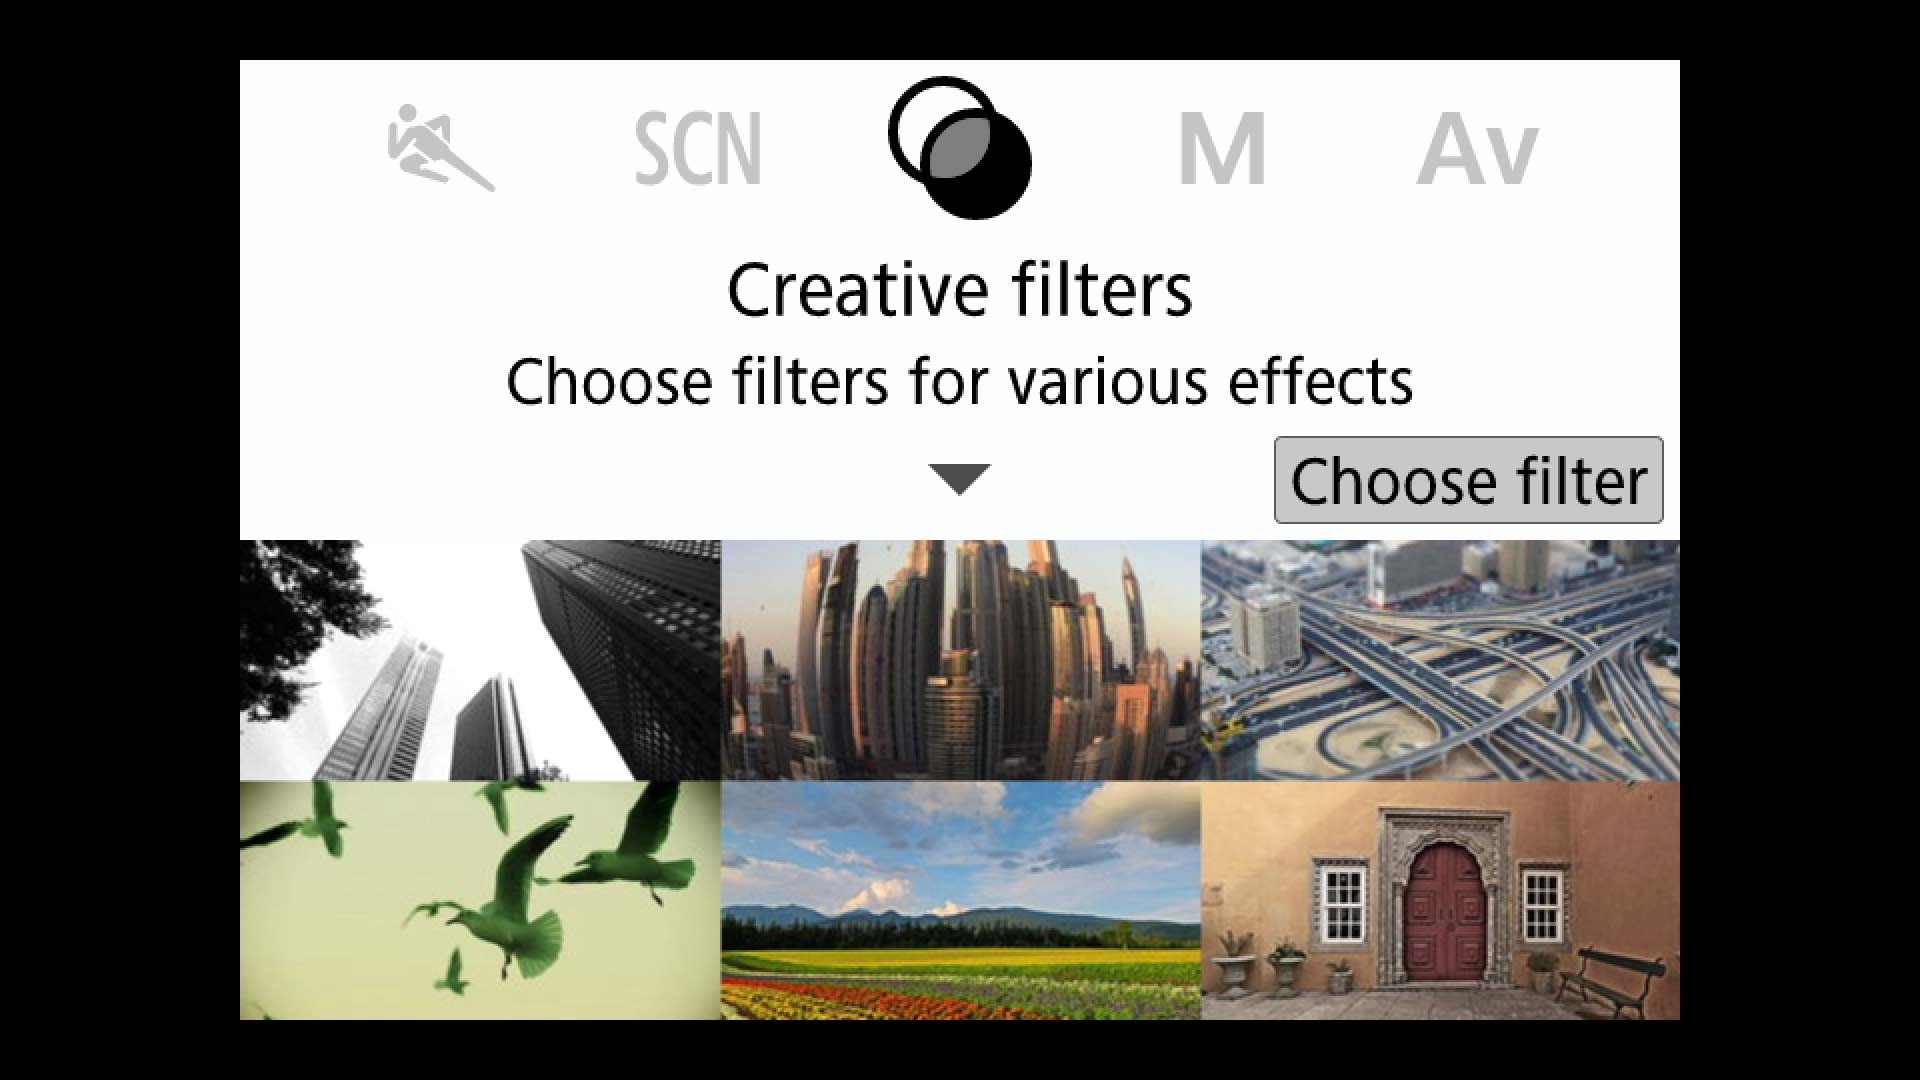
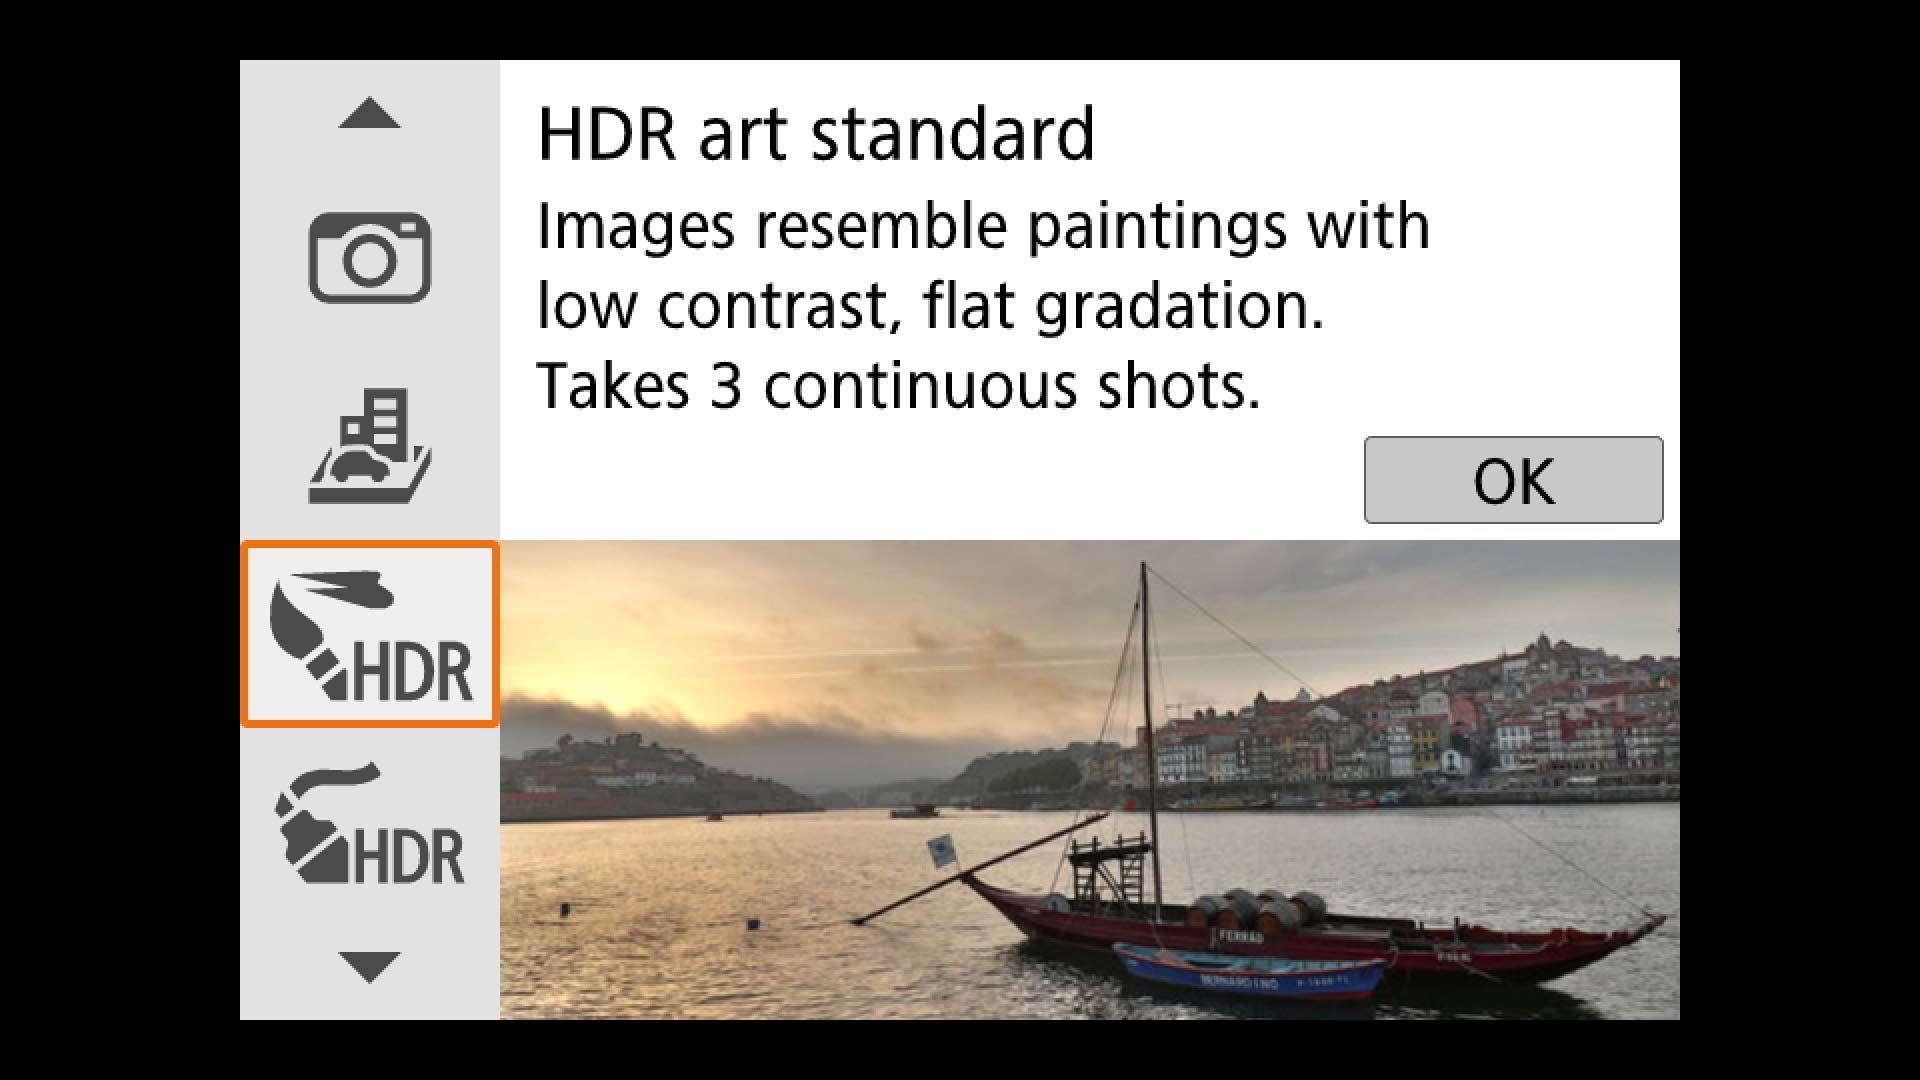
1. Set the Mode dial to the Creative Filters mode (two interlocking circles between the SCN and M modes). Select HDR Art Standard. Hold the camera very still (or mount it on a tripod or some other stable surface) and press/hold the shutter button until three shots have been captured. The camera will remain busy, and not able to shoot again until the images are merged. For more creative HDR effects, check out HDR Art Vivid, Bold and Embossed.
2. Note: In low light, the flash may pop up and emit bursts of light to assist with autofocus; the flash itself won’t fire since it can’t recycle fast enough.
Intermediate:
You’ll need software such as Photomatix, Aurora HDR, Adobe Lightroom, Elements or Photoshop to merge images shot with Auto Exposure Bracketing.
For the best results, put your camera on a tripod.
1. Set the Mode Dial to P (Program).
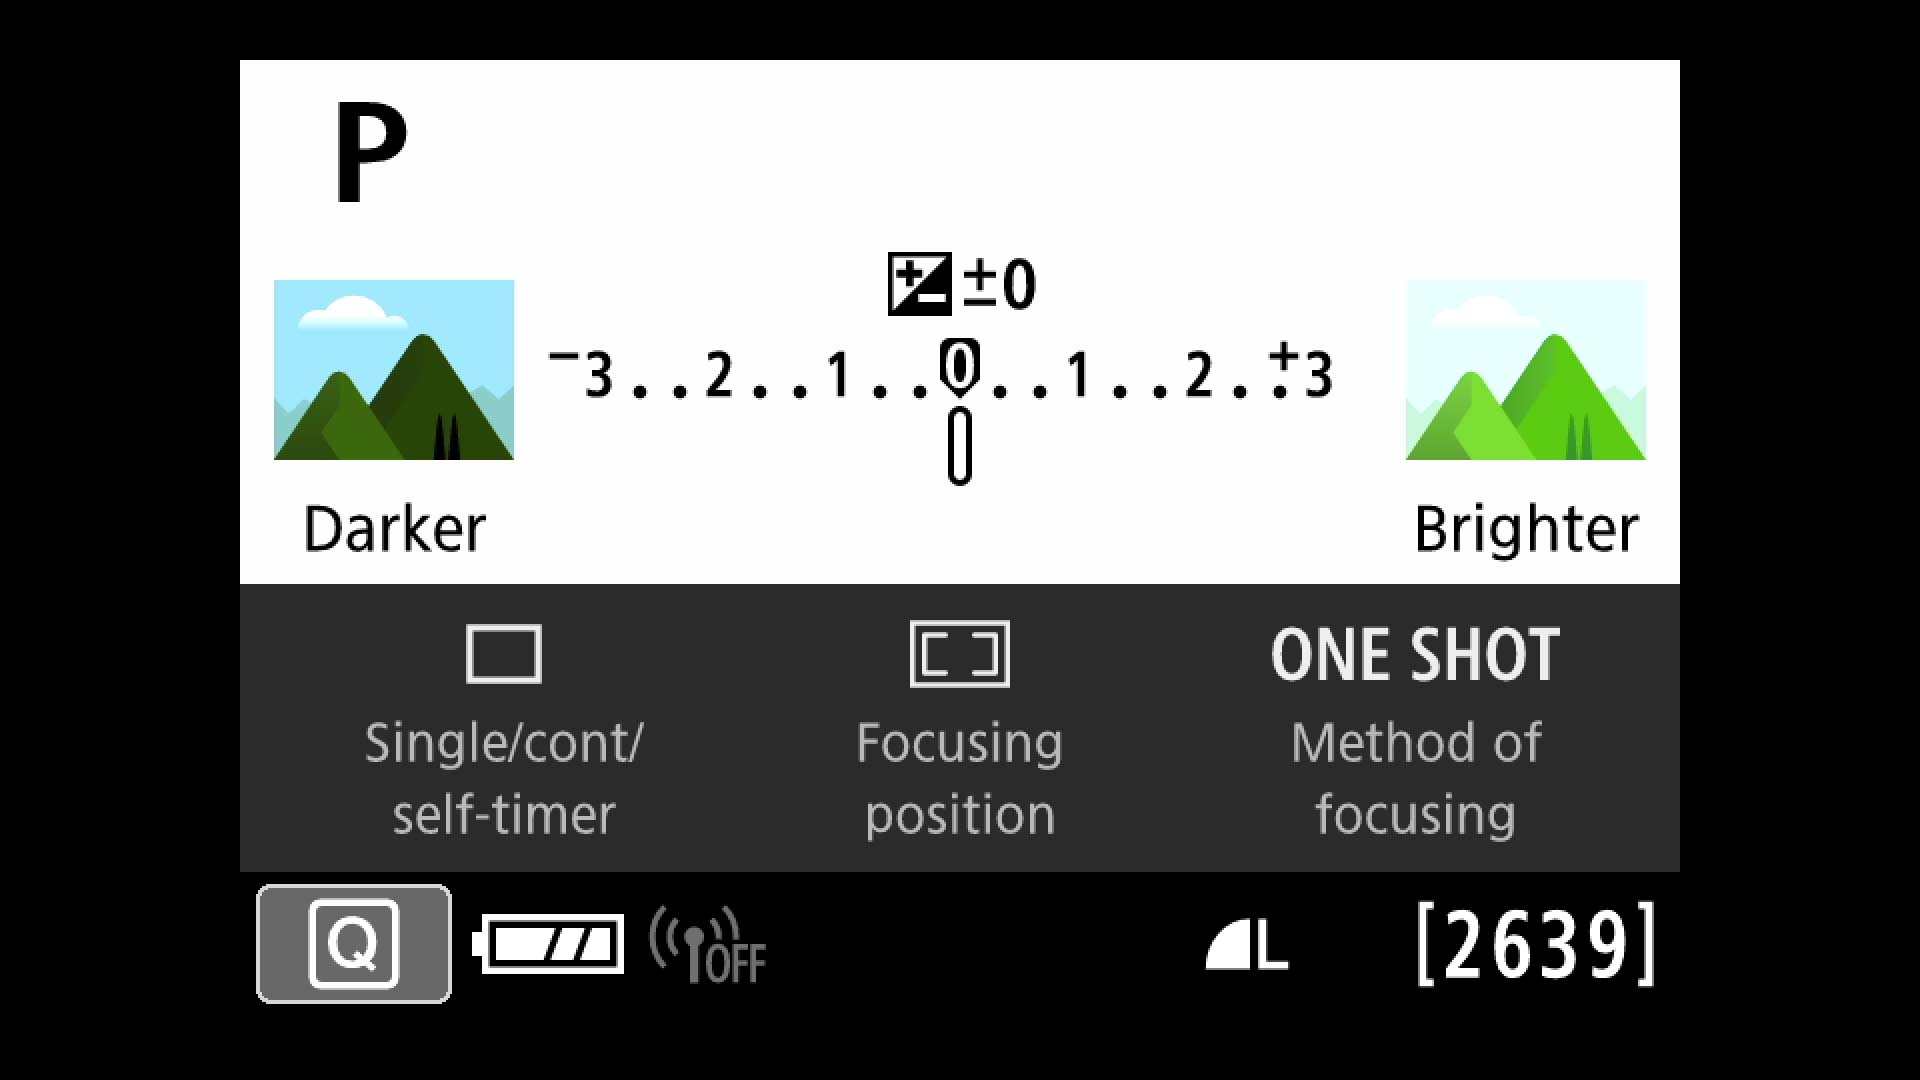
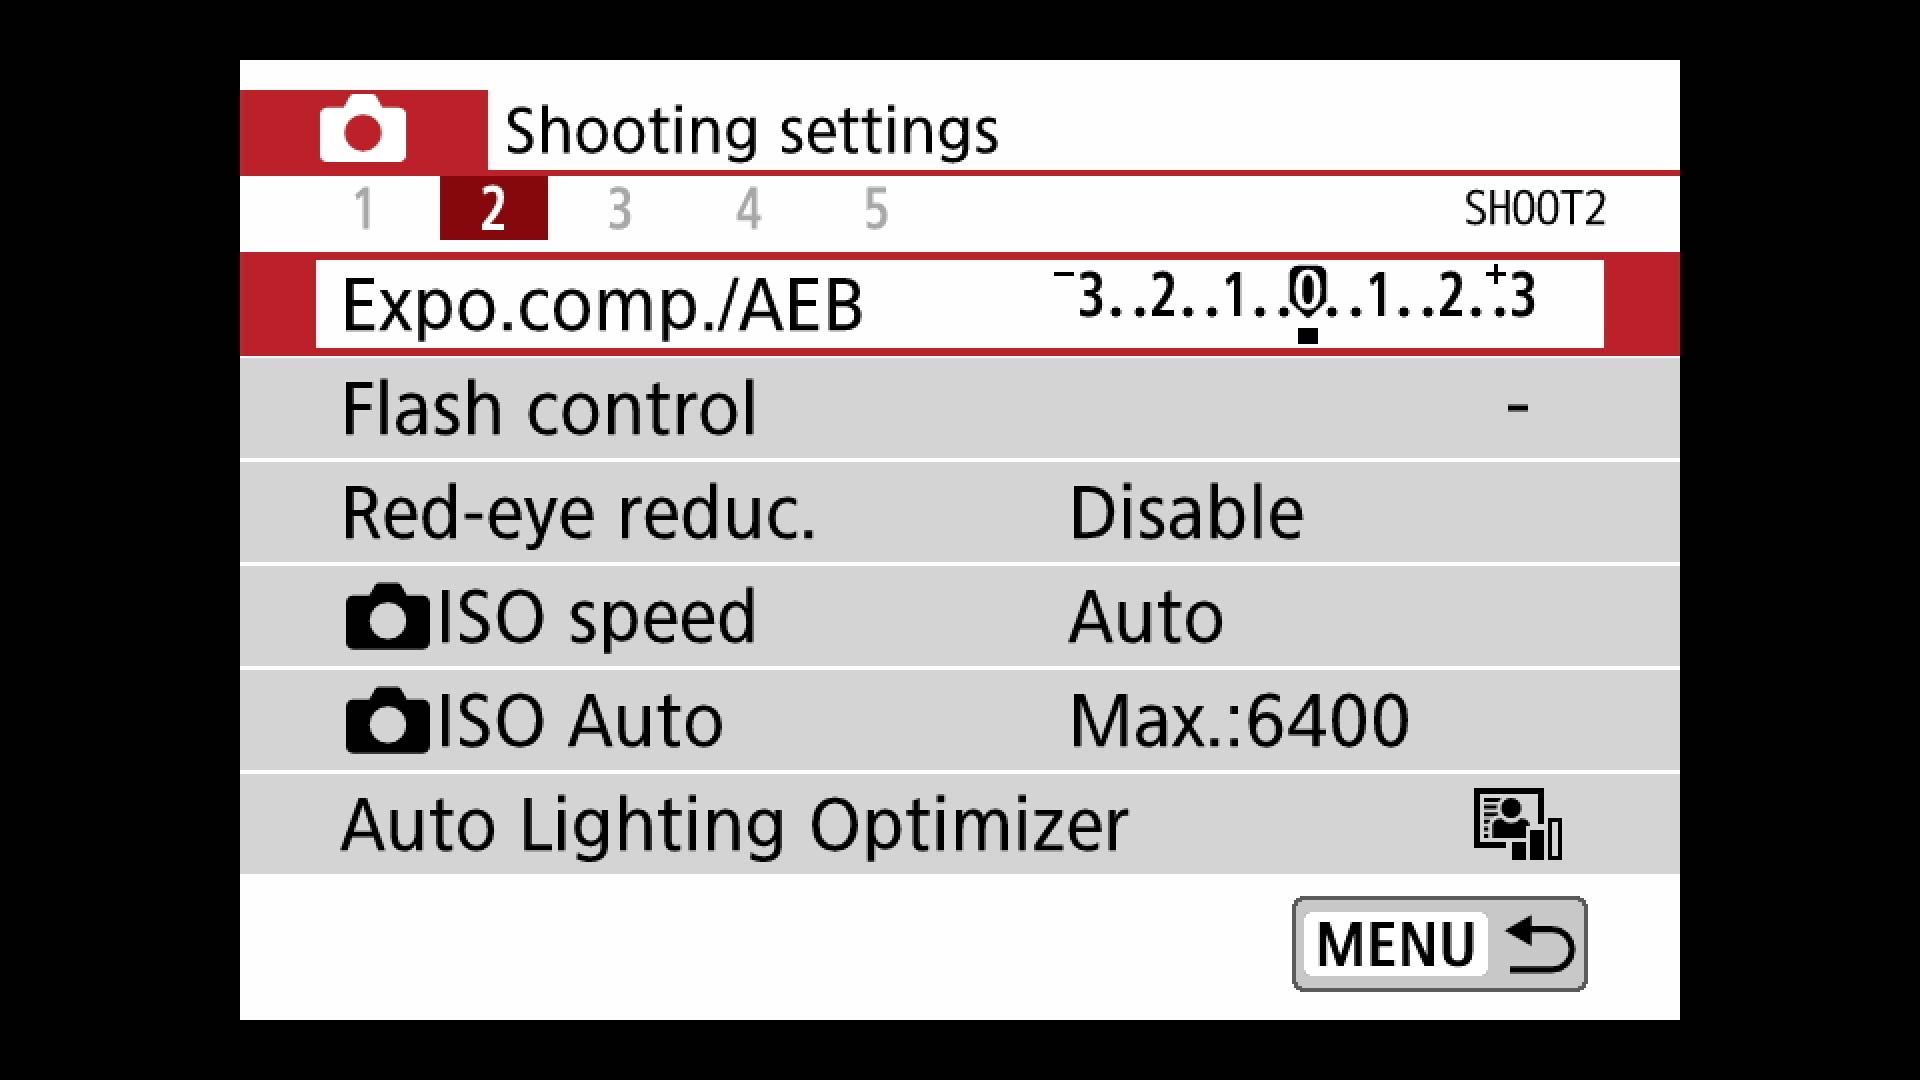
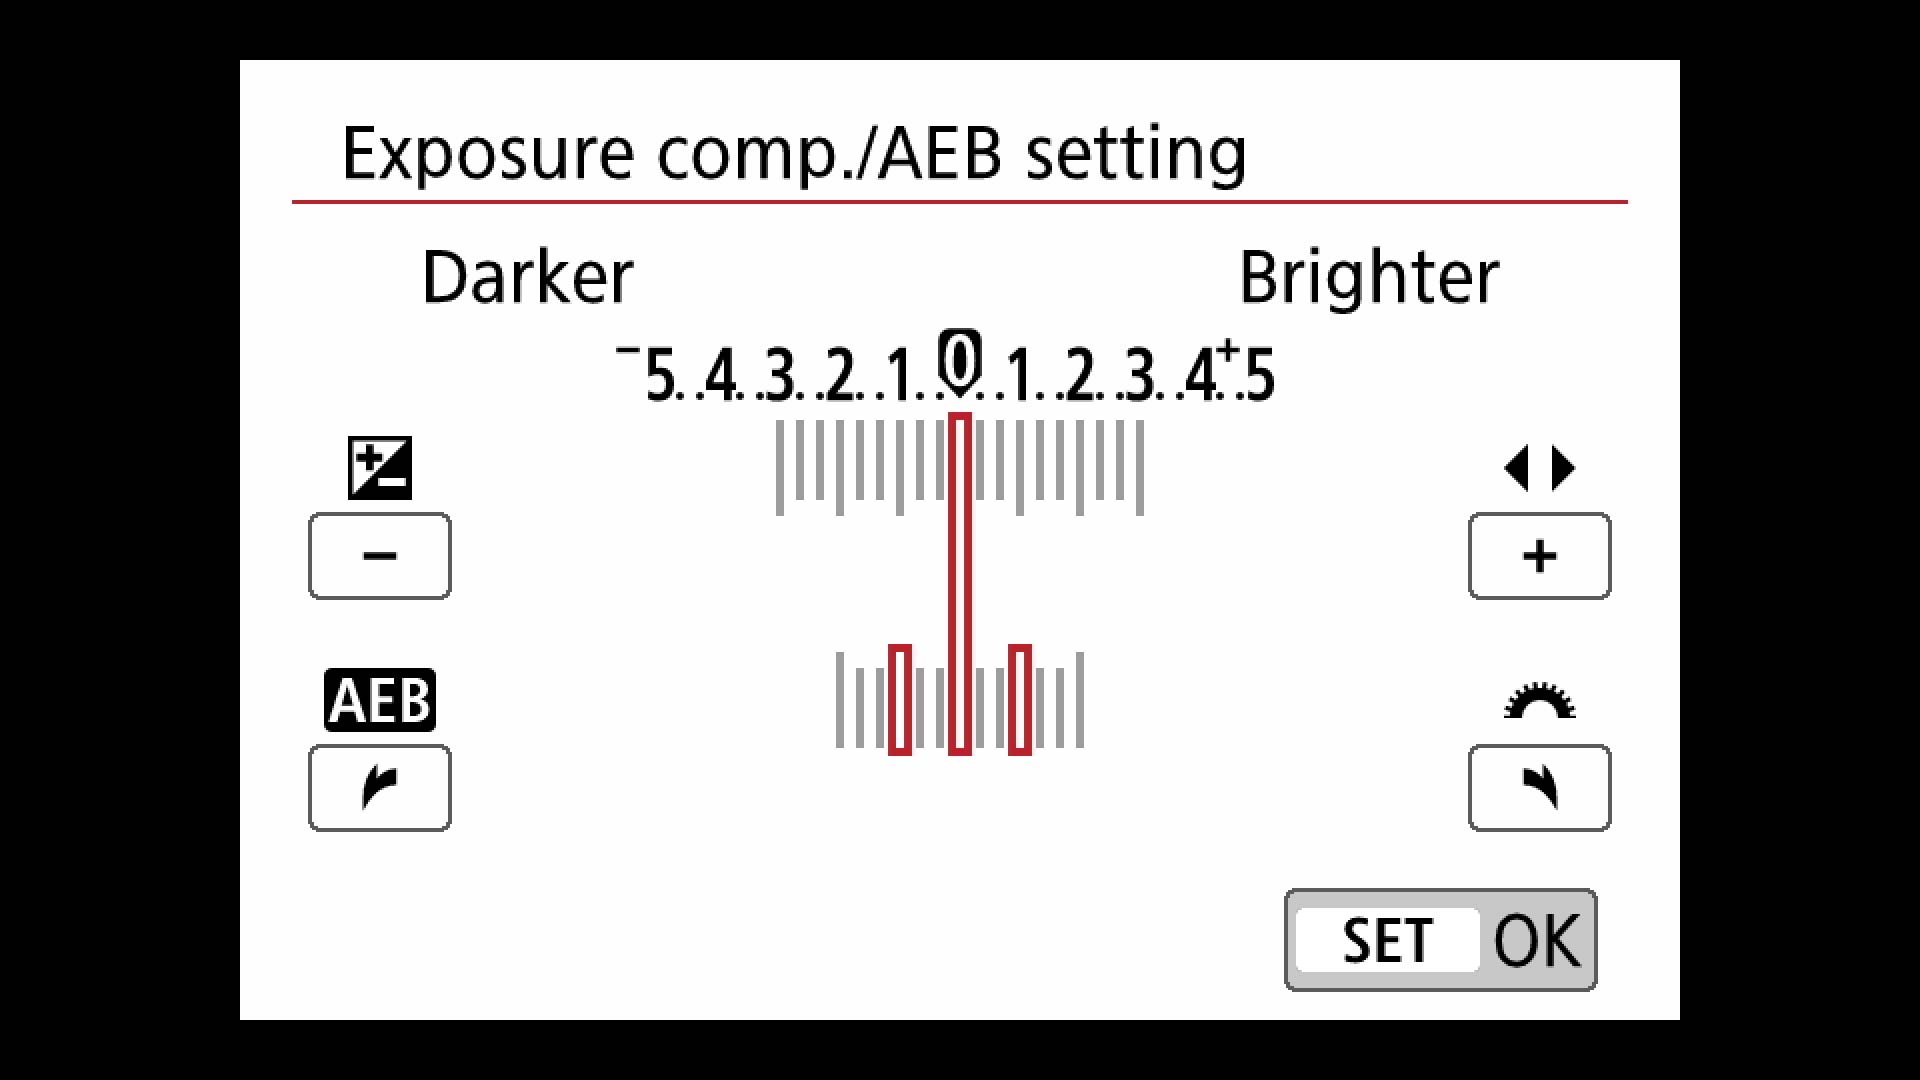
2. Go to Shooting Menu 2; select AEB (auto exposure bracketing). Turn the Main Dial three notches for a 1-stop difference between shots: one each, normal, underexposed, overexposed. Click Set, then exit the menu and return to the Program screen. (Be sure to re-set AEB to zero when you’re done.)
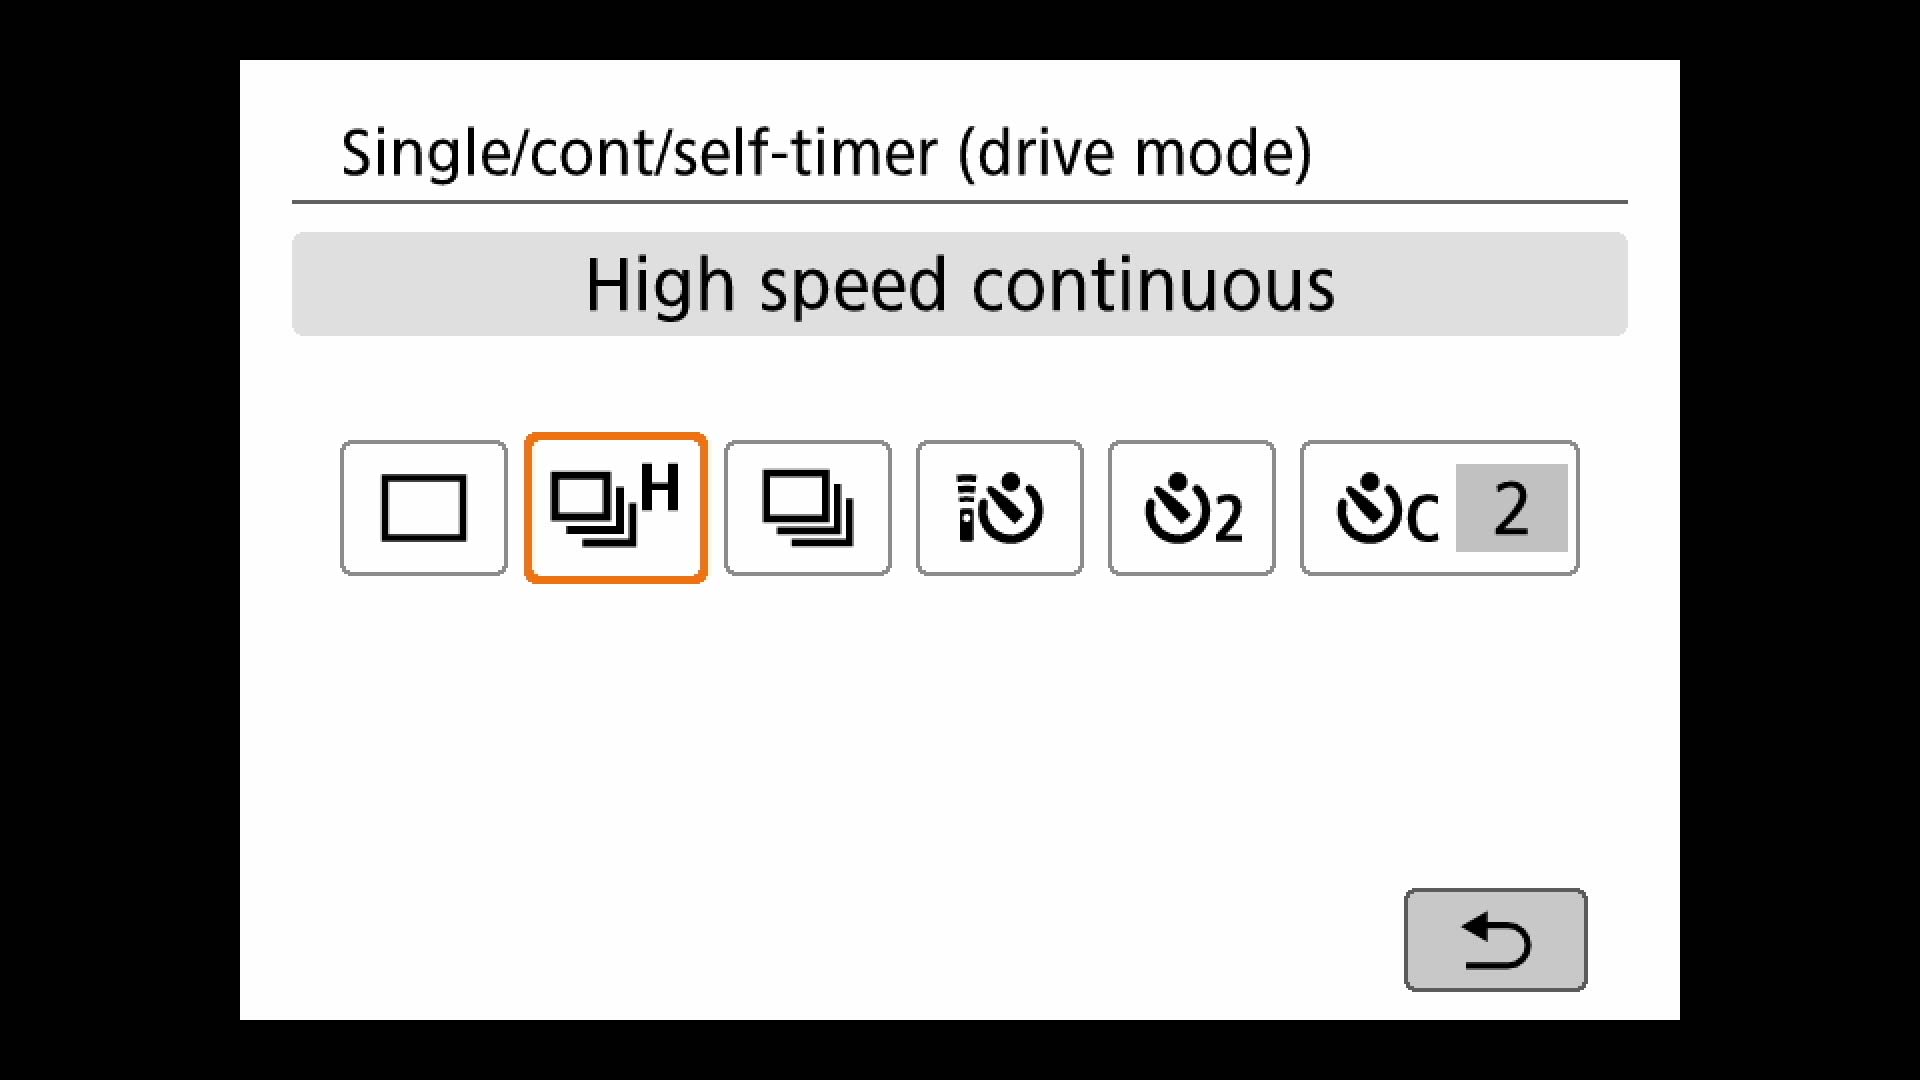
3. Press the Q button. Choose the first icon on the left and set to High Speed Continuous shooting. Holding the camera very still, press the shutter and hold until three shots have been captured.
4. Bring the images into your HDR-capable software and merge them.
5. Alternatively, you can set the camera to Manual exposure mode and change the shutter speed between shots (keep the aperture setting the same to maintain a consistent depth of field). This way you can capture as many
How To Use The Flash
The amount of control over the flash depends on your shooting mode; flash is always available in P, Av, Tv and M modes. Press the Q button to see if flash adjustments are available in other selected modes.
Easy:
1. Leave the flash on Auto. If the camera determines flash is needed, the unit will pop up automatically.
2. If the flash isn’t bright enough, move closer to your subject; if it’s too bright, move farther from your subject.
3. When photographing a person against a wall, have them step a couple of feet away from the wall to help avoid shadows.
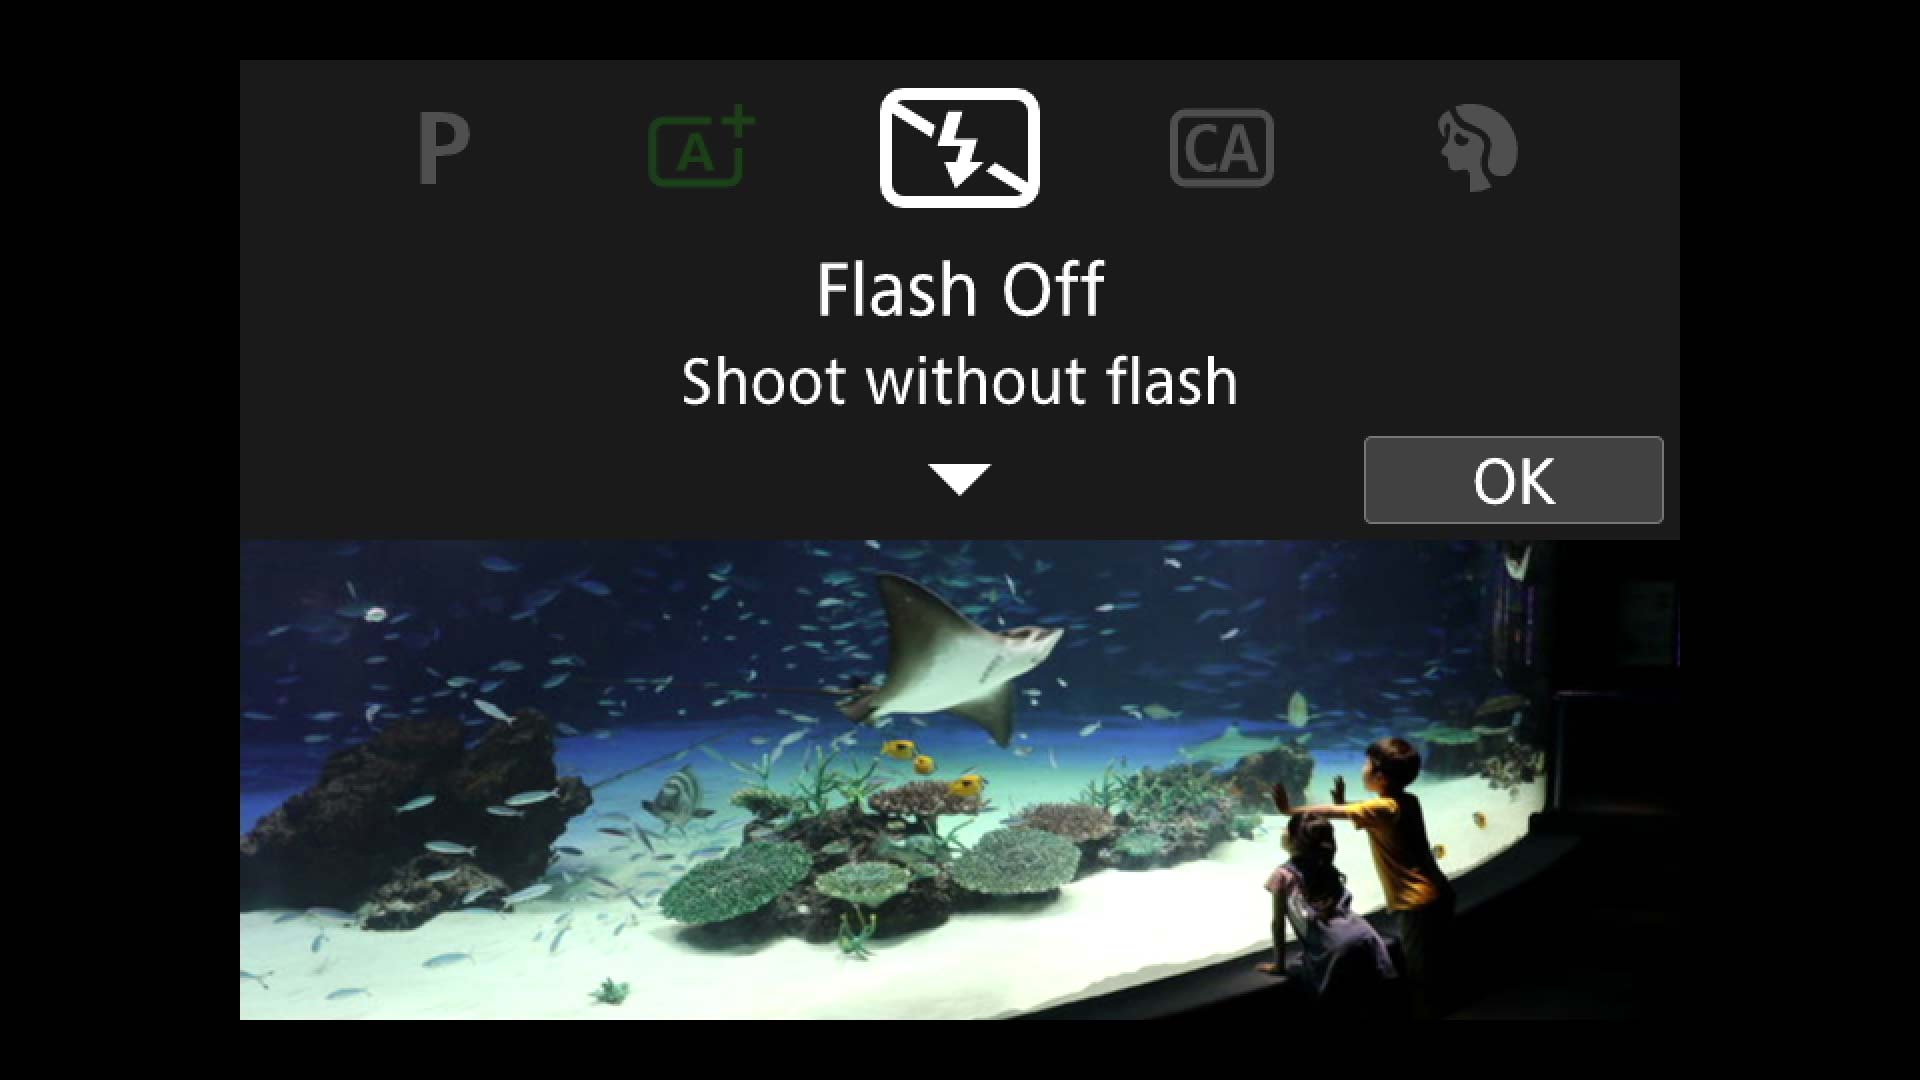
4. To force the flash off (if you’re shooting in a museum and don’t want the flash to fire, for example), choose the Flash Off icon on the mode dial (between the green Auto icon and CA icon).
Intermediate:
This applies to P, Av, Tv and M exposure modes only.
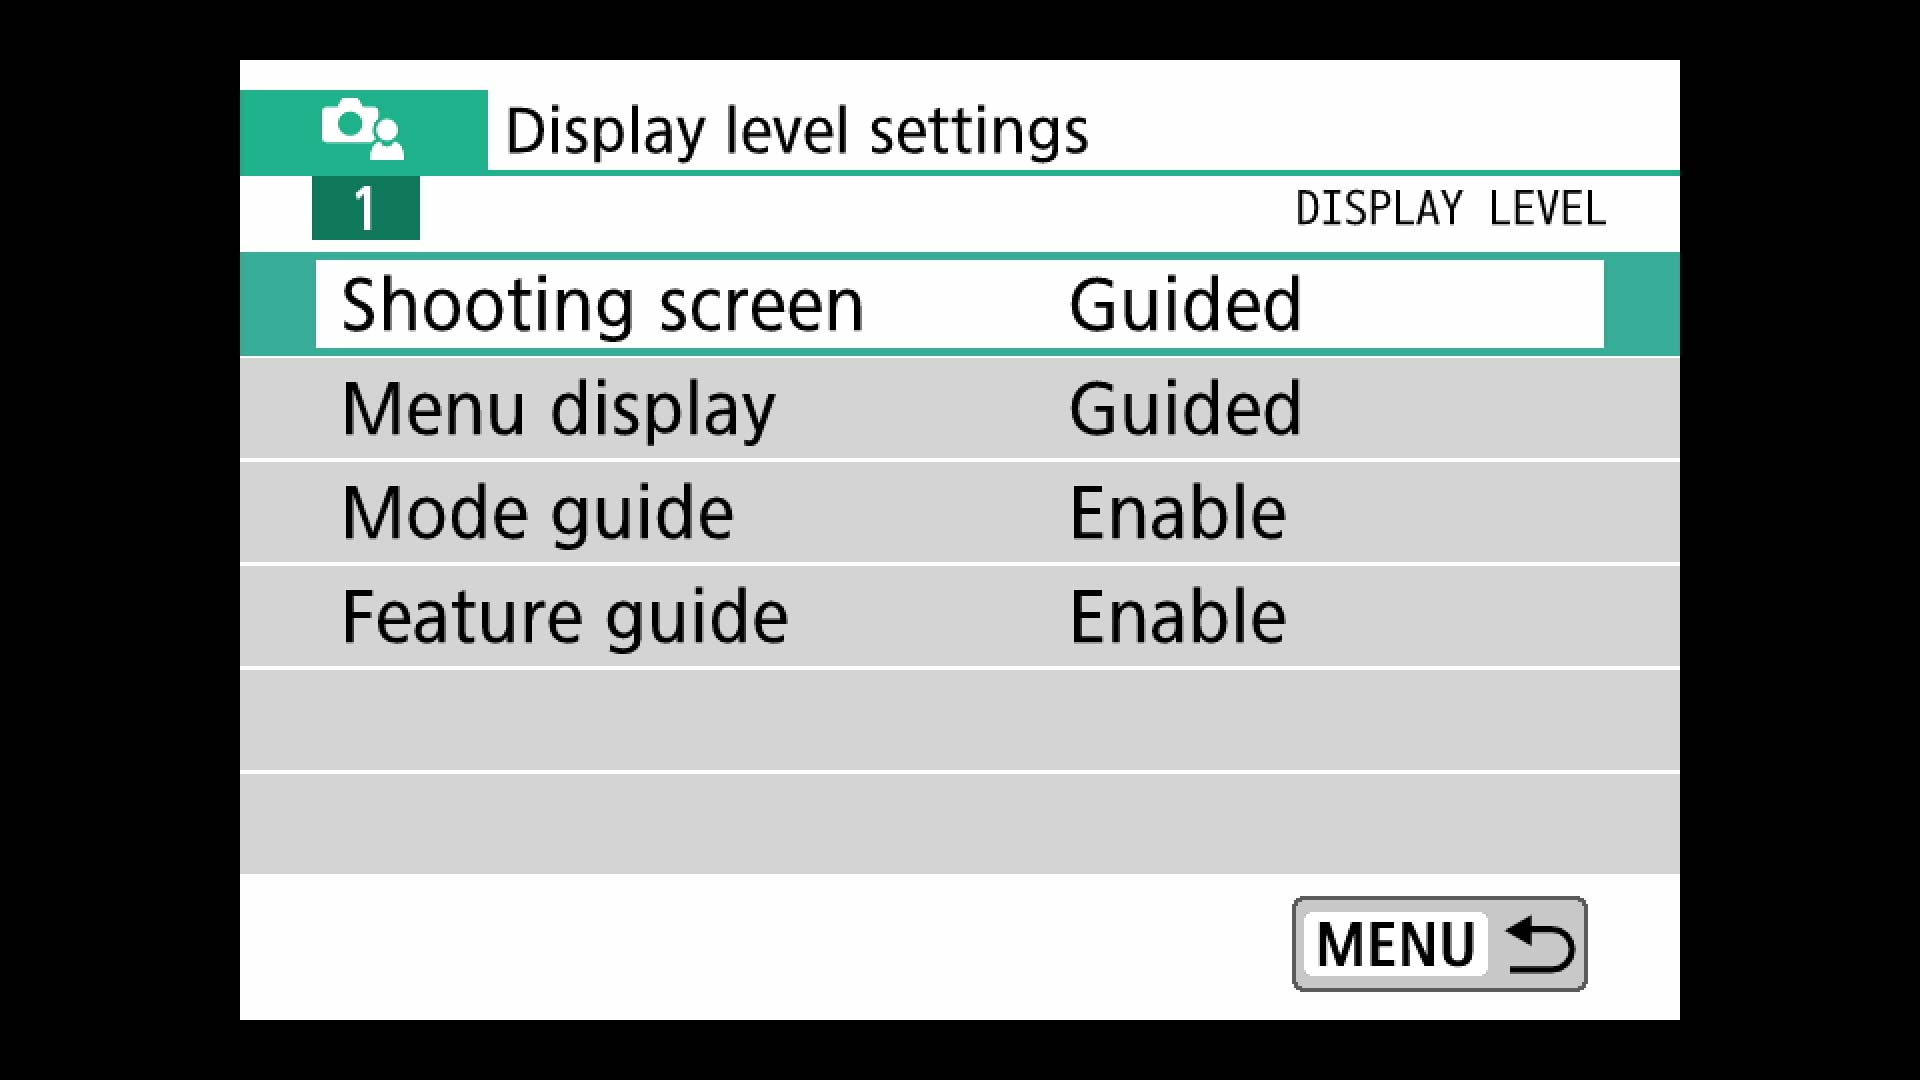
1. Change to the Standard Menu option for easier access to flash settings: Menu>Display Level Settings (green). Click OK. Choose Menu Display and change to Standard; do the same for Shooting Screen.
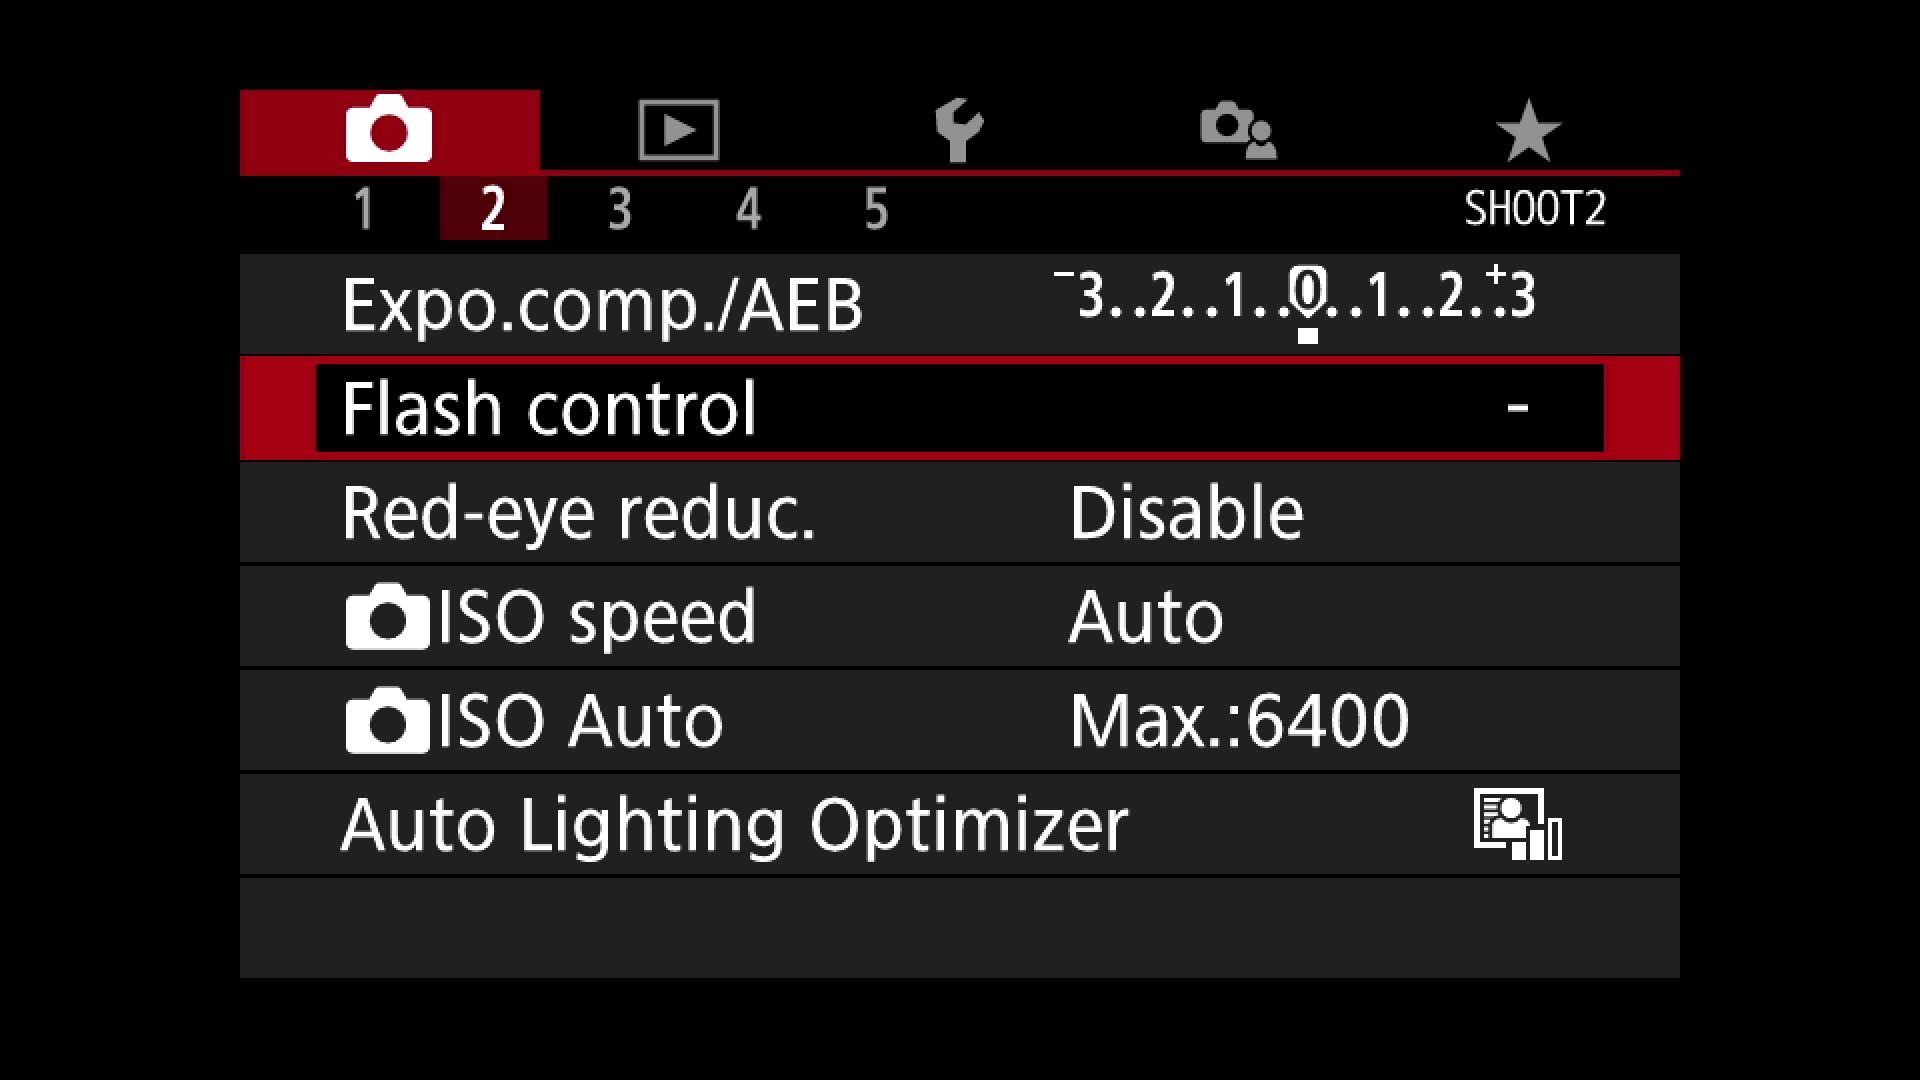
2. Go to Shooting Menu (red) 2; choose Flash Control and make sure Flash firing is enabled (which it should be by default). Tap Menu to return to the previous screen and enable Red-eye reduction if you’re photographing people.
3. Press the flash button on the front of the camera to pop up the flash. This “forces” the flash to fire, even if it’s a bright sunny day; perfect for lighting a subject that’s in shadows.
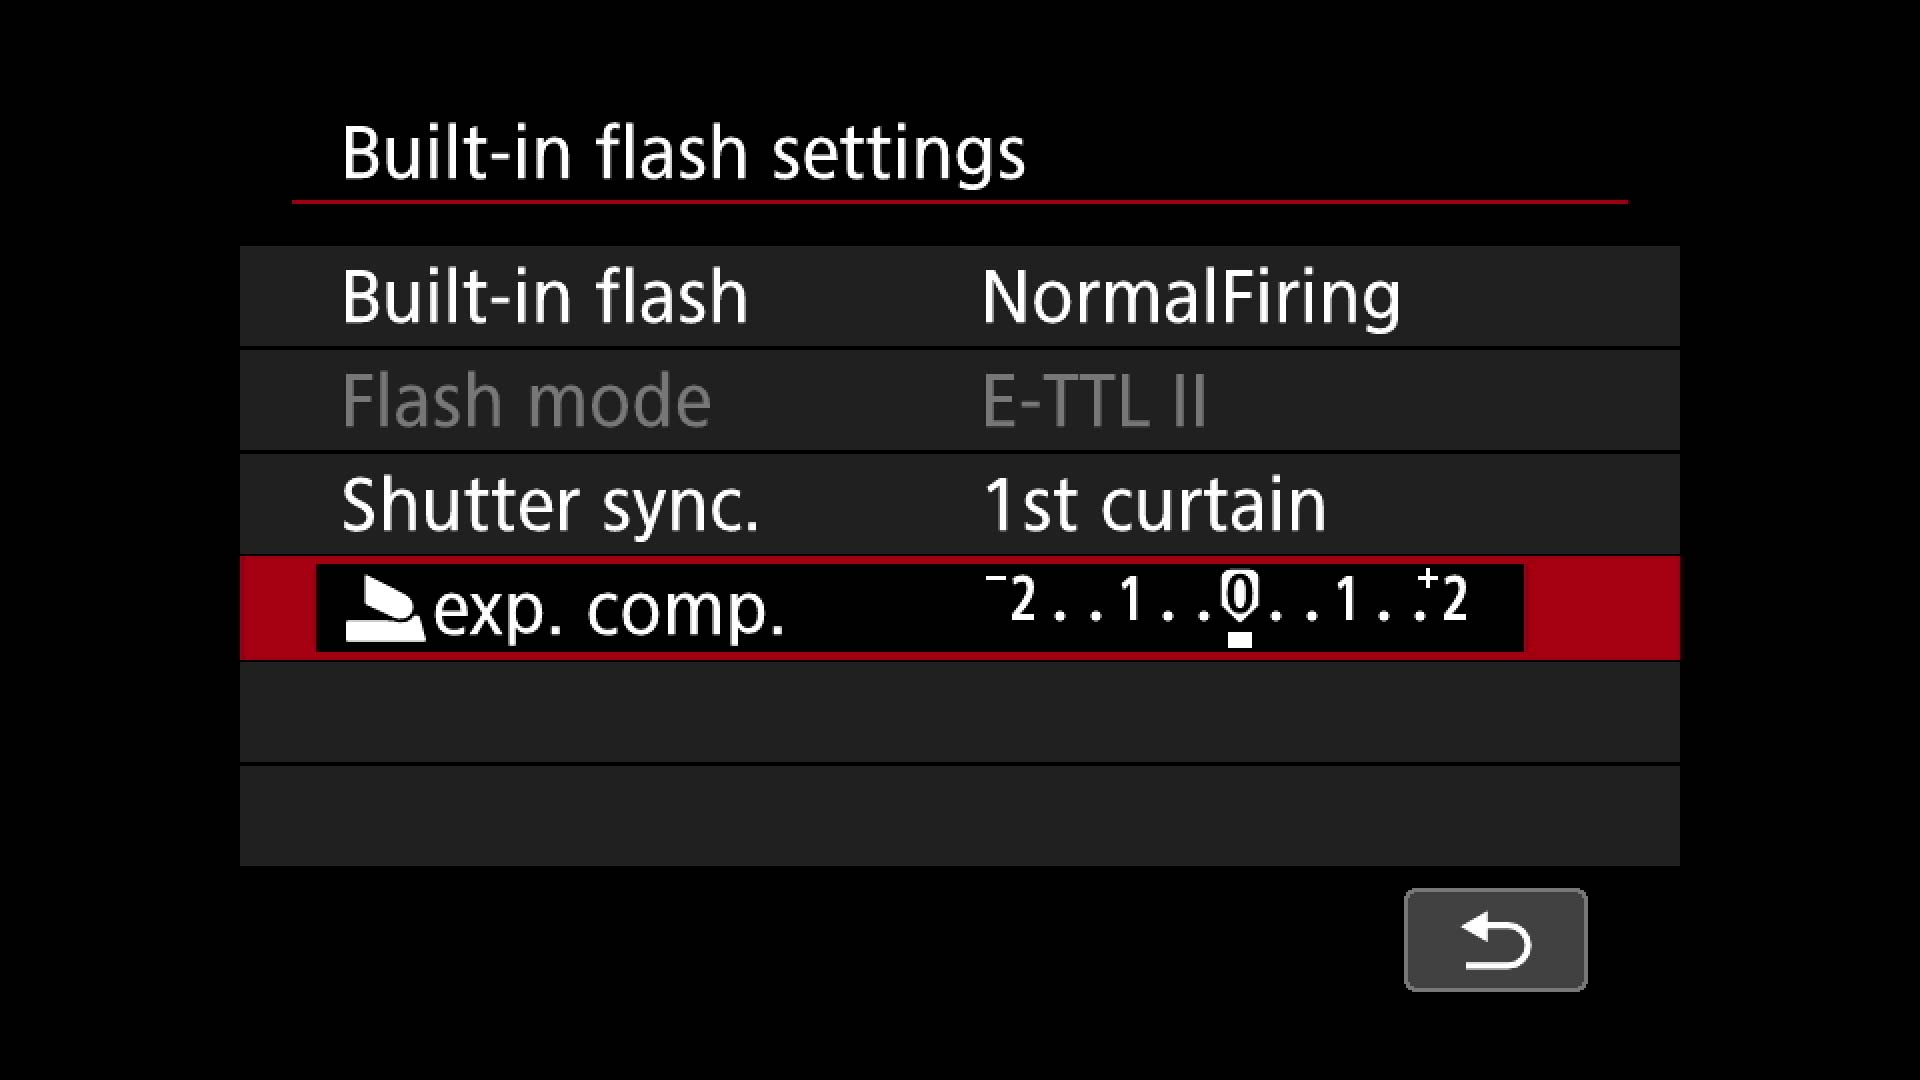
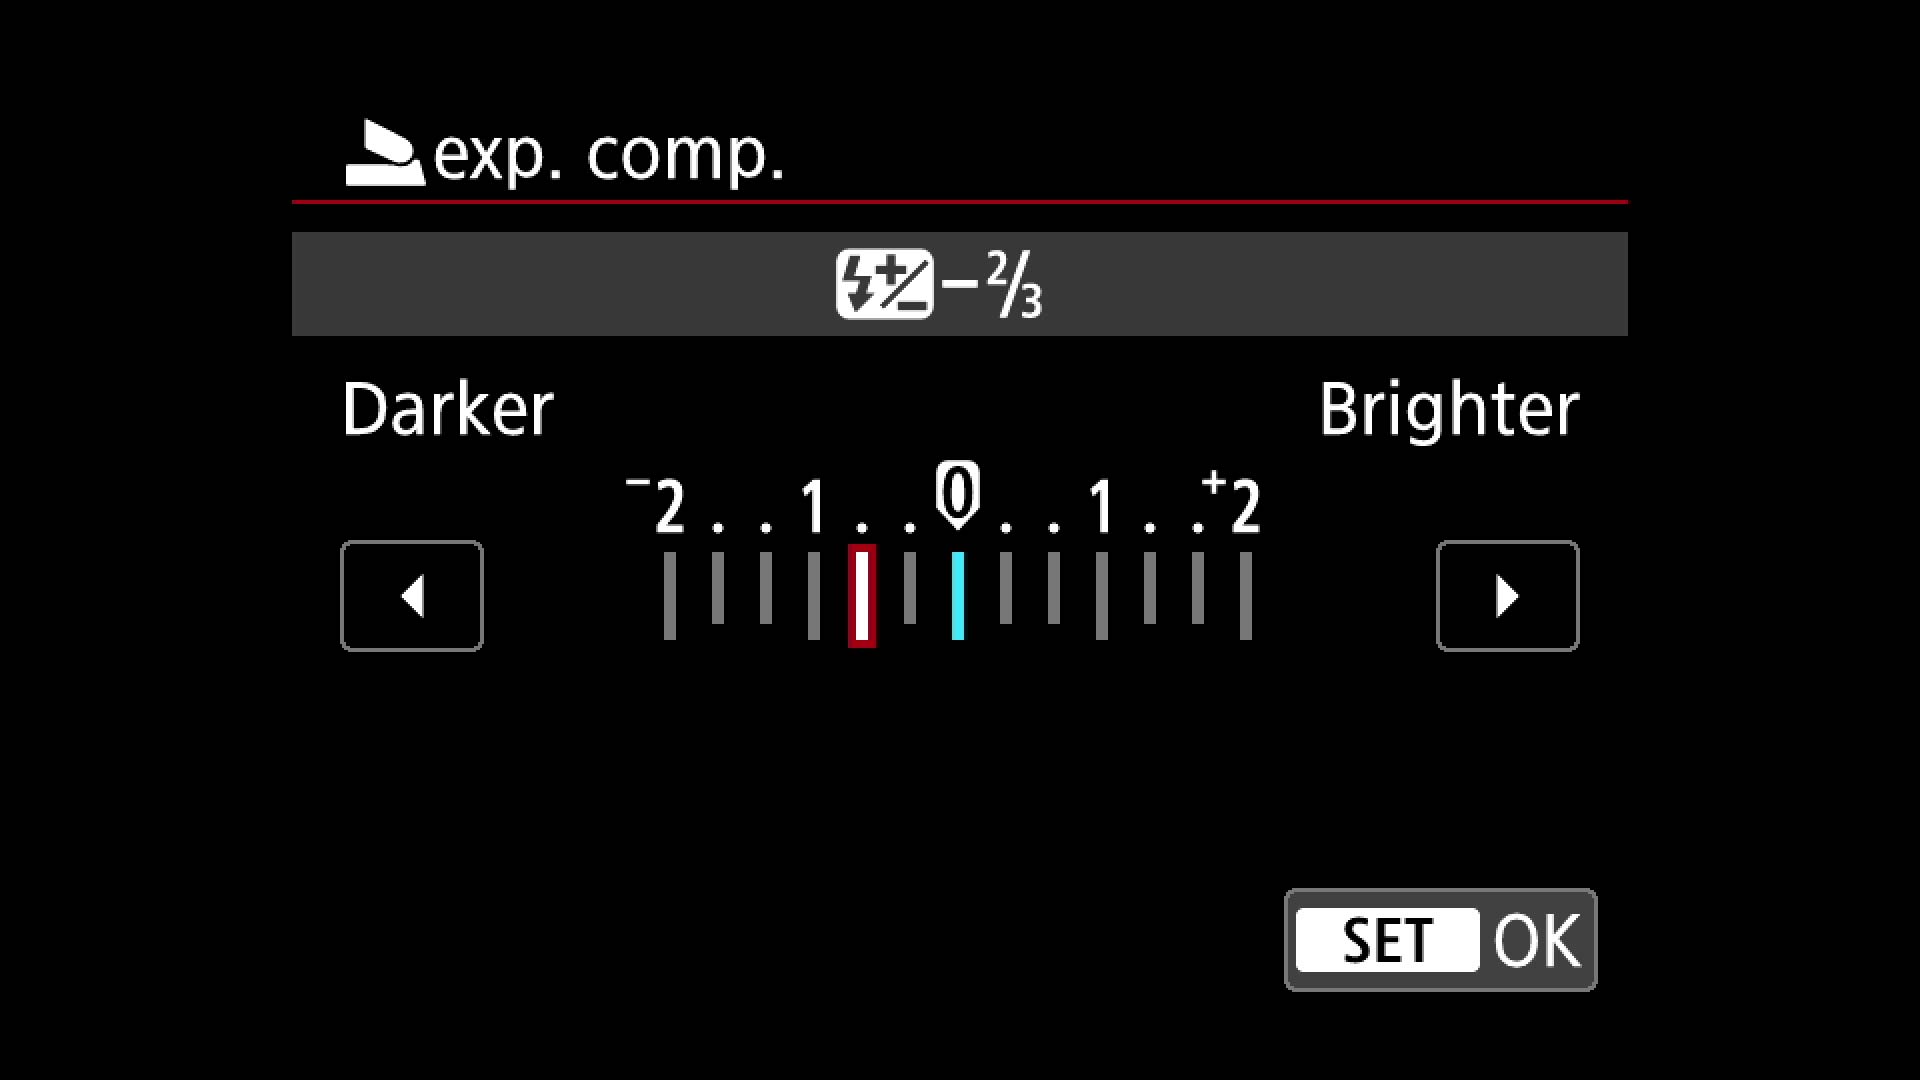
4. To adjust flash intensity, press and hold the flash pop-up button to access the menu screen. Select “exp comp” and move the center marker to the right for brighter exposures; to the left for darker exposures.
5. Important tips: Shutter speed syncs with the flash at 1/200th second and will not go any higher when the flash is engaged. If you have an external flash, attach it to the hot shoe. Read the flash and camera manuals for settings details.
Photo credit: Theano Nikitas/Tom's Guide
Theano Nikitas is a freelance journalist and photographer. She's been writing about photography for more than 20 years, contributing countless reviews of cameras, lenses, accessories and software packages to Tom's Guide. Her work has also appeared in dozens of other magazines and websites, including CNET, DPreview, PopPhoto, Professional Photographer and Shutterbug.
-
michael747bright Great brief tutorial for amateur photographers like myself: many thanks, guys!Reply
