Tom's Guide Verdict
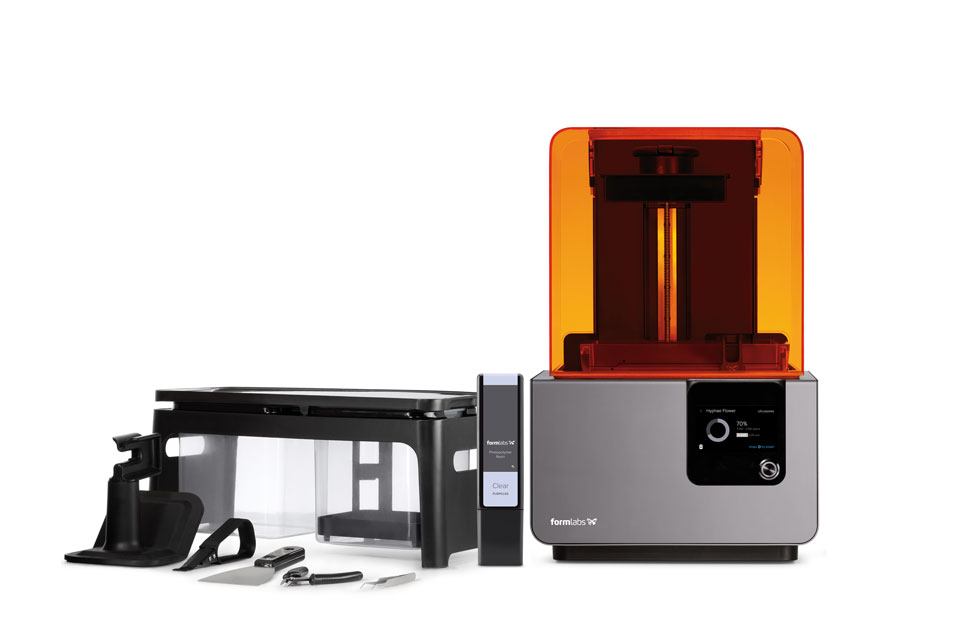
The Form 2 is an excellent, but expensive SLA printer that produces very high-quality prints.
Pros
- +
Excellent print quality
- +
Good selection of print materials including support for third-party resins
- +
Simple-to-use software
- +
Very adaptable for multiple users
Cons
- -
Both printer and resin are expensive
- -
Testing produced occasional print failures with large prints
Why you can trust Tom's Guide
One of the first low-cost stereolithography (SLA) printers for 3D printing enthusiasts, the Form 1 from Formlabs has seen other, cheaper models like the $1,500 Da Vinci rise up to challenge it. Formlabs' response, the Form 2, is a powerful, easy-to-use printer that smooths out most of the rough edges of the older model and produces beautiful prints.
It's no longer inexpensive, though: At $3,499 for the printer kit and $150 per liter of resin, the Form 2 is too pricey for all but the most dedicated home users. But professionals will love it, and new resin materials widen the appeal to users like jewelers and other artisans. That's why we include the Form 2 on our list of the best 3D printers available.
Design: Simple, Easy to Control
The Form 2 is an SLA printer, which means it prints by firing an ultraviolet (UV) laser into a thin layer of liquid resin between the print head and the bottom of the print tray. Once hit by the UV light, the resin solidifies. By tracing a pattern with the laser, the printer creates a solid layer. When the layer is complete, the print bed slides sideways and the print head lifts, taking the solid layer with it and letting in more resin. The print head then lowers to make another liquid layer, and the laser fires again. This process repeats to form the 3D model, layer by layer.
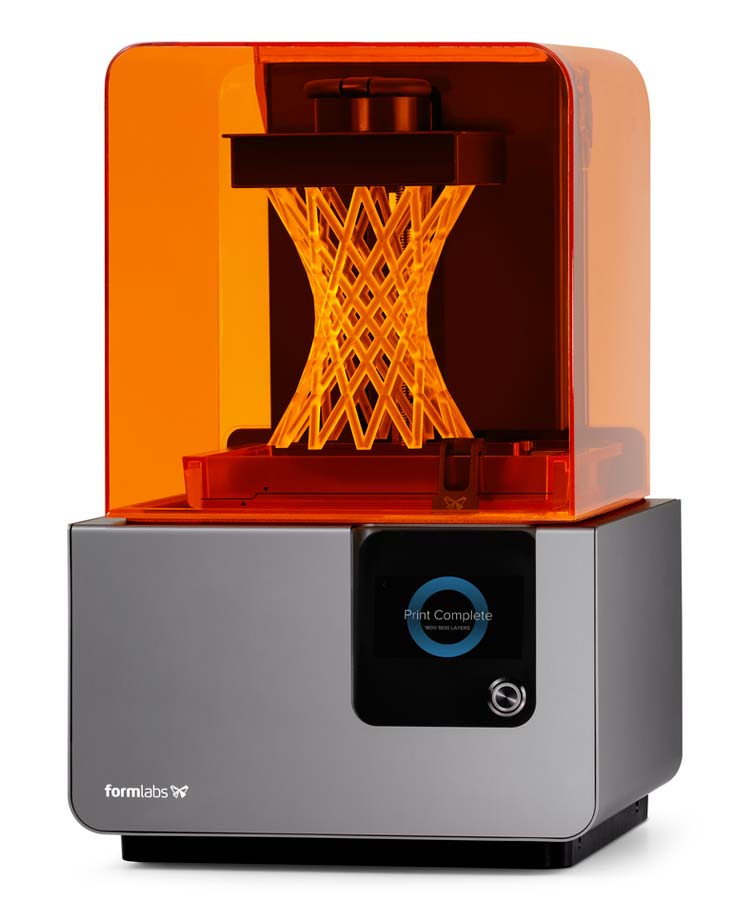
That is the same process that was used on the previously reviewed Form 1+, but there have been lots of improvements in how this process works. First, the print area on the Form 2 has increased to 224 cubic inches, measuring 5.7 x 5.7 × 6.9 inches. That's up from 156 cubic inches on the Form 1+. Second, the ultraviolet (UV) laser that solidifies the resin is bigger as well, doubling the power to 250 mW.
A new mechanism in the Form 2 also deals with the tricky business of lifting the solid layer and making sure that no gunk or air bubbles interfere with the liquid resin. The Form 1+ did this by tilting the print tray to peel the printed layer off the bottom of the print bed, but the Form 2 slides the print tray as it lifts the print head, then uses a wiper to clear any bits and bubbles away before the print head is lowered again.
Finally, an automatic mechanism fills the print tray with resin as required. It's a more complicated mechanism, but it is also better. We had significantly fewer failed prints than with the Form 1+.
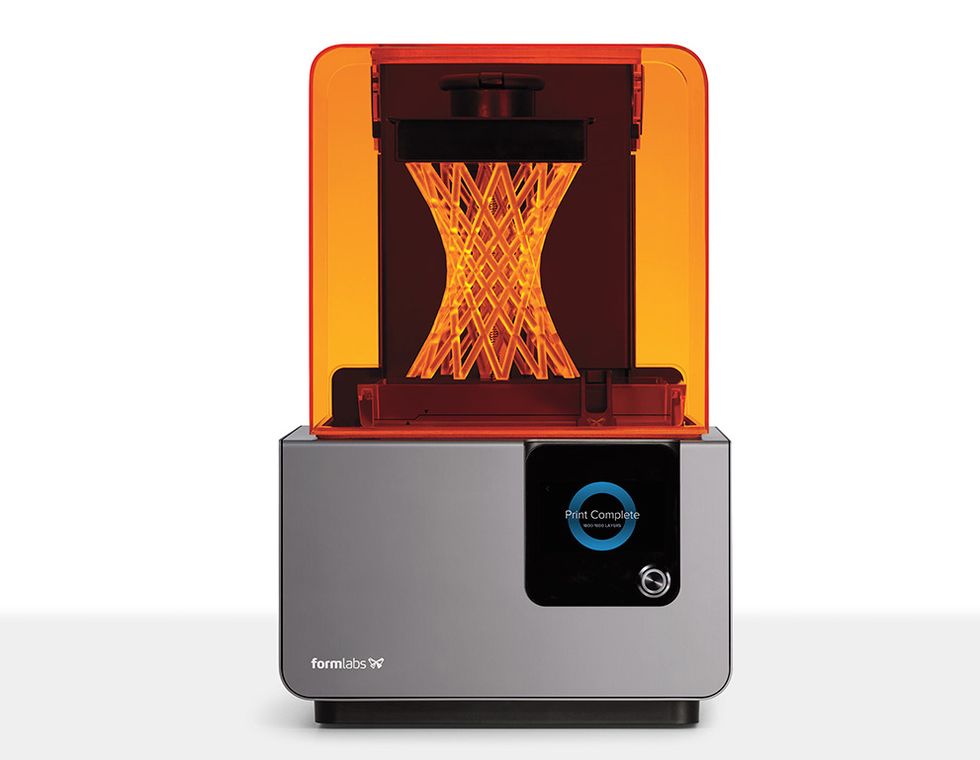
The Form 2 shares the same simple overall design as its predecessor, with an orange plastic hood sitting over the simple silver box that holds the laser and electronics. Both are slightly bigger than on the Form 1+, and a color touch screen has replaced the LCD display. This screen means that you can start, stop and pause prints from the printer itself, which makes controlling things much easier. During printing, the screen shows the progress of the print and an estimate of how long is left.
On the back of the box are the connections: power, USB and Gigabit Ethernet. That's the other big change here: The Form 2 connects to your computer over either USB or wired/wireless Ethernet. That feature makes it much easier for multiple people to use the same printer. Each user can run the PreForm software to prepare a 3D model, send it to the printer, and then walk over and touch the screen to start printing.
The Form 2 has other under-the-hood changes, with its base now sealed to keep dust away from the laser mechanism. A heater warms the print tray to get the resin to the right temperature for printing.
MORE: 3D Printer Buyer's Guide
The plastic hood that covers the printing area is orange, to block any stray UV light from hardening the resin in the tray. This hood is attached to the base by a hinge on the back, so you can lift it up and over to reveal the printing area. Here, the print tray sits on top of the silver base, locking into the mechanism that moves it and slides the wiper across the transparent base. This was easy to install, and the print tray comes with a lid that fits on top of the tray after you’ve removed it. This stops the resin from setting.
Above the print tray is the print head, an imposing chunk of metal that attaches to the arm that lifts the print head up. The print head is removable, locked in place by a metal latch on the top. When a print is done, you remove the whole print head so you can pry the print off.
Print Materials: Third-party Resins Allowed
Formlabs offers seven types of resins for the Form 2: Clear, Tough, White, Grey, Black, Flexible and Castable. That covers a wide range of uses and should satisfy most users. The castable resin is particularly interesting, as it is designed for jewelers and modelers who want to cast objects in metal. Missing from Formlabs' list, though, is a dyeable resin that can be made a particular color.
We used the clear resin in our tests. These resins come in a new container, a rectangular tank that drops into the back of the printer. This means you don't have to pour the resin yourself, because the printer automatically monitors the level of resin in the tray and fills it when required. That's a big step up from the manual filling of the Form 1. These resin tanks have a chip inside that identifies the type to the printer, so the printer will warn you if you use the wrong type of resin for the 3D print.
We didn't find much of a speed increase with the Form 2 compared to the Form 1+, though the new model is by no means a slow printer.
We found that the clear resin produced clean, sharp details of models, with an attractive, almost glasslike quality. Prints came out mostly clean, but definitely benefitted from a little bit of touch-up with a sharp knife and a light polish with sandpaper. The clear resin was a little soft, though. Our set of test gears quite quickly became worn from the repeated motion, and the surface of prints does easily get scratched and marked.
You'll have to pay up for the Formlabs resin. Each tank (which holds 1 liter of resin) costs $149 for the clear, white, grey and black resins; $175 for the tough; $199 for the flexible; and a steep $299 for the castable resin. That's a big step up for someone used to using spools of filament that cost $30 per kilogram.
To put those numbers in context, our gear-set test model used about 52 mL of resin, which costs about $7.80 to print. A solid, 4.5-inch-high print of our Thinker figure used much more: about 155mL, which would cost about $30.85. The same Thinker figure would cost $85 to print in white plastic at the 3D printing service Shapeways. Printing on a filament printer like the LulzBot TAZ 5 would be even cheaper, though. You can buy a kilogram of filament for less than $30.
One of our complaints about the Form 1 was that you were locked in; you could not use resins from other manufacturers. That seems to have hit a nerve, as FormLabs has said that it will allow use of third-party resins. However, you'll have to manually fill the print bed since the automatic filling and reservoir features will be disabled when third-party resins are used. This support will be added in a future firmware update.
Print Quality: Excellent
We found that the Form 2 produced prints of excellent quality, with very fine detail and excellent reproduction of our test models' shapes. The printed parts needed little trimming or cleaning, and fitted together well.
Our first test model is a complicated pile of gears that comes together to form a planetary gear-reducing set. The Form 2 aced this test, having no problem creating the screw threads and cogs of the gears. After we had removed the supports, these parts fit together smoothly, needing only a small amount of trimming to remove a few small lumps of resin that were still attached. Once assembled, the gears turned easily and smoothly.
The Form 2 produced prints of excellent quality, with very fine detail and excellent reproduction of our test models' shapes. The printed parts needed little trimming or cleaning, and fitted together well.
Our second test model is a geometric sculpture which involves a lot of complex overhanging parts and edges. Again, the Form 2 handled this without issues, reproducing the difficult model very well. This included the numerous sharp edges and pointed parts that defeat many printers.
MORE: Best 3D Printers
Finally, we used a 3D scan of Rodin's Thinker to create a 3D print. The Form 2 also printed this without issues, producing an attractive, clean print of the sculpture. Printing at both the 0.1mm and 0.05mm layer heights, we did see a certain amount of layering. In the shoulders of the sculpture, the layers that the printer uses to build the model are clearly visible. All 3D printers produce a certain amount of this, but the clear resin that we used for testing seemed to exaggerate the layering somewhat. This can be mostly removed by some gentle sanding, though.
Setup: Simple
All you have to do to set up the Form 2 is unbox it, plug it in, install a print bed and slide the resin tank into place, then connect it to USB or a network. It's all very simple.
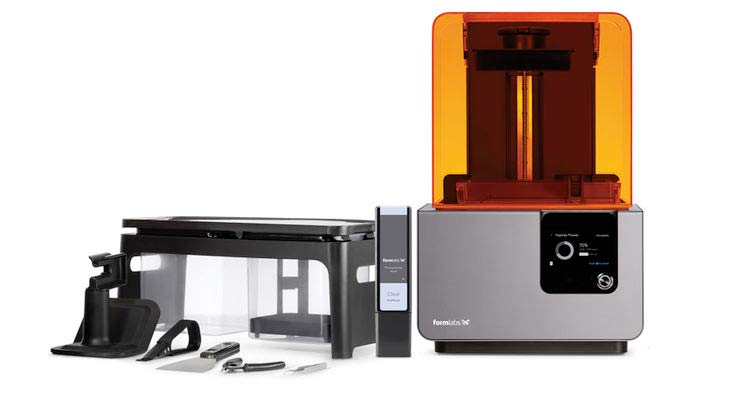
We had no issues getting the printer up and running, and were ready for our first test print in less than half an hour.
Before each print, the Form 2 needs to fill the print tray and preheat the resin to 30 degrees Fahrenheit. That can take a fair amount of time if the room is cold.
Interface: Software And Control Panel Are Easy To Use
The printer offers two methods of control: the PreForm software and the touch-screen controller. With the PreForm software, you load 3D models and prepare them for printing. You can do some simple operations like scaling and shifting a 3D model here, but PreForm is not a 3D-modelling app. Still, the app is well-designed and easy to use, with the controls on the left side and a 3D preview of the model in the main window.
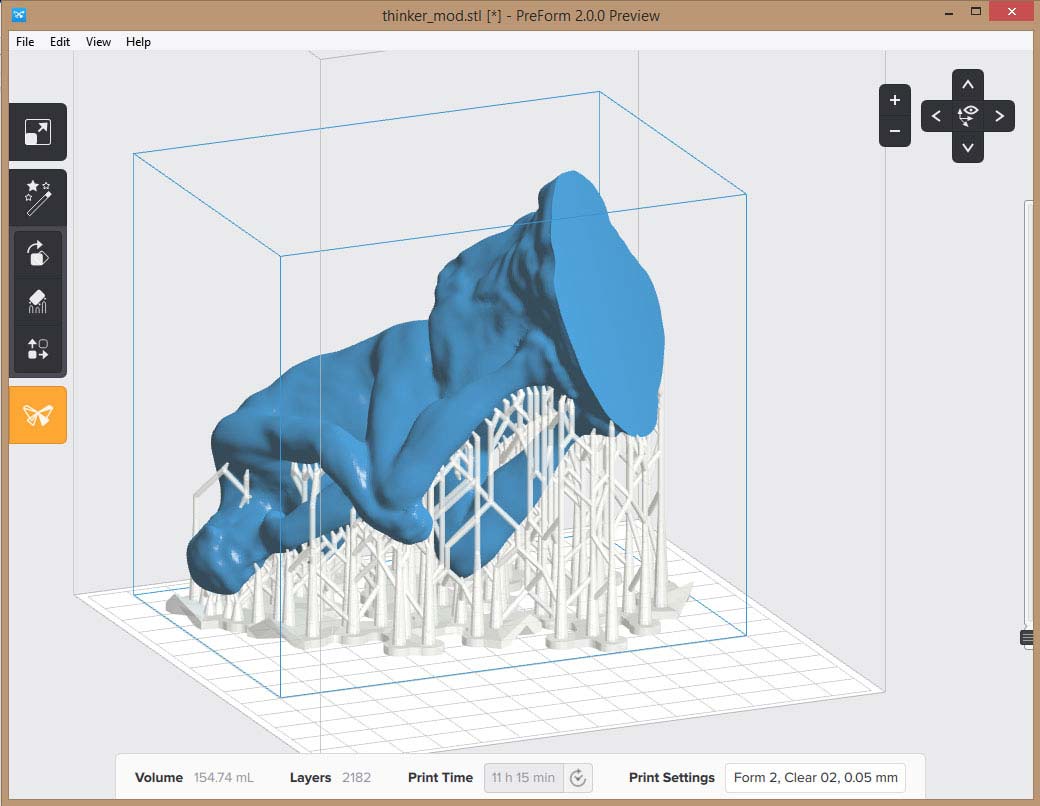
One very welcome feature with the software is the Quick Print button. Click this, and the software checks your model, orients it for the best print quality, builds the supports that hold it in place while printing and prompts you to send the model to the printer. This performed well in our tests; we used it on all of our test models with good results. The program also offers a good level of detail on how long the print will take and how much material it will use, a critical factor when the resin costs as much as it does for the Form 2.
PreForm supports multiple printers, and each printer supports multiple users, so it would be easy to set up an office with multiple printers for high-volume printing, or for several users to connect and send prints to a single printer.
Once the print file has been sent to the printer, you control the process from the Form 2 itself. The 3-inch LCD touch screen on the front of the printer makes this a simple process. You just look for the model name in a list of loaded models, tap it and press the button to confirm that you want to print.
You use the same touch-screen interface for managing the printer in tasks like joining a wireless network. To enter the password for a wireless network, you use a small touch-screen keyboard, which is somewhat awkward. Fortunately, you only have to do that once; the printer saves the password and automatically joins the network when it's powered on.
The same touch screen shows you a small thumbnail of the model, and once the print has started, a progress indicator and an estimate of the time remaining.
Print Process: Mostly Straightforward
Printing a model on the Form 2 is a somewhat-involved process, because prints need to be cleaned after they are complete. You remove the print head and release the model from it.
Release is a kind way to put the process. It often involves some fairly serious chiseling to get underneath the bottom layer of the print, especially with large models. This is a little easier than with the Form 1, though, because Formlabs has changed the way the supports for models are made. The base of the print now has holes in it, which means less sticking. A plastic base that holds the print bed while you are doing this chiseling is included, too, which also makes removal easier. Once you get the included scraper or prier tool under one edge of the print, you can (gently) pry the model off the base to release it.
Once the print is free, you use the included finishing kit to wash the print in isopropyl alcohol; that removes any liquid resin left sticking to the model. This kit includes a stand, two containers for the alcohol, a sieve tray that fits inside the containers, disposable gloves and a few tools. The alcohol itself is not included, but it is available from most drug stores.
After washing your model, you leave it to dry, and then remove the supports. These can usually be trimmed off easily with the included snippers. The PreForm software makes these supports tapered, so the support connects to the model only at a very small area. It does leave a slight mark on the model, but we had no issues buffing this out with fine-grade sandpaper.
We did have a few print failures in our tests. Several times while printing on the thinnest layer height, parts of a print were not properly formed, leaving only a partial print. After some investigation, we found that a loose piece of resin from a failed print had scratched the base of the print bed. This meant that the layers formed in that area were not lifting from the base of the print bed, but instead sticking to the base, causing the entire print to fail. The only way to fix this was to replace the entire print tray, with a new tray costing $59. The problem did not occur again, but it is a reminder that the whole mechanism is rather fragile, and even a small problem can cause the prints to fail.
Print Process Photos
The 3D model is loaded into the software, processed and sent to the printer. The software automatically places the model and builds the supports.
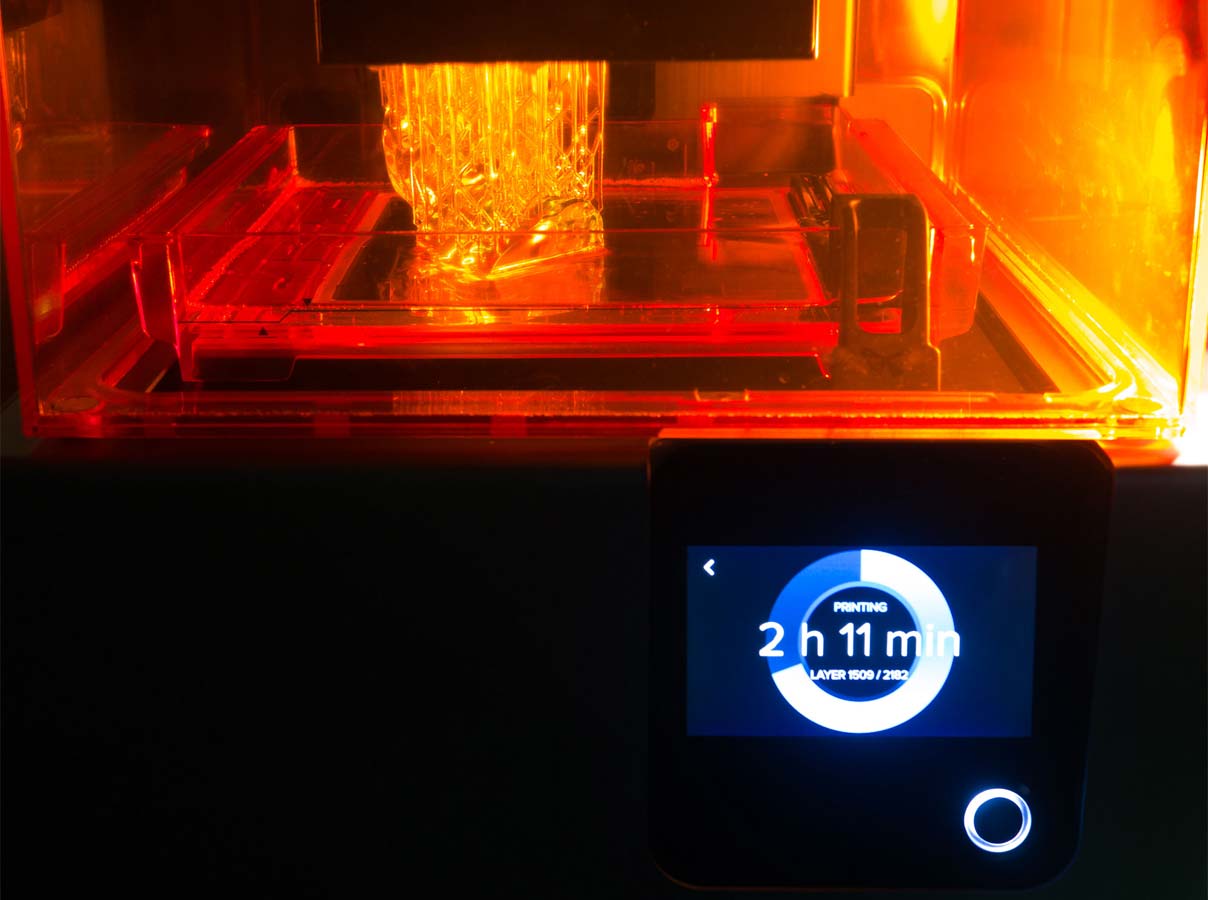
While printing, the Form 2 shows the status and estimated time left.
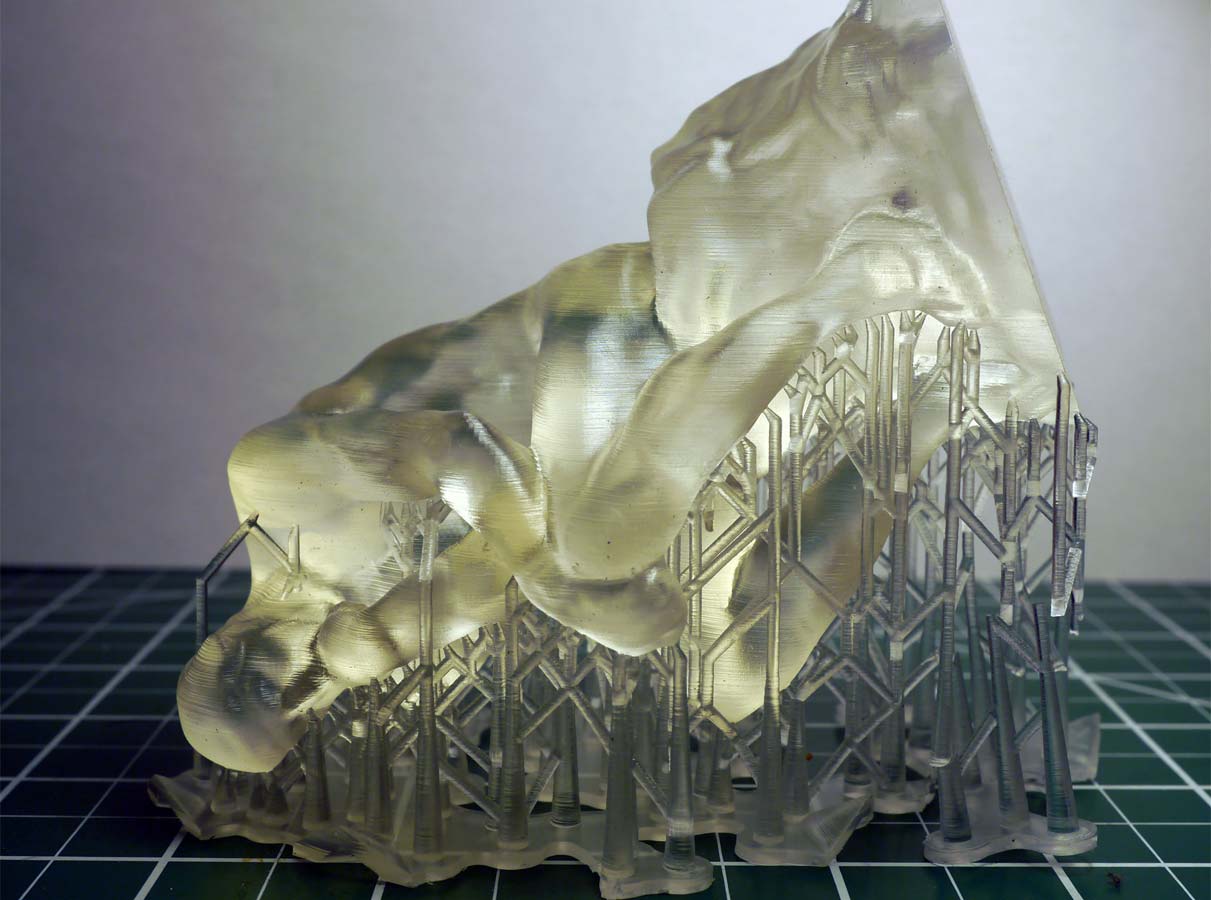
The finished print, removed from the print bed and washed in alcohol with the supports still in place.
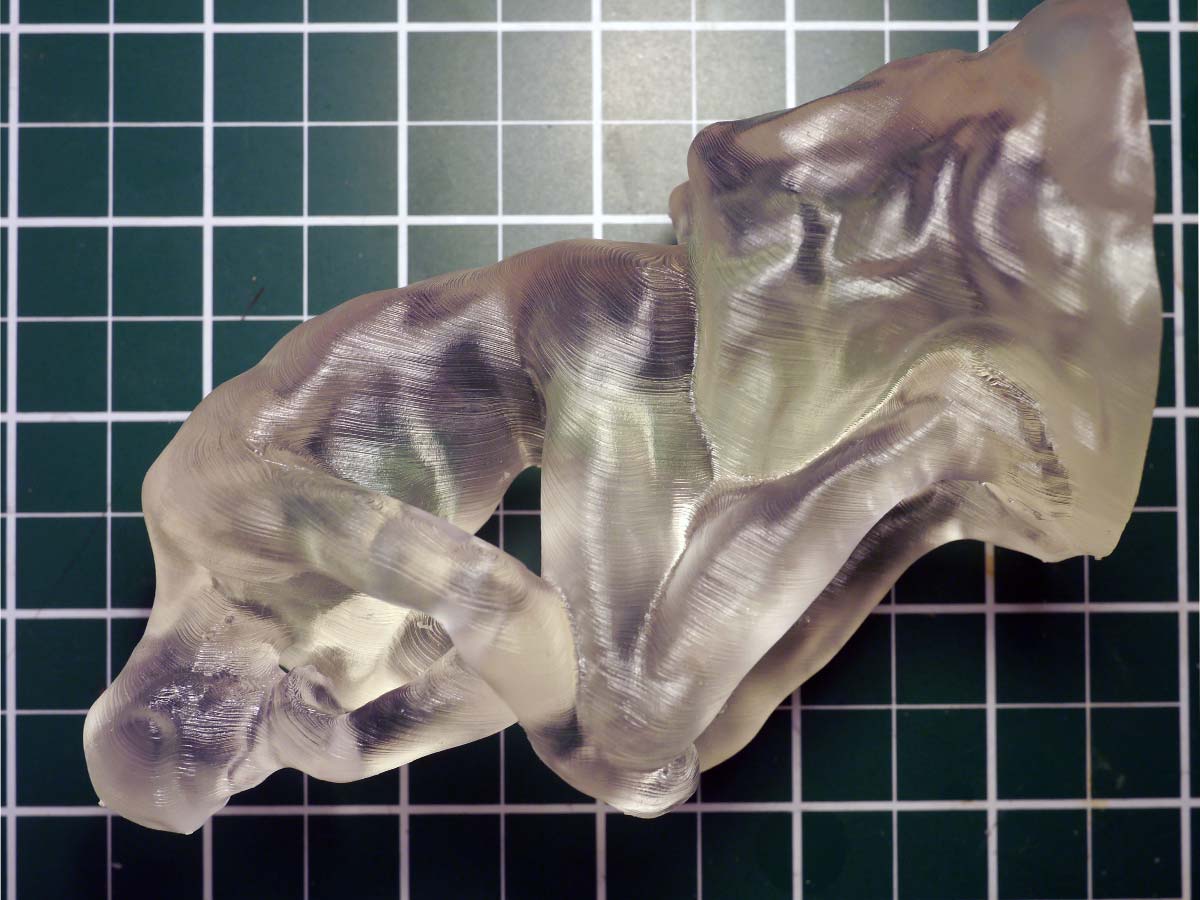
The final print, with the supports removed.
Print Speed: Faster For An SLA Printer
We didn't find much of a speed increase with the Form 2 compared to the Form 1+, though the new model is by no means a slow printer. Using the Print Wizard in PreForm, a 4.5-inch high model of the Thinker sculpture took 7 hours and 5 minutes to print on the 0.1mm layer height, or 11 hours and 15 minutes on the thinnest layer height (0.05mm) that the Form 2 offers. That's a little faster than the Form 1+, at 0.05mm, which took 12.5 hours. However, the Form 1+ was faster at the 0.1mm layer height, taking 6 hours and 5 minutes.
To compare this with a more-current model, the XYZprinting Nobel 1.0 took 10 hours and 21 minutes, and 29 hours and 6 minutes, respectively, to print the same model at the same layer heights. So, the Form 2 is significantly faster than the cheaper XYZ model.
Bottom Line
The Form 2 is an excellent 3D printer that can produce high-quality prints with very clean, sharp edges and fine reproduction of subtle details. Although the clear material we used in testing is quite soft, we were able to easily assemble our set of test gears, with multiple cogs, screws and pins fitting together after only minimal trimming; the complex overhanging edges of our geometric sculpture were also cleanly printed. All of the SLA 3D printers we've tested are slow, but the Form 2 is definitely the speediest of the lot.
You get good software, excellent models and decent speed, making the Form 2 a great printer for engineers, artists and jewelers who need accurate, attractive prints on demand. But you pay for the privilege: The Form 2 costs a steep $3,499, and the resin costs $149 and up for a liter. That puts the Form 2 out of the range of many users. Casual printers will be better off with a cheaper FDM printer like the LulzBot Mini, using the leftover money at 3D printing services like Shapeways that can produce occasional prints in other materials.
That said, a cheaper SLA model might be a false economy. We found that the $1,499 XYZprinting Nobel SLA printer had disappointing print quality. If you can justify the cost outlay, the Form 2 is the high-end SLA printer to beat, and nothing we have tested so far comes close.
Richard Baguley has been working as a technology writer and journalist since 1993. As well as contributing to Tom's Guide, he writes for Cnet, T3, Wired and many other publications.
-
Peter_12345678987654321 You mention the clear resin was soft and quite quickly got worn. That makes me wonder if you post cured the printed parts properly or just cleaned them with IPA and tried them out?Reply -
richardbaguley Peter, I used the process that Forms Labs recommends of washing in IPA (using two baths) and then leaving the prints to dry for some time. I didn't use any other post curing process, although Form Labs does detail some options here: http://formlabs.com/support/finishing/post-curing-prints/. It is definitely possible that these might make the parts tougher, but they still remain somewhat soft.Reply -
Greenstone Very helpful review! I'm specifically looking for a 3D printer to product clear objects, and this one looks pretty promising. However, I'm wondering if the clear resin was truly white-clear, or did it end up with a yellow tint that some of these resins often have?Reply
