Tom's Guide Verdict
Formlabs' Form 1+ 3D Printer produces very-high-quality items, but the printer and materials are pricey.
Pros
- +
Produces very-high-quality, high-resolution prints
- +
Software is easy to use
- +
Printing is fairly quick and easy to monitor
- +
Smaller prints are easy to print and remove from the device
- +
Range of layer sizes offers flexible balance between speed and quality
Cons
- -
Both the printer and the resin it uses are expensive
- -
Limited range of resin colors (clear, white, gray, black
- -
Larger prints are difficult to remove from the print bed
Why you can trust Tom's Guide
Formlabs is a relative newcomer to the 3D-printing scene, with the Form 1+ being only its second product. As the name implies, it is an update to last year's Form 1, which uses a resin printing system that offers print resolutions down to 25 microns (0.025 mm, or 0.001 inches). This enables the device to produce very precise models for architects or engineers, or for works of art. In addition, jewelers can use the prints to make molds for casting in metal.
The Form 1+ produces excellent-quality prints with great detail, but they are limited to only four resin options (three colors, plus clear) at the moment. At $3,299, it isn't cheap, but those who need extra-high-quality prints for their work or hobby will find the Form 1+ a worthy investment.
Who it's for
Jewelers, engineers, artists and others who need to print small, precise 3D models on demand.
Design: No Nonsense
This printer works quite differently from the more-familiar fused deposition modeling (FDM) types such as MakerBots and Printrbots. Rather than using a melted plastic filament, the Form 1+ uses a liquid resin, which is solidified by an ultraviolet laser. The printer repeats this process for each thin layer of resin, to build up a full object.
MORE: Best 3D Printers
Design: Simple & Straightforward
The Form 1+ has a simple design, with a gray aluminum base sporting a single button and a small LCD display. Above is an orange plastic cowl covering the business end of the printer. This cowl tilts backwards to reveal the main parts of the printer: the metal print bed at the top and the resin tray that sits underneath it. The orange color is an engineering, not aesthetic, choice. This hue blocks ultraviolet light (which hardens the resin) from entering or exiting the printer.
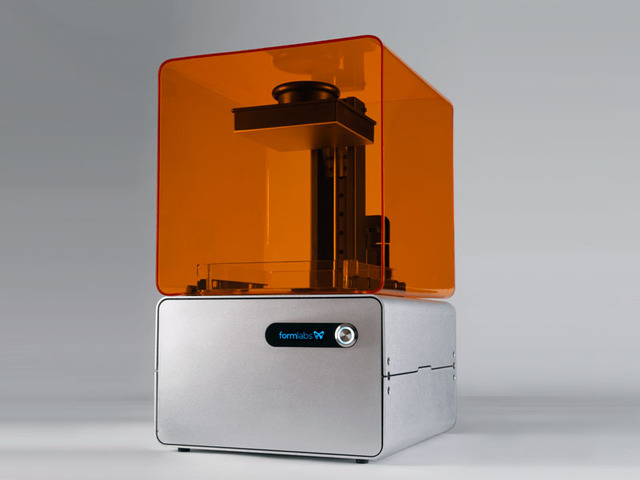
Both the print bed and the resin tray are removable. This combination gives a maximum print size of 4.9 x 4.9 x 6.5 inches — a total of 156 cubic inches. That compares well with other printers, and means it could handle anything up to a statuette in size.
Setup: Unbox, Pour & Print
The Form 1+ is simple to set up: You unpack it, install a print tray and fill the tray with the liquid resin. Once you have plugged in the printer and installed the software, you are ready to print. The process is controlled from a computer connected via USB and running the included PC and Mac software. There is no memory-card slot, Wi-Fi or other way to send jobs to the printer.
The resin is a special brew that is available only from Formlabs. It costs $149 for a liter and is offered in clear, white, gray and black. That's not a huge range of colors, and the resin is a little more expensive than others; for instance, MadeSolid sells a similar resin for $99 a liter. Using other resins may void the printer's warranty, though. (The company's literature doesn't say so outright, but it hints at it.)

The software does give a good indication of how much resin a print will use. Our geometric model print (which is about 2.5 inches across) used 25.8 milliliters, for a cost of just less than $4 in resin. That cost rises quickly with larger models, though, especially solid ones that use a lot of resin. A solid 3.5-inch print of Rodin's The Thinker used about $25 worth of resin.
In addition, the trays that the resin sits in (sold separately) cost $58 apiece. You'll need one for each resin color you want to use, as they can't be completely cleaned out to use for other colors afterward. The trays do come with a lid that seals them, so it is easy to switch colors by swapping and storing resin trays.
MORE: Resin: The Next Little Thing for 3D Printing
Controls: One Button & Easy Software
The only control on the Form 1+ itself is a single button next to the LCD screen that shows messages and print progress. This button pulls triple duty as a Power, Start Print and Pause Print button. Lifting the cowl also pauses printing, but that's a safety mechanism to prevent exposure to the laser.
Formlabs offers its own PreForm software as a free download, which you use to load your models and set them up for printing. PreForm is available for Windows (XP and up) and Mac (OS X 10.6.8 and up). A computer connects to the printer through its single USB 2.0 port.
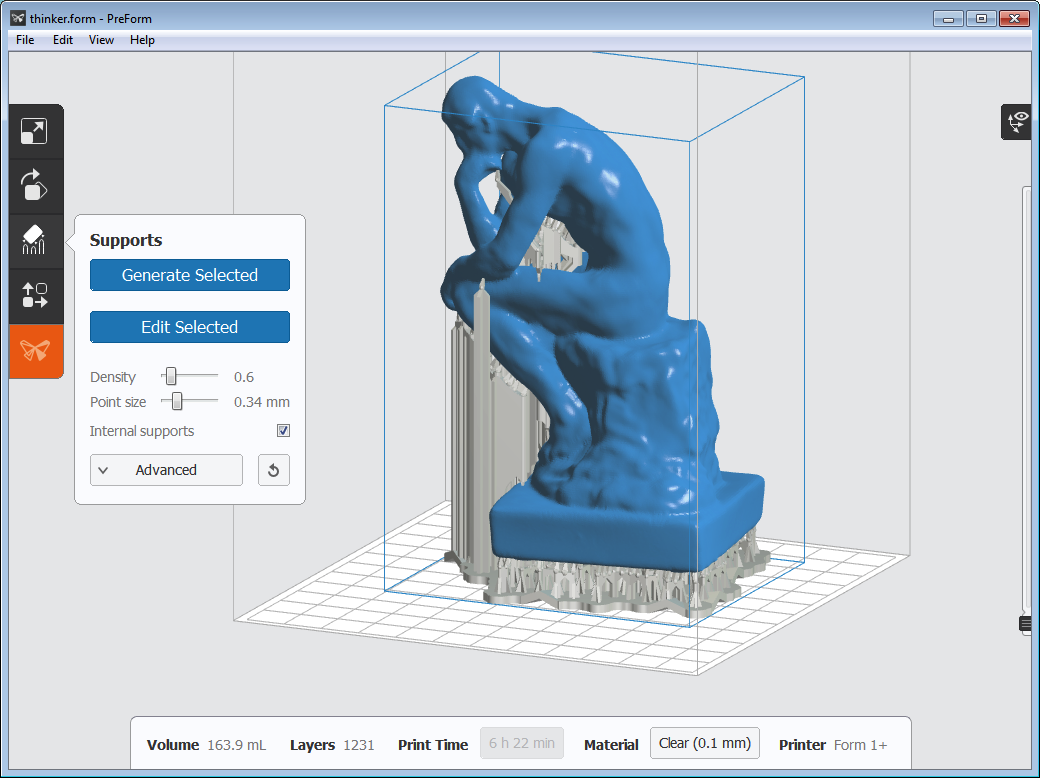
PreForm is a mostly simple-to-use program that focuses on the basics. You can't build objects in it; instead, it can read .STL or .OBJ files, or Formlabs' own .form format. That means it can easily import object files from 3D-printing sites like Thingiverse or from most 3D design programs that can save models in these formats, such as Blender or Solidworks.
Once your object is loaded, you can scale, spin and move it in the print area as required and then add auto-generated supports. These are the tall spikes of resin that hold the print in place during printing.
When you are ready to print, you can calculate the volume of resin that will be used and how long the job will take to print. If everything is correct, you hit Print, and the program creates the printing code and sends it directly to the printer.
PreForm does have some bugs, though. It was unable to open some 3D models I tried, claiming that they were corrupted or incomplete. Other 3D-printing programs, such as Slic3r, had no issues with these models. PreForm also has an odd problem if you switch units of measure between millimeters and inches. For example, changing the units for a 1100-mm object made it 1,100 inches tall (that's more than 90 feet).
Printing Process: Simple (When it Works)
This resin tray has a clear base with a silicone nonstick layer on it. To print, the metal print bed is lowered to just above this layer, creating a thin film of resin between the printhead and the silicone. The printer then blasts this with a UV laser that bounces off moving mirrors to form the shape of the object. This intense UV light hardens the resin — a process called stereolithography, or SLA printing.
This solidified resin sticks to the metal print bed (or to the hardened layer of the print above), and the print tray gently tilts, so the hardened resin peels off the silicone. The print head is then lifted and lowered again to create another thin film of resin. This process is repeated, so the object is formed layer by layer.
MORE: 3D Printing Services Reviewed: Do They Really Work?
After the print is complete, the printer lifts the printhead out of the resin tray. You then remove the printhead and completed print using the included scraper.
I found the process to be more cumbersome than Formlabs' instructions made it look. The problem is that the print sticks to the printhead too well. Particularly on larger prints, I had to use the scraper like a chisel to get under the hardened resin.
At the suggestion of the members of the Formlabs forum, I found that a small glass razor (used to remove paint from glass, available at any hardware store) was more effective. You use the razor to lift the edge and then use the scraper to push underneath the print and pry it off. It still requires a lot of force, though, and I often ended up splashing the remaining liquid resin around. Fortunately, the finishing kit comes with a large supply of disposable nitrile gloves for just this reason.
The lifting process also has to be done fairly quickly — if you leave the print too long, the resin sets and becomes much harder to lift, again requiring a lot of brute force. This whole process can be rather arduous, but consumer-priced SLA printers are still a young class of products, and we don't expect the level of polish that a mature product category would have.
Once the print has been removed, you use the included finishing kit to wash it in isopropyl alcohol (not included, but available from any hardware store), which dissolves any remaining liquid resin. After washing and drying, you can then use the included small snips to cut the print free from the supports that held it in place.

PreForm creates a small, easily cut neck that connects the support to the print body, which leaves only a small nub of resin on the print itself. This is easily sanded off to leave no trace.
Although most prints were trouble-free, I did get the occasional failure. My first few prints didn't stick to the print bed, which meant I got nothing more than a piece of goopy resin floating in the resin bed. After consulting again with users on the Formlabs forums, I tried cleaning the print bed with alcohol to remove dust and specks of resin, which helped. After I cleaned the print bed, my prints stuck to the print head.
On a couple of occasions, a print failed partway through because the layers didn't stick together. That was rather frustrating when it happened two-thirds of the way through a 24-hour print job (wasting a lot of resin and time), but it was more the exception than the rule.
Printing Quality: Excellent Detail
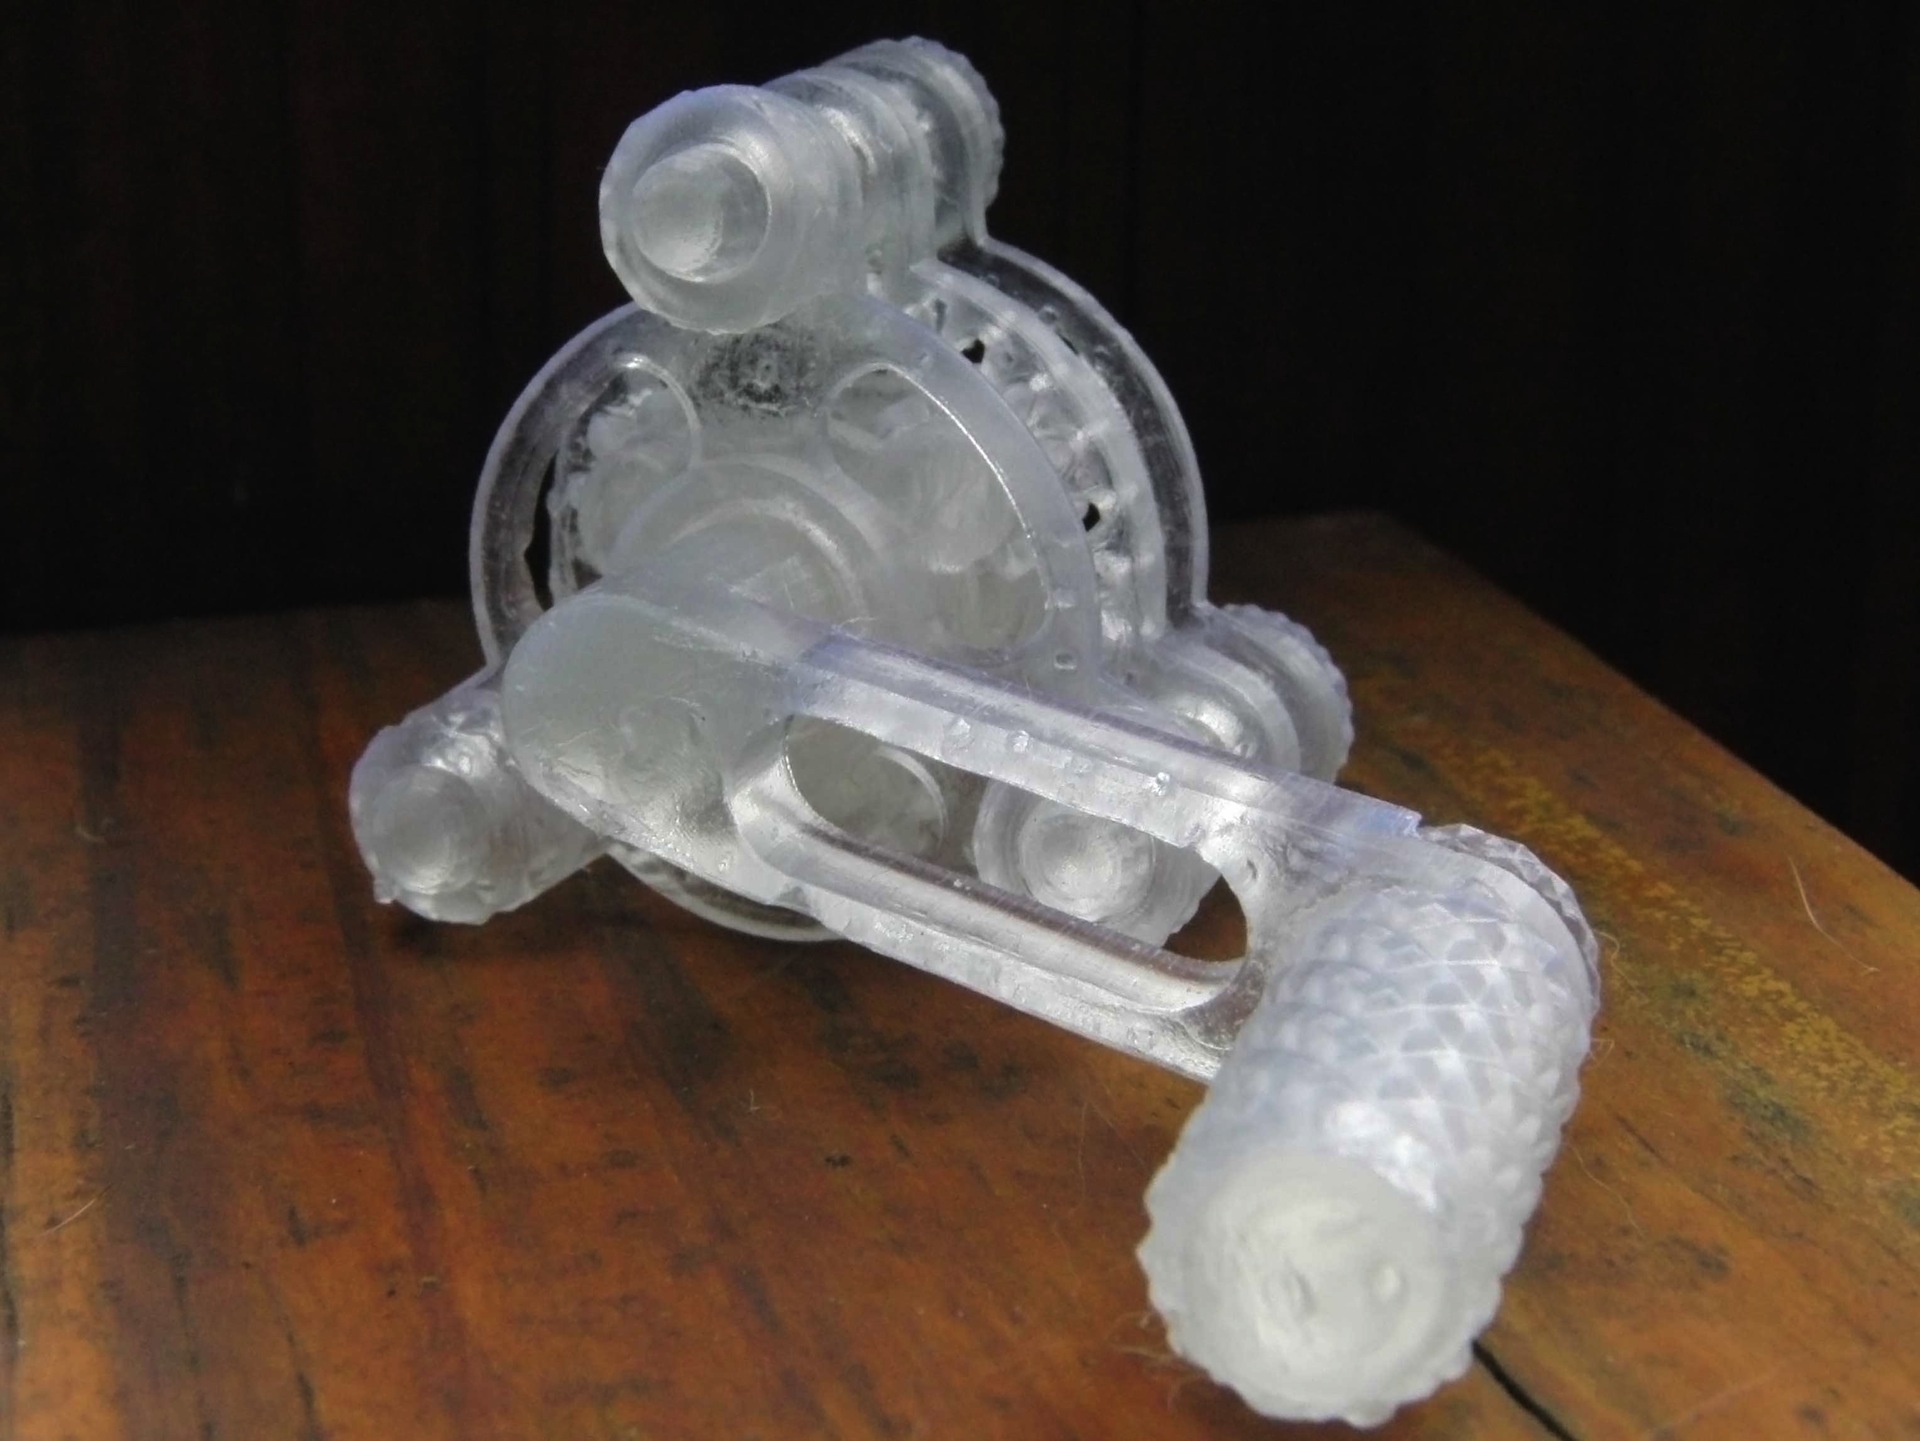
The quality of my prints from the Form 1+ was excellent. I found that the prints it produced were clean, with sharp edges and smooth curves and surfaces.
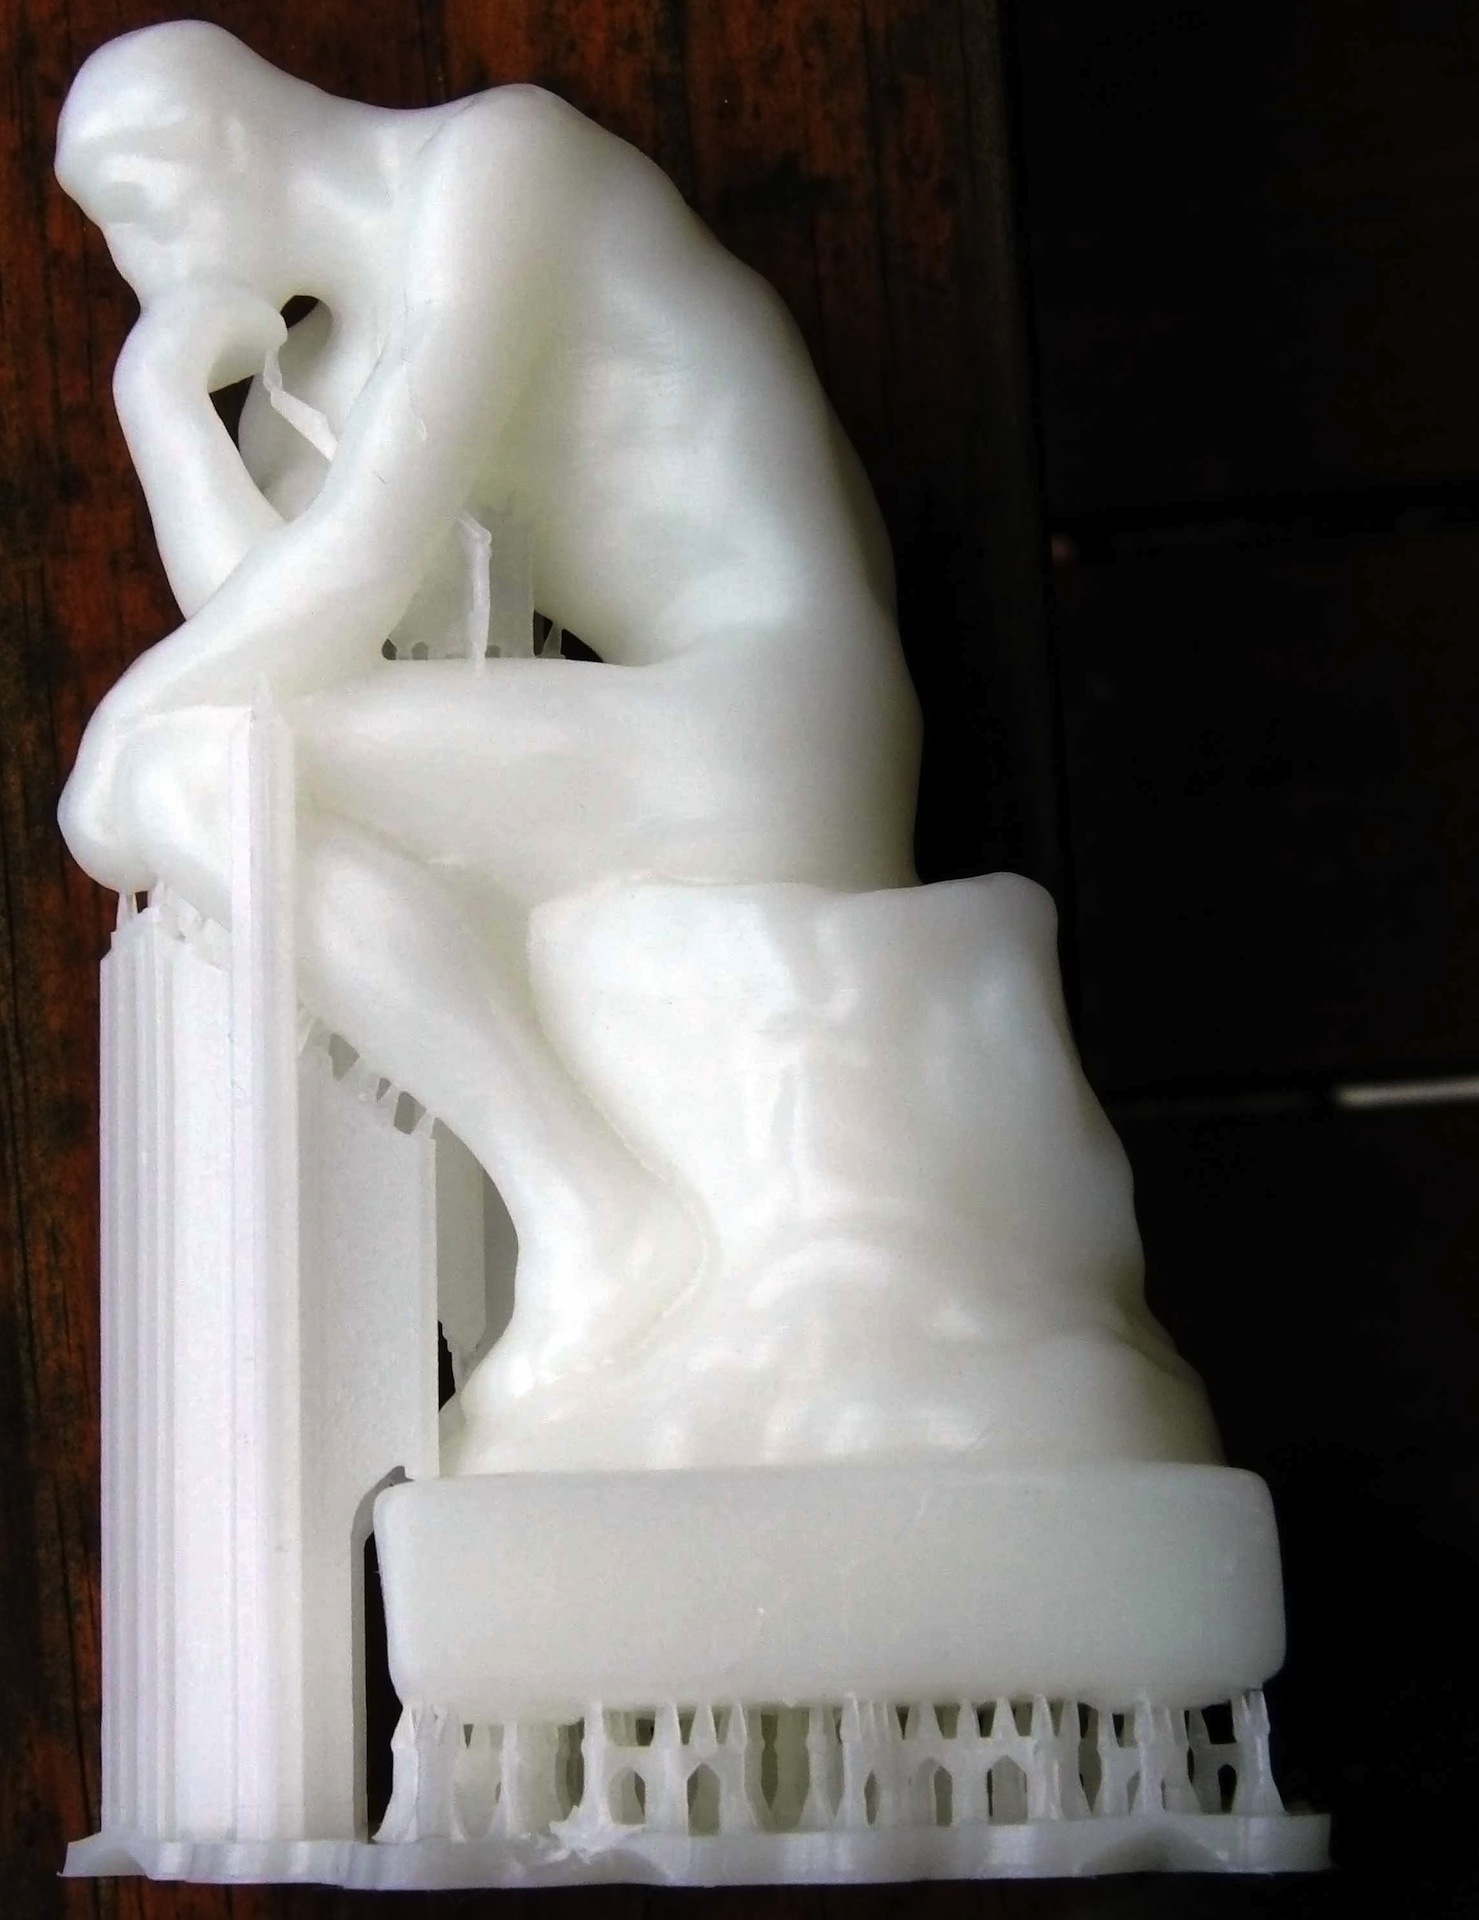
My first test model, based on a scan of The Thinker by Rodin, came out with excellent detail that captured the subtle curves and contours of the original, with only slight evidence of the individual layers. A print of the statue in the clear resin was especially striking, having an almost glasslike quality. (This photo shows the print before I removed the supports.)
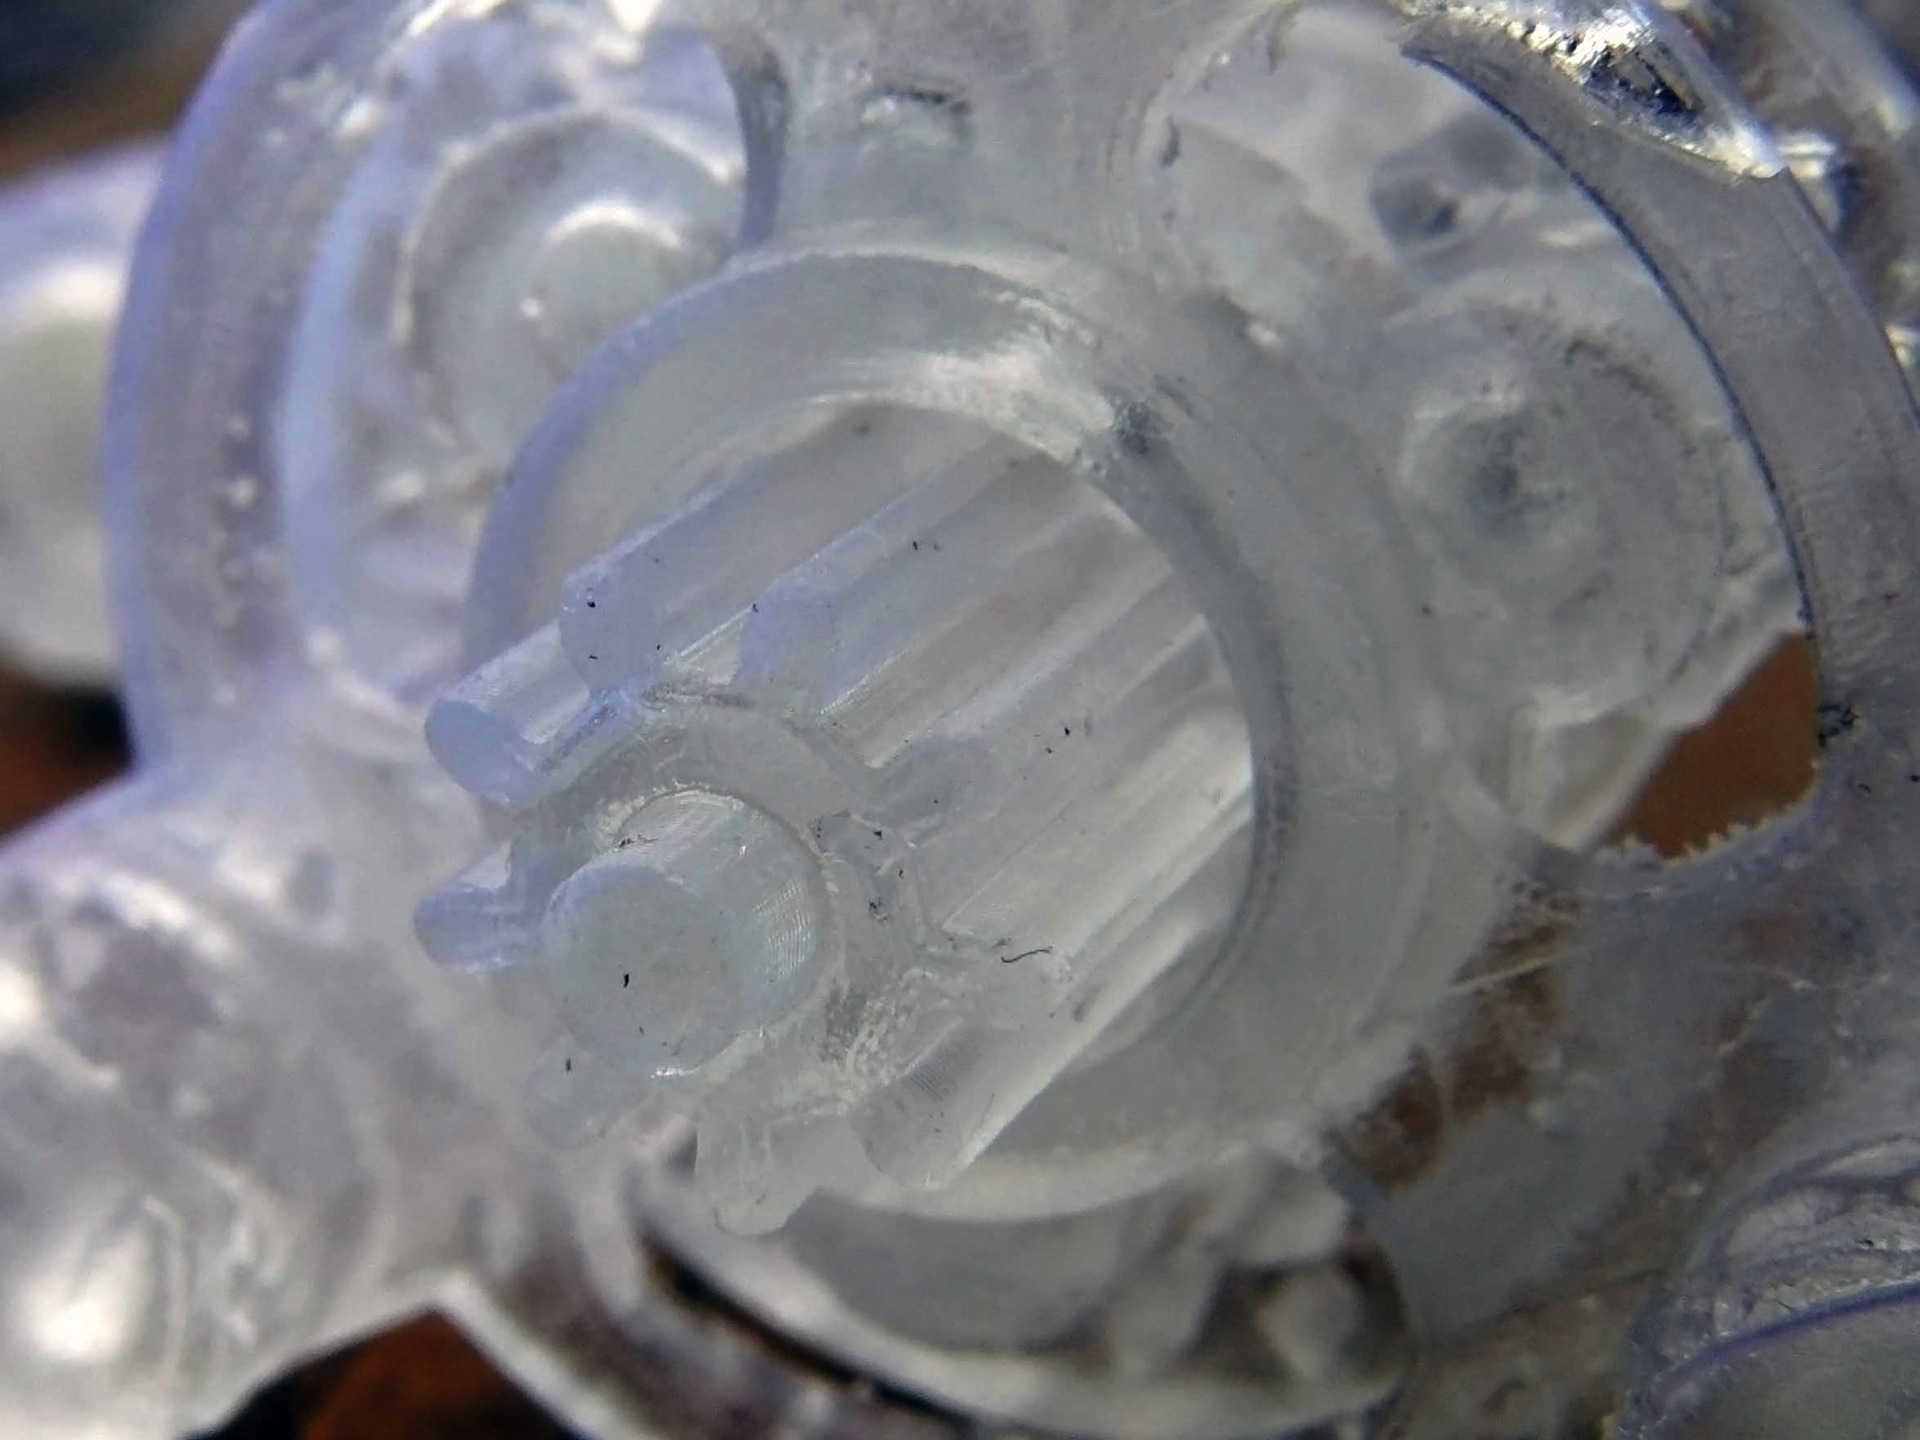
Next, I used a design for a set of geometric gears from Thingiverse. Again, these were printed with excellent quality, and I had no problems fitting the gears together to produce the final mechanism. Most printers require some cleanup here, removing odd bits of plastic from the gears and cleaning the thread of the screws that hold the mechanism together. The prints from the Form 1+ required only a very small amount of cleaning to fit — a slight sanding to smooth the small nubs of plastic left by the supports. These parts were much easier to fit together than those printed on cheaper FDM printers like the LulzBot TAZ 3 and the Printrbot Simple Maker (read review), where odd bits of plastic blocked screw threads or created gears that didn't always mesh perfectly.
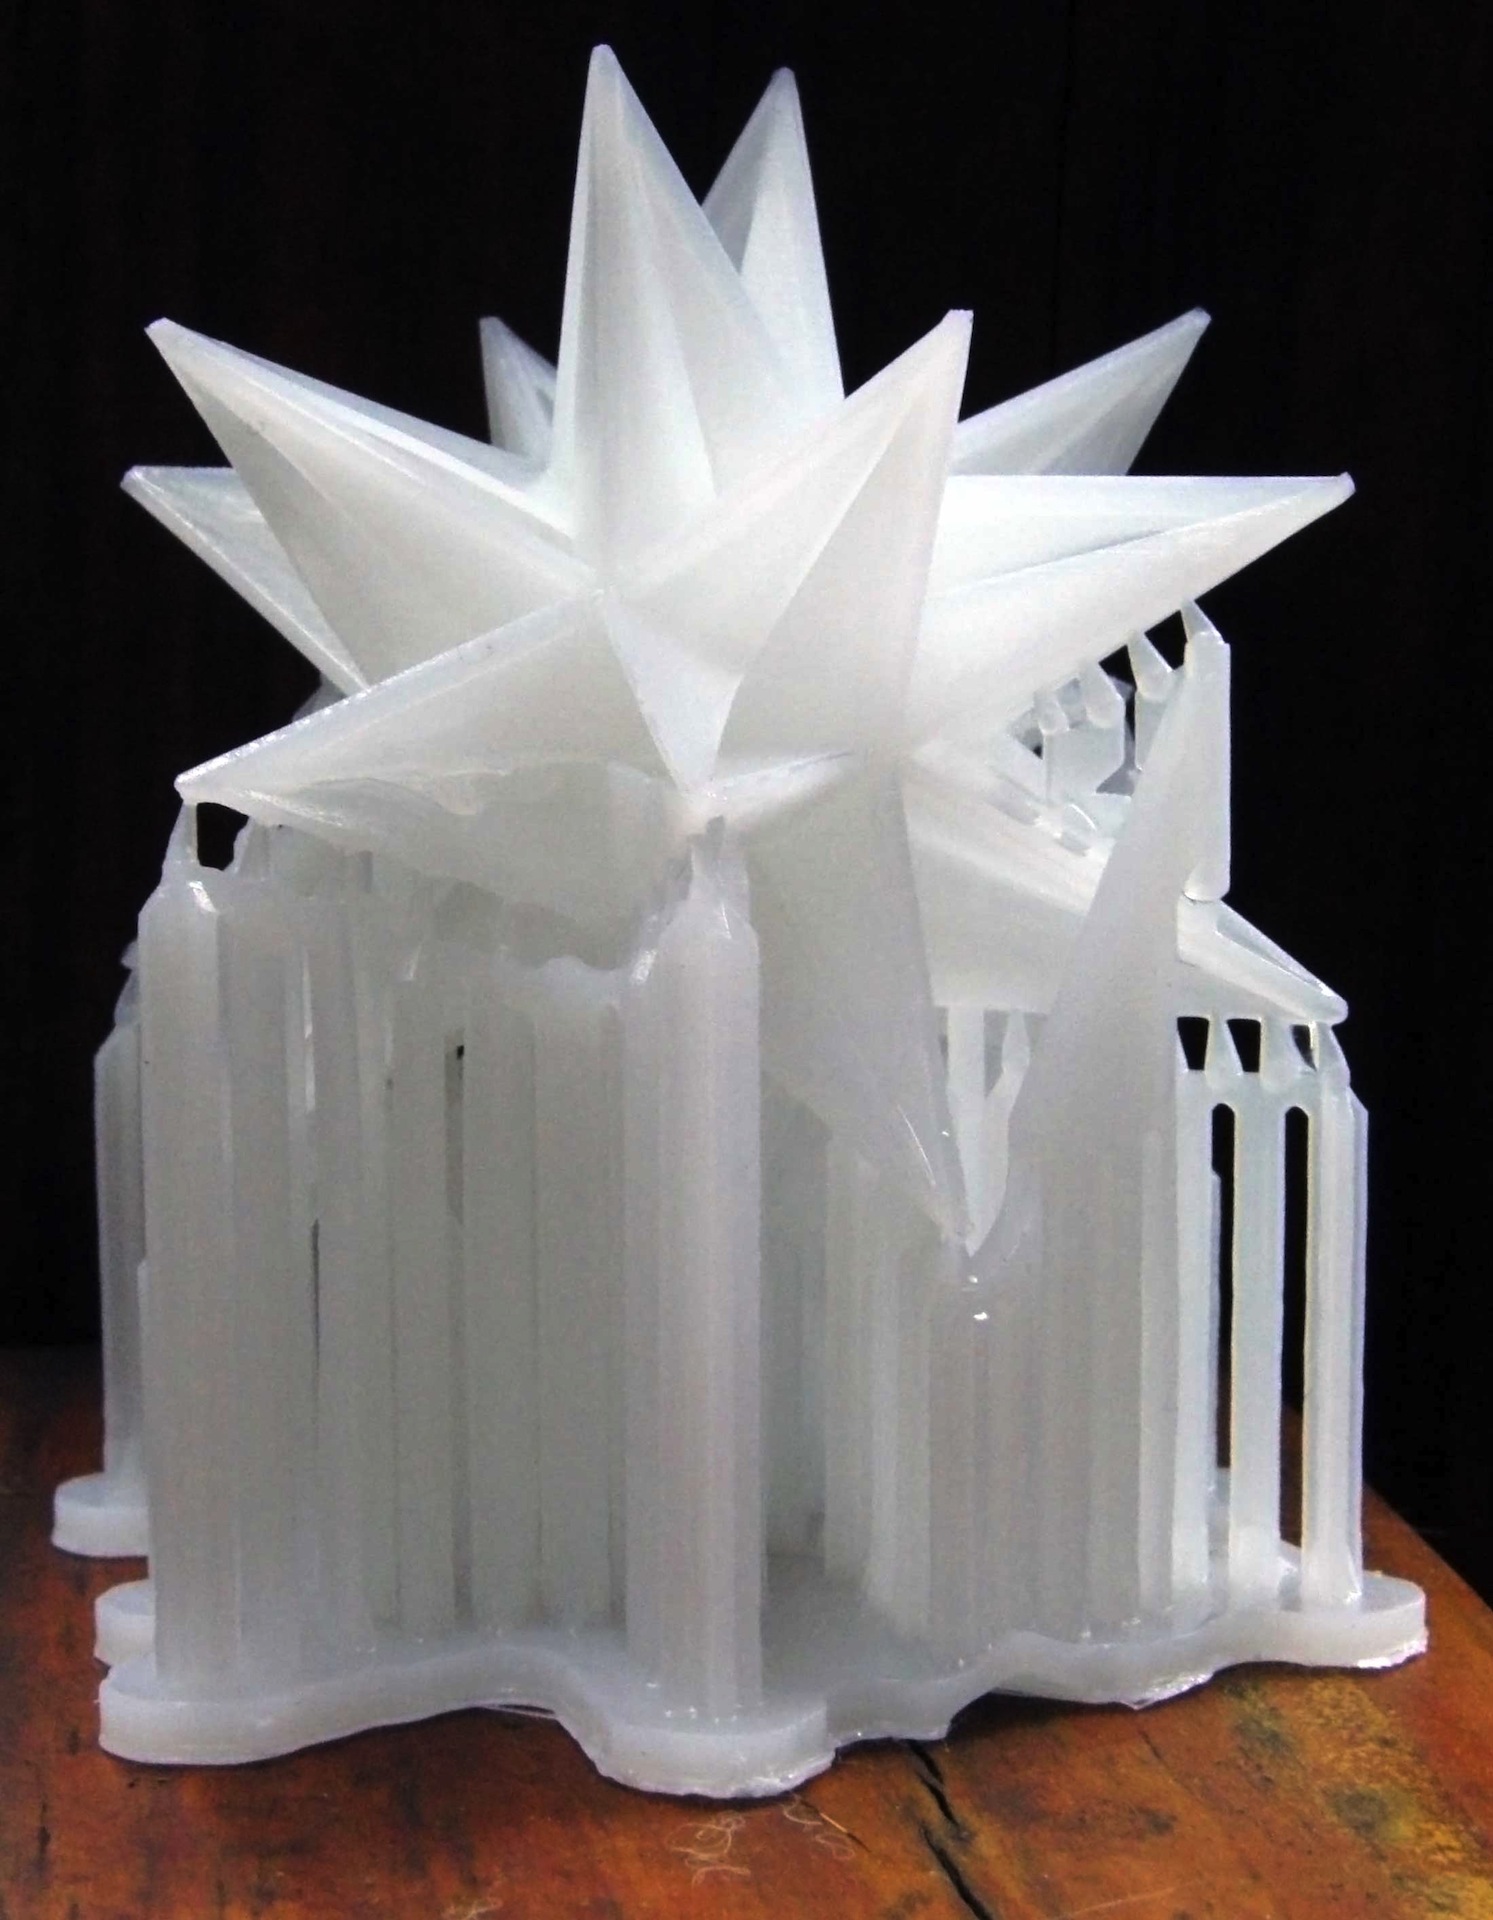
Our toughest 3D-print test is a geometric sculpture, which involves lots of angled edges and overhangs. Again, the Form 1+ aced this test, producing a clean print that had only very slightly visible layering on some of the edges. It created the overhangs without issues, and the supports (still in place in this photo) were easy to remove with a few snips and sands.
Printing Speed: Relatively Fast
No 3D printer we have tested could be described as fast, but the Form 1+ is among the speedier ones. With the largest layer size of 0.1 mm, our 4.25-inch-high thinker statue took a little less than 6.5 hours to print. When we decreased the layer size to 0.05 mm, the print time doubled to nearly 12.5 hours. That makes it faster than FDM printers we have tested. For example, the LulzBot TAZ 3 took 11 hours to produce the same size of print with a 0.1-mm layer height.
Bottom Line
The benefit of the SLA printing process that the Form 1+ uses is that you can create very thin layers that result in extremely fine detail. The downsides are that it is complex and requires special resins. Oh, and it is expensive: $3299 for the printer and $149 for each liter of resin.
This is still an evolving technology, though, and there are a few quirks on this printer. It doesn't measure the amount of resin left, so you can run out halfway through a print if you aren't paying attention. The occasional printing glitches are also rather annoying, especially with the expensive resin. However, the quality of the prints is excellent. People who need high print quality with only occasional hassles will find that the Form 1+ serves them well.
Key Specs
Dimensions: 11.8 x 11 x 17.7 inches
Weight: 18 lbs.
Print Material: Methacrylate photopolymer resin
Print Area: 4.9 x 4.9 x 6.5 inches
Print Surface: Removable metal print bed
Layer Size: 0.001, 0.002 or 0.004 inches
Interface : USB 2.0
NOTE: This article has been updated to correct the price of resin, the material of the printer base and the method for pausing a print.
Richard Baguley has been working as a technology writer and journalist since 1993. As well as contributing to Tom's Guide, he writes for Cnet, T3, Wired and many other publications.

