What Is Cloudflare's 1.1.1.1 DNS and How to Set It Up
Cloudflare says you can get faster internet speeds with its 1.1.1.1 DNS, but what is a DNS, and how do you use theirs?
On April 1, the internet-services firm Cloudflare announced it was offering a fast DNS resolver that uses the 1.1.1.1 IP address. Here's how to set it up on Android devices, iPhones, Macs and PCs.

What is DNS?
You can think of the Domain Name System as "the phone book of the internet." To explain it further, it's the system that converts a human-readable text-based domain name such as tomsguide.com to a computer-readable numerical Internet Protocol address such as 34.192.57.190 so that your web browser or email client can load content from the internet. (Yes, http://34.192.57.190 should lead to Tom's Guide.)
What is Cloudflare's 1.1.1.1 DNS service?
Your internet service provider gives your router a default DNS resolver, which in turn tells your system which web servers to connect to in order to load a website. Cloudflare says its 1.1.1.1 DNS resolver is faster than the one your ISP gave you, though.
Specifically, Cloudflare claims its resolver will take 14.8 milliseconds to answer a DNS query, which according to Cloudflare beats the 70-millisecond average among ISPs and the 34.73-millisecond response time from Google's public DNS services. Cloudflare claims its speed advantage comes from the power of its more-than-1,000 servers around the world.
MORE: Best Wireless Router - Routers for Strong, Long Range Wi-Fi
A couple of notes up front, though: Cloudflare's 1.1.1.1 DNS can also be used for encrypted DNS resolution that keeps your ISP from seeing where you go on the internet. Setting that up is immensely complicated, and running it will probably slow down your DNS queries, but if you're a veteran with the Linux command-line, check out Cloudflare's instructions for DNS over HTTPS and DNS over TLS.
Also, changing your DNS settings to 1.1.1.1 may lead to a lack of service if you're in certain enterprise environments. The 1.1.1.1 IP address is owned by the Asia-Pacific Network Information Centre (APNIC), which partnered with Cloudflare for this service, and the address wasn't originally designed for full-internet consumption.
Sign up to get the BEST of Tom's Guide direct to your inbox.
Get instant access to breaking news, the hottest reviews, great deals and helpful tips.
Some networking devices may be using the 1.1.1.1 address for other purposes in local environments, and if so, your DNS queries will go precisely nowhere. Hopefully, this issue will be resolved in the coming months.
If you're comfortable editing your router's settings (and each is massively different), here are the entries to add:
1.1.1.1
1.0.0.1
Google's also got its own public DNS, and its entries are:
8.8.8.8
8.8.4.4
How to set up Cloudflare's 1.1.1.1 DNS on Windows
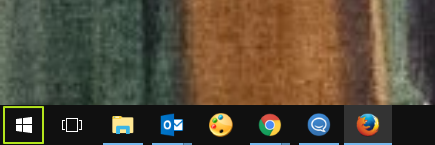
1. Right-click the start menu button.
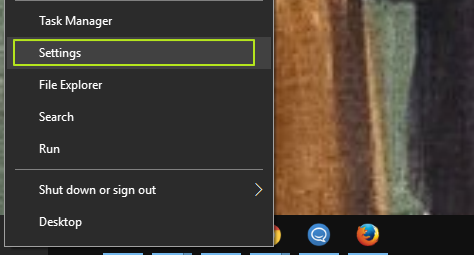
2. Select Settings.
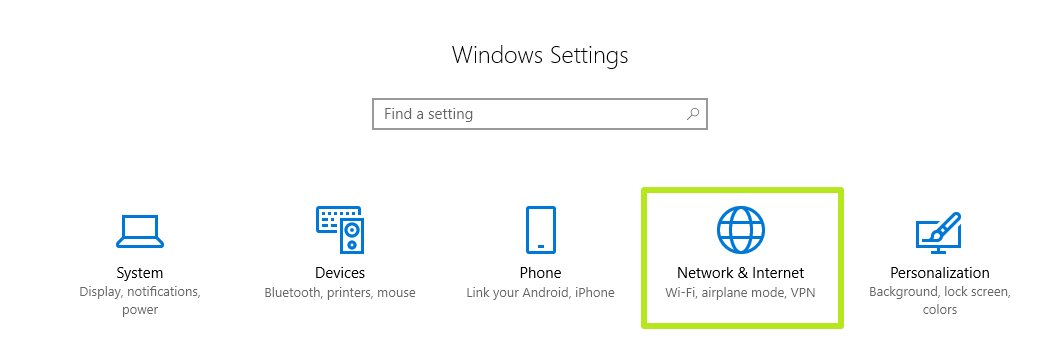
3. Click Network & Internet.
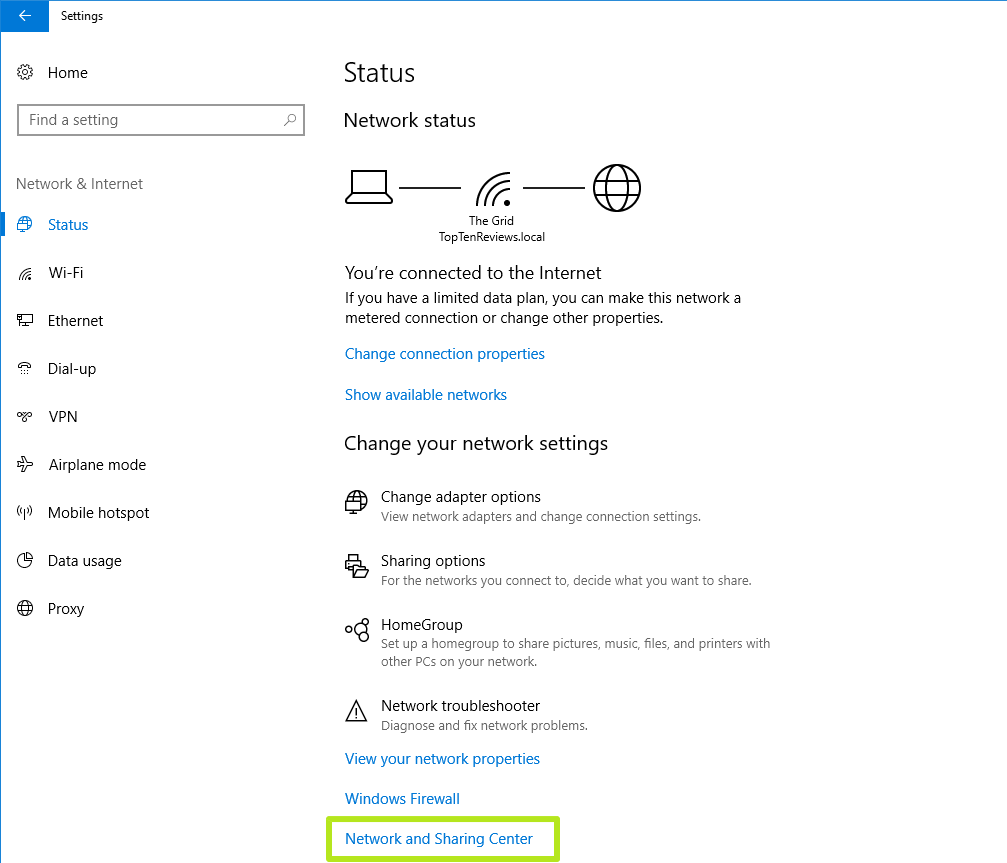
4. Click Network and Sharing Center.
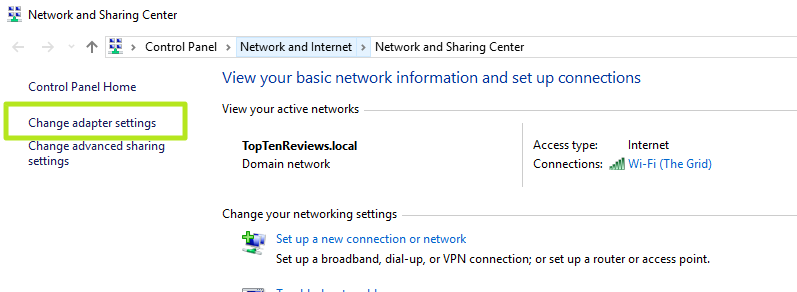
5. Click Change adapter settings.
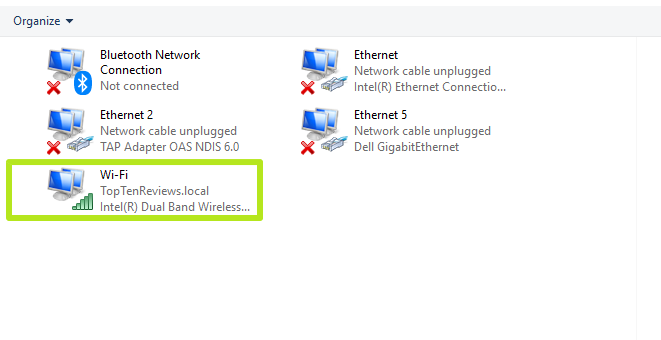
6. Right-click on the Wi-Fi network you're connected to.
7. Select Properties.

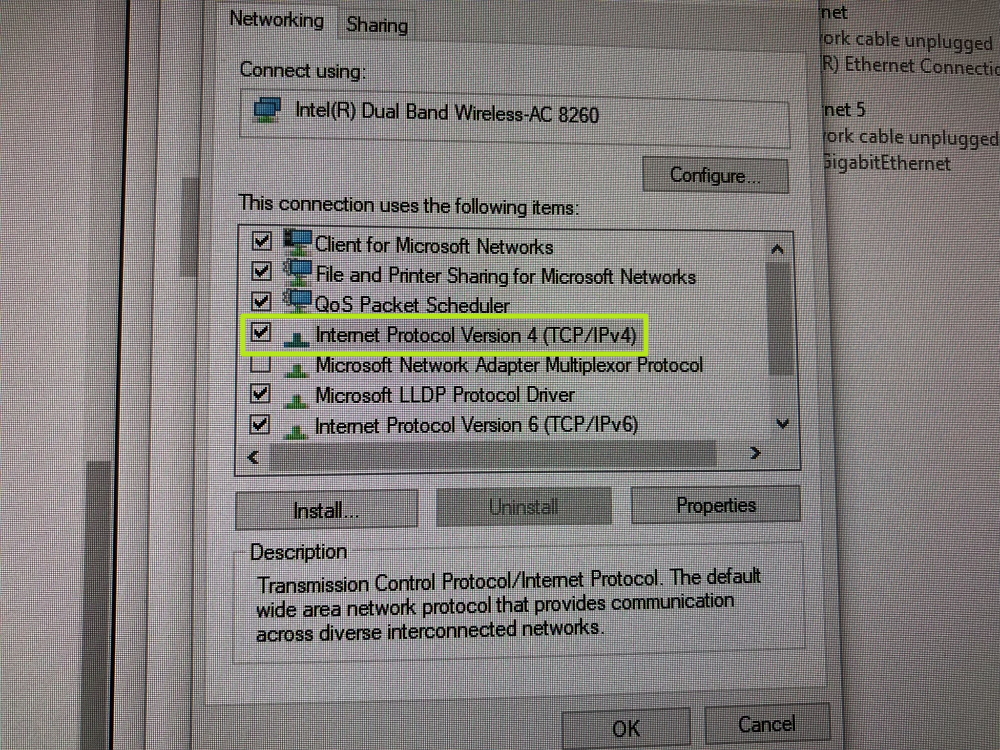
8. Double-click on Internet Protocol Version 4 (TCP/IPv4).
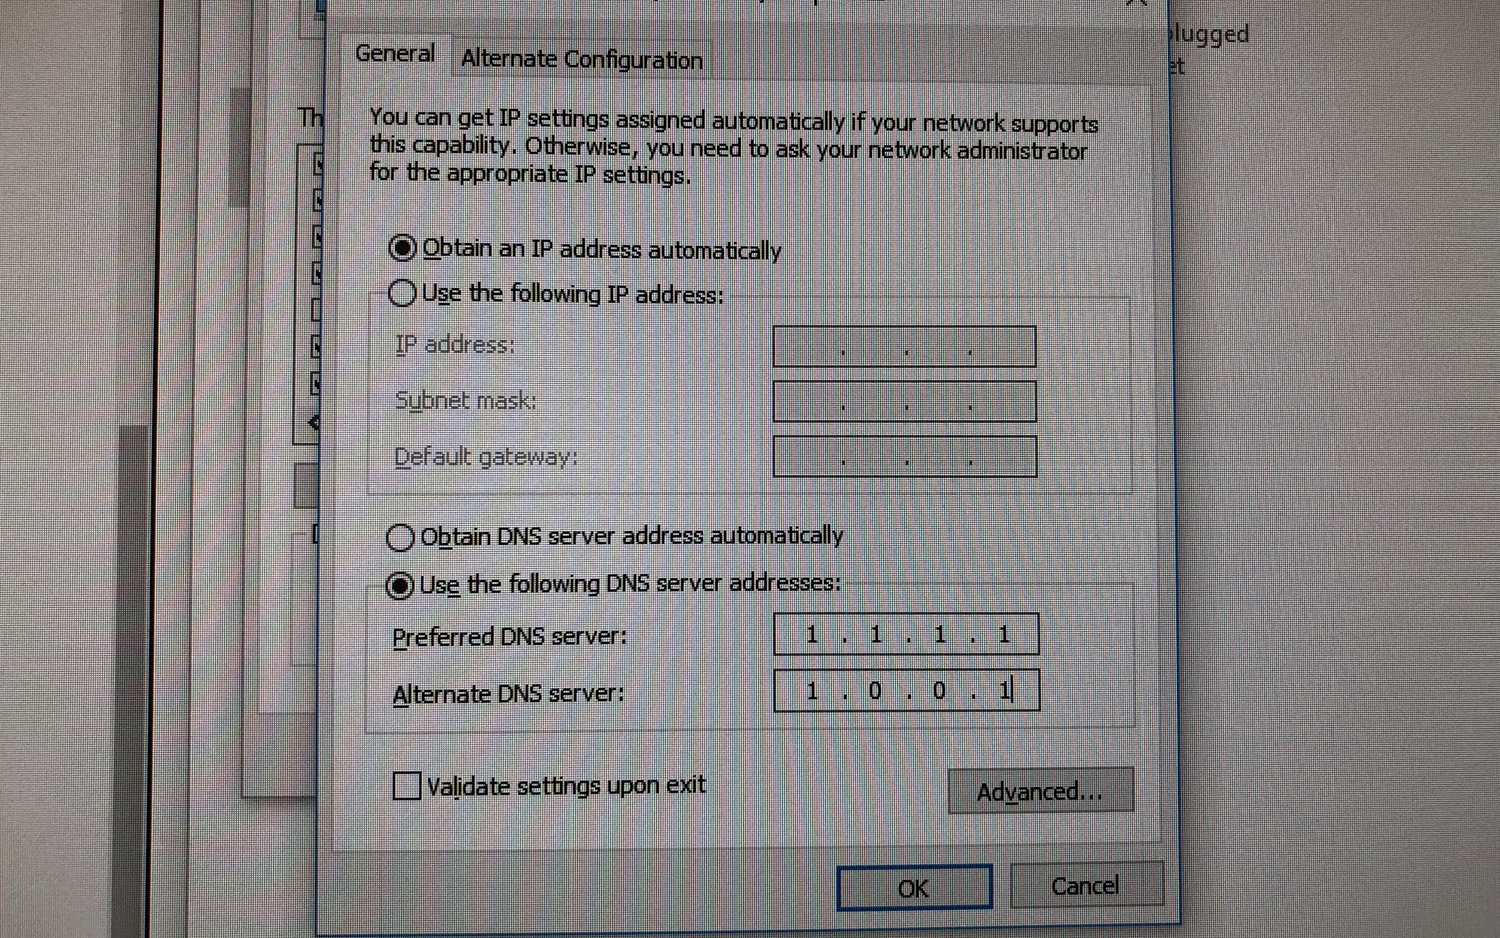
9. Click the bubble next to "Use the following DNS server addresses:" and fill in the following addresses:
1.1.1.1
1.0.0.1
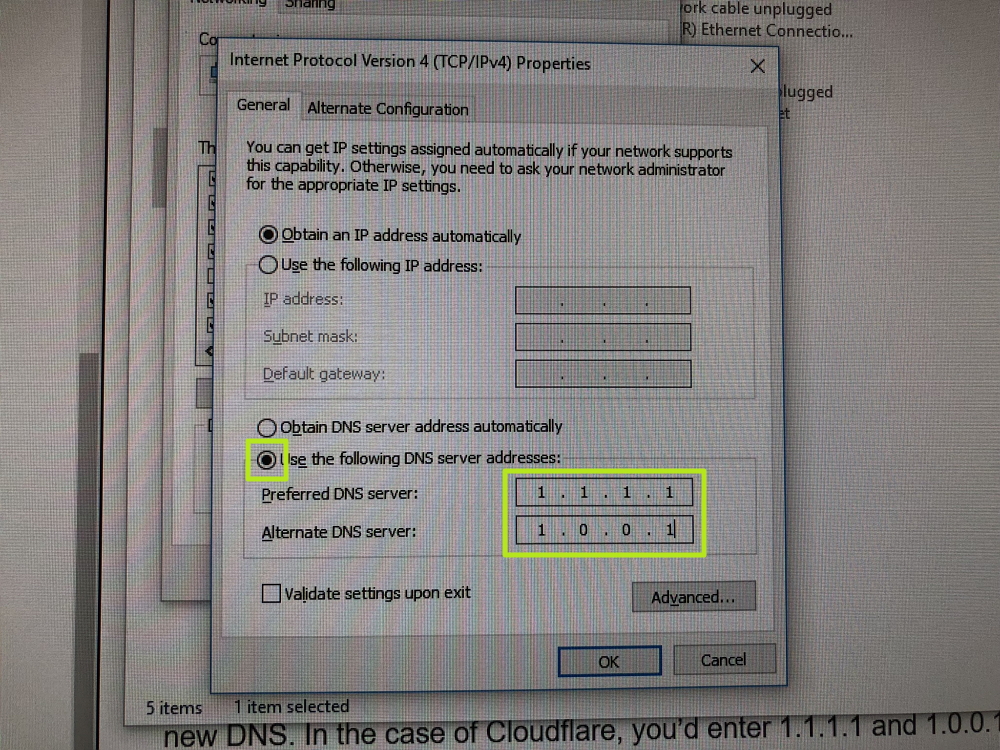
10. Click OK.
11. Double-click on Internet Protocol Version 6 (TCP/IPv6).
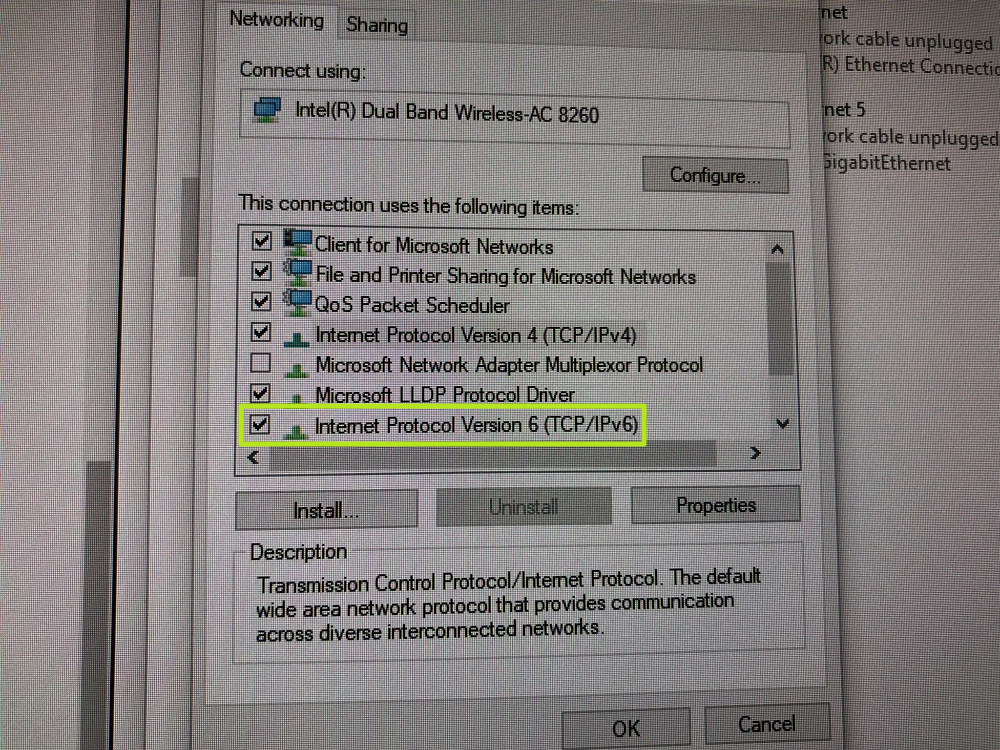
11. Click the bubble next to "Use the following DNS server addresses:" and fill in the following addresses:
2606:4700:4700::1111
2606:4700:4700::1001
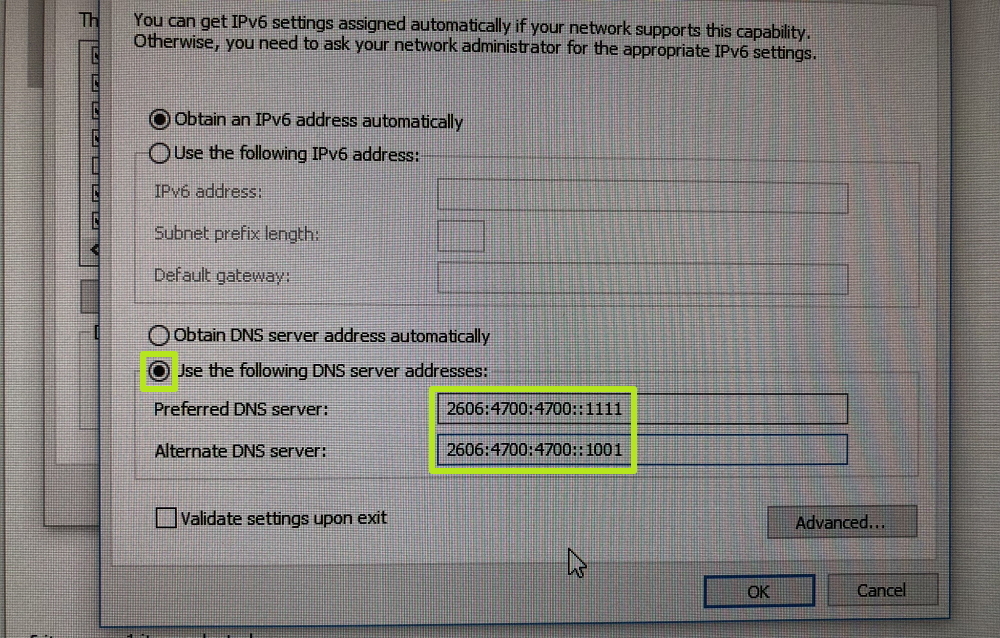
12. Click OK.
How to set up Cloudflare's 1.1.1.1 DNS on a Mac
1. Click the Apple icon in the top left corner.
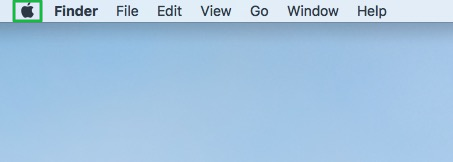
2. Select System Preferences.

3. Click Network.
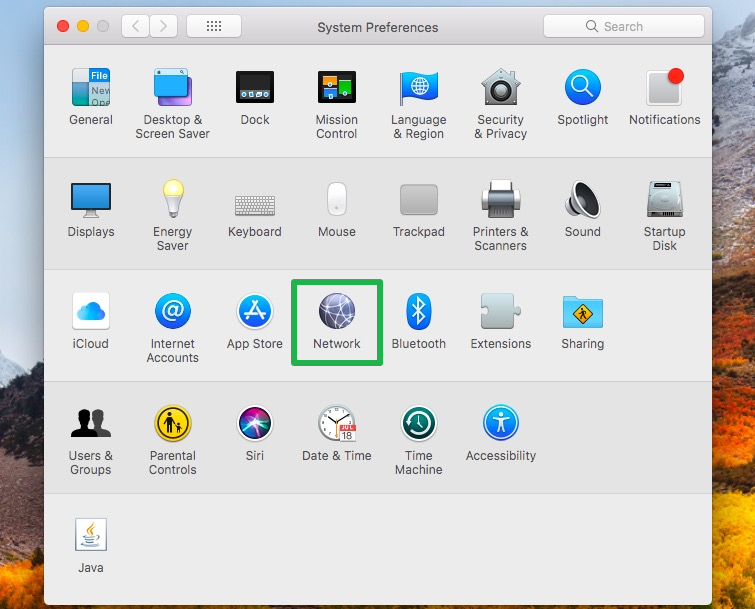
4. Click Advanced.
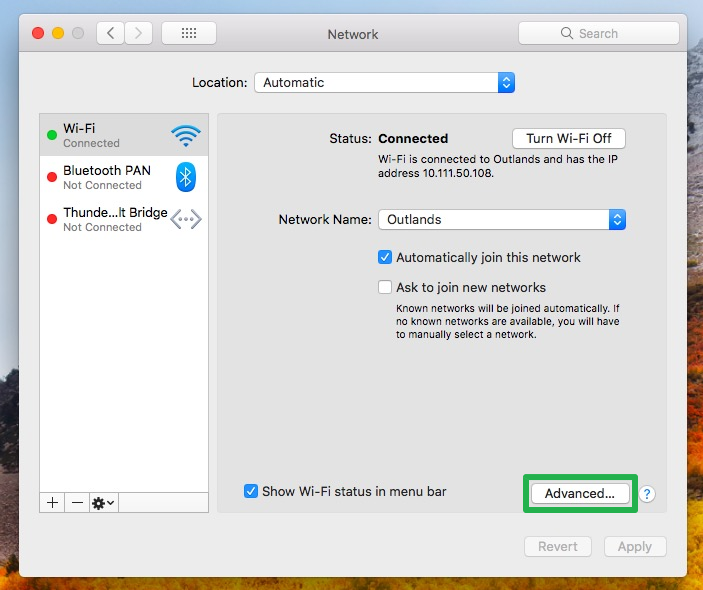
5. Click DNS.

6. Click the + button, enter the first of the following server addresses, and repeat until all four are in.
1.1.1.1
1.0.0.1
2606:4700:4700::1111
2606:4700:4700::1001
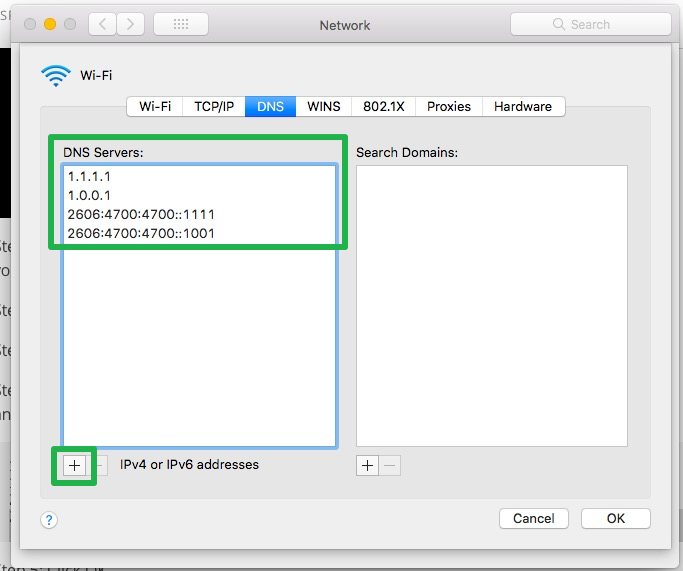
7. Click OK.
How to set up Cloudflare's 1.1.1.1 DNS on an iPhone
1. In Settings, tap Wi-Fi.
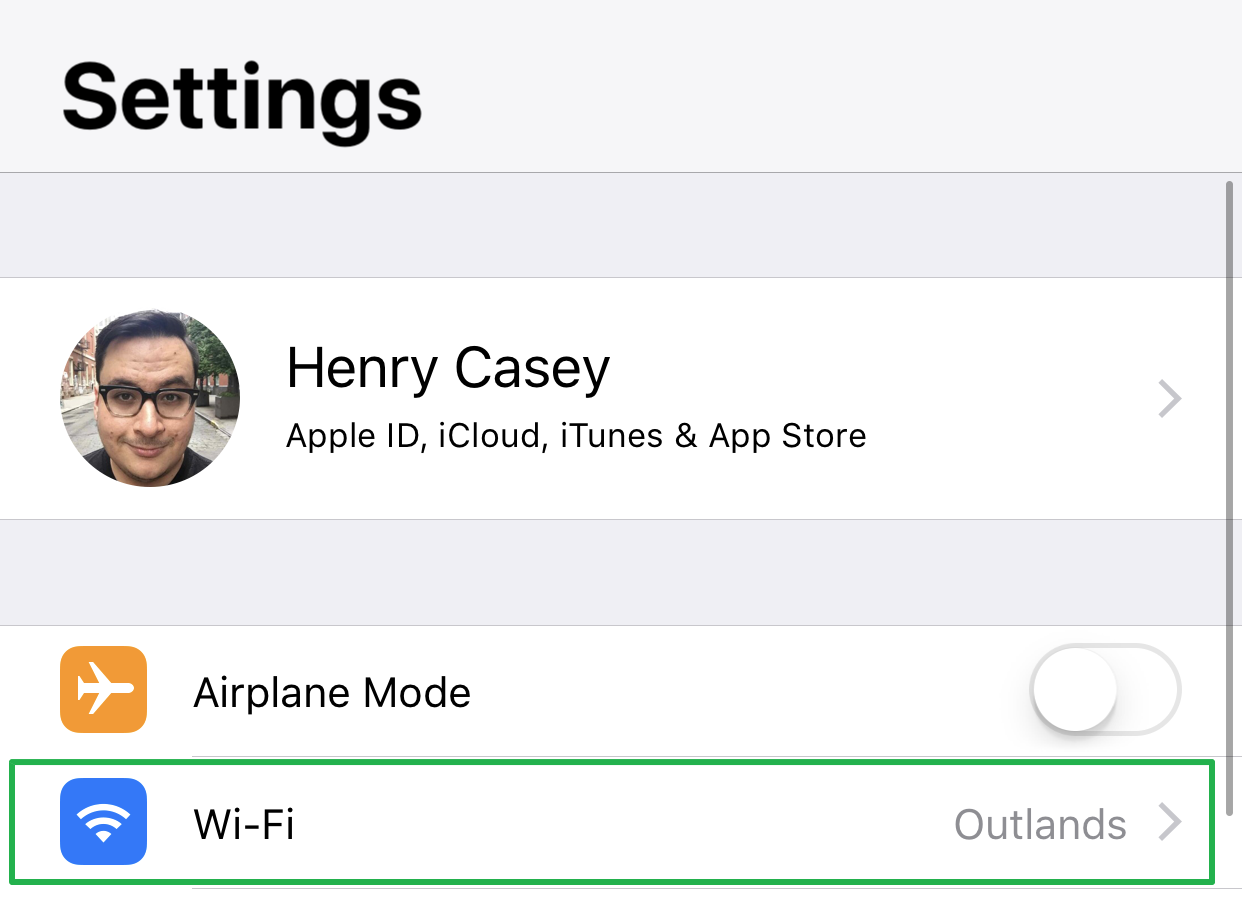
2. Tap the "i" next to the network you're connected to.
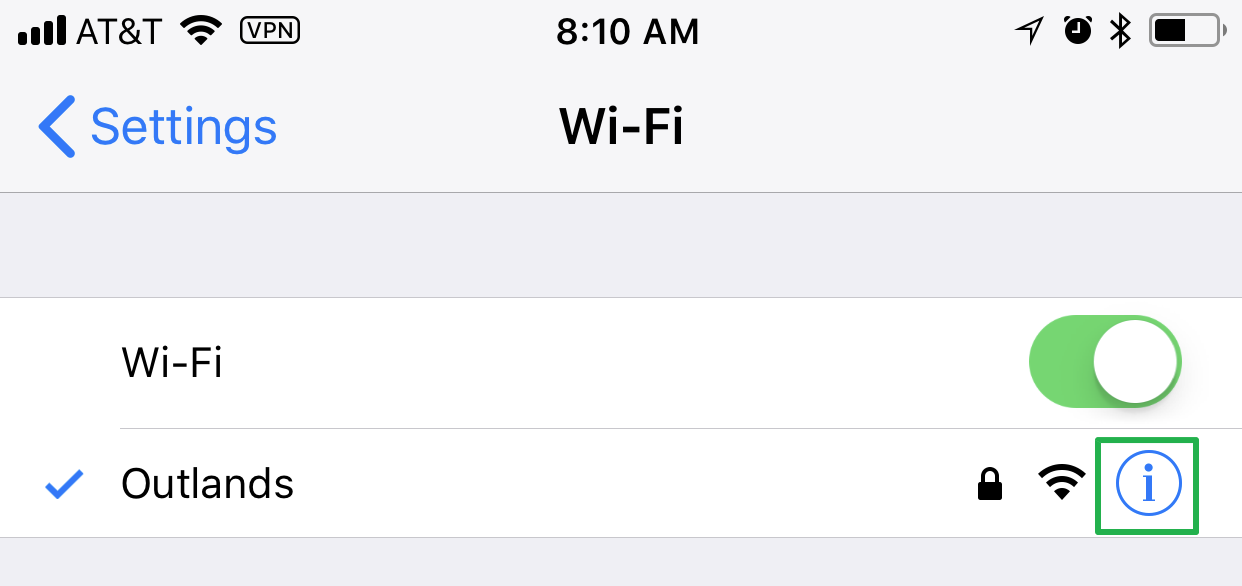
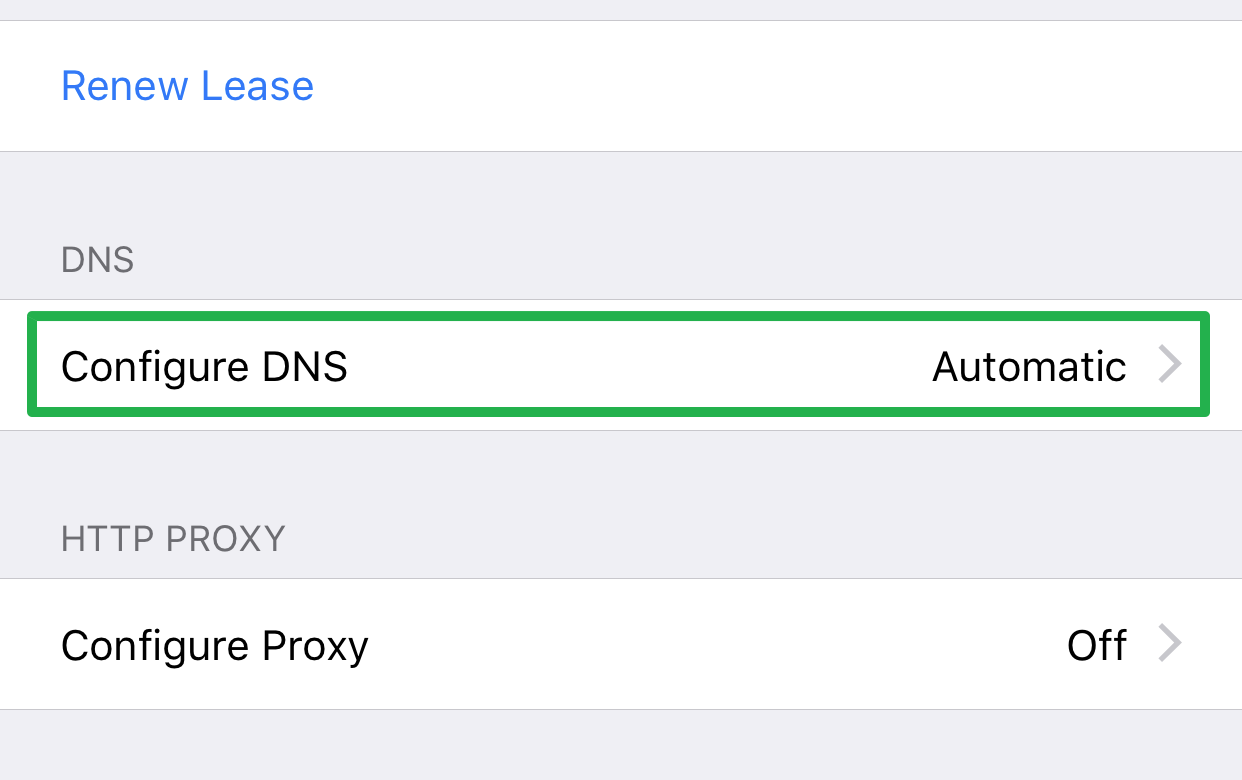
3. Tap Configure DNS.
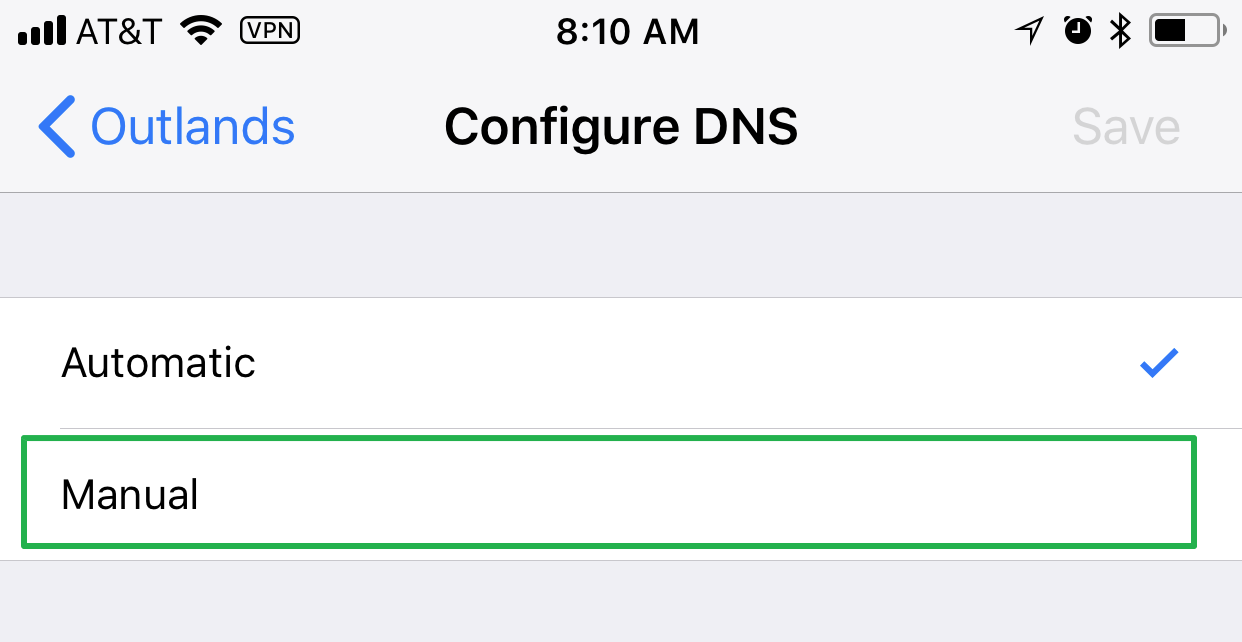
4. Tap Manual.
5. Delete existing DNS entries.

6. Enter the following entries:
1.1.1.1
1.0.0.1
2606:4700:4700::1111
2606:4700:4700::1001
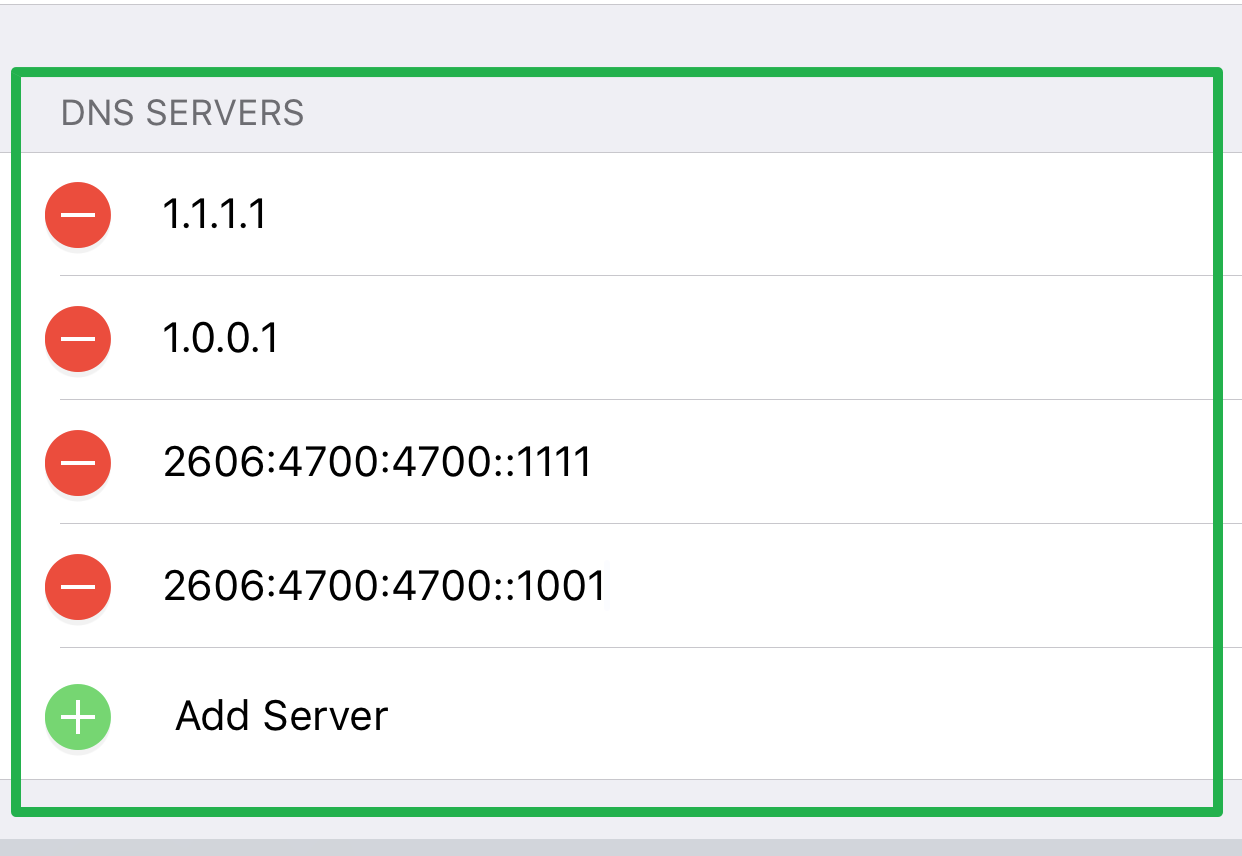
7. Tap Save.
How to set up Cloudflare's 1.1.1.1 DNS on an Android
These screens may vary depending on your version of Android. These came from a Samsung Galaxy S9.
1. In Settings, tap Wi-Fi.
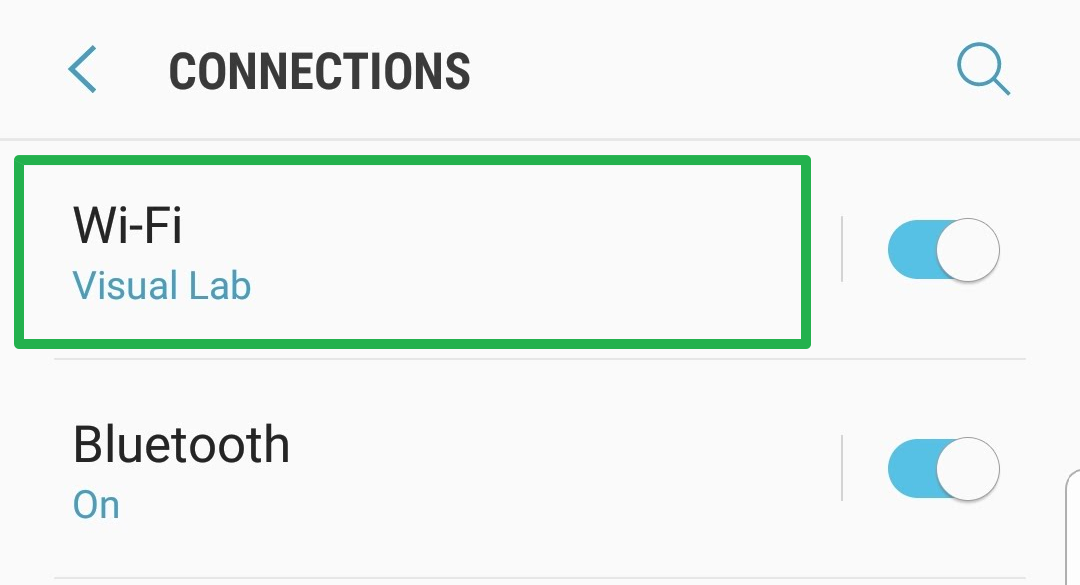
2. Press and hold on the network you're connected to.
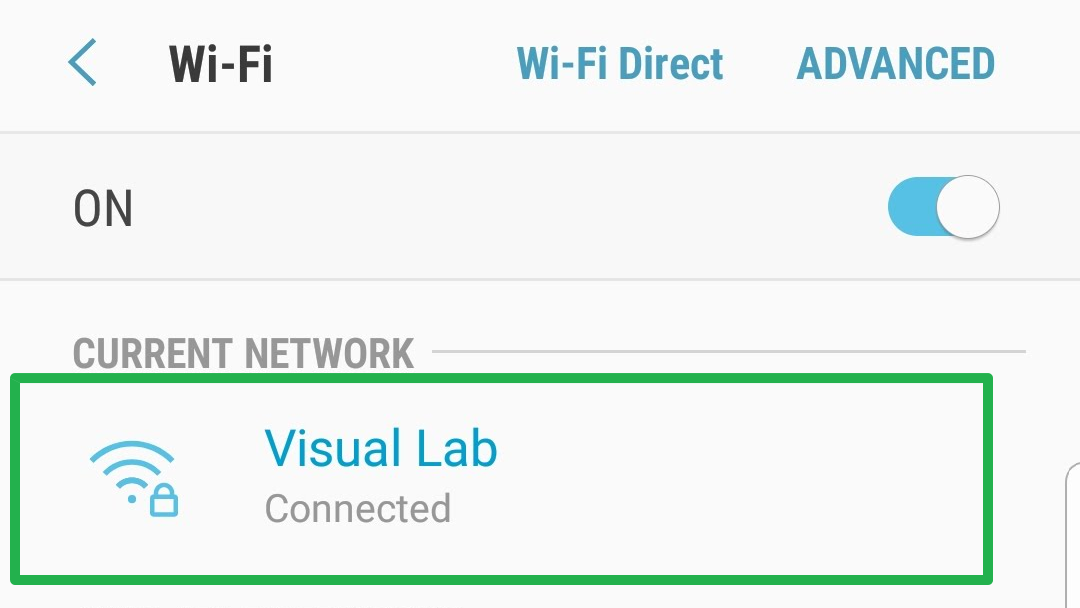
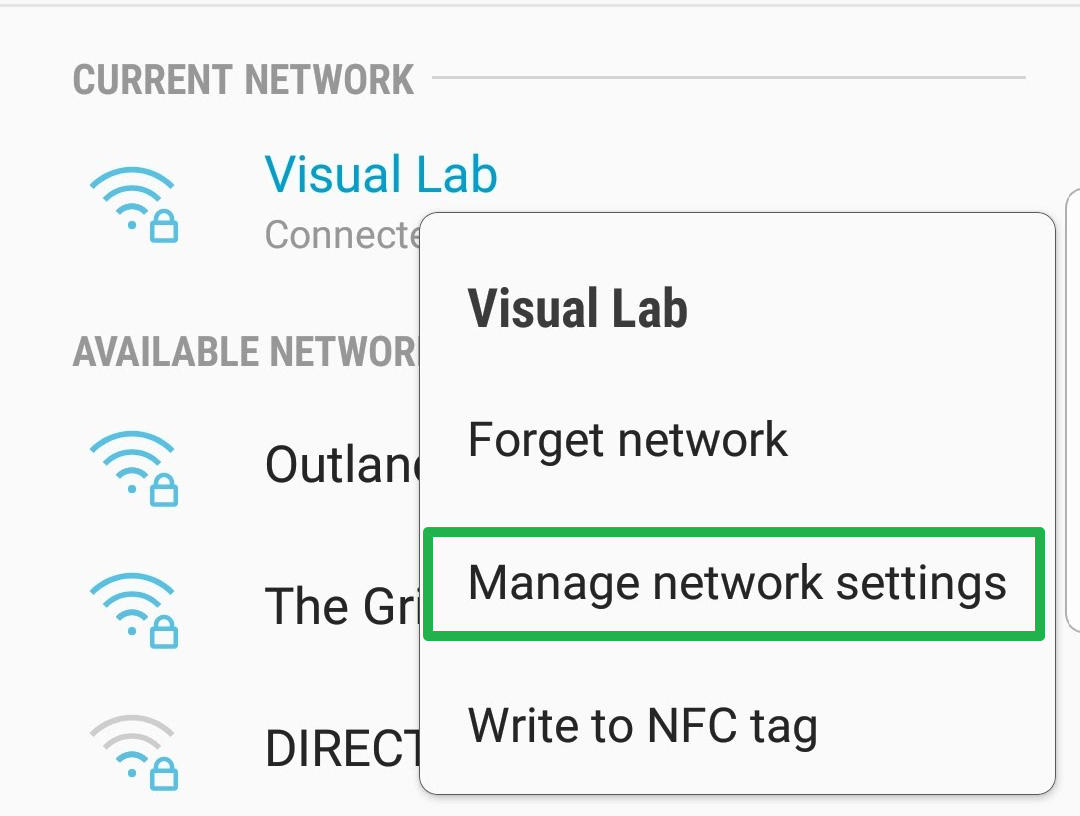
3. Click Manage Network Settings (it may read Modify Network on your device).
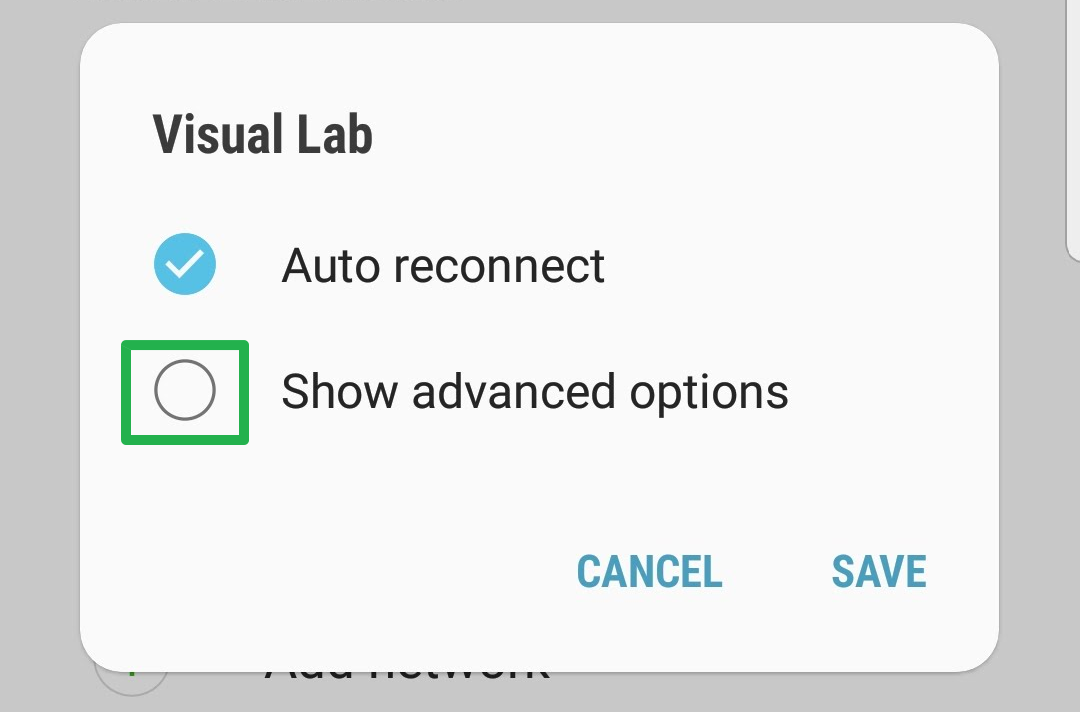
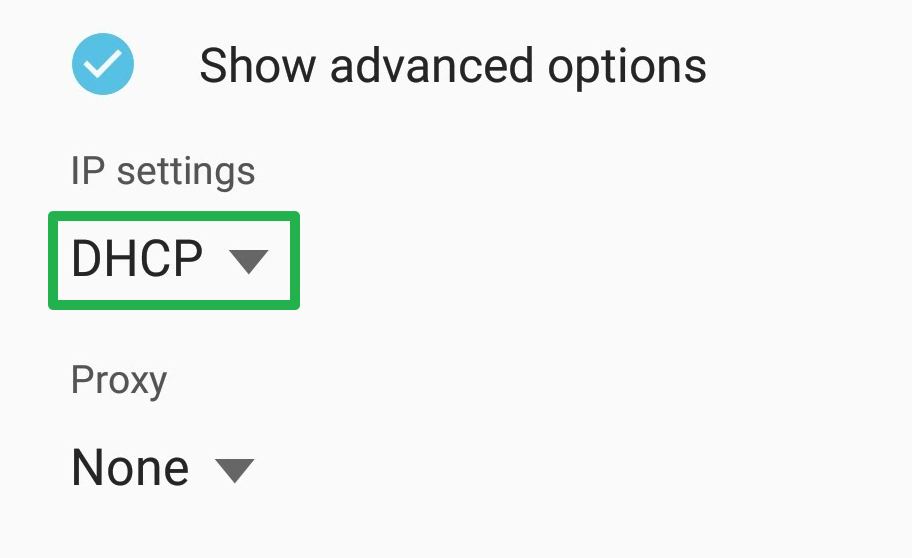
4. Click the check box called Show Advanced Options.
5. Click DHCP under IP Settings.
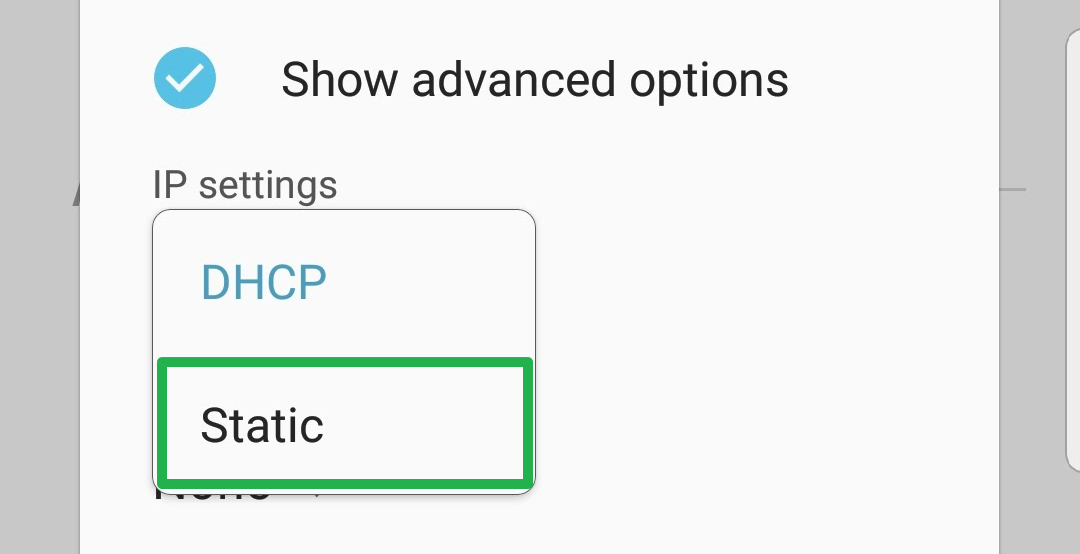
6. Select Static.
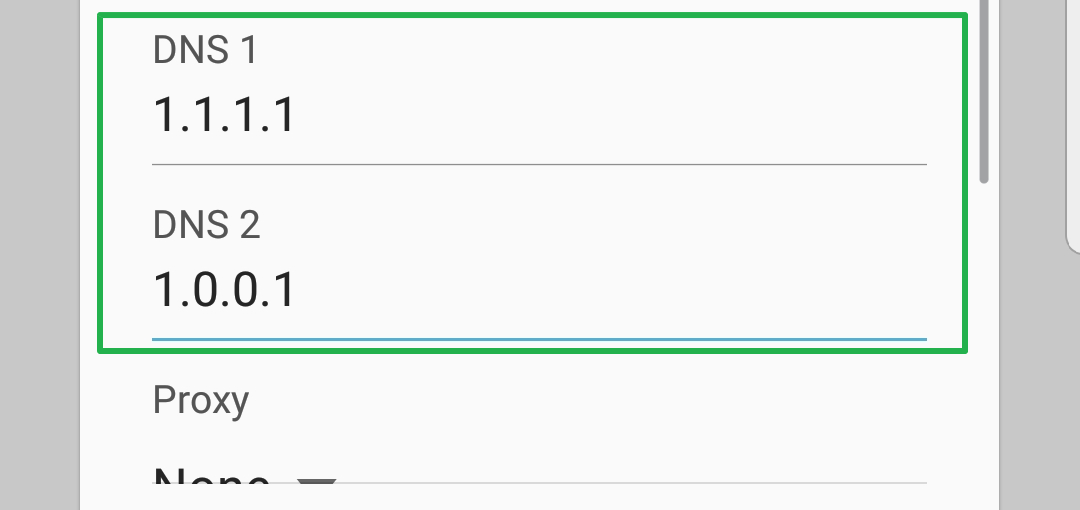
7: Remove any DNS addresses that may be already listed and in their place add:
1.1.1.1
1.0.0.1
8: Click Save. If you're not noticing any change, disconnect and reconnect to the Wi-Fi.
You've set your computer to use Cloudflare's 1.1.1.1 DNS resolver! (If you need to revert to the previous setup, repeat the above instructions but select "DHCP," "Automatic" or "Obtain DNS server address automatically.")

Henry is a managing editor at Tom’s Guide covering streaming media, laptops and all things Apple, reviewing devices and services for the past seven years. Prior to joining Tom's Guide, he reviewed software and hardware for TechRadar Pro, and interviewed artists for Patek Philippe International Magazine. He's also covered the wild world of professional wrestling for Cageside Seats, interviewing athletes and other industry veterans.
