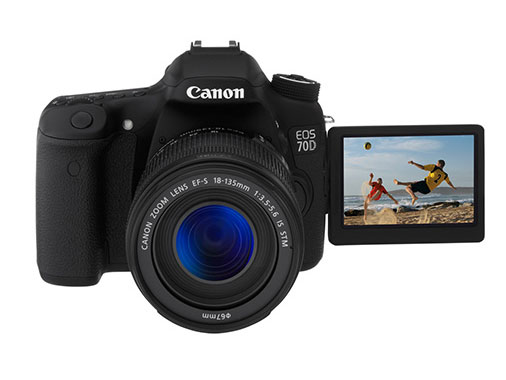
Canon EOS 70D DSLR: 7 Tips for Great Pics
Canon's DSLR is great for advanced consumers as well as pros who want to lighten their loads. These tips will help you get the most out of the camera.
1. Pick the right mode
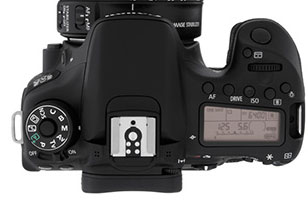
Using the Mode Dial on the top left of the 70D, you can choose between several modes that are split into two zones: Basic and Creative. The former zone, which includes the Intelligent Auto, Flash Off, Creative Auto and Special Scene modes, is great for beginners. Creative Zone shooting modes give experienced photographers more control over ISO (light sensitivity), aperture and shutter speed options.
(For help with any of the terms we use here, please see our Digital Camera Glossary.)
A+ - Intelligent Auto: Use this no-brainer mode if you have little experience or don't want to think about settings. All you have to do is focus on the subject and take the picture. You do get to control the flash and whether the camera takes single shots or shoots continuously (up to seven photos per second).
Z - Flash Off: When you don't want your flash to go off in places such as museums, this beginner-friendly mode is particularly handy. The camera works around your light situation by setting features such as aperture and shutter, but does not trigger the flash.
CA - Creative Auto: This mode gives newbies a little more control over the look of the shot. You select the level of background blur (depth of field) and richness of color you'd like, and the camera makes it happen. You can also control the flash and whether the camera shoots single frames or continuously.
P - Program AE: Ideal for most situations and novices looking to learn, this mode puts the camera in control of shutter speed and aperture, leaving you to adjust a few other settings, such as ISO (which we'll explain).
Tv - Shutter Priority: Use this mode to capture action photos (more below). Set the shutter speed, and the 70D takes care of the aperture to achieve a proper exposure. You'll have to set ISO unless you've put that feature on Auto.
Sign up to get the BEST of Tom's Guide direct to your inbox.
Get instant access to breaking news, the hottest reviews, great deals and helpful tips.
Av - Aperture Priority: Use this mode for situations in which you need to control the depth of field, such as portrait photos. Choose the aperture and let the camera set the shutter speed. Again, if you want the 70D to determine the ISO, you'll have to set that control to Auto.
B - Bulb: If you're in a situation with close to no light or are shooting the nighttime cityscape and want the stars to show up, use this mode for full control of the shutter speed. The shutter will stay open for as long as you depress the shutter button.
(Click on photo samples below to see larger versions.)
2. Use Creative Auto mode to take photos with effects
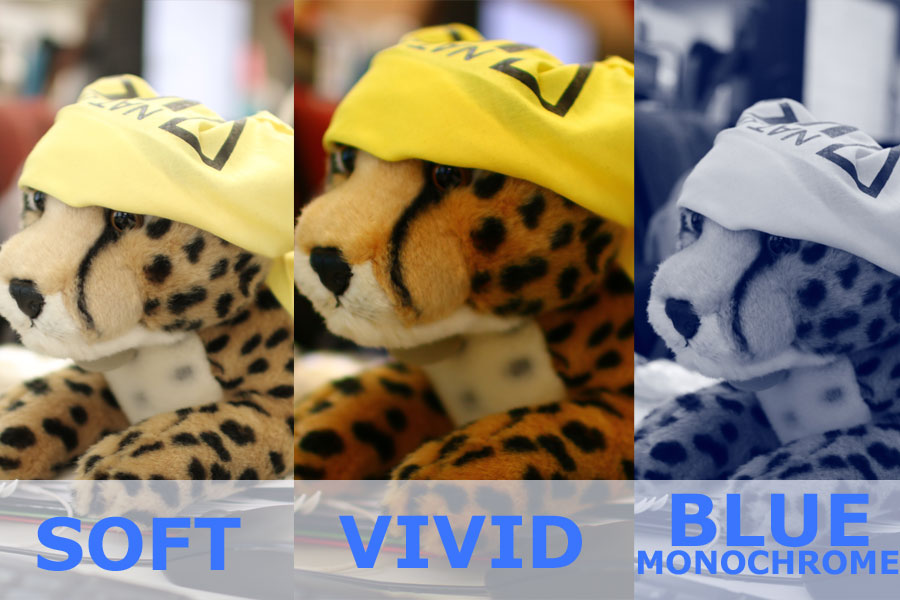
If you're a fan of filters and effects, you'll have fun with the 70D's Creative Auto mode. These effects are applied when you take the picture, not after. You can get more-vibrant colors in the Vivid and Intense modes, or muted but brighter colors in Soft mode. We found the Monochrome filters — Blue, Black-and-White, and Sepia — especially nifty. Those who like to have a retro, artistic effect without adding it afterwards in editing software will like these filters.
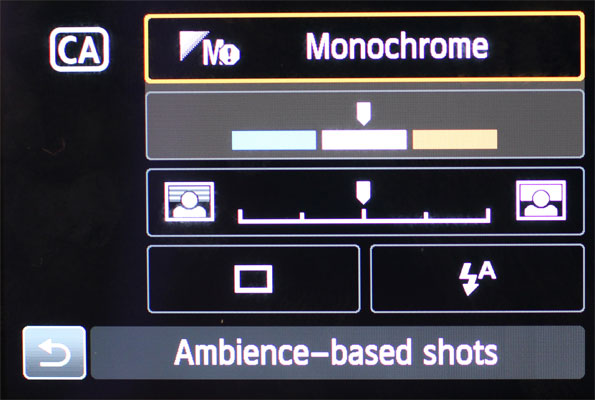
We especially like that you can control the level of background blur (or depth of field) in each shot in this mode. To do so, tap the box that has a ruler and two squares with a person on each end on the LCD, then turn the Main Dial.
MORE: Canon EOS 70D Review
3. Use high dynamic range (HDR) for tough exposure situations
HDR is particularly useful when you're shooting a photo that has widely different lighting conditions in one scene, such as a brilliant sky in the background with darker subjects in the foreground. In this mode, the camera takes the same picture at a few different levels of exposure (typically three), and merges the shots together so that all elements are properly exposed.
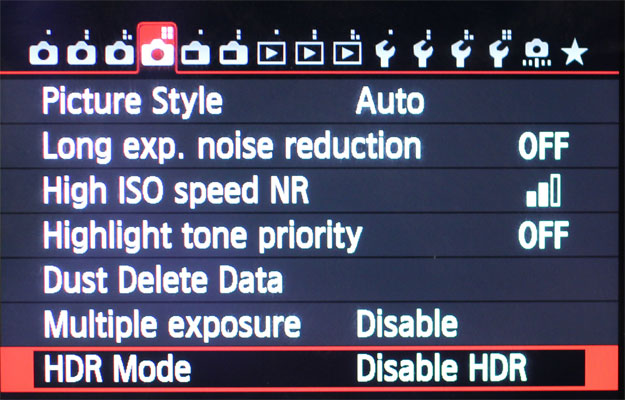
Shoot HDR images on the 70D by going into the fourth tab in the Menu, and selecting the level of exposure difference you want between images in HDR Mode. If you select Auto, the camera will determine which exposure compensation steps to use.
You can also choose between +/- 1, 2 or 3 EV, meaning the 70D will capture the scene at 1,2 or 3 full stops of exposure above and below the middle-of-the-road exposure you would get when taking a single shot. (A "stop" is the basic unit of light measurement in photography, representing a doubling or halving of light, depending if you go up "+" or down "-", respectively.)
We recommend shooting HDR in Live View mode, since we got sharper images with this mode than in SLR mode using the viewfinder. This could be because in Live View the camera's mirror doesn't have to keep going up and down, slowing the process and causing vibrations. (To engage Live View, press the round Start button to the right of the viewfinder.)
4. Set an appropriate ISO light-sensitivity level (and turn on noise reduction)
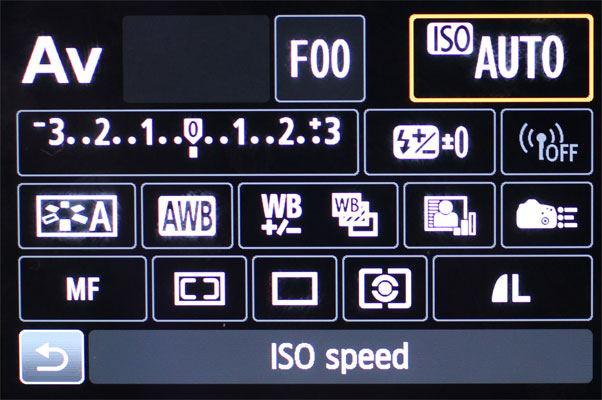
The 70D is adept at automatically controlling the ISO level, so we recommend setting ISO on Auto (Tap Q button>ISO box>Scroll Main Dial all the way to the left). To reduce grain in your pictures, though, cap your ISO at 3200. Go to the third tab after pressing the Menu button, then tap the "ISO speed settings" row. Under Auto ISO Range, scroll down to 3200 in the Maximum box.
You can also go manual if you want finer control or need to push the ISO settings a little higher for a dark situation. On the 70D, we found that picture quality remained acceptable (with minimal graininess or "noise") at ISO levels of up to 6400 in low light. If you have to go higher, it's better to do that and get the shot rather than miss it.
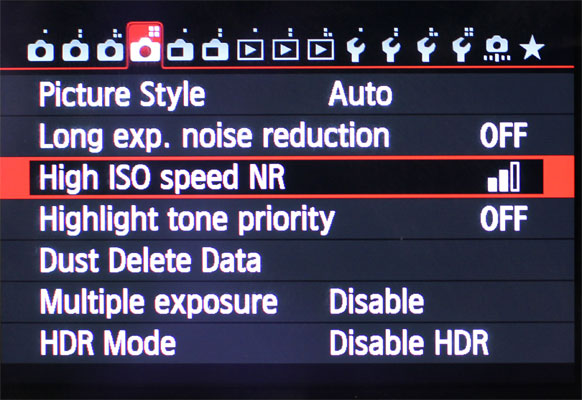
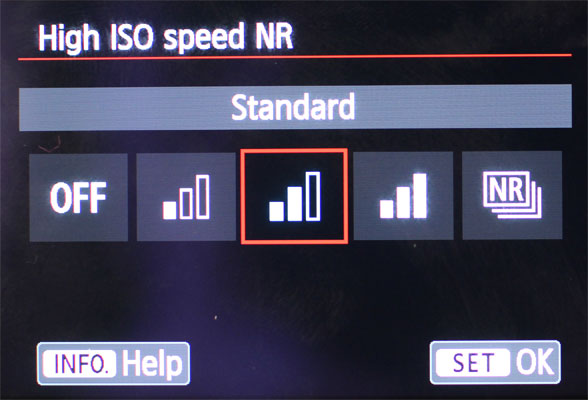
Whether you decide to adjust ISO manually or leave this up to the camera, make sure to turn on Noise Reduction. You'll find the option to do so under the fourth tab in Menu, labeled "High ISO speed NR." Here, you can choose from four Noise Reduction modes: Low, Standard, High and Multi Shot. We recommend using Standard because it offers the best balance of noise reduction and preservation of detail.
MORE:How Many Megapixels Do You Really Need?
5. Make photos lighter or darker using exposure compensation
The Canon 70D tends to underexpose photos in bright lighting, as that reduces the chance of blowing out highlights. And brightening dark parts of images is a simple and standard operation when editing RAW image files in a program such as Photoshop.

If you don't want to go the image-editing route and plan to use the camera's JPEGs, you'll typically want turn up exposure compensation by two-thirds of a stop in daylight. To do that:
1) Press the Q button to the right of the screen.
2) Use the four-way directional pad to highlight a long box in the top right that looks like a ruler, with the numbers -3, 2, 1 to the left and 1, 2, +3 on the right.
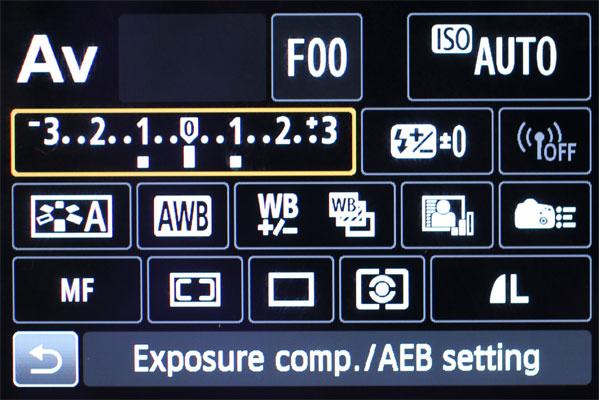
3) Press the Set button in the center of the directional pad, and click the pad to the right or left to increase or decrease exposure. Each step on the scale is 1/3 f/stop.
6. Adjust white balance for more-accurate colors
You'll find Canon's automatic white balance adequate for most shooting situations, except incandescent and low-light situations.
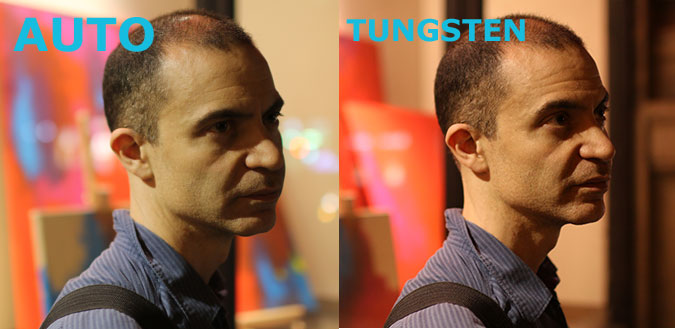
Picking a preset white balance, such as Daylight, Tungsten or Shade, may do the trick in those scenarios. Doing this merely requires tapping the White Balance box after pressing Q and scrolling with the Main Dial. But when that doesn't give you the color environment you want, you'll have to use custom white balance, which, on the 70D, is a tedious process.
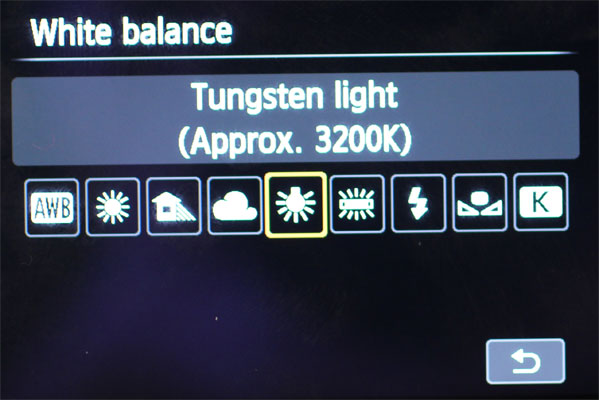
First, you'll have to set the White Balance profile to Custom (using the instructions in the previous paragraph). Then you'll press the menu button, go to the third tab, select Custom White Balance and take a reference picture.
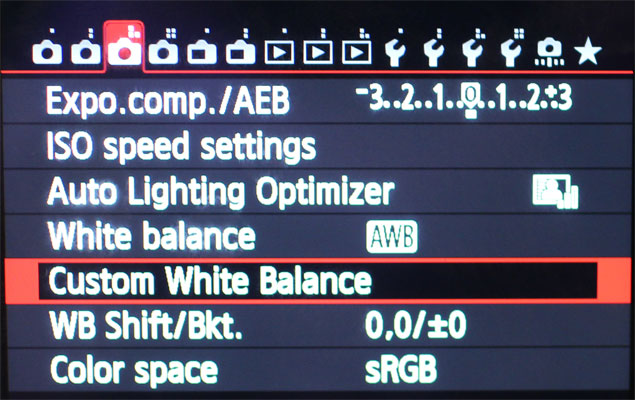
You'll get familiar with the process over time if you do this frequently, but it's still a pain.
7. Choose the best lenses for the 70D
The EOS 70D is typically bundled with an 18-135mm or 18-55mm zoom lens. The kit lens we tested, an EF-S 18-55mm f/3.5-5.6 IS STM Zoom Macro, performed ably. While the depth of field is not as shallow on the kit lens as on primes, the kit lens still offered great clarity.
MORE: DSLRs vs. Mirrorless Cameras: Which Should You Buy?
The 70D is also compatible with about 100 EF and EF-S Canon lenses. EF-S lenses are limited to mainstream DSLR models (those with a sensor type called APS-C), but if you think you may upgrade to a full-frame model such as the 5D in the future, consider investing in EF lenses. They work on both body types.
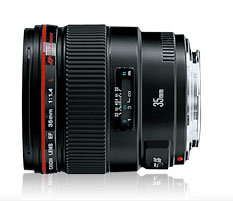
We used Canon's $1,479 35mm f/1.4L USM prime (nonzooming) lens for testing, which delivered crystal-clear detail and stunning image quality (particularly in terms of contrast and some colors). However, you can get comparable quality from the Sigma 35mm f/1.4 DG HSM for Canon DSLR cameras, which is about $500 cheaper.

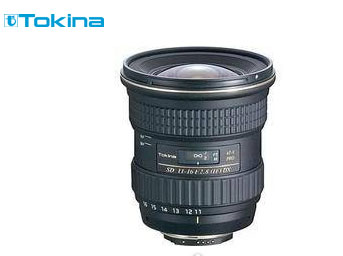
For landscape shots, get a wide-angle lens such as Canon's EF 17-40mm f/4L USM ($839) or Tokina's 11-16mm f/2.8 AT-X116 Pro DX II ($514). These will allow you to grab more of the environment.
If your budget is a little more conservative, you can consider the EF 50mm f/1.8 II telephoto lens, which sells for as little as $125 and produces surprisingly sharp pictures for the price.
Follow Cherlynn Low @cherlynnlow and on Google+. Follow Tom's Guide at @tomsguide, on Facebook and on Google+.
Cherlynn is Deputy Editor, Reviews at Engadget and also leads the site's Google reporting. She graduated with a Master’s in Journalism from Columbia University before joining Tom's Guide and its sister site LaptopMag as a staff writer, where she covered wearables, cameras, laptops, computers and smartphones, among many other subjects.
-
mnd_bg ReplyWhat is the best tip for shooting great with a Canon? Buy a Nikon.
Hahahaha.. funny.
Not.
Good photographer will take a good picture regardless of the equipment.

