Apple Clips: Get Started with These Quick Tips
Apple's Snapchat competitor Clips is out, and its Live Titles feature allows you to animate the things you say onto your video clips.

Apple, possibly learning from its previous attempts to create brand new social networks (Ping, Connect), released Clips as an app where you make fun videos and photos to share via iMessage and in other apps. So, why would people find a new app for creating content when Snapchat and its imitators already are adept at making funny clips and snapshots?
MORE: iOS 10.3 Arrives: Here Are the Top New Features
Apple Clips' big marquee feature is Live Titles, where you can add text to the screen just by talking. You can even choose between a number of different text formats for how your voice appears in type.
But while your own personal subtitle track can look cool, prepare to repeat yourself. The app, which uses Apple's dictation technology, sometimes misheard me (which other reviewers have noted), and translated my speech incorrectly.
Aside from that, Clips looks to do some, but not all, of what Snapchat and Instagram offer. There are text frames to edit, but no doodling or face-adjusting filters like the ever-popular dog mask. This looks to appeal to iPhone owners who have been curious about Snapchat, but haven't used it yet.
Here's how to use Apple Clips:
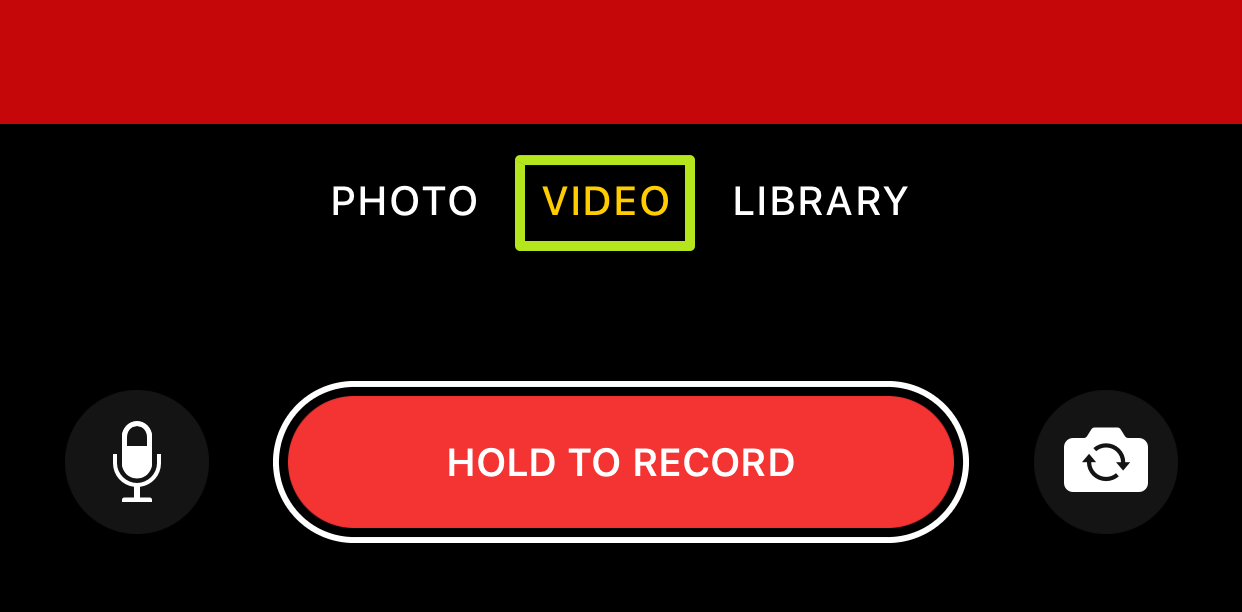
1. Select Photo, Video or Library. All three work similarly, and support Live Titles. For now, we'll do Video.
2. Tap the voice bubble icon to add Live Titles. Do this before recording video. You can add Live Titles to pictures and library files at any point.
Sign up to get the BEST of Tom's Guide direct to your inbox.
Get instant access to breaking news, the hottest reviews, great deals and helpful tips.

3. Select a Live Title style. You'll see a preview of how the text your currently saying will appear, and as you can see, Clips doesn't always hear you right. I was saying "Recording," but it heard "Mccourty," which isn't a real word.
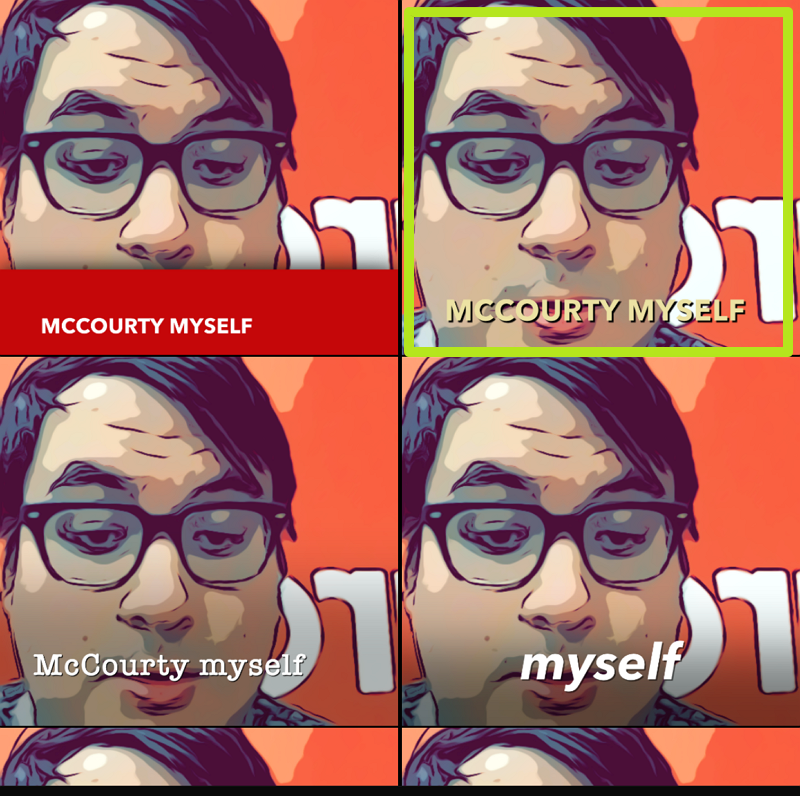
4. Tap the filter icon to add an image-adjusting filter.

5. Select a filter style.

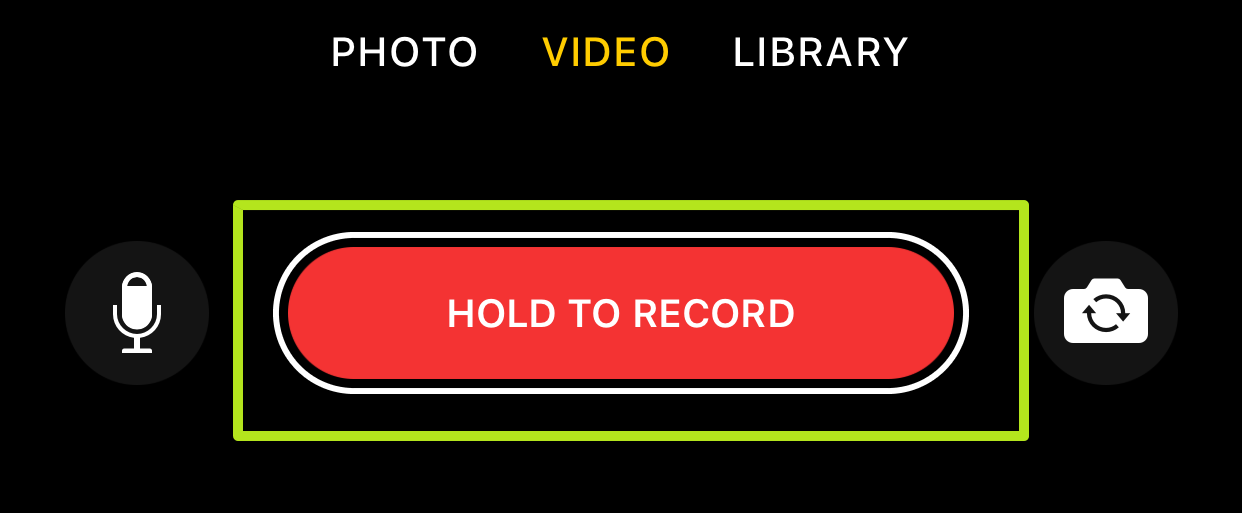
6. Hold the record button and talk to capture video and create a Live Title. If text isn't appearing over the viewfinder, tap the microphone icon on the left to turn on the mic.
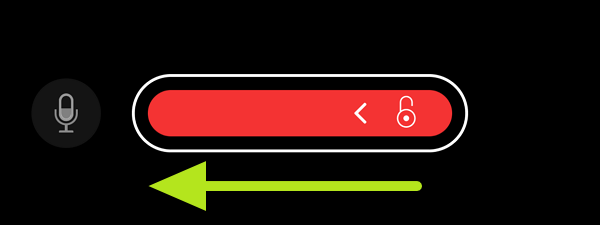
7. Slide the record button to the left to record video without holding your finger against the screen. Tap the red button to stop recording in hands-free mode.
8. Tap the Star icon to add stickers.

9. Select a Clips sticker or swipe left to find emoji to add.
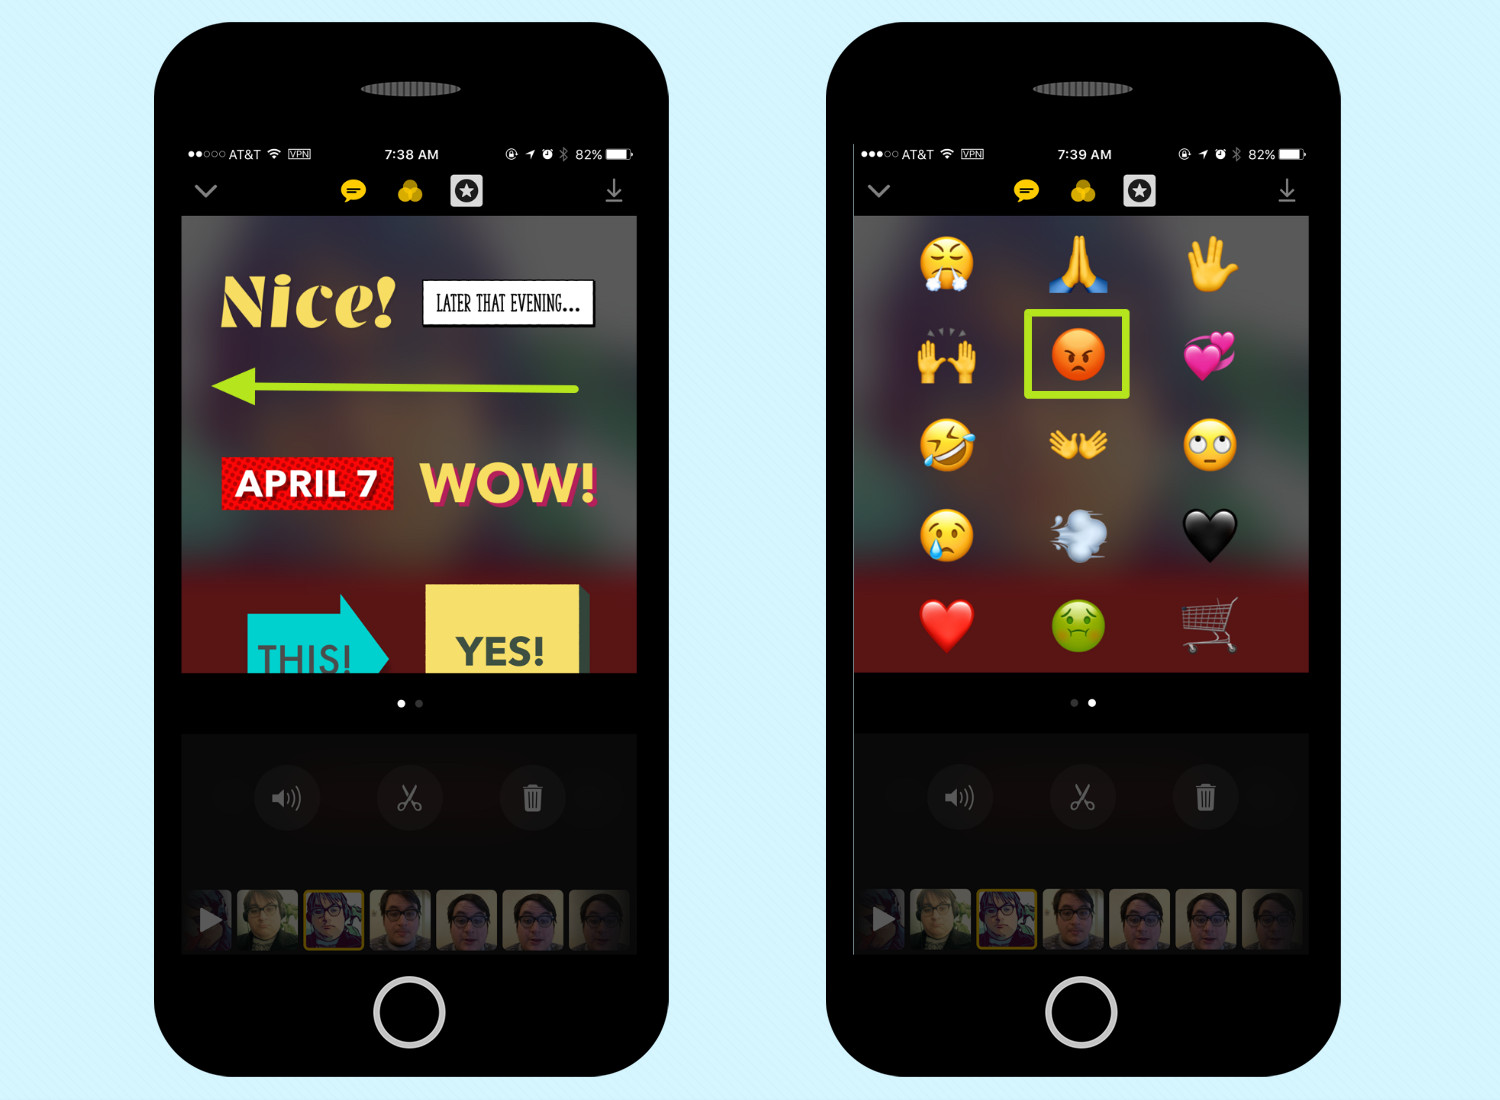
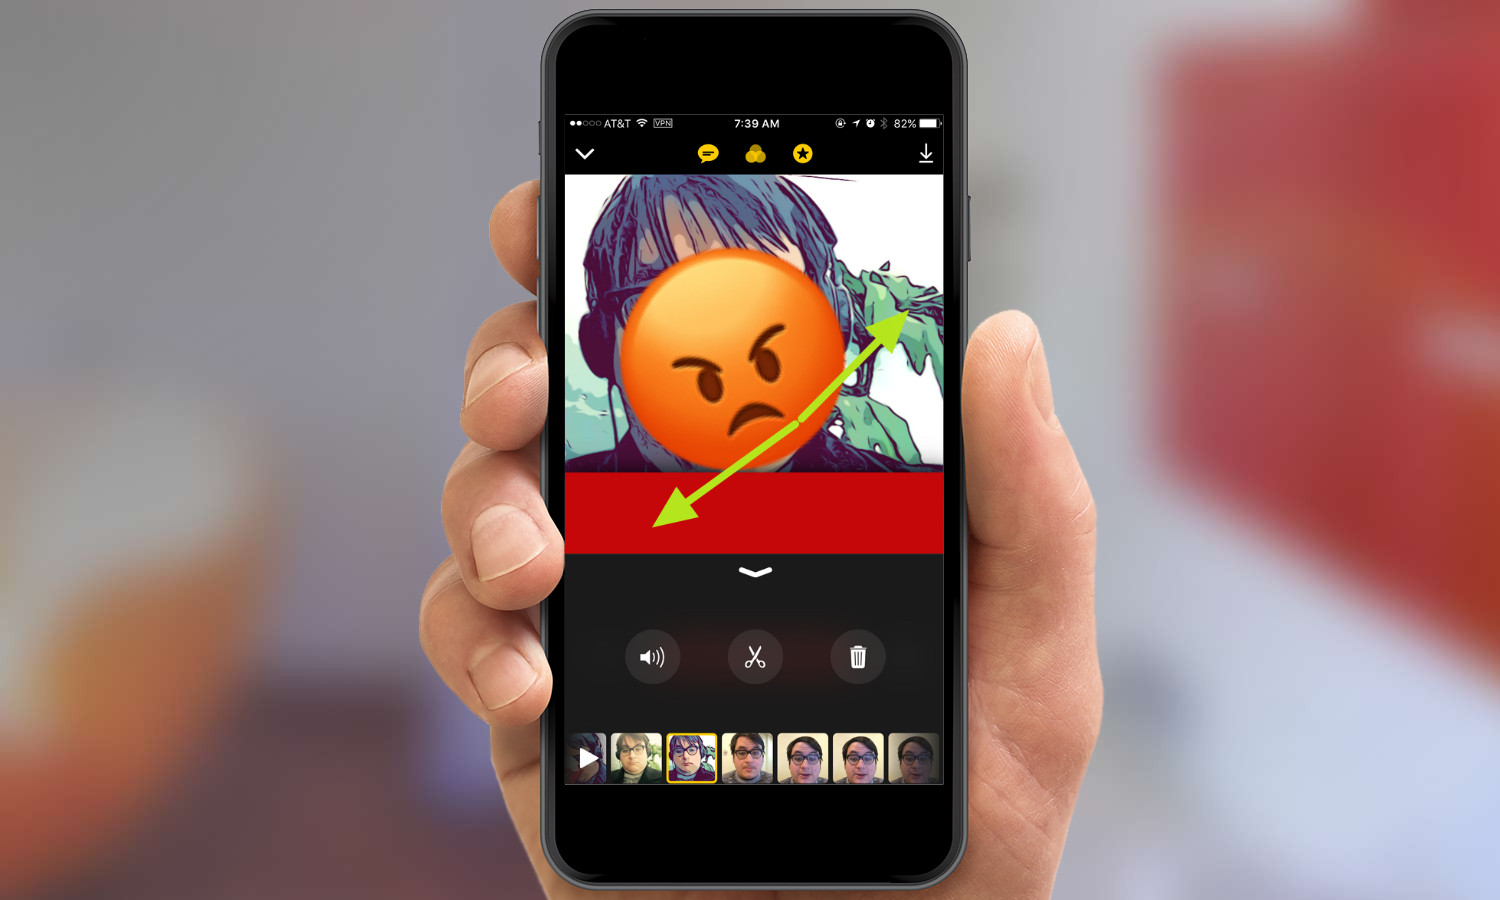
10. Pinch and zoom to adjust stickers once added.
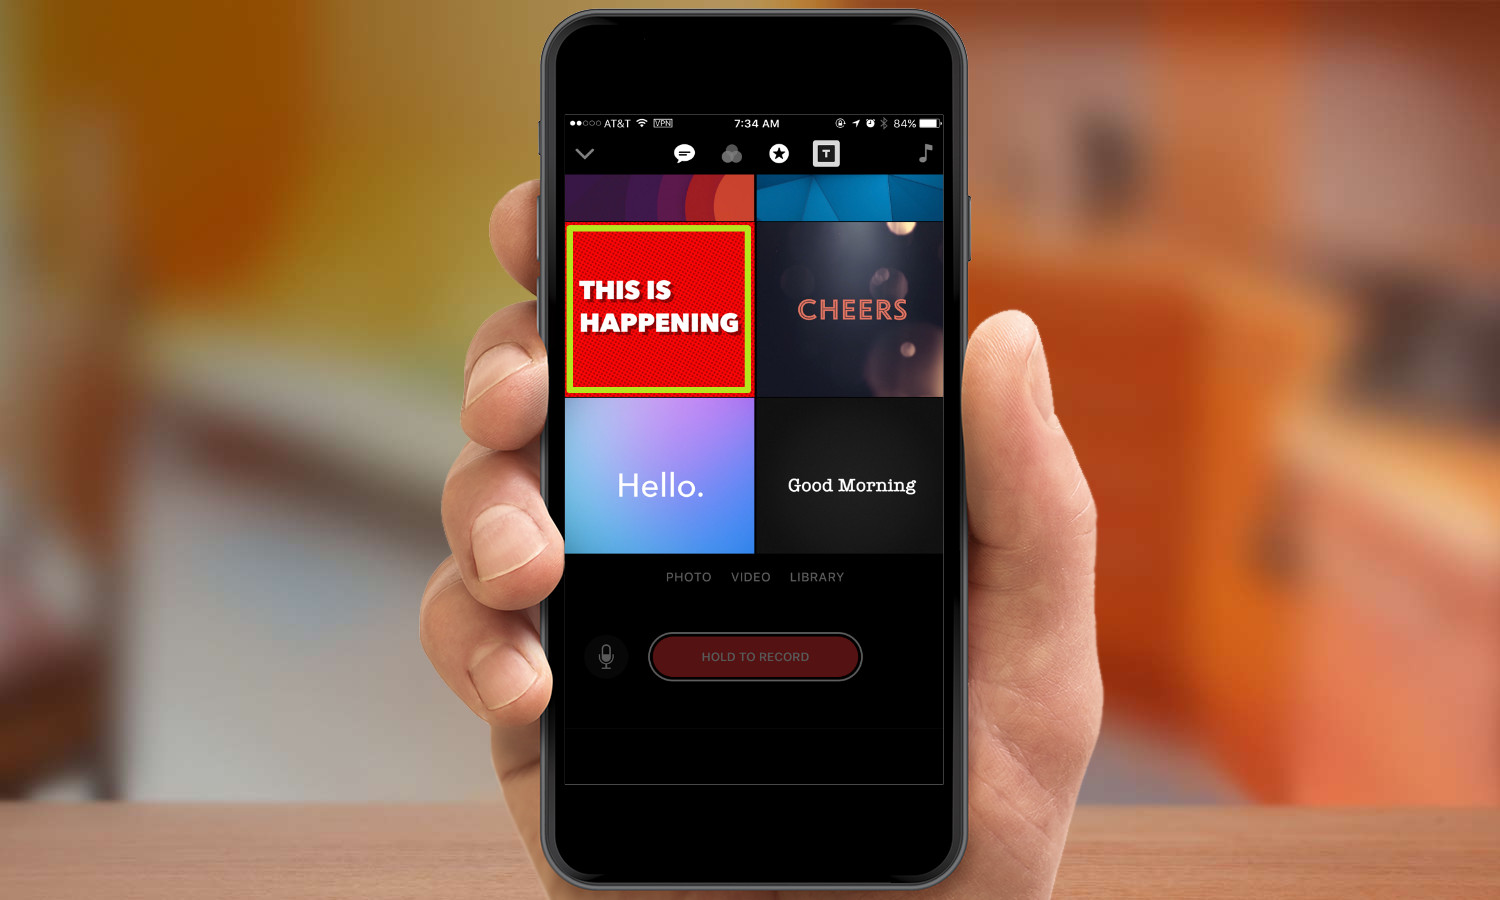
11. Tap on the T button to see Clips' full-screen animated posters. These can function as neat title cards for telling a story.

12. Select a poster style. Remember, you're not committed to that text.
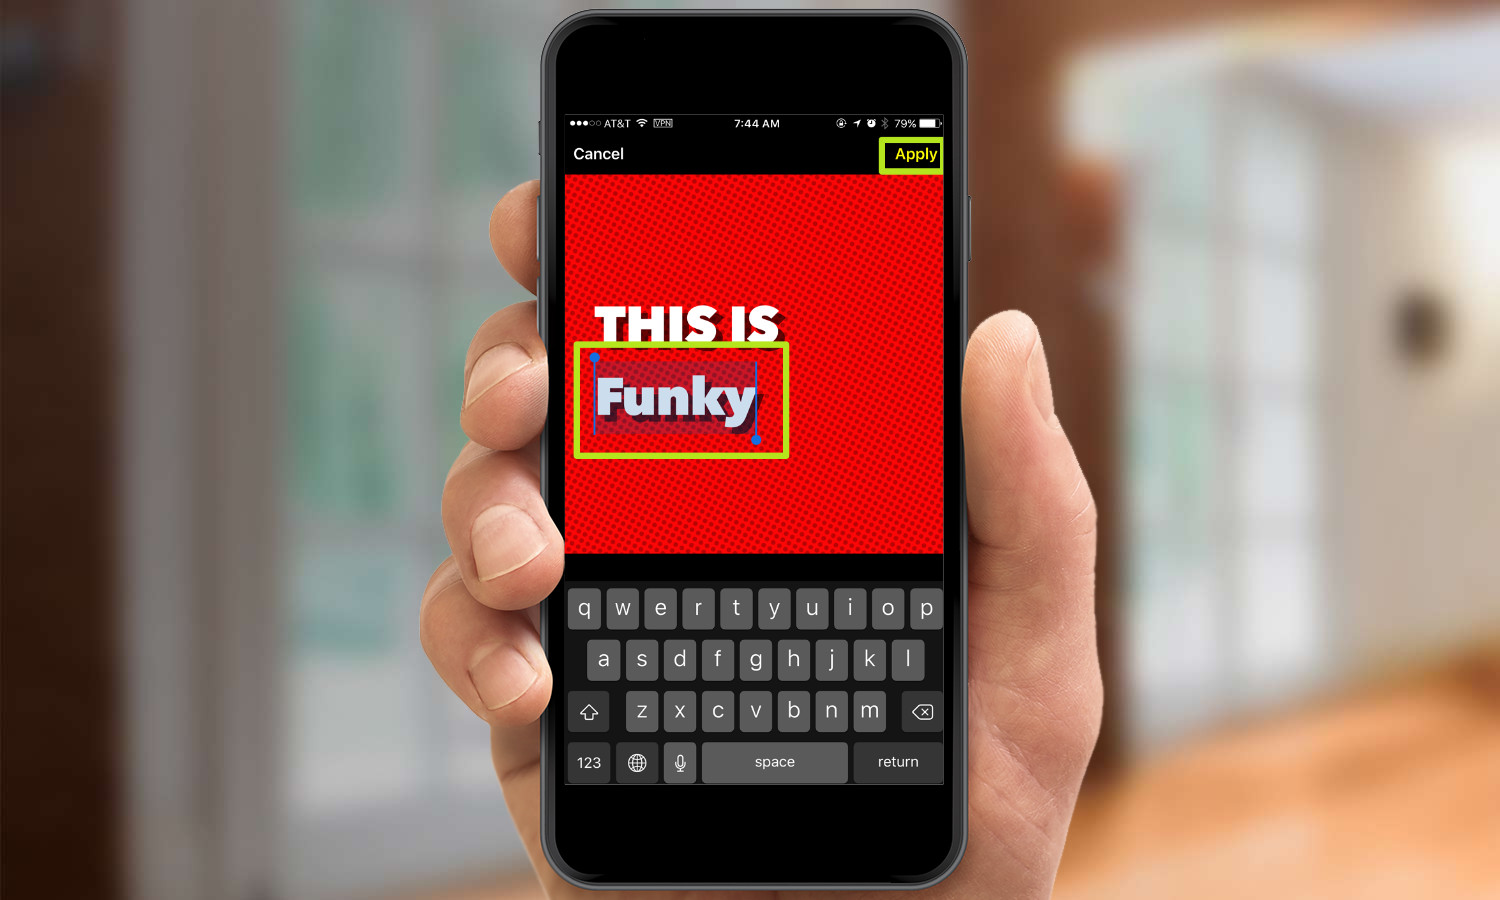
13. Double-tap text in a poster or sticker to edit it. Tap Apply when finished.
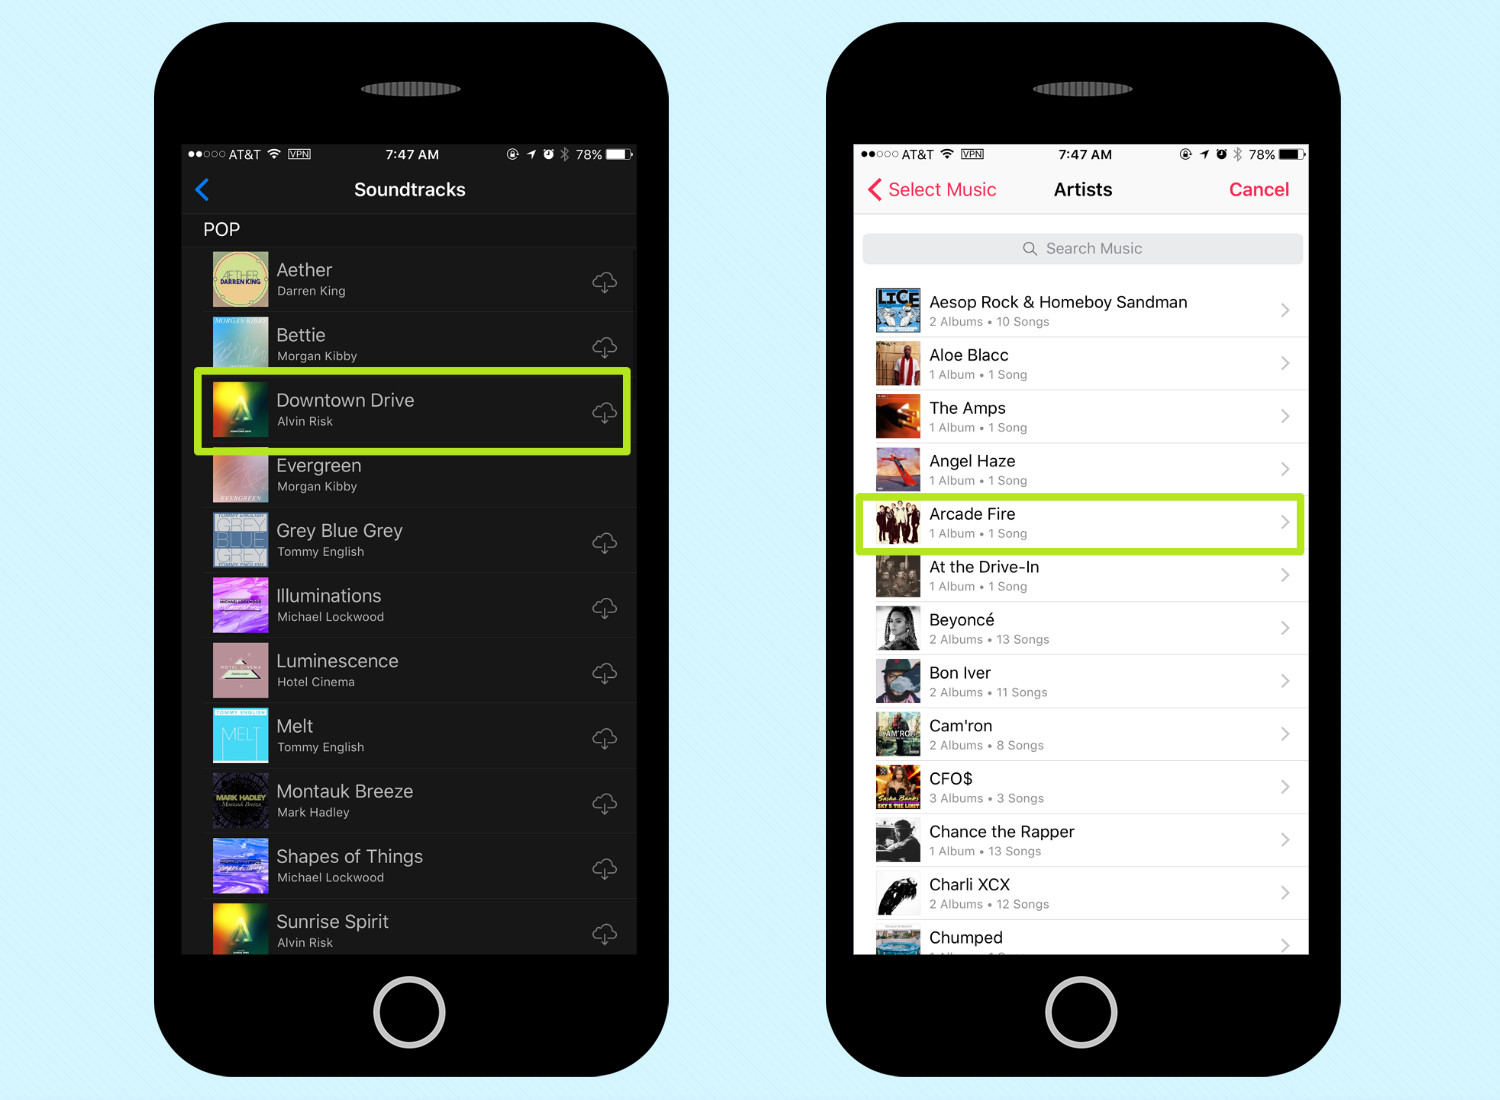
14. Tap the Music icon in the top right corner to add a soundtrack.

15. Select a tune from Apple's soundtracks or your iCloud Music Library.
16. Tap on tiles to edit them. You can mute, trim and delete. You can also drag and drop to rearrange. The mute button may be especially useful if there's so much background noise that you'd prefer to use Live Titles to speak for you.
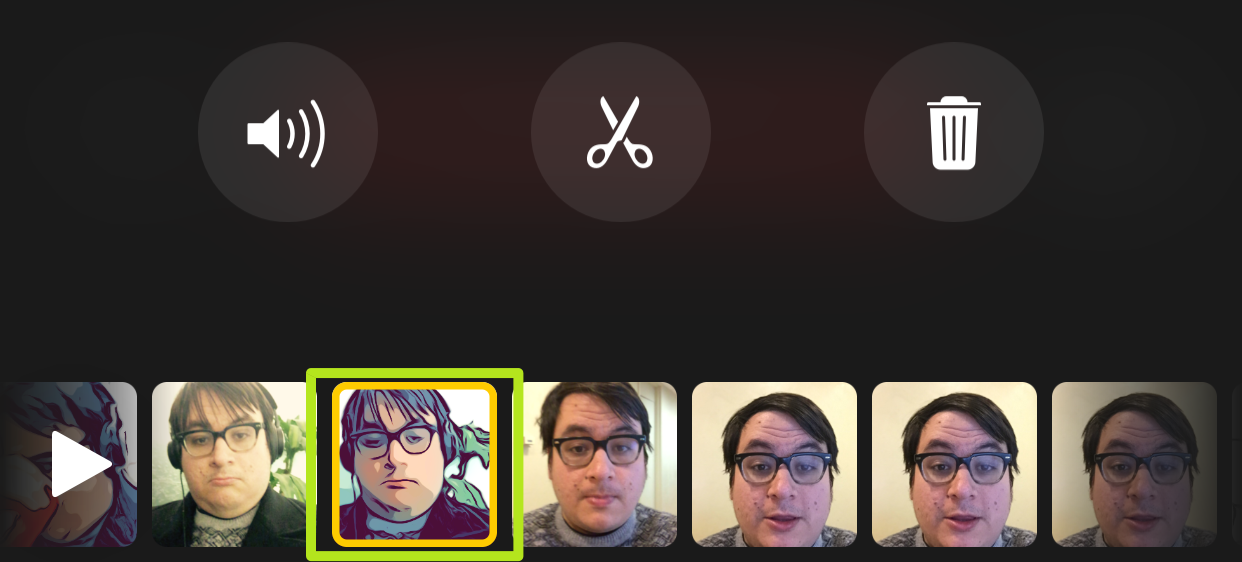
17. Hit Done when you're finished.

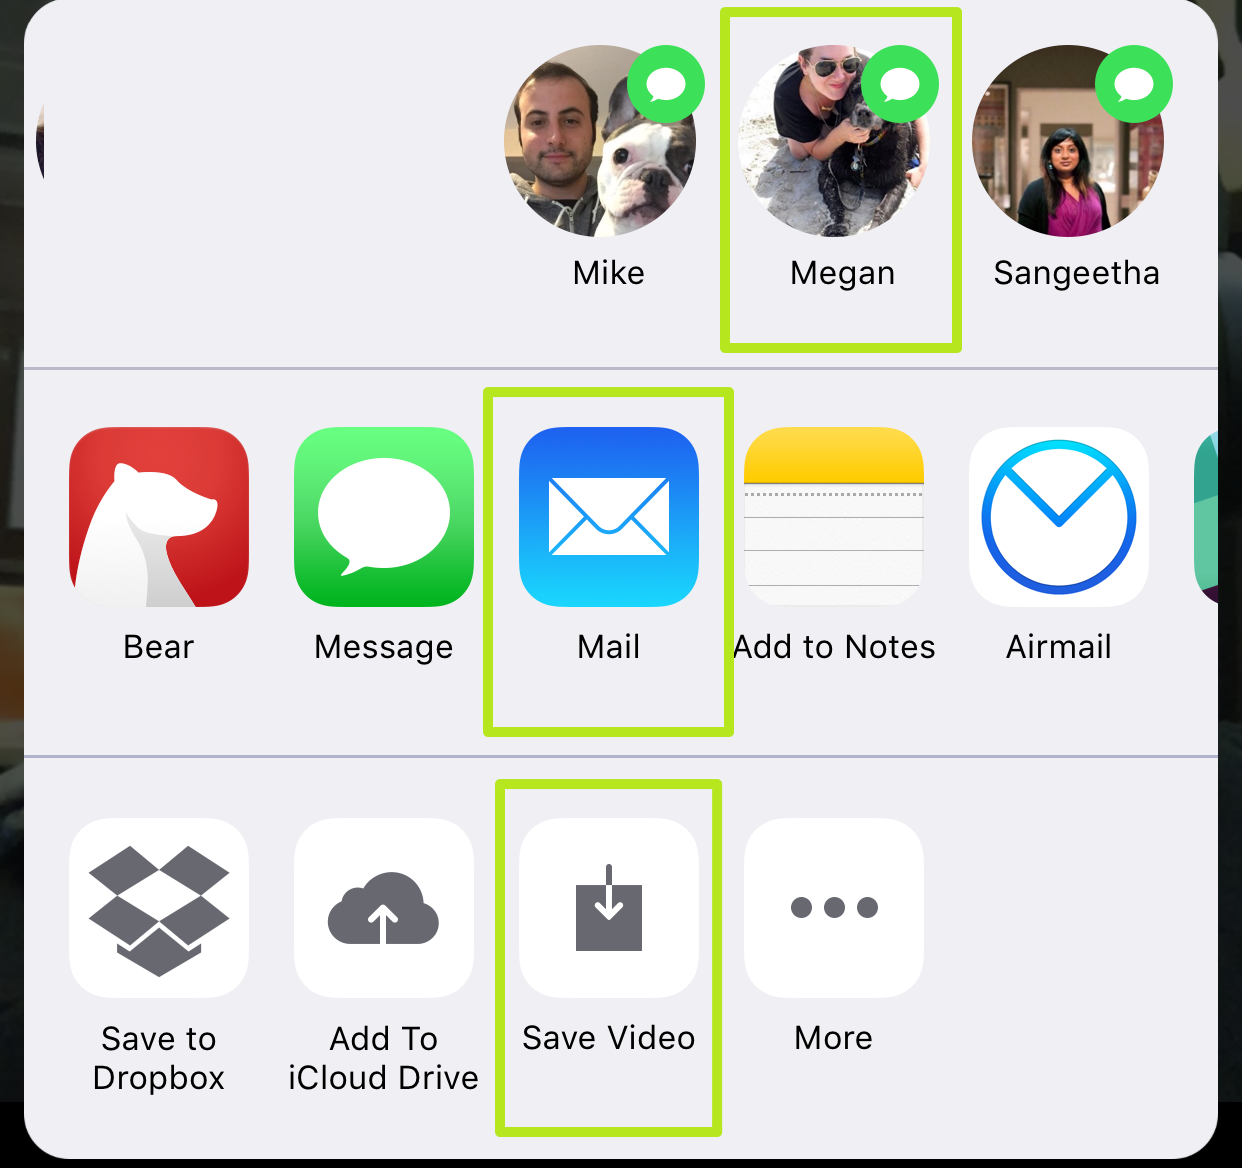
18. Hit the Share icon. Also, the Play icon will show you your Clip before you send it.

19. Select an app or a contact to share your Clip with. If your app of choice doesn't use the Share function, tap Save Video to move the Clip to your Camera Roll.
Congrats, you're a Clips master!

Henry is a managing editor at Tom’s Guide covering streaming media, laptops and all things Apple, reviewing devices and services for the past seven years. Prior to joining Tom's Guide, he reviewed software and hardware for TechRadar Pro, and interviewed artists for Patek Philippe International Magazine. He's also covered the wild world of professional wrestling for Cageside Seats, interviewing athletes and other industry veterans.
