How to Boost Your Phone's Performance in Android Oreo
With a few simple tweaks in Android Oreo, you can get better performance out of your smartphone. Here's where to start.
Android gets a bit faster with every new version, so if you’ve got a high-end handset that either shipped with Android Oreo preinstalled or received the Oreo update, you likely won’t have to do much to ensure a speedy, smooth experience. But not all phones running Oreo feature the latest and greatest specs, and even the ones that do get bogged down with data and resource-hogging apps over time.
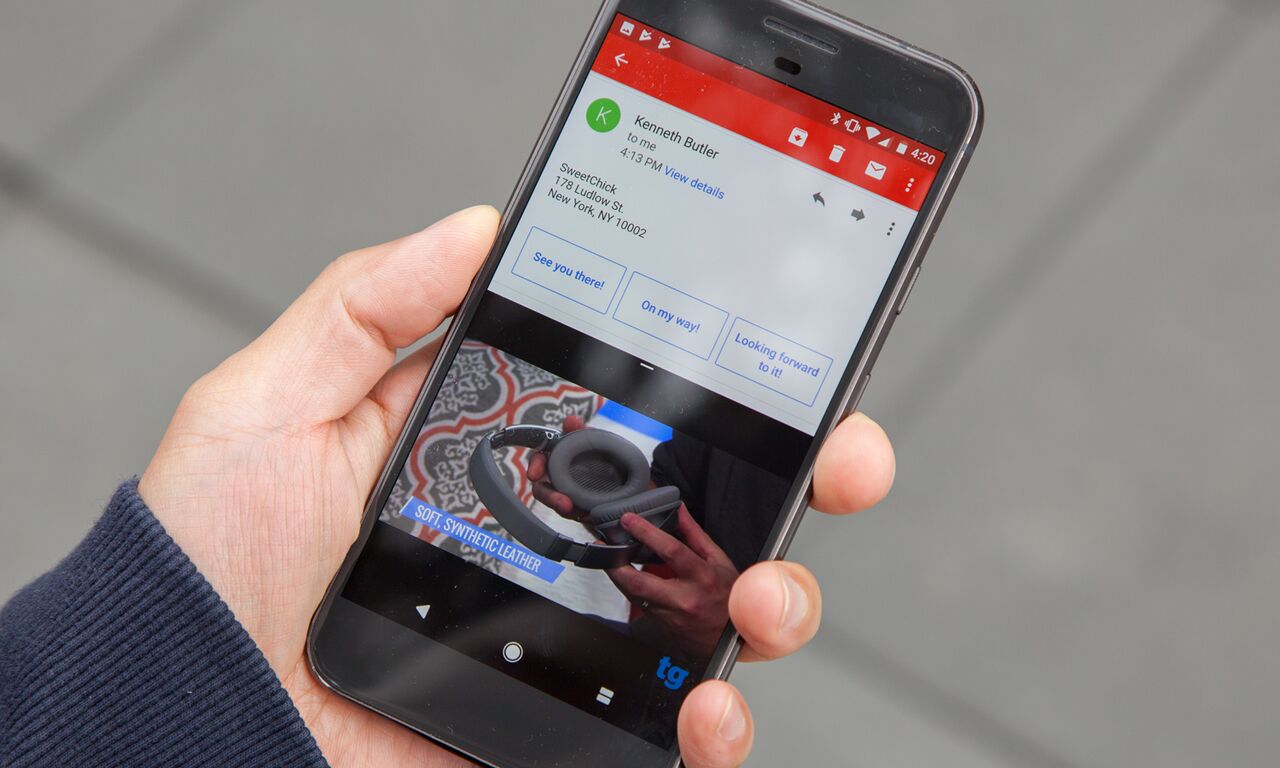
Chances are, you’ll have to do a little spring cleaning on your phone at some point. But while you’re at it, you can also make your phone a little bit faster and last longer by tweaking a few settings. Here’s how to use those tweaks to get the best performance out of Android 8.0 Oreo.
Delete Unused Apps
This step is obvious, but that doesn’t mean it’s not critical. Resource-intensive apps that are constantly upgrading in the background and siphoning battery power can be devastating for your performance and longevity on a charge.
Despite Google’s best efforts to curb the worst offenders with behind-the-scenes improvements in Oreo like Background Execution Limits, often the best course of action is to simply delete or disable what you don’t need to begin with.
MORE: Best Android Apps You're Not Using
If you’re using a Google-built phone, you may not encounter much bloatware or pre-installed content on your phone that should be deleted. But phones from other manufacturers and carriers often ship with loads of extraneous apps that probably serve you little good. One of the first things you should do when booting a new phone for the first time is get rid of these unnecessary apps.
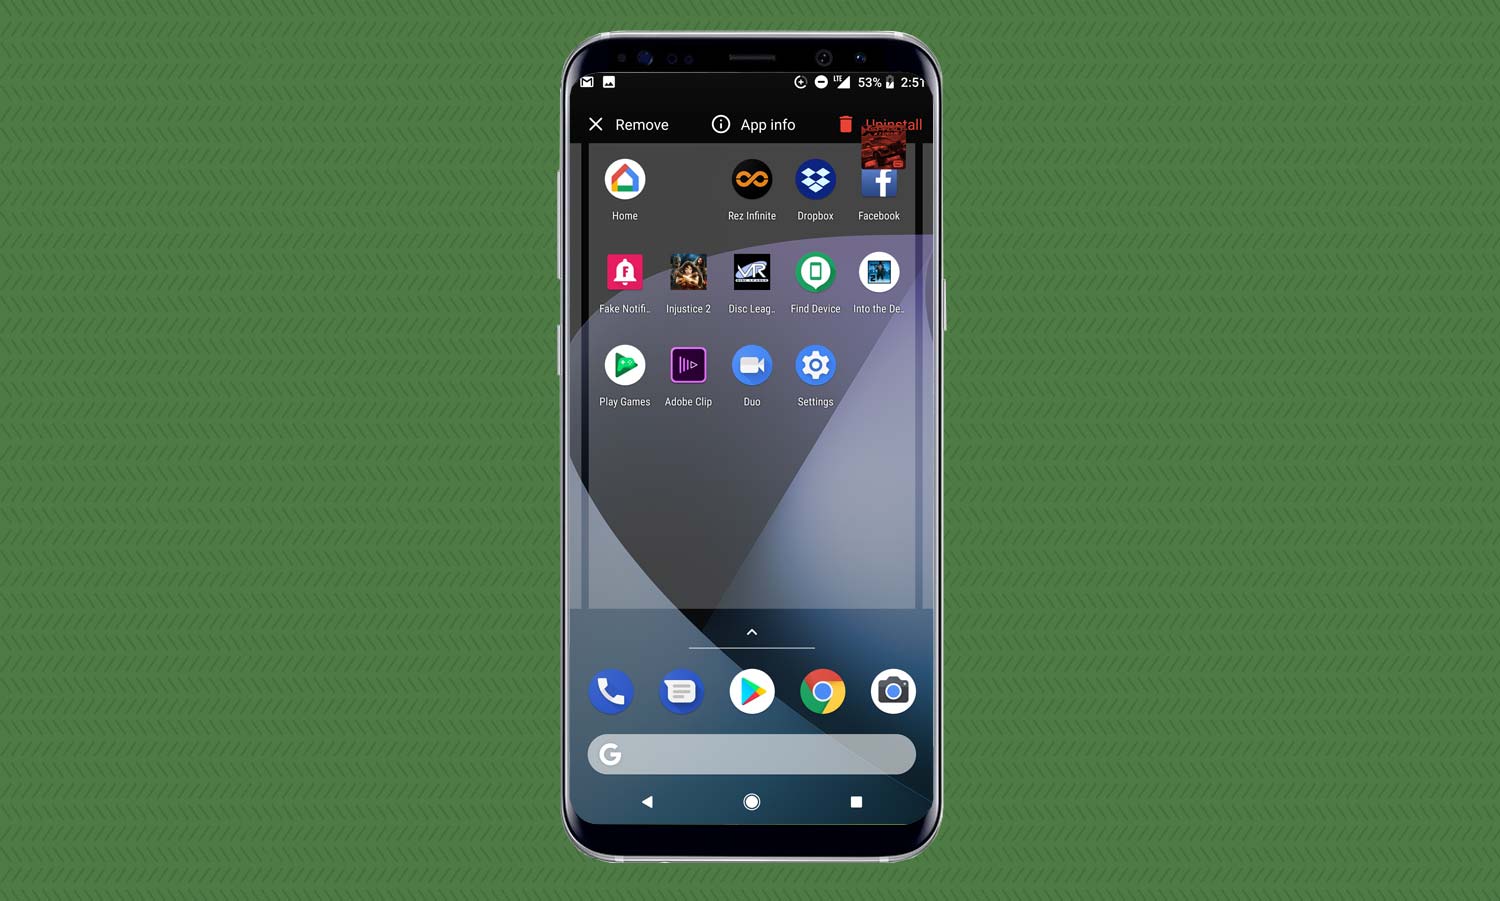
Here’s how: The act of uninstalling apps differs slightly from device-to-device, but it usually goes like this: press and hold on an app on your home screen or in the app drawer, and start dragging it upward. As you drag, you’ll see an Uninstall icon along the top of the phone. Drag the icon there and let go. Conversely, you could also go to the Info page for that particular app with a long press on the icon, and delete it from there.
Sign up to get the BEST of Tom's Guide direct to your inbox.
Get instant access to breaking news, the hottest reviews, great deals and helpful tips.
Enable Data Saver in Chrome
Wouldn’t it be great if web pages had smaller file sizes? That way, you’d not only spend less time loading them but also consume less of your monthly cell phone data. Fortunately, that’s exactly what Data Saver can do for you in Google’s Chrome browser.
Data Saver uses Google’s servers to remotely compress web pages before sending them to you, saving your device legwork while also saving you time and money. One caveat, however: private sites utilizing HTTPS cannot be optimized using Data Saver, so those will continue to come through normally.
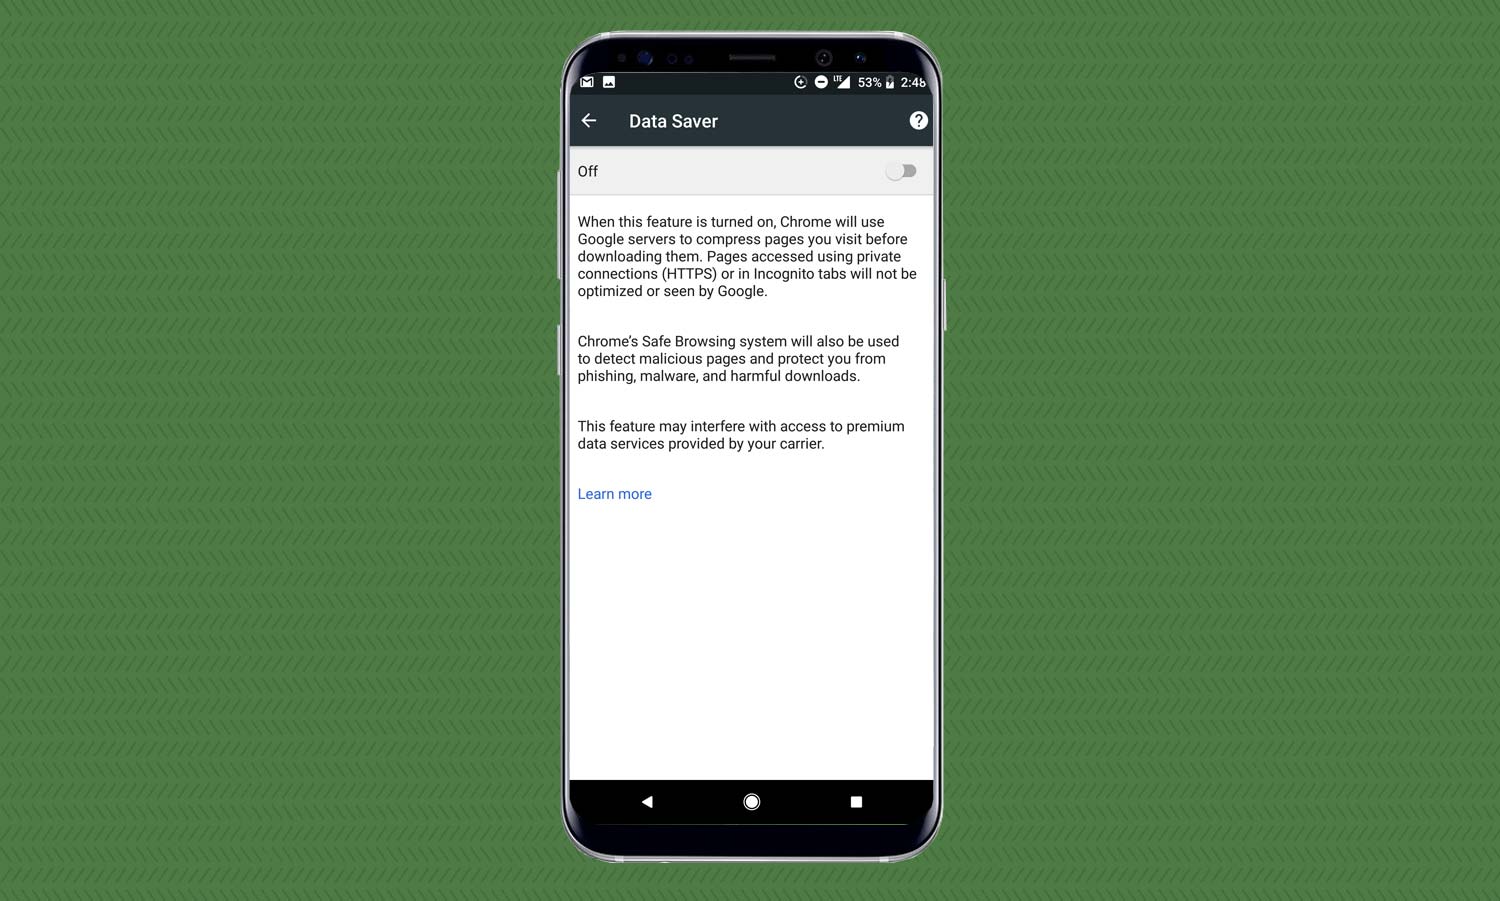
Here’s how: Open Chrome, and tap the Menu in the top right corner represented by the three vertical dots. Then tap Settings. Scroll to the bottom, and tap Data Saver. On the following screen, you can toggle the feature on, and over time you can return to this space to see how much data you’ve saved by using it with the visual aid of a handy graph. If you ever want to turn it off, simply toggle it back.
Enable Data Saver Across Android
Not to be confused with the aforementioned Chrome feature, the Android-wide Data Saver is a different beast entirely — though in a similar way it can help you conserve processing power and battery life.
Android’s Data Saver, introduced in Nougat, restricts background activities for most apps and even certain ones in the app you’re currently using as well. Bear in mind this may affect the behavior of apps differently, perhaps requiring you to press on images before being able to view them at full resolution, for example.
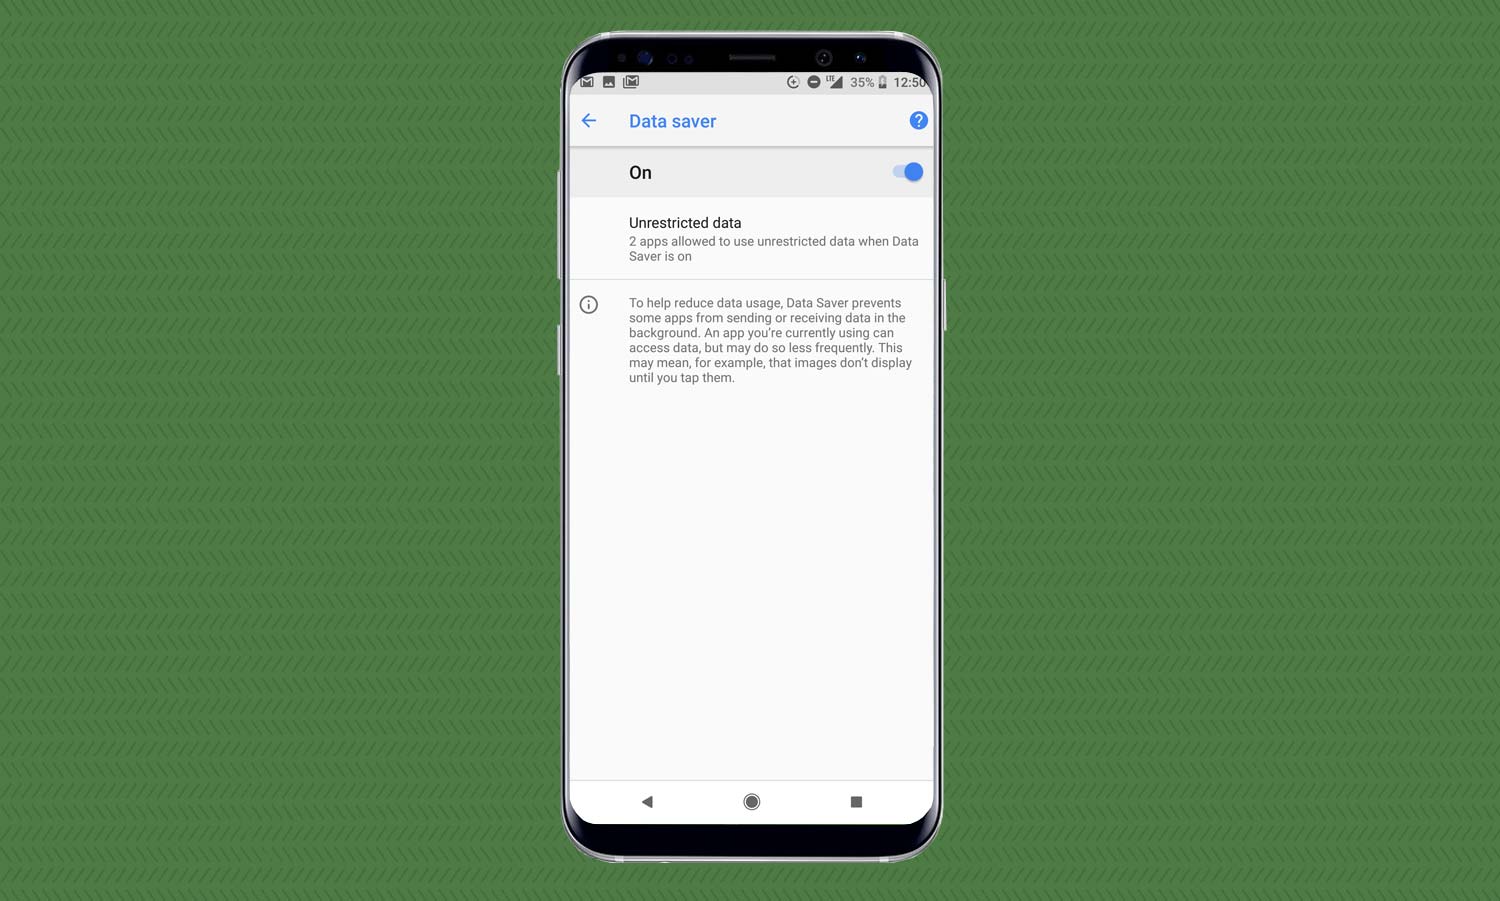
Here’s how: Open Settings, and tap Data Usage. Tap Data Saver to access the screen where the feature can be switched on or off.
Conversely, Data Saver can be accessed via a quick toggle in the notification shade. In the Pixel 2’s case, you’ll know when it’s running thanks to a small icon that appears in the status bar, showing a plus sign enclosed in a circle.
Speed Up Animations with Developer Options
While the other tips here are mostly designed to give your device room to breathe and concentrate on tasks that are actually necessary, this one will physically make it faster. Hiding in Android’s Developer Options are a trio of animations settings which let you set the speed of animations to be twice as fast or turn them off entirely to save even more time between opening apps, returning to the home screen, and more. Best of all, cutting down those pretty but pesky animations won’t have an adverse effect on your battery life.
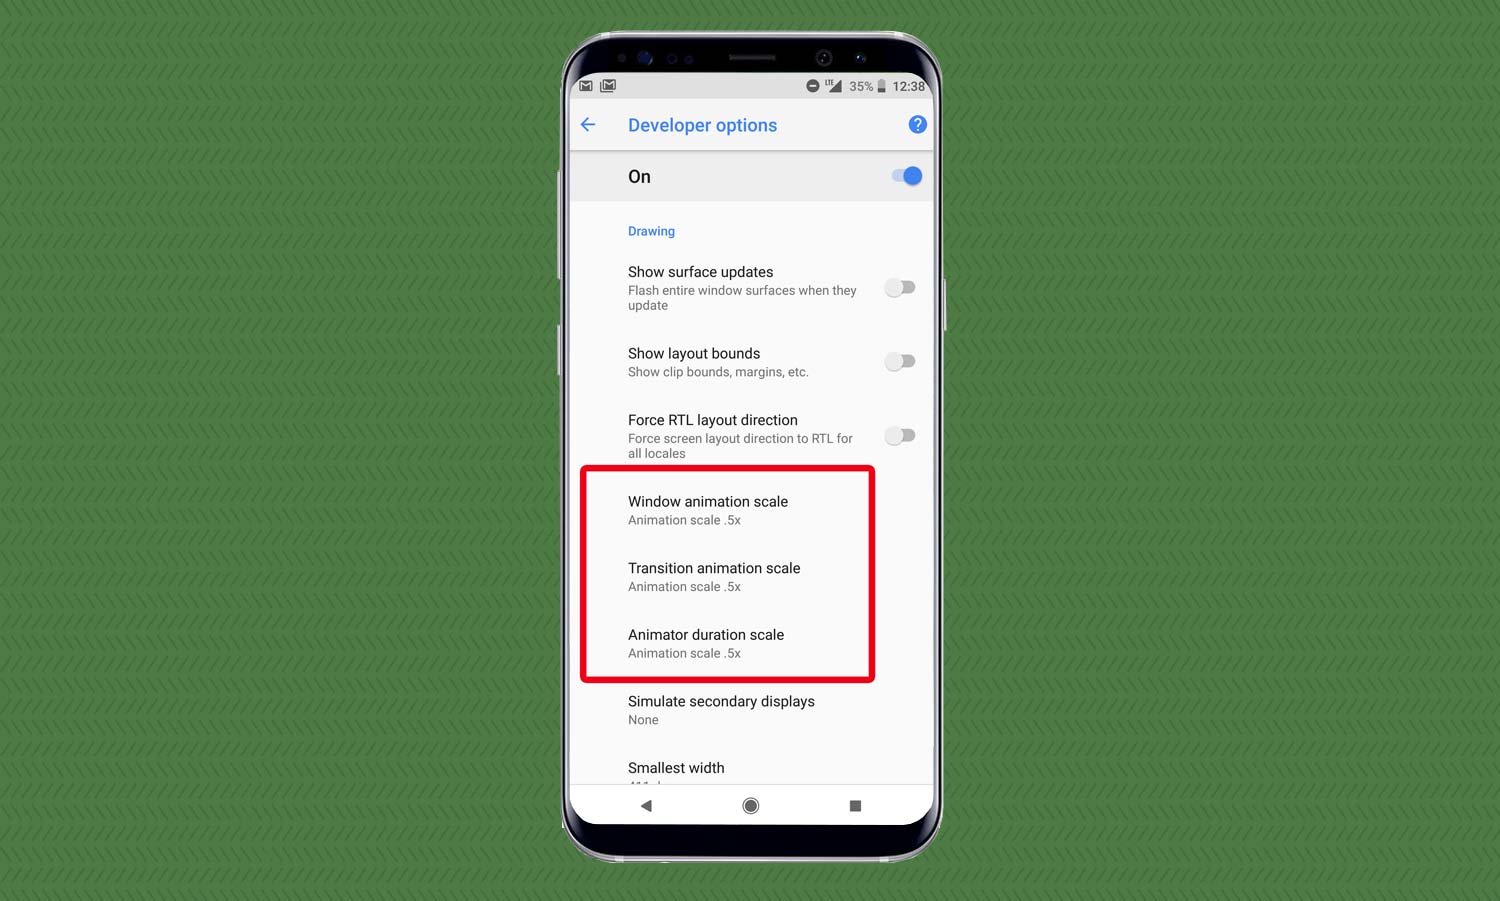
Here’s how: First, you’ll need to enable Developer Options if you haven’t already. Open Settings, then System, then About Phone. Start repeatedly tapping the Build Number until the on-screen prompts tell you you’ve enabled Developer Options.
Back out to the System menu and tap Developer Options, which should now appear in the list after having been turned on with the previous step. Scroll down to the Drawing toggles, and identify Window animation scale, Transition animation scale, and Animator duration scale. The default values for all of these are 1x, but we want to make them either .5x or turn them off entirely. You should immediately notice your phone respond more quickly to taps and swipes.
Restrict Background Data for Certain Apps
Say you’ve identified particular apps that are eating up a tremendous percentage of your battery life or memory. Oreo makes it very easy to simply switch off background activity on a per-app basis. Just keep in mind that if you do this, you will no longer receive notifications from the app in question unless you’re actively using it.
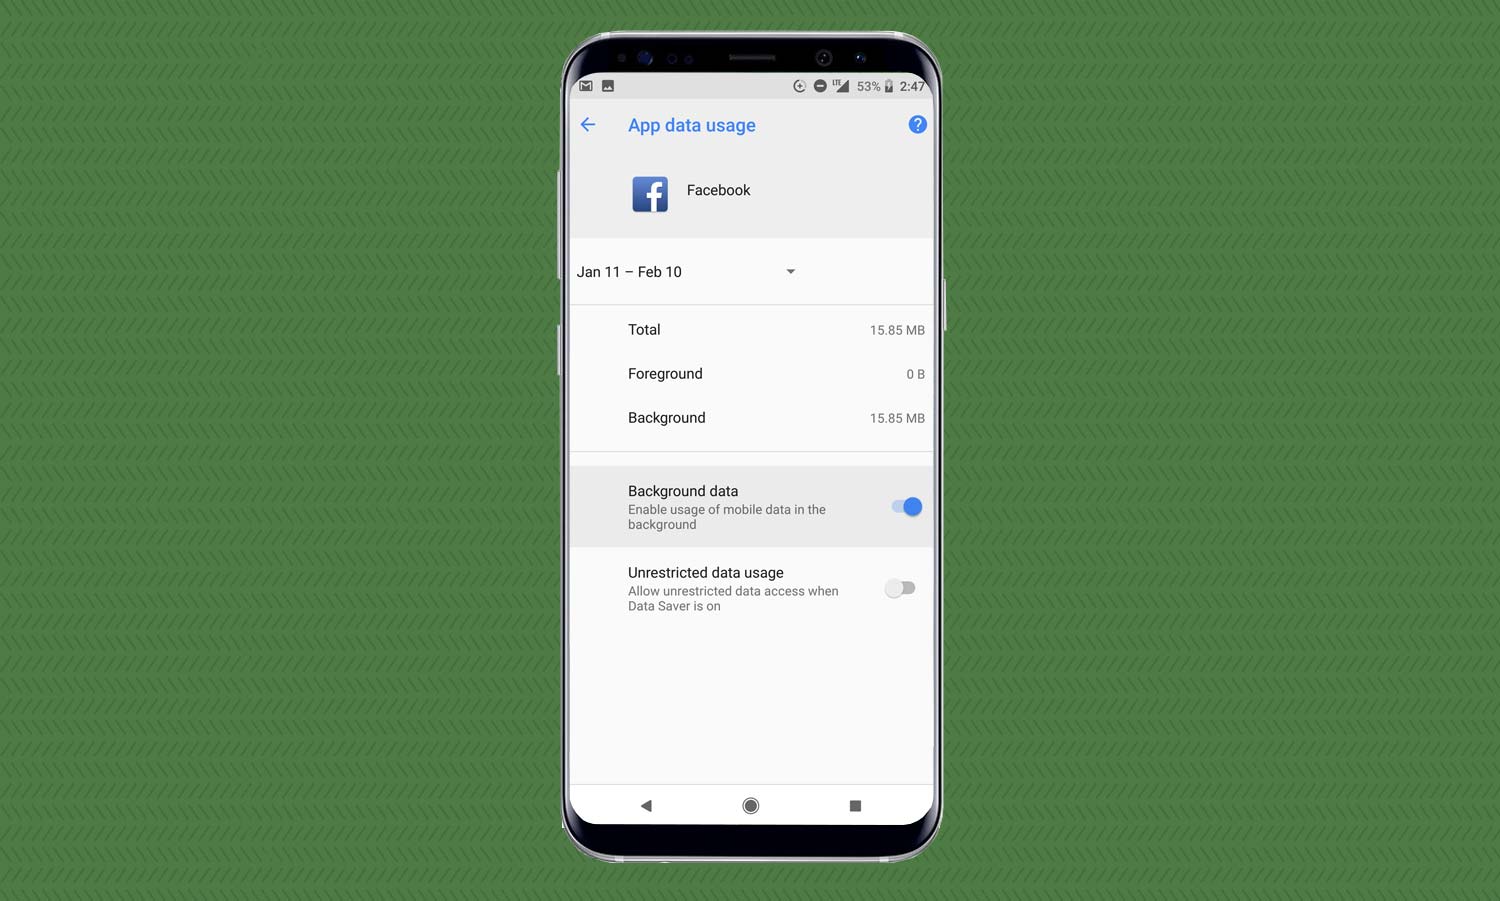
Here’s how: Access the App Info screen for the app you’d like to restrict, either by long pressing the icon and tapping App Info, entering Settings followed by the Apps & Notifications page, or dragging an app icon up to App Info on the home screen or drawer. Once you’re there, tap Data Usage, and then switch the Background Data toggle to off.
MORE: How to Close Background Apps in Android
Clear Cache for Misbehaving Apps
For an app that’s really causing performance trouble, clearing the cache might be necessary every now and then. This simply dumps the temporary files that accumulate for a particular app over time. Although these files are stored to speed up loading and opening, they can occasionally slow things down, especially if you’ve been using the app for a very long time.
You can rest assured that deleting the cache won’t wipe the data or passwords stored inside it. To do that, you’d have to clear the app’s data instead — something we’d only advise as a last resort if no other method works, as it’s equivalent to deleting and reinstalling a fresh copy of the app.
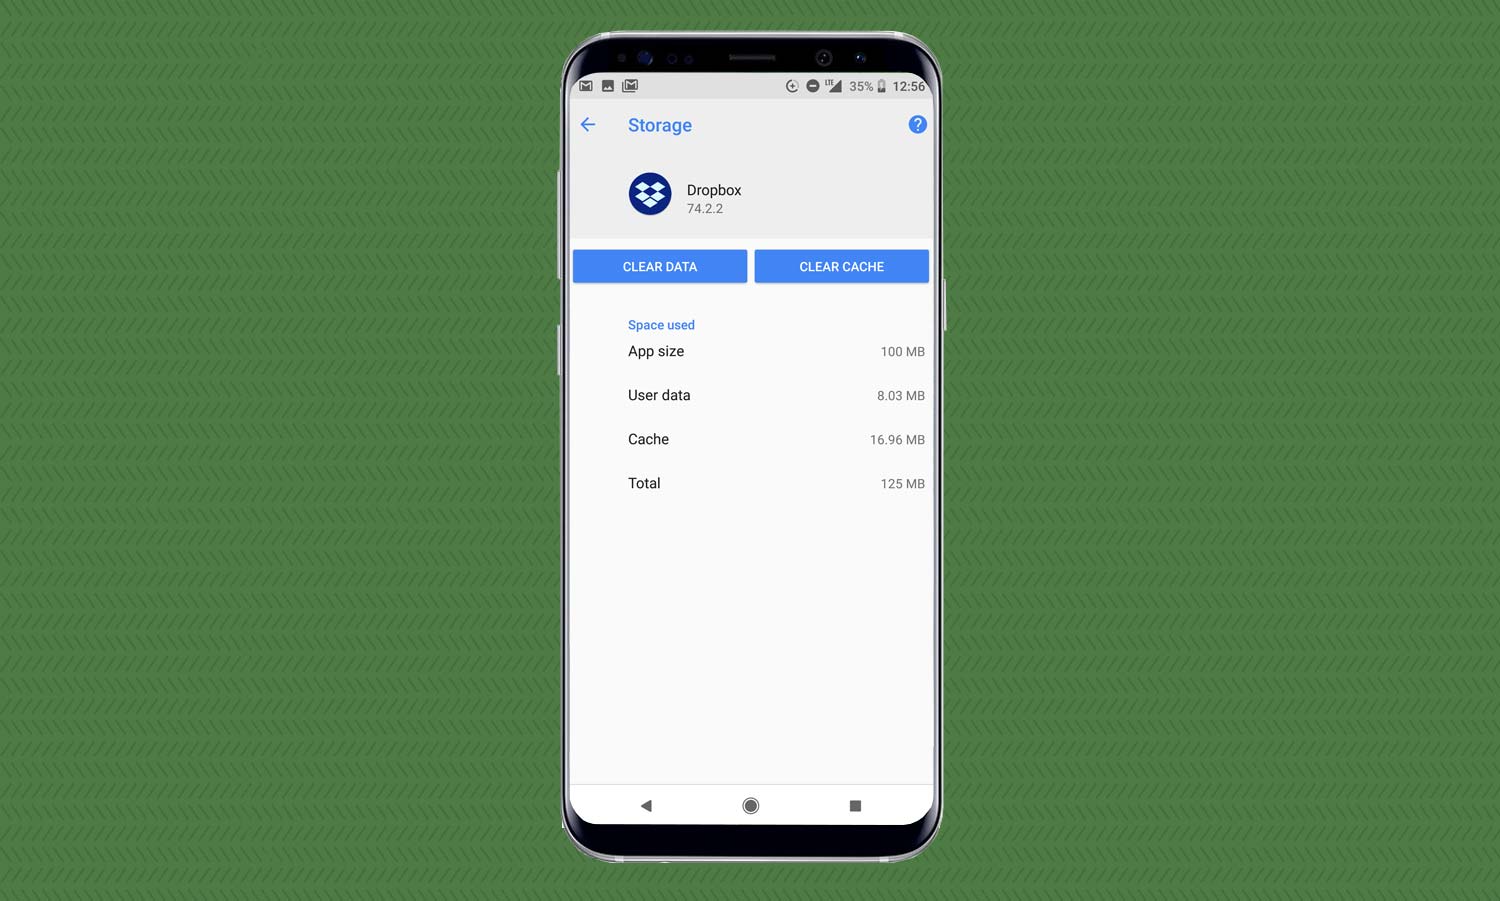
Here’s how: Go to an App Info page, but this time, tap Storage. Then tap Clear Cache.
Restart!
It sounds silly, but it’s true. Most people restart or power down their phones so infrequently, they never realize it can solve a wide range of performance issues. A restart every now and then can restore order to your smartphone and keep it functioning at peak performance, no matter if you have a budget handset or a top-tier flagship.
Adam Ismail is a staff writer at Jalopnik and previously worked on Tom's Guide covering smartphones, car tech and gaming. His love for all things mobile began with the original Motorola Droid; since then he’s owned a variety of Android and iOS-powered handsets, refusing to stay loyal to one platform. His work has also appeared on Digital Trends and GTPlanet. When he’s not fiddling with the latest devices, he’s at an indie pop show, recording a podcast or playing Sega Dreamcast.
