How to Use Google Photos
Google's free service stores and organizes every photo and video you shoot. Here's how to get started and get the most out of it.
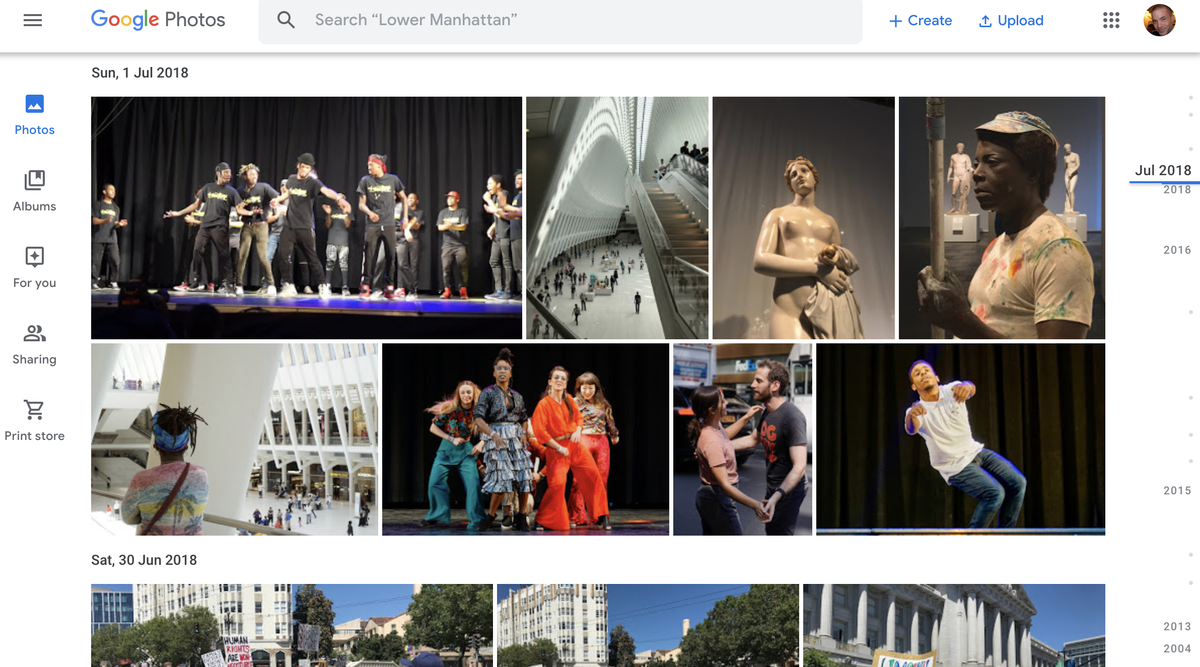
You probably have thousands of photos scattered between your smartphone, your tablet, your camera, and your laptop, with no easy way of knowing which pictures are where. Google Photos is an easy and free way to organize and sync all of your images, so you can access them no matter where you are and which device you're using. That's why Google Photos is one of the best photo storage and sharing sites around.
The service uses Google's image-analysis technology to organize photos and videos, making them easier to search and share. Google Photos provides unlimited storage for free, and offers paid options for people who want to store higher-quality versions of their media.
Here's how to get up and running with Google Photos in a few easy steps.
- The best cloud storage for photos and pictures: free and paid
- Amazon photo storage vs Google Photos: Which is best?
Step 1: Install the Photos app on your devices
Google Photos provides free apps for smartphones in the Apple App Store and Google Play store; there's also a web-based version of Google Photos for uploading pictures and videos from PCs and Macs. But instead of downloading full copies of your photos from other devices, the apps simply provide online previews of what you've stored in Google's cloud. As a result, your smartphone's storage won't be swamped if you have uploaded thousands of photos and videos from your home PC.
(Google Photos and Google Drive used to automatically sync their photo collections, but that feature was disabled in 2019. Google provides instructions on how to manually select photos in Drive and copy them over to Photos.)
The first thing I noticed after downloading the Google Photos app was how many garbage images I had on my iPhone, including failed shots like a close-up of my finger and reminder snaps I'd take of a sign. Using Google Photos gave me an opportunity to weed out the junk, which I could do either in the mobile app or in the web interface on my computer. In the app, a trashcan icon appears below the image (along with icons for editing, sharing, and searching for similar images). In the web version, click on a photo to bring it up in a new window, and click on the trash can icon displayed on the upper right.
MORE: Best photo editing software
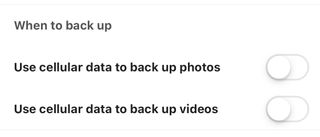
To prevent photo and video uploads from blowing through your data cap, the mobile app can be set to upload only over Wi-Fi. To confirm that setting (or change it), press the menu icon (three parallel lines) on the upper left of the app. Then click Settings>Back up & sync. Make sure the two switches at the bottom of the screen, "Use cellular data to back up photos" and "se cellular data to back up videos," are turned off.
Sign up to get the BEST of Tom's Guide direct to your inbox.
Get instant access to breaking news, the hottest reviews, great deals and helpful tips.
Step 2: Select the quality level for uploads
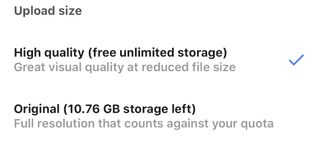
Google Photos is currently free — if you agree to let it store compressed copies of your media. If the pictures are larger than 16 megapixels, Google Photos will downsize them to that size. (The originals on your computer or mobile device are not altered.) Videos are capped at 1080p resolution. You can save unaltered originals, including RAW image files, using the Original setting in the app, and store them in your Google Drive account, which includes 15GB of free storage. (That storage is shared among all Google services, such as your Gmail or Google Docs account.) If you need more space for your unaltered originals, you can upgrade, from 100GB for $1.99 per month, to 2TB for $9.99 per month.
Note also that free storage comes to an end on June 1.
Unless you're extremely fussy, the free option is fine. I uploaded copies of the same photo of my boss Mark, shot with a pro-grade Canon 5D Mark II DSLR, using both the High Quality (i.e. compressed) and Original settings. No one in our office — including the photographer who took the photo — saw a clear difference onscreen.


That's especially impressive because the unaltered JPEG version was 4.5MB, whereas the other JPEG was just 0.85MB. You can see for yourself by clicking on the two images below to view cropped portions displayed at 100 percent.
With many new cameras shooting 20-MP and larger images, you may lose some resolution with the free option, but even a 16-MP image is larger than you can display at full size online and big enough for at least a 12 x 14-inch print.
Step 3: Navigate your images
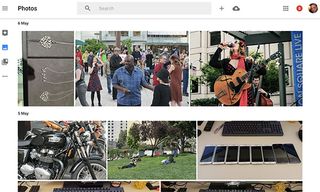
By default, Google Photos opens in the Photos view, which organizes images and videos by date, with the newest ones at the top. On the mobile app, you can spread your fingers over the screen to zoom in and view the photos by month, then day and then individual photos. Then, you can pinch to zoom back out. In the web interface, you can click on a timeline that runs down the right side of the page.
Tapping the Albums icon at the bottom of the mobile app or the left of the web interface brings up a new view, organized by People, Places, Things, Videos, Collages, Animations, and Movies, which are edited videos. (We'll discuss actual album creation later on.) The first category uses face-recognition technology to group photos of the same person. This is a common feature in most photo-organizing apps, as is organizing photos by place, if they were taken on a smartphone or GPS-enabled camera that records location data.
Clicking on the People category brings up portrait photos, and clicking each portrait brings up all the pictures that Google thinks are of the same person. If a photo doesn't belong, click on it to bring up a new screen in the app (or click the "i" icon on the web), scroll down to "People" and click the pencil icon to the right. Then click the red dot on the thumbnail of the album you want to remove it from,` or click the blue dot on the album you want to add it to.
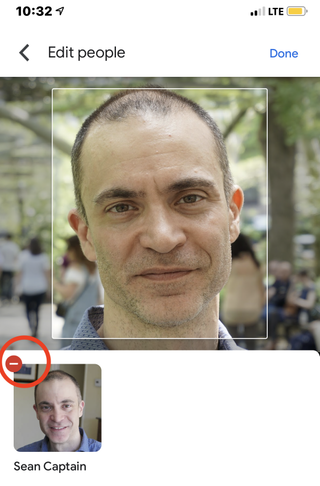
You can name the person in the photos by tapping "Add a name" under their main profile picture. If you do that for your own photo, Google associates your account with the pictures. Your contacts in Google Photos or in your Gmail address book will be alerted if you appear in a photo they take, and Photos will suggest that they share the picture with you. If you find this degree of personalization creepy, don't label your group of faces. If you already have and want to undo it, tap the three dots in the upper right of the screen, and select "Remove name label." You can shut off face recognition completely by going to Settings (from the main screen), selecting Group similar faces, and clicking off the switch next to "Face grouping."
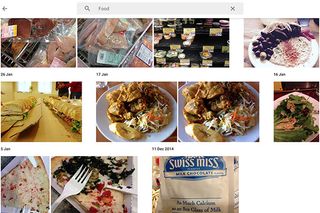
In Things, Google uses its image-search technology to identify the subject of the photo. My initial batch of test photos yielded Things in both broad categories, such as Food, Sky, Selfies and Cars, and more specific ones, such as Stained glass and Fog (both of which I did photograph). Food worked perfectly — showing snaps of sushi, pizza, a supermarket cart and even an ad for hummus and a packet of hot chocolate mix. The Cars category was pretty funny but less accurate, featuring a car and a truck, but also a video of someone on a subway train and a portrait of someone with cars in the background.
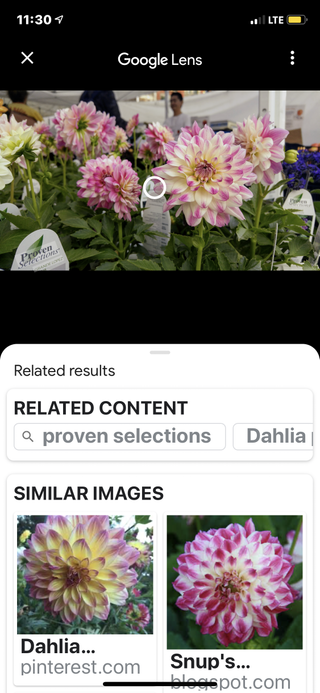
When you bring up an individual photo, you can also click below it on icon of a dot inside a square to activate Google lens. It will analyze the photo and provide search results of similar images from around the web. For instance, I learned that some flowers I shot in the park are examples of the dahlia pinnata variety.
Step 4: Edit your pictures
Google Photos offers a good assortment of editing tools in the app and web interface. You might start with crop and rotate to trim the photo and tilt it if the shot was crooked. For quick touchups, the app offers 12 Instagram-style filters with cryptic names. West, for instance, cranks up the whites in images, and Vista is a high-contrast black-and-white effect. Each filter has a slider that lets you adjust the intensity of the effect. You can save a copy with your effects, and you always have the Cancel option to undo all changes.
There are also traditional adjustments, beginning with Light (brightness) and Color (spelled "Colour" in the web version) . Tapping an arrow to the right of the Light and Color sliders displays fine-grained adjustments, such as Exposure, Contrast and Highlights under Light; and Saturation and Warmth under Color. The Color section also features specialty adjustments called Skin tones and Deep blue (for skies and water).
Editing video clips (possible only in the app) is limited to trimming from the beginning or end of a clip or rotating the video if the orientation came out wrong (such as upside down) when you shot it. (Later on, we'll show how you can combine multiple clips into a movie.)
Step 5: Create albums, photo books, collages and movies
Google Photos lets you combine your images into an Album, Collage or Animation (a series of photos that play in a looping slideshow you can share as an animated GIF).You create them all the same way: by reviewing your photos and selecting the ones you want to include. You can then add, delete or rearrange images to your liking.
You can also arrange images to make photo books, which you receive in print form. (Books start at $9.99 and go up based on the number of photos. You can also order individual prints and prints on canvas).
Movie creation is available only in the mobile app, since it relies on the touch screen for making quick edits. First select multiple clips or photos (up to 50). You can drag and drop clips to set the order they play in and slide your finger across each clip to select its start and endpoint. You can also replace the recorded audio with another sound file.
Step 6: Share your stuff
Sharing is a big part of Google Photos. By default, all of your photos and videos (and anything you create using them) are private. You can share a single photo or video by tapping on it and selecting the upload icon on the lower left of the screen. On iOS devices, the icon is a box with an arrow coming out of it, and on an Android devices, it's a "<" icon. (Sharing Albums, Animations, Collages and other creations works similarly.)
The Share button brings up the standard options for your iOS or Android phone, such as email, Facebook, Twitter or text message. These options depend, in part, on which apps you have installed on your phone. (If you have a Gmail account, you also see thumbnails of suggested contacts to email directly.) You can also click the Create link button to generate a unique URL for your selections that you can paste into an email, text or other message. That URL isn't tied to the person you send it to; anyone with the URL can view the photos associated with it. You can, however, revoke a URL to cut off views at any time.
MORE: How to Take a Great Selfie
You can also select multiple pictures by pressing down on one of them for a few seconds until a circle appears in the upper left of each image; then tap photos one by one to select them. Alternately, just drag your finger across a whole bunch to photos (without first pressing down) to get them all at once
Bottom line: A good starting point
Google Photos is very efficient for uploading, storing and syncing your photos and videos. Its automated tools, such the Things album or Lens, provide handy ways to search your own photos, recognize text and find related material on the web.
If you are a professional or even a serious amateur photographer, the heavy compression of images (despite how good they look) in the free version will likely be a deal-breaker. The price for storage of full resolution photos is in line with what you would get from other cloud services, like Dropbox Even if Google Photos isn't your main storage site, there's no harm in using a free account as a second repository to easily share samples of your images.
You aren't giving up any rights to your creations, and Google (at least for now) has no plans to "monetize" the content.
And if your main desire is to quickly share snapshots from your trove of cellphone pics, Google Photos is a very handy tool indeed.
- Best photo editing apps
- The best cloud storage for photos and pictures: free and paid
Follow Sean Captain @seancaptain. Follow us @TomsGuide and on Facebook.
Sean Captain is a freelance technology and science writer, editor and photographer. At Tom's Guide, he has reviewed cameras, including most of Sony's Alpha A6000-series mirrorless cameras, as well as other photography-related content. He has also written for Fast Company, The New York Times, The Wall Street Journal, and Wired.
