How to Back Up Your iPhone to the Cloud or a Hard Drive
Here are step-by-step instructions on how to back up your iPhone contacts, messages, photos and videos to the cloud or to a hard drive.
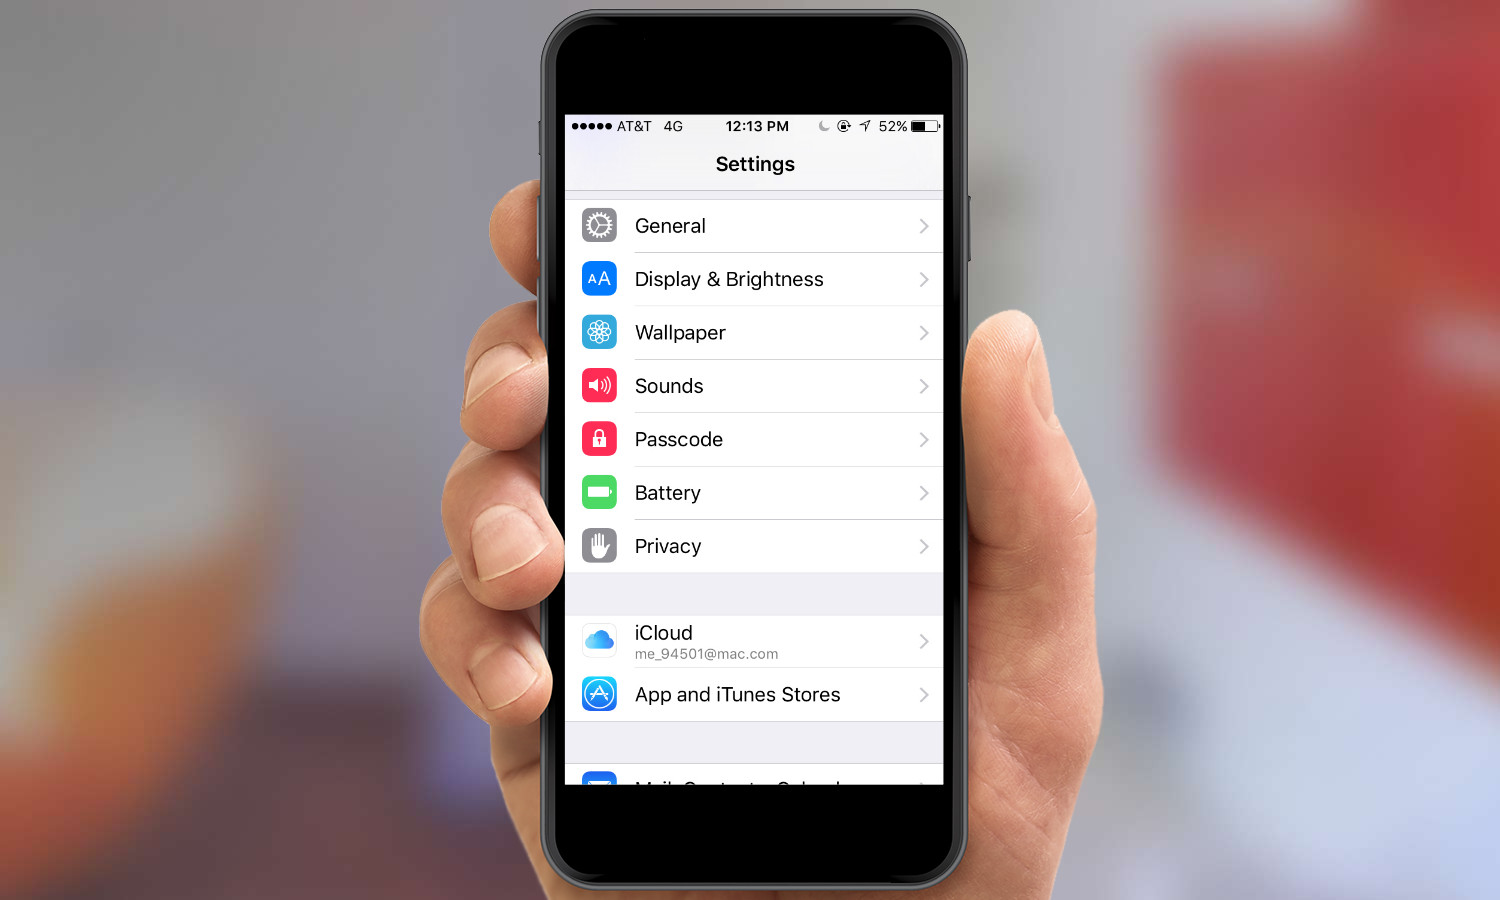
Backing up your data is one of those things you know you’re supposed to do, but you don’t do nearly enough -- or worse, you don’t do at all. At least with the iPhone, it’s surprisingly easy to back up whatever you’ve got stored on your mobile device, whether it’s to Apple’s iCloud service or to a hard drive.
Here’s what you need to do.
Back Up to iCloud
iCloud’s built-in backup feature will back up any personal and app data stored on your phone -- photos, documents, settings, contacts and so on -- while your phone is plugged in and connected to a Wi-Fi network. iCloud Backup technically does not back up the apps themselves. Instead, it saves a record of what you purchased the App Store, iTunes Store, and iBooks Store, and automatically re-downloads any purchased items, assuming they’re still available from Apple’s content stores.
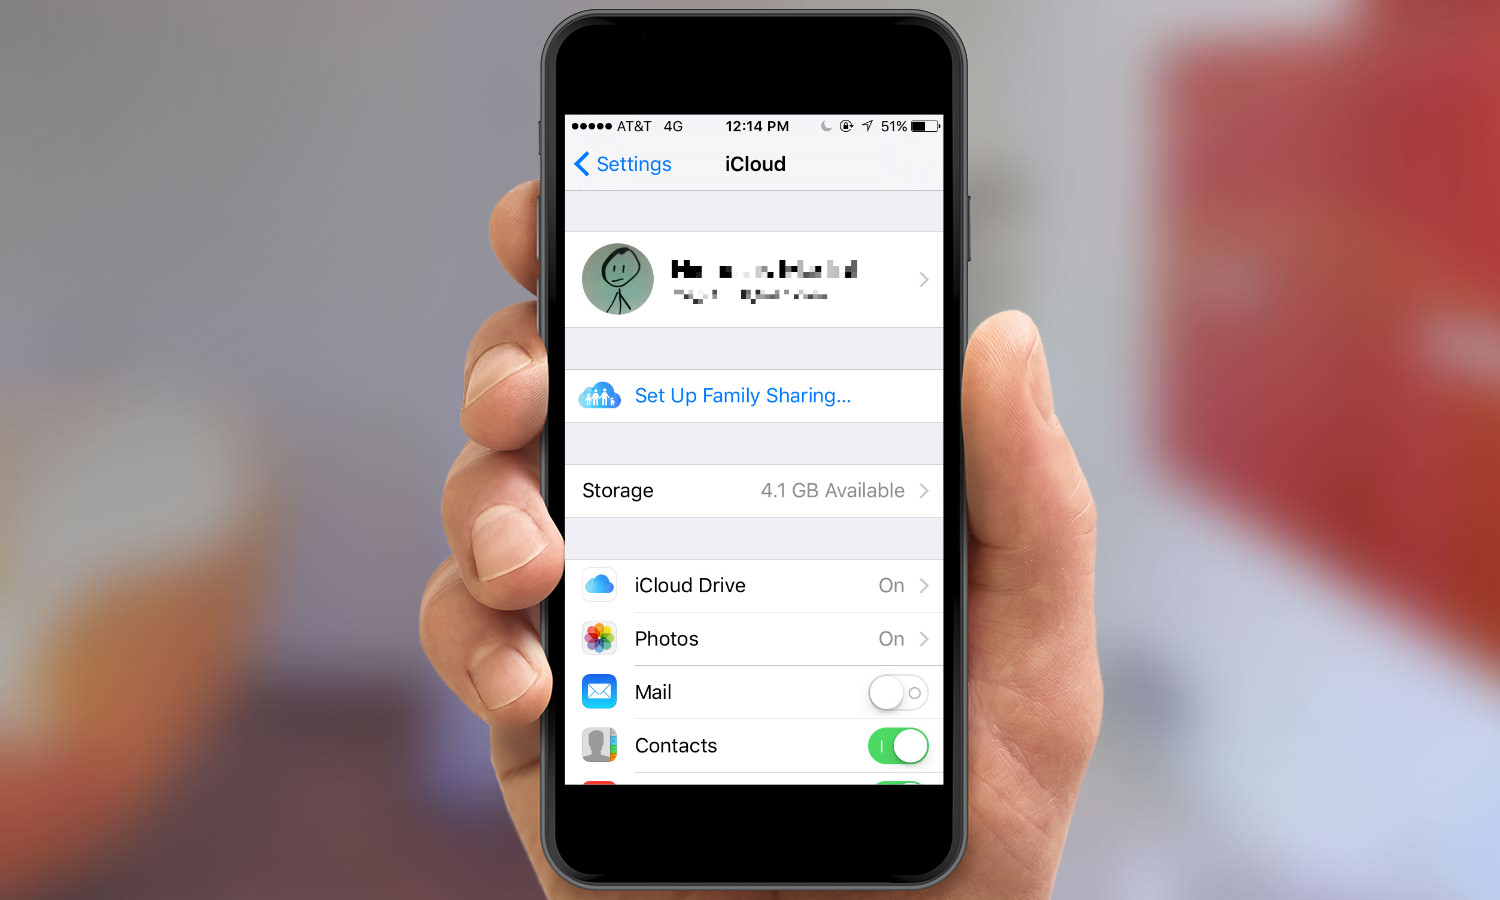
1. From the Settings app on your iPhone, tap on iCloud.
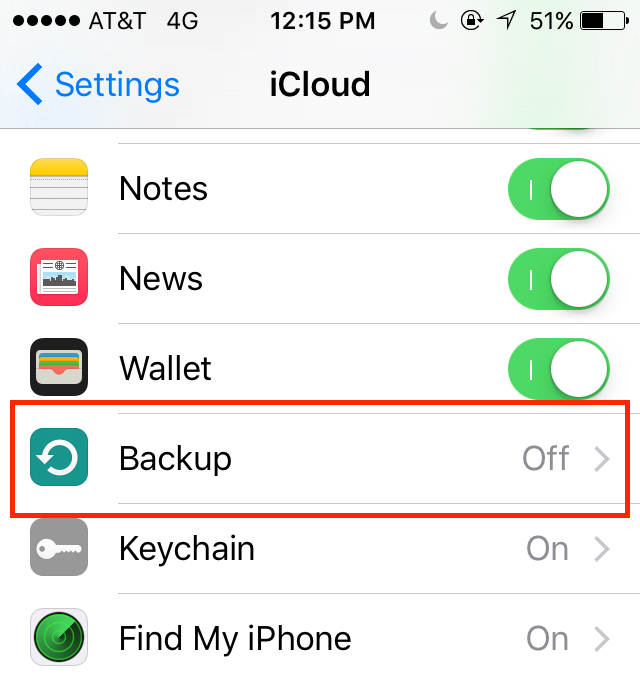
2. Scroll down and tap Backup.
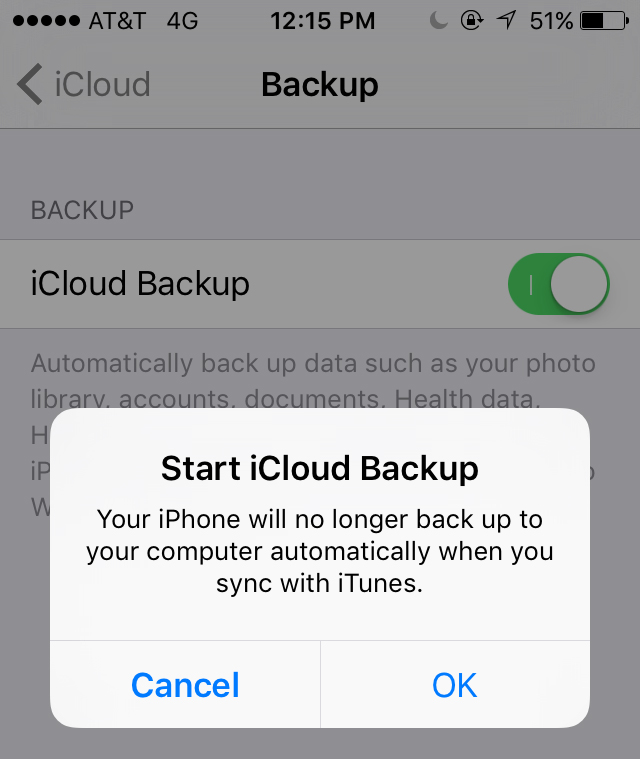
3. Move the on-off toggle for iCloud Backup to On. When prompted, confirm that you want to turn on iCloud Backup, then enter your iCloud password if you’re prompted to do so.
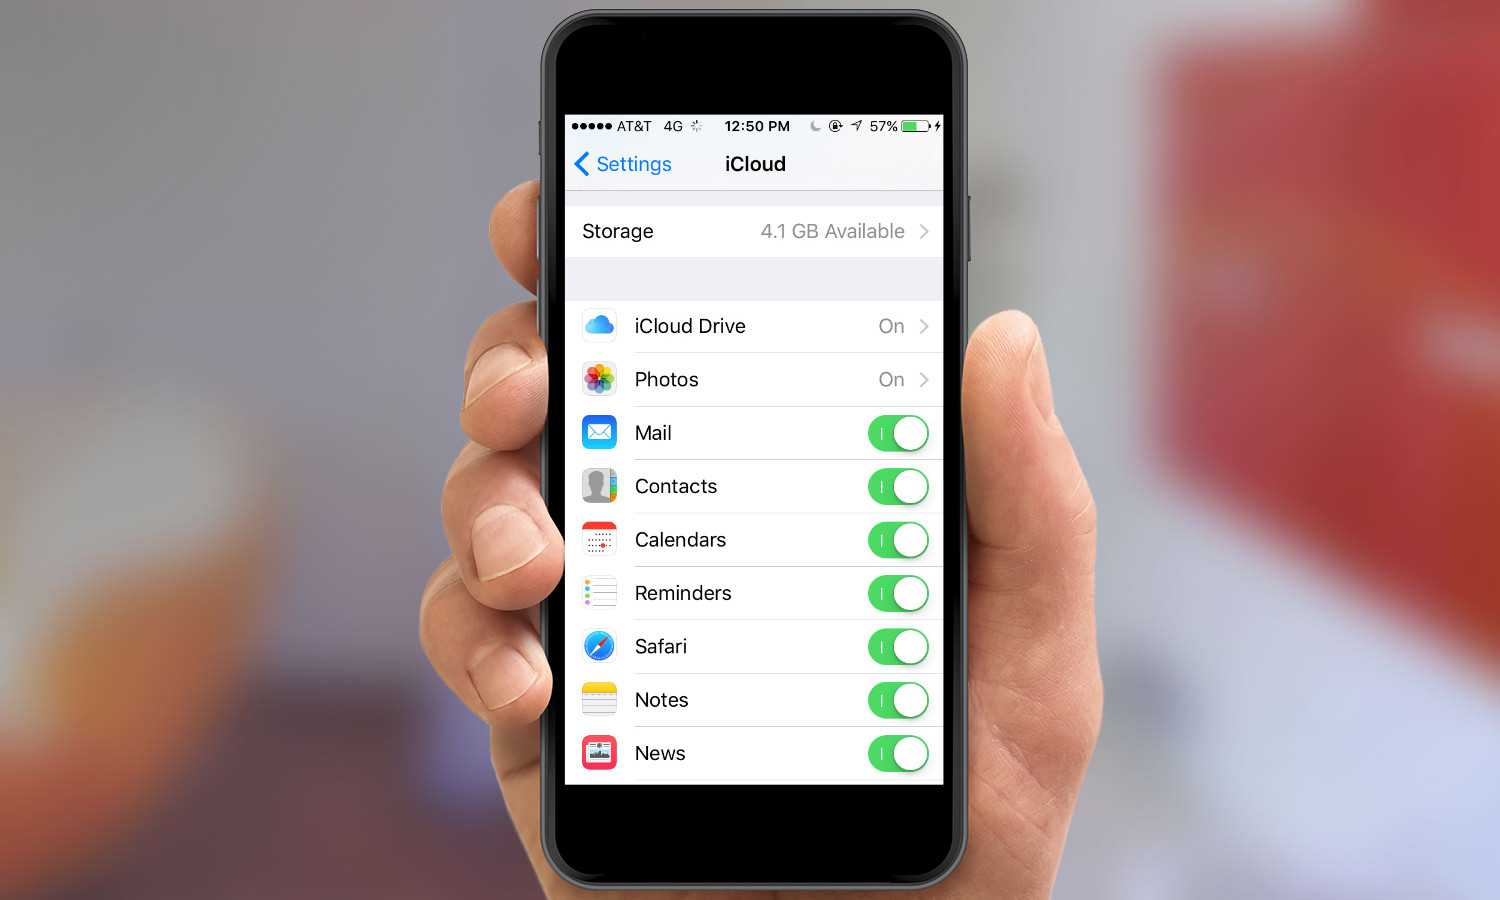
From the iCloud screen in settings, you can also fine-tune what you want backed up to iCloud. In addition to photos, documents, data and passwords, you can also adjust iCloud settings for the following apps: Mail, Contacts, Calendars, Reminders, Safari, Notes, News and Wallet.
Sign up to get the BEST of Tom's Guide direct to your inbox.
Get instant access to breaking news, the hottest reviews, great deals and helpful tips.
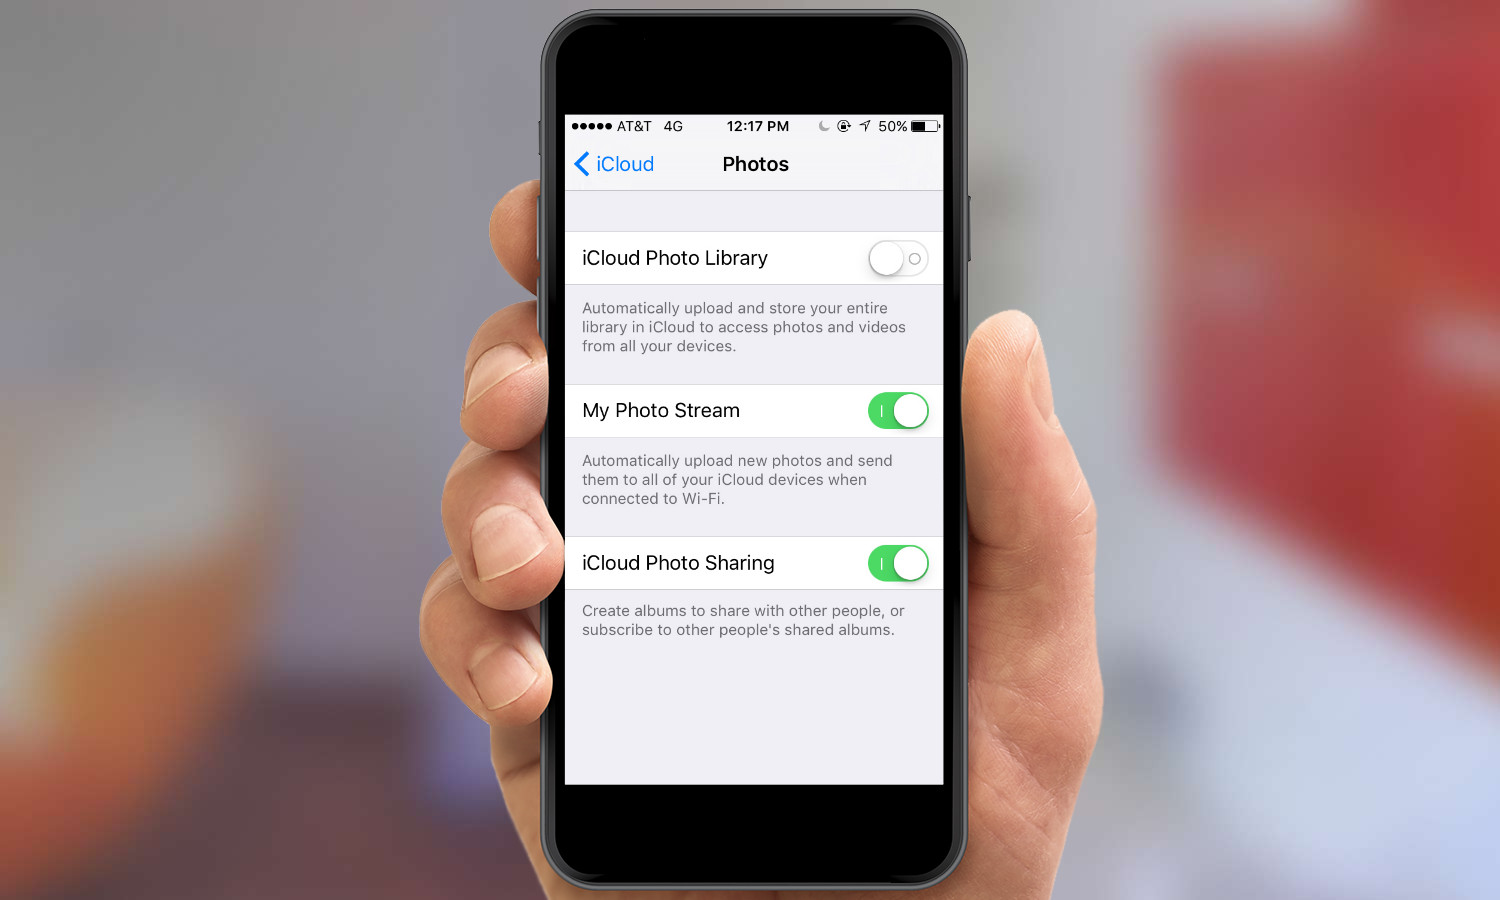
Tapping on the Photos option lets you further control what gets synced to iCloud. Turning on iCloud Photo Library will upload and store your photo library from every device, while enabling My Photo Stream automatically uploads any new photos to iCloud whenever you’re connected to a Wi-Fi network. The iCloud Photo Sharing option lets you share and subscribe to cloud-based photo albums.
Back Up To a Hard Drive
If you want a copy of your photos, videos and other data to be closer to home, here’s how to create a more traditional backup.
1. Plug your phone into your computer. Open iTunes if the app doesn’t open automatically.
2. Go to the iPhone panel in iTunes. In iTunes 12 and later, you get there by clicking the iPhone icon that appears in the toolbar.
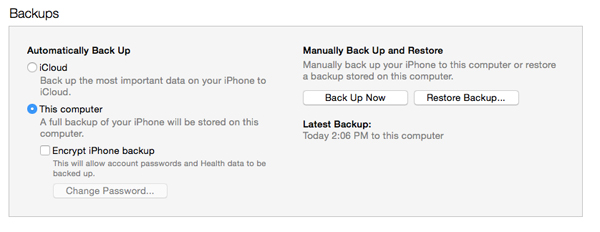
3. From the Backups section, click Back Up Now. If you have items you purchased on your phone that aren’t on your computer, iTunes will ask you whether to sync them. Once you provide an answer, iTunes will start the backup process.
The backup process may take a while, and how long it takes will depend on how much stuff is on your phone, so be patient. Since computer drives are prone to failure, it’s always a good idea to back up your iPhone backups along with any other data on your computer, whether through OS X’s Time Machine feature on the Mac or a different backup program.
-
paradigital Really? We're sinking to the level of "what mac" magazine now are we? How is this news, important, useful, or even relevant? How many iPhone owners haven't seen this feature over the last, what, 4 years? Utterly pathetic, even worse than your "what's on my streaming service this month" "articles".Reply
