How to use Dropbox, OneDrive, Google Drive, or iCloud cloud storage solutions
Learn how to use some of the most popular cloud storage solutions
Cloud storage solutions were once considered less reliable than physical storage, but not anymore. Nowadays, individuals and businesses happily store essential documents and personal data on the cloud. Providers offer hundreds of gigabytes or even terabytes at affordable rates, and more consumers are choosing to switch to the best cloud storage solutions.
One huge advantage is that you can access documents from any device with an internet connection. Important information isn’t bound to one physical desktop, which is especially useful for teams who collaborate on projects. However, the market is saturated with options, and it can be difficult to decide which cloud storage solution will best serve the needs of you or your business.
But before you consider switching to cloud storage, there are several critical questions to ask. For example, can the cloud really replace the trusty hard drive as your primary location? How easy is it to access important files and documents from other devices? And perhaps most importantly of all: will your data be safe?
In this article, we'll answer these questions and provide insights into how to make the most of your cloud storage solution, no matter which platform you choose. We’ll explain how to use Dropbox, Microsoft OneDrive, Google Drive, and iCloud. When you see these service's capabilities, you should be able to decide which is right for you.
Cloud storage solutions: How to choose yours
The most important step in moving to cloud storage is making sure you choose a platform that suits you. For example, iCloud is best suited for people who predominantly use Apple devices: if you regularly use a Windows computer or an Android device, iCloud probably isn't right for you.
Likewise, if you use Microsoft 365 applications exclusively, then Microsoft OneDrive will likely be the most seamless platform for you. If you use Google Workspace or Google Docs, then Google Drive will probably be your best choice. The point is to find the provider that best fits your computer and software usage.
Free or paid?
Sign up to get the BEST of Tom's Guide direct to your inbox.
Get instant access to breaking news, the hottest reviews, great deals and helpful tips.
It can often be tempting to use free cloud storage solutions, but we advise against it for business. The reality is that these plans offer limited storage, can be less reliable, won't provide high-quality customer support, and data security protocols are more likely to be below standard.
We also discourage business users from using a free solution because providers of the best cloud storage for business offer highly affordable packages. Compared to the frustration and lost productivity of a poorly performing platform, or the costs of data loss or a cyberattack, investing in a high-quality service is a no-brainer.
Some storage-as-a-service products even come included in other software bundles. For example, all Microsoft 365 subscribers get 1TB of included OneDrive storage. If you already use the Microsoft 365 suite of applications, it’s likely you already have one of the best cloud storage platforms at your disposal.
Security, encryption, and backups
Your account is only as secure as the devices that access it. Your data is at risk if your device is compromised (whether due to damage, theft, or cyberattack). Potential data loss is an unavoidable risk, whether due to cybercrime, accidental deletion, or hardware failure. Businesses managing sensitive customer data or financial information need to be particularly prudent about how they manage data online.
At a minimum, you should protect devices with a strong PIN code or password. You should also make sure to change your password regularly. If you want to seriously up your data security game, investing in one of the best password managers is the way to go.
There are a few extra steps individuals and businesses can take to protect their cloud storage data. Two-factor authentication (2FA) makes it nearly impossible for hackers to access your account, even if they know your password. It ensures that before signing in from a new device, you must enter the password and a unique one-time code sent to your email address or mobile phone.
Encrypting data ensures it is inaccessible even if your account is compromised. Without the proper authentication keys, any would-be thief will only see an incomprehensible series of numbers. If you take data security seriously, encryption is non-negotiable.
If someone does gain unauthorized access, you'll want to know as soon as possible. Services can help you find out when, where, and from what device someone was able to gain access, and keep track of where you have logged in, in case you forget to log out when using a public computer. If you notice a suspicious login, you can log out of all devices at the same time.
Many third-party applications can access files stored on a cloud storage platform. From your account dashboard, you can see what apps have access to your data, and what data they have access to. You can revoke permissions for apps you would rather not have access to sensitive files and documents.
The final step is to always have a backup. Although exceptionally unlikely, in the case of a major attack on your platform, you want the comfort of knowing you have another copy of your data stored in a secure location. This could be either another service, a physical server, or a hard drive, and like your cloud storage files, should be encrypted and secured with 2FA.
How to use Dropbox: Preparation
Decide what tier plan you want. Most individuals will be fine on the free plan, which allows you to store 2GB. However, if you’re a freelancer using Dropbox for work, you’ll likely need the Plus plan, which costs $9.99 a month and allows for 2TB of storage. Businesses will likely need the Professional plan, which costs $16.58 a month, gives you 3TB of storage, and allows access from unlimited devices.
Step 1: Choose where you’ll use Dropbox

Sign up and then decide which devices you’re going to need Dropbox on. Dropbox allows you to store files on the cloud, then view them via a web browser, from your computer/laptop’s desktop, or via the mobile application. We’d advise you to download Dropbox on your desktop/laptop, so your files synchronize automatically.
If you want to use Dropbox on your laptop/desktop or cell, download the relevant application and log in to your account.
Step 2: Add content and tools
Dropbox’s desktop application integrates with your Windows system tray or macOS menu, so you can save content to Dropbox as easily as you would your personal computer.
Dropbox integrates with cloud content applications, including Google Workspace and Microsoft 365, so they’re saved alongside all your other files in Dropbox. This allows you to keep track of all your content in one place, something which business users consider invaluable.
Step 3: Set security measures
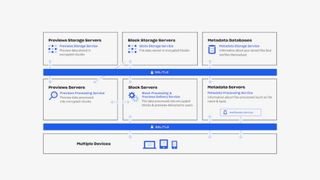
Business users can alter the privacy settings on individual Dropbox folders to let the whole team or only specific members access certain files. Use Dropbox Security to check which devices are active on your account, or if any third-party applications you haven’t approved have access, and remove them if necessary.
How to use OneDrive: Preparation
OneDrive is pre-installed on all Windows 10 devices, so is the natural choice for Windows users. You can download OneDrive on a Mac, but it’s unlikely Mac users would choose this service above Dropbox unless they’re working for/with an organization that keeps its content on OneDrive.
OneDrive is completely integrated with Microsoft Teams, so is an excellent application for remote offices and distance learning programs. However, business users should be aware that they must have some kind of Microsoft 365 subscription before using OneDrive. Personal plans start with a free plan including 5GB of storage, scaling up to Microsoft 365 Family at $7.99 a month, with 6TB of storage.
Business plans meanwhile start at $5 per user a month, with 1TB of storage per user, scaling up to $10 per user a month for unlimited cloud storage and advanced security tools.
Step 1: Install and configure
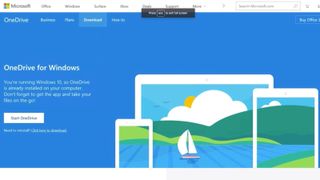
If you intend to use OneDrive on a Mac or mobile device, you must download the OneDrive application, which allows you to synchronize files instantly from your menu bar or system tray. Windows users on pre-2016 versions of Windows will have to install and configure the app on their devices.
Step 2: Choose how you share files
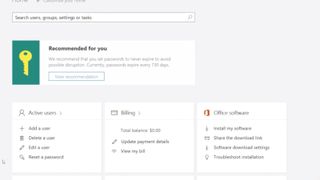
Most individuals will never have to tinker with the sharing options unless they want to enable link sharing files, but business users often want to hide some files from certain employees. From the admin center, you can choose on what devices you want your employees to access OneDrive, prohibit link sharing outside the organization, and restrict access to files or folders.
Step 3: Learn how to maximize OneDrive’s potential
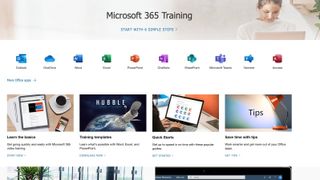
OneDrive encourages business users to train their staff on how to use OneDrive to get the most from the application. One example of a hidden but very useful feature is that OneDrive allows you to share files with other team members of Teams or Outlook as though they’re email attachments, and allow for live editing.
If you’ve sent an email with an attachment, but realize the attachment needs updating after it’s been sent, the update will automatically synchronize so the viewer will receive the most recent version of the attachment. Training videos are available on OneDrive’s website, and even personal users will benefit from learning the extent of OneDrive’s capabilities.
How to use Google Drive: Preparation
Google Drive is free for individual users to start with, with paid plans available via Google One, and is available via Google Workspace for businesses. The free plan offers 15GB of free storage, while the paid personal plan start at $1.99 a month for 100GB, scaling up to $9.99 a month for 2TB.
Business users can choose between four plans, the most expensive of which is by quote, while the least expensive ($6 a month) only allows for 30GB of storage per user. Most businesses will favor the Business Standard plan ($12 a month), which accommodates 150 users with 2TB of storage per person, or the Business Plus plan ($25 a month) for 250 users with 5TB storage per person.
Step 1: Upload files to drives
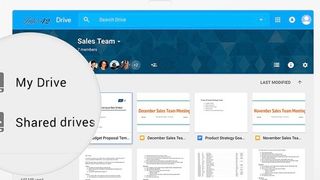
Any type of file can be uploaded to your Google Drive. Windows Office files are automatically converted into the equivalent Google Workspace format, so you can work on them via the Google Workspace cloud. All files are scanned for viruses as they’re uploaded.
Step 2: Set sharing and viewing permissions
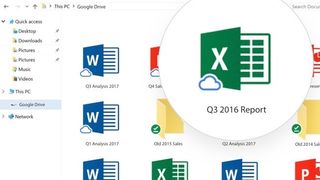
Elect an administrator to decide what files/folders members of your organization can see. The administrator can edit individual permissions so files can’t be seen by certain members or shared outside your organization, if that’s what you choose. Individual users can choose whether to enable link sharing on documents, share with a specific address, or keep documents private to them.
Sharing/viewing permissions can be edited on all types of Google Drive files, including Docs, Sheets, Slides, Maps, and Folders.
Step 3: Edit offline access permissions
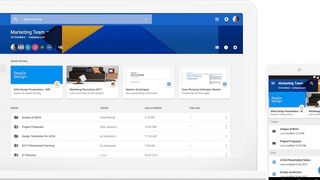
Offline access is automatically available on all business Google Drive accounts, and is not freely available for individual users. Allow members of your organization to disable offline access in case they’re working on older devices with limited data storage. Administrators can disable offline access remotely in case of employees leaving or data breaches.
How to use iCloud: Preparation
iCloud was designed for personal use, so those with a Mac desktop/laptop, iPhone, and/or iPad could enjoy the convenience of their personal data (their music, notes, photos, etc.) synced across devices.
Because it wasn’t designed with business users in mind, even with Apple’s most expensive plan ($9.99 a month), you cannot integrate iCloud with Windows or Google Workspace.
Step 1: Choose a pricing plan

We’d advise those first trying iCloud to use the cheapest plan possible ($0.99 a month) until they run out of data. The majority of users won’t need more than 50GB for personal storage of photos, notes and calendar information.
We recommend that you only upgrade your iCloud plan to the 200GB ($2.99 a month) or 2TB ($9.99 a month) plans when you’re notified by Apple that you need more data: as soon as you purchase a plan, your cloud storage updates automatically.
Step 2: Choose the content you want to sync
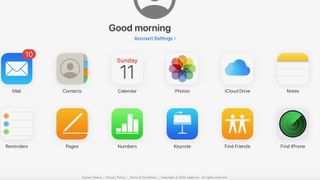
iCloud is automatically enabled on Mac devices. Once you’ve signed into your account, head to "System Preferences" (from your desktop, cell or iPad) and decide what content/data you want to save on the cloud.
When you’ve what you want to synchronize, content including messages, photos, music downloads, voice notes, notes, calendar appointments and emails will automatically synchronize across devices. iCloud will simply quietly run in the background after these two steps.
Cloud storage solutions: Summary
Among all cloud storage solutions, Dropbox best integrates with other applications, including Google Workspace and Microsoft 365. Google Drive and Microsoft OneDrive are both attempting to be total suites for business users, encompassing communications and workflow management in addition to data storage.
If you want a complete business suite, whether you prefer Google Drive or Microsoft Office is down to personal preference, as their capabilities are equivalent. iCloud is almost essential for a modern Mac user and protects data loss in instances where devices are damaged or broken. However, its inability to work with other operating systems is its fatal flaw.
Further reading on cloud storage
Read our reviews of the services mentioned in this feature, including our Dropbox review and our Dropbox Business review; our OneDrive review and our OneDrive for Business review; our Google Drive review, and our iCloud review.

