How to set up the Passwords app in iOS 18
Apple's new password manager offers a lot — here's how you can use it
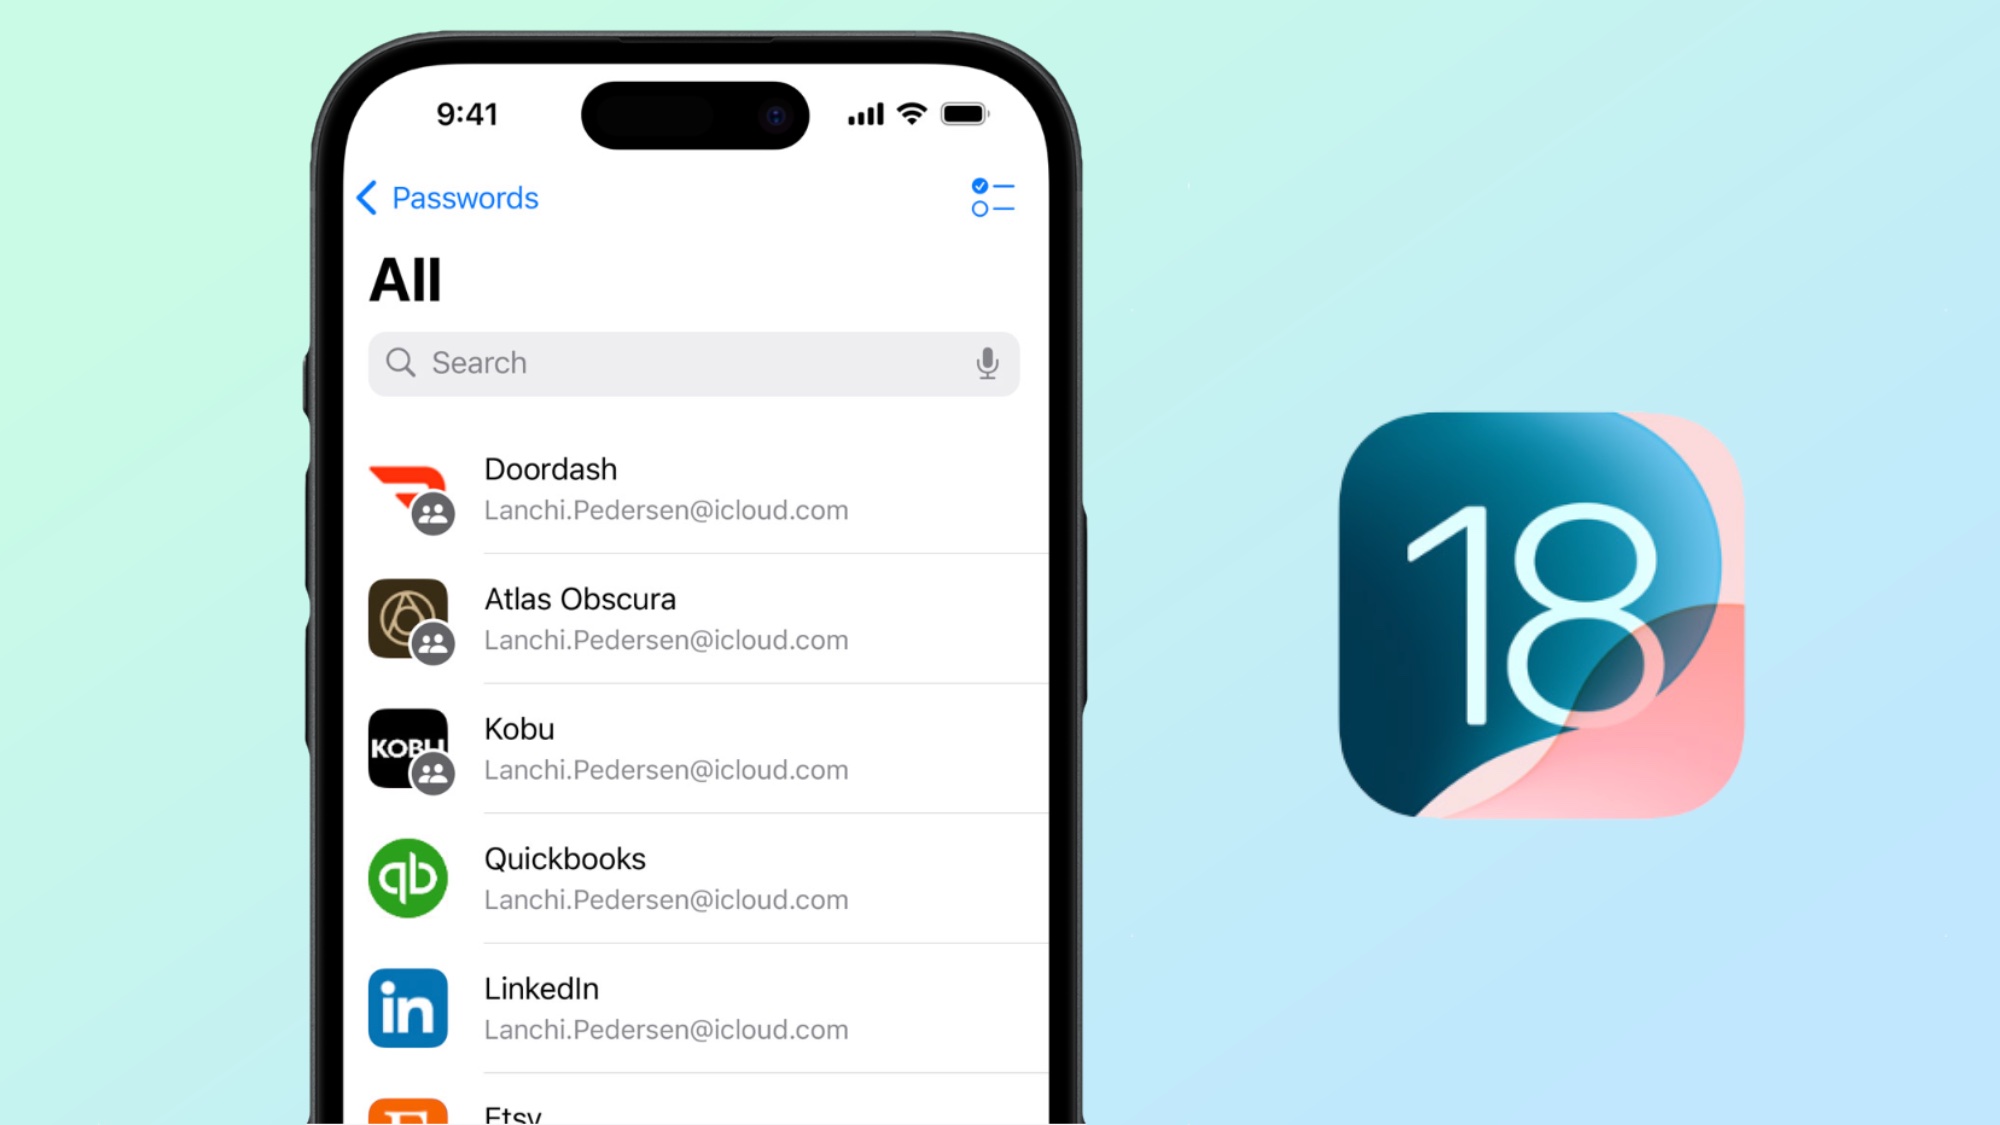
The Passwords app in Apple's iOS 18 is going to make controlling your many different accounts easier than ever before. Apple has been able to save and auto-fill passwords in the iCloud Keychain for over a decade, but it’s never made it particularly easy to see and manage your passwords like the best password managers might.
Fortunately, the Passwords app has changed all that, offering Apple’s take on the traditional password manager. It offers way more than just quick and easy access to your saved passwords; it’s more like a miniature security hub. There’s space for saved Wi-Fi passwords, two-factor authentication codes and passkeys — and it offers the ability to generate new passwords. On top of that, there are security recommendations, should your passwords either be too weak or show up in a data breach.
You may be wondering how everything works, and how to set up the Passwords app in iOS 18. Thankfully, it’s really easy to get going, and the app is a breeze to use — despite the sheer amount it can store.
How to set up Passwords app in iOS 18
1. Open the Passwords app
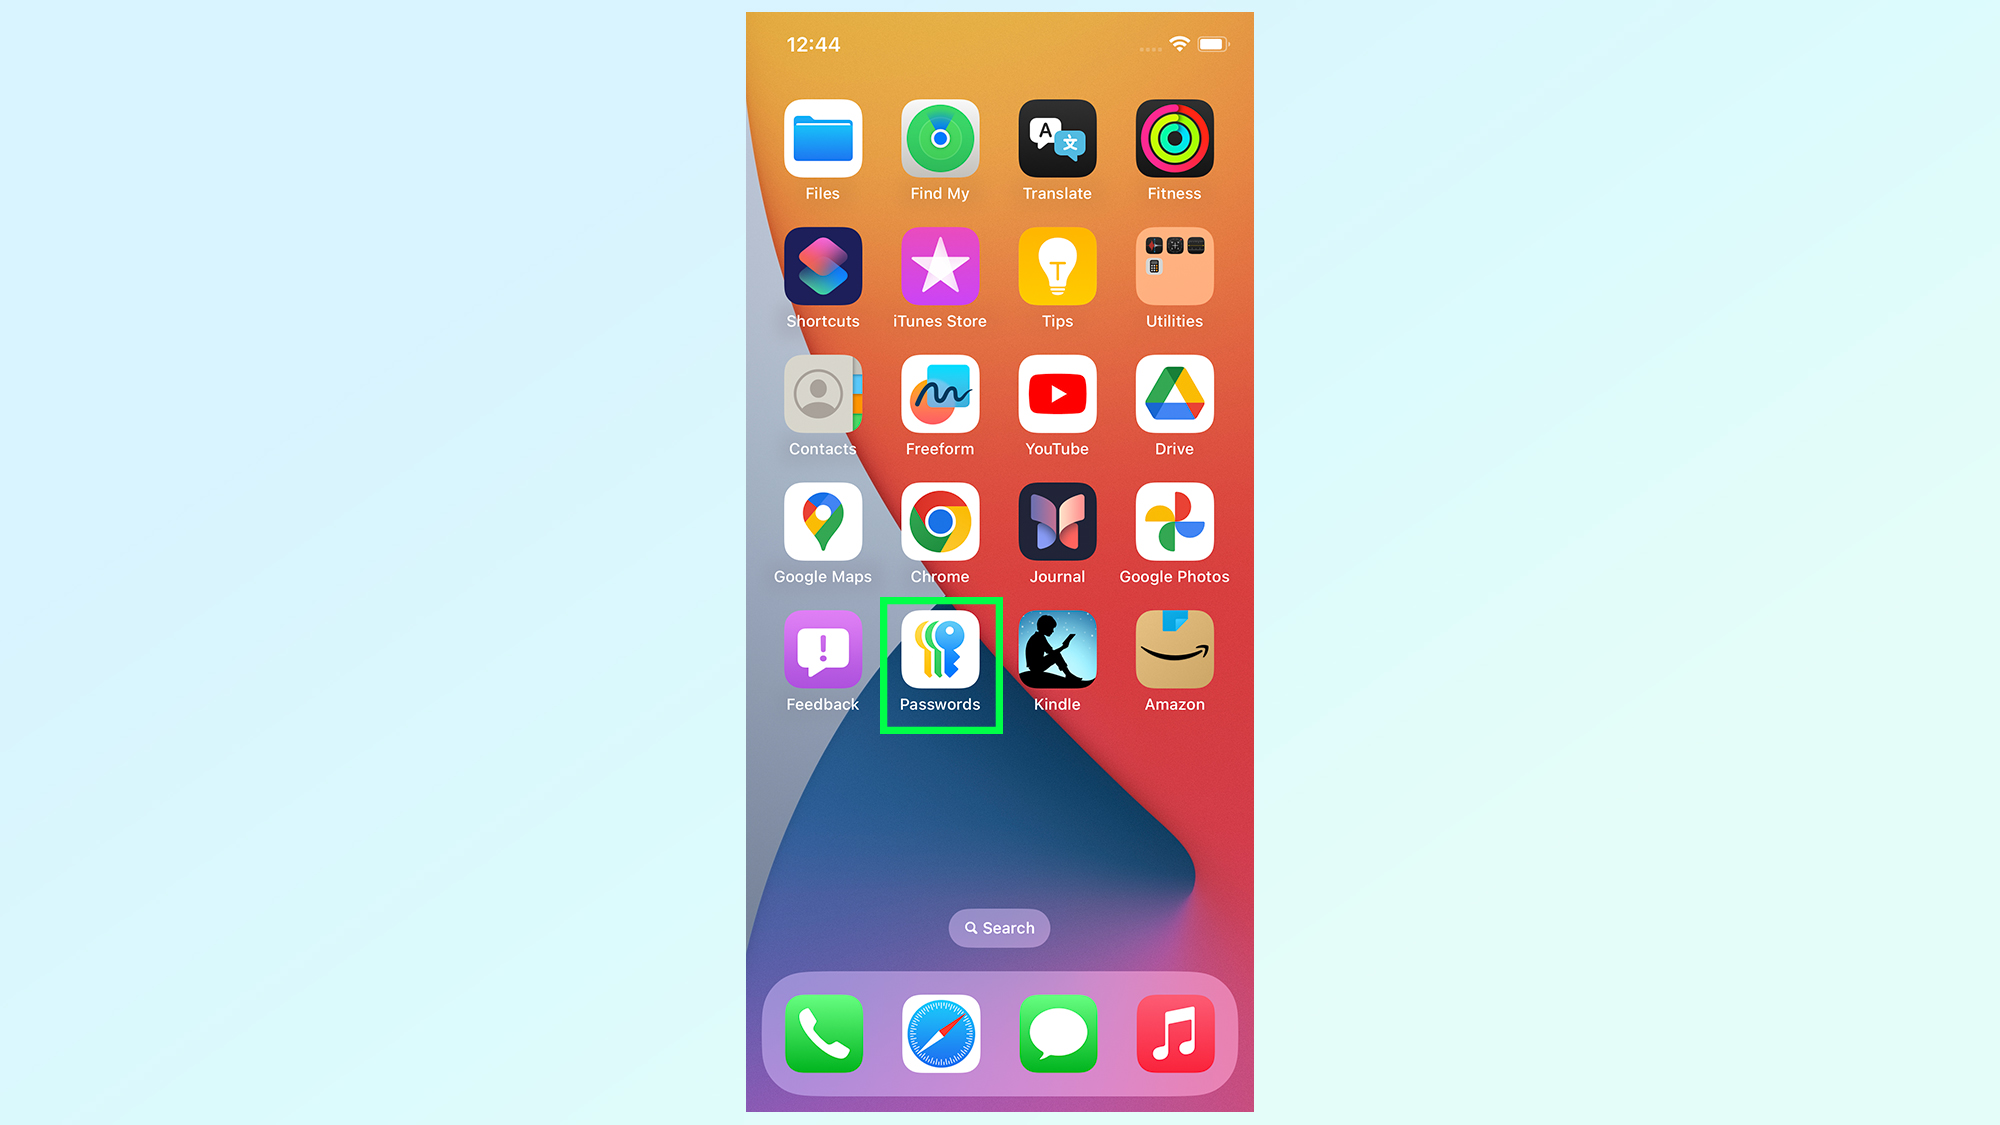
As soon as you update to iOS 18, you’ll find the Passwords app on your home screen. Tap this to open the app.
2. Wait for Face ID to unlock, or enter your passcode
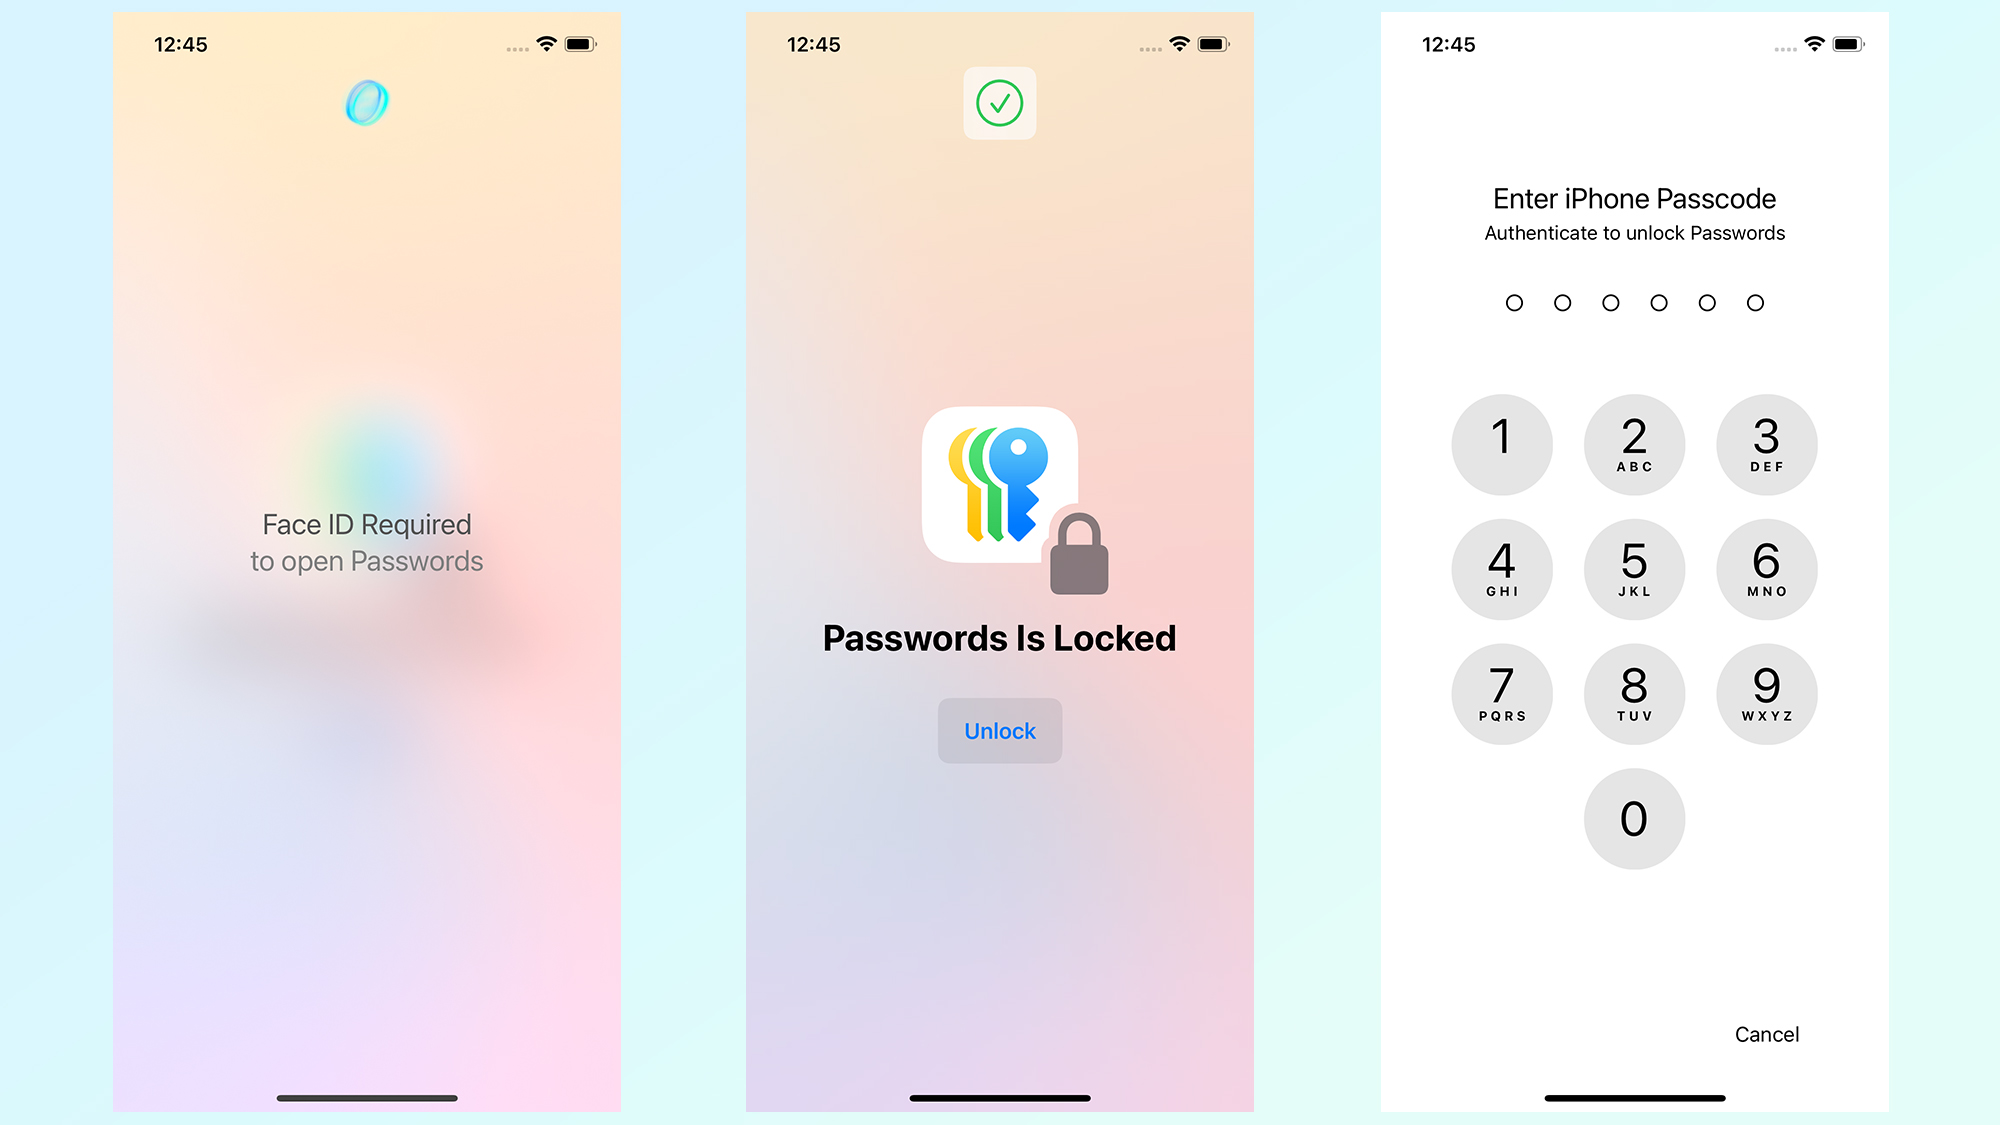
Once the app opens you’ll be met with this unlock screen. If you have Face ID on your iPhone it should start automatically and unlock the app. If you have an iPhone SE you’ll get a prompt to scan your fingerprint with Touch ID — which will open the app right away.
If either of these methods aren’t working for whatever reason, you’ll be asked to enter your passcode. That’s the same passcode you use to unlock your iPhone and verify certain things.
3. Explore your saved passwords
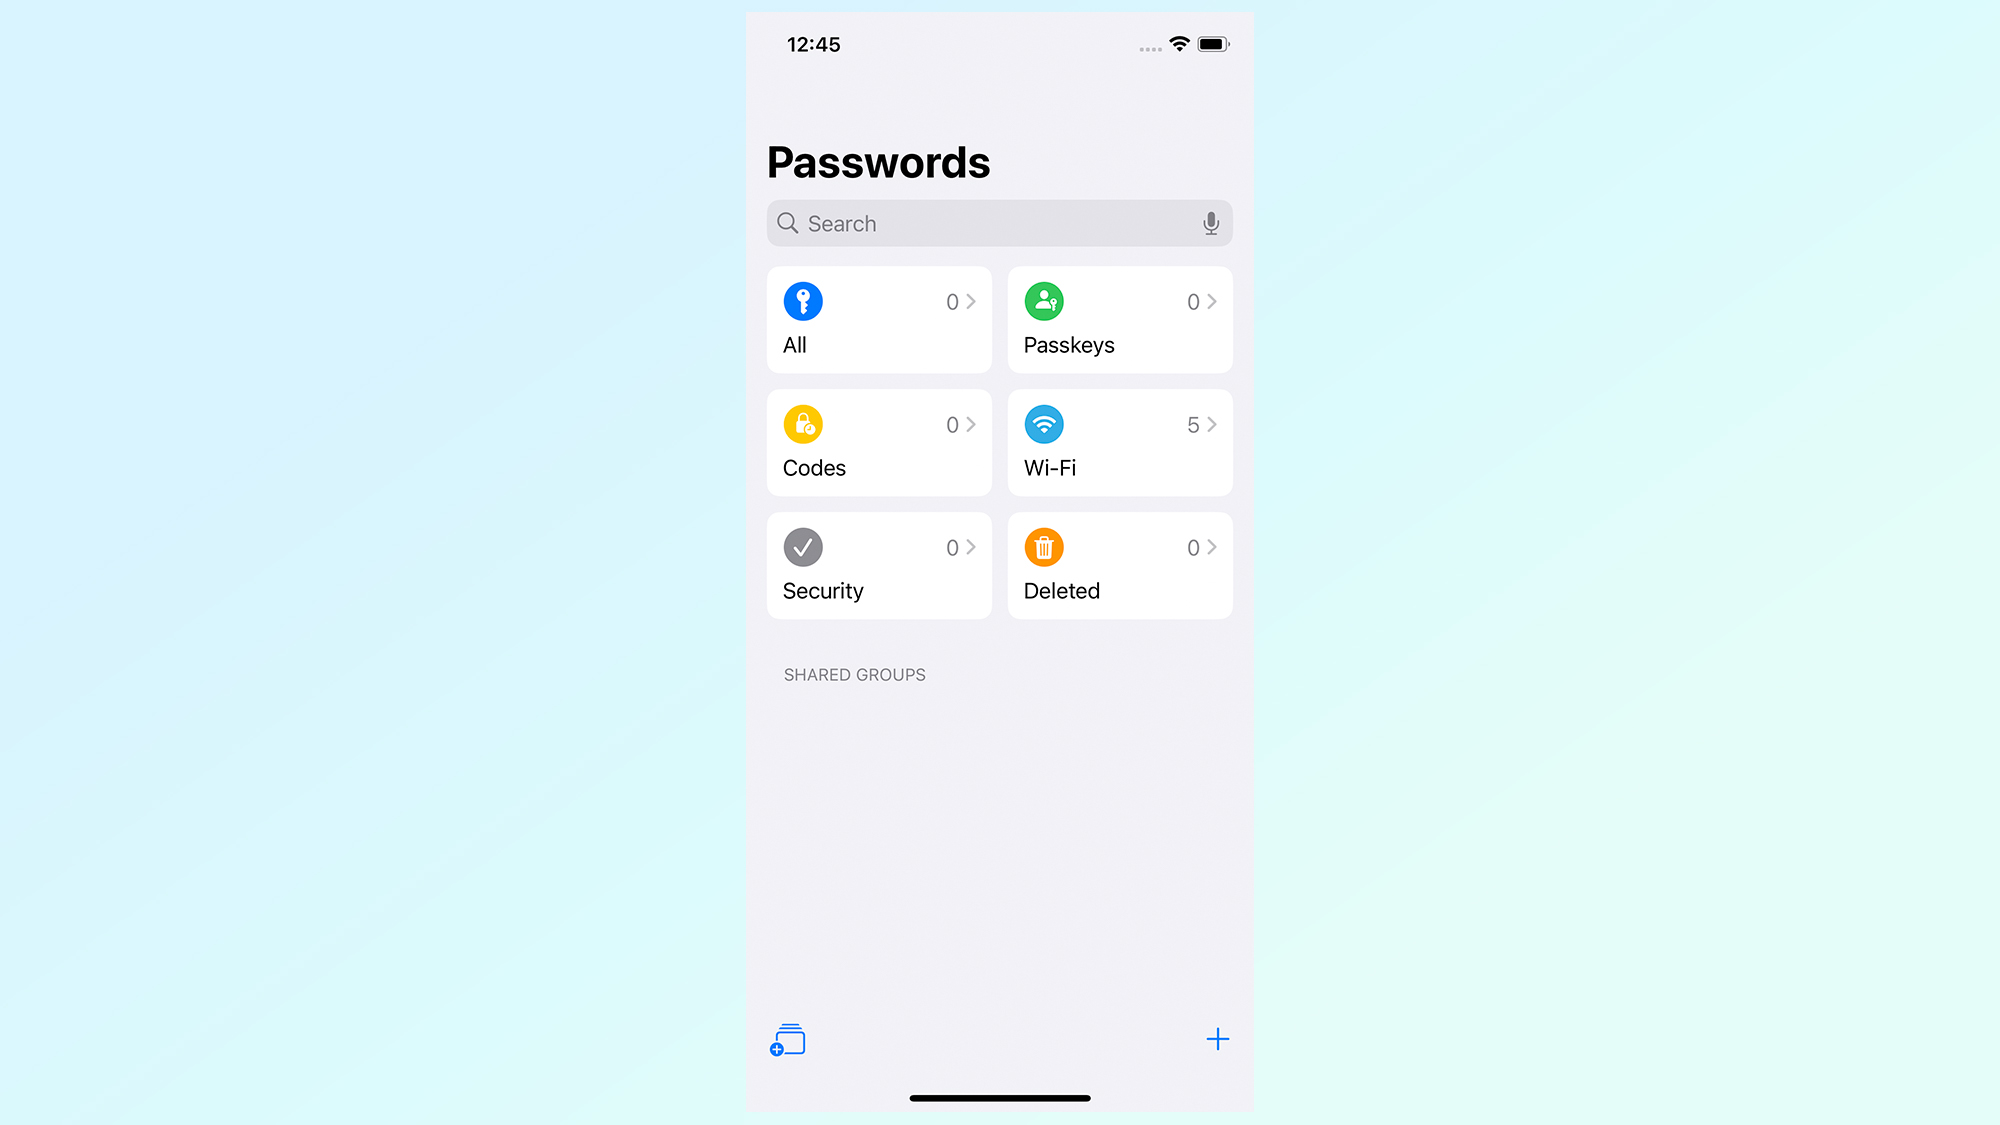
You’ll find that the Passwords app is automatically populated with passwords and passkeys that are associated with your Apple Account. Similarly, any Wi-Fi passwords that are saved in your phone will be available in the Wi-Fi tab.
The only thing you won’t find are two-factor authentication codes, since they were never set up by Apple in the first place. There’s no option to import your 2FA keys that we can see, and that means you’ll have to re-enter them all manually.
How to add a password in iOS 18 Passwords
1. Tap the + button in the bottom right
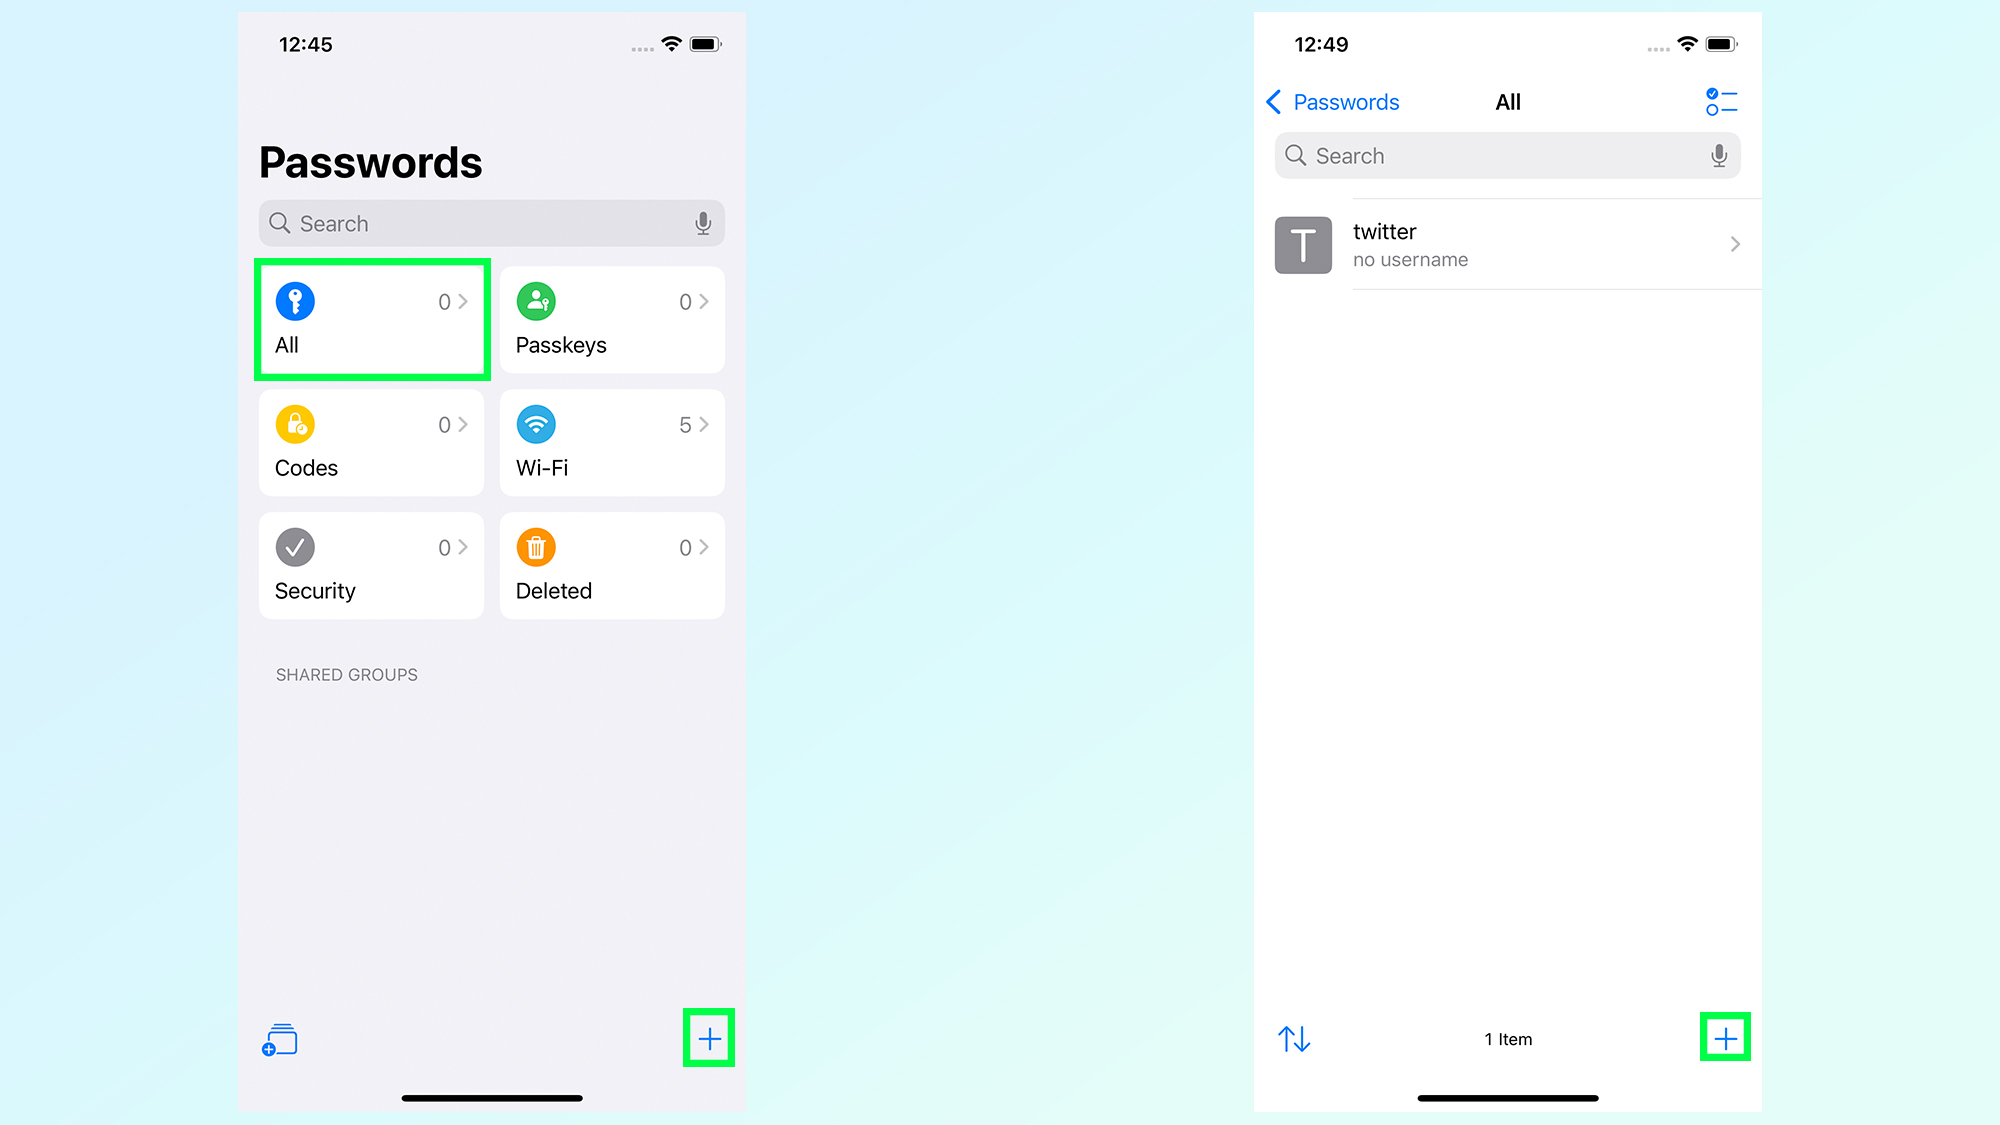
To start adding a new password you’ll need to start by tapping the “Plus” sign button in the bottom right hand corner. This can be found on the main screen and the “All” tab where passwords are stored.
2. Fill out the website and user name
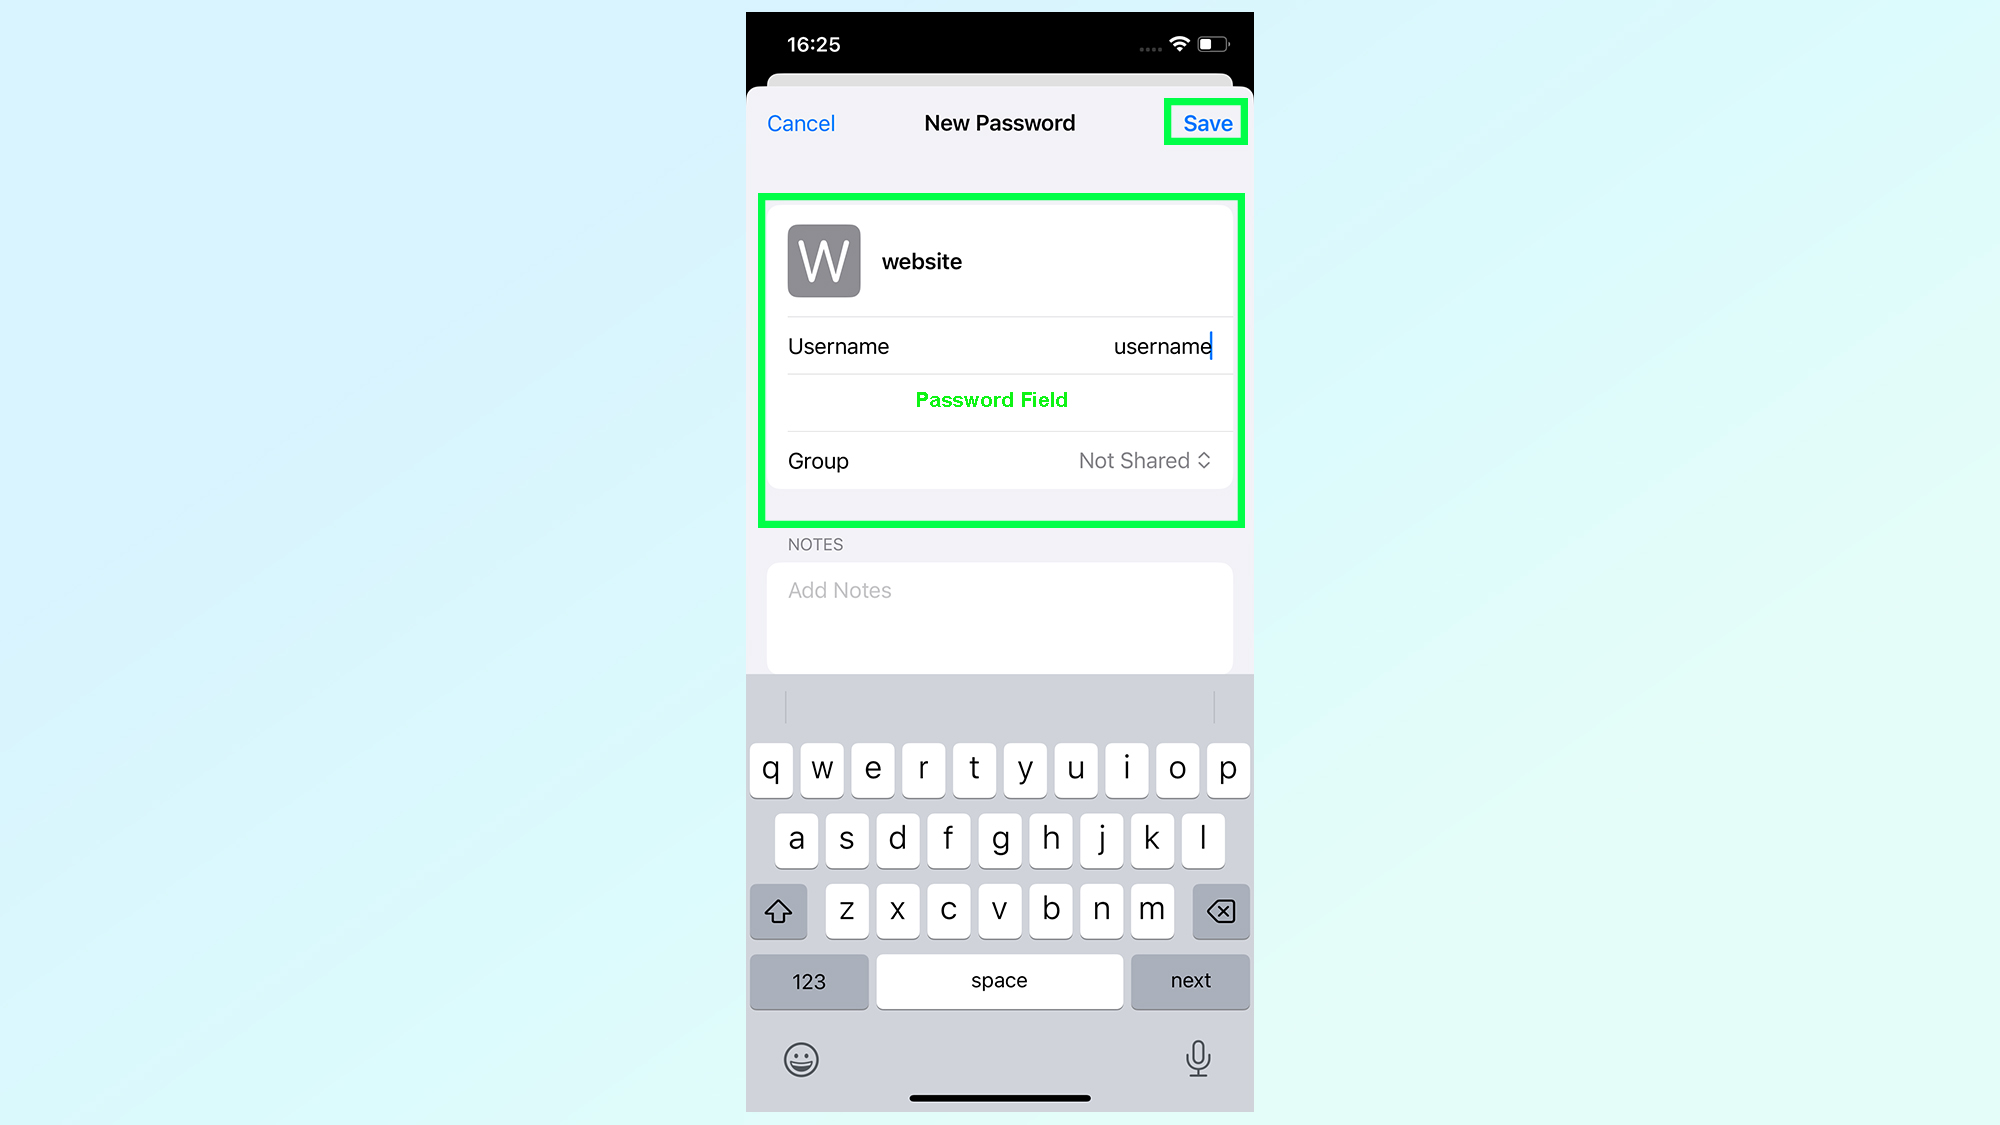
You’ll be met with this form, asking you to add the website name and your user name. The password field is in the middle, and will automatically generate a secure password for you to use. But this can be replaced with your own custom password.
If you're happy with the password you can complete the process by tapping Save.
3. Restart the process if necessary
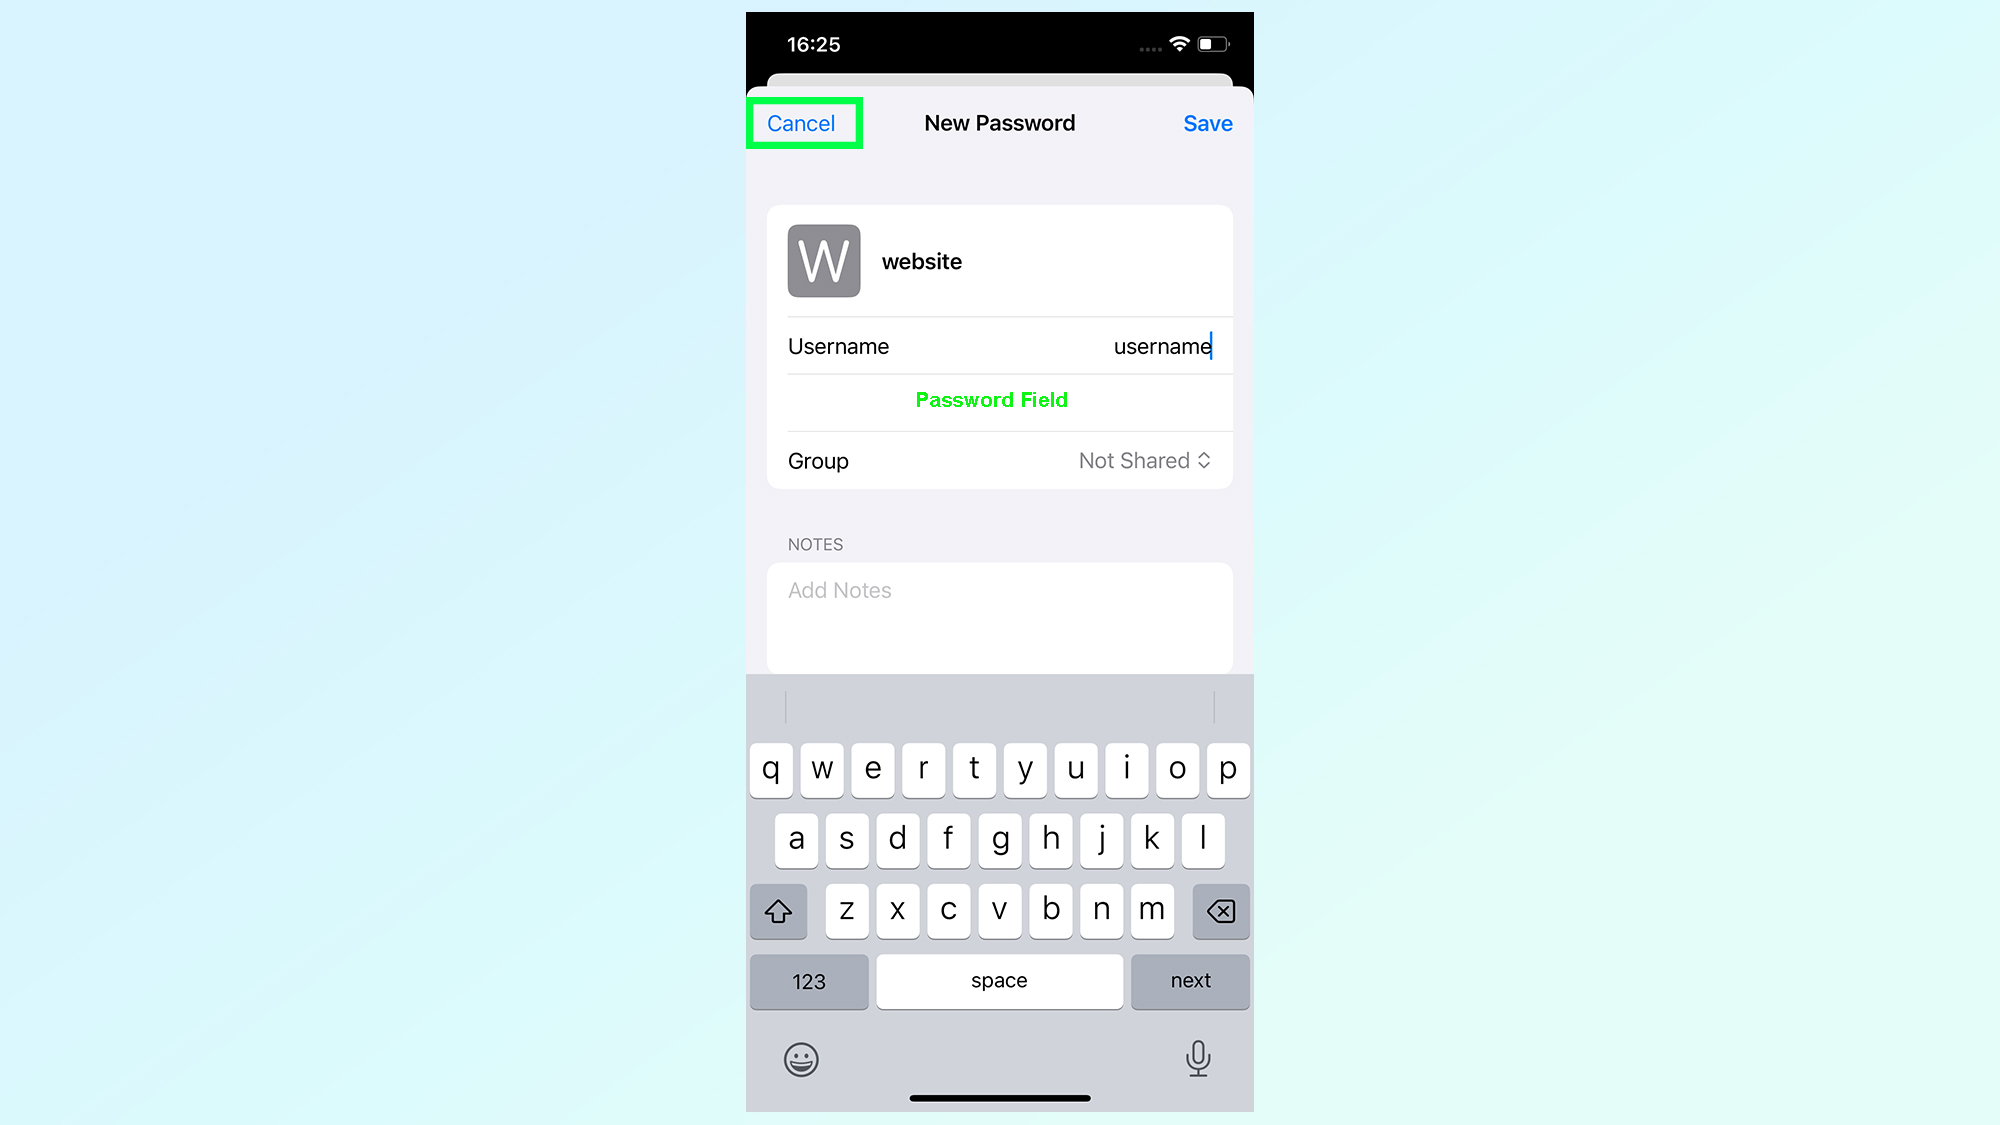
If you don’t like the Apple-generated password for whatever reason, and you don’t have a custom password on hand, you’ll need to restart the whole process. Tap the Cancel button in the top left, and then restart by pressing the Plus button again.
How to add 2FA codes to iOS 18 Passwords
1. Open the Codes tab and press the Plus symbol
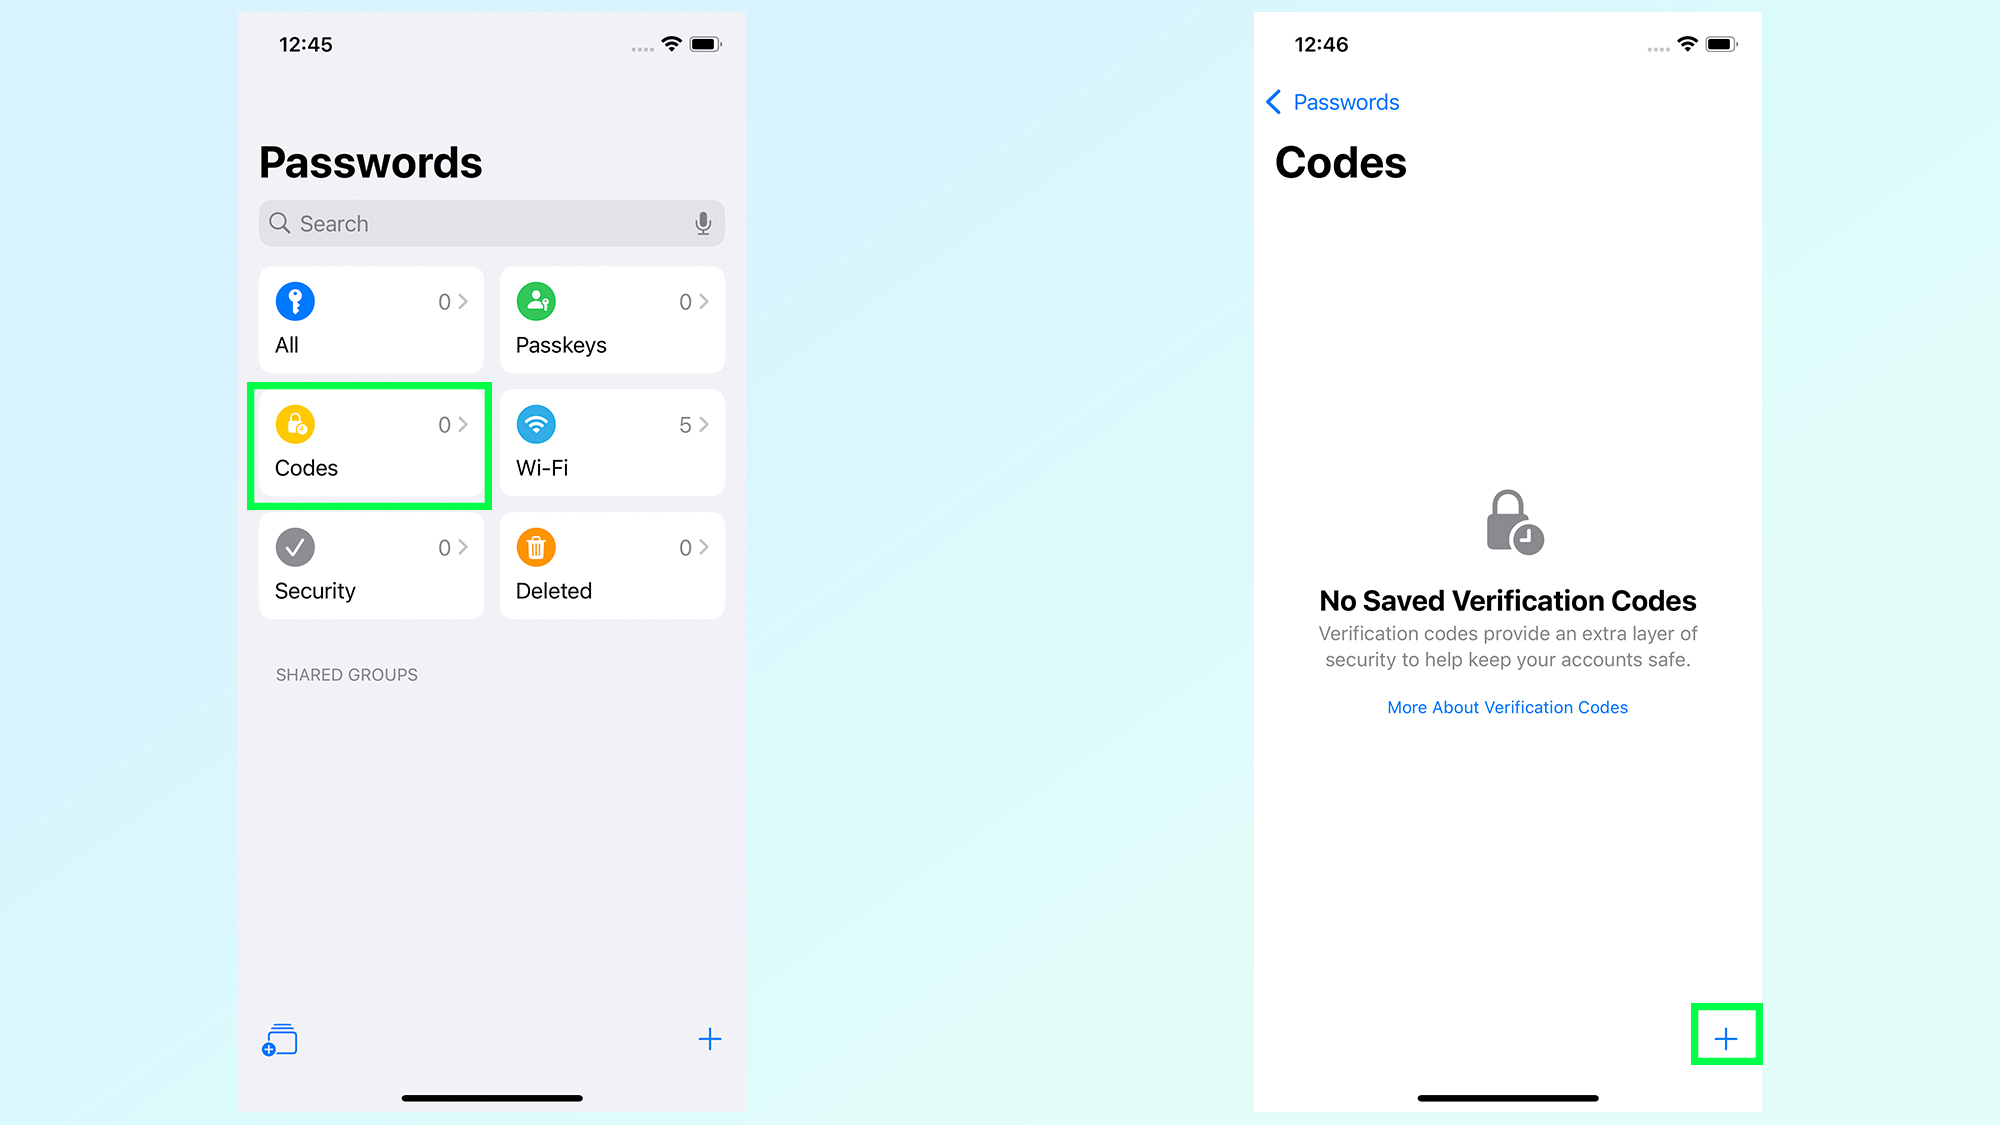
The Codes tab is on the left side of the phone, and stores all your two-factor authentication codes. Tap to open, then tap the plus sign on the bottom right
2. Enter your setup key or select Scan QR Code with Camera
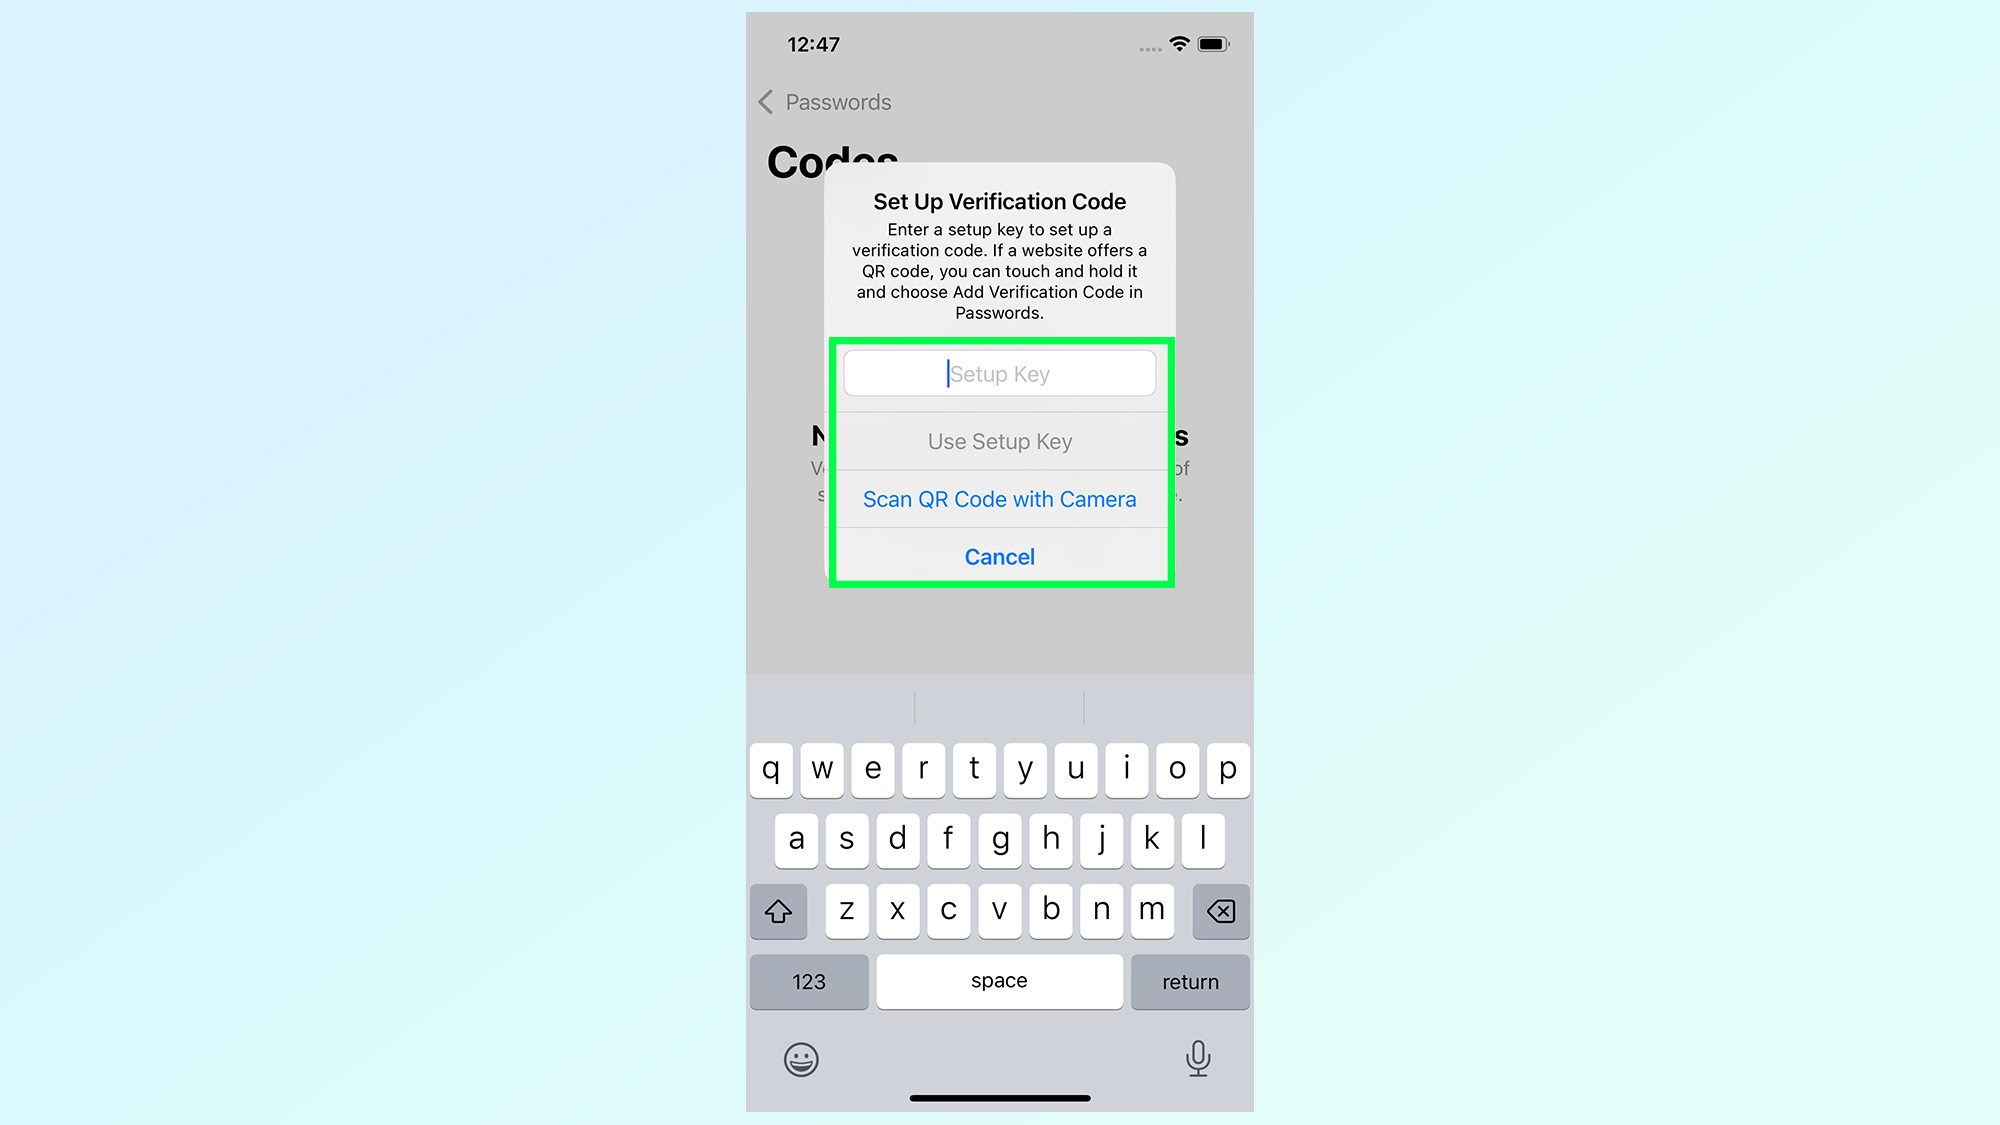
If you have a setup key for 2FA you can type or paste this into the Setup Key box, at which point you tap Use Setup Key (which will be grayed out otherwise).
If you want to scan a QR code to add 2FA, which is a lot more common, tap Scan QR Code with Camera in the middle of the menu
2a. Scan the QR Code
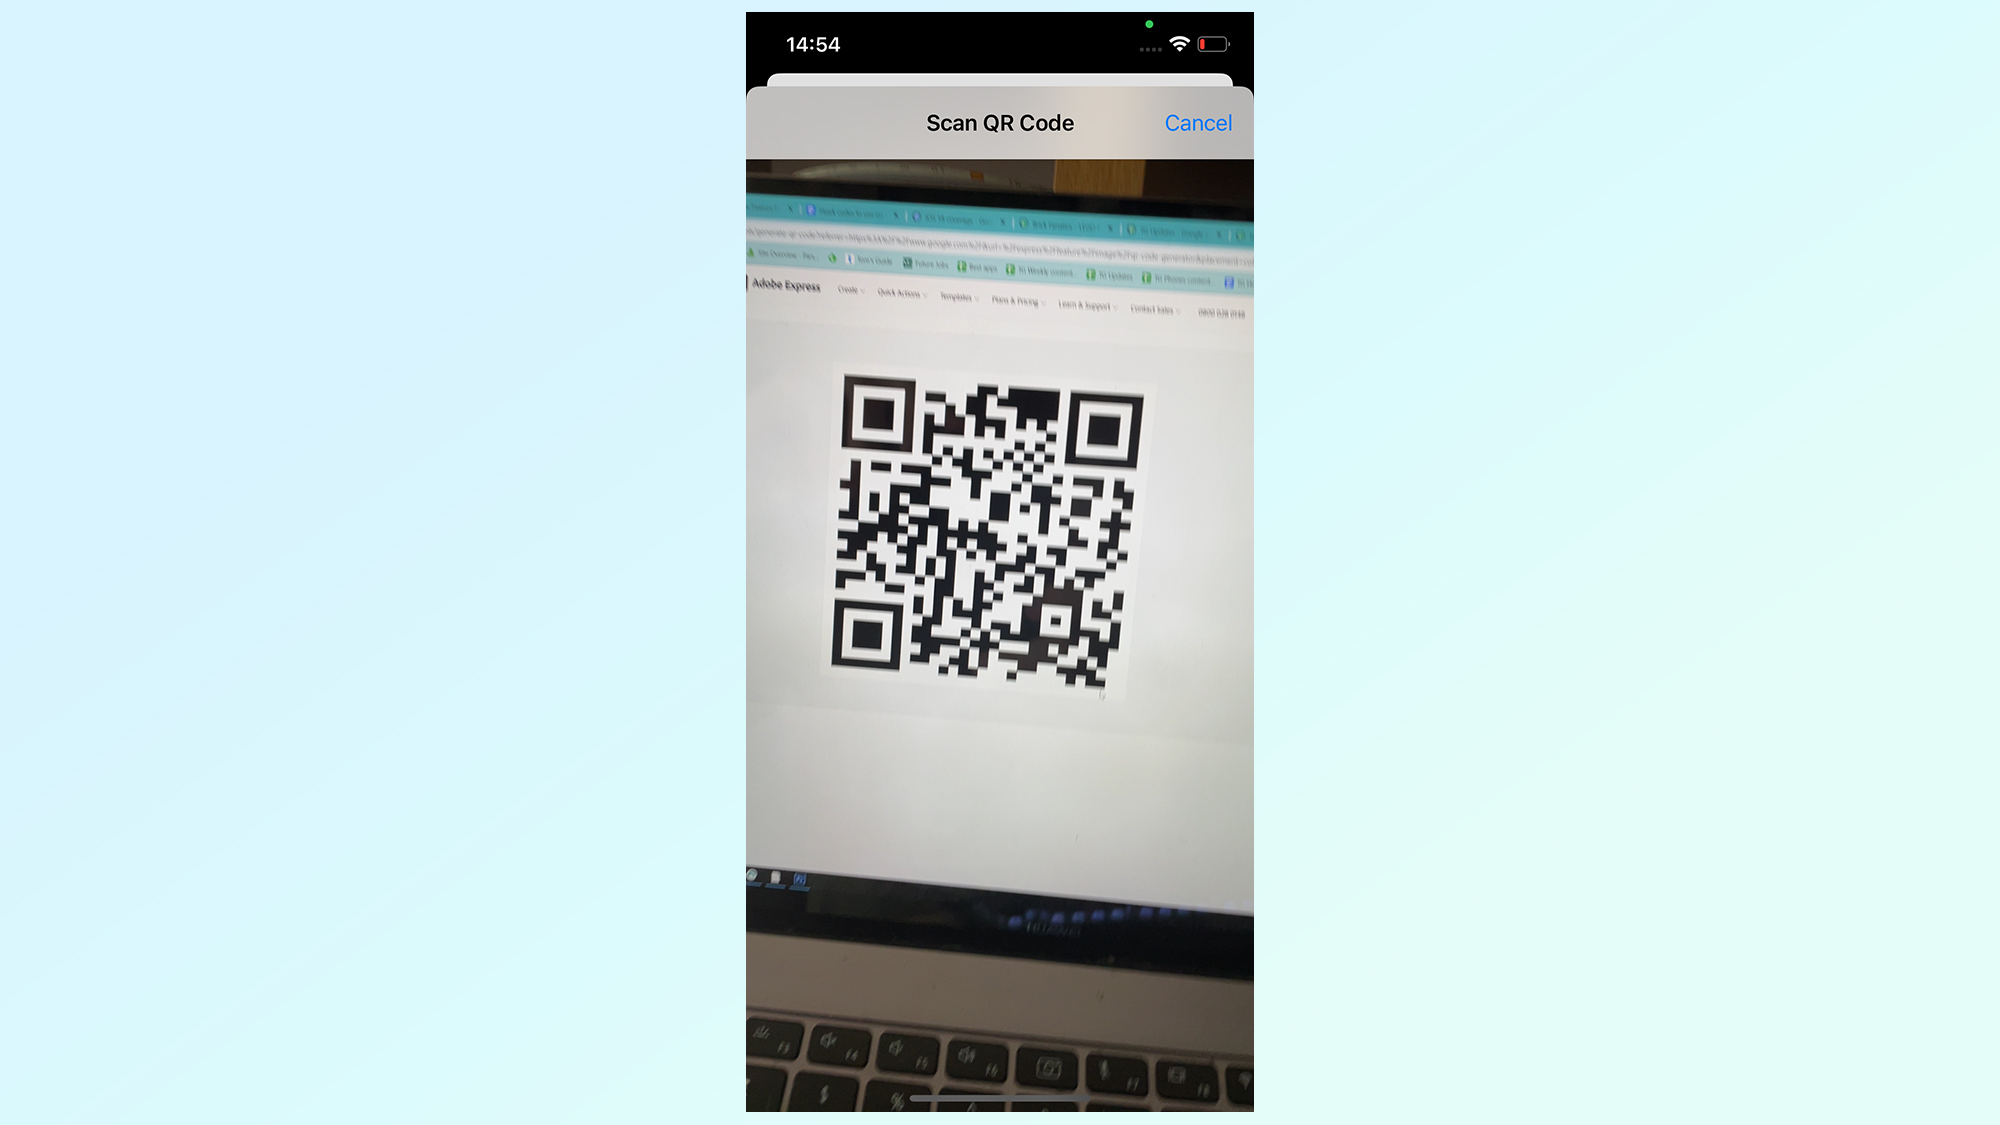
If the account you want to secure serves up a QR code, simply point your iPhone camera to the QR code. Your phone will detect the QR code and scan it
3. Select the password to tie the code to
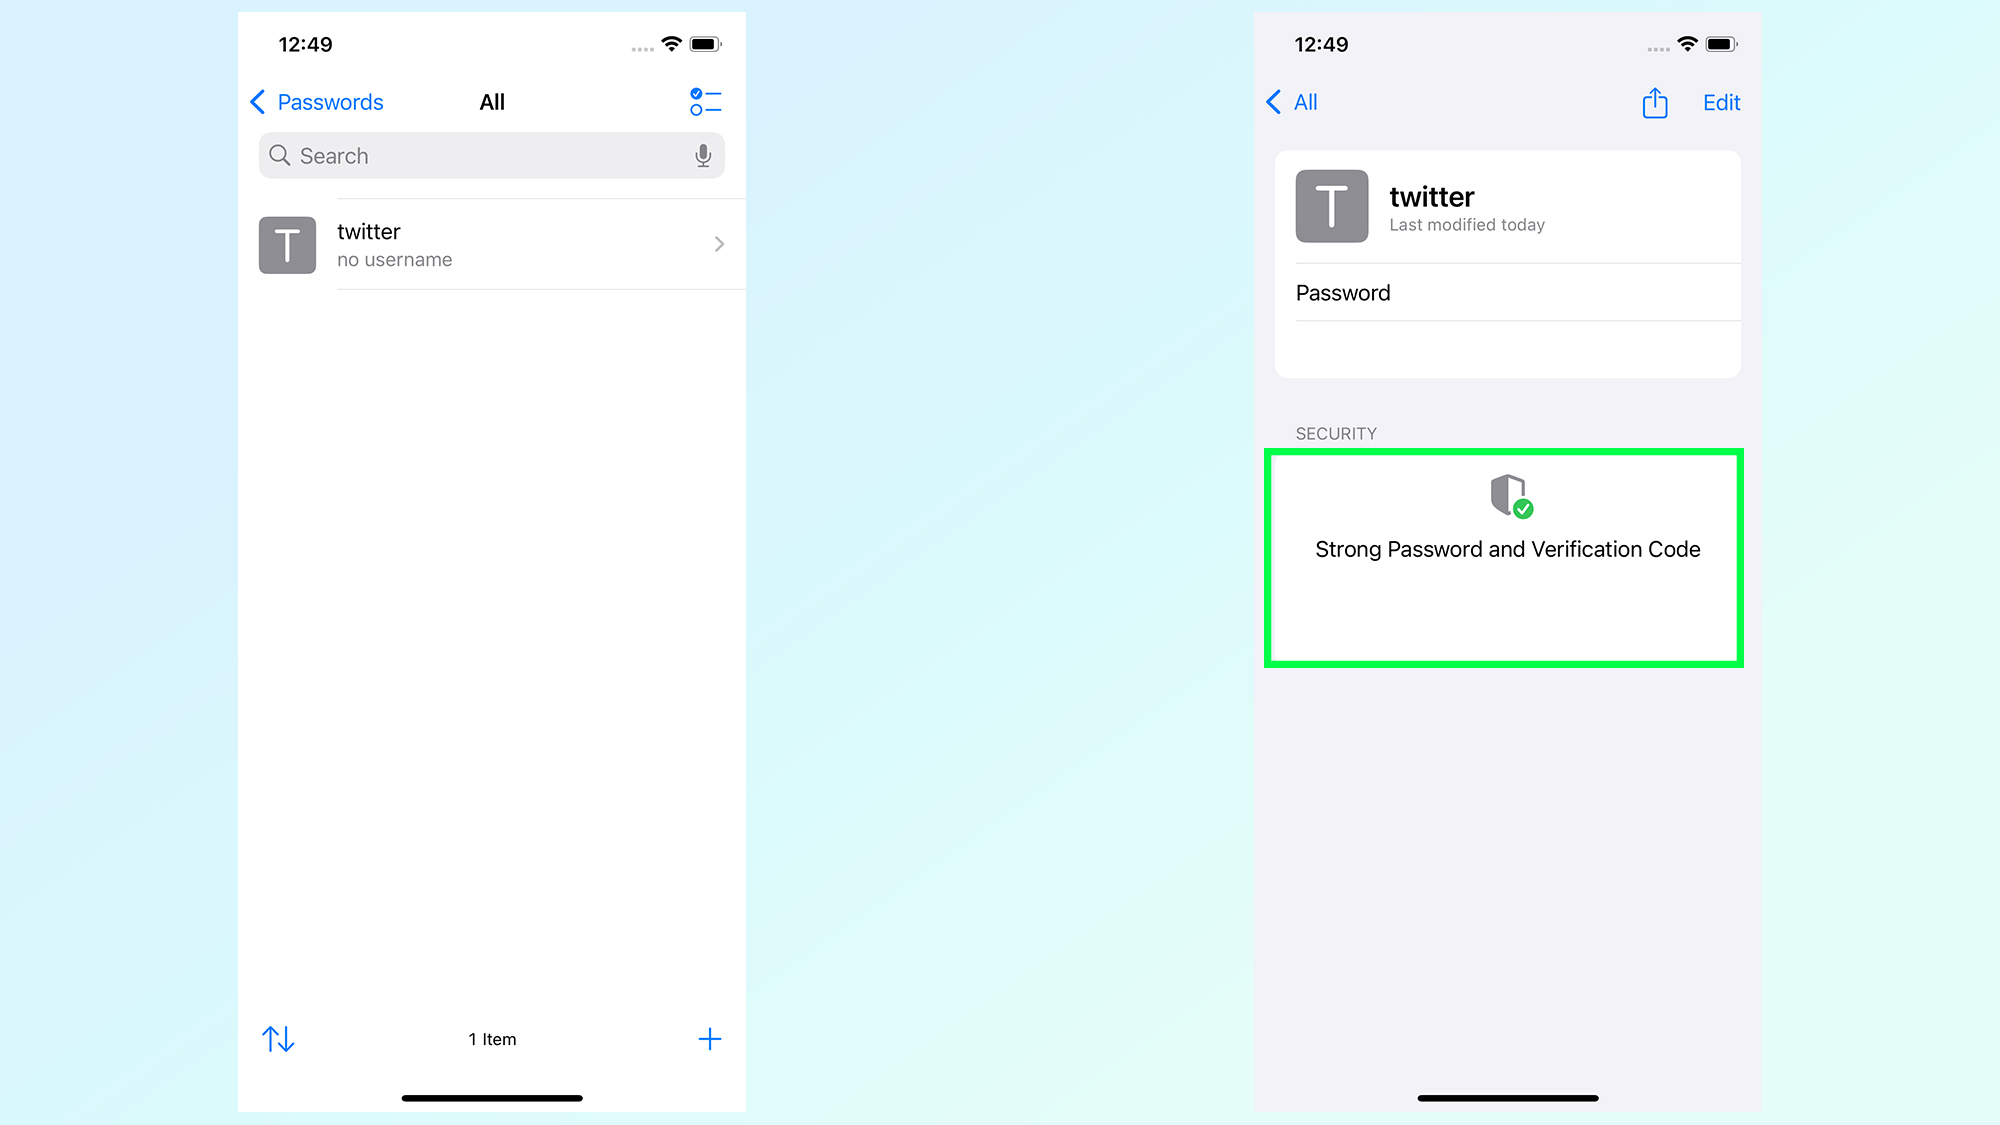
You will need to have created a password for the account you want to protect with 2FA ahead of time. Once you enter the setup key or scan the QR code simply pick it from the list of accounts, or search for it with the search bar up top.
4. Grab your 2FA code from the Codes tab
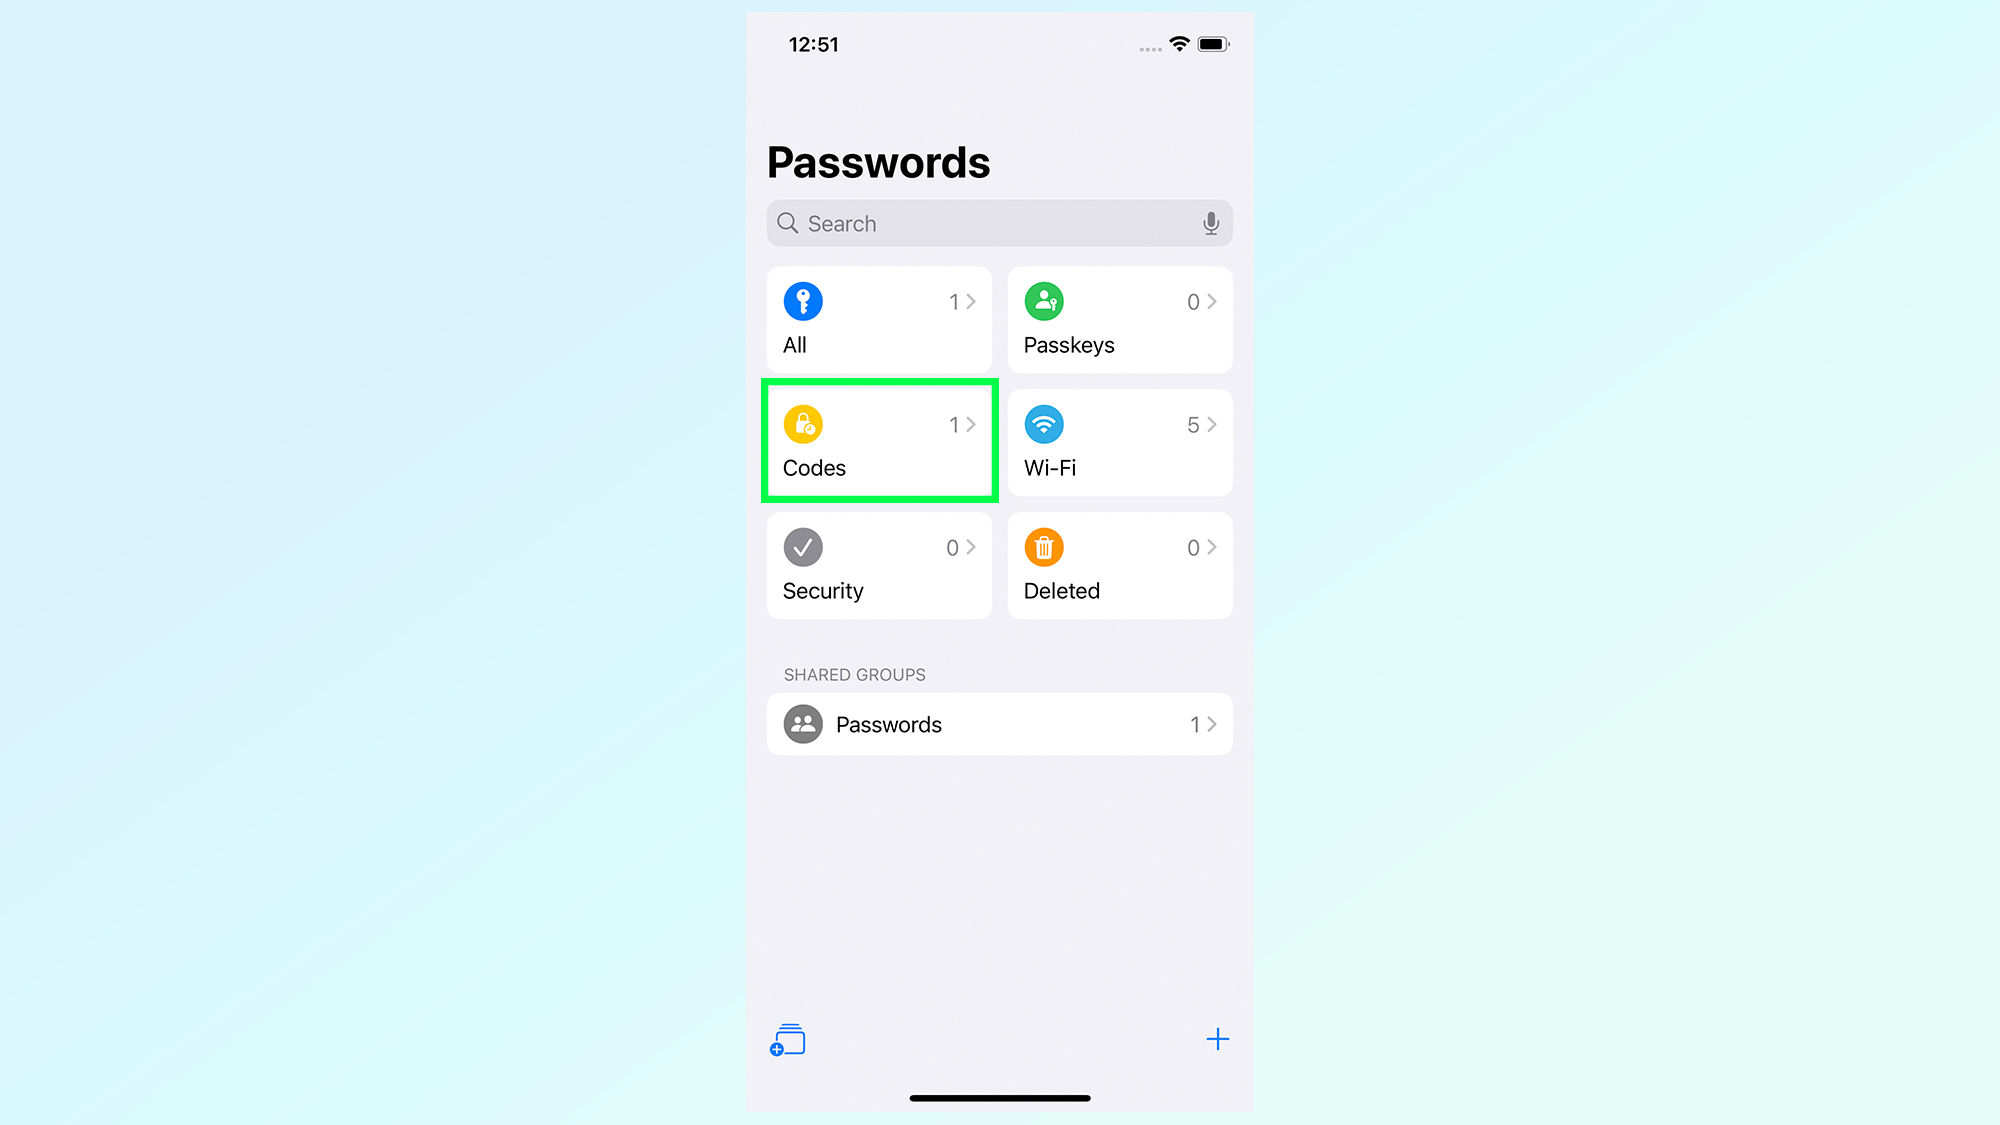
You’ll be told the 2FA protection was successfully set up, and you can find your security codes on the Codes tab next to the relevant account name.
How to set up shared passwords in iOS 18 passwords
1. Tap the New Shared Group icon in the bottom left corner
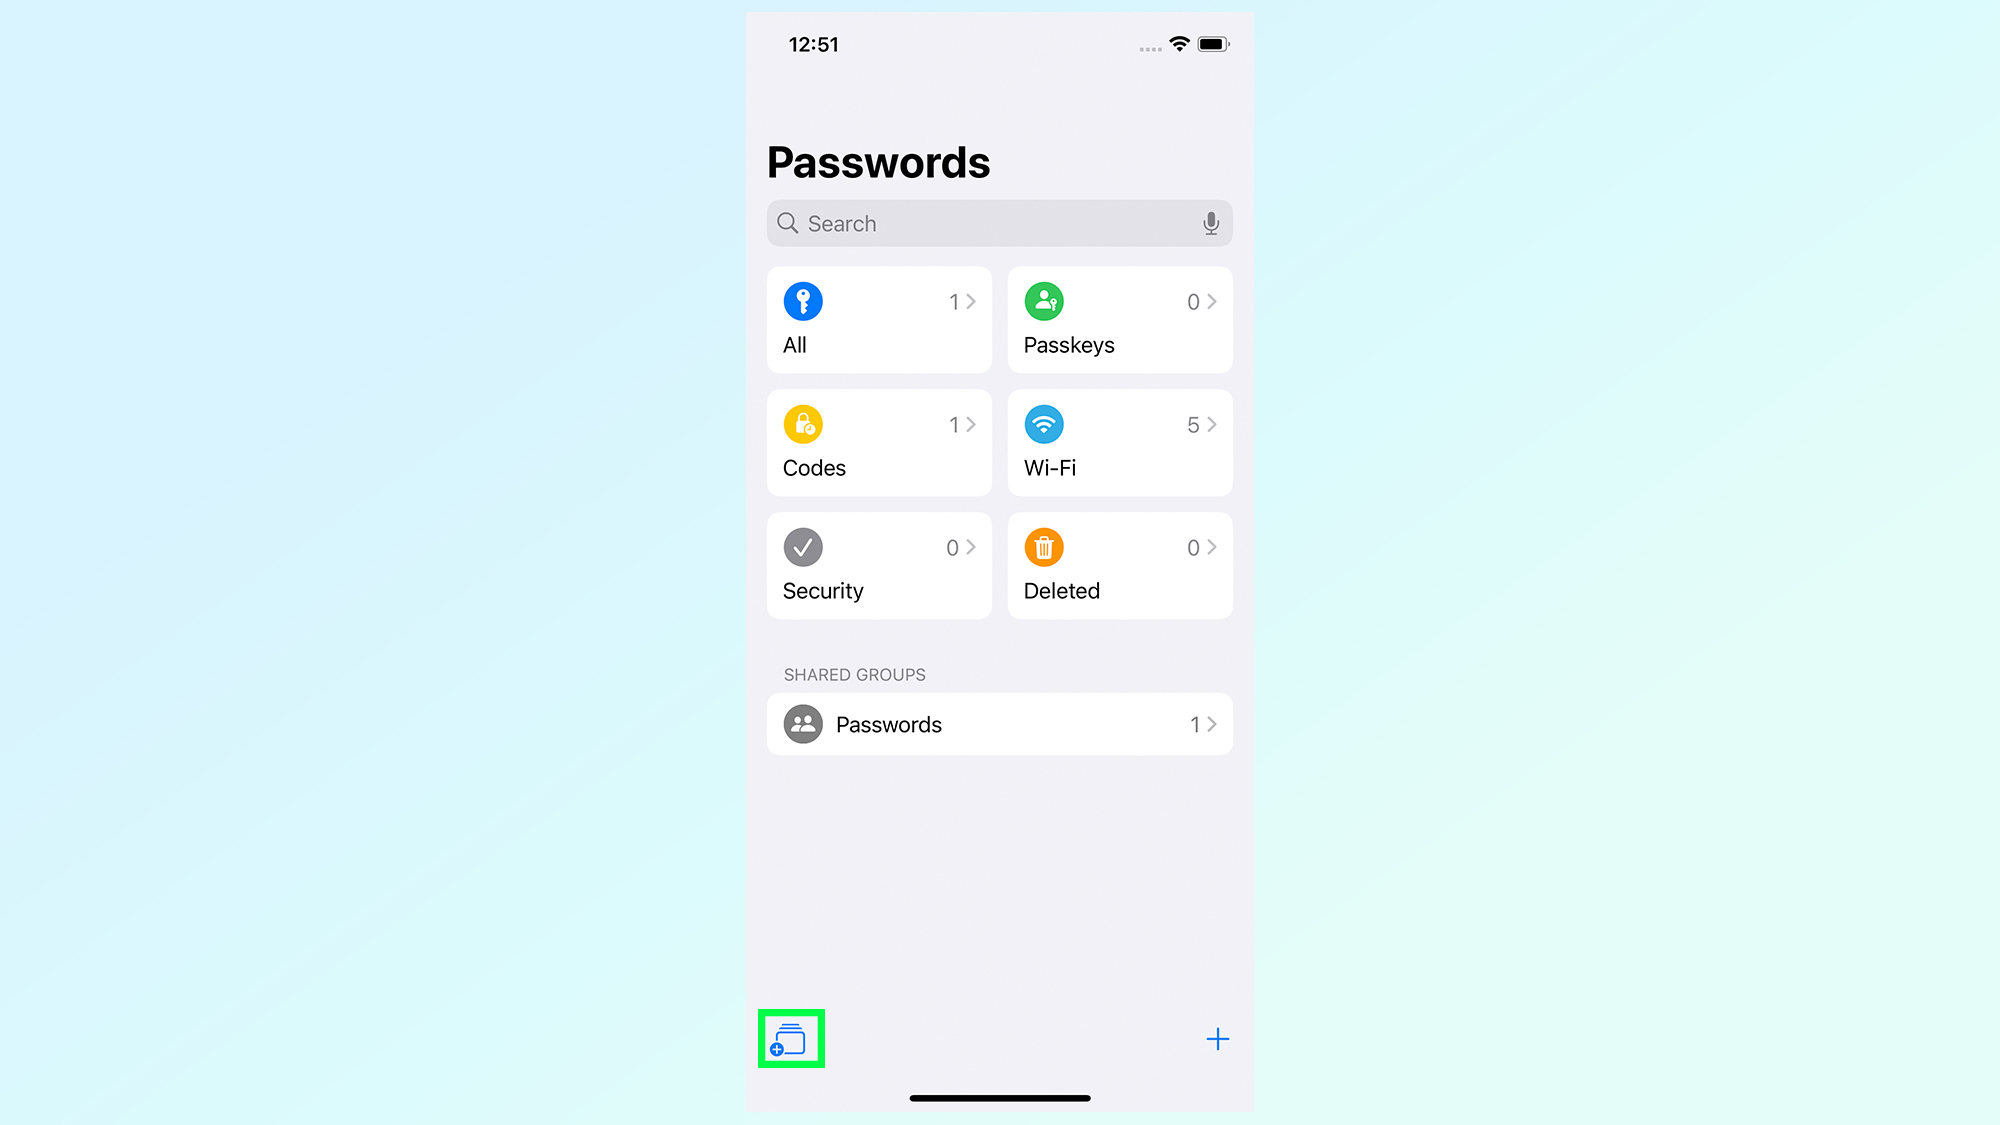
To start sharing passwords with other, you’ll need to create a Shared Group. Start by tapping the folder icon on the bottom left corner of the Passwords app.
Alternatively, if you've already created shared password folders, you can add a new password to it when you add it to Apple Passwords.
2. Name the new group, add contacts and tap Create
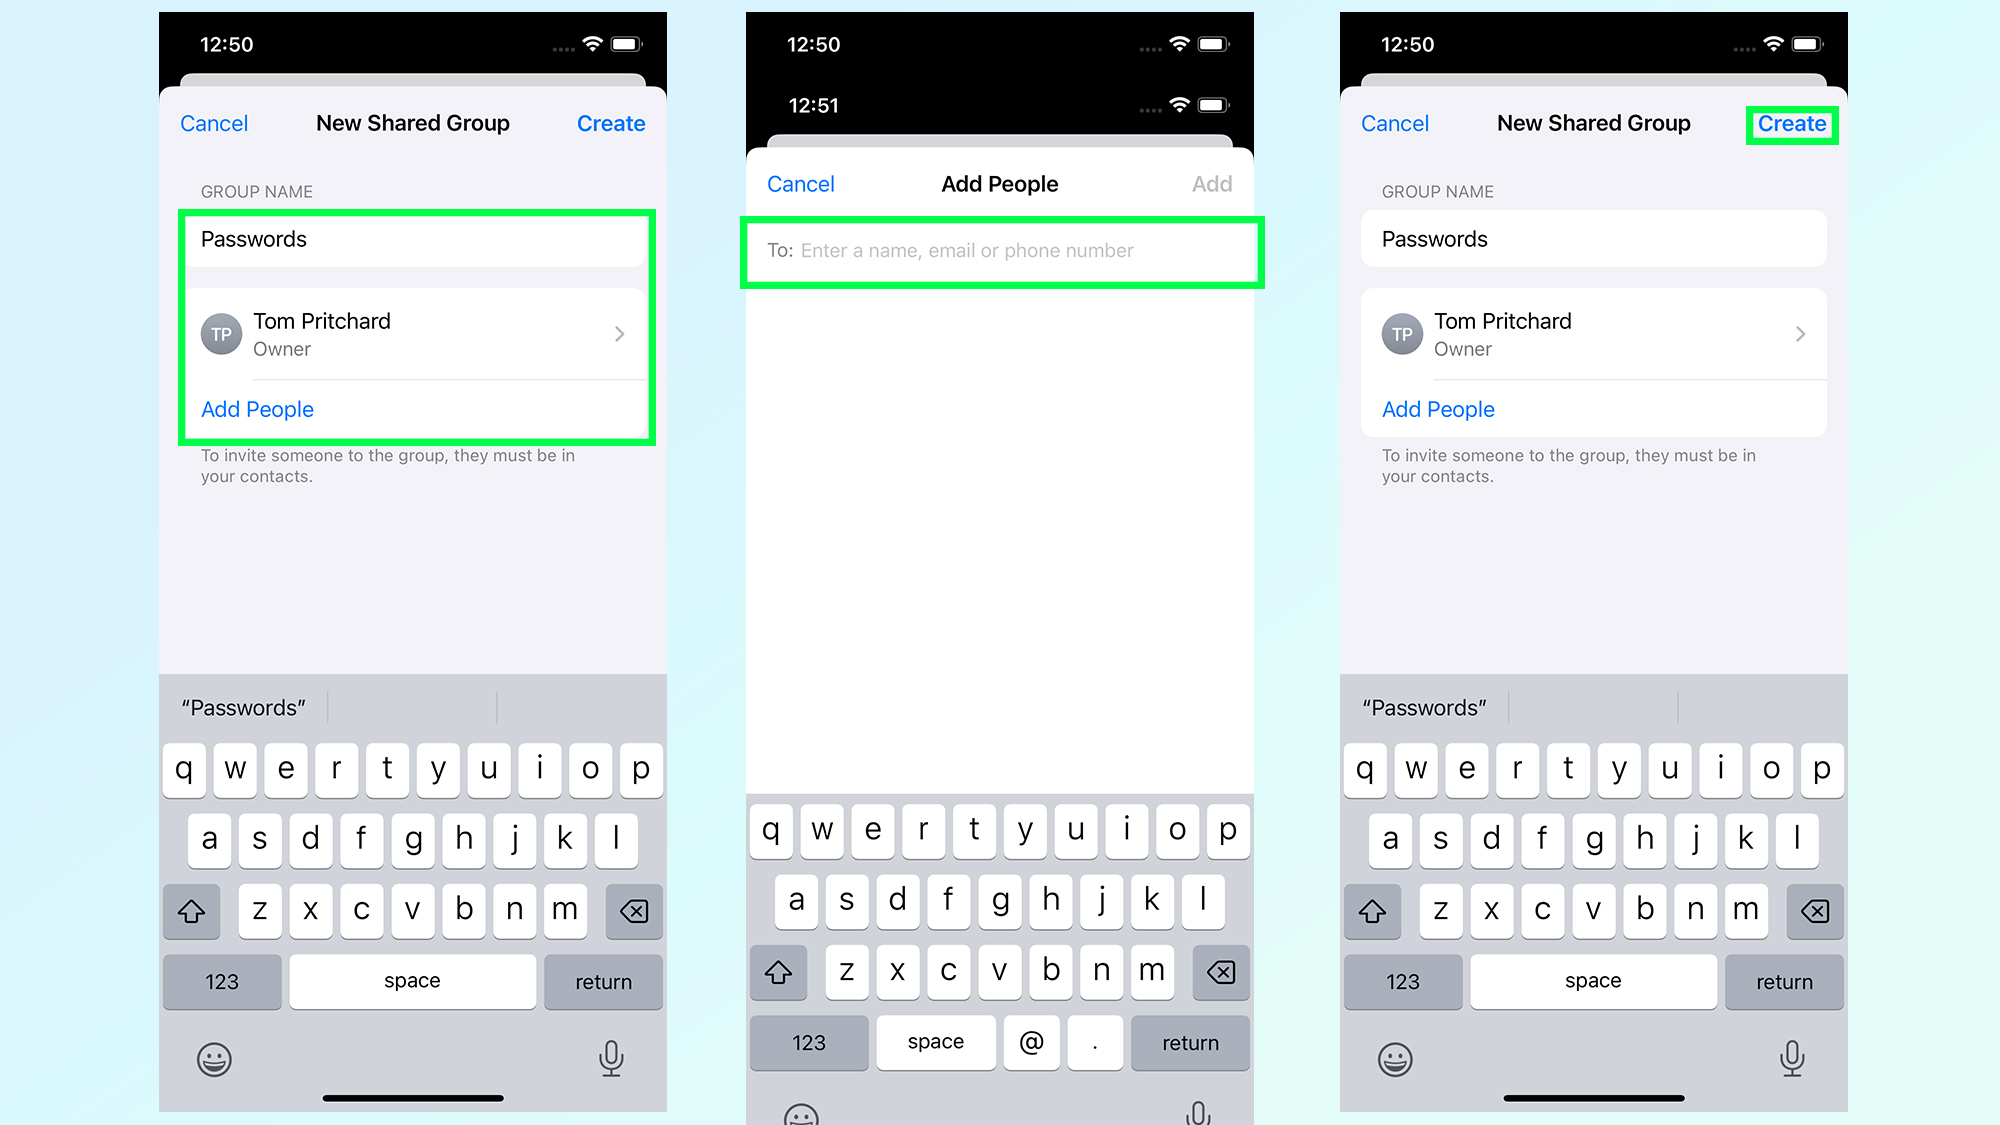
You’ll then have to name this Shared Group, and add people to the folder. Type Add People and the Passwords app will bring up your contacts list, letting you select people who will be able to access this password. Alternatively, you can just keep it reserved for yourself for the foreseeable future. Once you’ve selected all the recipients, tap Create in the top right corner.
3. Choose the passwords to share and tap Move

The next screen will ask you to select the passwords you want to add to this shared group then tap Move in the top right corner. Just be aware that anyone you shared this group with will be able to see and utilize as they see fit. You’re also only able to add a password to a single group at any given time — and trying to add it to a second group will inform you of this.
And there's a rundown on how to set up the Passwords app in iOS 18, and get all your passwords, 2FA codes and other information safely stored away on your Apple account. If you've just installed iOS 18 and are looking for more guides explaining how to use the new features, be sure to check our tutorials on how to send messages via satellite, how to customize your iPhone's home screen, a guide on how to use text effects to bring your messages to life, as well as how to finally schedule messages in iMessage.
Get instant access to breaking news, the hottest reviews, great deals and helpful tips.

Tom is the Tom's Guide's UK Phones Editor, tackling the latest smartphone news and vocally expressing his opinions about upcoming features or changes. It's long way from his days as editor of Gizmodo UK, when pretty much everything was on the table. He’s usually found trying to squeeze another giant Lego set onto the shelf, draining very large cups of coffee, or complaining about how terrible his Smart TV is.
