iOS 18 Memory Movie is one of Apple Intelligence’s best features — here’s how to use it
You can use AI to auto-assemble a slideshow
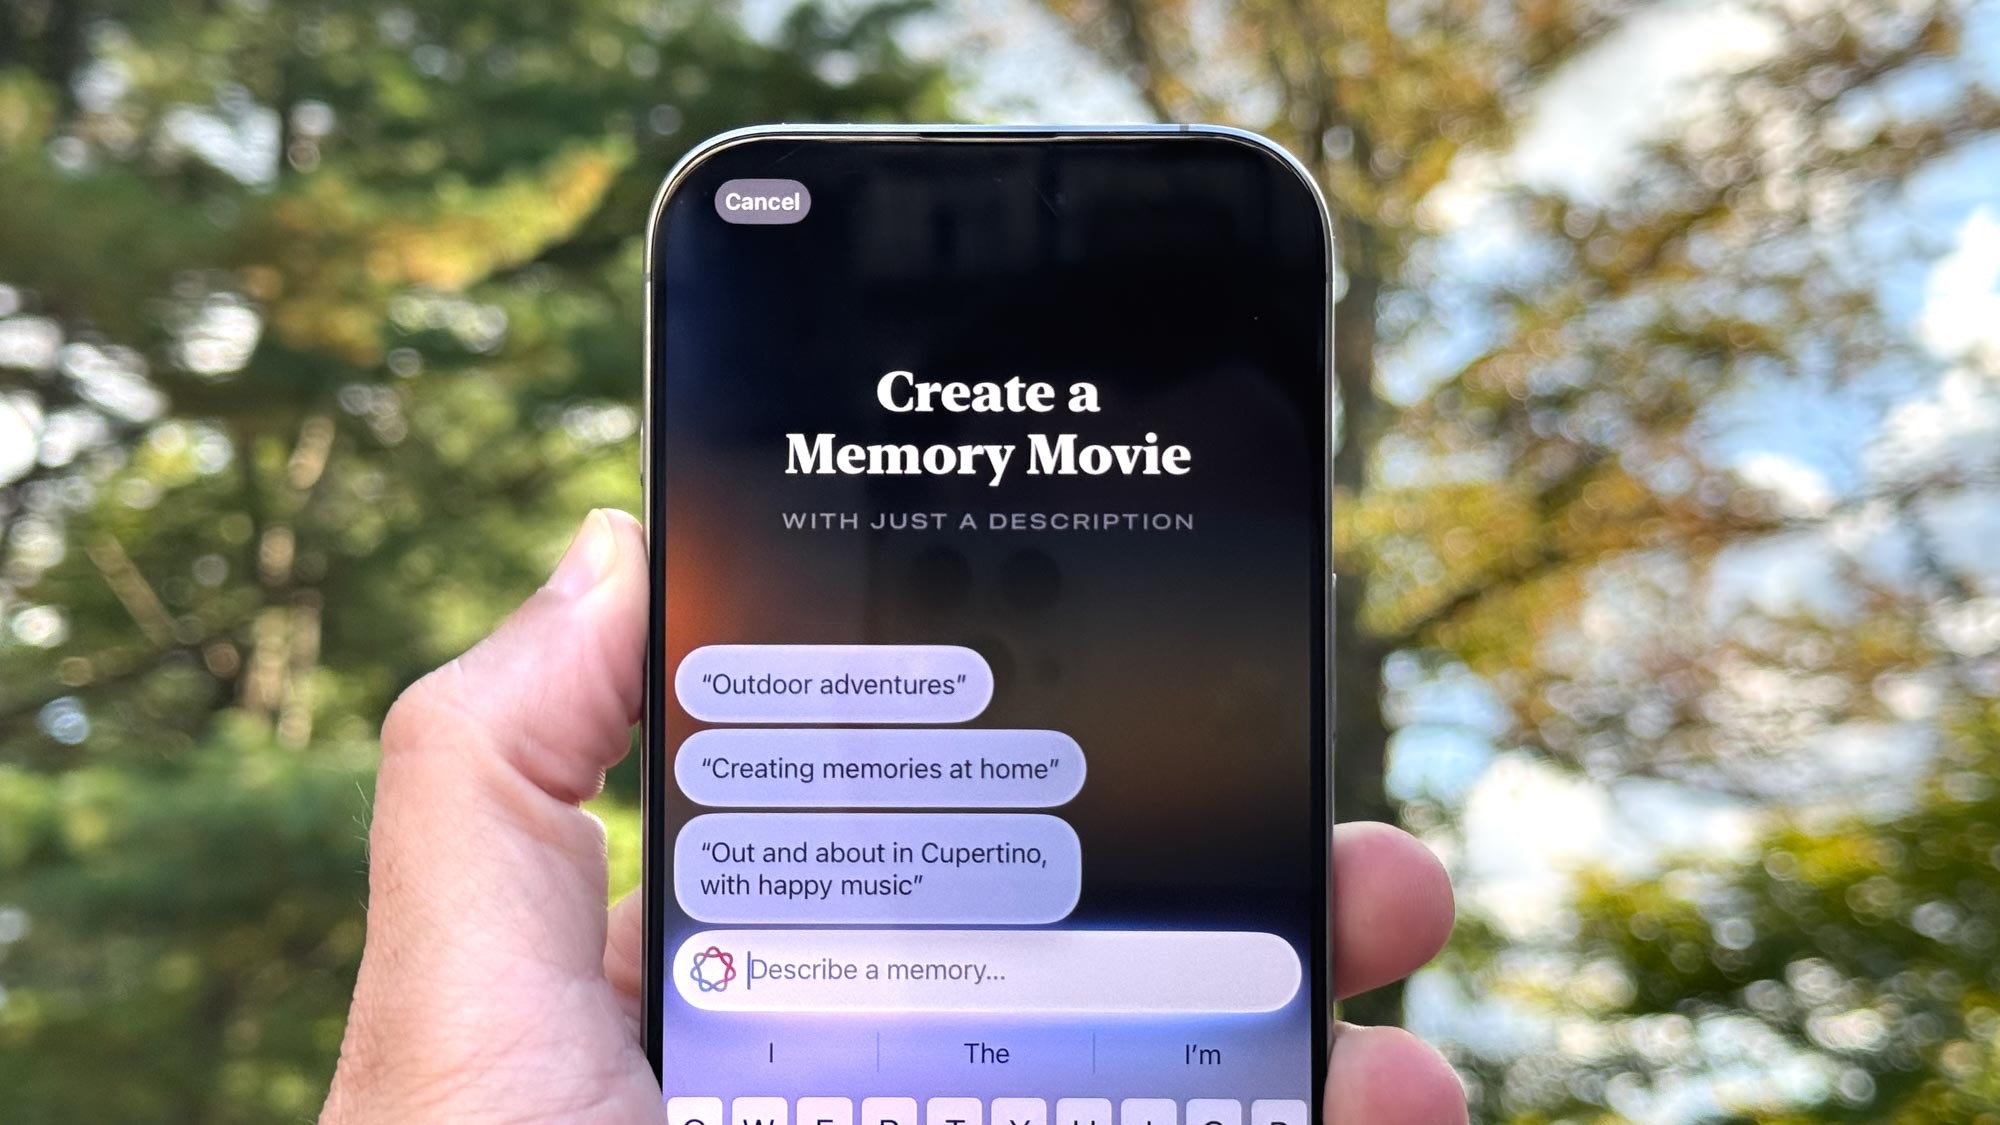
If you've ever looked at the Memories in the Photos app on your iPhone and longed to create your own slideshow using photos and videos from your library, Apple Intelligence will grant you your wish. Among the AI-powered features now available on your iPhone is the ability to create a Movie Memory using nothing more than a text prompt.
Memory Movie joins other Apple Intelligence features now available as part of the iOS 18.1 update, but you can only tap into Apple Intelligence features if you have a compatible phone — an iPhone 15 Pro, iPhone 15 Pro Max or any of the new iPhone 16 models. So as cool as the Memory Movie capability is, it's not a feature everyone is able to use.
Still, if you do have a compatible phone running iOS 18.1, you should give Memory Movie a try. I spent some time creating Memory Movies on an iPhone 15 Pro, and I was generally pleased with the results, though like many Apple Intelligence tools, this one remains a work in progress.
Find out for yourself just how polished feature is by following these steps to create a Memory Movie on your iPhone.
How to create a Memory Movie in iOS 18
1. Head to the Photos app to create a Memory Movie
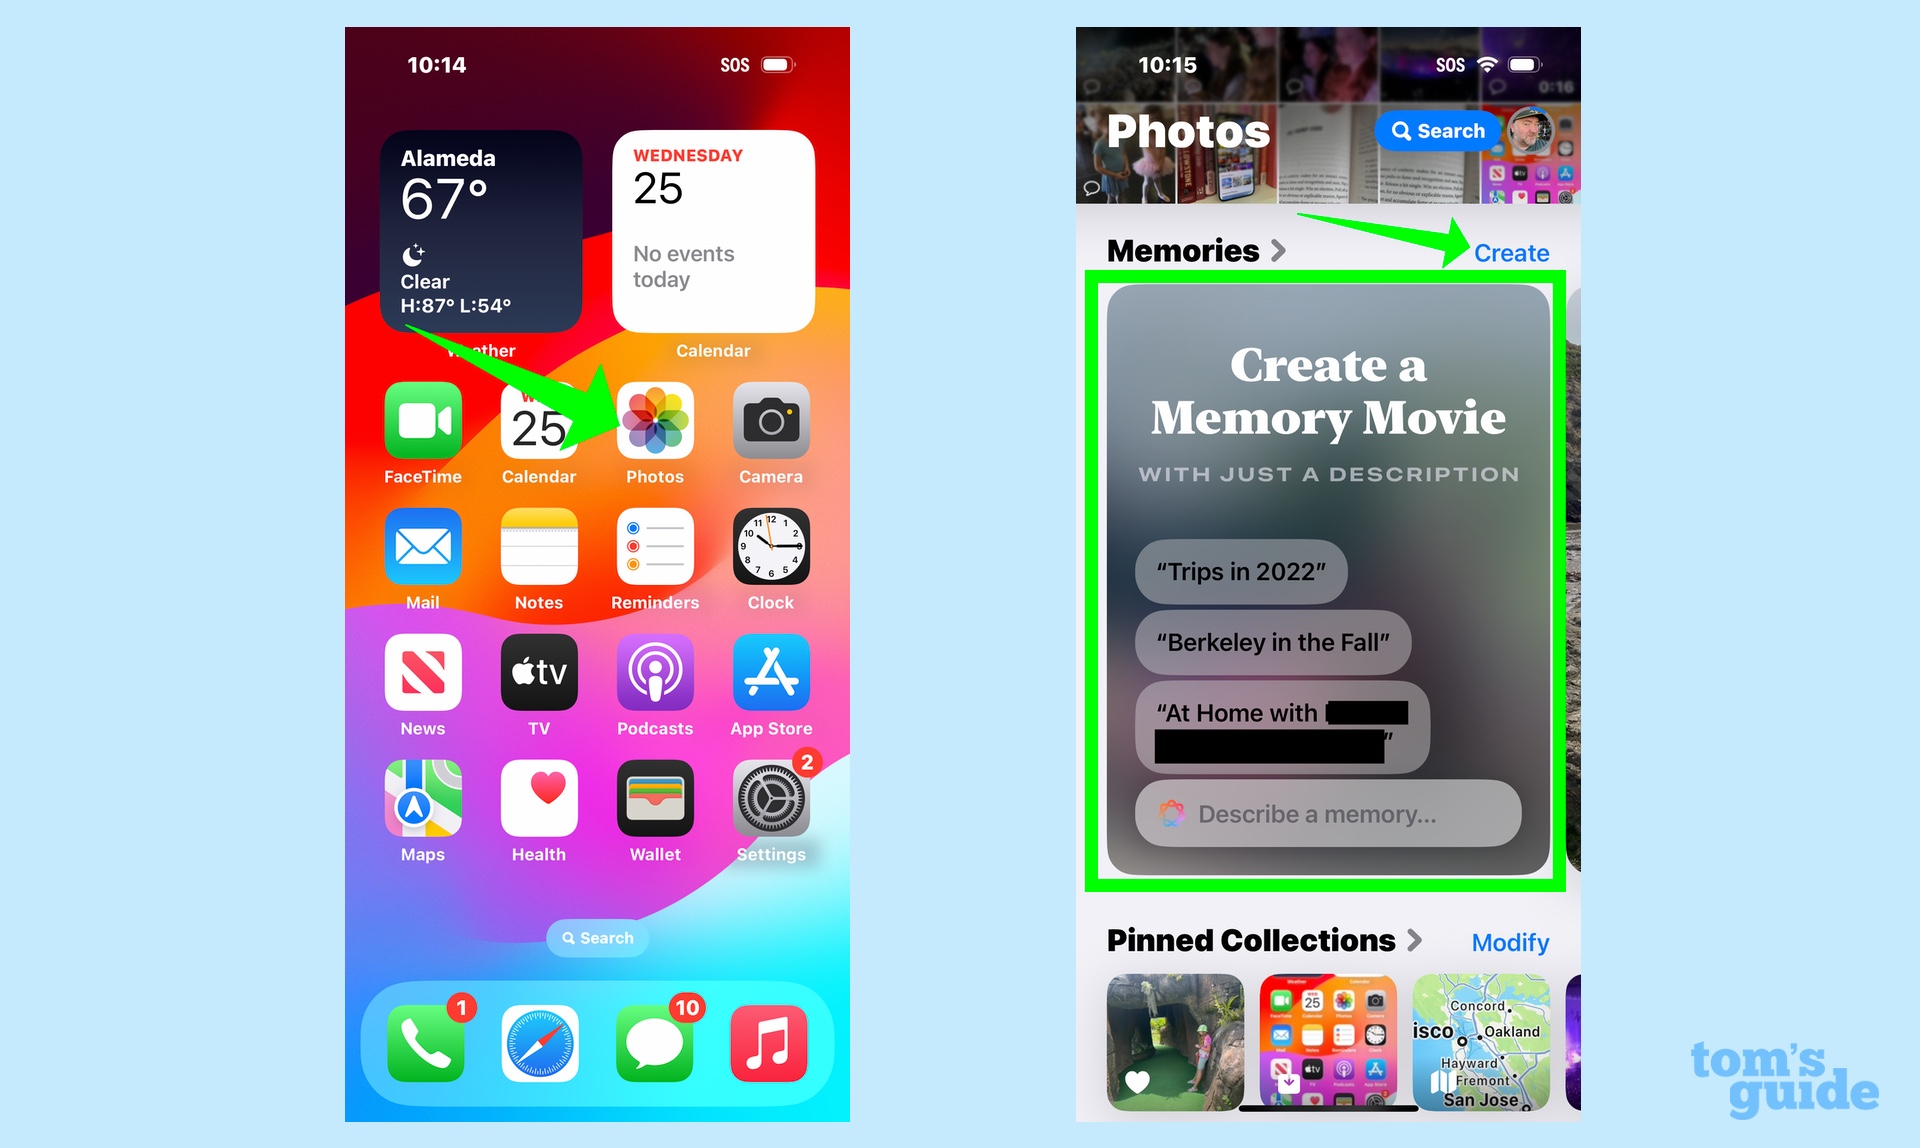
On your iPhone, launch the Photos app and scroll down to find the Memories section. (Remember, you can customize the iOS 18 Photos app so that Memories appears wherever you want it to.) When you find Memories, you'll see a prompt to create a Memory Movie in the first window of the carousel, as well as a Create command. Tap either one to get started.
2. Type in your prompts
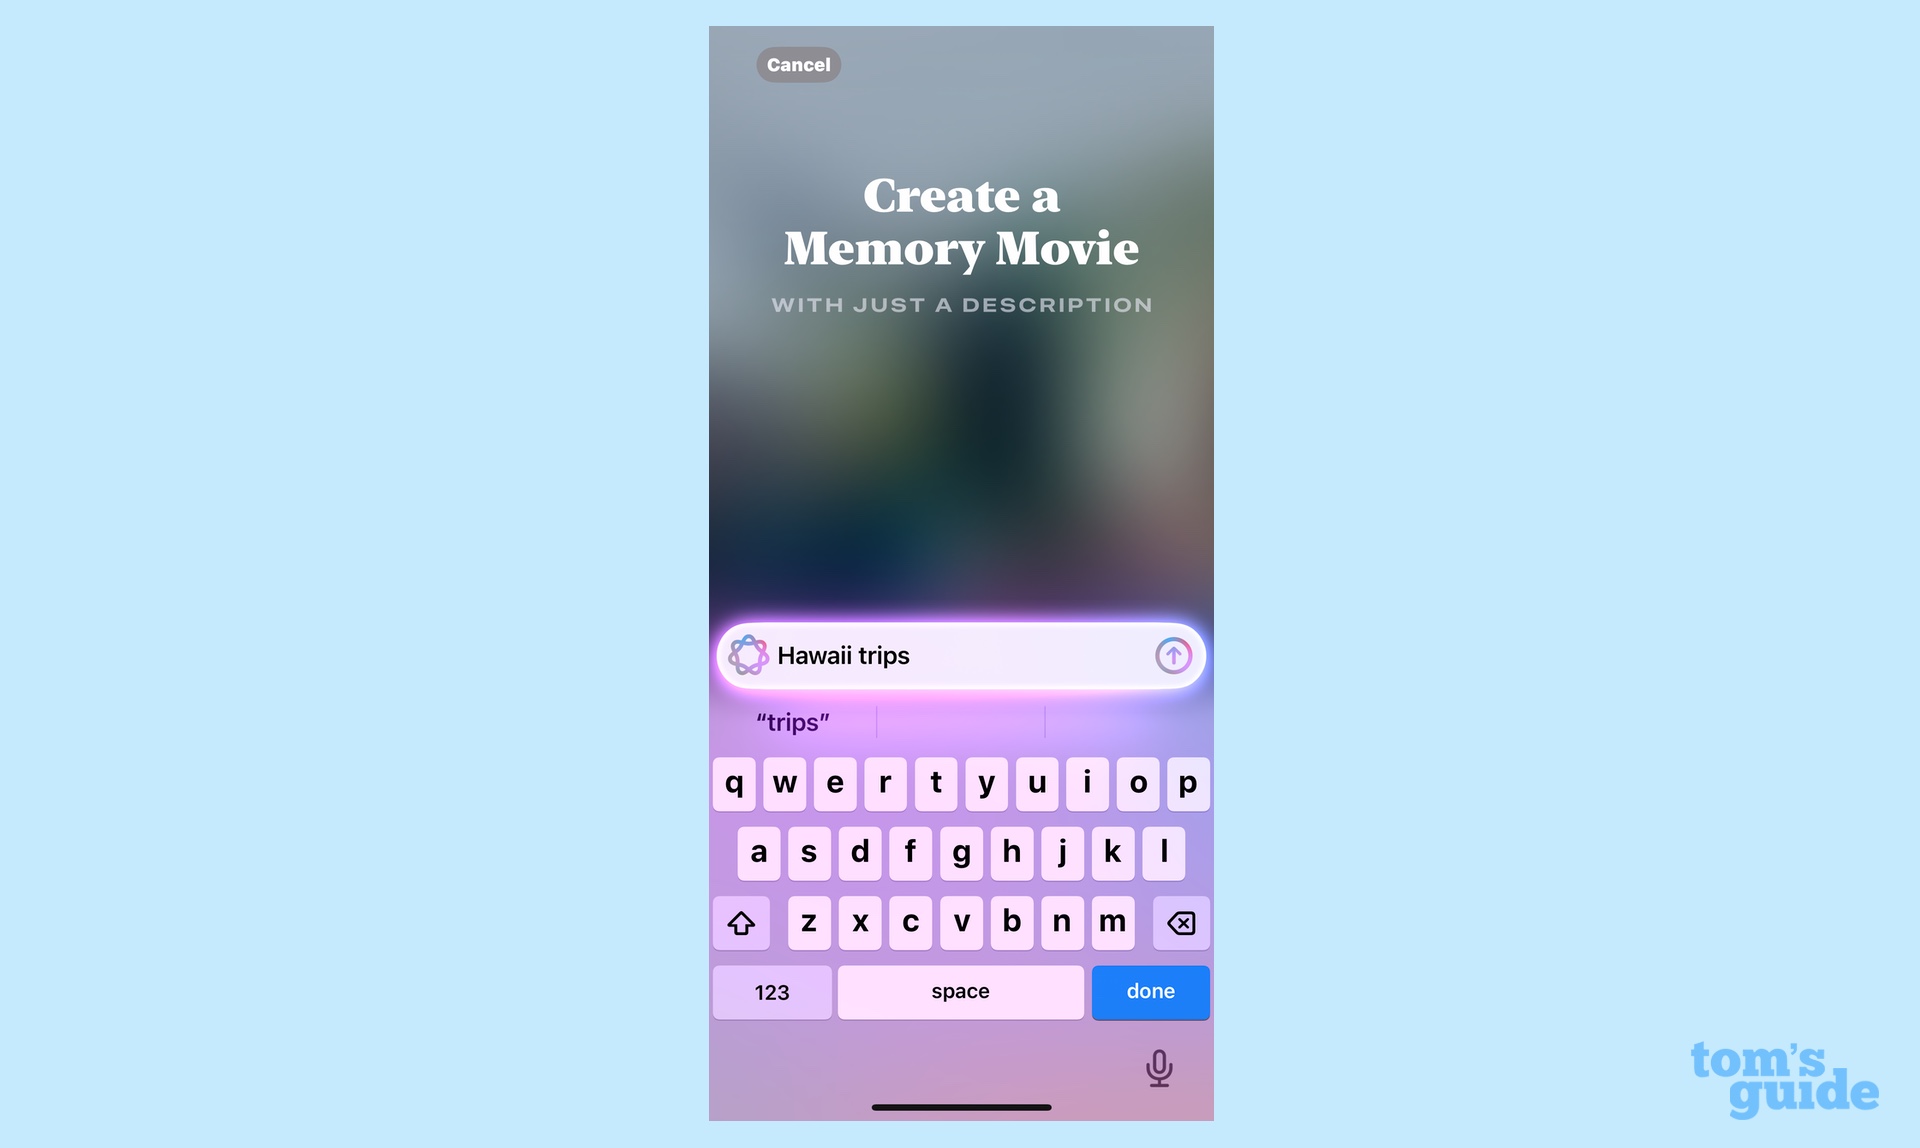
The Memory Movie feature has some prompts that you can tap to get started. Or you can type in your own idea for a movie. I find the more specific the prompt the better. You can also suggest a music style to accompany your slideshow — a feature that works best if you're an Apple Music subscriber and can pull from a wider library of songs. When you've completed your prompt, hit the Done button or the up arrow in the text field.
3. Watch your Memory Movie
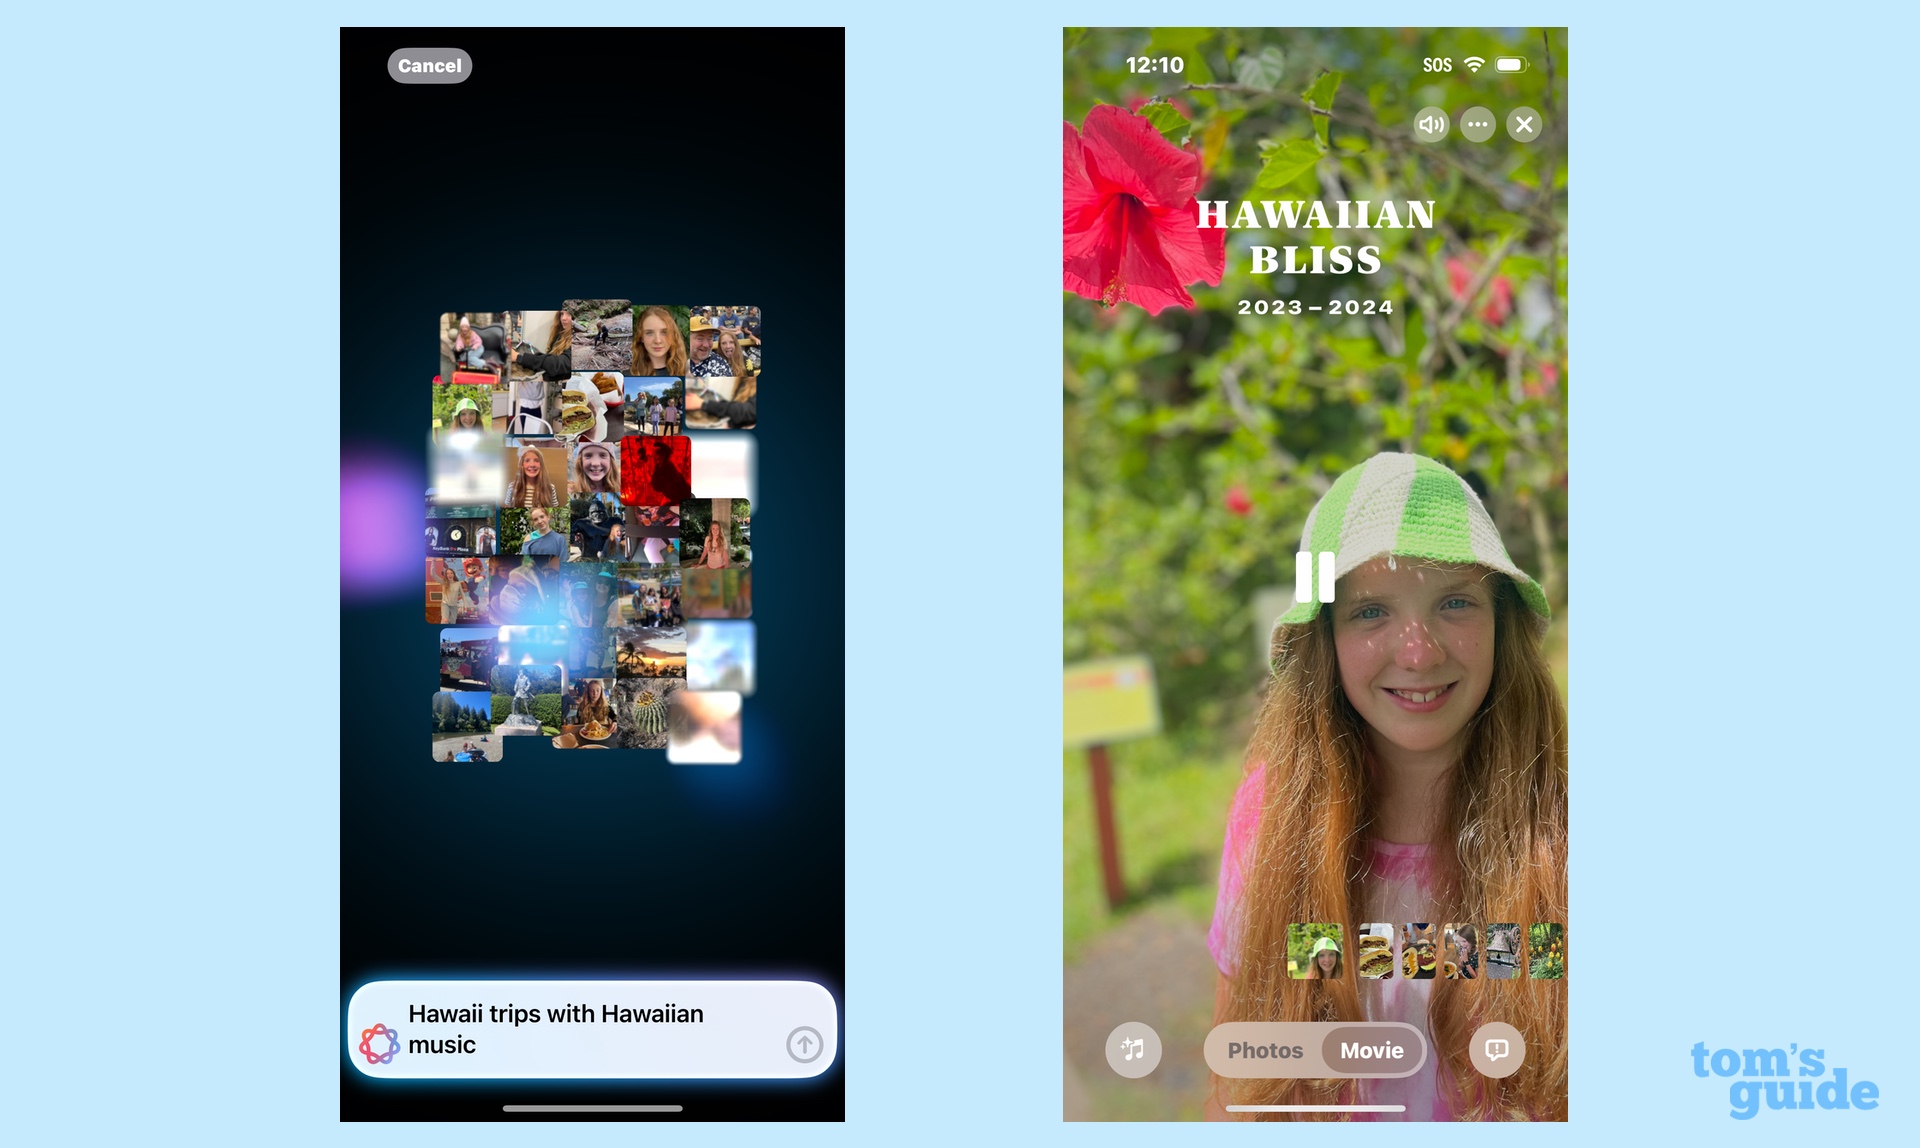
Here's where you sit back and let Apple Intelligence do its thing. You'll see photos from your library and keywords come together while the Memory Movie is assembled. When everything's put together, the movie starts playing automatically.
4. Edit your Memory Movie's music and filters
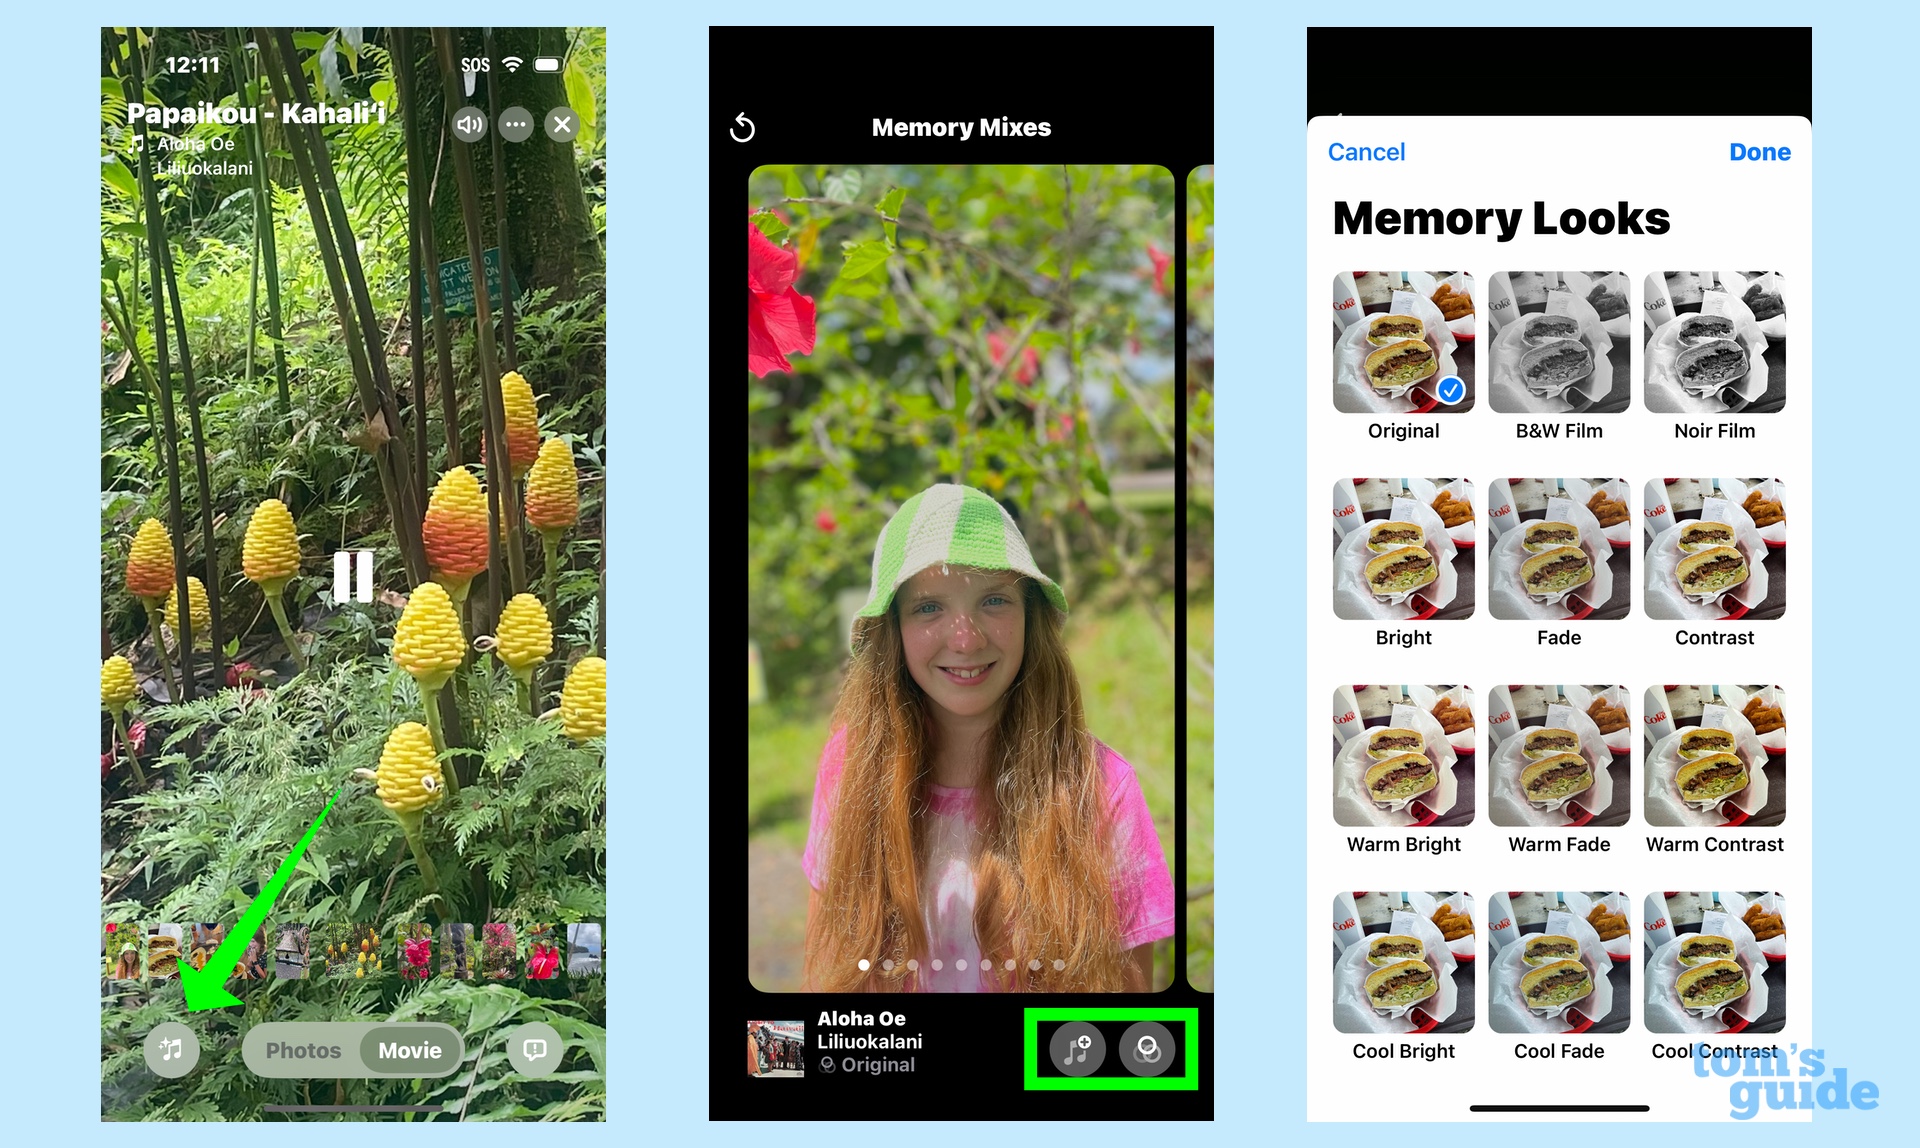
Apple Intelligence picks the music for your Memory Movie automatically, but if you'd like to mix things up, tap the musical note icon in the bottom left corner of the screen. On the ensuing Memory Mixes screen, you can scroll to the right to hear more potential soundtracks or tap on the music note icon with the plus button to see a list of suggestions. Next to that is a filters button; tap that to change the filter of the photos in your Memory Movie. (Whatever filter you select will apply all images in the movie.)
Tap on the Memory Mix screen to go back to the main view.
5. Perform additional edits
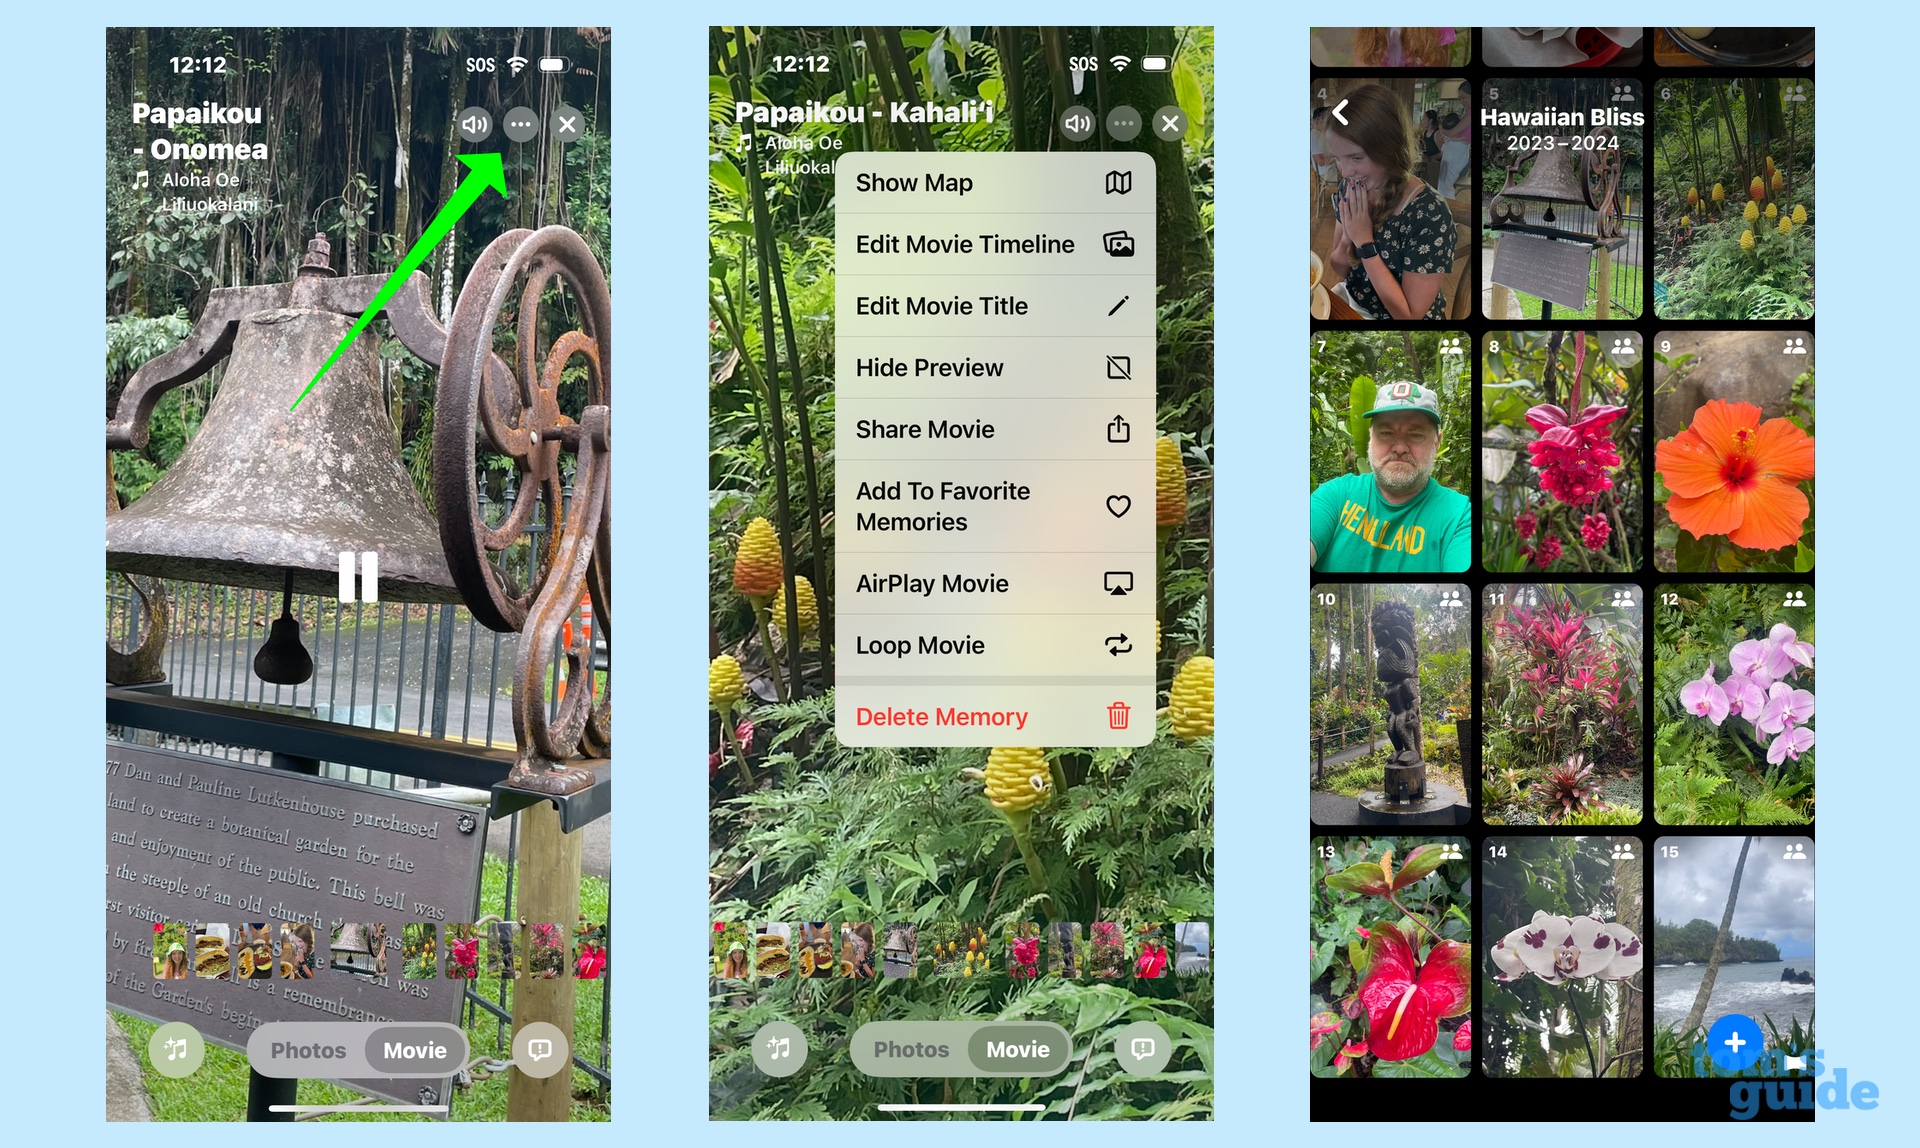
You may want to make additional changes to the assembled Memory Movie. If so, tap on the More button in the upper right corner of the screen. (It's the one with three dots.) A menu will appear with your options. Here's where you can write a new title for your Memory Movie or edit the movie timeline.
Choose that latter option, and you see a grid of the images that appear in your Memory Movie. You can reorder the slides by dragging and dropping them anywhere in the timeline. Pressing and holding on a slide gives you the option to hide it from the movie; you can also opt to make that slide a key image in the movie, too. The Plus button in the lower right corner lets you manually select photos from your library for this Movie Memory.
6. Give feedback on the Memory Movie you've created
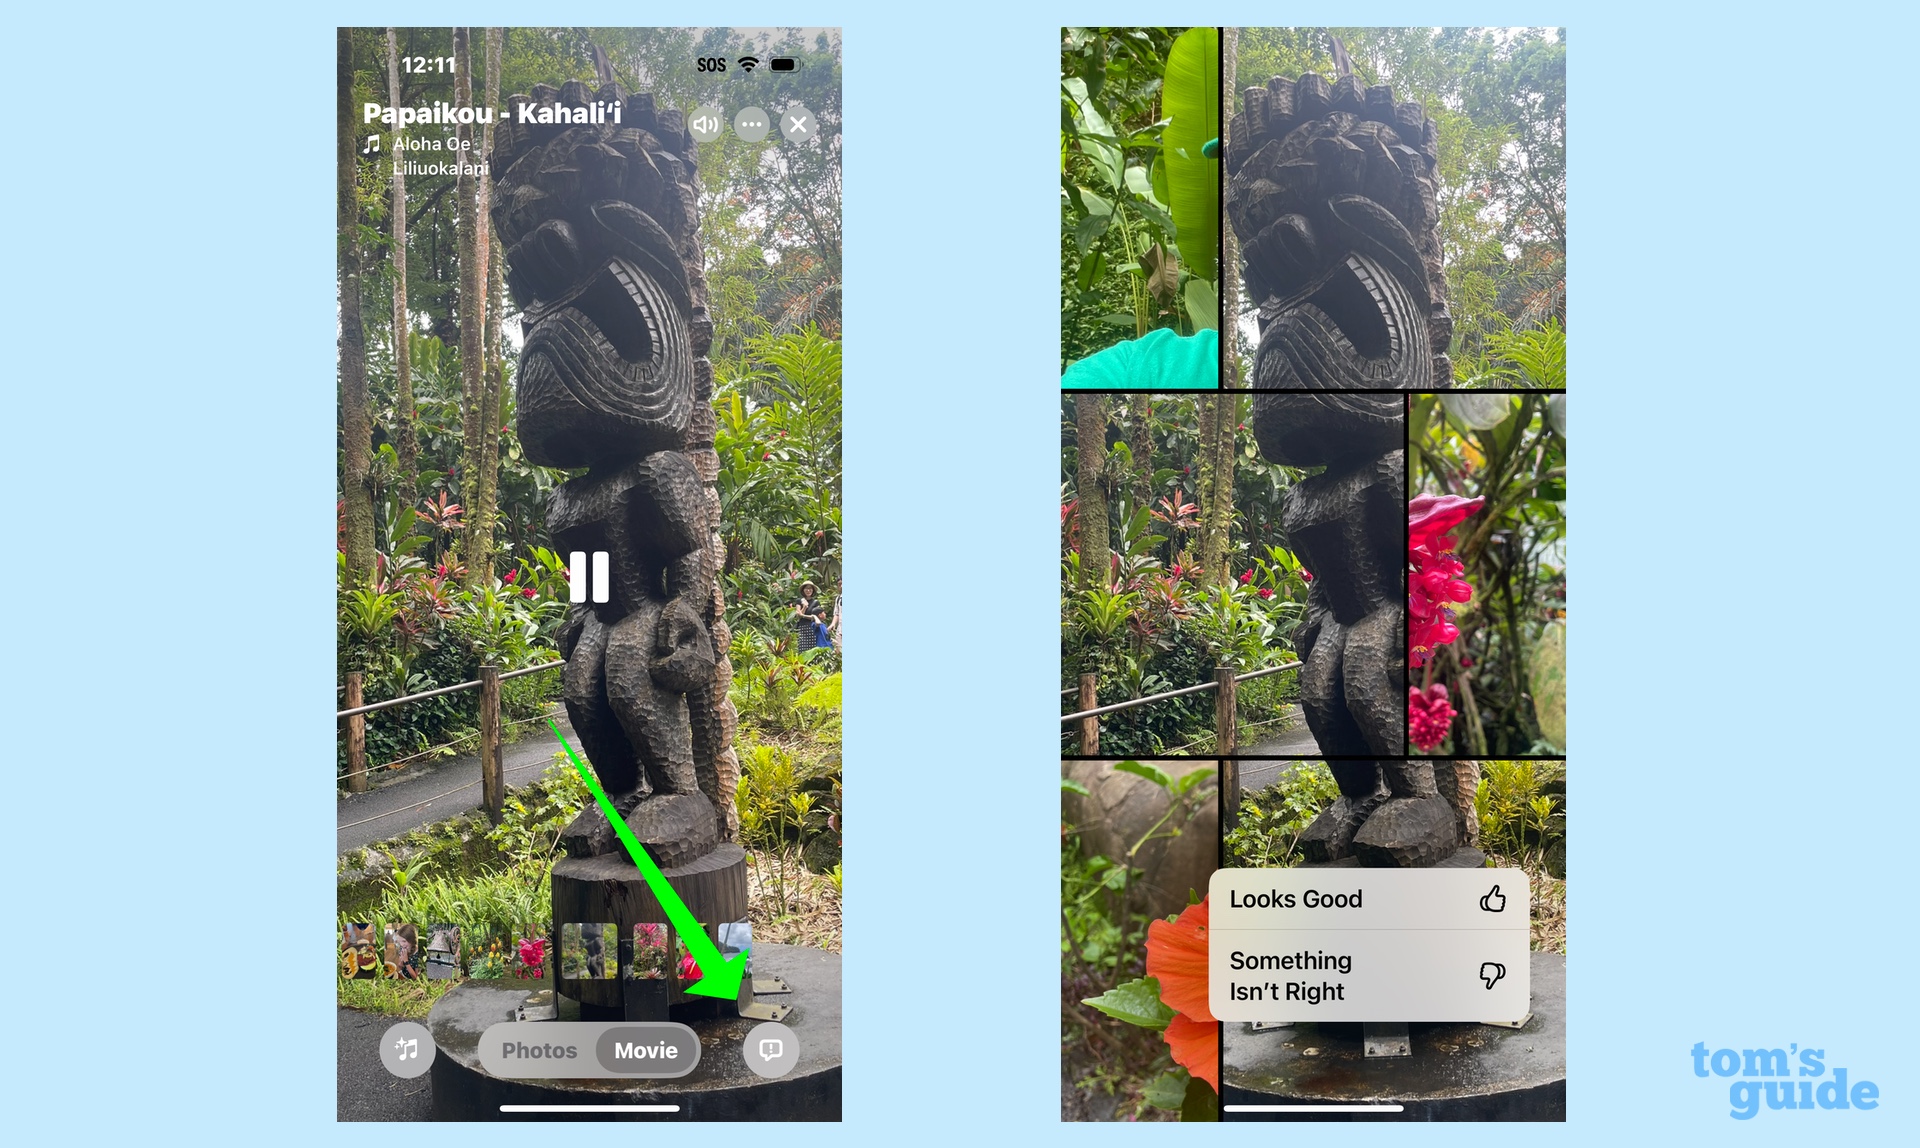
To give feedback, tap the feedback icon in the lower right corner. You can then select whether the slideshow looks good or if there's a problem. If the latter, you get a list of potential problems, and you can tick off as many that apply. (Samples include the wrong music, images that didn't match your prompt and so on.) Whether good or bad, you can then upload a report to Apple.
7. Delete your Memory Movie
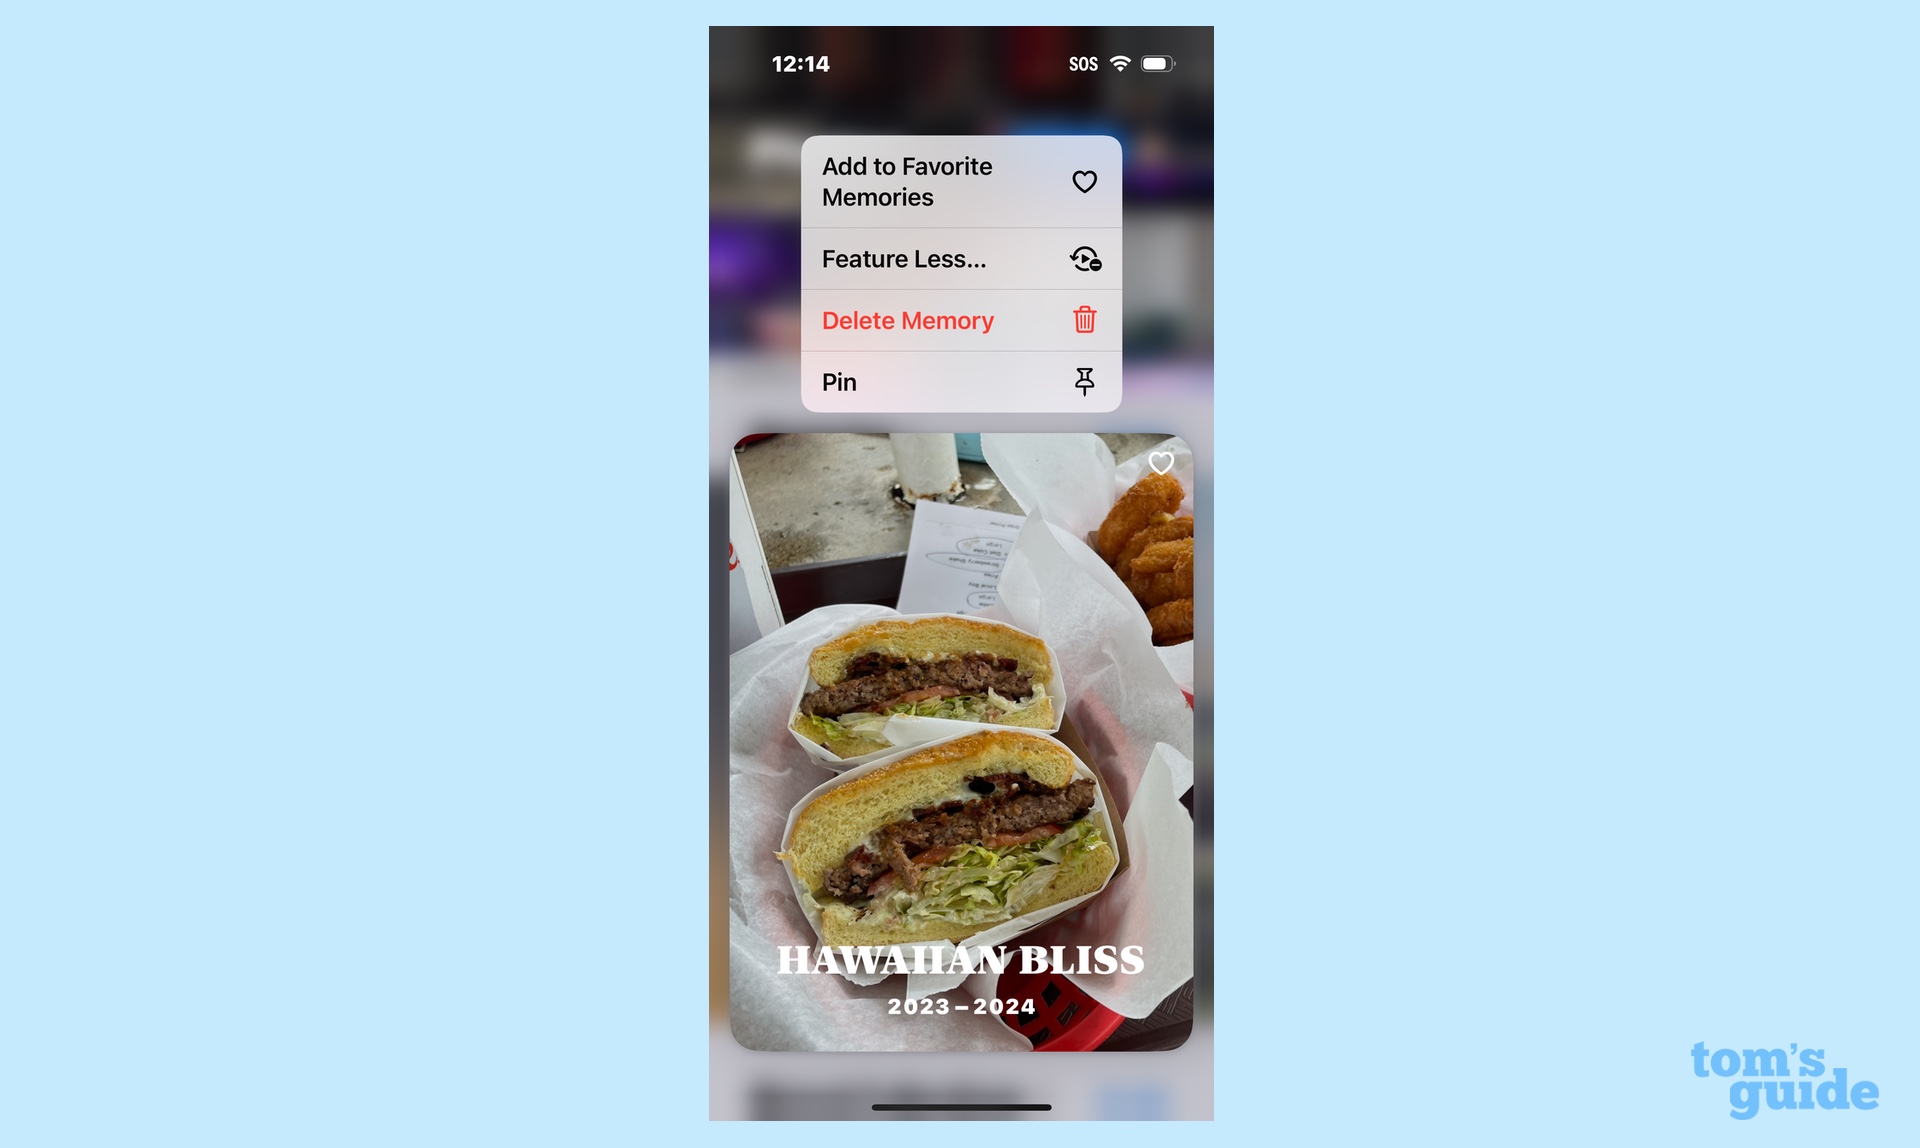
Did the Memory Movie miss the mark? That's OK, you're not stuck with it. From the Memories carousel in the main Photos interface, just tap and hold on the Memory Movie. From the pop up menu that appears, you can select Delete Memory. The Feature Less option will also show the movie less if you're merely lukewarm about it. You can also pin or favorite the movie from here if you're a fan.
And that's all there is to creating a Memory Movie using Apple Intelligence. If you want to give it a try, make sure you download the iOS 18.1 update to get started. Or, if you're more interested in features that are more widely accessible in iOS 18, we can show you how to make an audio recording in iOS 18 Notes and how to set up the new Passwords app on your iPhone.
Sign up to get the BEST of Tom's Guide direct to your inbox.
Get instant access to breaking news, the hottest reviews, great deals and helpful tips.
Philip Michaels is a Managing Editor at Tom's Guide. He's been covering personal technology since 1999 and was in the building when Steve Jobs showed off the iPhone for the first time. He's been evaluating smartphones since that first iPhone debuted in 2007, and he's been following phone carriers and smartphone plans since 2015. He has strong opinions about Apple, the Oakland Athletics, old movies and proper butchery techniques. Follow him at @PhilipMichaels.

