I’m using my Peloton bike more than ever after adding a second monitor for games and movies
One screen for games and movies and another for workouts
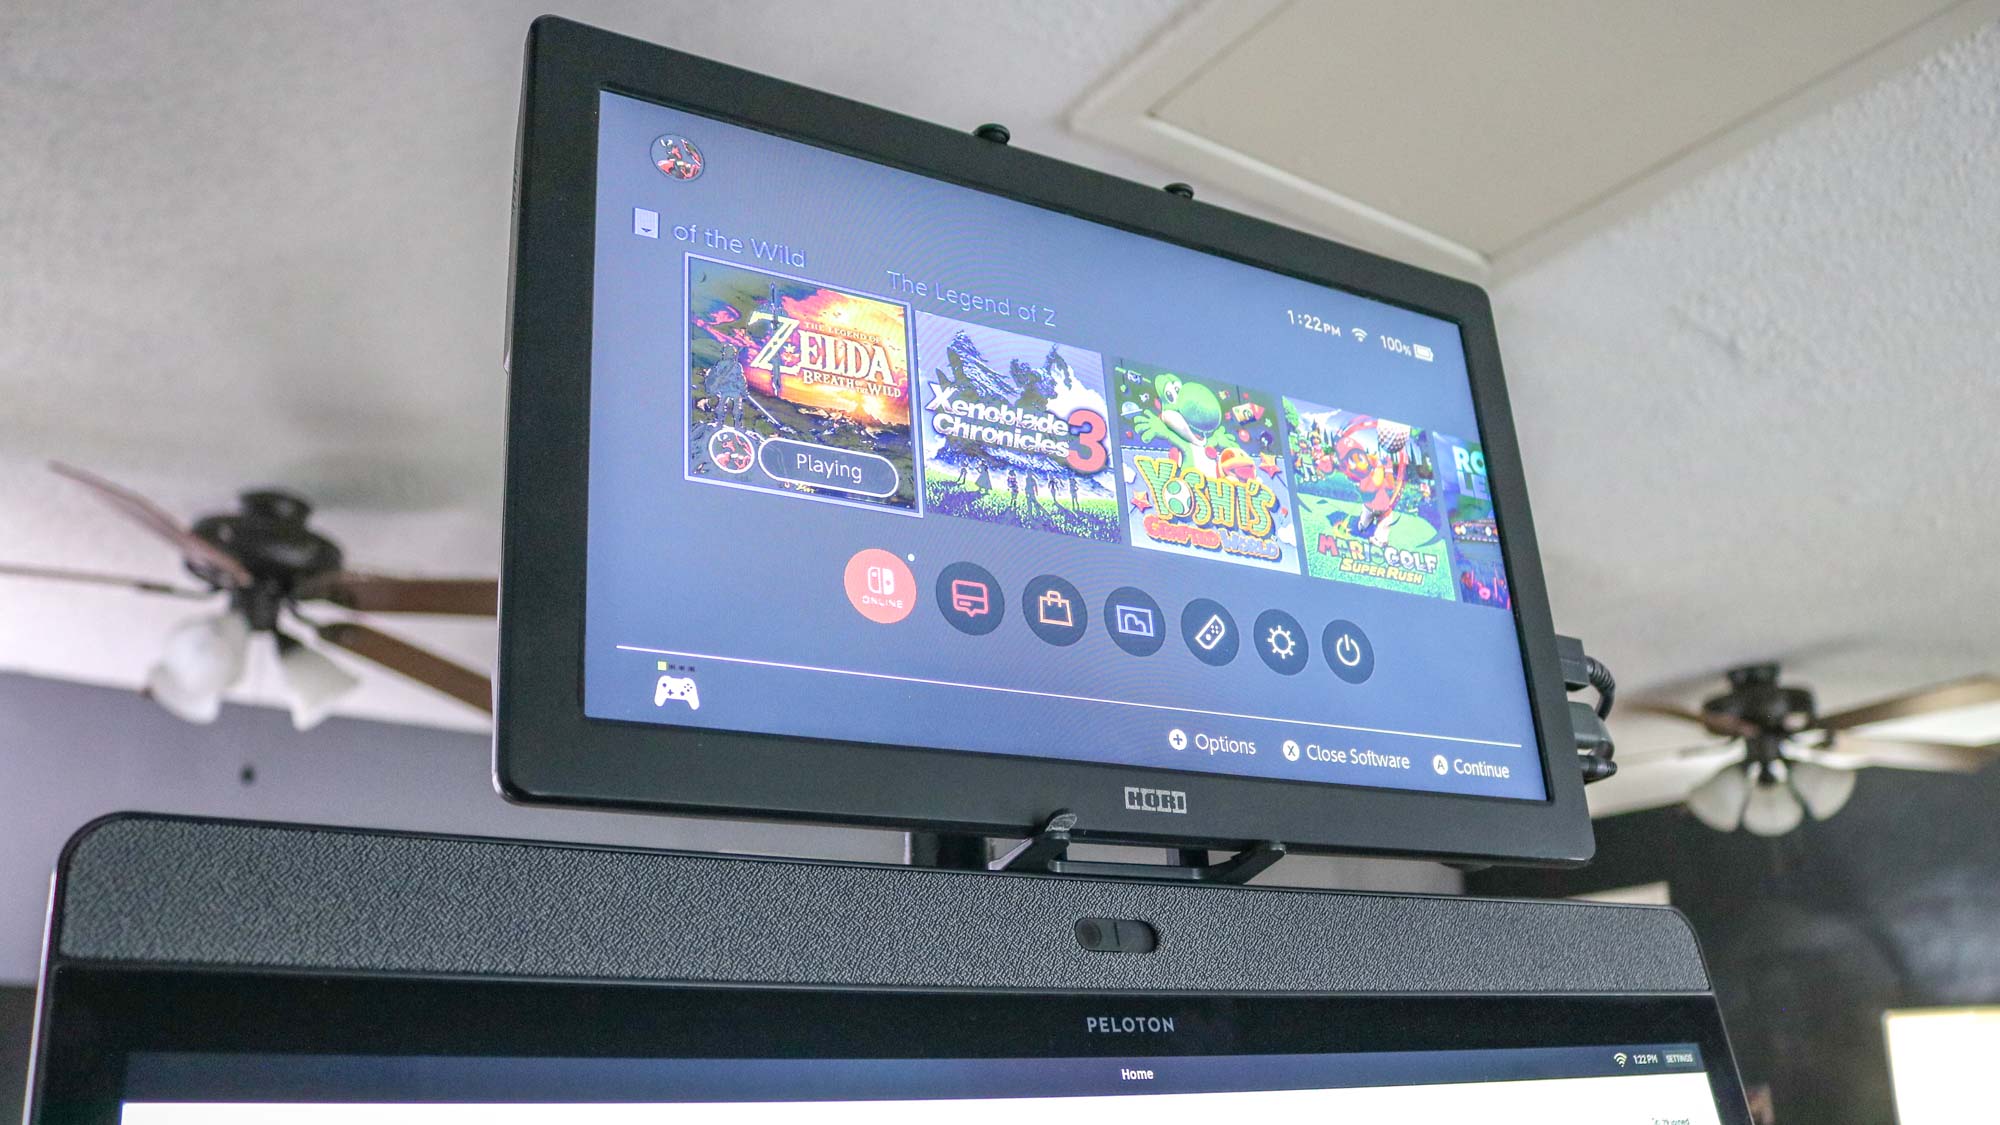
Making the trek to the gym can be hard, especially when you have a busy schedule which is why I and many others have a home gym instead. While I have a weight rack and a pull-up bar in my garage, I also have a Peloton Bike Plus in my game room since the heat out there can be brutal while doing cardio.
Getting a Peloton wasn’t actually my idea; it was my wife’s. Before we moved, she had started doing spin classes and really enjoyed them. However, when she couldn’t find a spin class near our new house, she decided to go with a Peloton — after checking out a few of the best Peloton alternatives first.
Although my wife loved the on-demand classes and Peloton’s charismatic instructors, we got pregnant shortly thereafter and as can happen with home exercise equipment, our Peloton Bike Plus sat in a corner and started gathering dust. I tried riding it myself and while the classes were pretty fun, they just weren’t for me as I’ve always preferred to go at my own pace.
The Peloton Bike Plus also wasn’t my first exercise bike as I had a folding one I loved back in our apartment. I really liked riding it while catching up on TV shows or even playing video games — something you just can’t do with a Peloton unless you hack or jailbreak it. Since this was my wife’s bike and hacking was off the table, I knew I had to come up with a creative workaround — and that's exactly what I did.
Designing the monitor mount
Adding a laptop tray on top of the handlebars of the Peloton Bike Plus or even hanging a tablet holder from its screen would have been the easiest solution to my problem. However, despite not being the biggest fan of Peloton’s classes, I love its user interface and the fact that it runs on top of Android.
I didn’t want to cover the screen with another one or block it with one of the best laptops. After a lot of brainstorming, I came up with a solution: I would mount another monitor on top of the Bike Plus’ screen. A dual-monitor setup made perfect sense as I would still have access to the Peloton UI while also being able to watch TV or play games. Now, I just had to figure out a way to make it work.
I initially thought of using a monitor arm to attach an old, 15.6-inch portable monitor to the monitor mount at the back of the Bike Plus. However, while testing this out, I realized that a metal monitor arm was actually heavier than my portable monitor. I saw a few videos online of DIY monitor arms made out of 1-inch PVC pipe and decided to go this route instead.
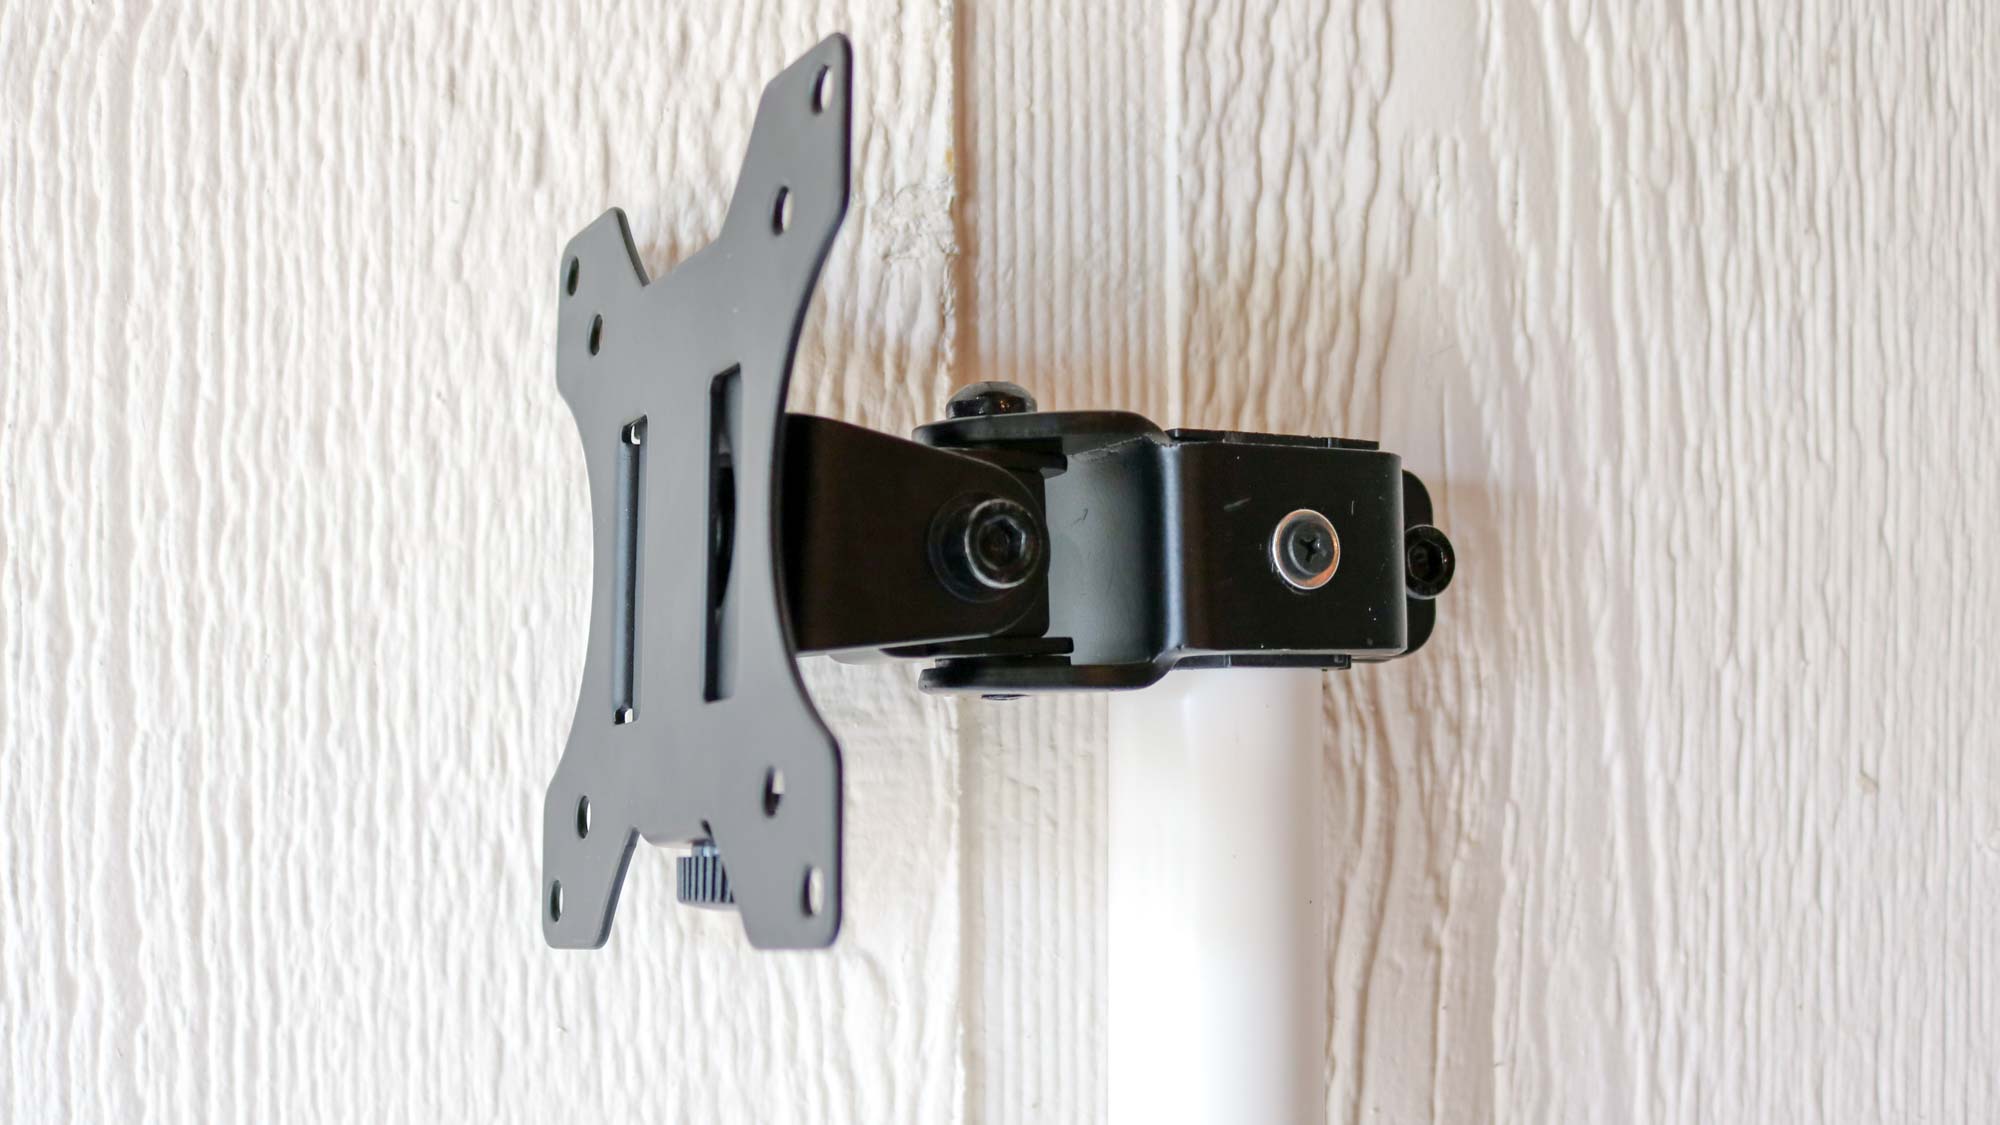
Not only is PVC pipe lighter but it’s also easy to cut to size and drill holes into. I took the VESA mount off a metal monitor stand and attached it to the PVC pipe using two screws. Since my portable monitor didn’t have VESA mounting holes, I used a VIVO Universal VESA Mount Adapter ($25, Amazon) to attach it to the pipe. This adapter also works with the best tablets.
In order to attach the PVC pipe to the back of the Peloton Bike Plus, I drilled holes on either side of the PVC and ran some cable ties through. I had to use two 10-inch cable ties attached together to have enough length to wrap them around both the PVC pipe and the Bike Plus’ monitor mount. Another reason why I used cable ties as opposed to something more permanent is that the whole setup can actually be taken down in just a few minutes
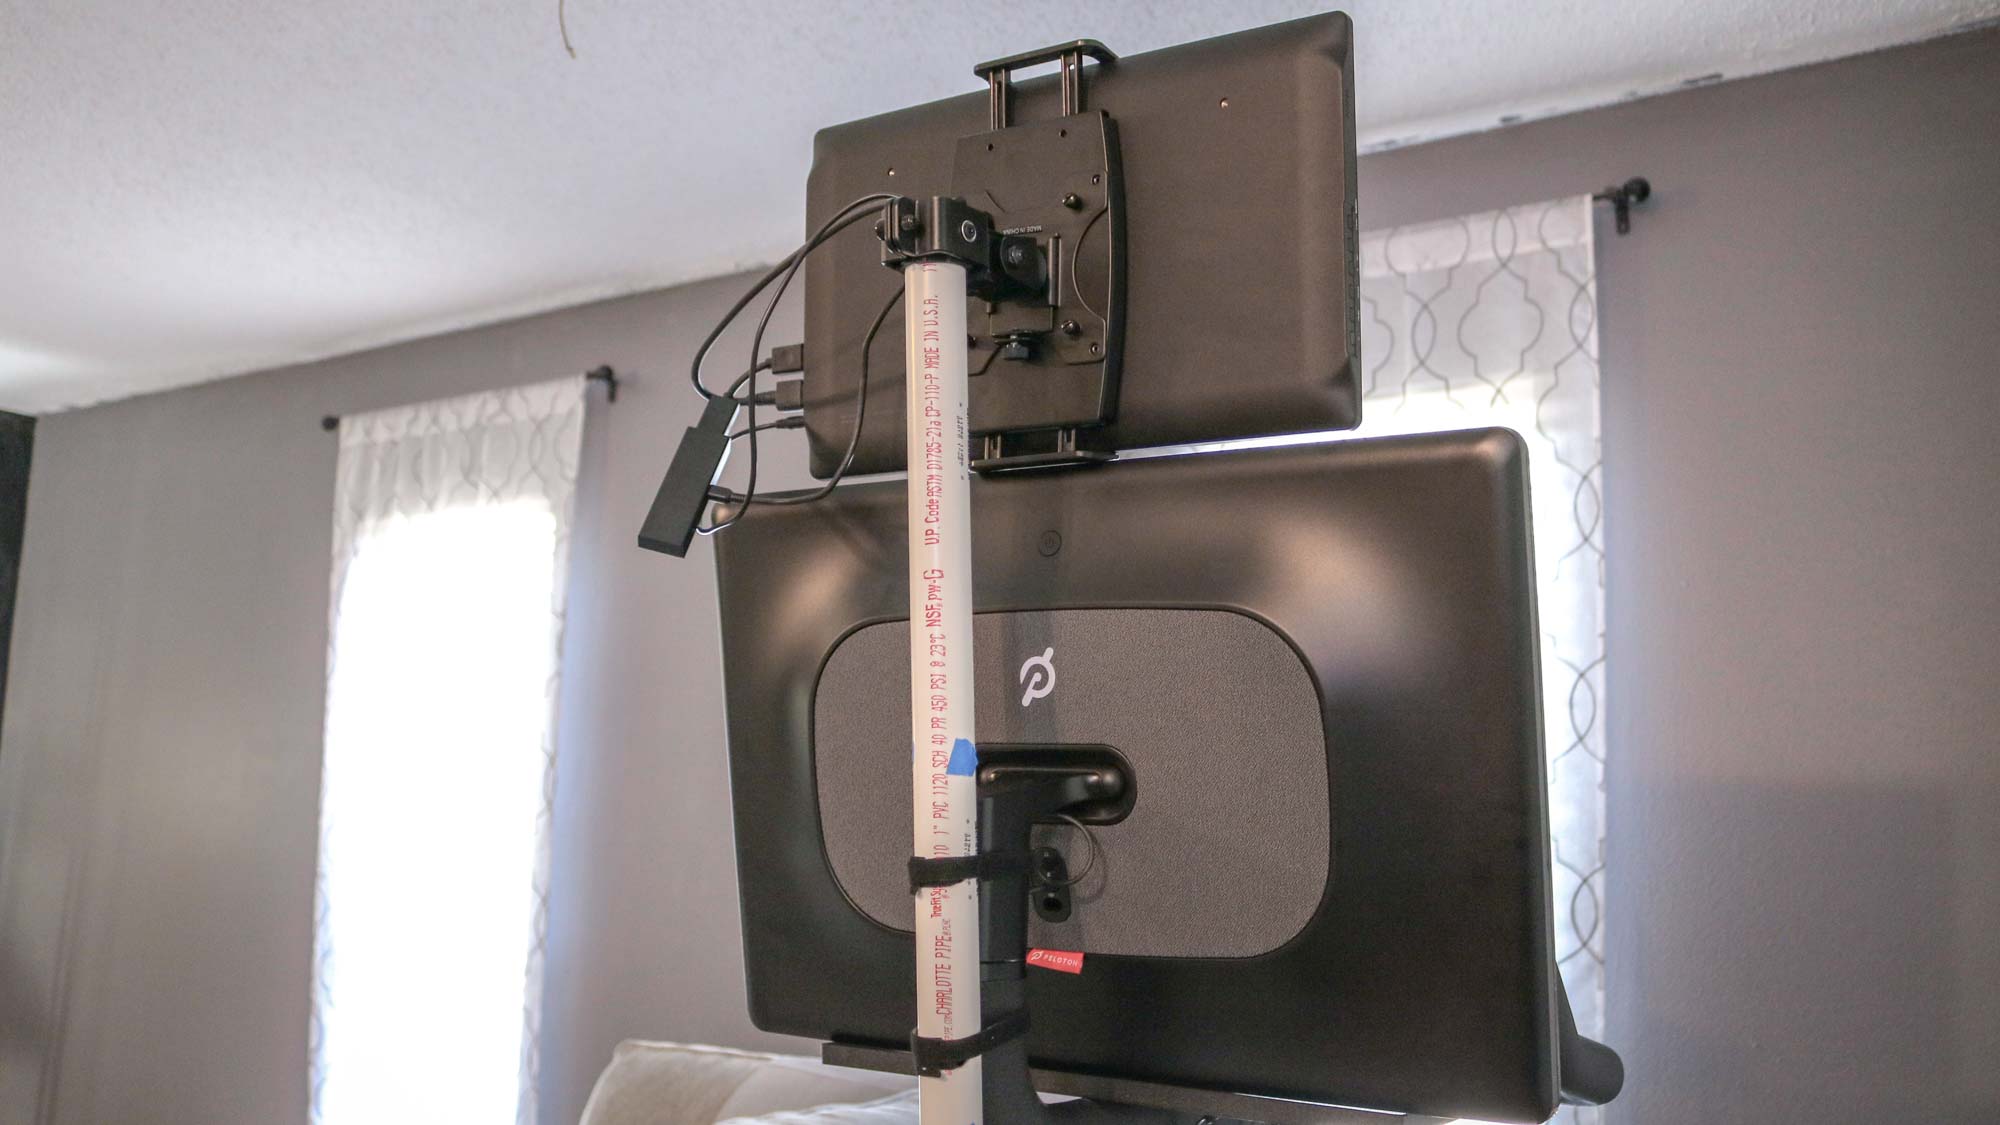
With just two sets of holes and my cable ties pushed through them, I managed to attach my DIY PVC monitor mount to the back of the Bike Plus and to my surprise — it stayed in place. During this prototype phase, I used an Amazon Fire TV Stick 4K Max to test and make sure everything was working. But I wasn’t done there.
Besides the classes and features available on the Bike Plus, what makes it one of the best exercise bikes in my opinion is its design. I didn’t want my DIY monitor arm to detract from the beauty of its black, powder-coated, carbon steel frame, which is why I took everything down and painted the PVC pipe.
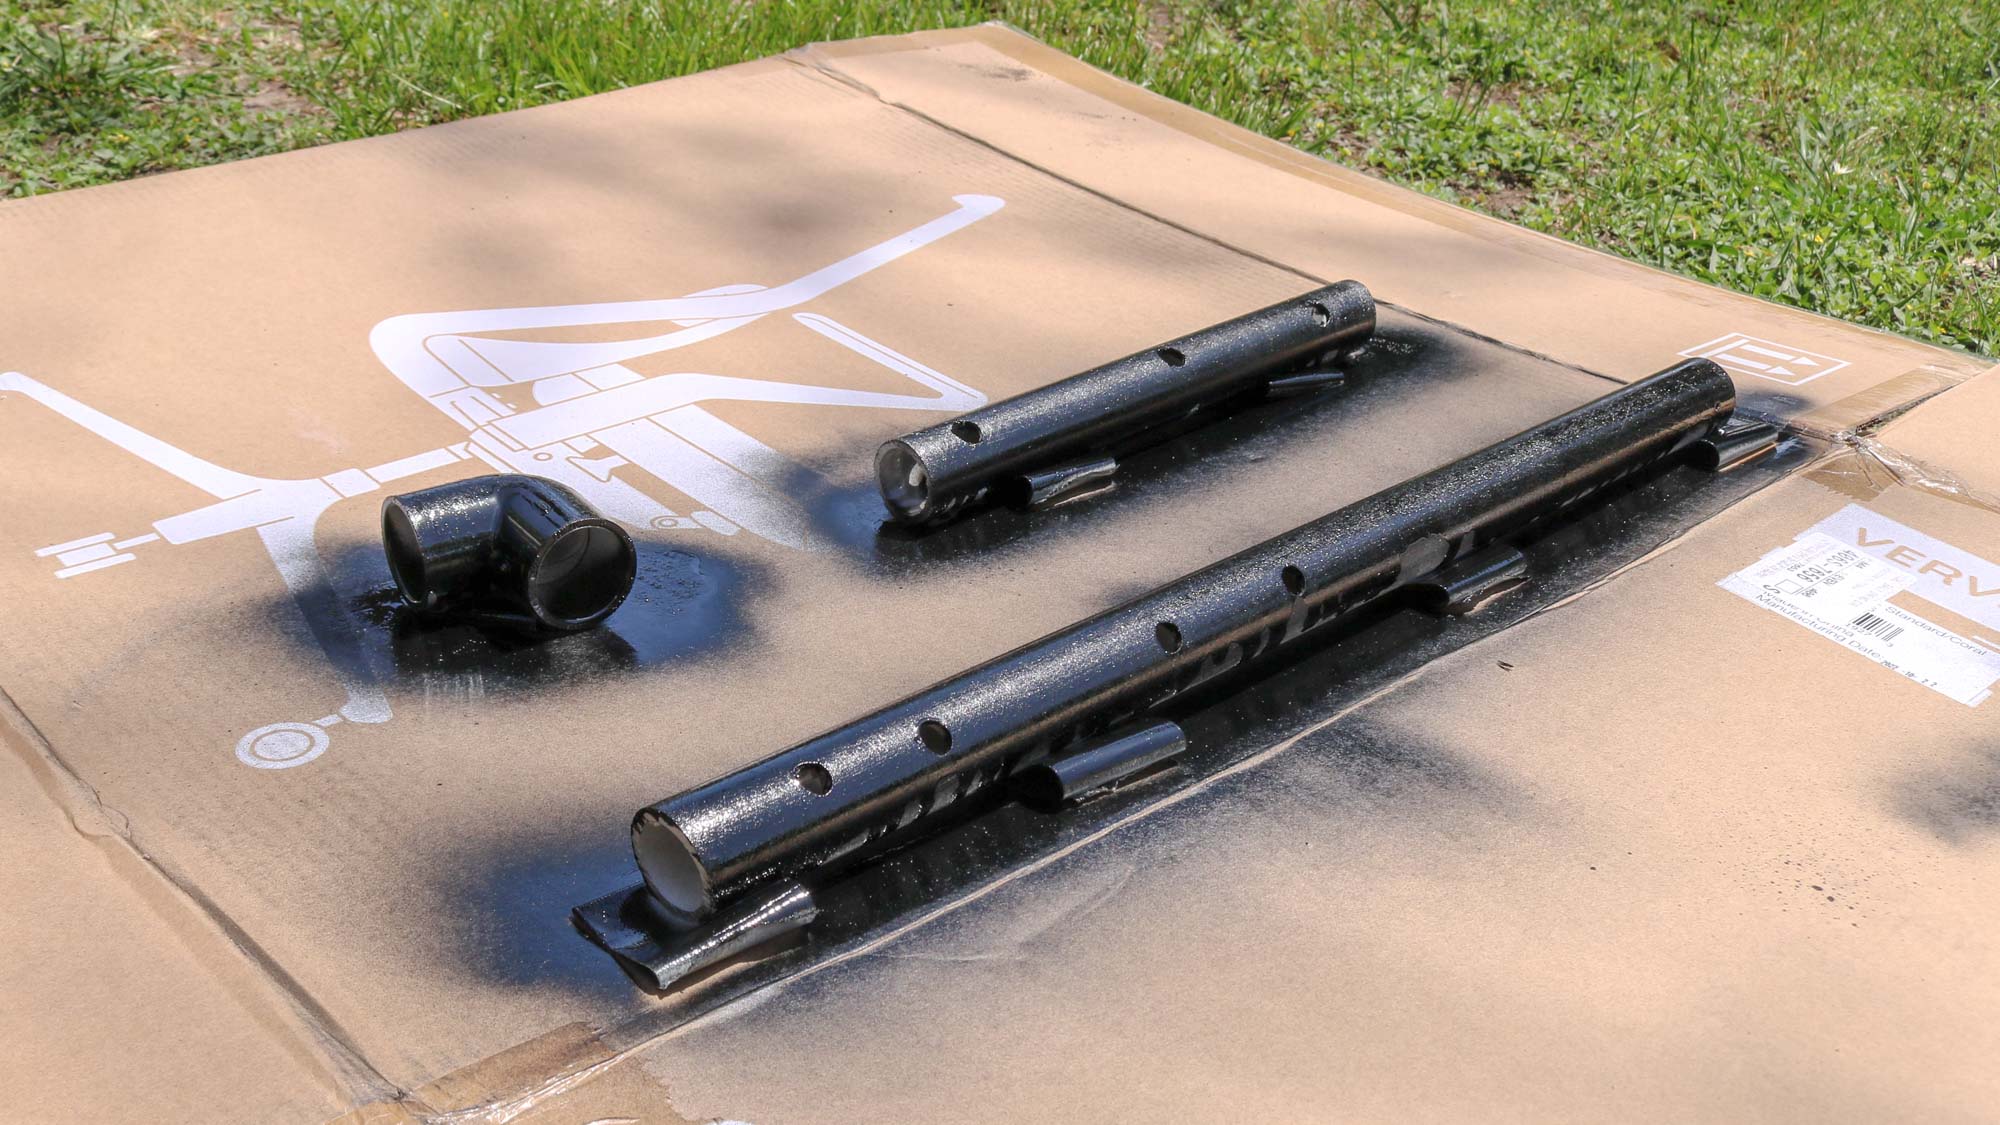
I used nail polish remover to take off the red writing on the PVC pipe and then sanded it down so that the paint would stick. With a box from one of the best office chairs, I carefully painted the PVC pipe after drilling a few extra holes so that it would attach firmly to my Bike Plus.
Putting it all together
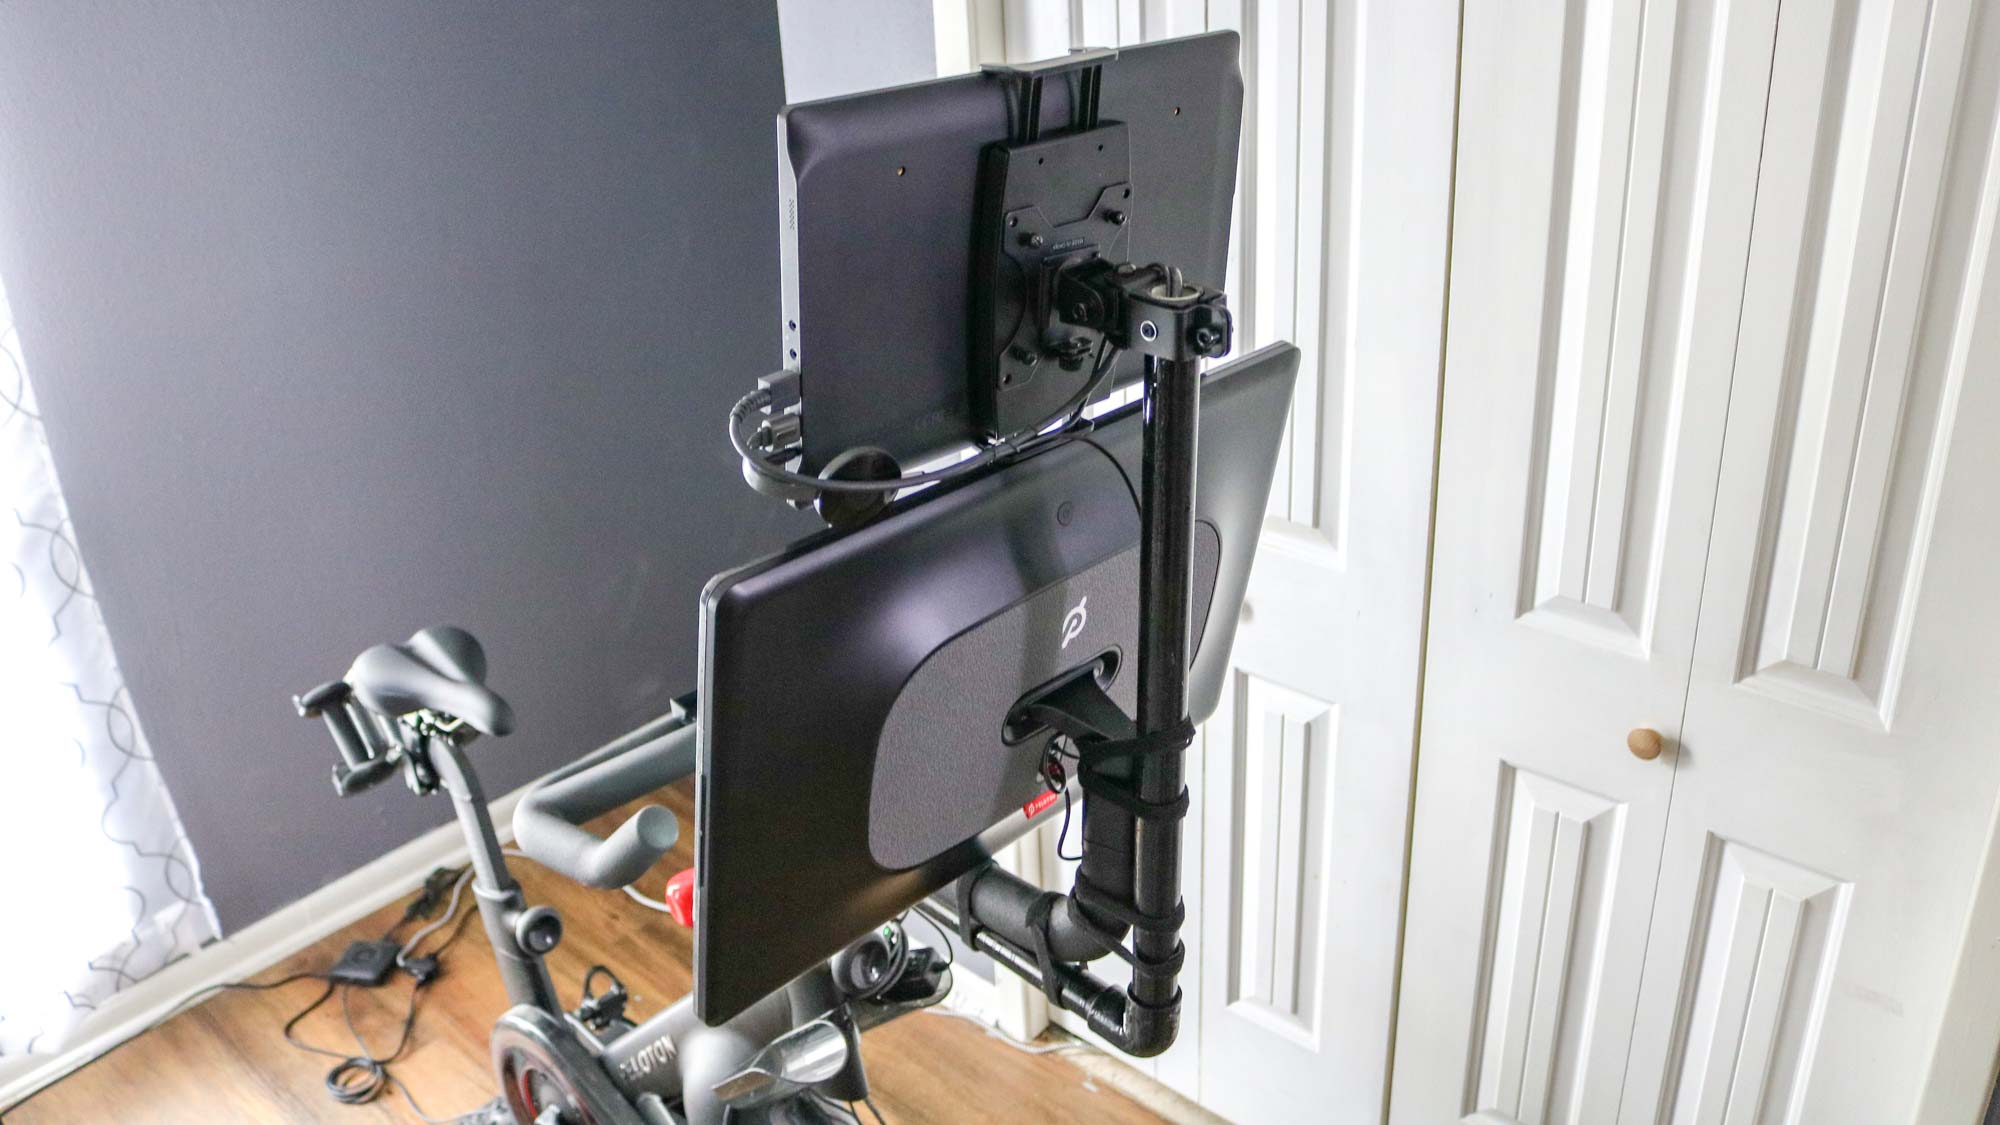
Besides painting and adding more holes for additional cable ties, I also added an elbow joint along with another piece of PVC pipe. This way my DIY monitor arm would be connected to the Bike Plus’ monitor mount at more points. However, this also allowed me to run an HDMI cable along with the portable monitor’s power adapter up to the top of the Bike Plus from its water bottle holder.
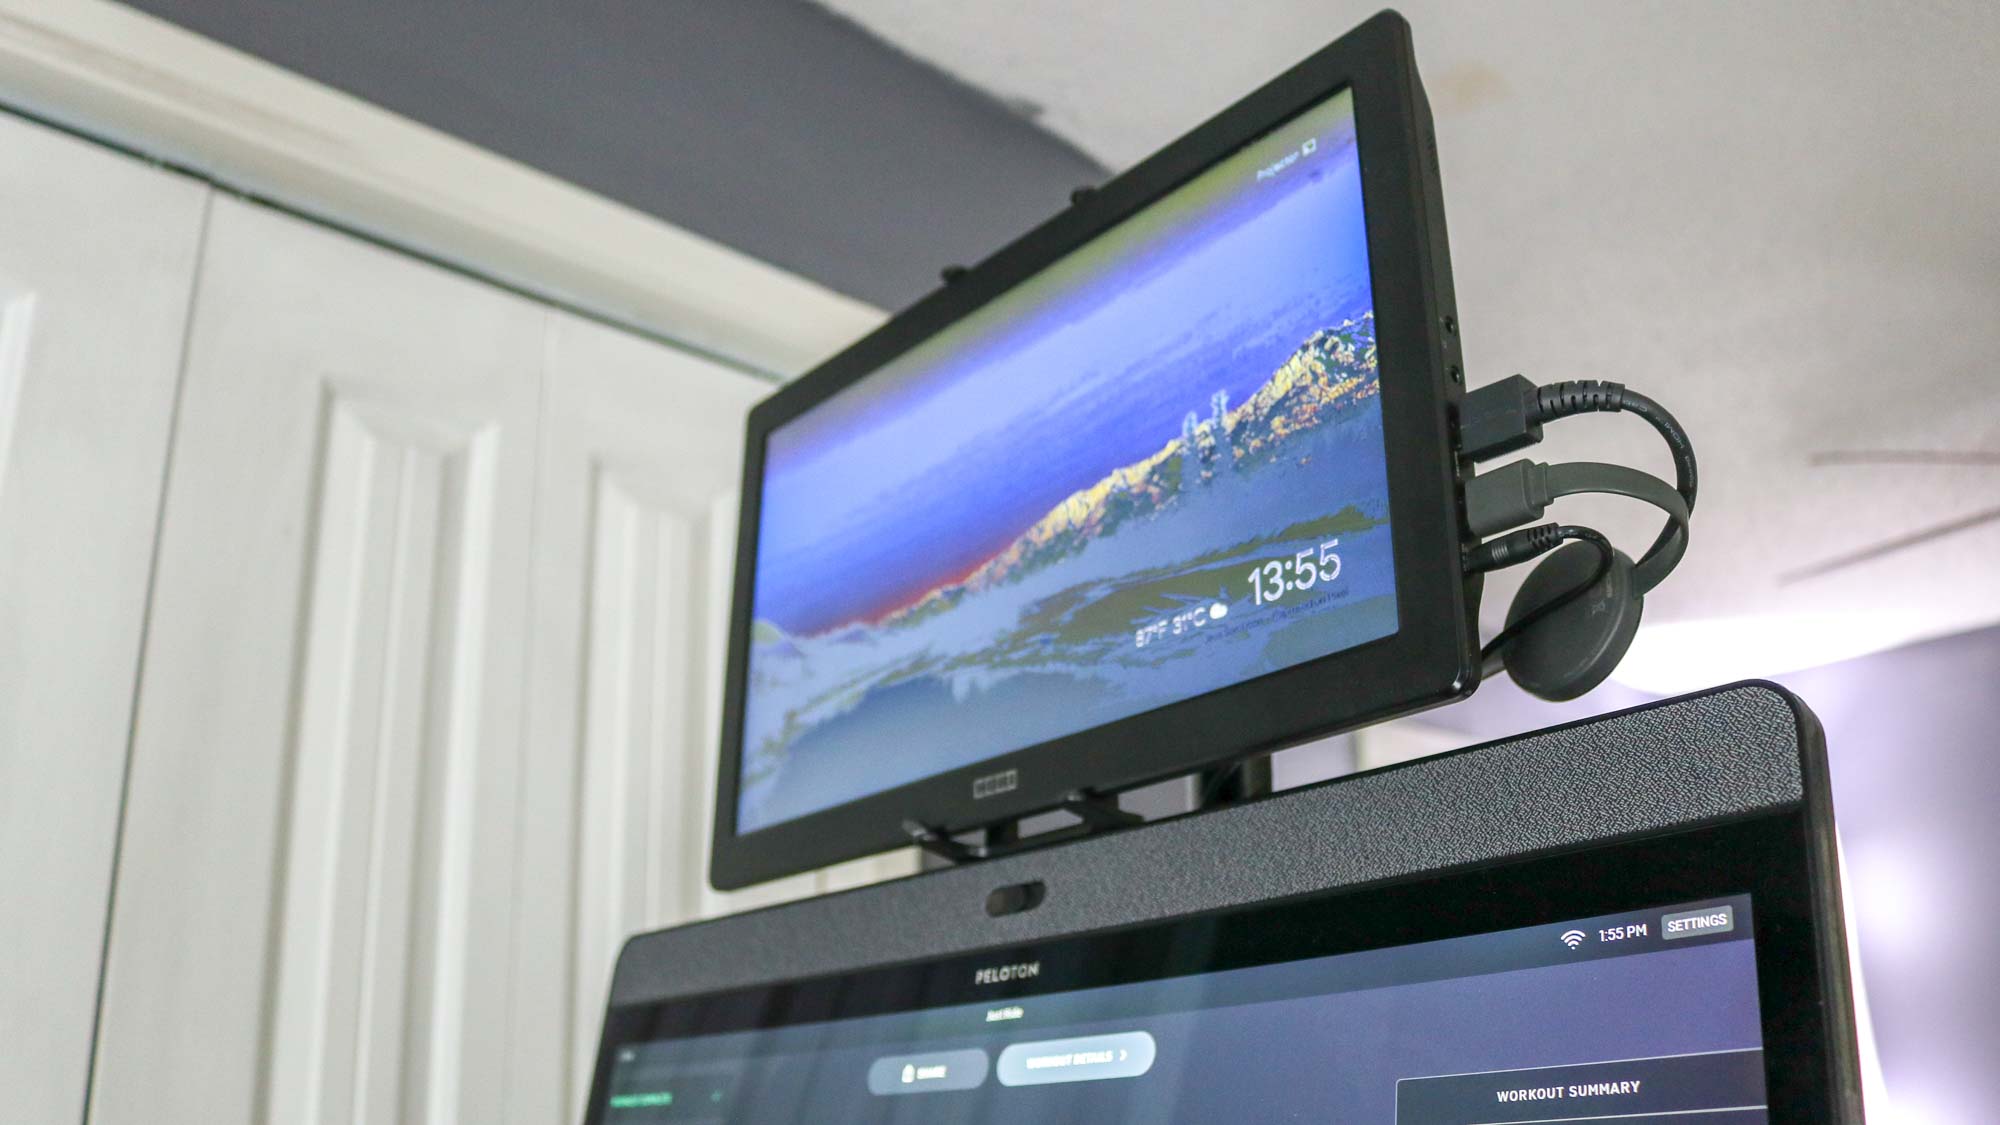
I also ran a micro USB cable through the pipe to power a Chromecast connected to the portable monitor. However, after doing so, I realized I didn’t have enough power outlets on the extension cord I was using. Fortunately, with a USB-C to USB-A adapter, I was able to power the Chromecast from the USB-C port at the back of the Peloton.
PVC pipe ($7, Home Depot)
10-inch cable ties ($15, Amazon)
Spray paint ($7, Amazon)
VIVO Universal VESA Mount Adapter ($25, Amazon)
DoublePlus Phone Holder ($11, Amazon)
Genki Covert Dock Mini ($50, Amazon)
Google Chromecast 3rd Gen ($45, Walmart)
Portable monitor ($99, Amazon)
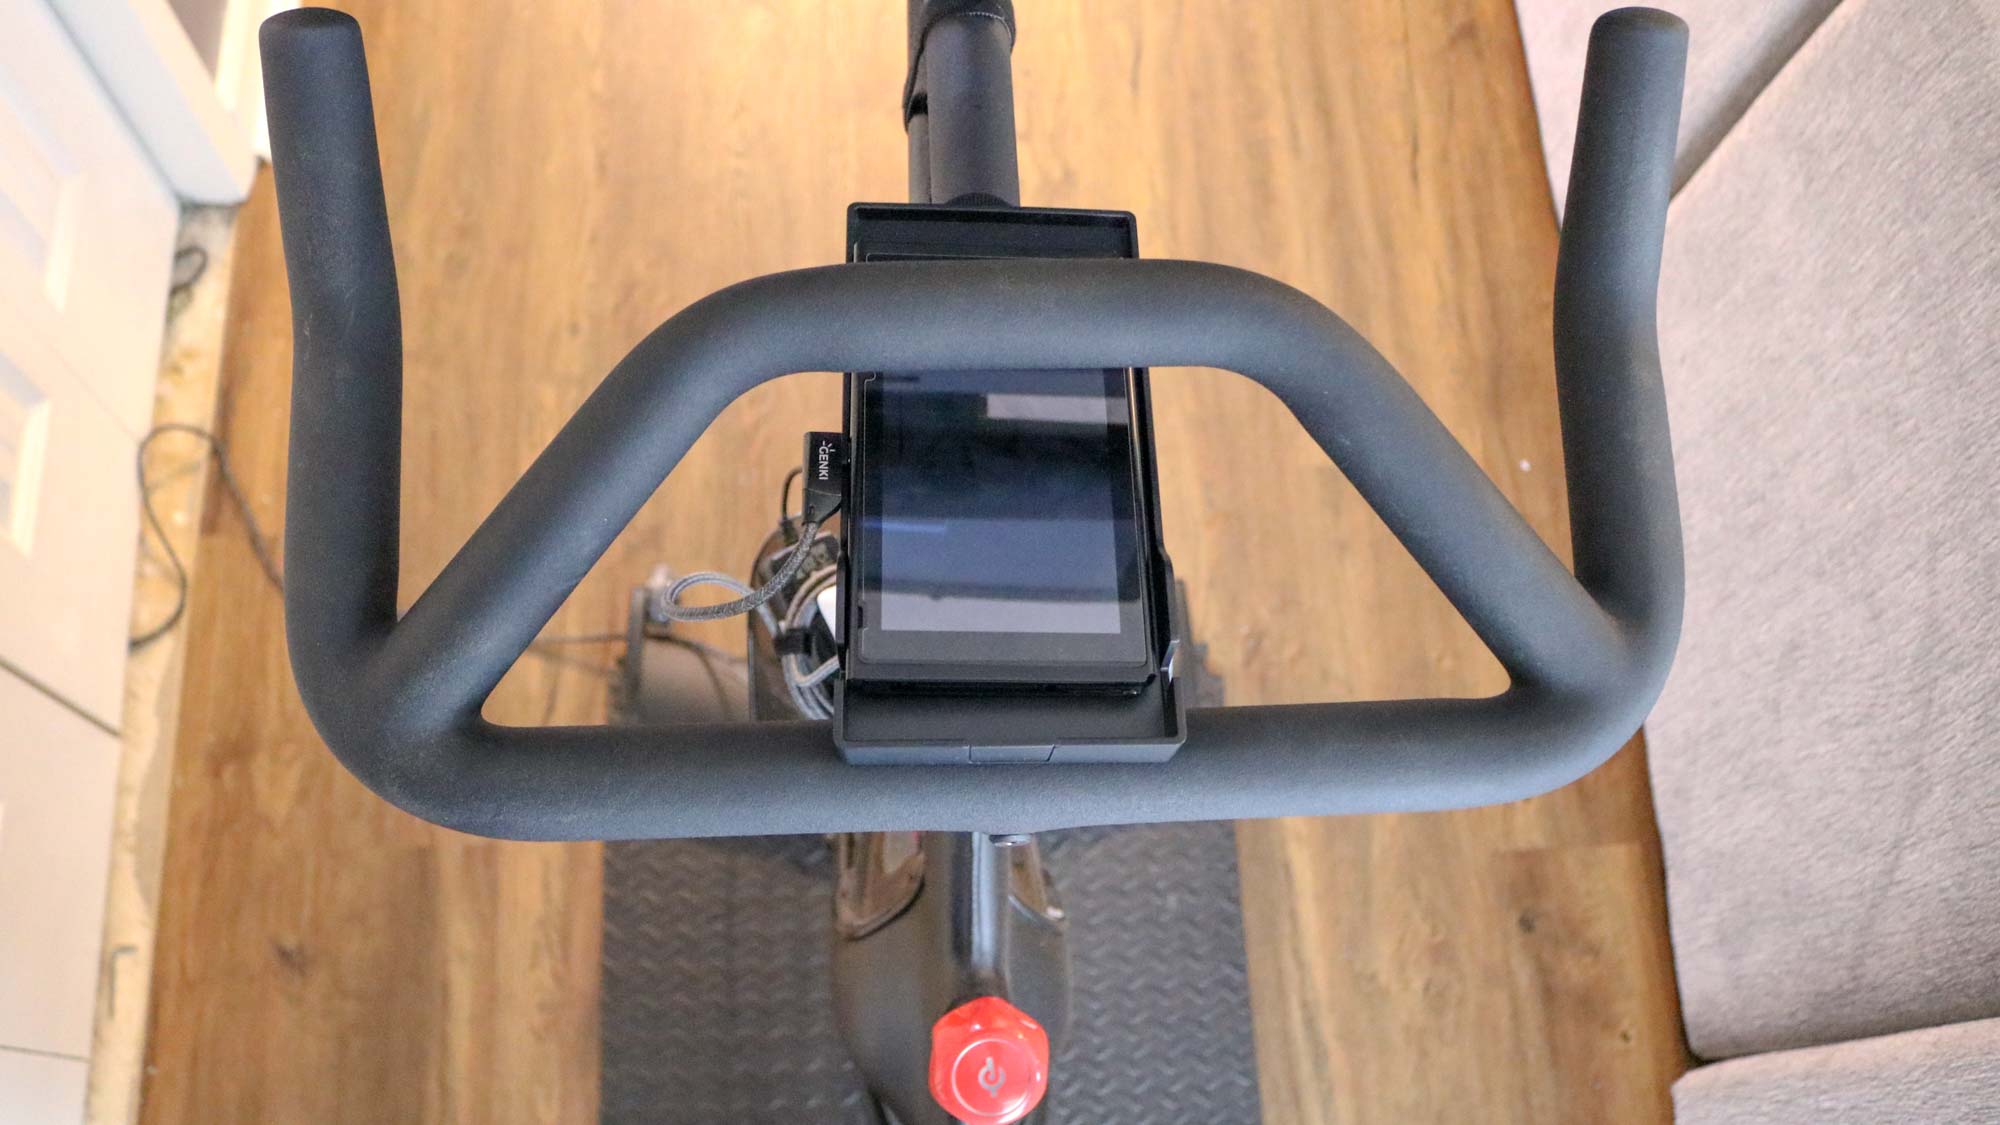
As I was already using the monitor mount at the back for my DIY monitor arm, I used a DoublePlus Phone Holder ($11, Amazon) designed to attach under the handlebars of the Bike Plus for my Nintendo Switch. Instead of using an official dock, I actually tried using a third-party dock for the first time. Unlike other ‘unofficial’ docks that have been known to fry the Nintendo Switch, the Genki Covert Dock Mini ($50, Amazon) uses the correct voltage. It’s also absolutely tiny and 20 times smaller than the original Switch dock.
The power adapter for the portable monitor along with the Genki Covert Dock Mini are plugged into an extension cord that sits on the Bike Plus’ water bottle holder on the left side. Their cables then run through the PVC pipe which goes horizontally before going vertically up to the portable monitor.
Tackling my backlog one ride at a time
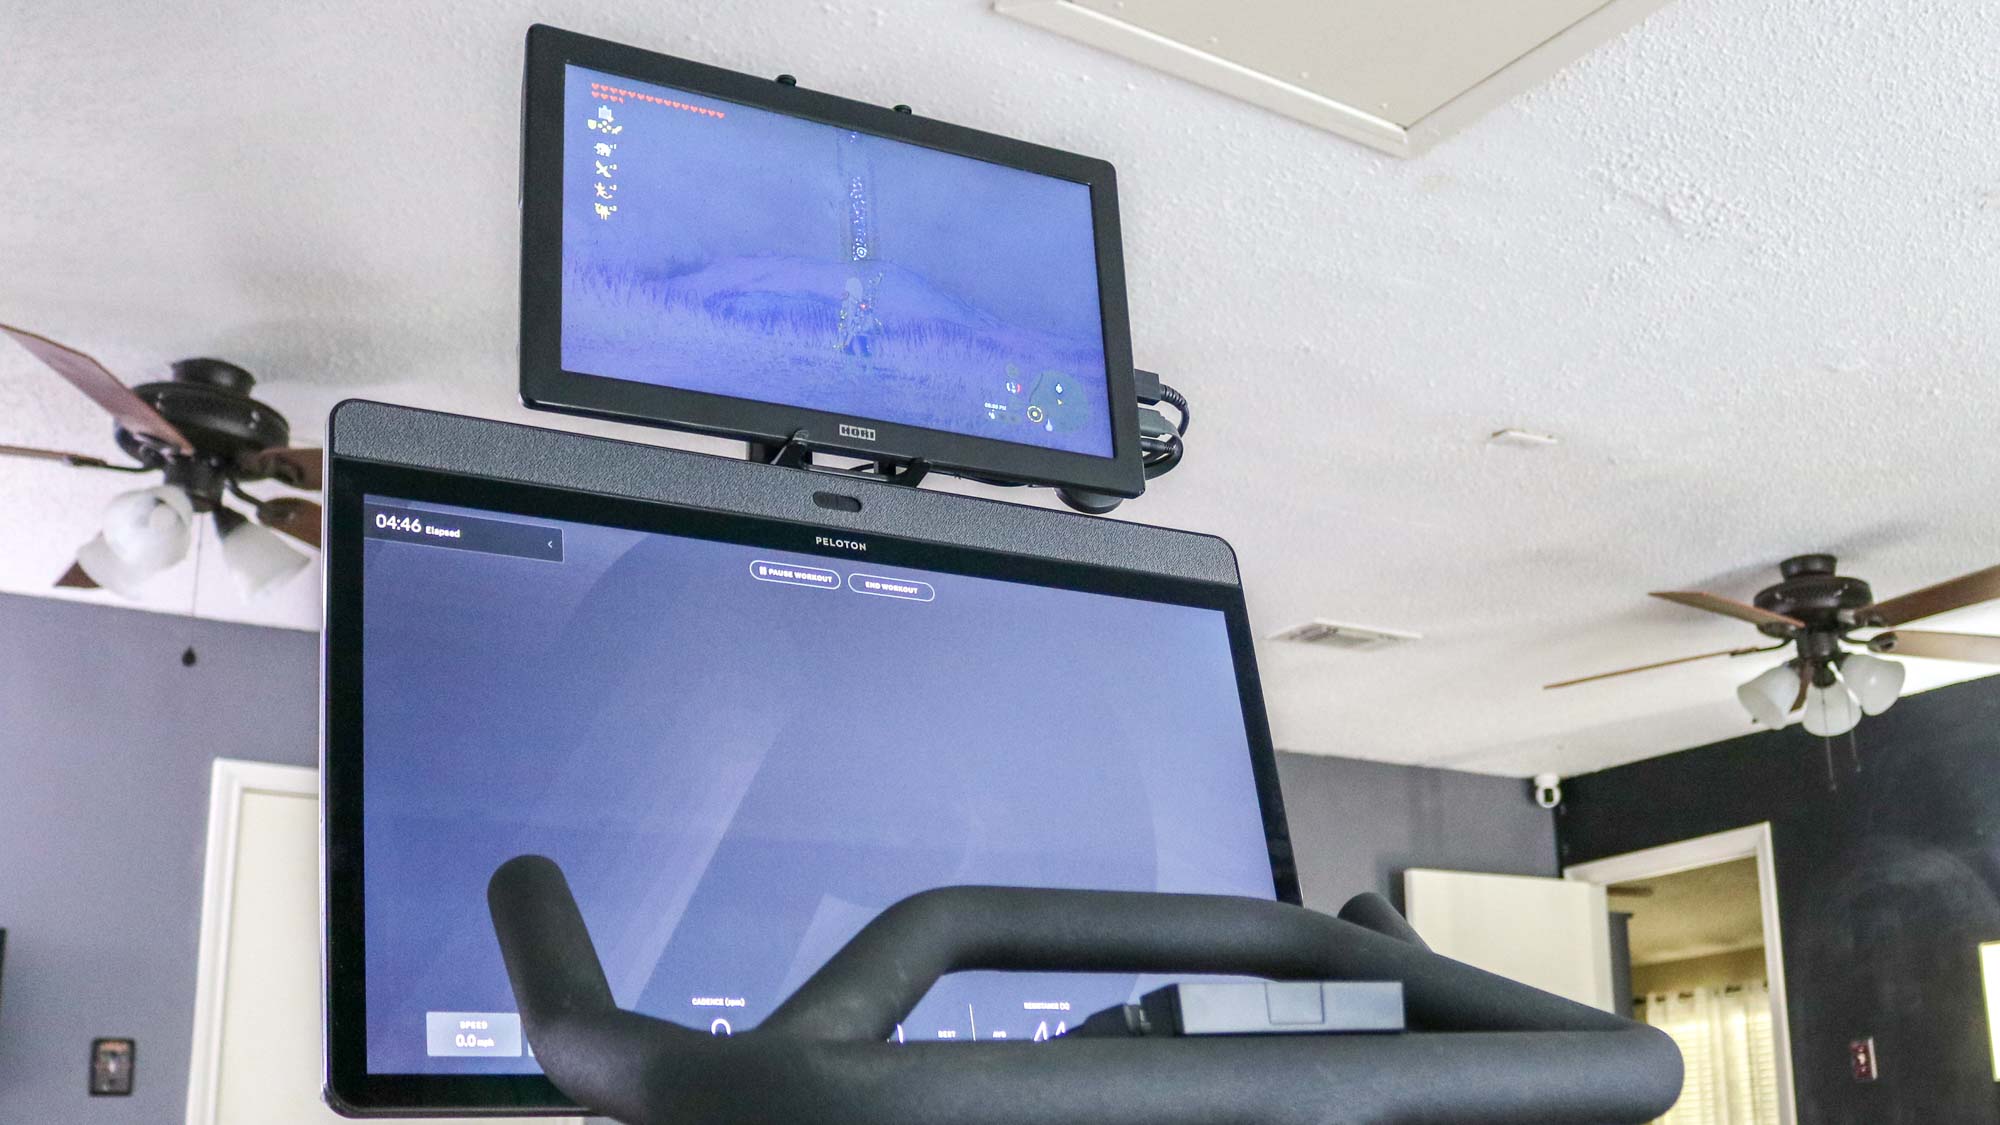
I know die-hard Peloton fans will probably scoff at my DIY monitor arm and the fact that I now have a portable monitor mounted above the Bike Plus’ main display. However, I’m loving the setup so far and my Peloton hasn’t seen this much usage since it was first delivered.
With a one-year-old son, I just don’t have the time to exercise and play video games anymore. I have to choose between one of the two with the little time I have left each day. However, thanks to my new setup, I can do both simultaneously. Sure, my rides may not be as intensive as those of the Tom’s Guide fitness team but with exercise, what works for one person may not work for another.
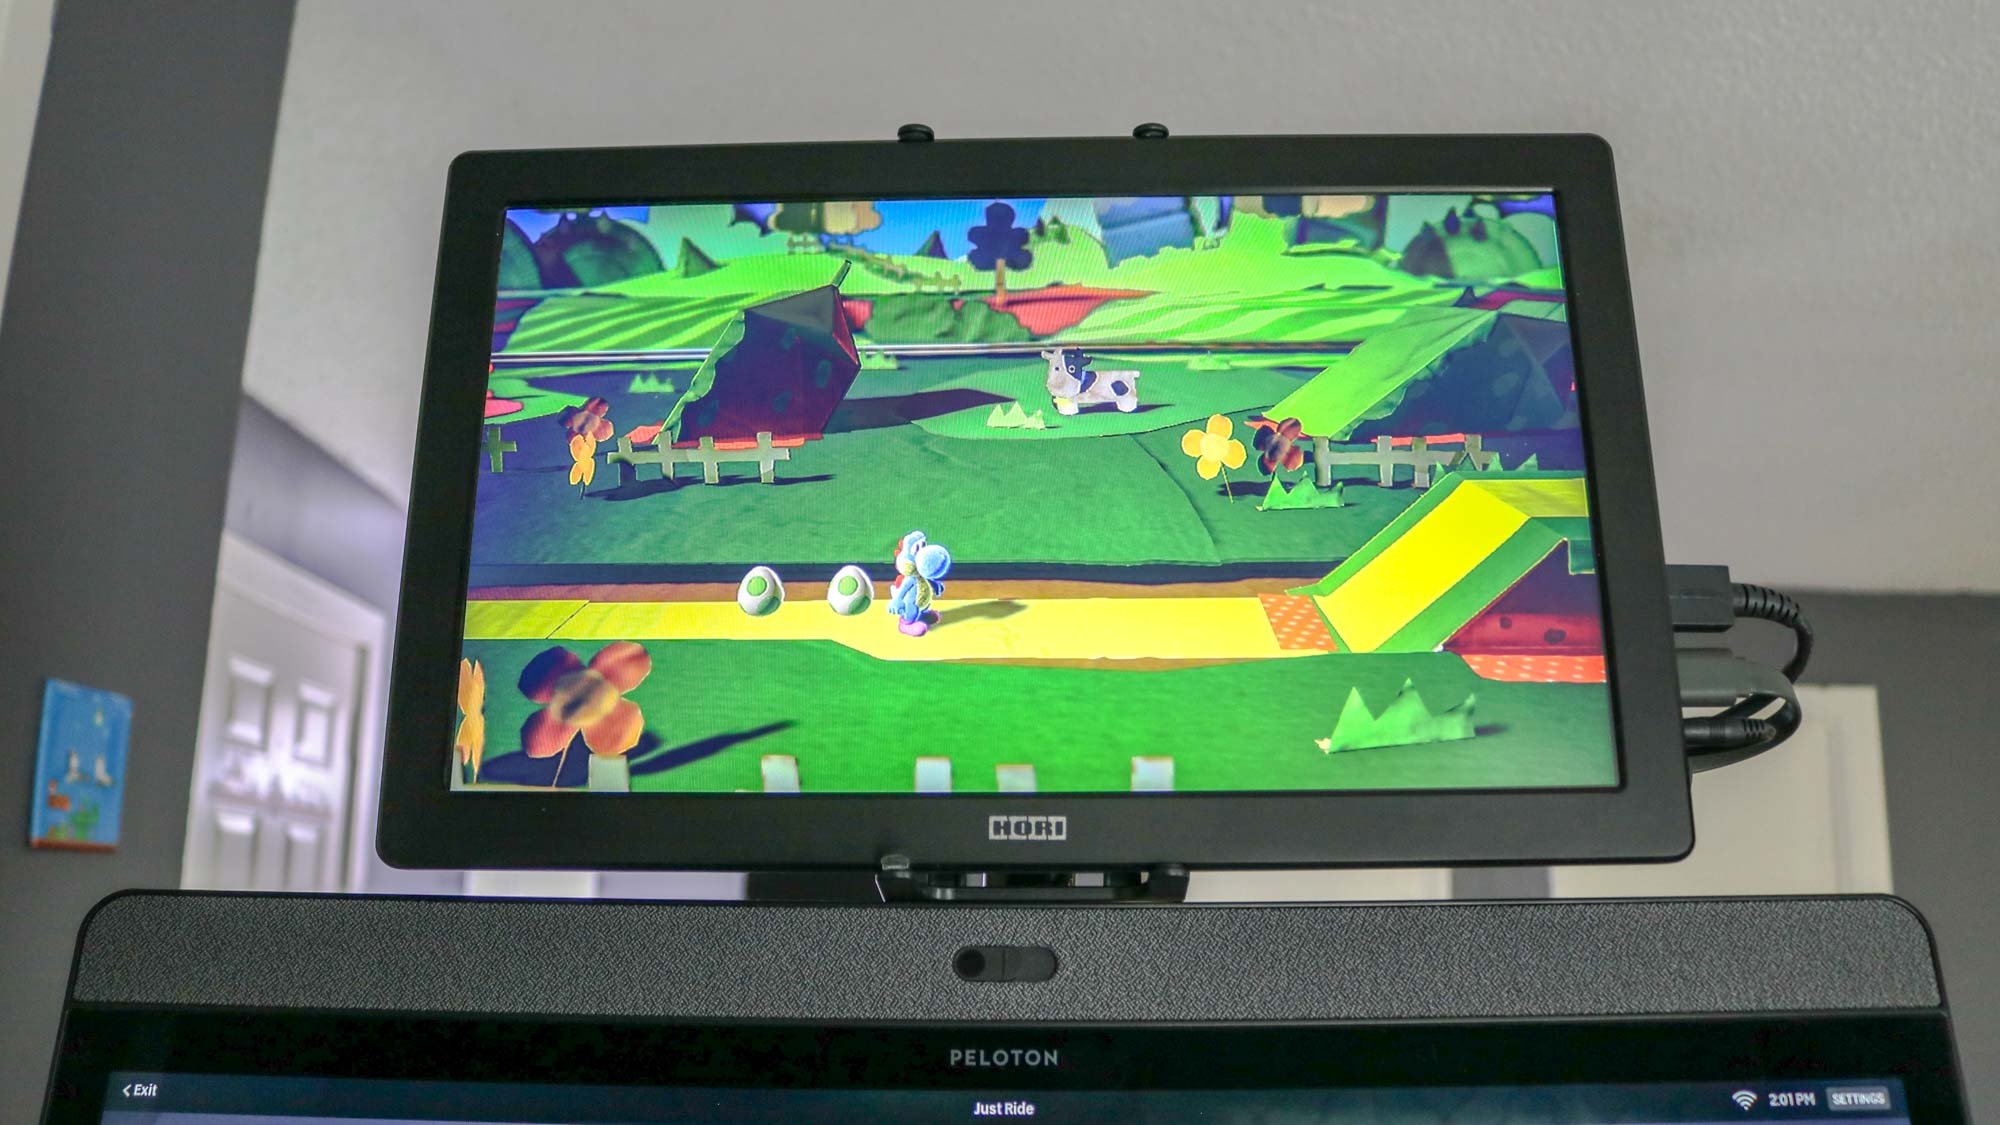
Still, gaming while riding a stationary bike is a bit different. Though you might have a difficult time playing fast-paced games, I love grinding my way through lengthy JRPGs like Persona 5 Royal and Xenoblade Chronicles 3 while on my bike. I also enjoy playing first-party Nintendo games like Yoshi’s Crafted World which are a bit slower during my rides.
I had concerns about the stability of my DIY monitor arm while riding my Peloton Bike Plus but I’m happy to report that it hasn't fallen down yet, even when unclipping the Peloton shoes. In fact, I’ve had so much fun with my new setup that I’m even considering picking up some pedal converters for my Peloton so that my friends can try it out without having to pick up a pair of the best Peloton shoes.
Unlike when I turned an old monitor into a digital dashboard or used smart lights to decorate for the holidays, this project actually took over a month to come to fruition and I even took my son to the hardware store for the first time to help me pick out the PVC pipe.
I’ve now been using my upgraded Peloton Bike Plus for the past week and hopefully with a backlog full of the best Nintendo Switch games and a Chromecast to watch new TV shows and movies from the best streaming services, I’ll keep up with it this time around. Even if I don’t though, I did manage to fix one of my biggest gripes with the Peloton without having to hack my Bike Plus.
More from Tom's Guide
Sign up to get the BEST of Tom's Guide direct to your inbox.
Get instant access to breaking news, the hottest reviews, great deals and helpful tips.

Anthony Spadafora is the managing editor for security and home office furniture at Tom’s Guide where he covers everything from data breaches to password managers and the best way to cover your whole home or business with Wi-Fi. He also reviews standing desks, office chairs and other home office accessories with a penchant for building desk setups. Before joining the team, Anthony wrote for ITProPortal while living in Korea and later for TechRadar Pro after moving back to the US. Based in Houston, Texas, when he’s not writing Anthony can be found tinkering with PCs and game consoles, managing cables and upgrading his smart home.
