9 essential Returnal tips and tricks
Live, die, repeat, is the name of the game in Returnal, but make the cycle less gruelling with our tips and tricks
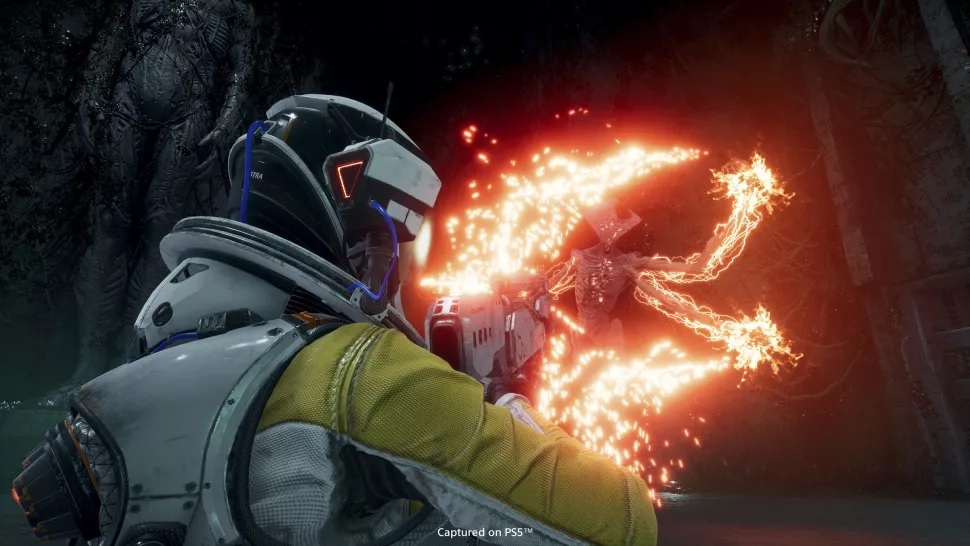
Returnal is one of a handful of PS5 exclusive games available right now, and if you're wondering whether or not to pick it up, the answer is "yes." We gave it an almost perfect score in Returnal review, and are loving the next-gen features it offers. If you like spooky sci-fi, shoot-'em-ups, and the challenge of a roguelike, Returnal is worth a look.
While there's no avoiding the fact that you're going to spend a lot of time dying in Returnal, there are ways to make the cycles easier. Having a bit of spoiler-free knowledge at the outset is going to make things significantly easier on you. We've rounded up some essential Returnal tips and tricks to help you survive on Atropos, and get the best out of the never-ending time loop.
- Where to buy: PS5 restock update today
- PS5 review: The future of console gaming is here
- Plus: The best PS5 games you can play right now
1. Take your time
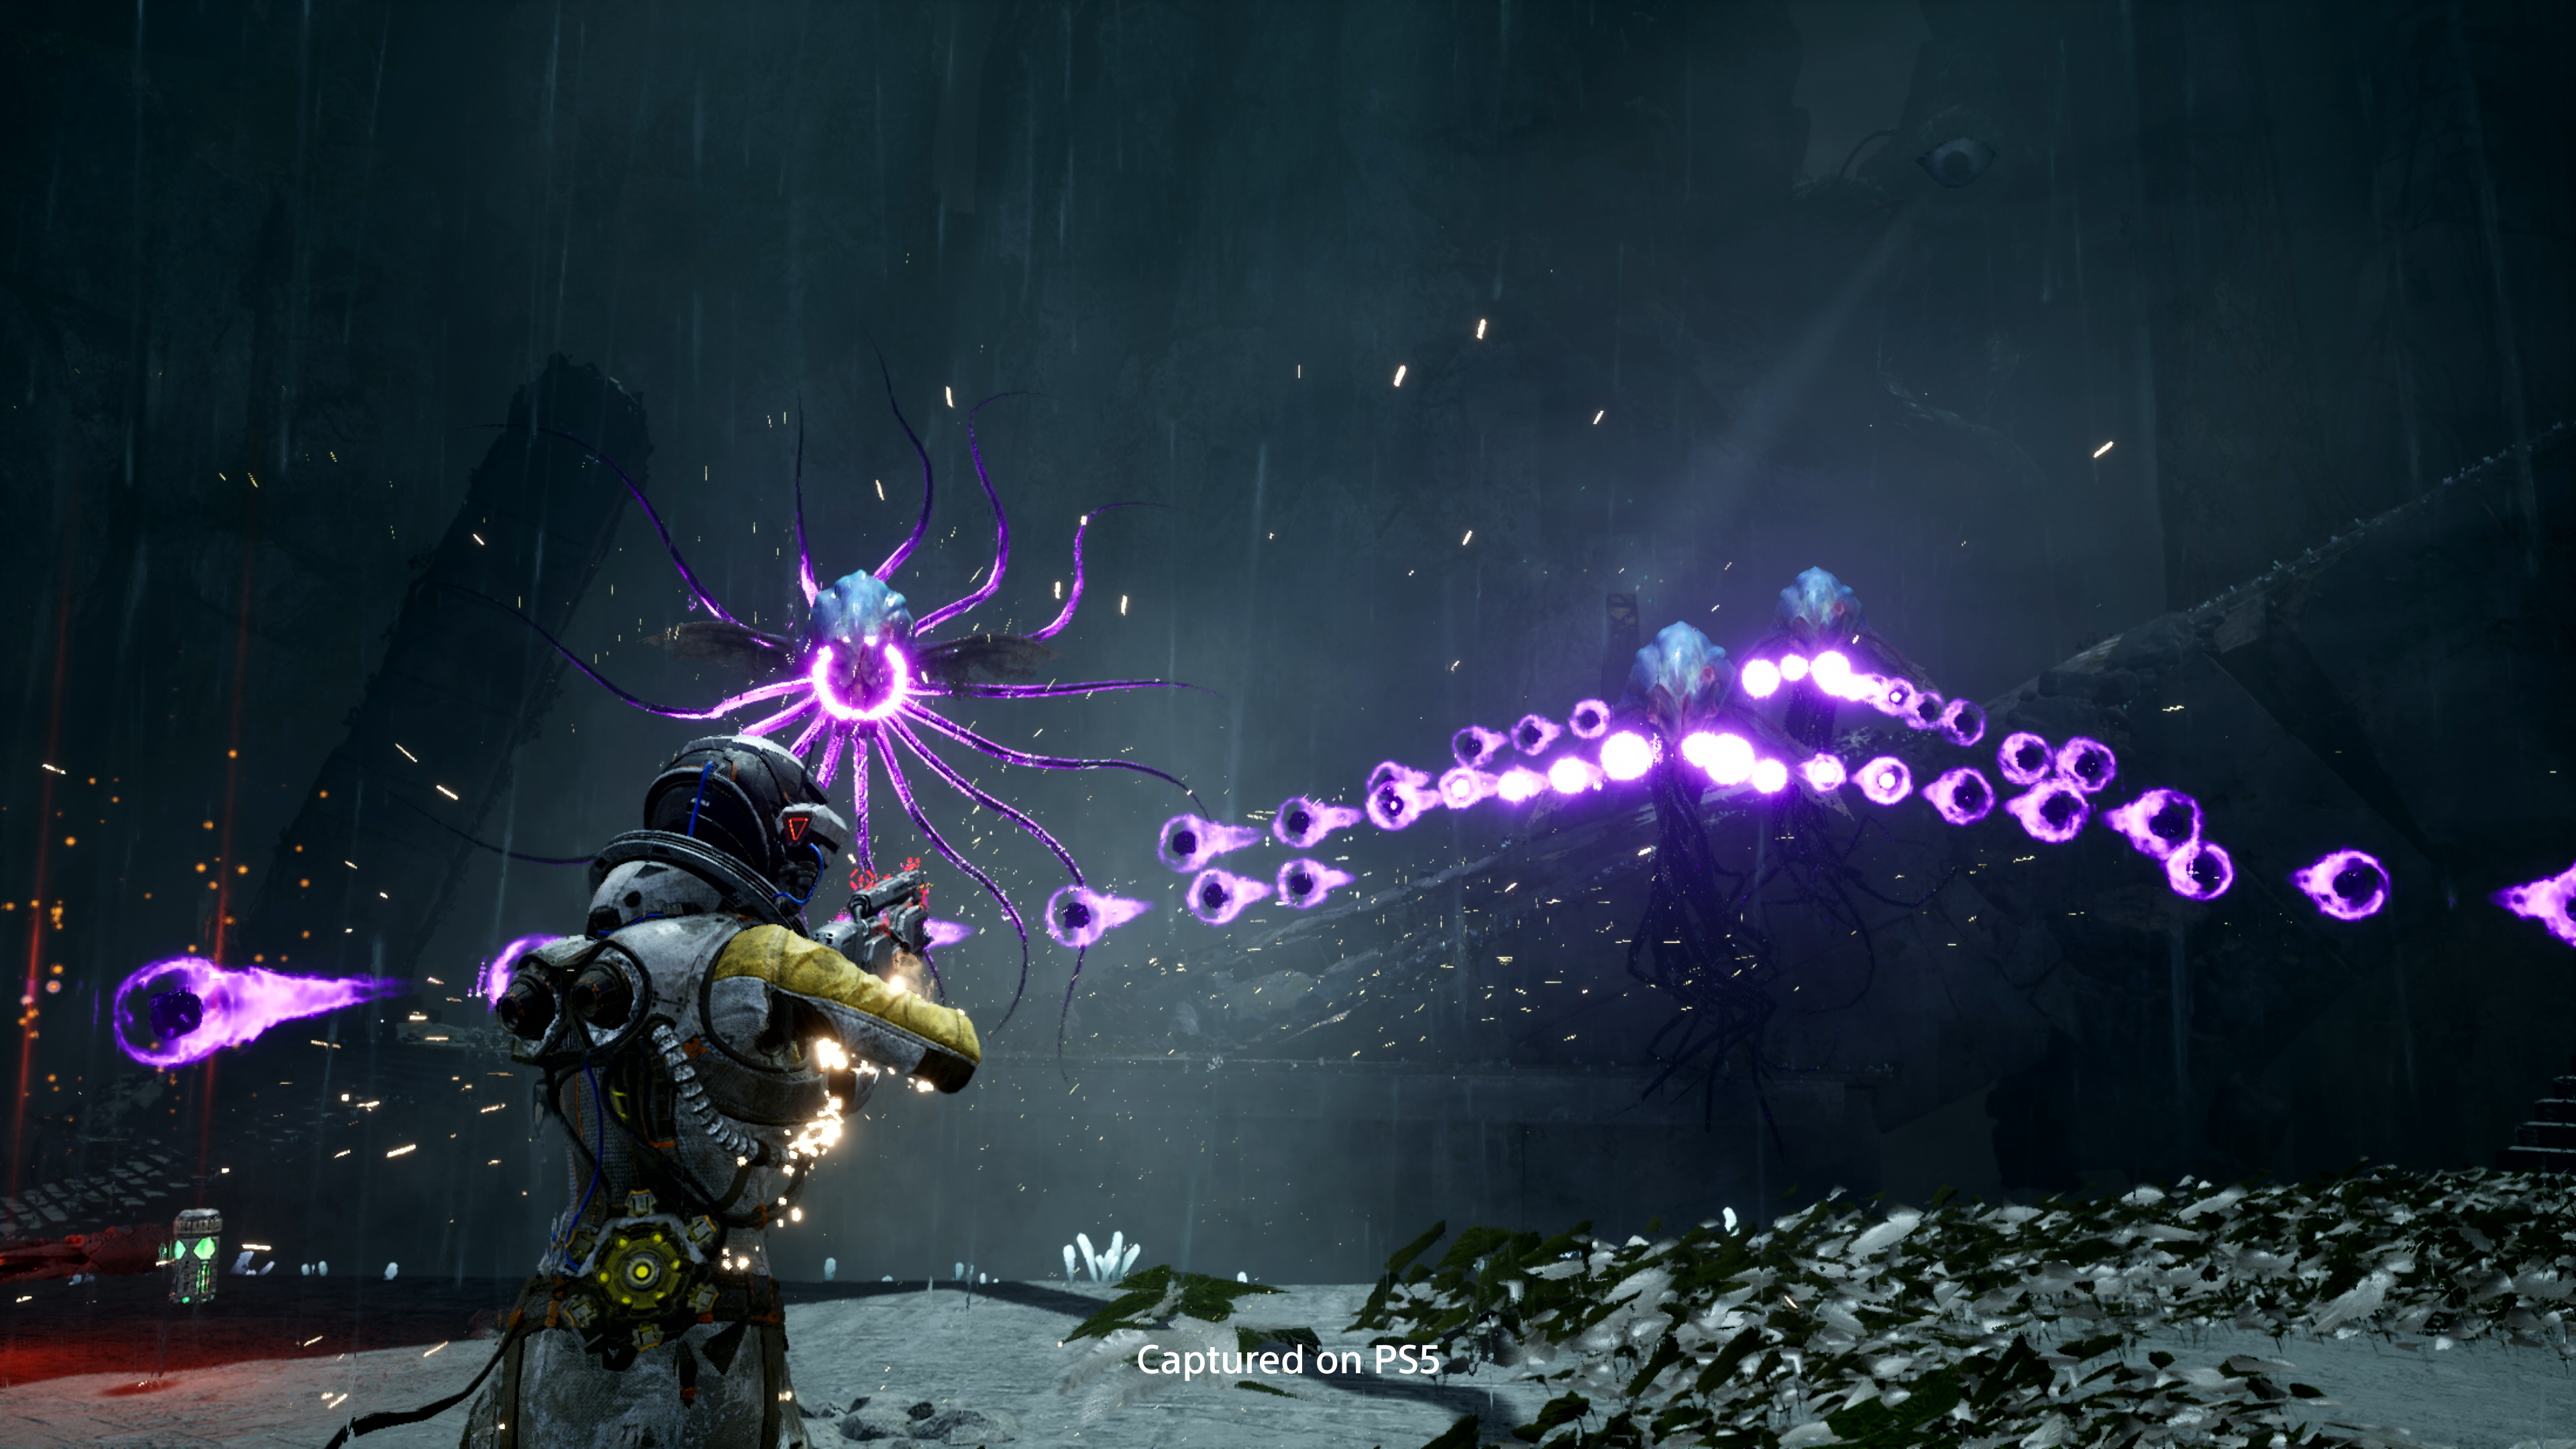
Returnal sits in the stable of Housemarque games — a studio known for frenzied, action-heavy titles like Resogun, Matterfall, and Nex Machina. With that in mind, you might feel obligated to throw yourself into battles with gay abandon.
Dancing in and out of a flurry of neon orbs spewed out by enemies, effortlessly dispatching them, and perfectly timing your reload is something you can enjoy watching on YouTube. Out here in the trenches, you might want to reconsider the flashy stuff and take it easy.
Every death strips you of practically everything — weapons, currency, you name it. If you're not proficient with the genre, you can still enjoy the game and play at your own pace. Scan each new area, check out the map for collectibles and points of interest, and edge your way in to trigger enemy spawns.
There's no shame in wanting to get the lay of the land rather than blindly running in and hoping for the best. If you're comfortable ploughing in and putting on a deadly light show, we applaud you! But don't get sucked into rushing to your own death because it's the 'right' way to play.
2. Picking your weapon
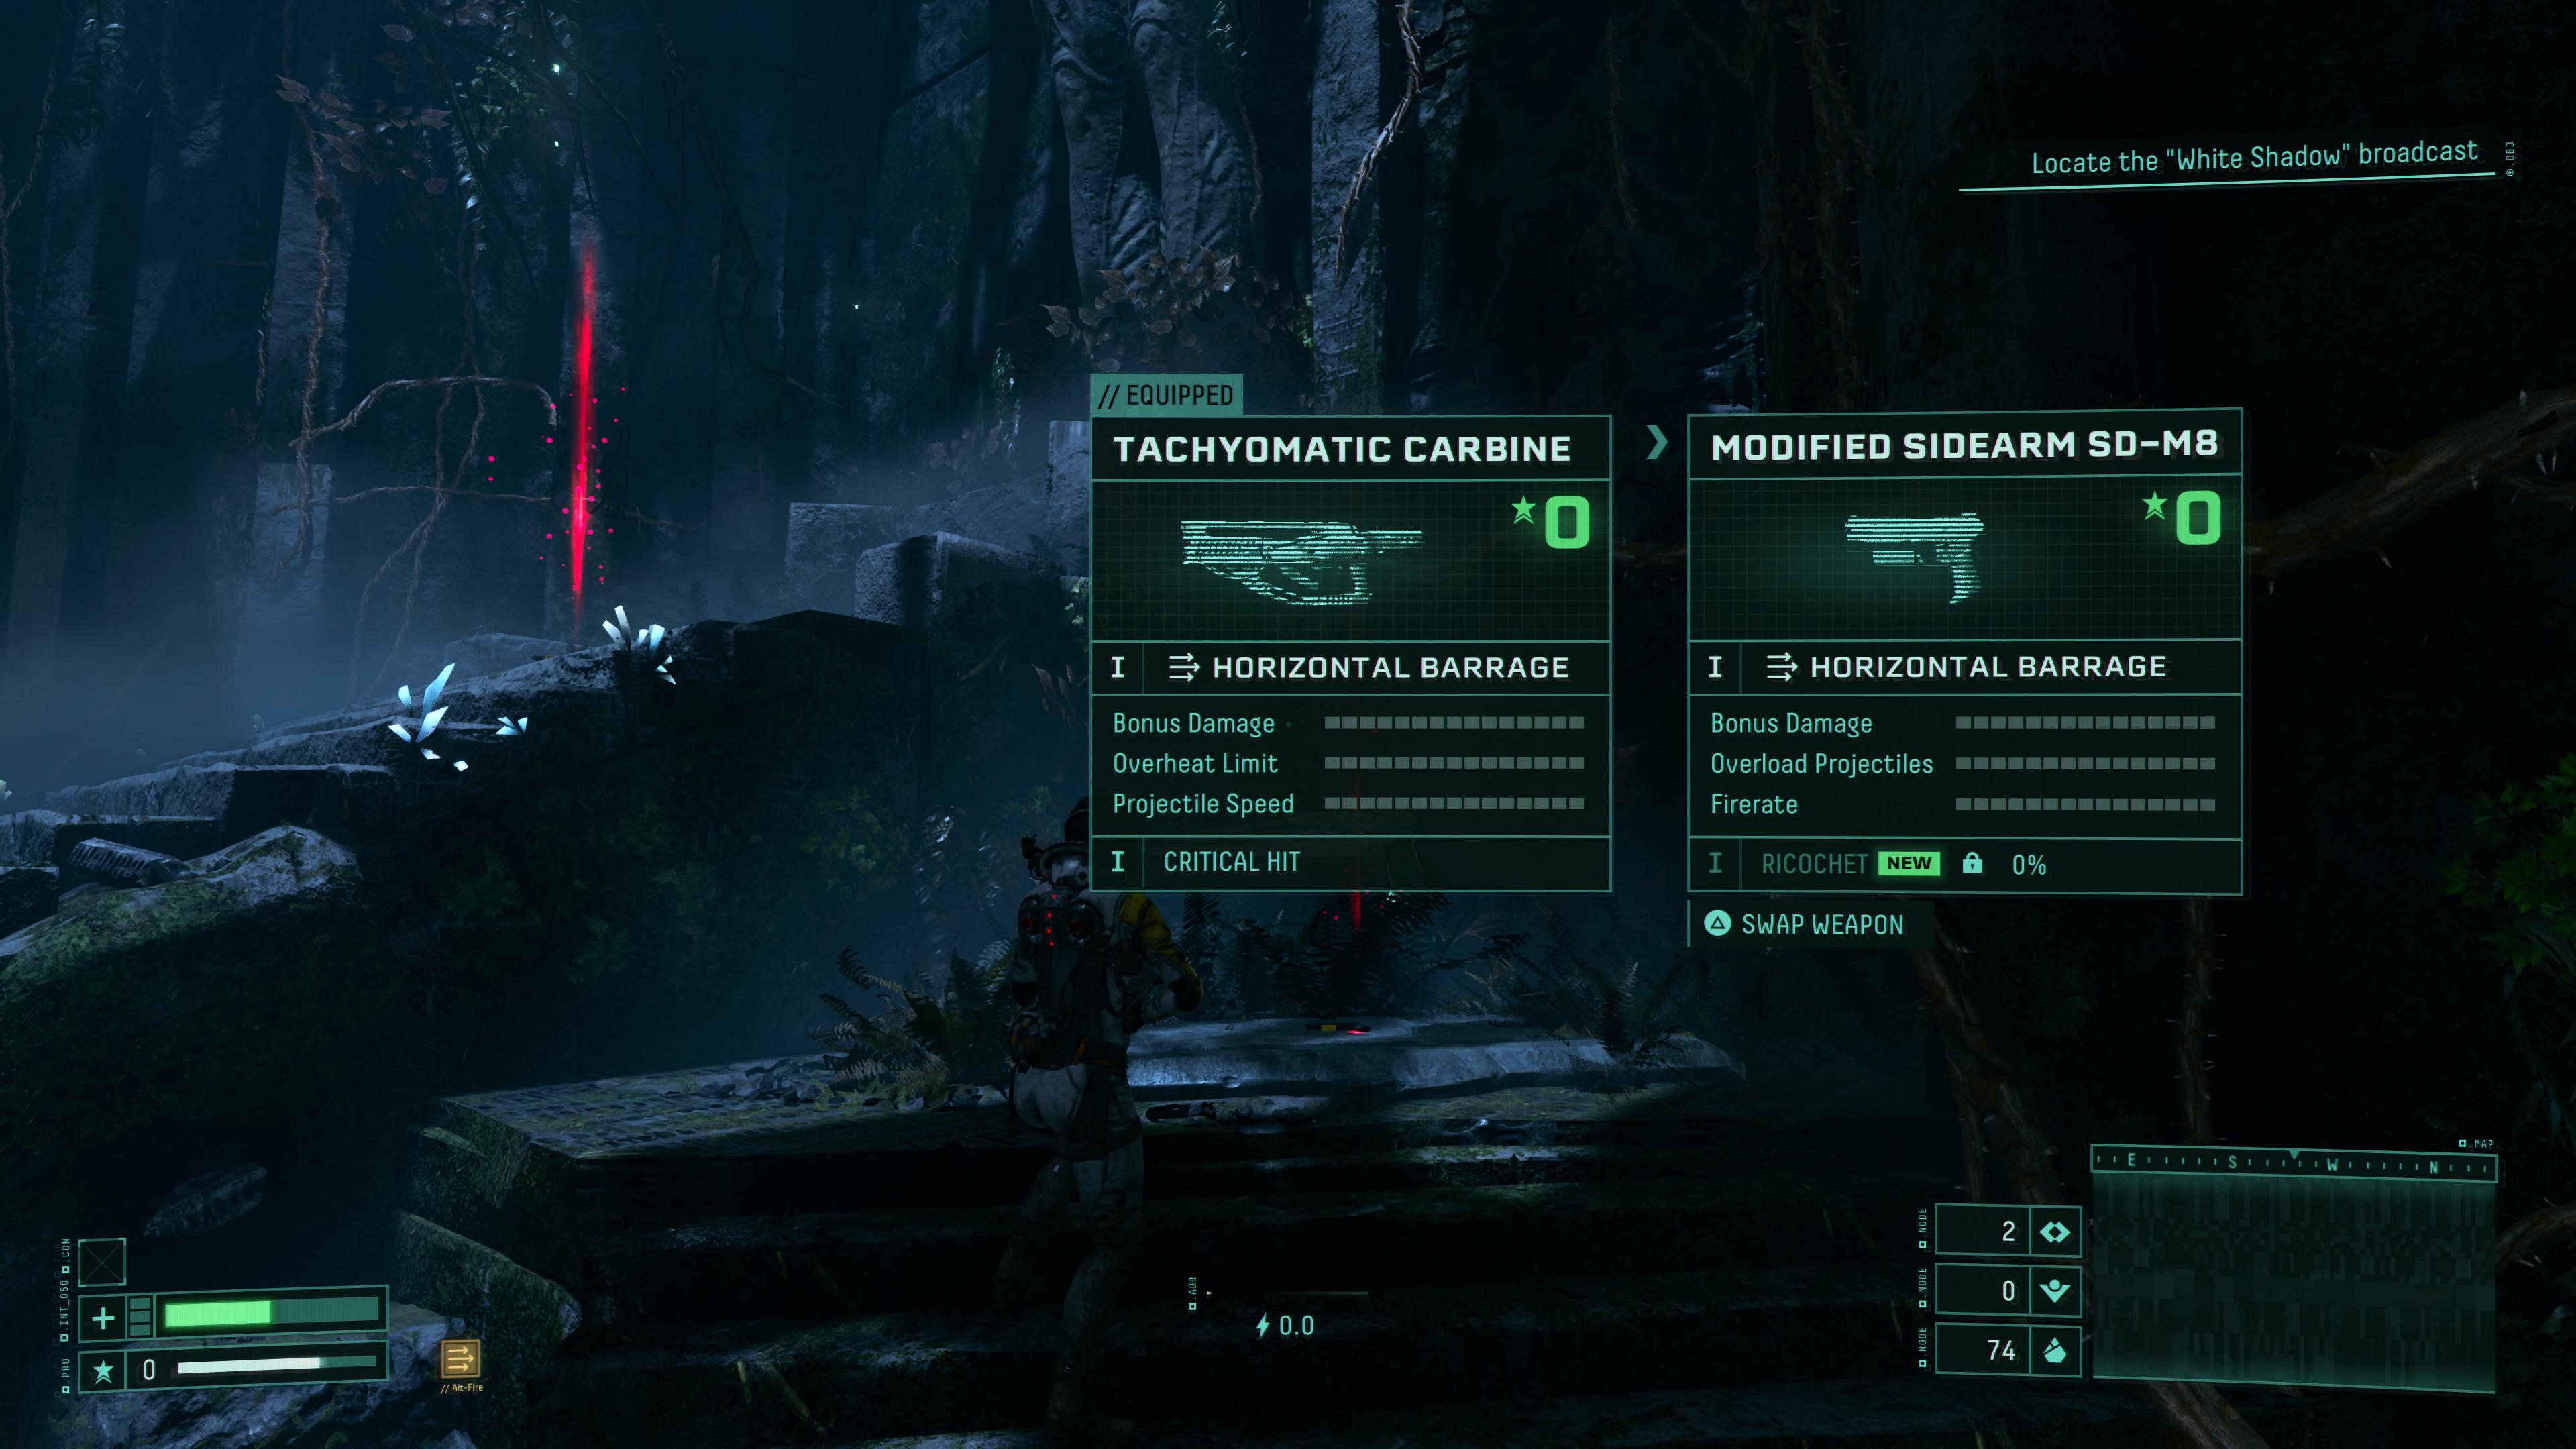
There are a number of different weapon types available in Returnal, outside of the pistol that you start each cycle with. The RNG gods will dictate what you find and the properties that particular weapon is imbued with. You'll come across a breadth of alien firearms with obscure sci-fi names, but ultimately they fall into categories you'll already be familiar with: Assault rifle, shotgun, rocket launcher etc.
Sign up to get the BEST of Tom's Guide direct to your inbox.
Get instant access to breaking news, the hottest reviews, great deals and helpful tips.
Because your inventory is wiped upon your demise, we suggest experimenting with each new find until you settle on one you're comfortable with and that fits your playstyle. While enemy types and attacks vary, the random nature of the game leaves a lot of uncertainty, so wielding a weapon you enjoy using is the way to go.
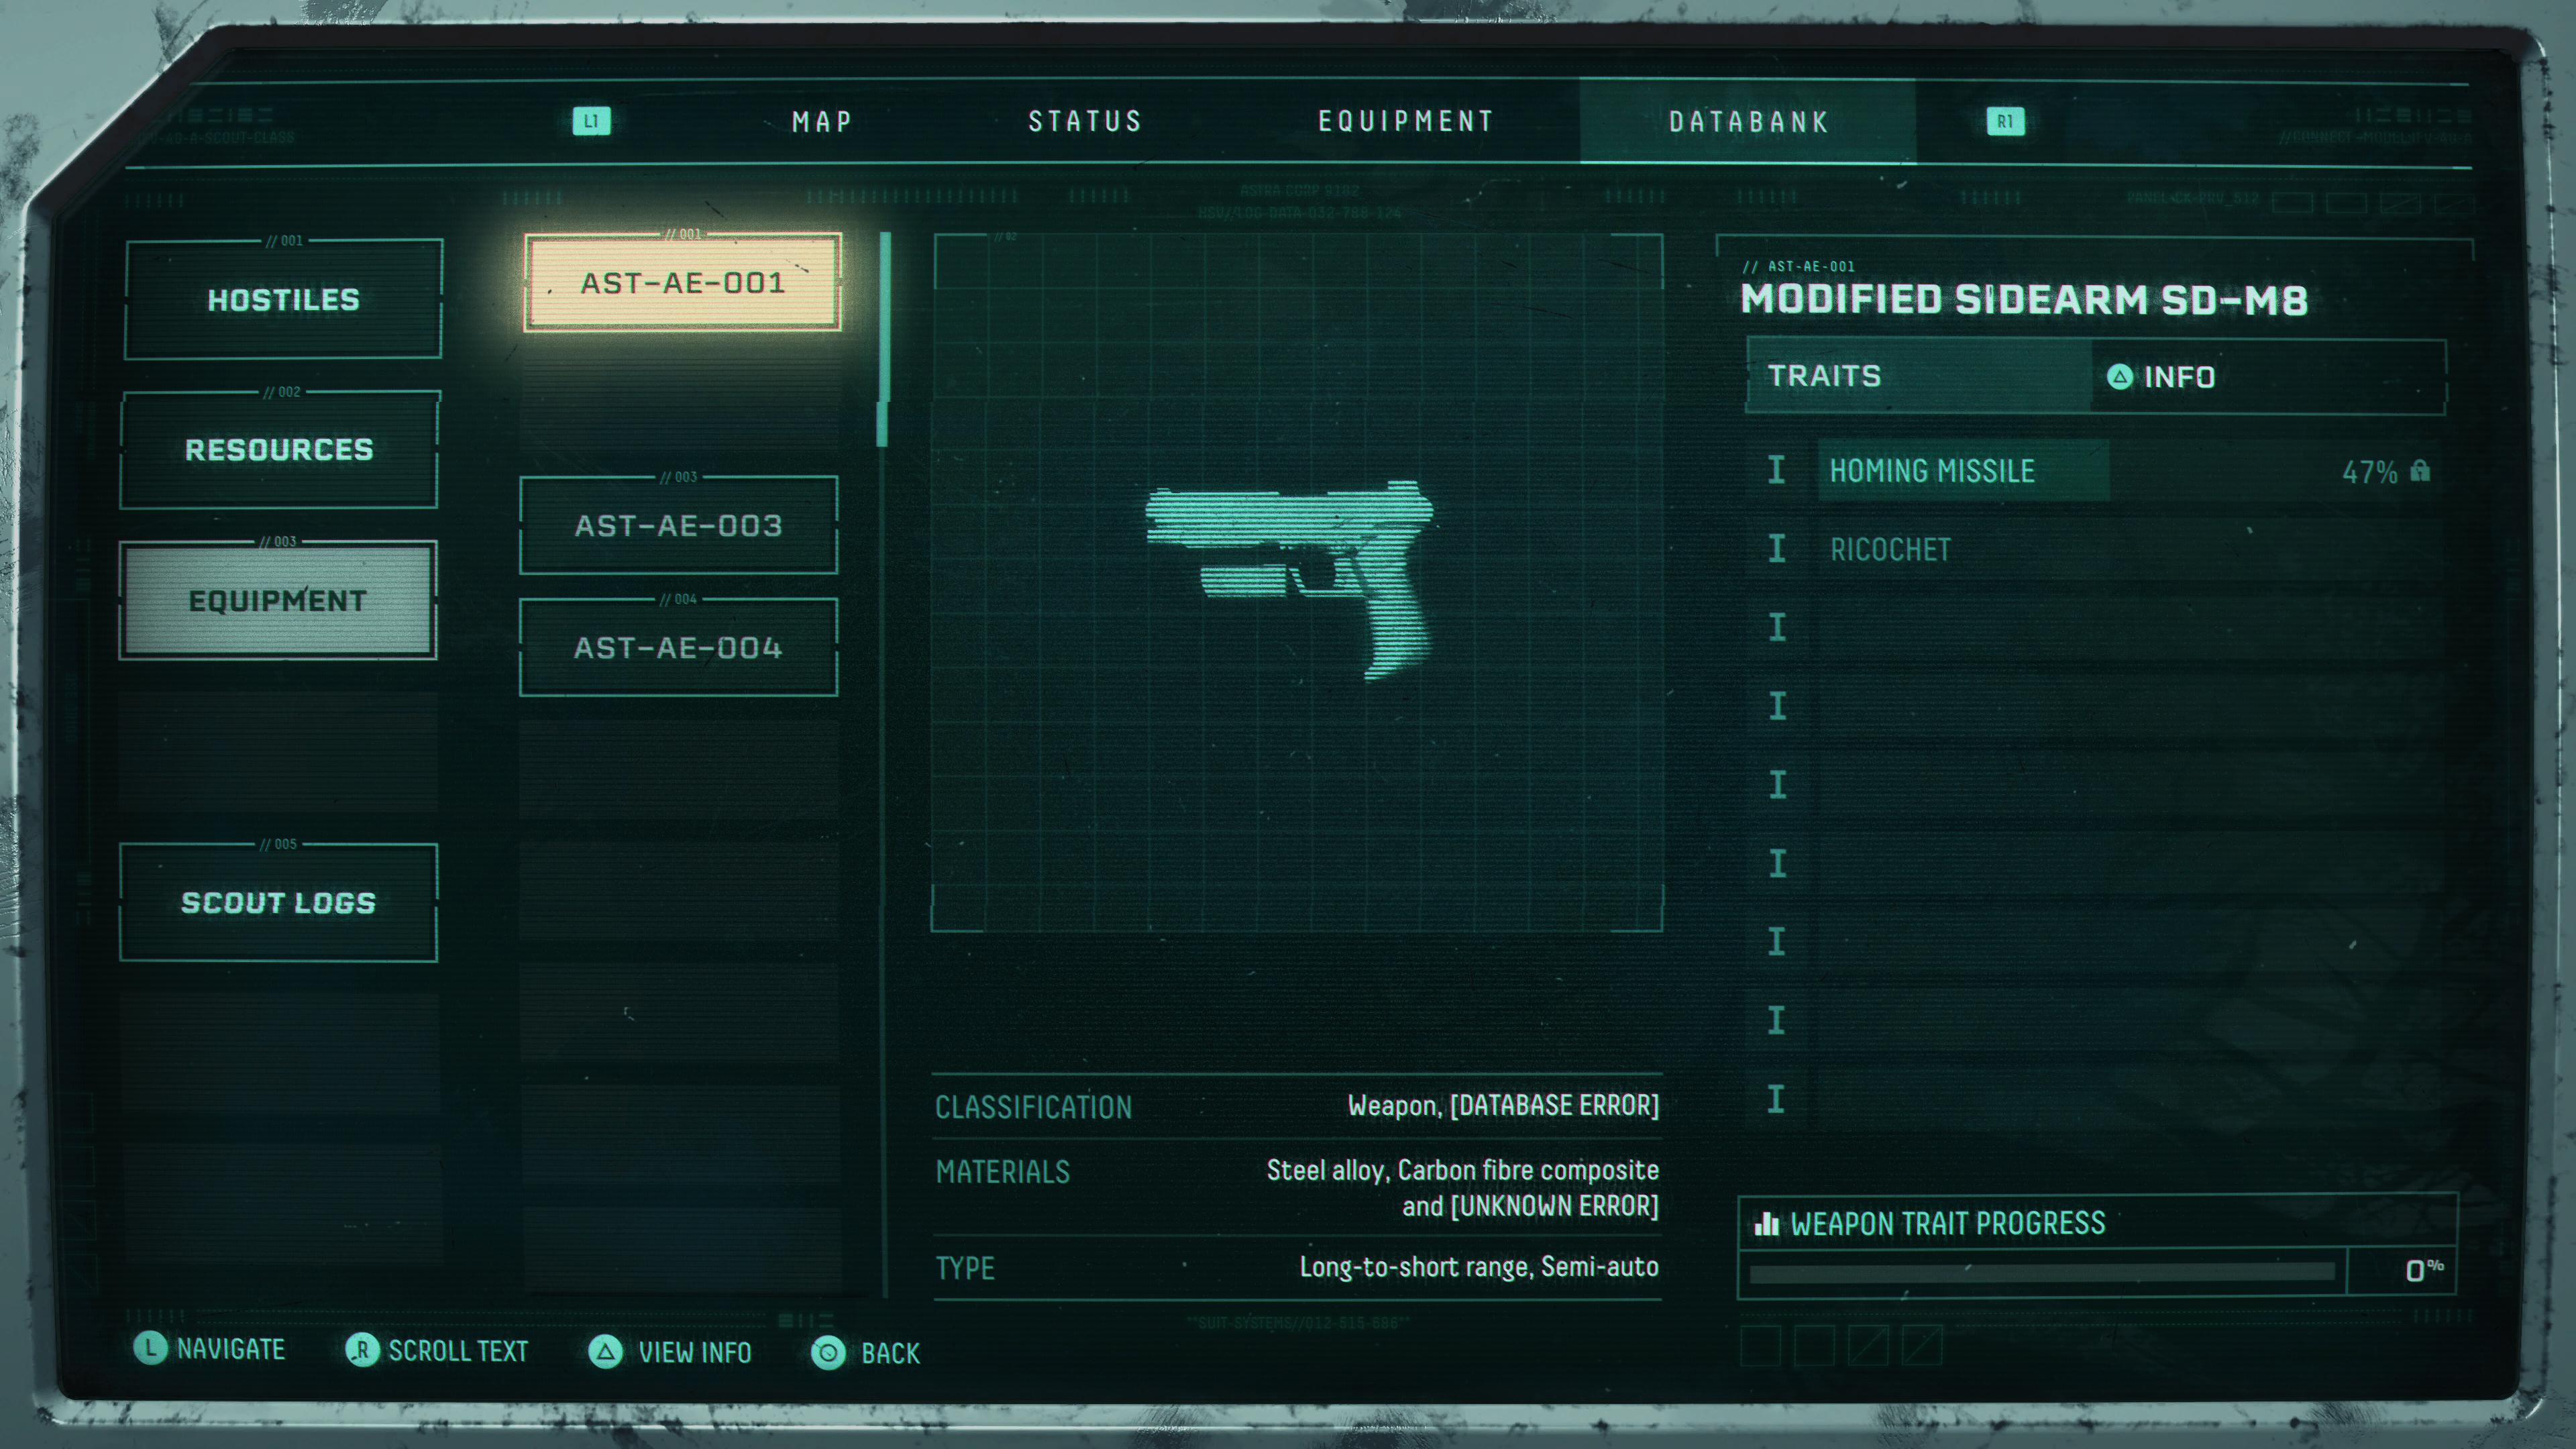
Each weapon has three properties: Alt-fire, stats, and traits. Alt-fire is basically a special attack with a cooldown. Stats dictate power and other attributes. Traits tweak or add new behaviours to weapons.
A lot of traits are locked, but continually using that weapon will unlock them. If you're keen on unlocking specific traits, then you'll want to consider passing over new weapons to chip away at the progress bar. Alternatively, you might want to embrace the cyclical nature of the game and use each loop to experiment, and if anything unlocks along the way, it's an added bonus.
It's worth noting that your Proficiency level (which is reset every cycle) determines how high the stats will be on the weapons you find. Killing enemies and using specific items will kick it up a notch, so keep an eye on that, too.
3. Pay attention to the map and environment
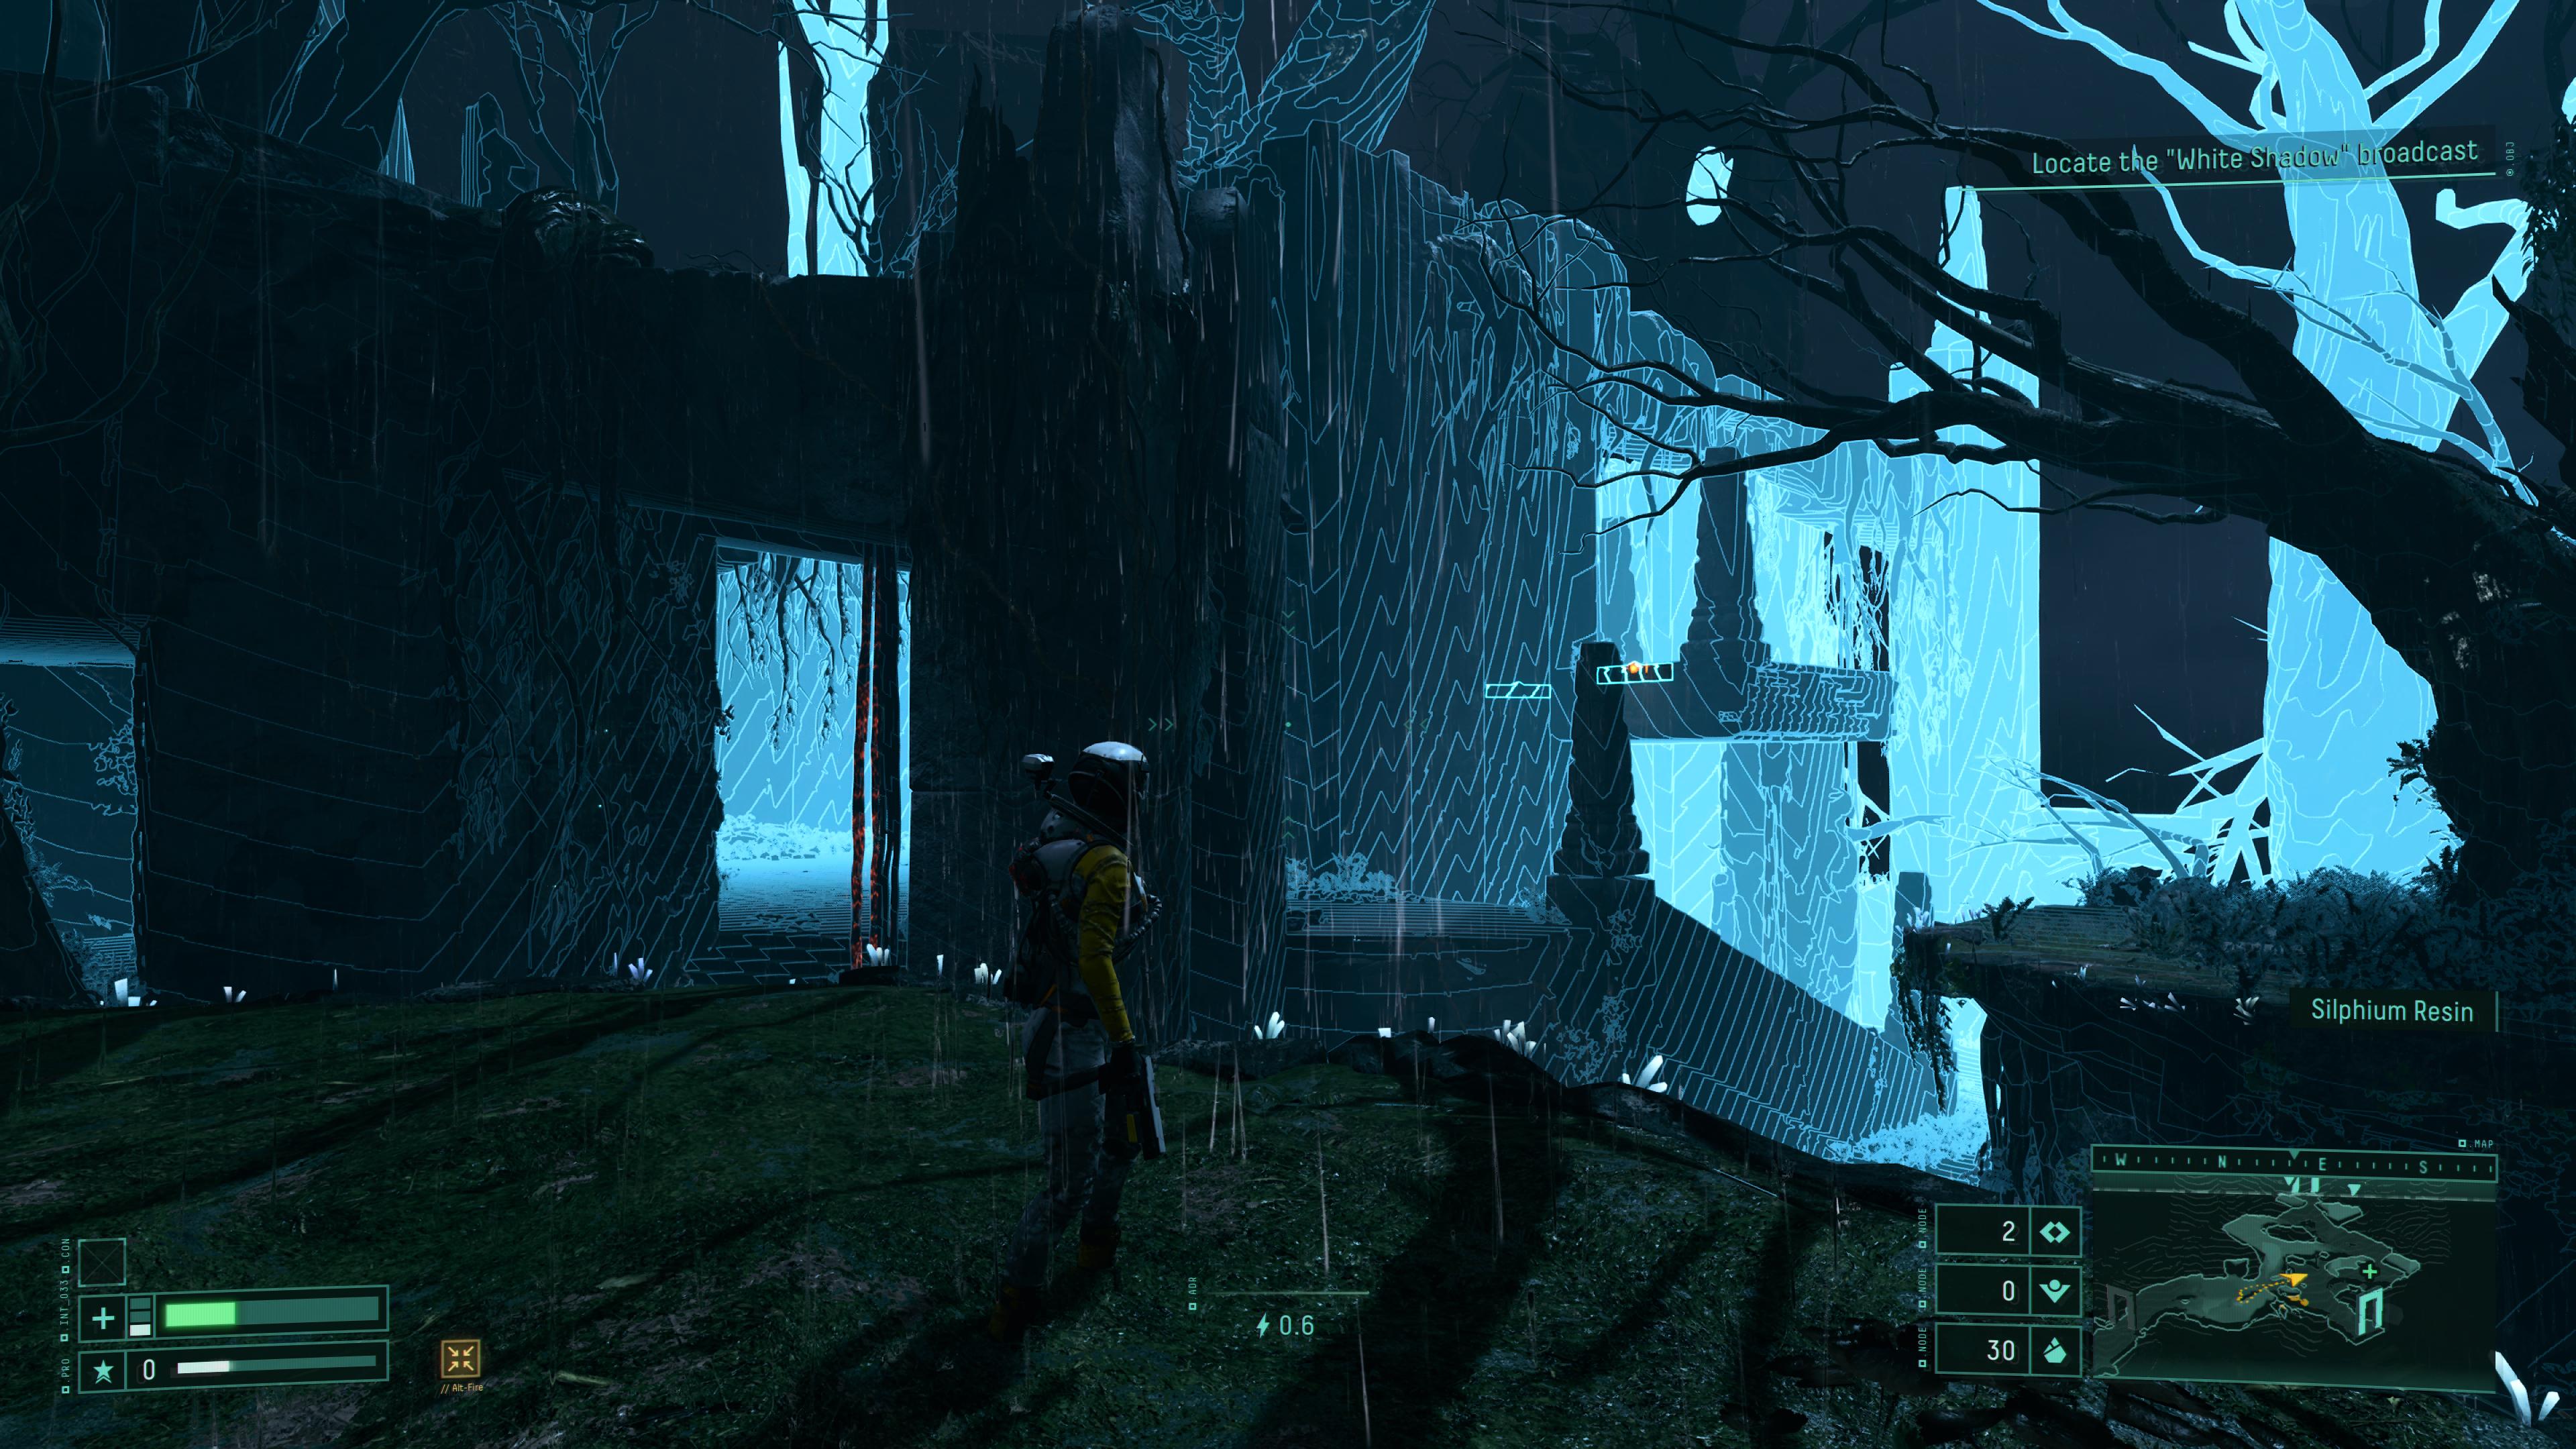
Returnal is quite forgiving in that it maps out each new area you enter, flagging up collectibles. The route to your objective is clearly marked with highlighted doors, but there are also routes to side objectives that are worth looking out for. These excursions can result in some pretty decent finds, so we recommend deviating from the main path whenever the opportunity presents itself.
To that end, check the map in each new area, and make the most of the scan button! It can highlight useful points of interest in the environment (some of which you might not be able to interact with until certain abilities have been unlocked). The sonar-type ping also gives you a good look at the layout of the 'room' you're in, so you can identify useful spots for battles as well as figure out how best to traverse the area to pick up items.
3. Look out for hidden switches
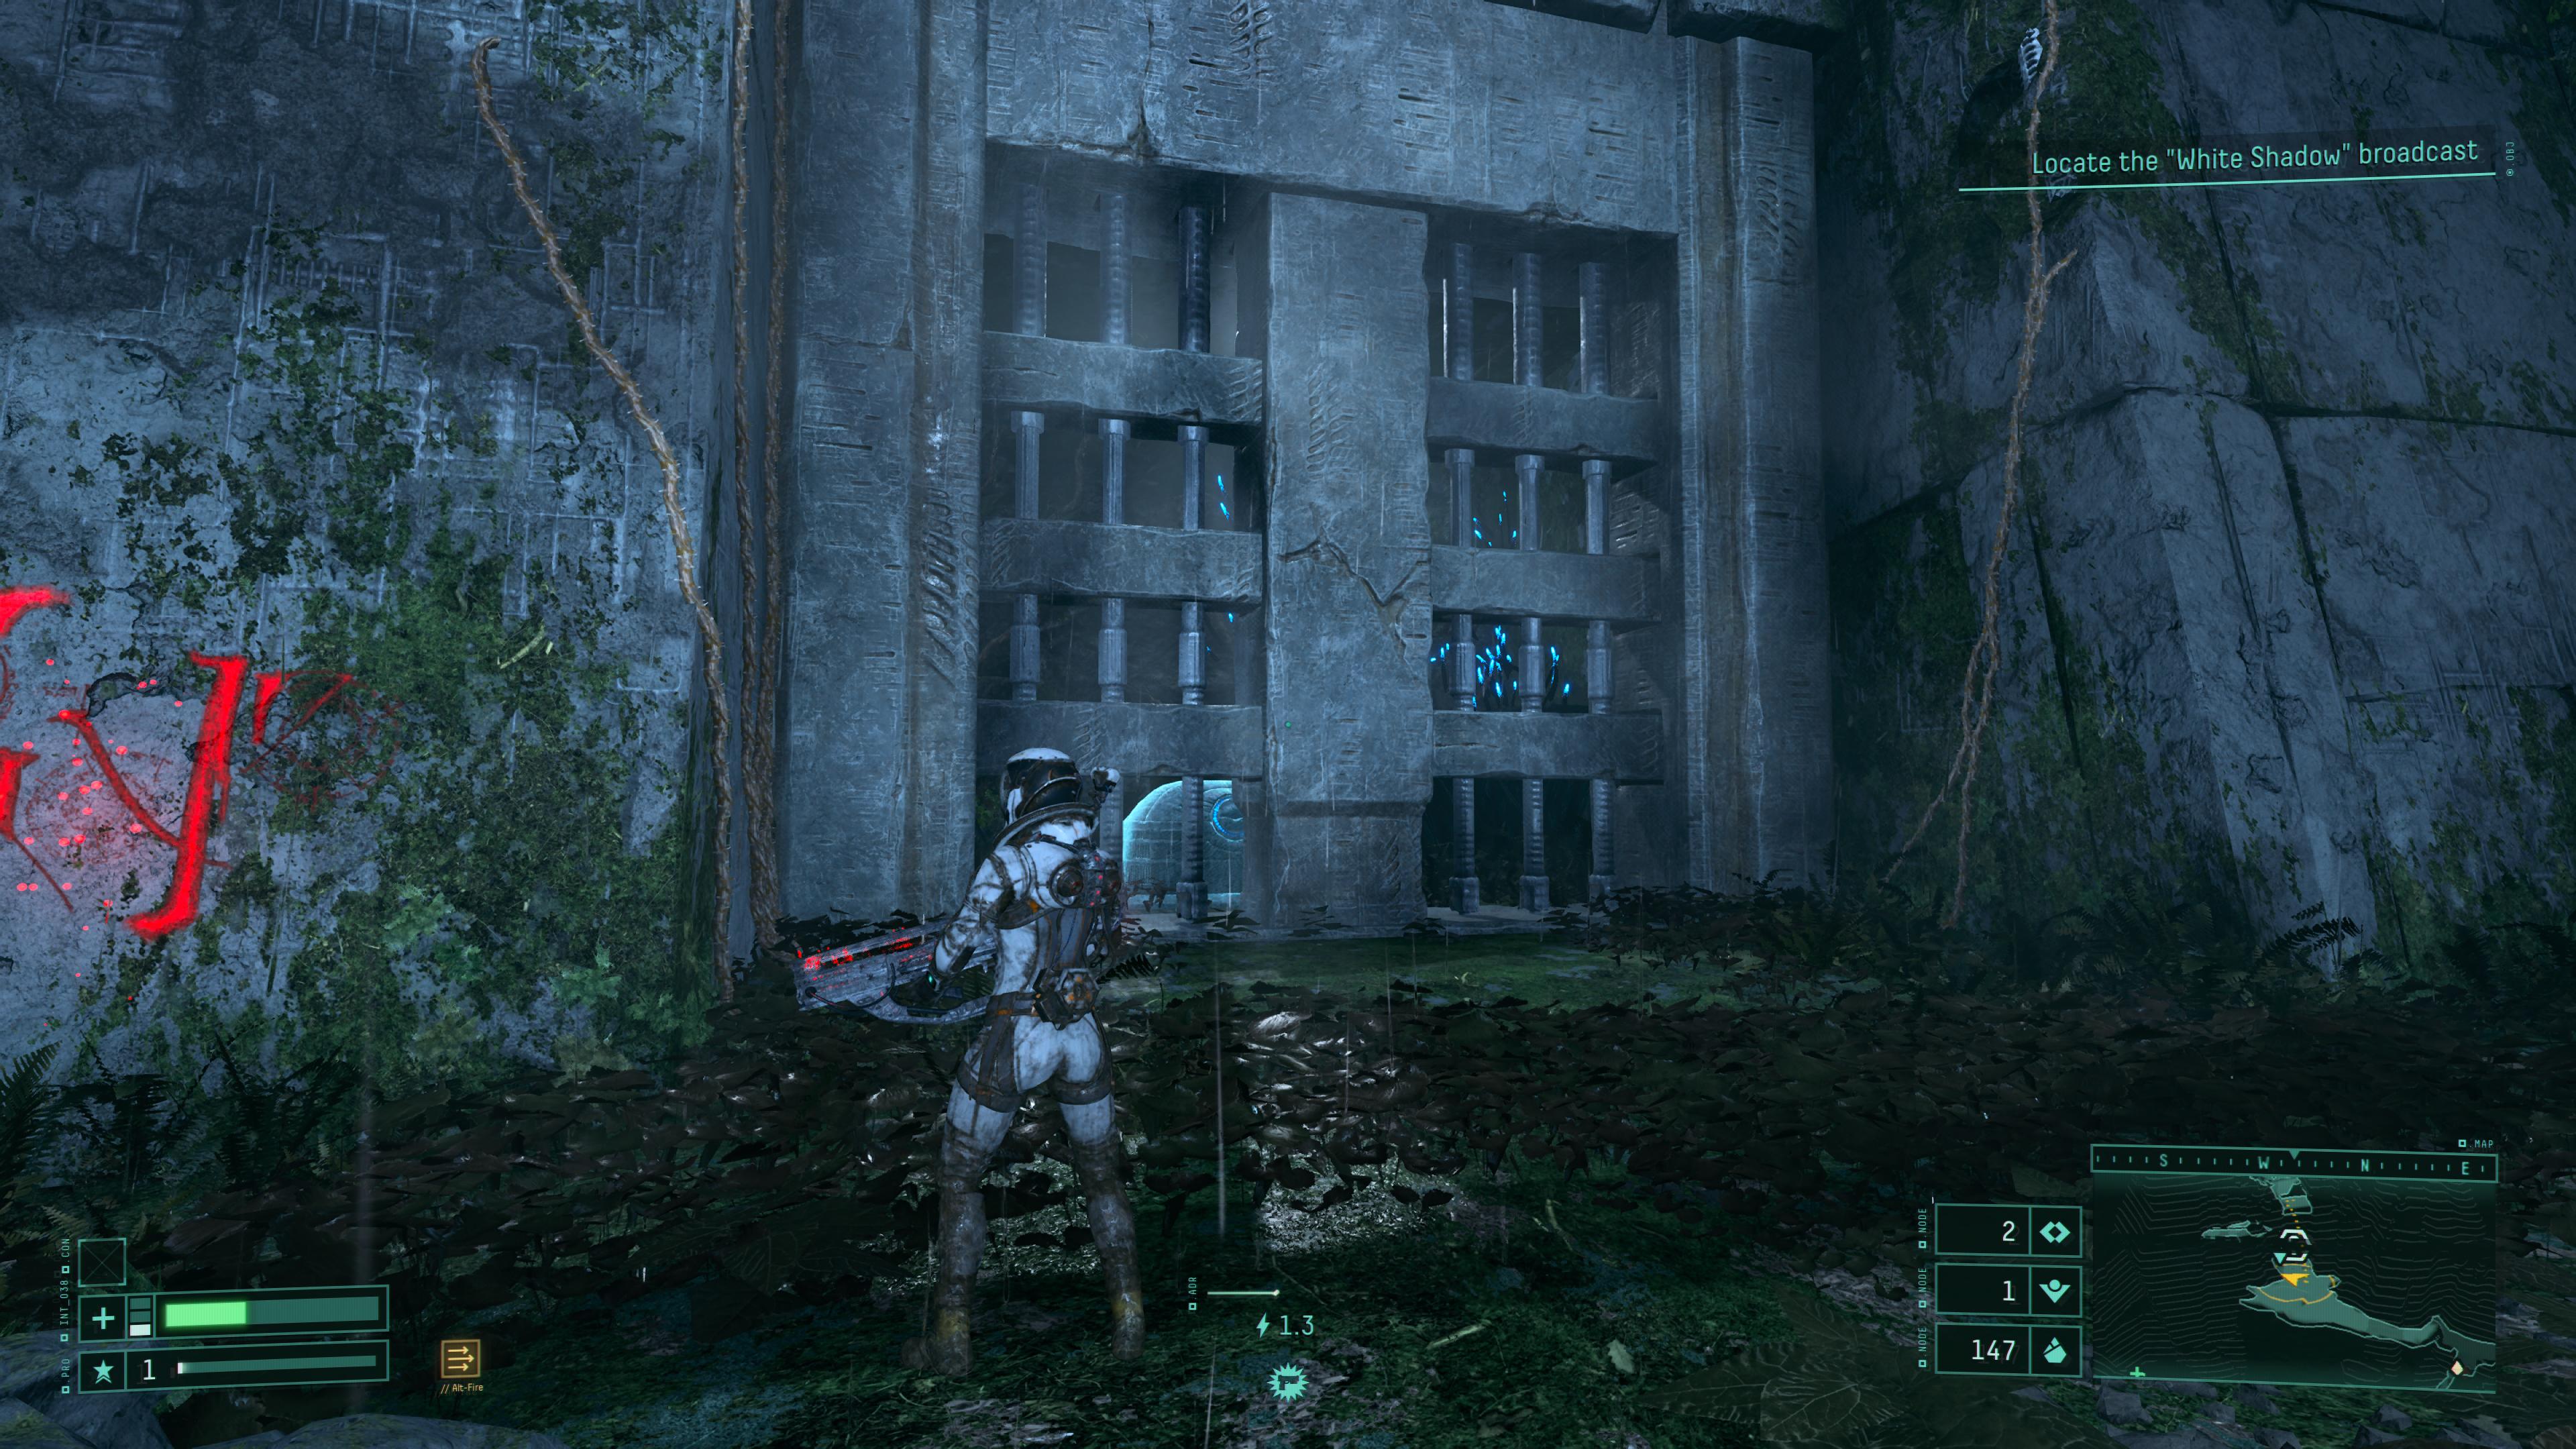
Often in Returnal, you'll spot a delectable looking pickup tucked away in what seems like an unreachable area. These can be cordoned off until you gain a certain ability, but it'll be fairly obvious when that's the case. If you stumble across gates like these however, you can open them immediately. But you'll need to have a poke around for the switch that opens the gate.
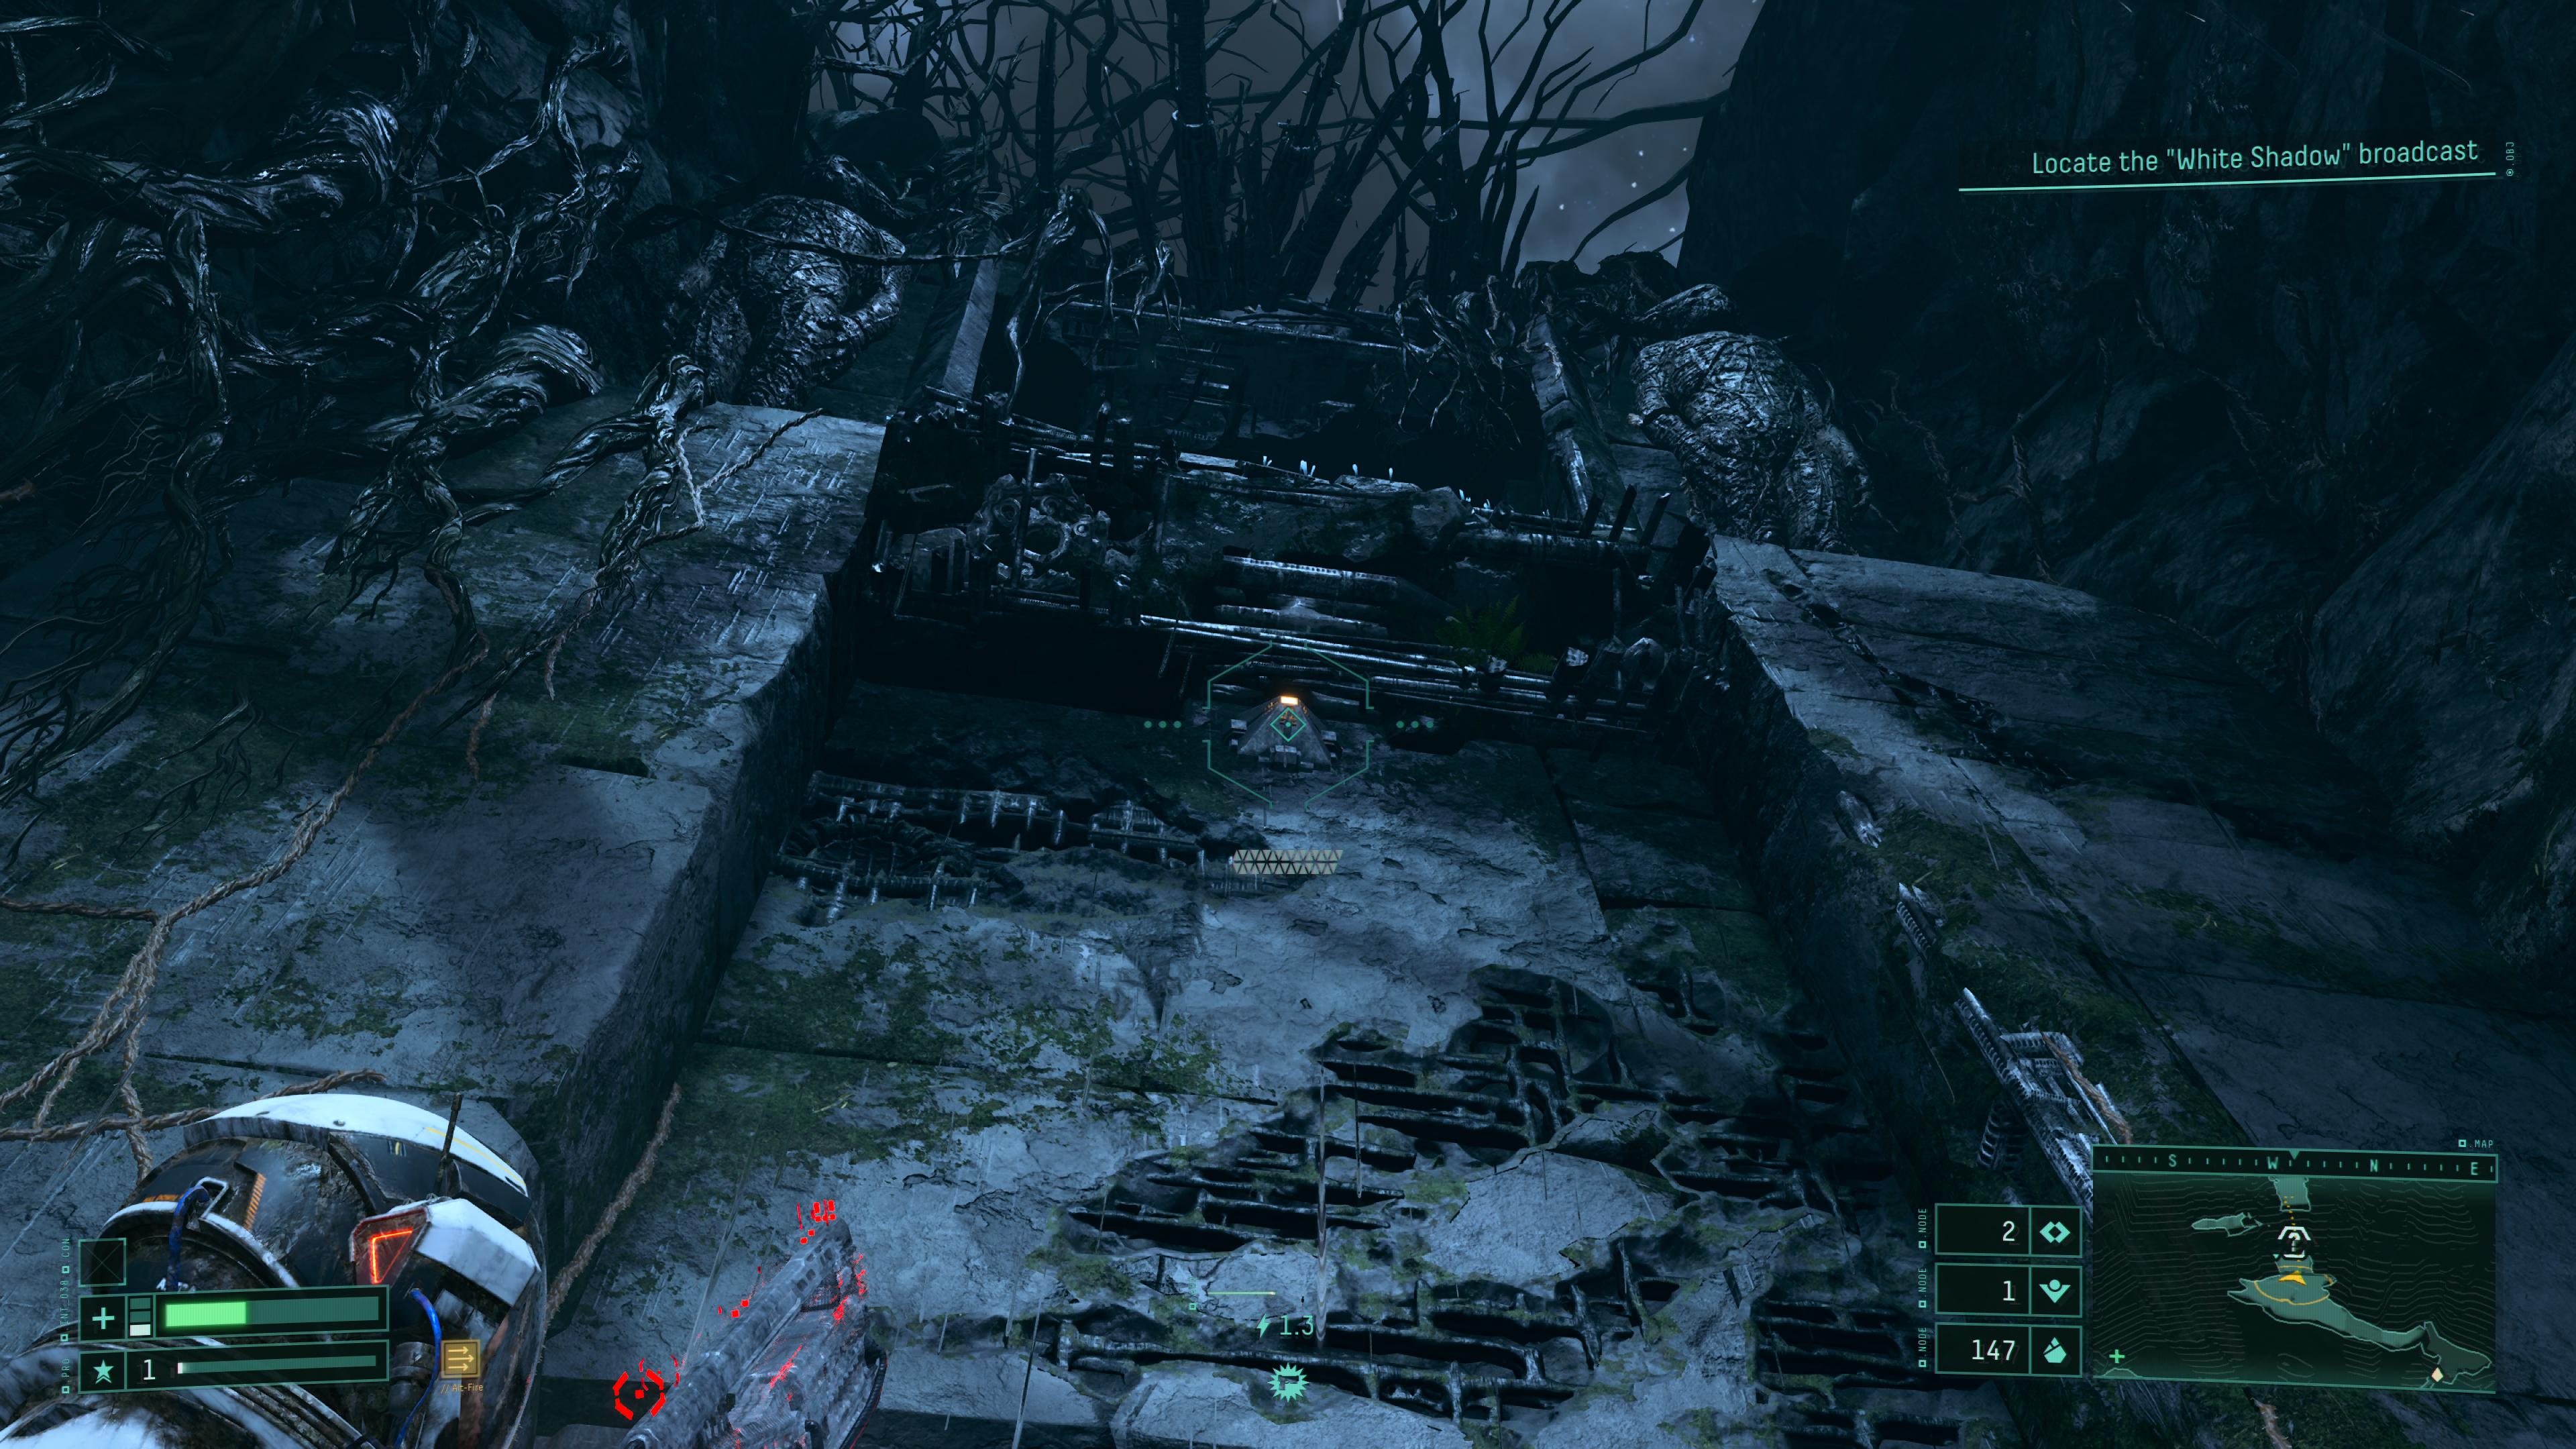
The switches are pyramid shaped, with a yellow light in the middle. When you aim your gun at them, they'll begin flashing red. Shoot them to open up the nearby gate. If you miss the window, they'll revert to a steady yellow light, and it seems like the opportunity has passed to open the gate. When I missed the cue (because I was busy taking screenshots), shooting at the switch was ineffective. You can try leaving the area and coming back, but save yourself a job and just spray it with alien bullets at the first opportunity.
4. Shoot anything and everything that glows
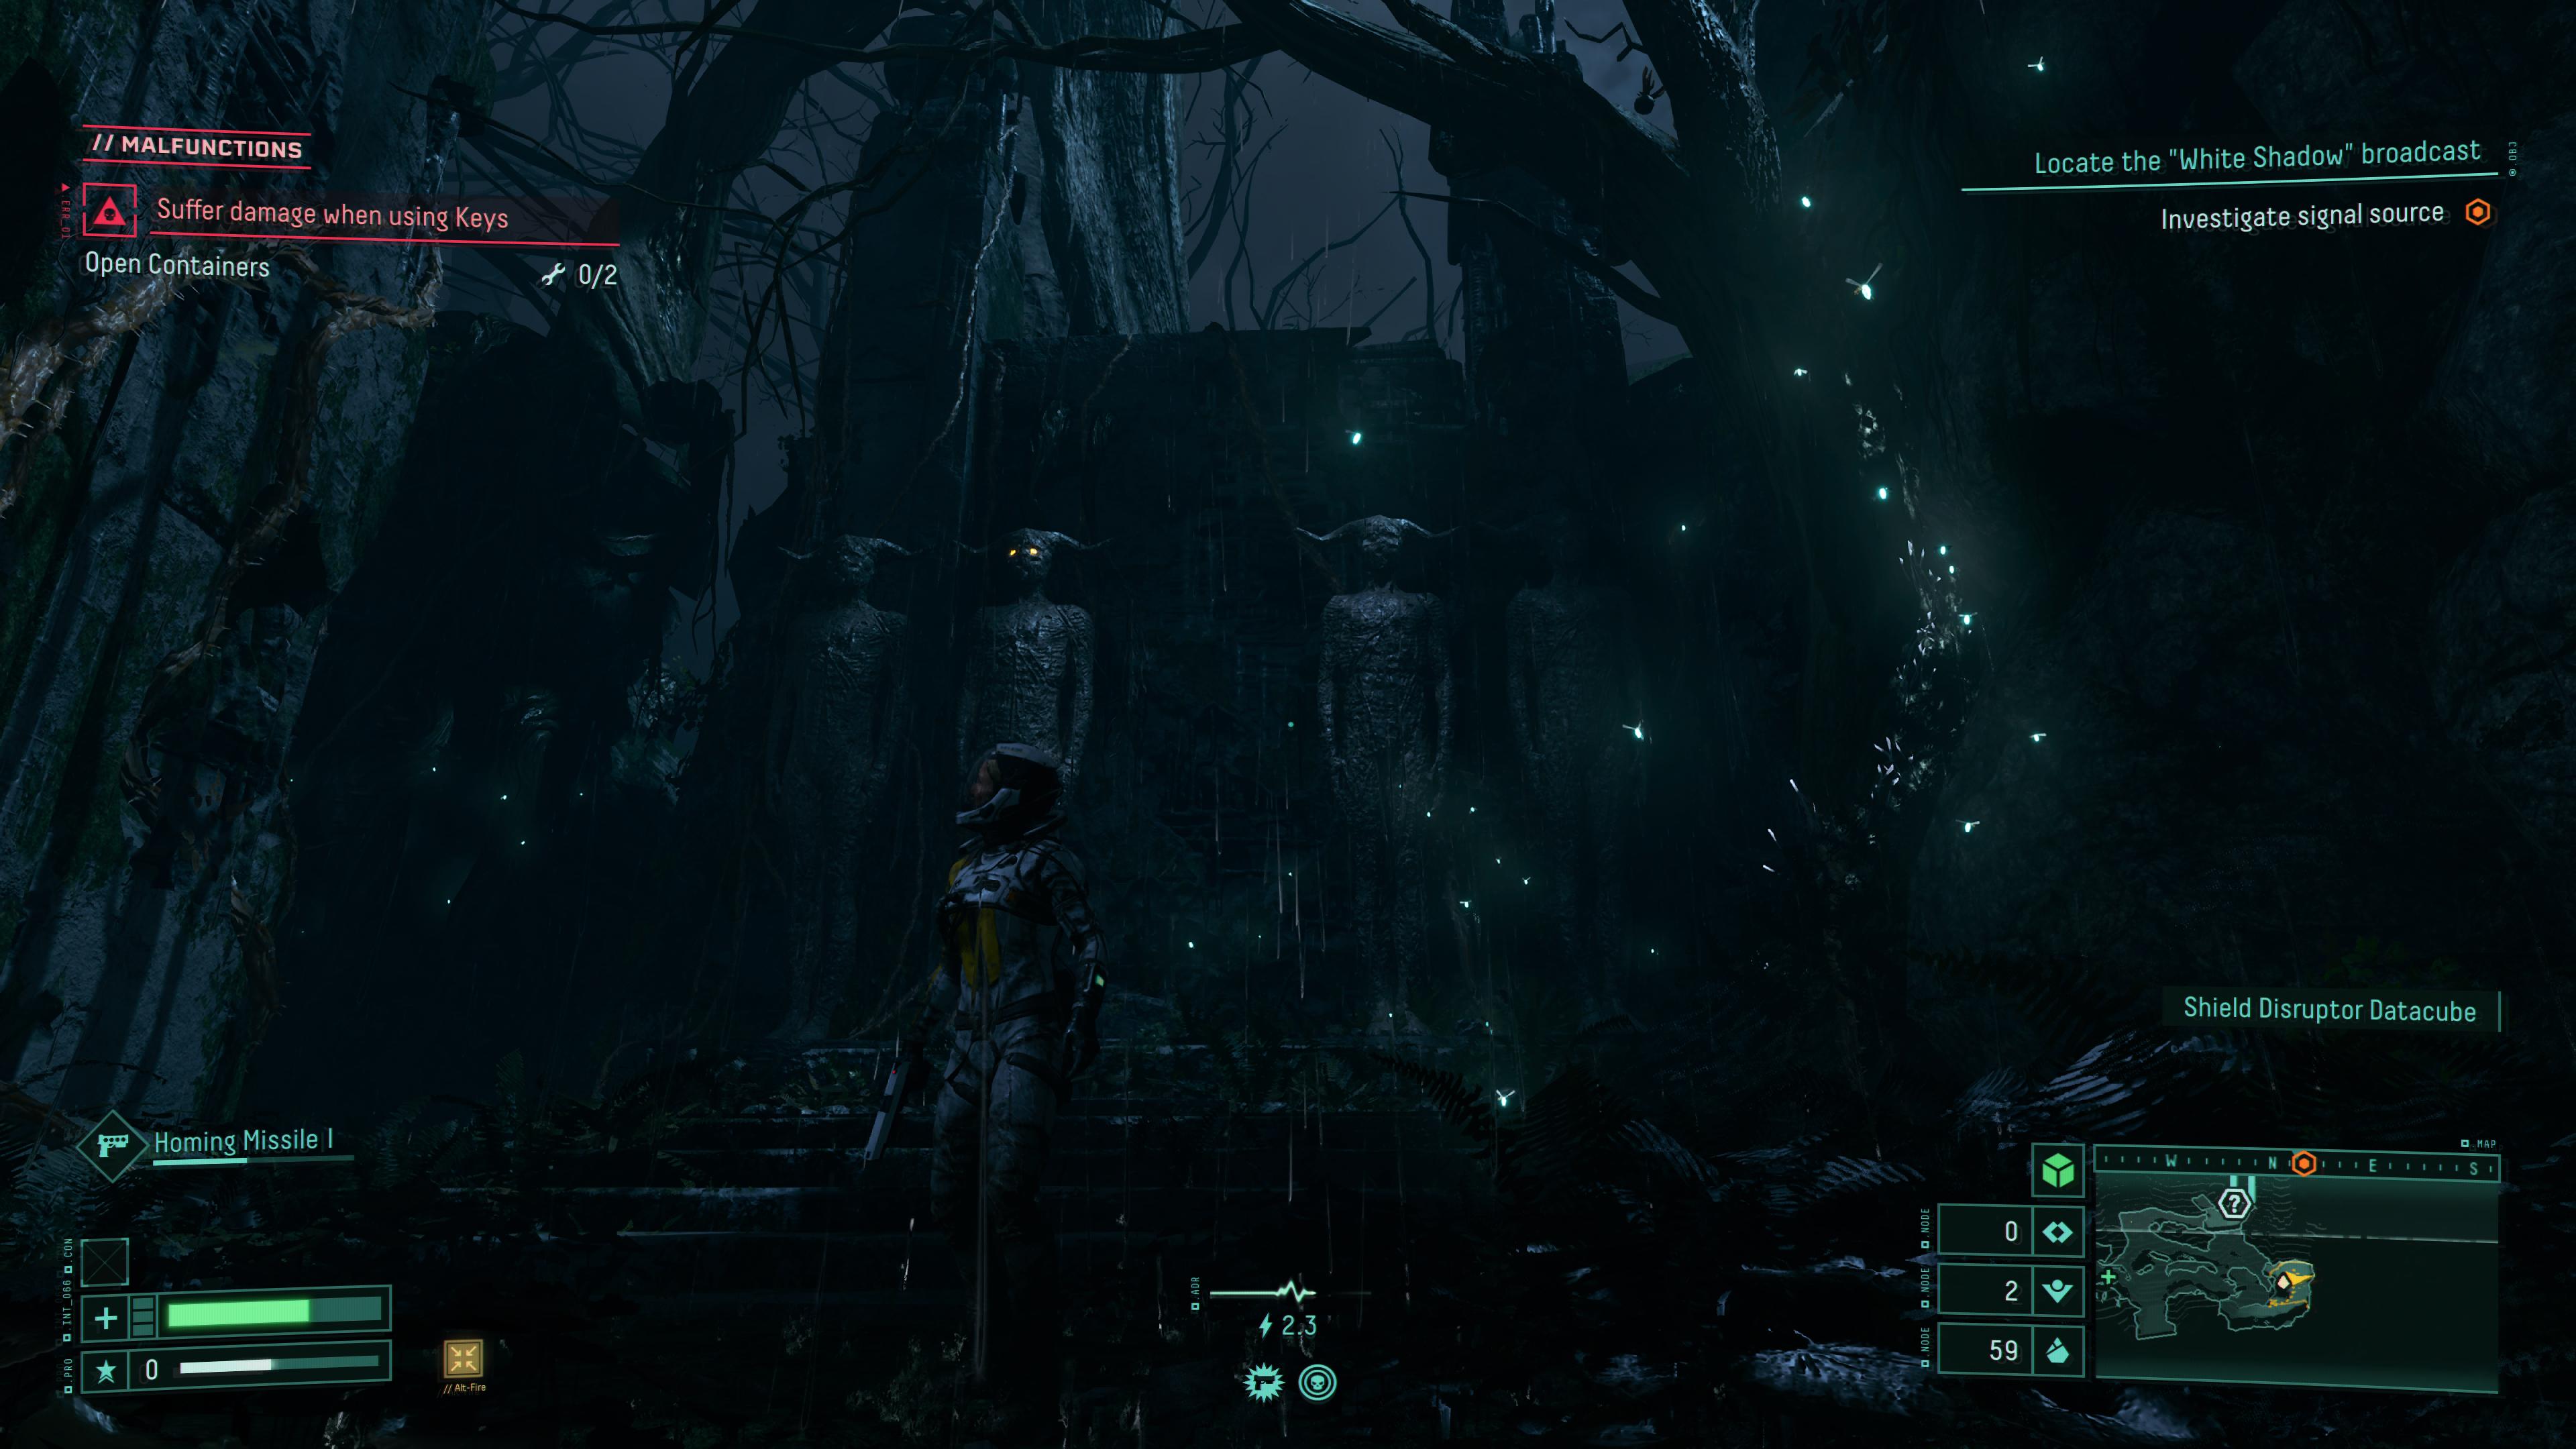
Obolite is the in-game currency, with the tiny yellow orbs being rewarded when you kill enemies. Unlike the Souls game, when you dispatch a hostile, you'll need to go and collect the obolites that spill out of their corpses before they fade away. So make sure you're not so overwrought during a firefight that you neglect to pick them up. This also discourages cheesing to a degree, but it's up to you to calculate the risk/ reward of each encounter, and pick the approach that works best.
There are other ways to harvest obolite, and that involves shooting anything and everything that's shiny, glowing, or pulsating. Statues with yellow eyes aren't going to stir into life as you walk past (which I was certain was going to happen). Shoot them, and they'll burst into a million tiny pieces, sprinkling obolite at your feet.
If you see any foliage that looks like it can be shot, go nuts. They don't all contain obolite, but there's enough there to make shooting inanimate objects worth your time. Plus ammo is infinite, so spray away.
5. Enter trap rooms at your peril
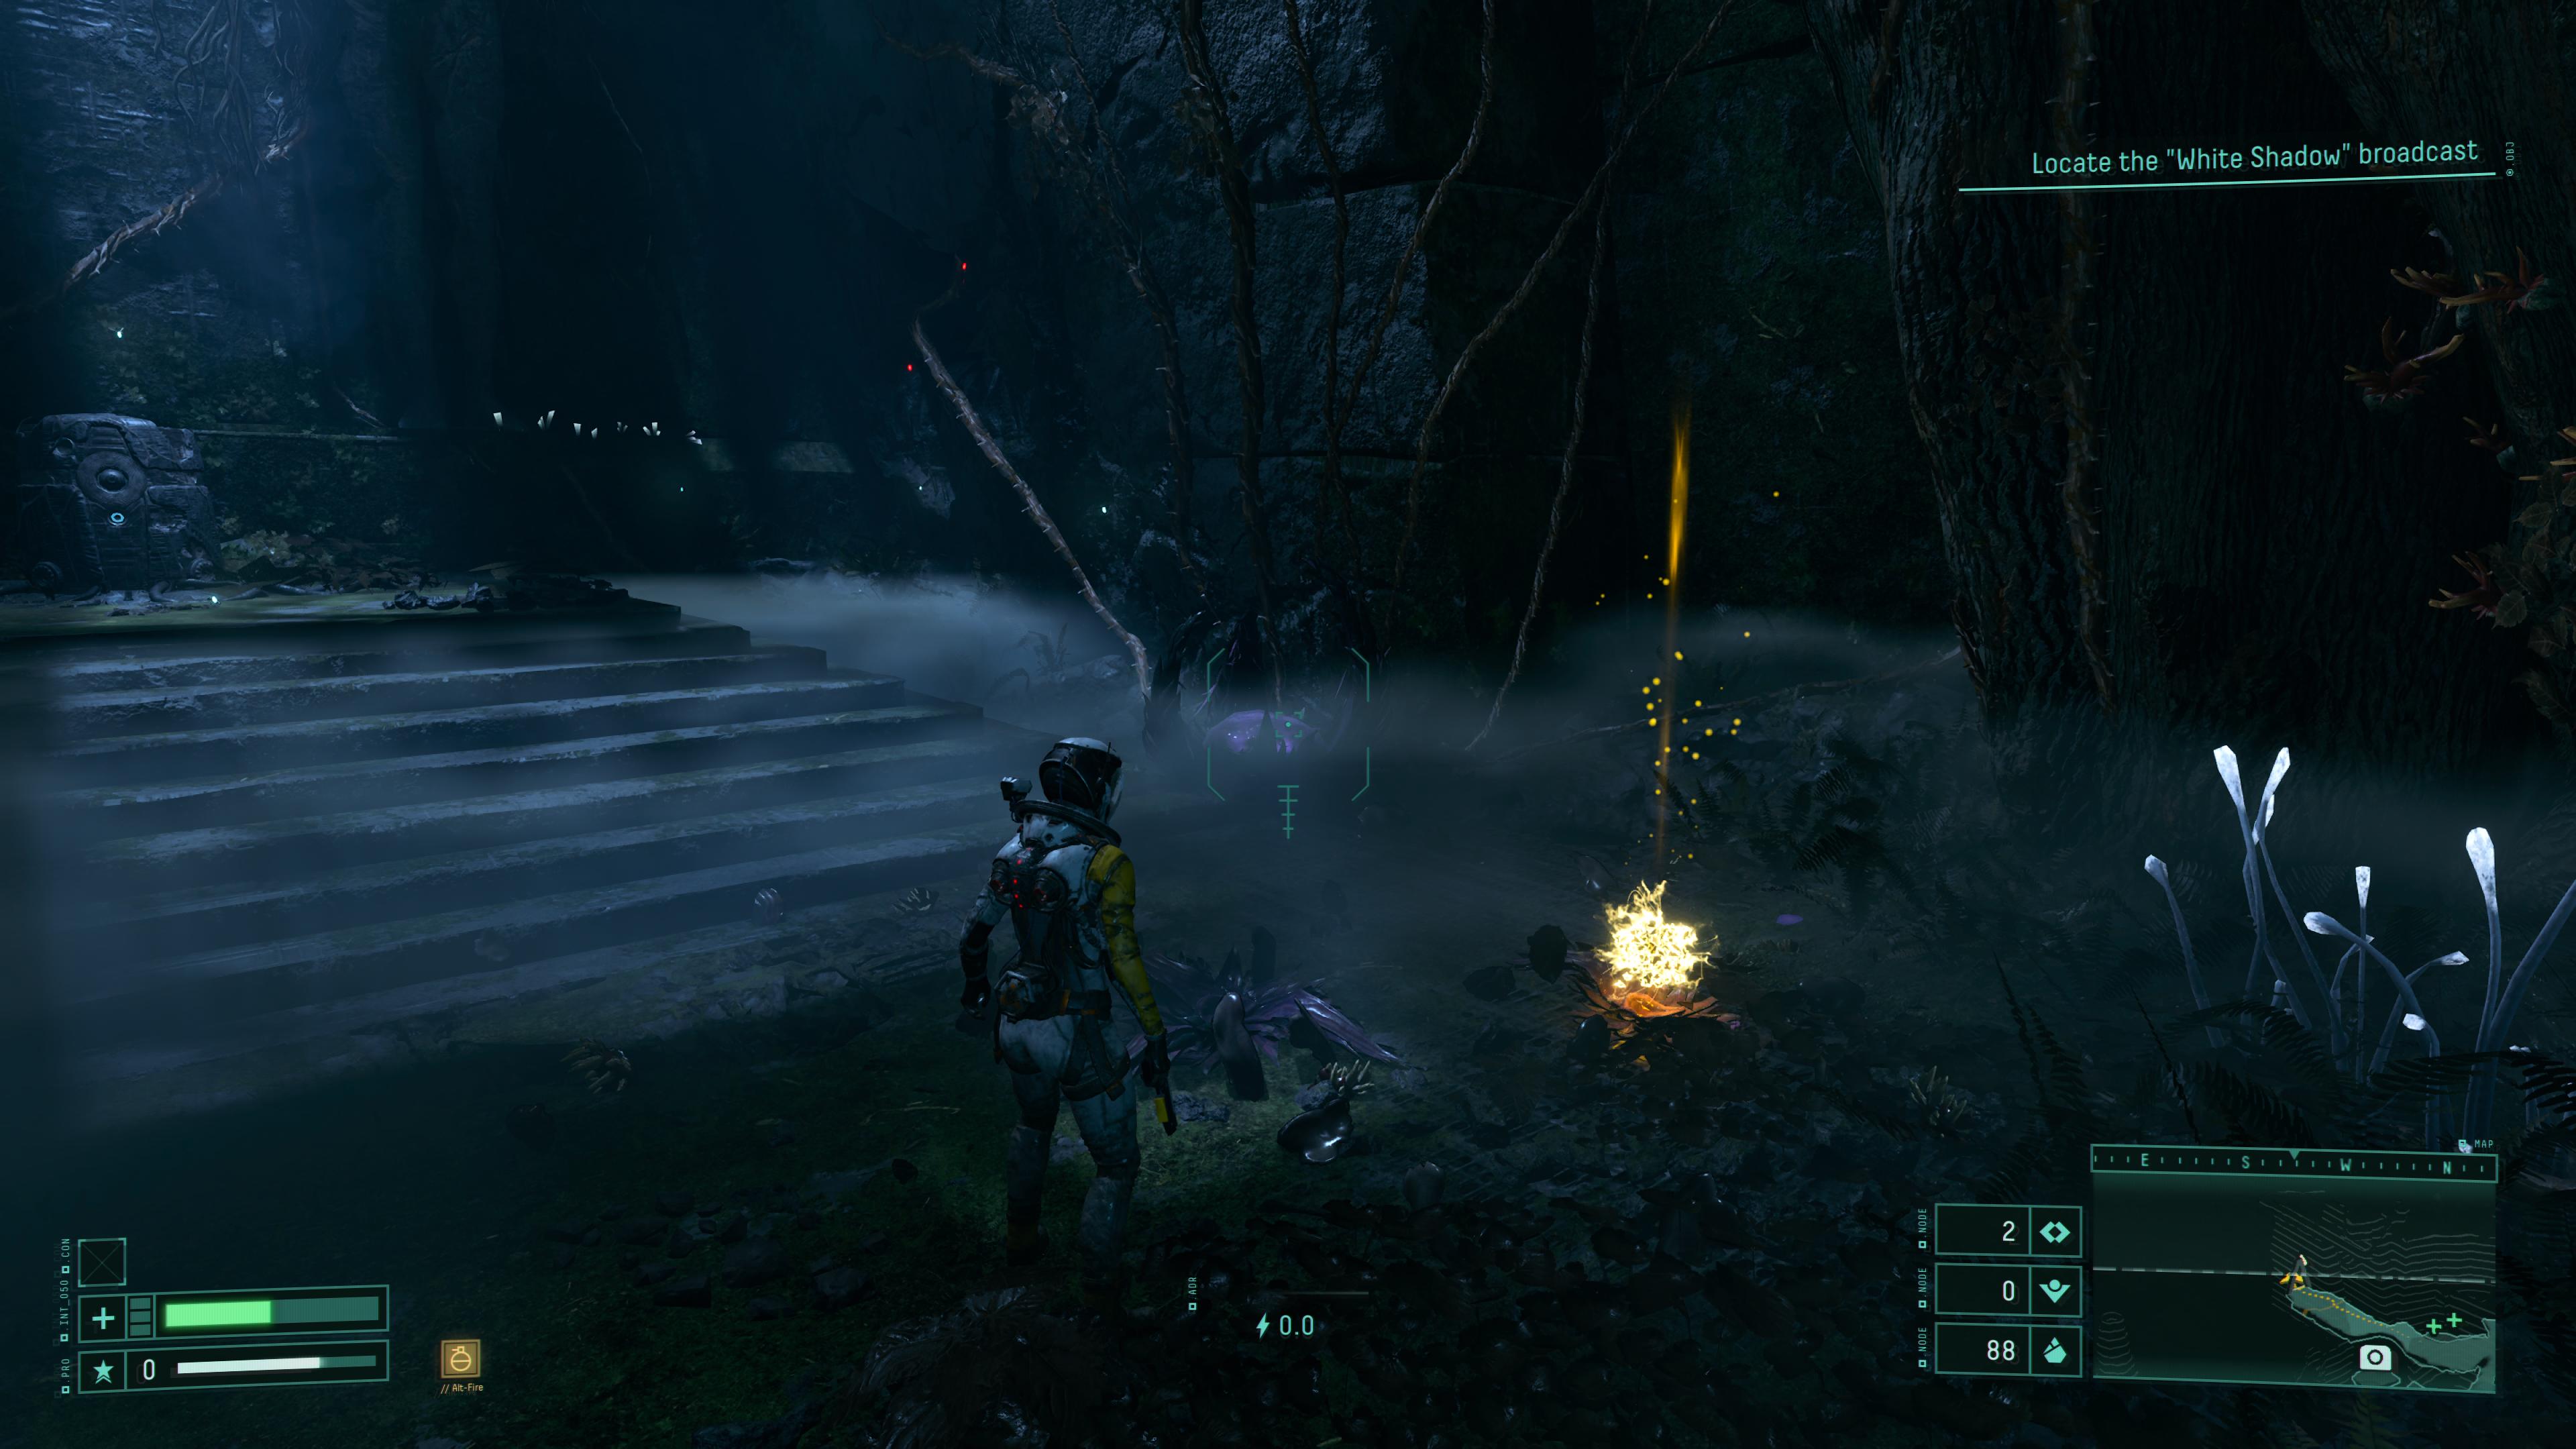
If you see a large, yellow, glowing ball floating above the ground like this, be warned — the floor will give way under you, and you'll be deposited in a closed-off room. Any number of things are waiting for you down there, from enemies, to a room full of obilite that you need to hoover up before it disappears. There are also chests full of goodies, as well as tombs that can offer up items, as well as trigger an enemy spawn.
The good news is that the transporters which you use to leave the area can be activated at any time. If you drop into a room and a giant alien monster is down there, you don't have to tussle. Just run to the transported and get out of there.
If you're low on health and spot the telltale orb, think twice before paying the room a visit. It may not be worth the risk, but depending on how confident/ brave/ stupid you are, you might decide it's worth the gamble. Good luck!
6. Pick and choose Parasites

You'll come across Parasites early in the game. They offer a buff/ debuff combo, and if you like what you see, you can attach them to your suit to start enjoying the benefits and simultaneously suffering the consequences of your choices.
While we wouldn't recommend stacking too many, or attaching every single one you some across, the risk/ reward factor should be at the forefront of your mind. There are trophies for attaching a number of them, so if you're after those, by all means, go wild.
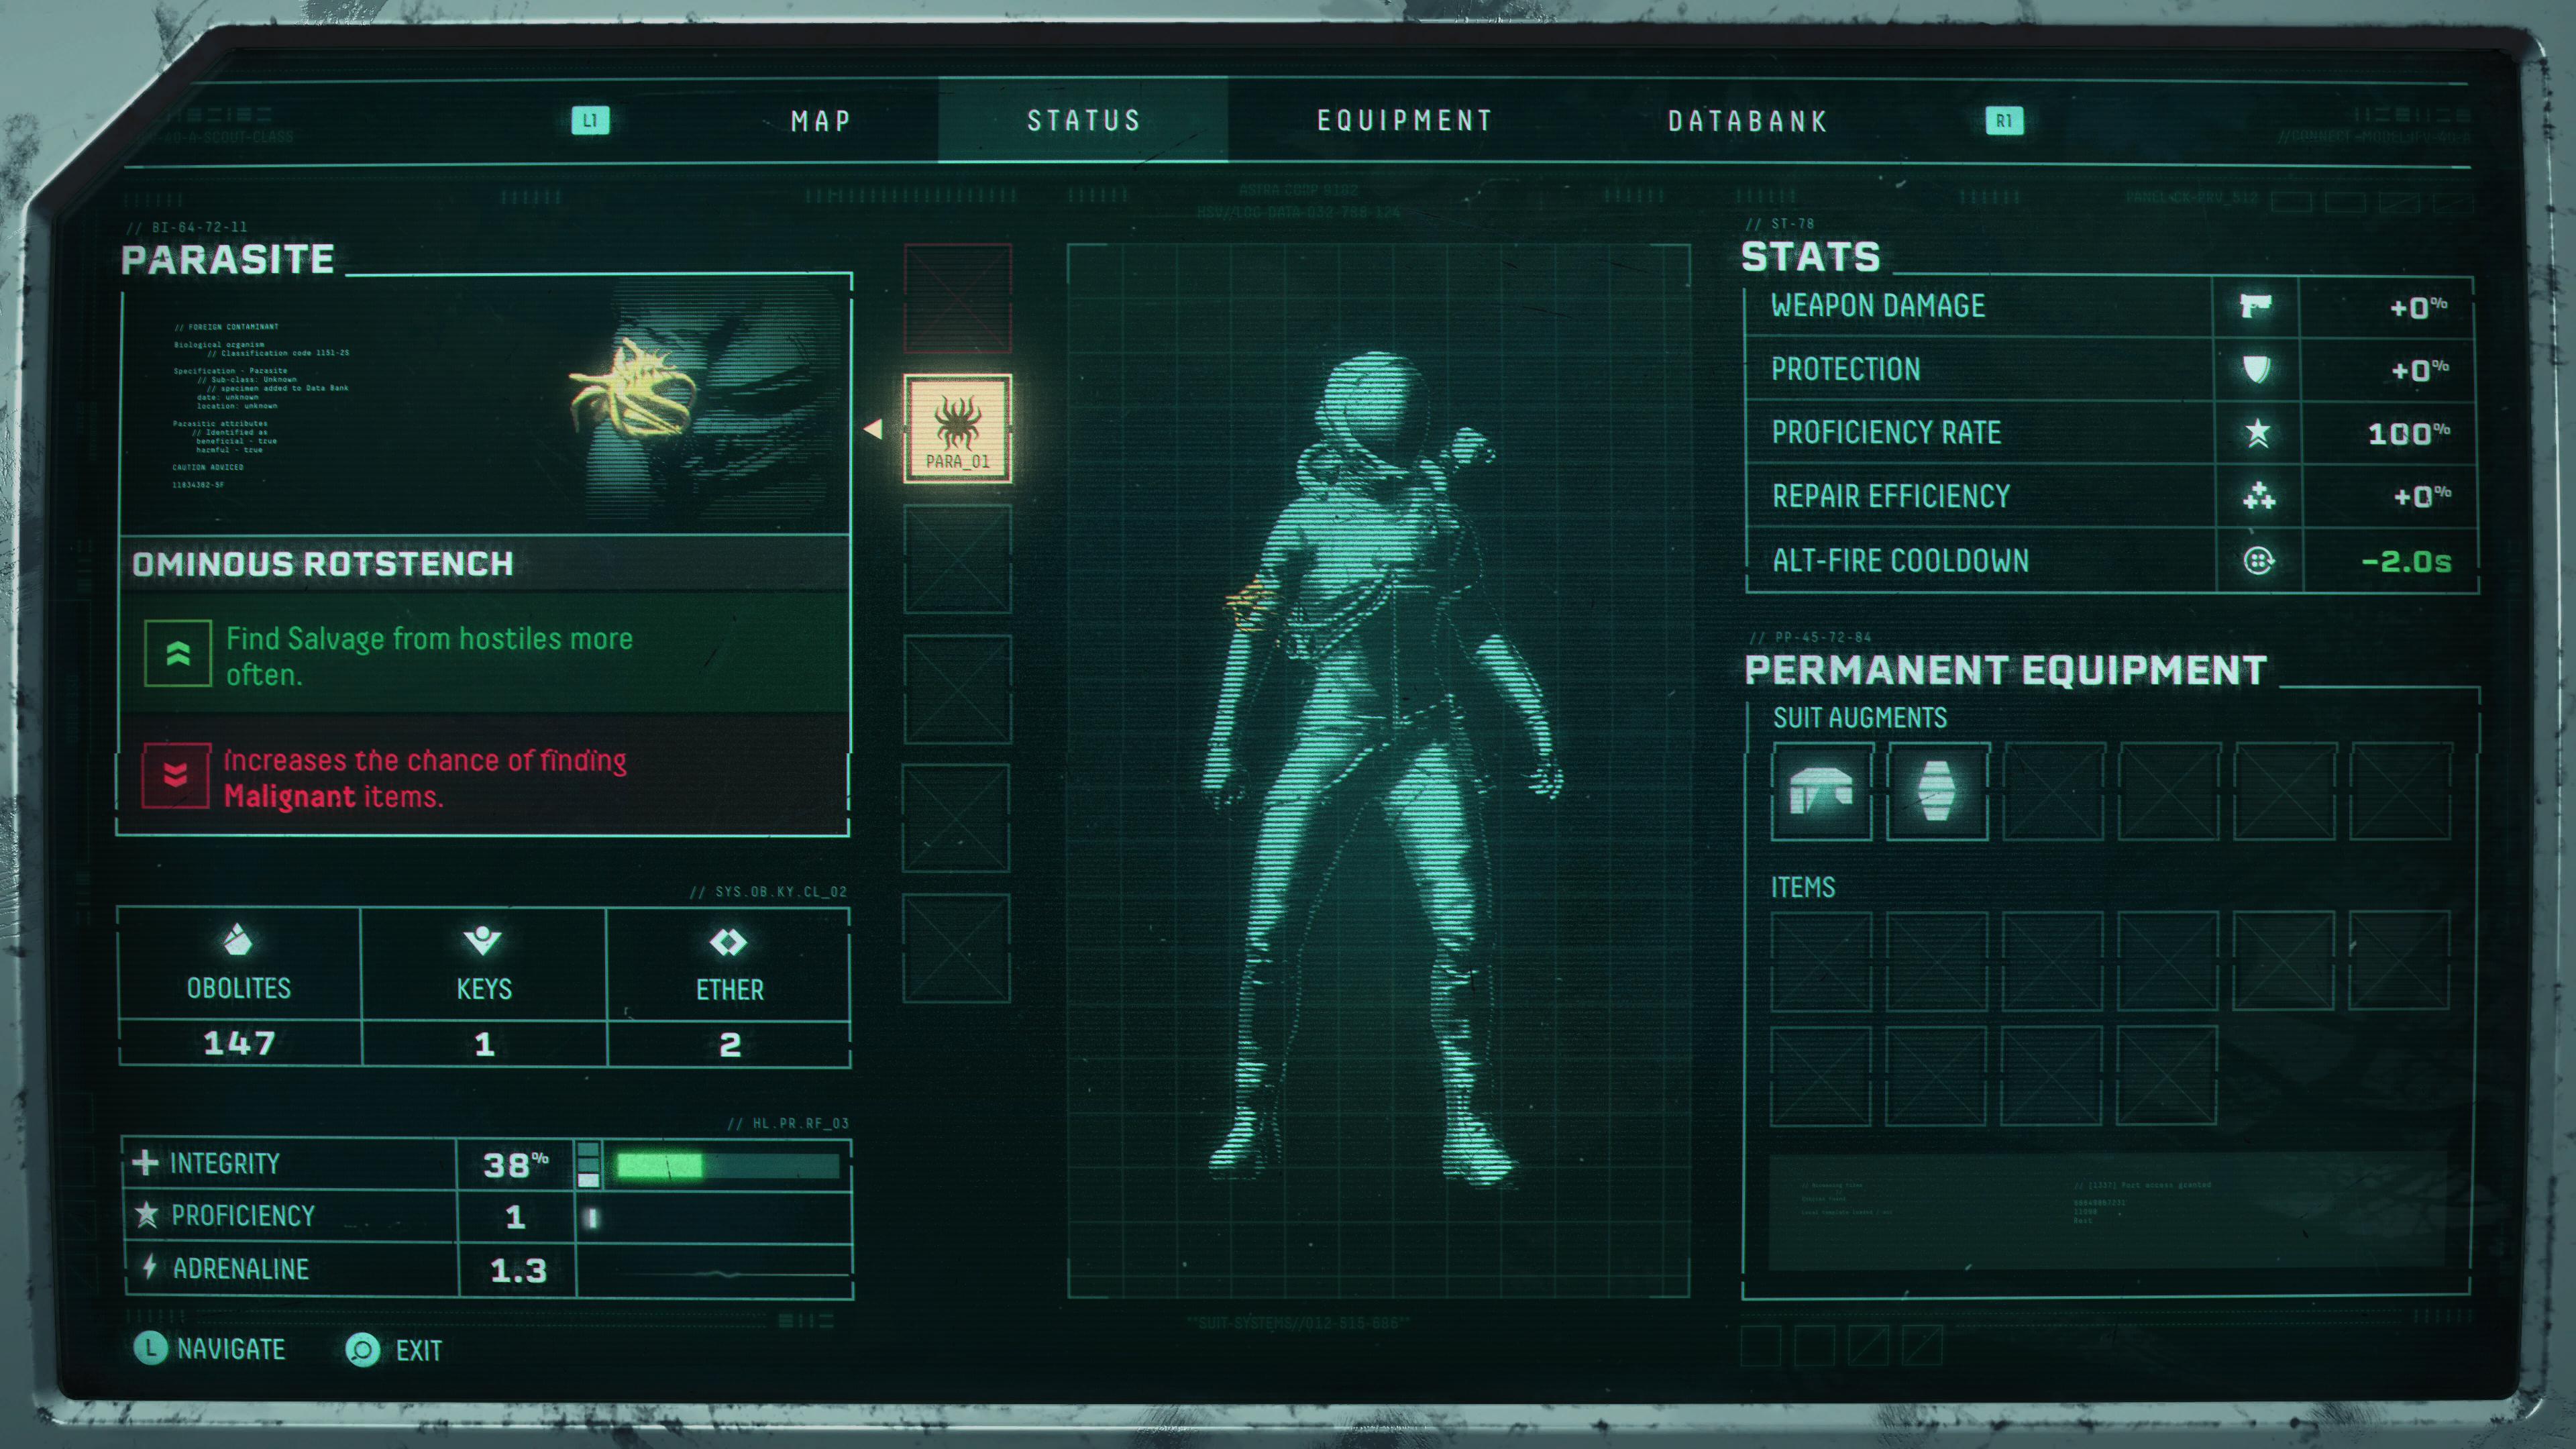
Given the roguelike nature of the game, it's also fun to experiment with pickups, particularly at the start when the stakes don't feel so high. So that's the time to play around. Outside of that, it's worth erring on the conservative side, especially taking Malignant items into account.
7. You don't need to pick up every Malignant item
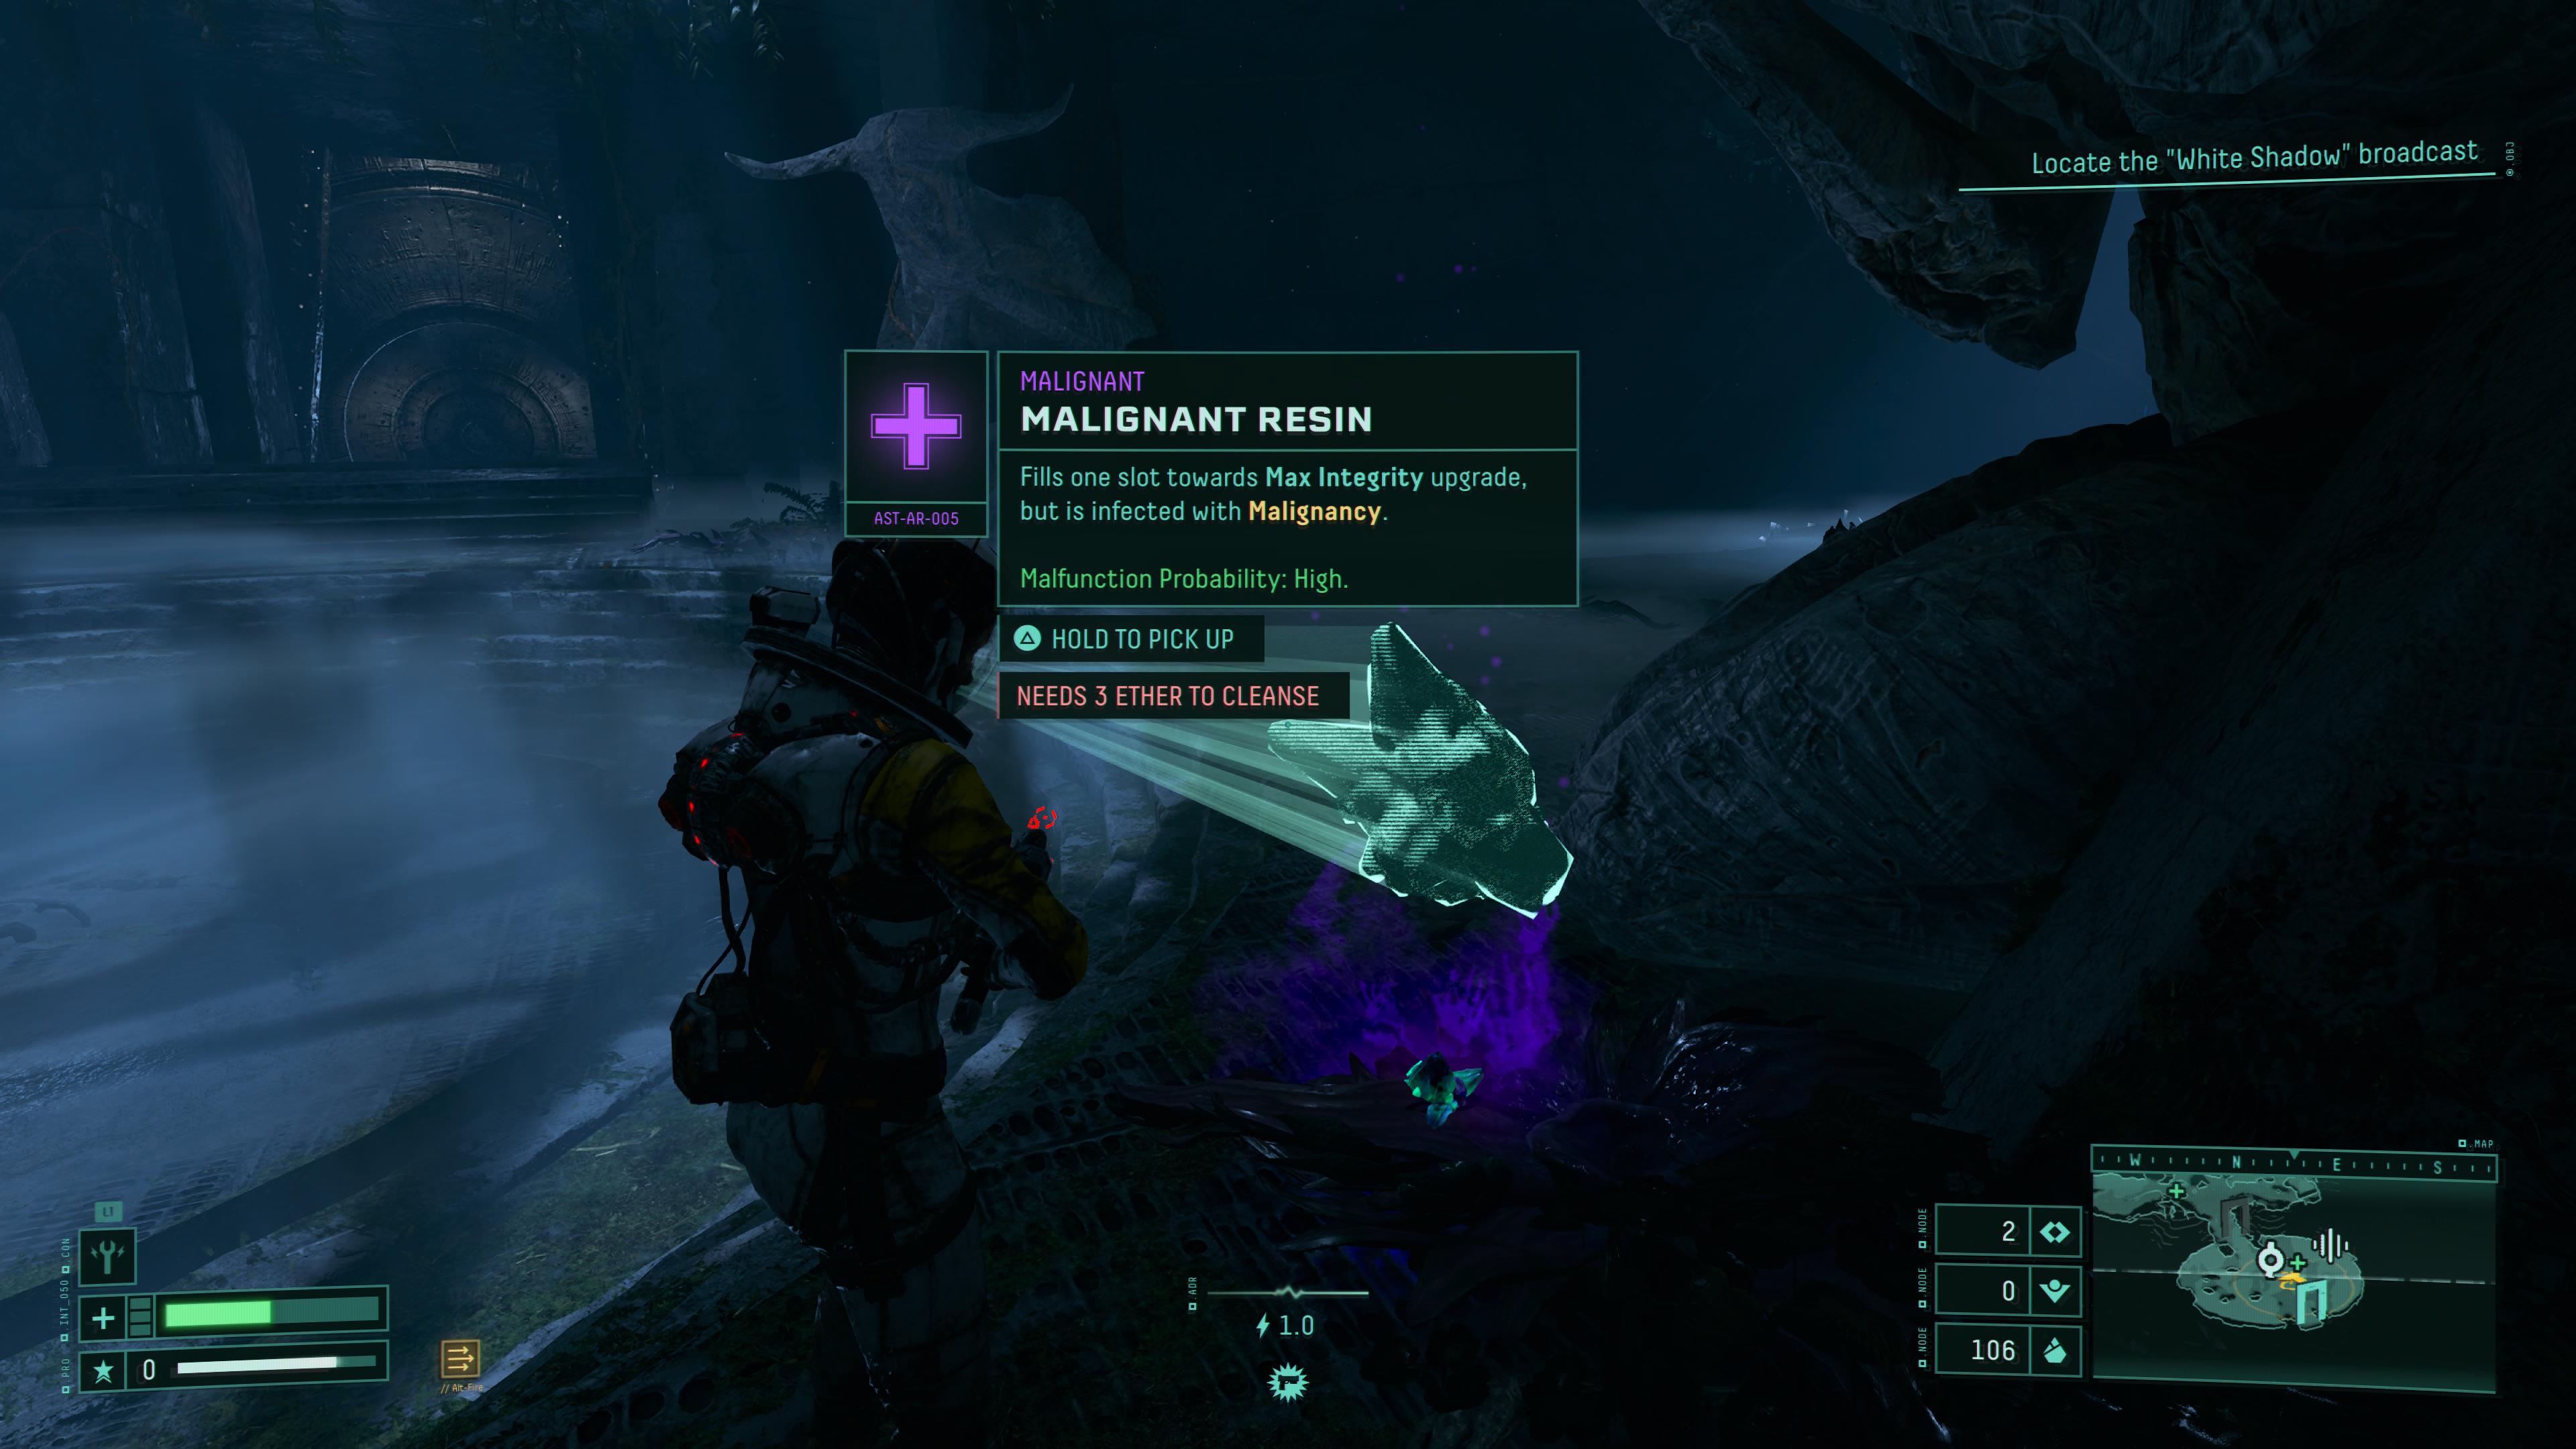
Malignant items are versions of regular items that have been afflicted with a malignancy which turns them a pretty purple color. It also means that as well as beneficial buff, there's a debuff waiting in the wings to pounce.
Luckily, you can see what you're in for before picking up the item. You have a couple of options at this point — you can either pick it up and complete the objective to get rid of the debuff, called a 'suit malfunction,' or you can use ether to cleanse it. Ether is a rare resource and is one of the few things that carries over between cycles. It has other uses in the game that are far more important than cleansing Malignant items, so we don't recommend frittering away on cleansing. Of course, that's ultimately up to you, but we'd advise passing up particularly nasty items, or slogging through with the objective to get rid of the malfunction.
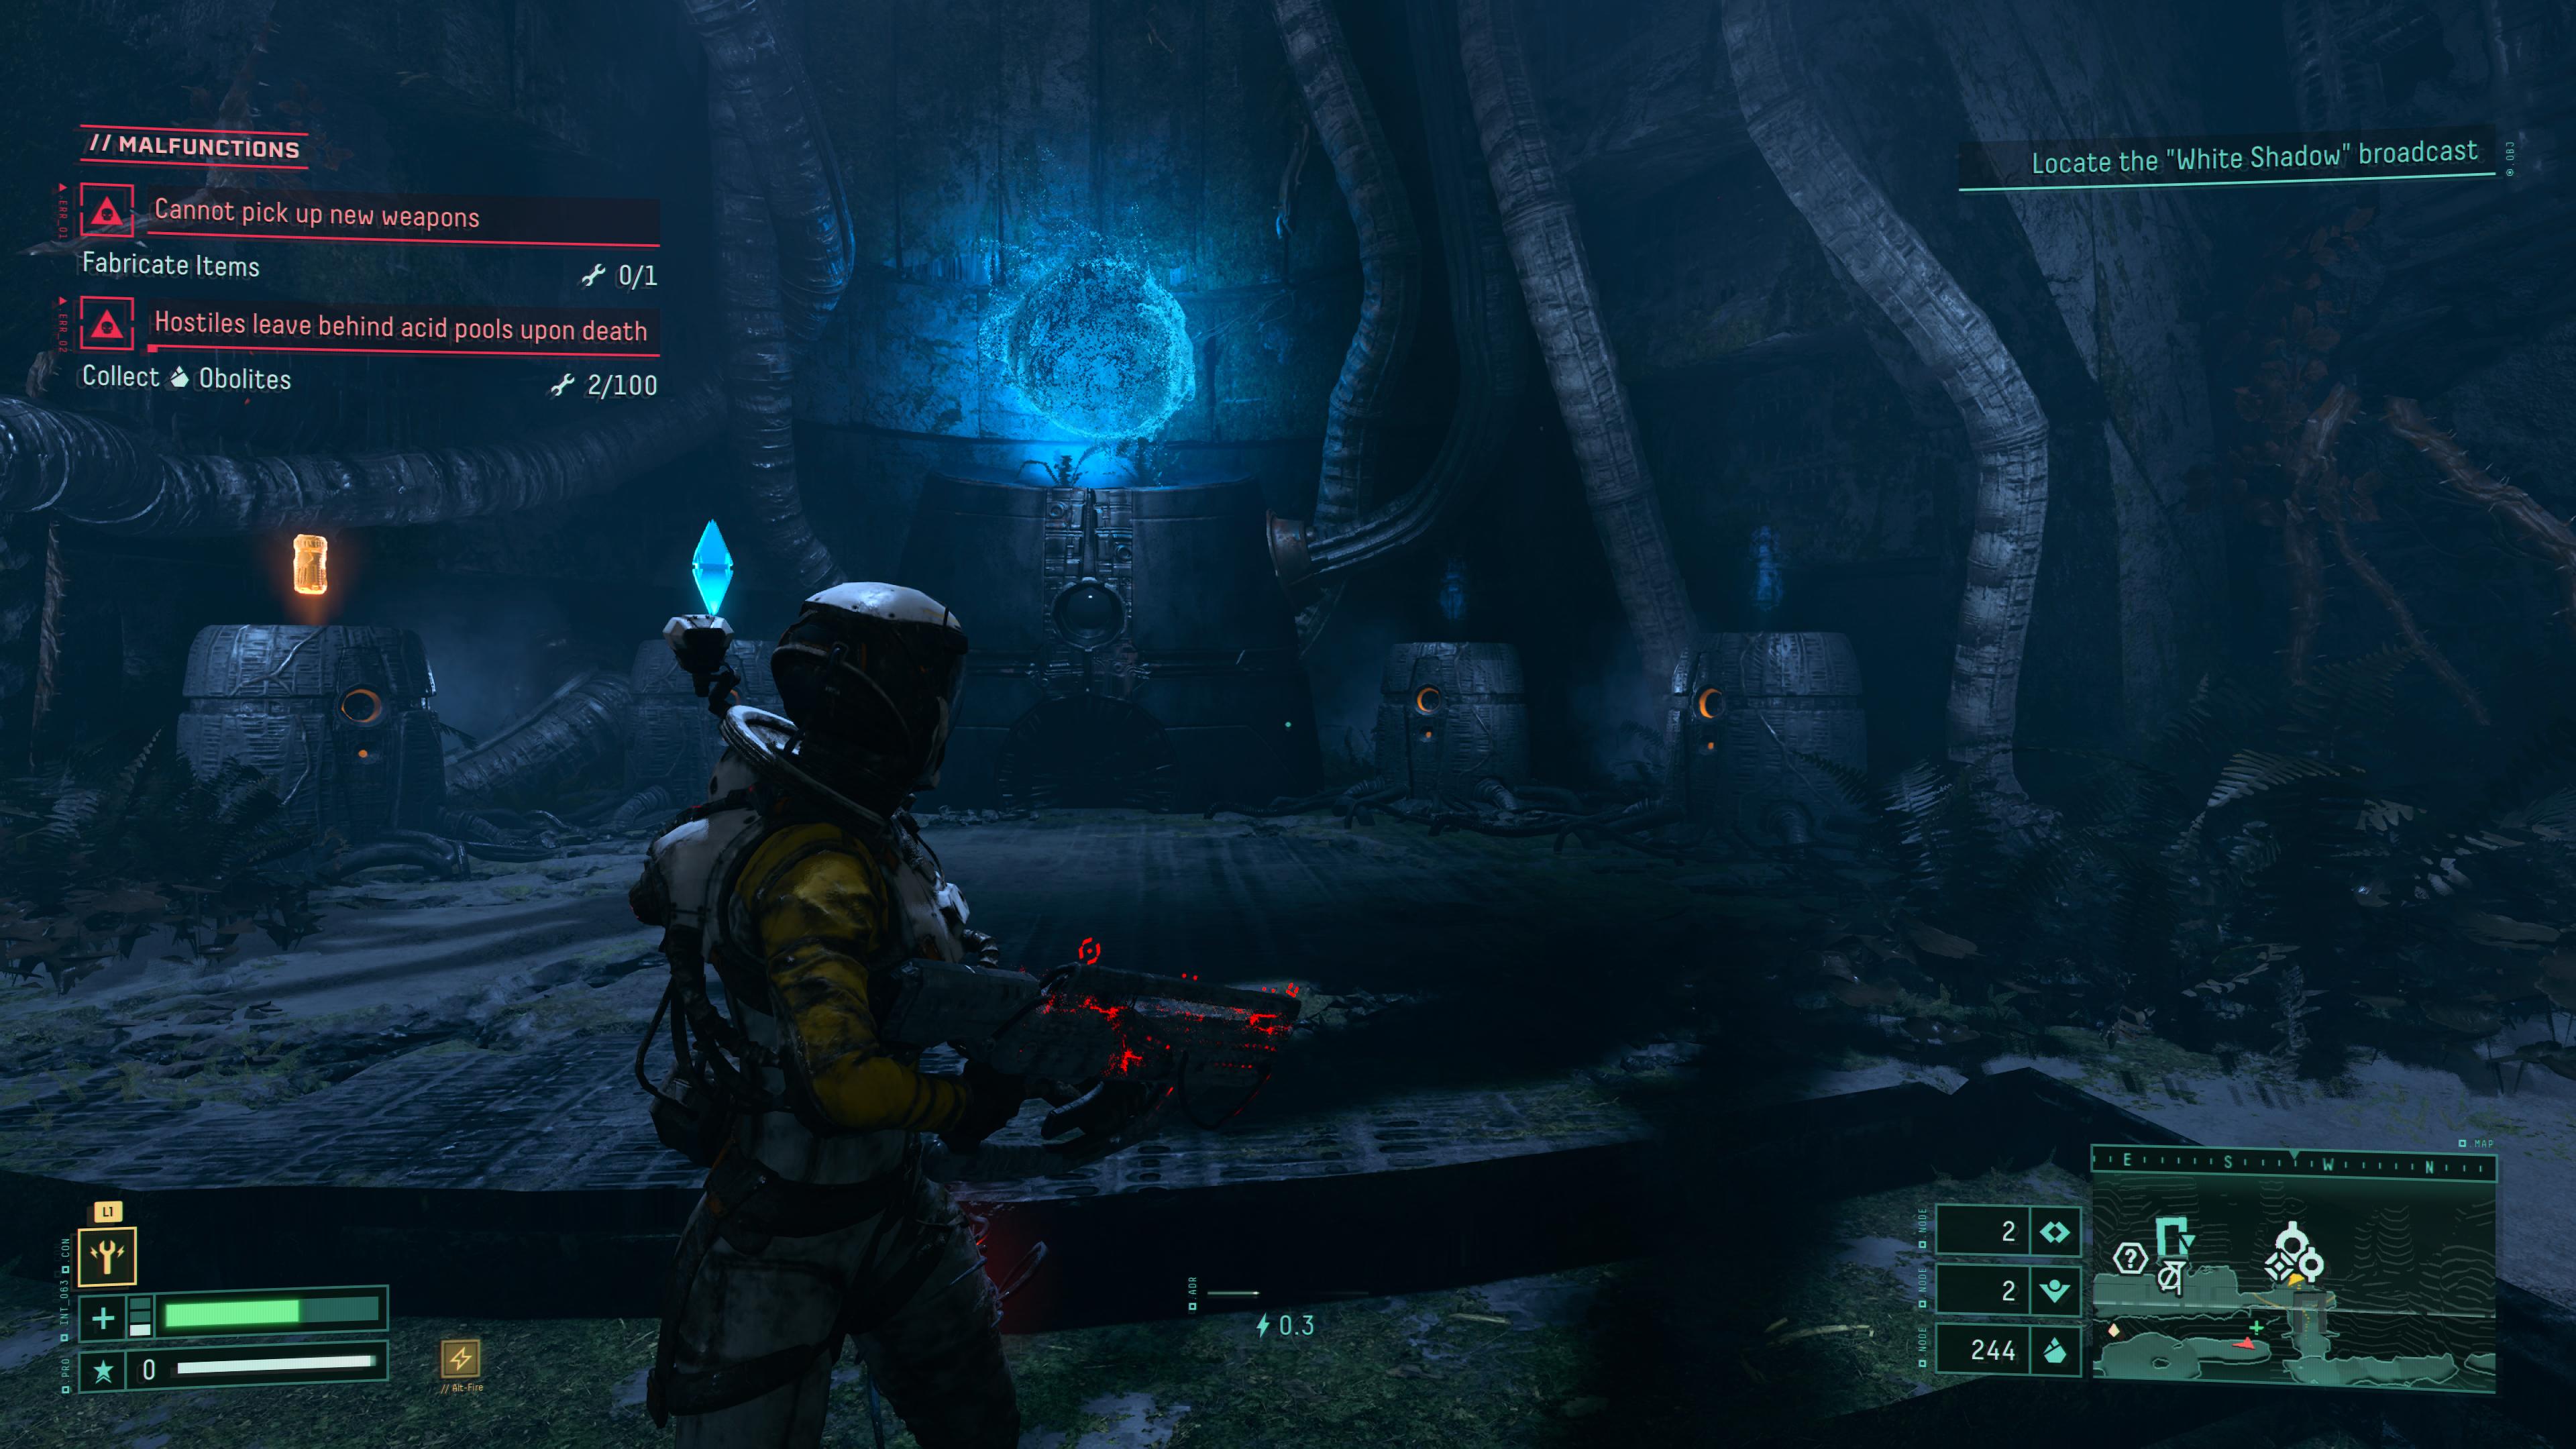
You can pick up multiple Malignant items, and each one brings its own suit malfunction to the party. You can end up stacking quite the array of horrendous side effects, like not being able to pick up new weapons, or enemies leaving behind pools of acid after they've been killed.
It's up to you to gauge the risk/ reward component, but unless the buff is something stellar, or you enjoy experimenting, we'd say steer clear. Or at least exercise some restraint!
8. Sleep every time you spawn at Helios
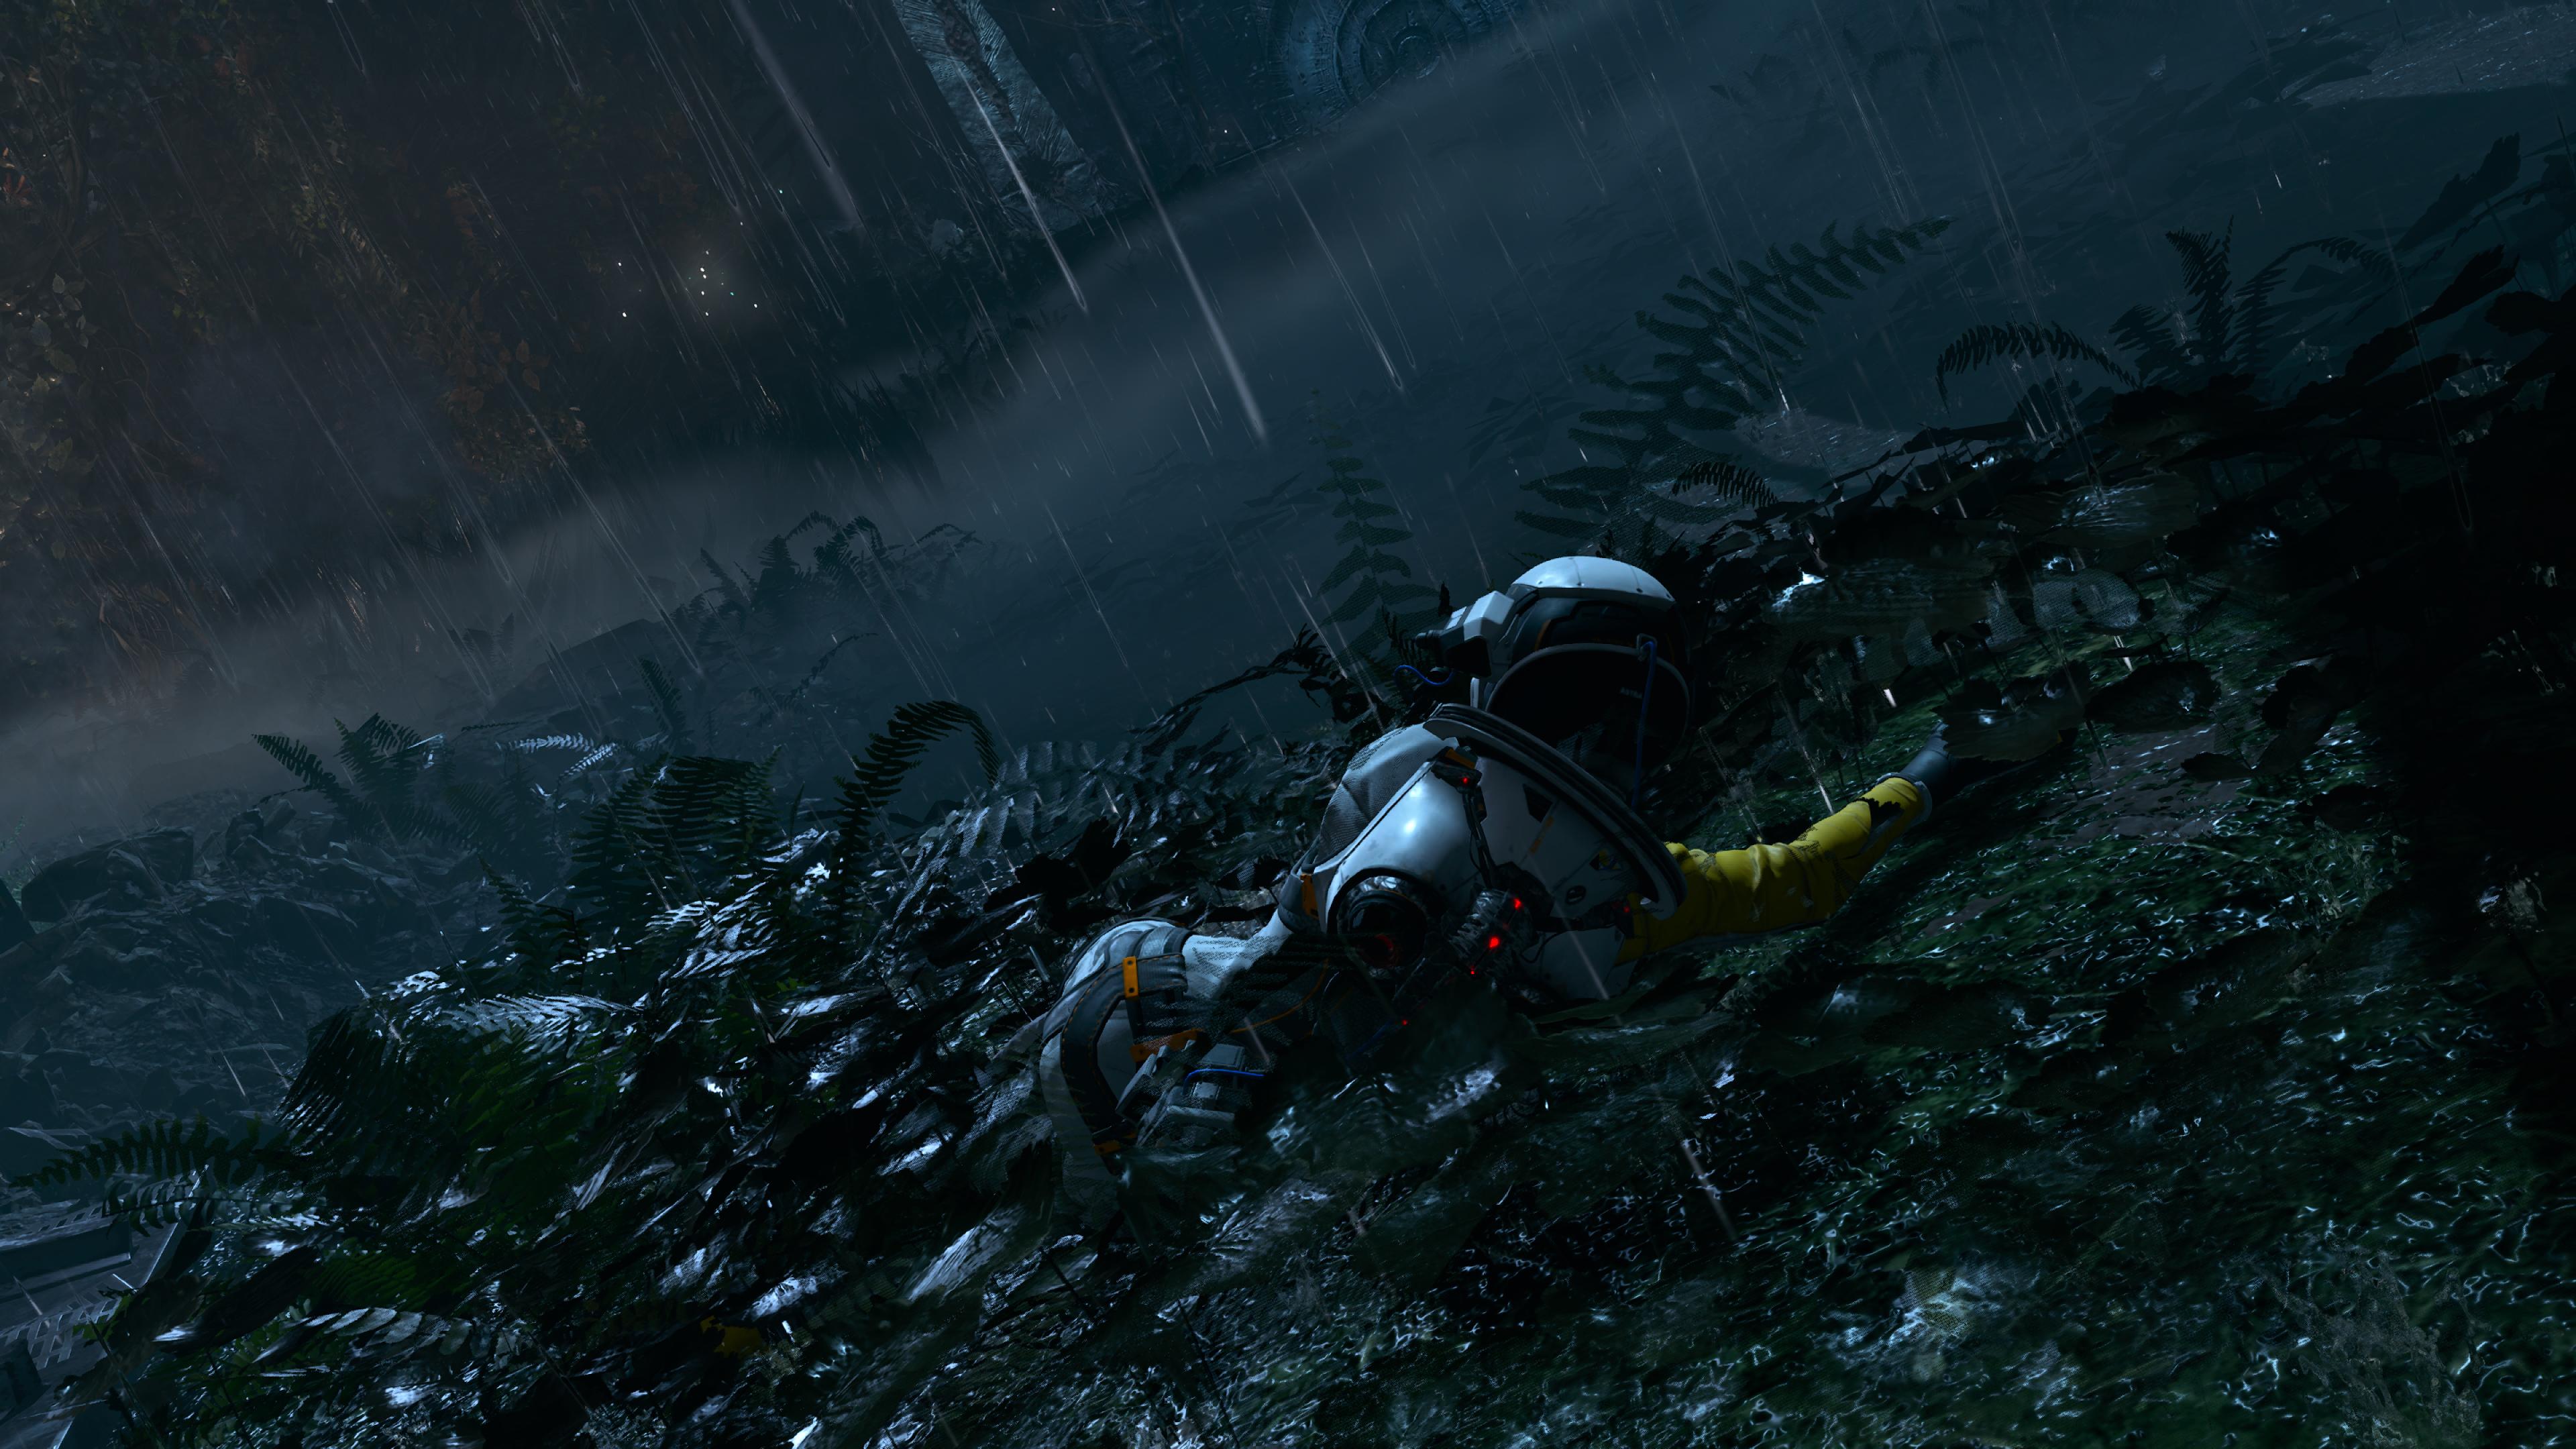
You'll be visiting Selene's ship a lot in Returnal. Every time you die, you'll spawn outside. It's worth popping back into the ship before you head out though, for a few reasons.
Inside, you can access your in-game stats, which will let you know how many deaths you've clocked up, how many enemies you've killed etc. You can also access online leaderboards here. But there's also a bed in the ship that Selene can take a nap in, and it's worth doing it if you're interested in the mystery and lore of the game.
Without getting into spoiler territory, resting at the ship offers nothing other than a brief cutscene. You'll observe a range of them, and they won't make much sense at first. It's not necessary to do this, but it adds to the mystery of whatever is happening on Atropos.
9. You might want to tinker with DualSense settings
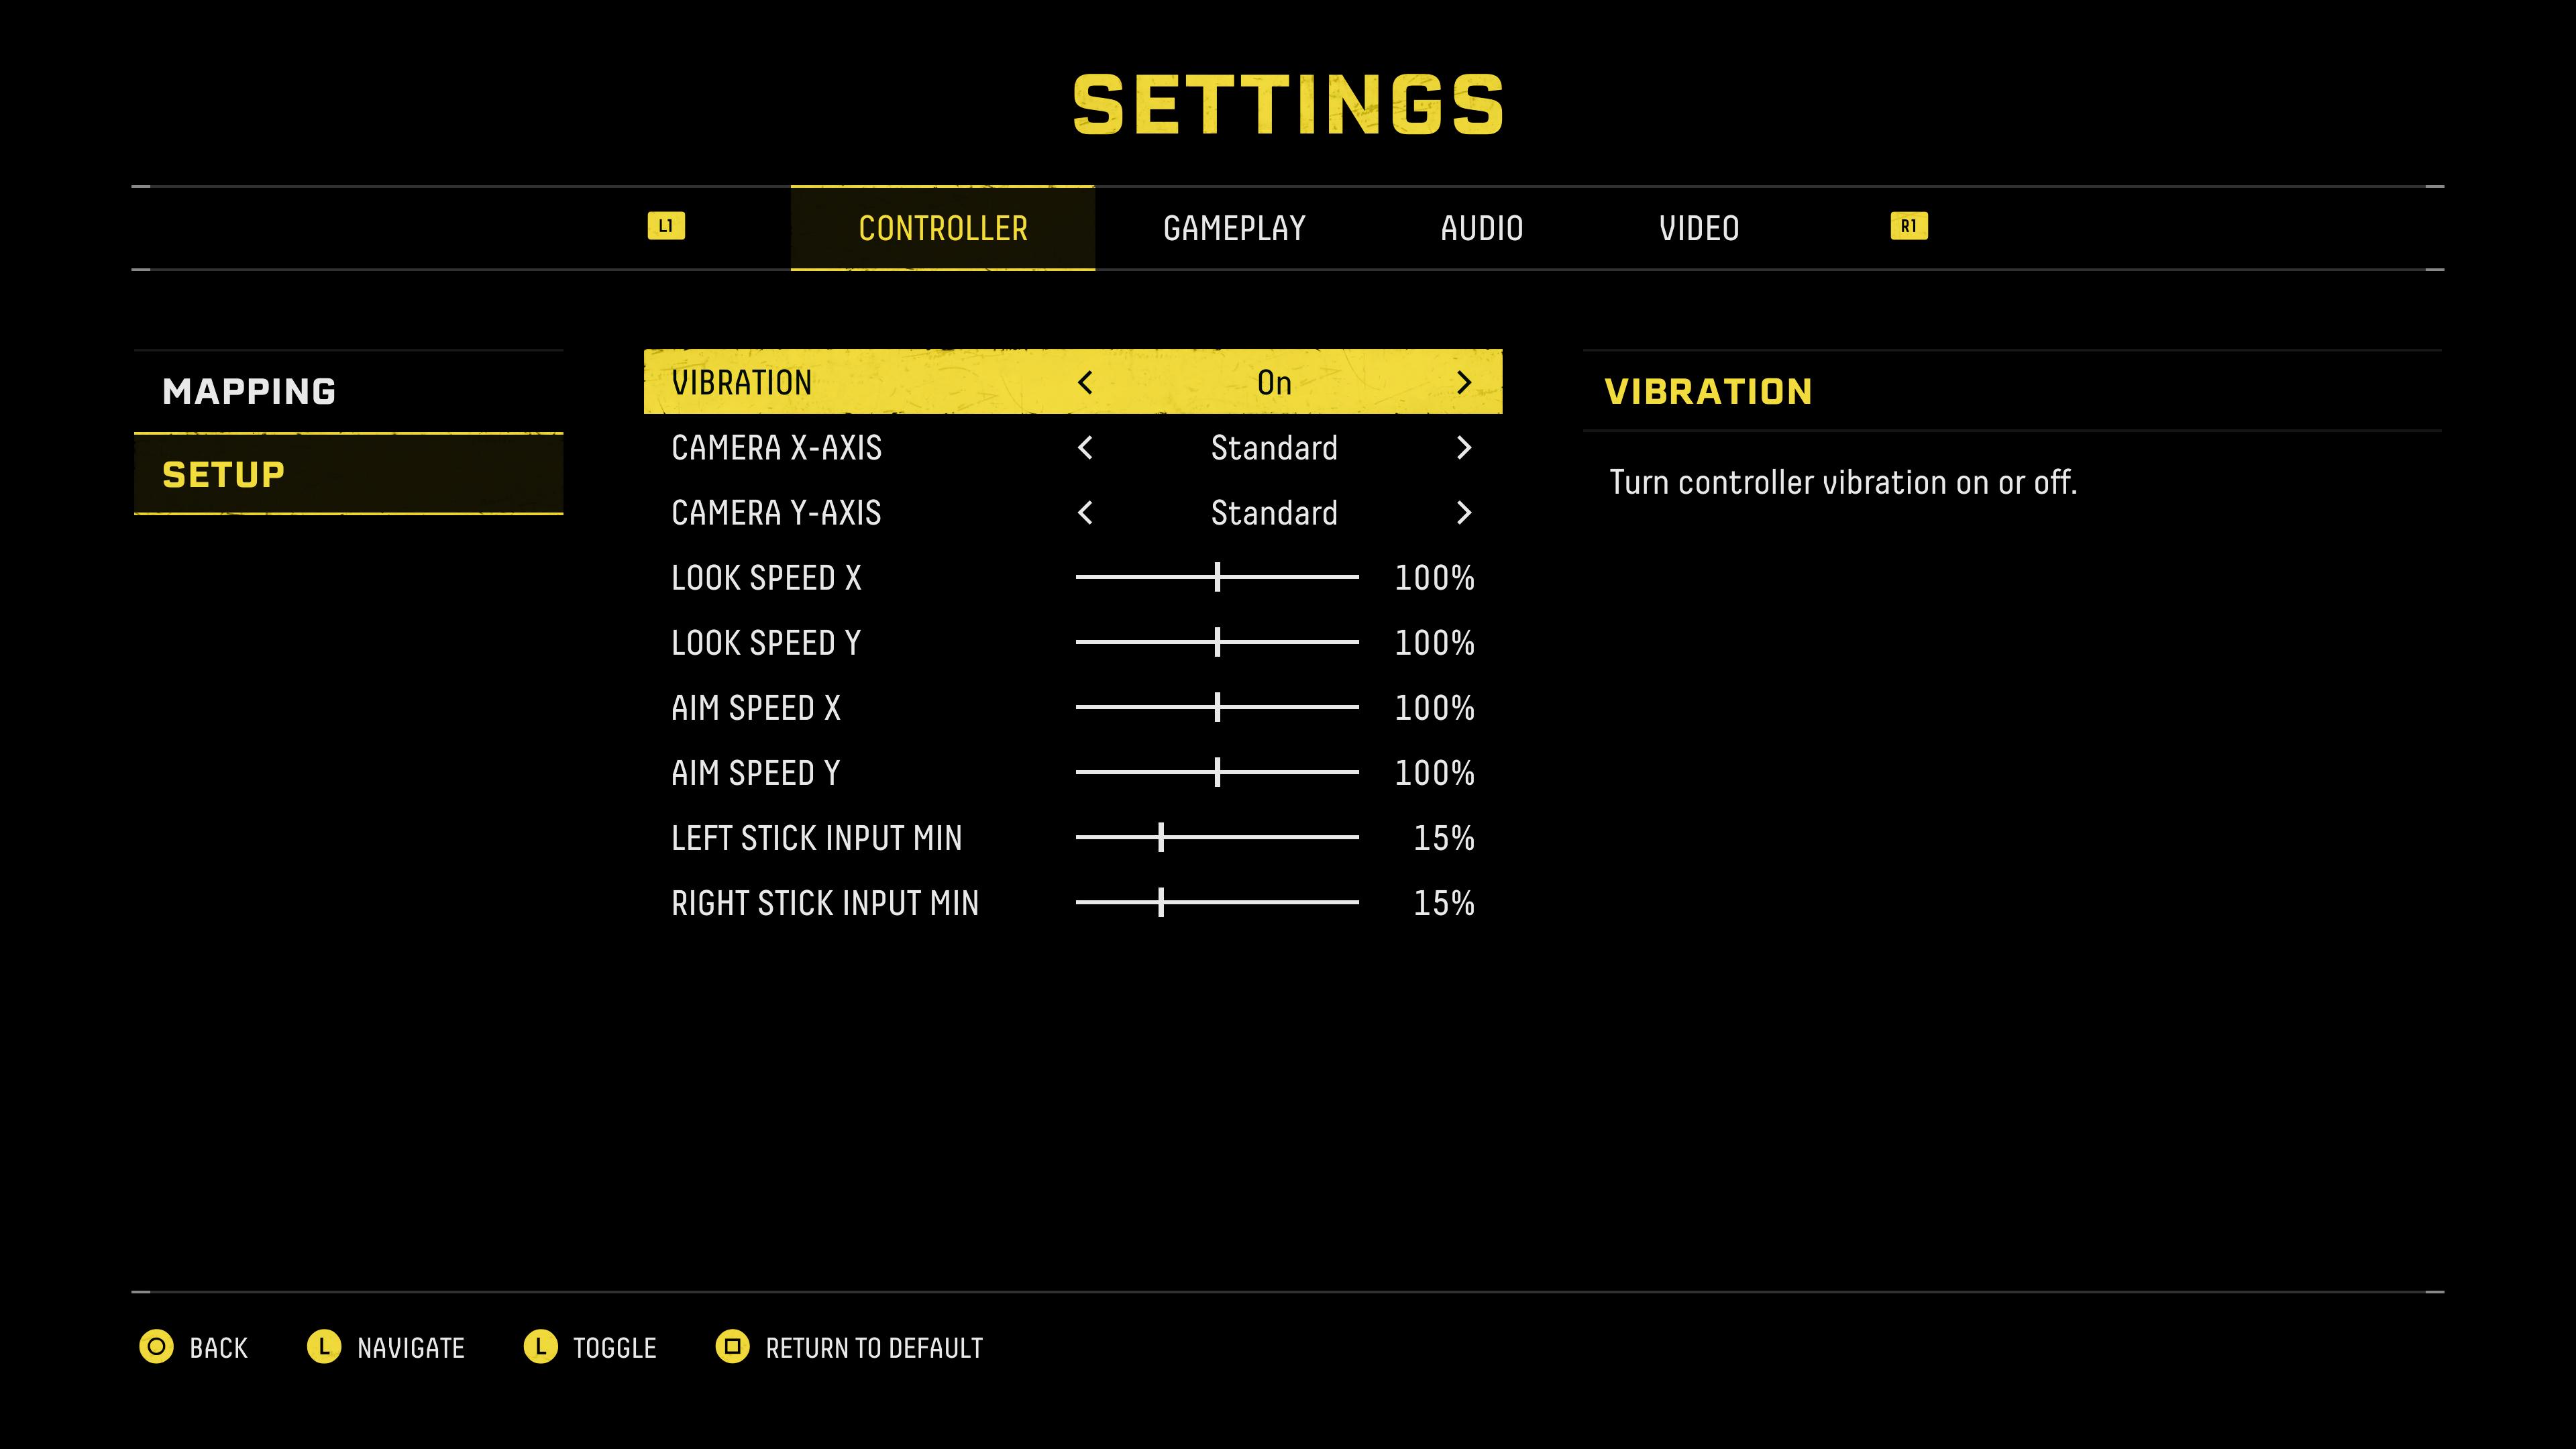
This is less of a game tip, and more of a PSA. Returnal takes advantage of the PS5's next-gen hardware features, and that includes the DualSense controller. But boy howdy! Does it take a toll on the battery.
Rory noted that while playing the game for review, his controller battery drained twice as fast as usual, giving him around two and a half hours playtime. If you have two DualSense controllers, or a charging cable long enough to reach your gaming nest, then it's not too much of an issue.
But if the battery draining is an annoyance, or the controller speaker is bothering you (it's in use a lot), you can head to the game's settings to adjust both the haptic feedback, and the speaker level.
You'll find the vibration toggle in the controller tab in the settings menu, while the controller speaker slider is under the audio tab. And don't forget you can head to the console's system settings to adjust these as well.
- More: Returnal review: A true next-gen experience
Shabana is T3's News Editor covering tech and gaming, and has been writing about video games for almost a decade (and playing them since forever). As well as contributing to Tom's Guide, she's had bylines at major gaming sites during her freelance career before settling down at T3, and has podcasts, streaming, and video content under her belt to boot. Outside of work, she also plays video games and should really think about expanding her hobbies.

