How to send Nintendo Switch screenshots to your phone or computer
We've got two new ways to send Switch screenshots, and they require some explanation
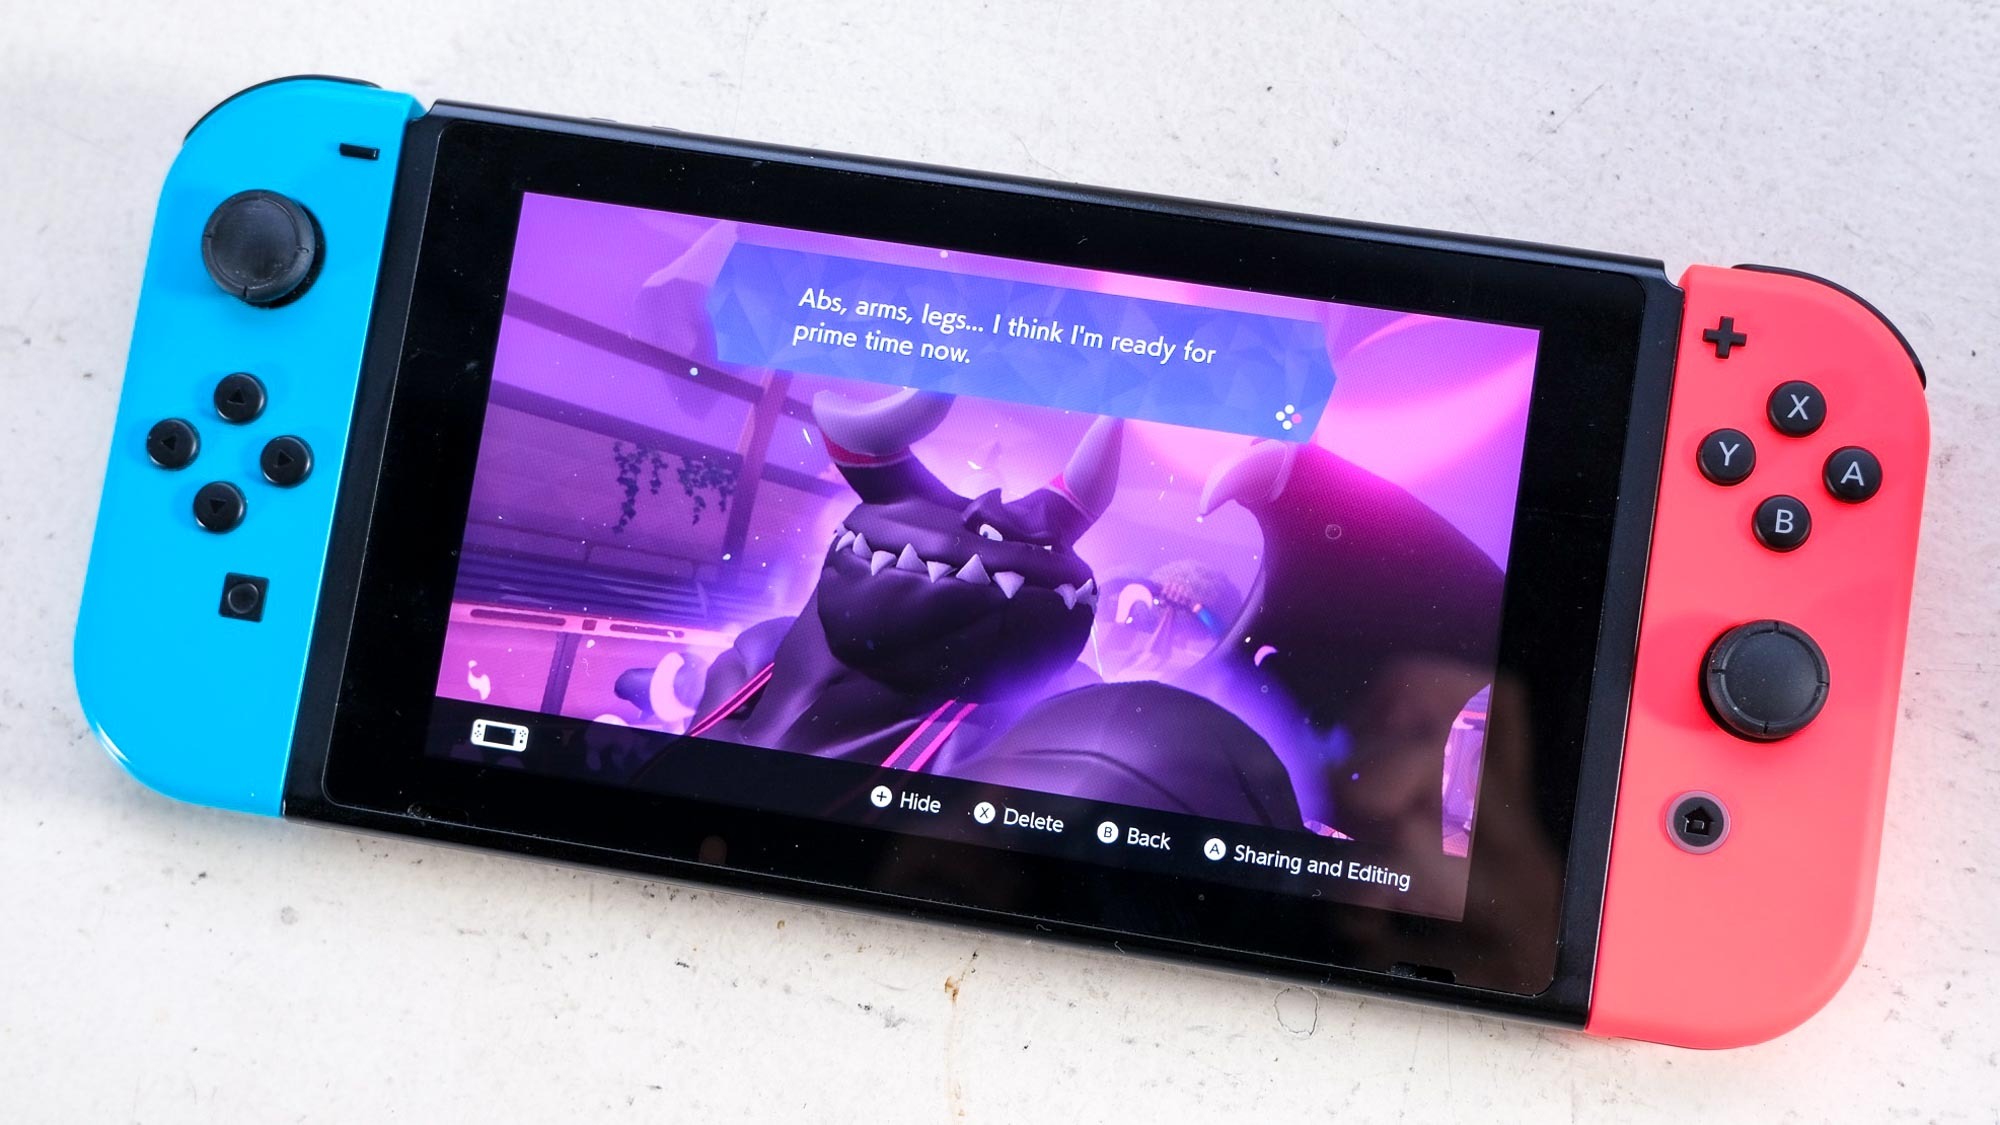
You can now directly send Nintendo Switch screenshots to your phone or other smart device, but the process is kind of confusing. Once we saw how complicated things can get, we thought it would be best to create a step-by-step walkthrough to explain how screenshot transfer works.
There are two ways to send Switch screenshots to another device. When you want to send a screenshot to your phone or tablet, you'll use the wireless method (which employs QR codes), and if you want to share images with a laptop or desktop, you'll transfer via USB cable.
- The best Cyber Monday deals you can still get
- Need more adventures? We've got the best Nintendo Switch games
And as a reminder, you take screenshots by clicking the little circle button near the bottom of the left Joy-Con (or above and to the left of the D-pad on the Pro controller).
But no matter how annoying this may be, it's still far easier than the two other methods we've used in the past: posting directly to social media or ejecting your microSD card and connecting it to a computer.
We've hit only two hiccups so far. First, we can't connect our Switch via USB to a Mac, as that method works only on PCs right now. Secondly, while Nintendo says "Up to 10 screenshots and 1 video capture can be transferred wirelessly at one time," we've only been able to send the single video or the 10 screenshots, not both. Selecting a video takes away the option to add photos, and videos are not available to add once you've selected photos.
Let's start with the method to send screenshots (and video) to your phone or smart device, since that's the easiest to do.
How to send Nintendo Switch screenshots to your phone
All you need for this process is a phone or camera-equipped smart device, as this requires a QR code reader.
Sign up to get the BEST of Tom's Guide direct to your inbox.
Get instant access to breaking news, the hottest reviews, great deals and helpful tips.
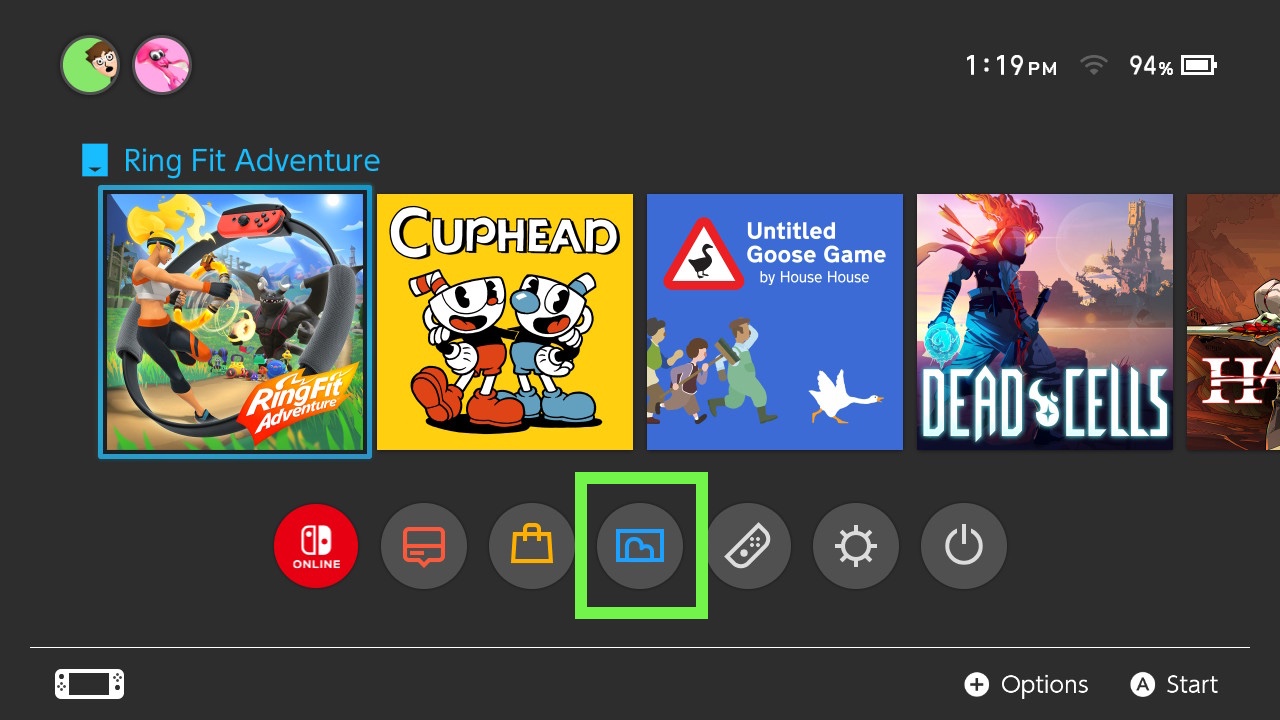
1. Open Albums on the home screen.
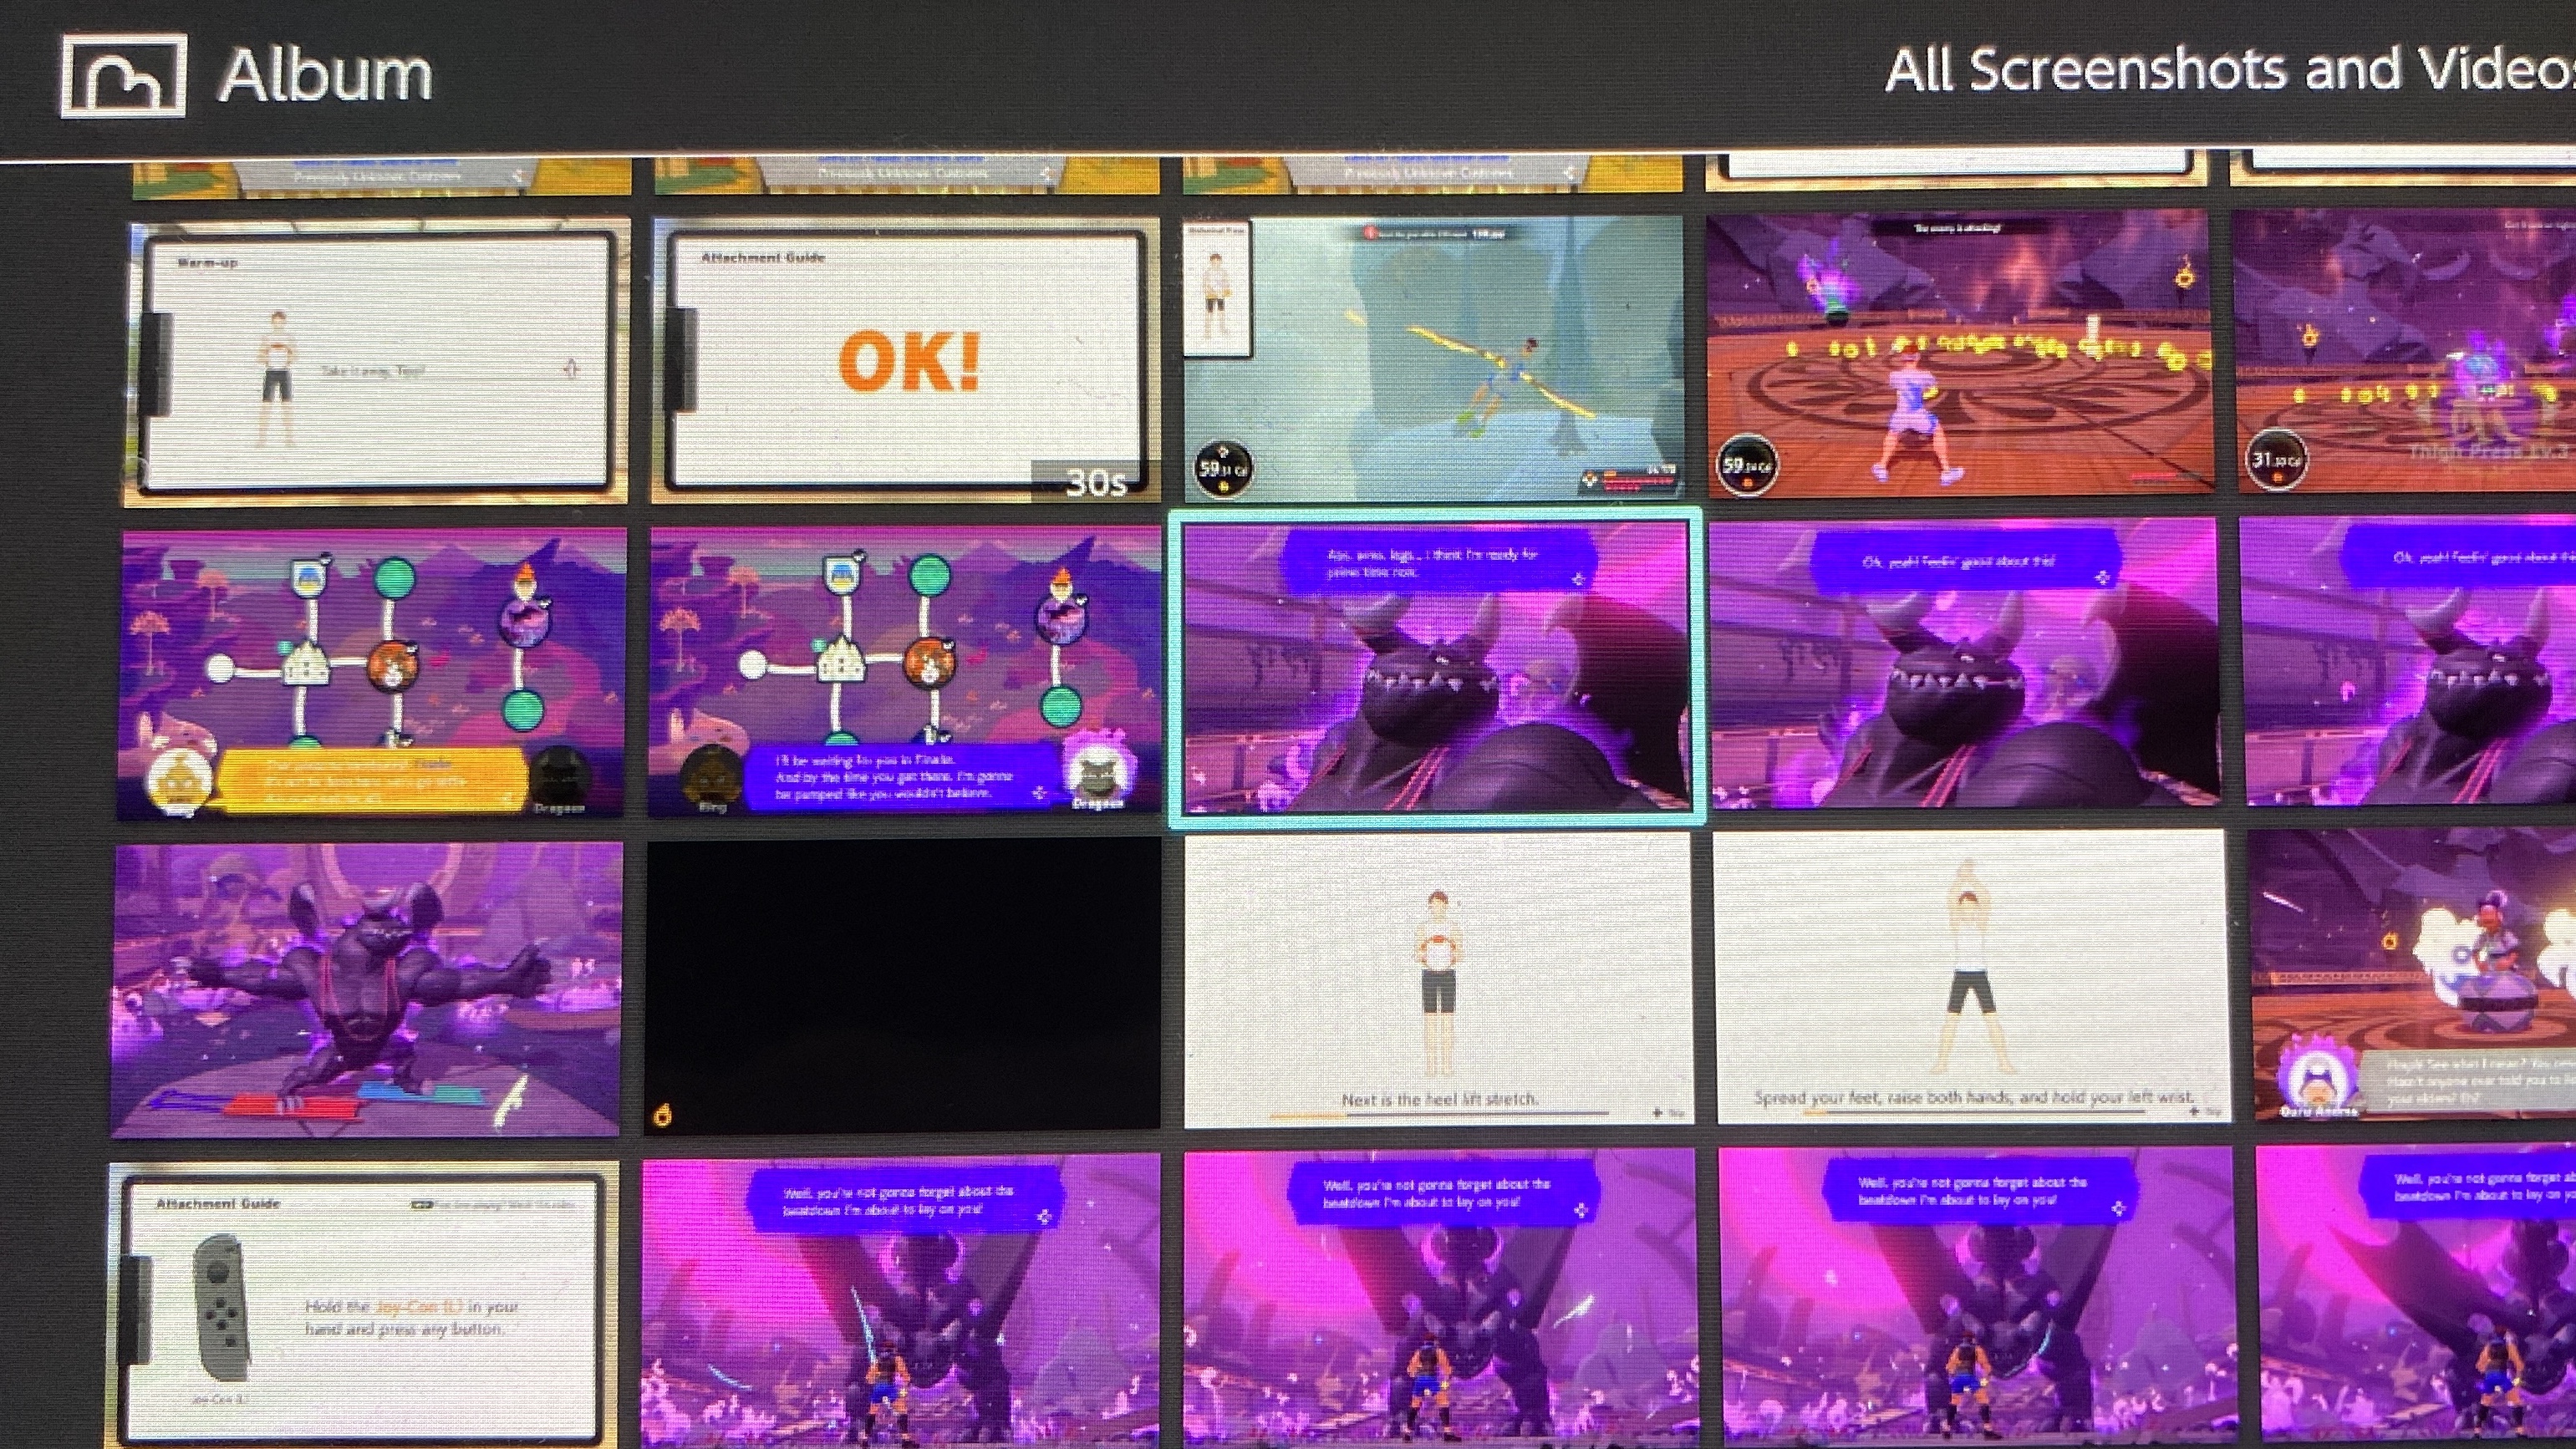
2. Select a photo or video
3. Click A
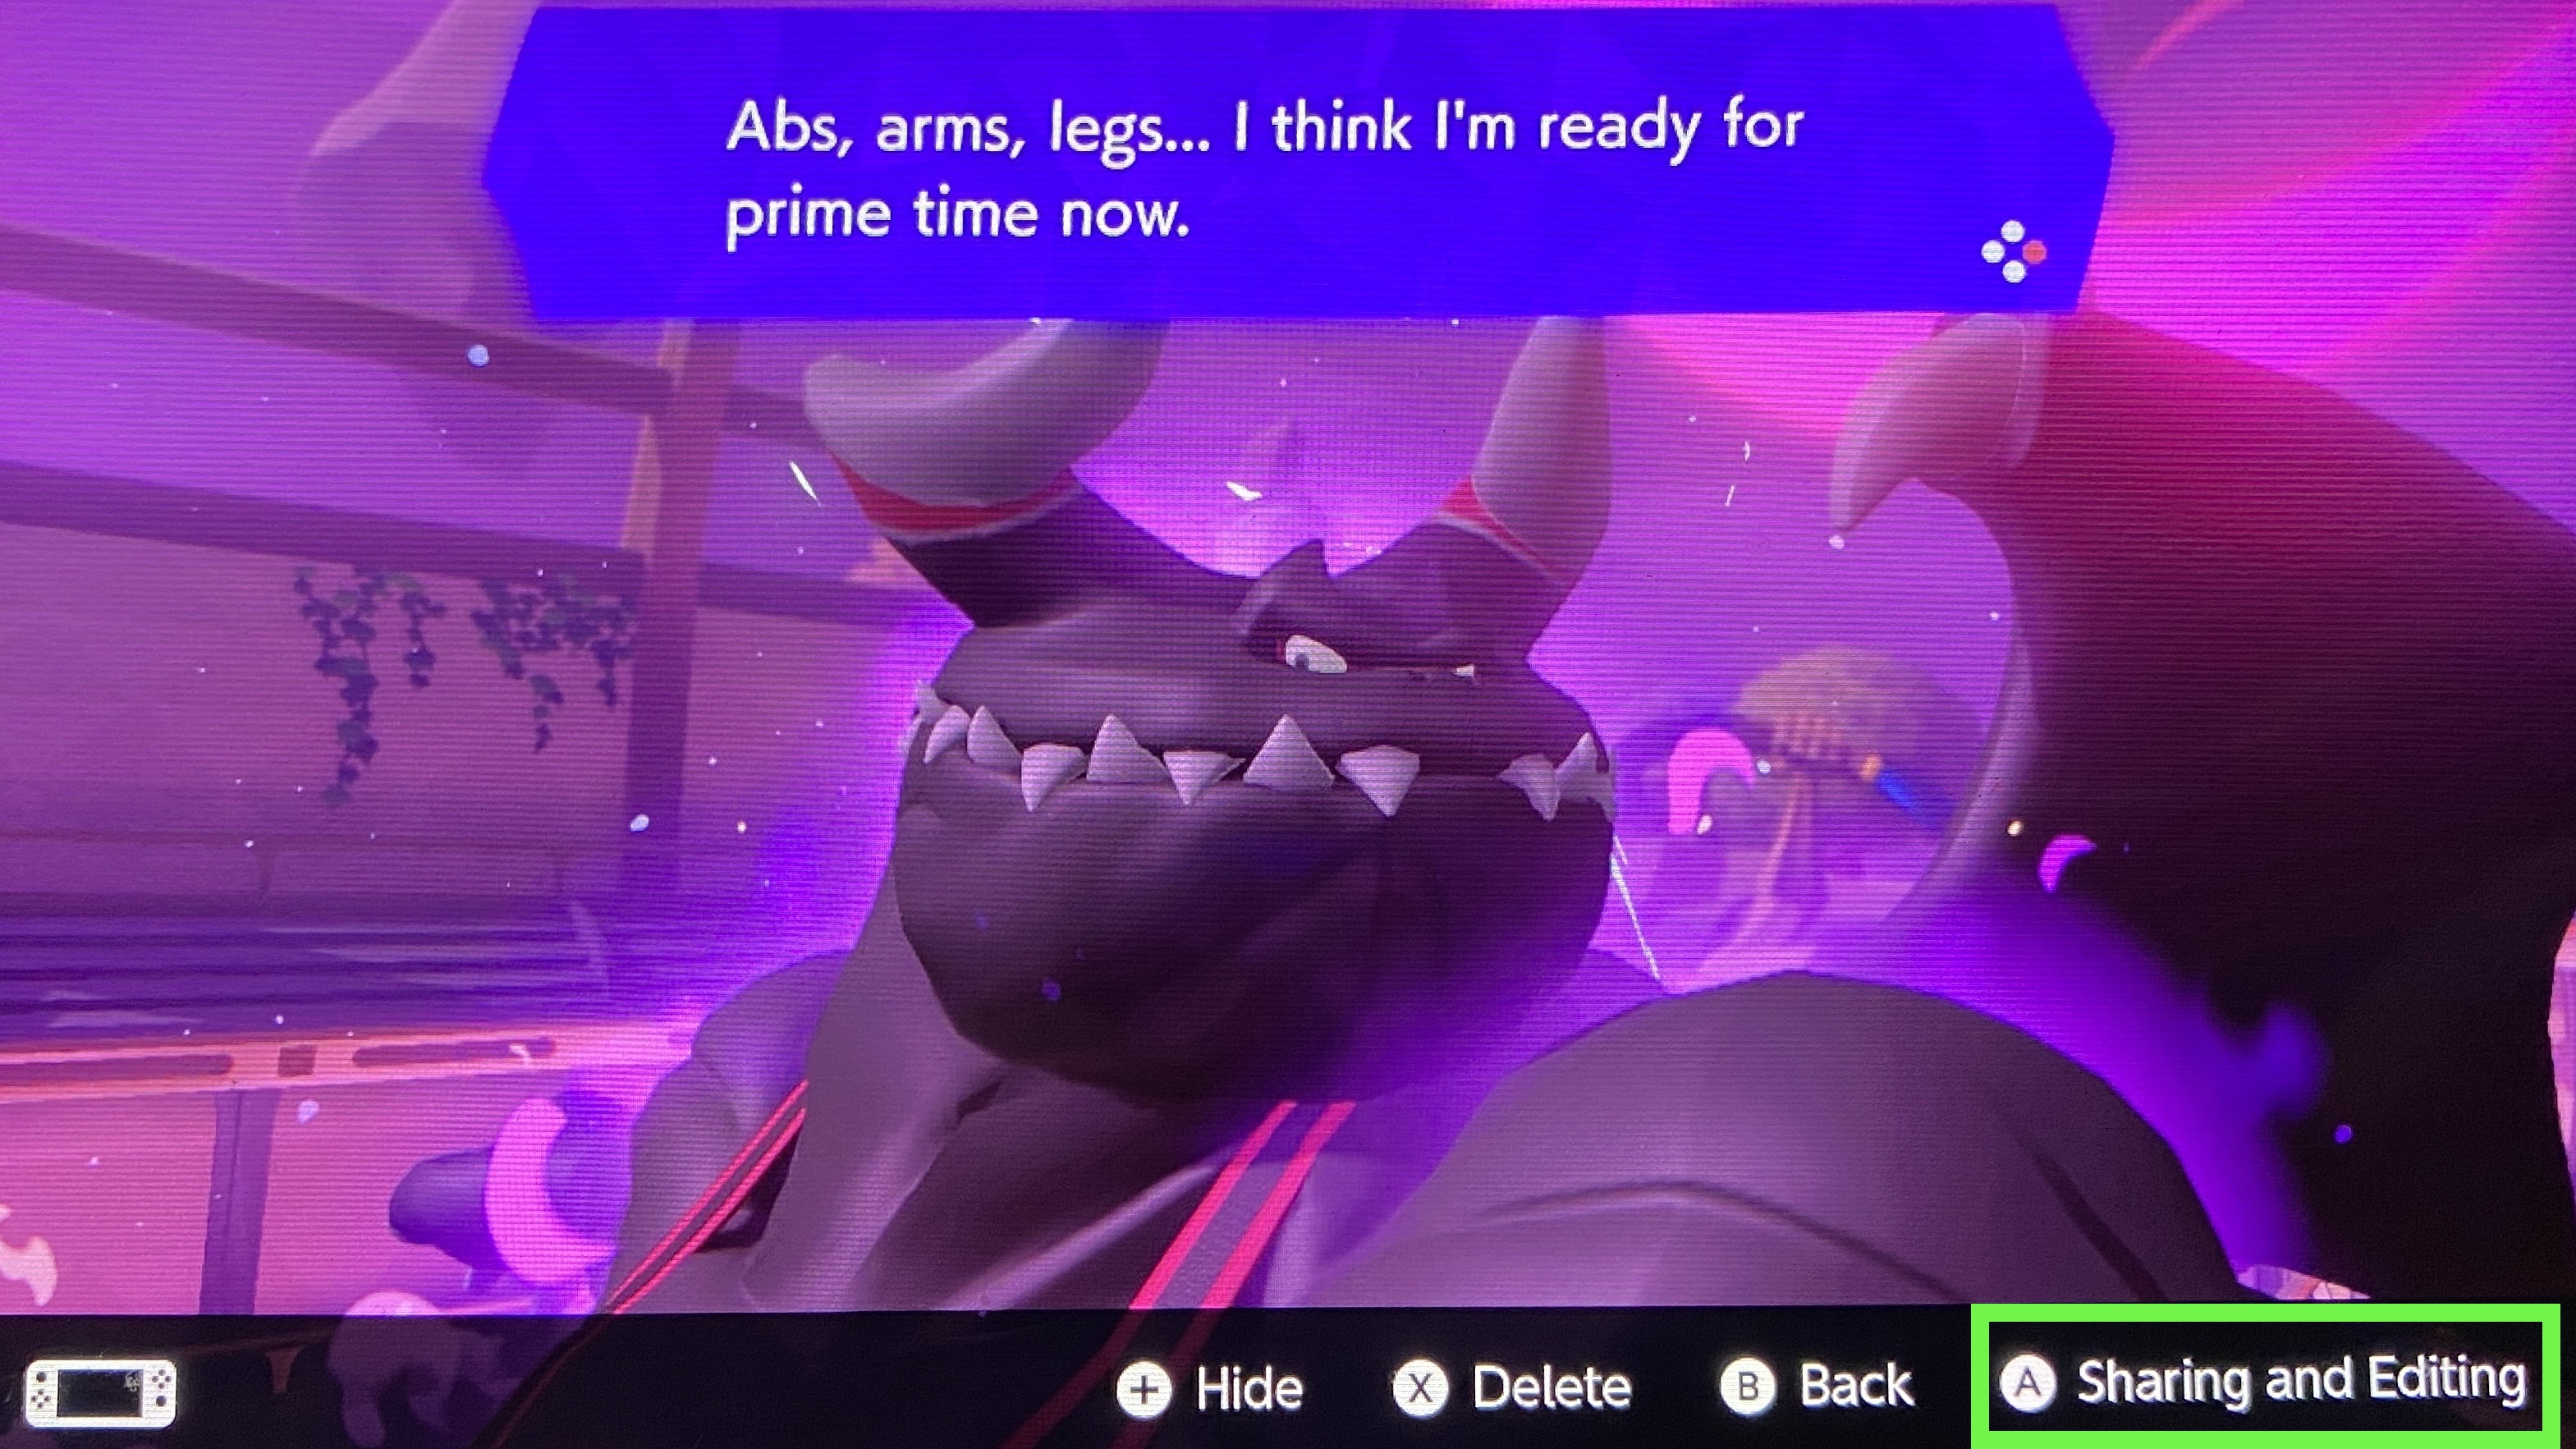
4. Select "Send to Smartphone"
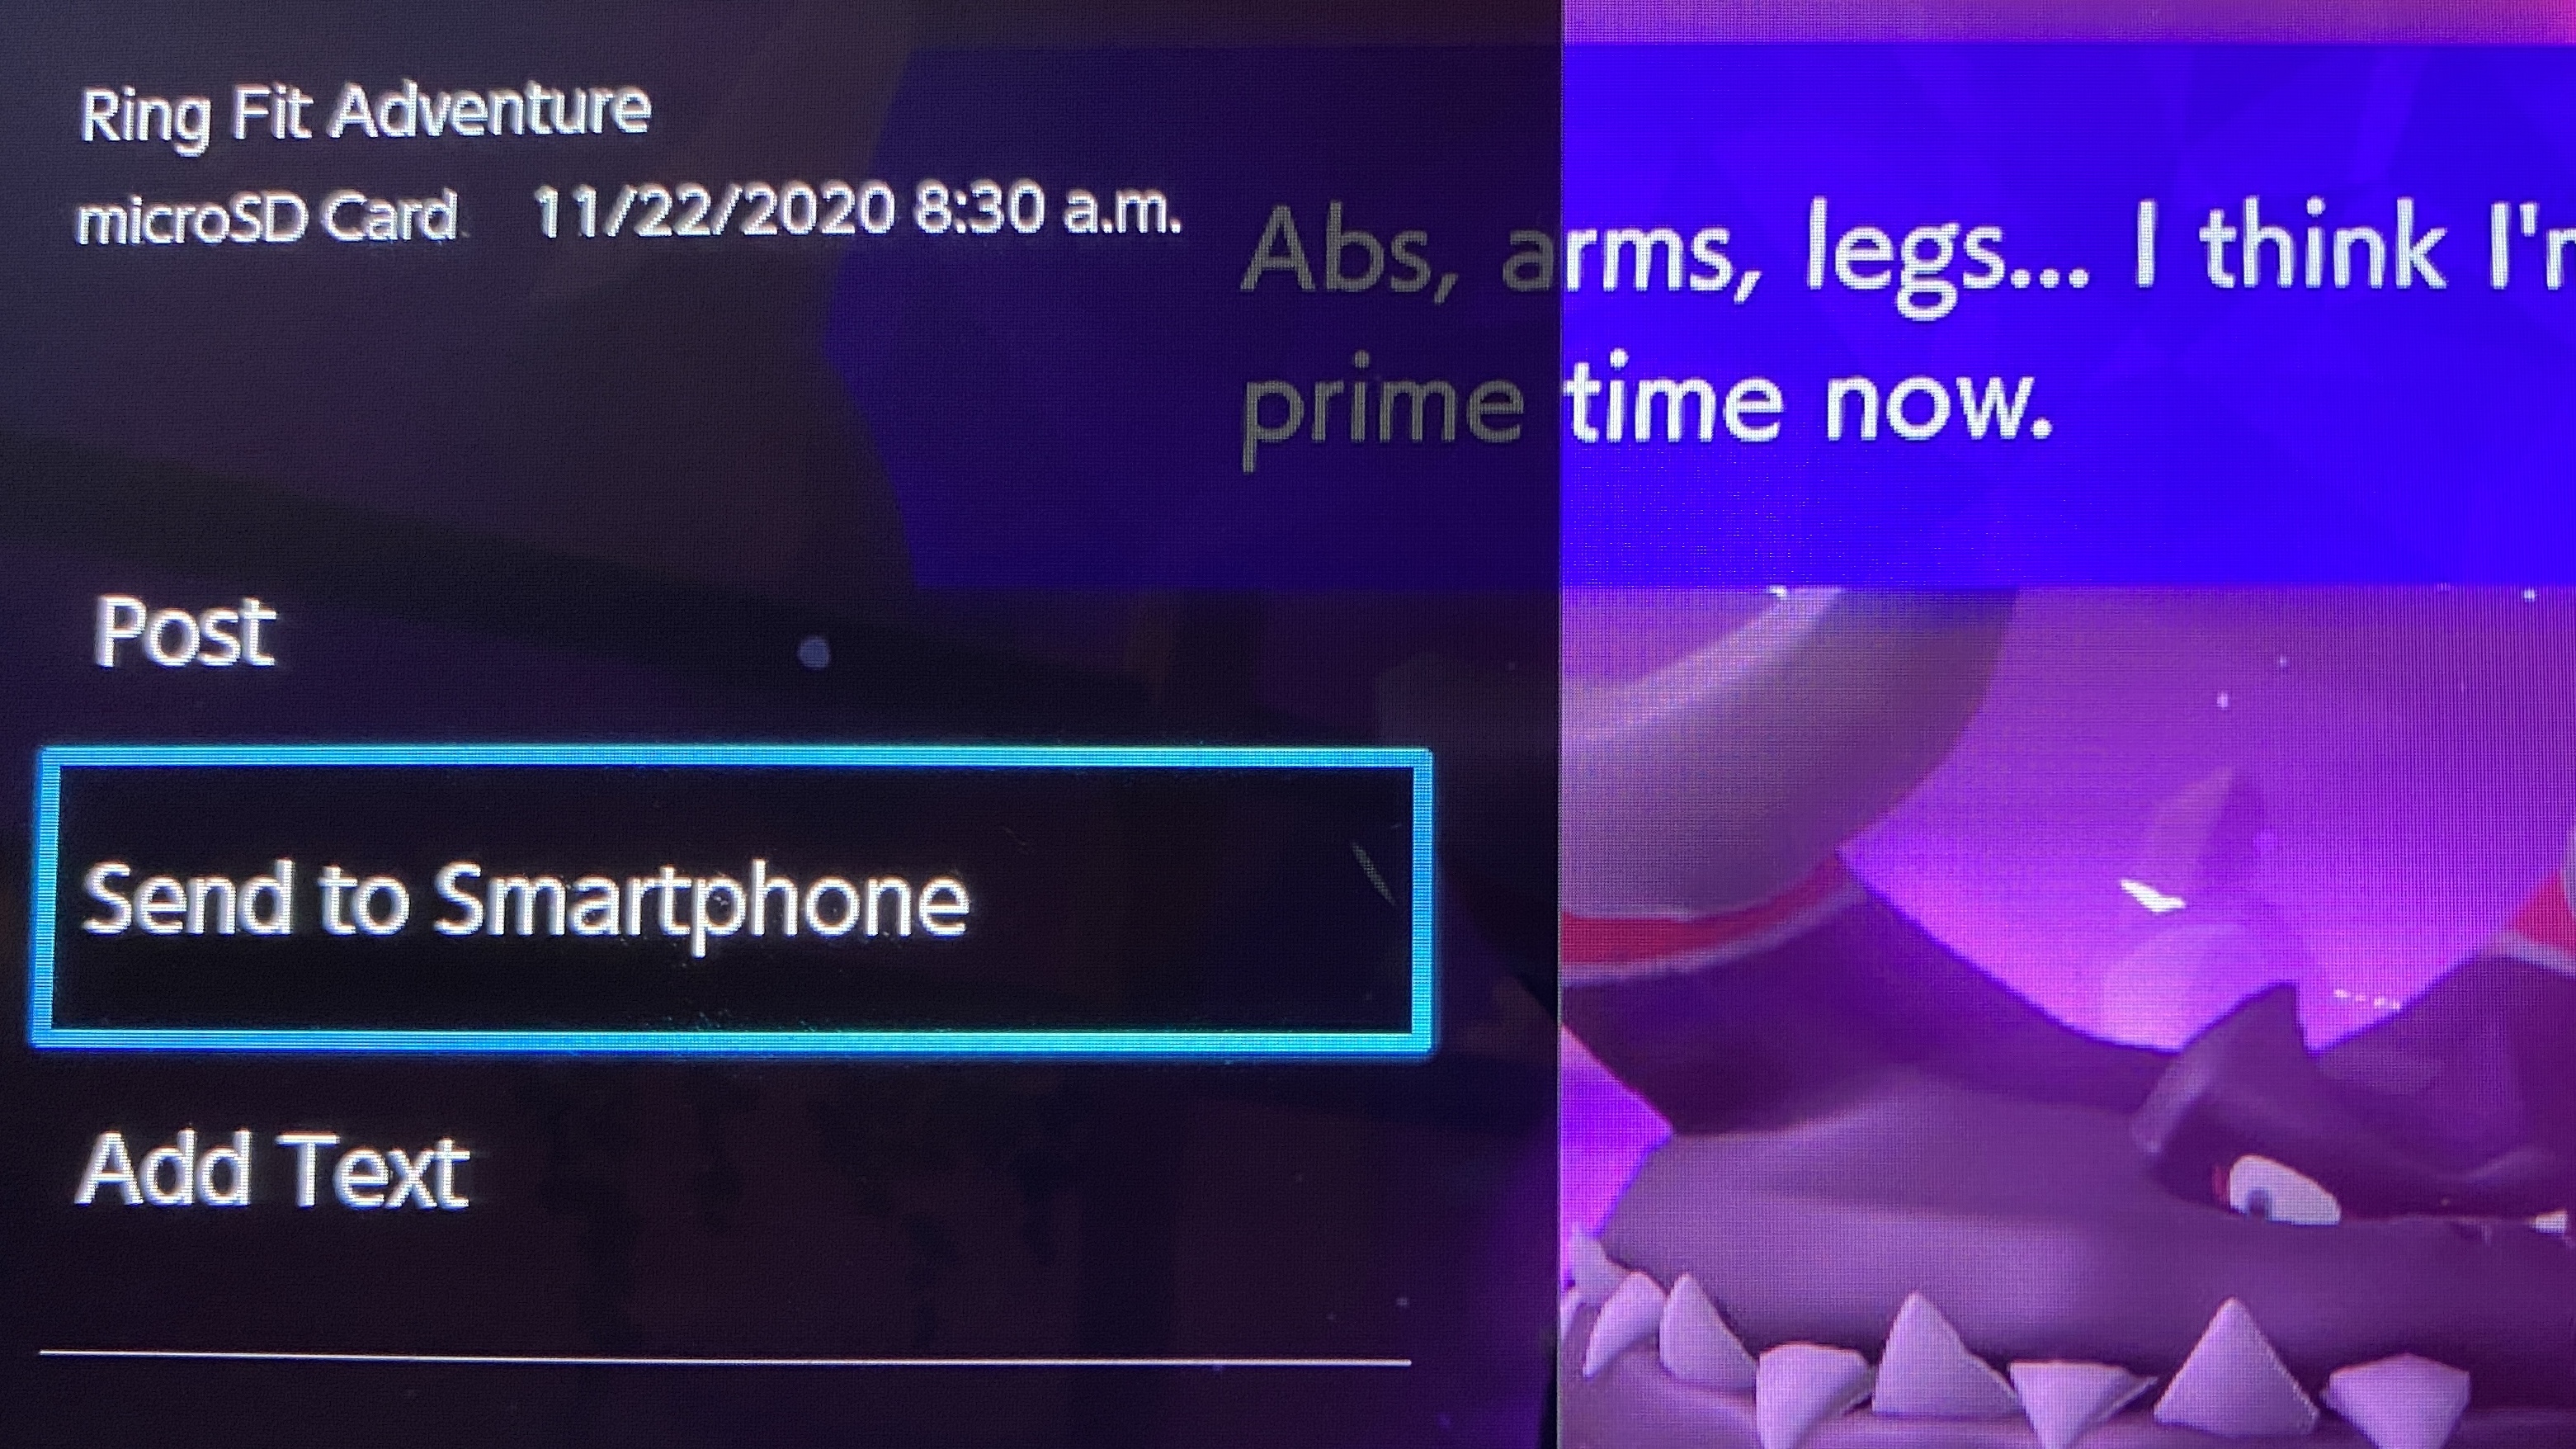
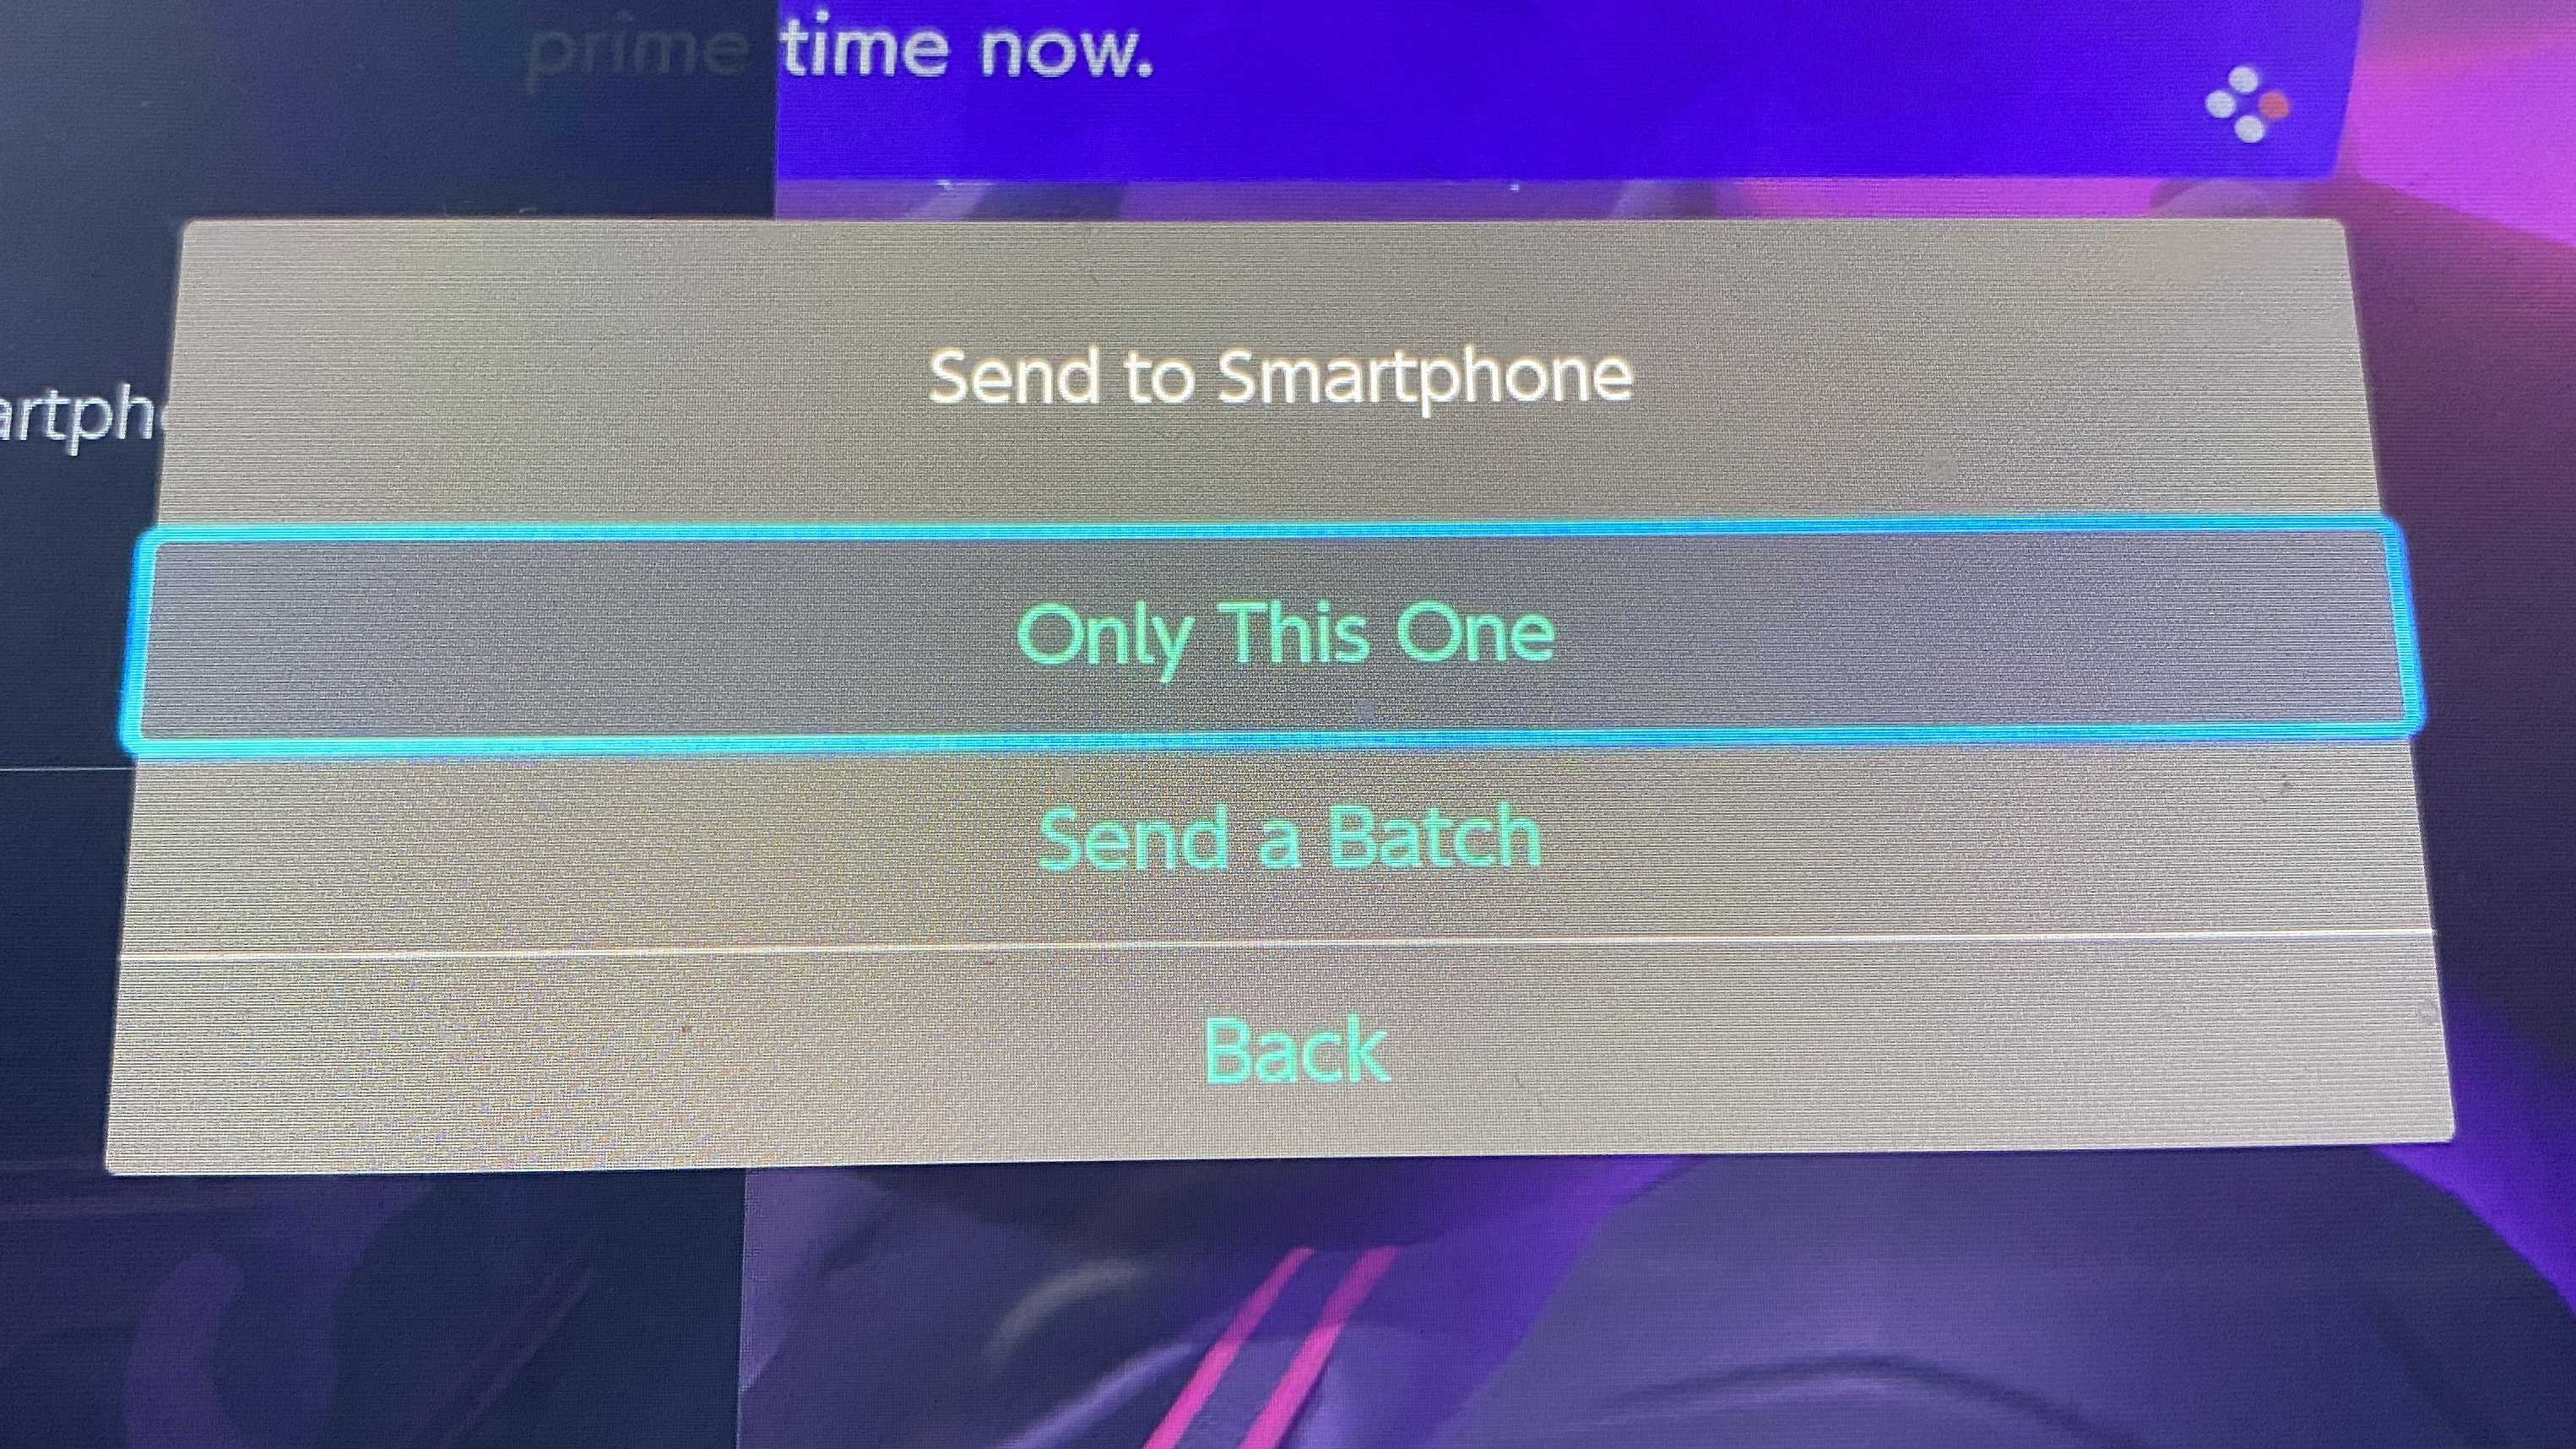
5. Select "Only This One" or "Send a Batch"
If you select "Send a Batch" you'll get to check off other photos to send. Currently, the limit for a single transfer is 10 photos or 1 video.
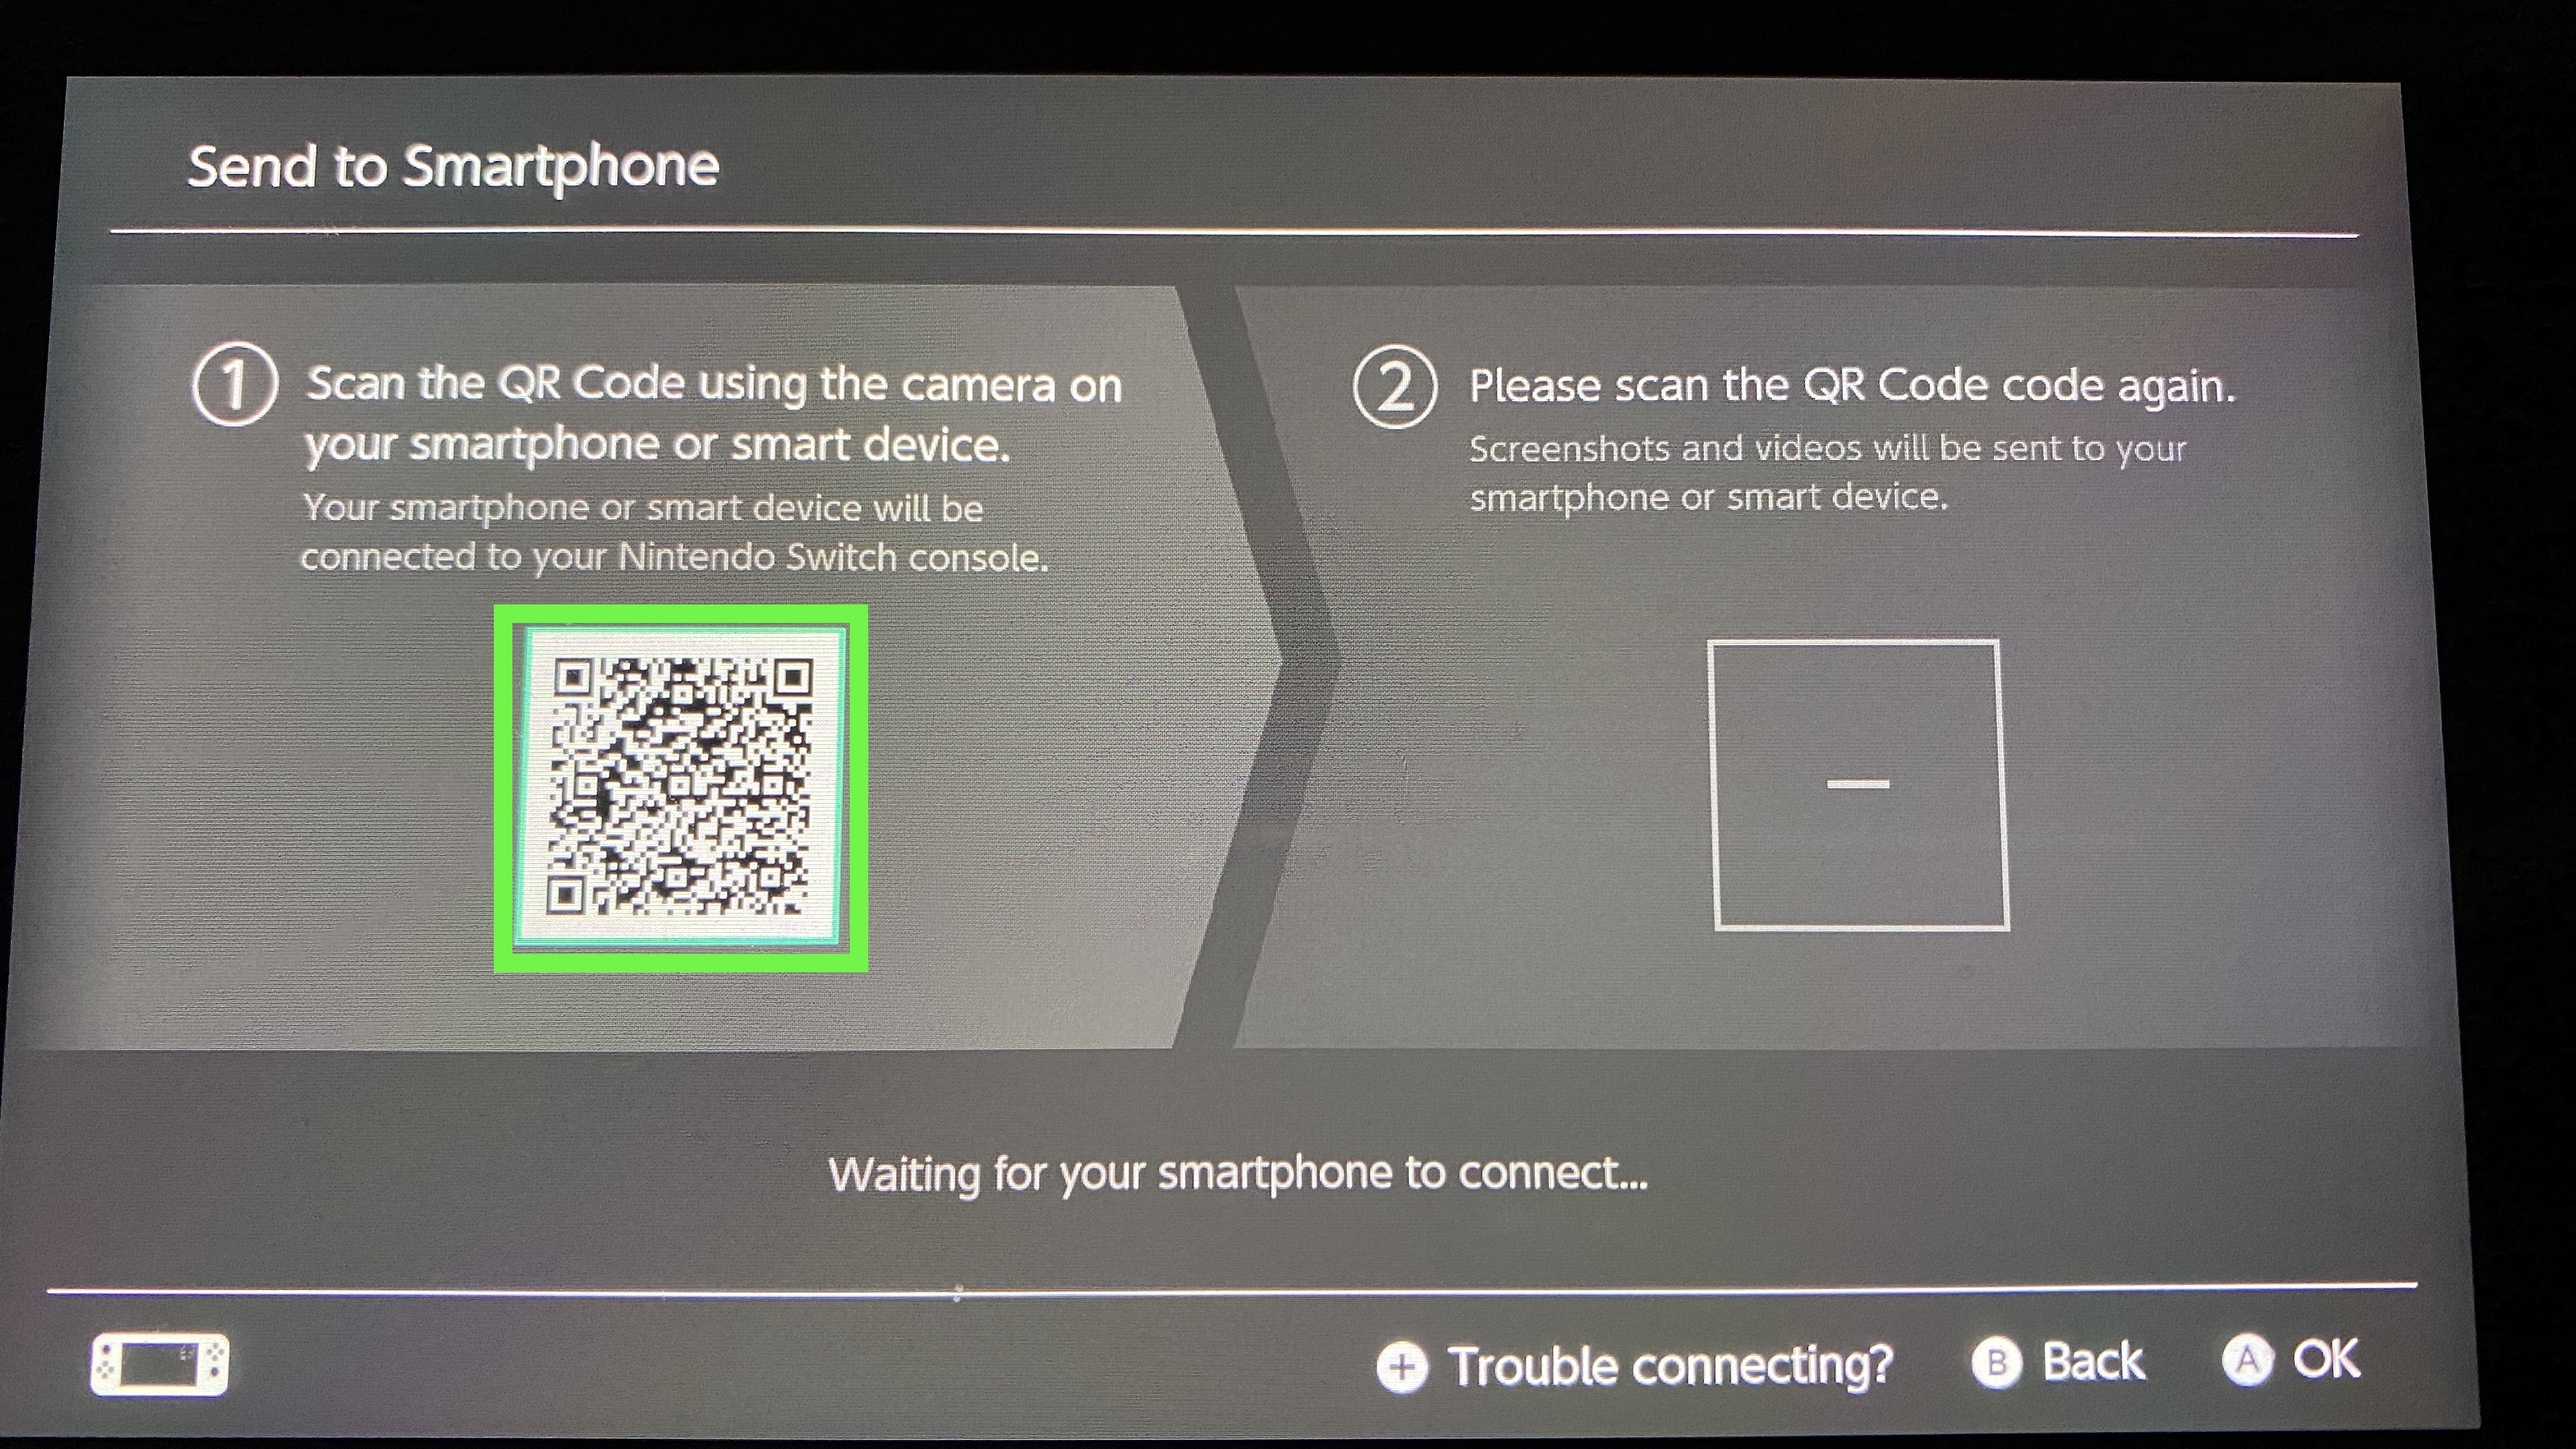
6. On your smartphone, open your camera and focus on the QR code
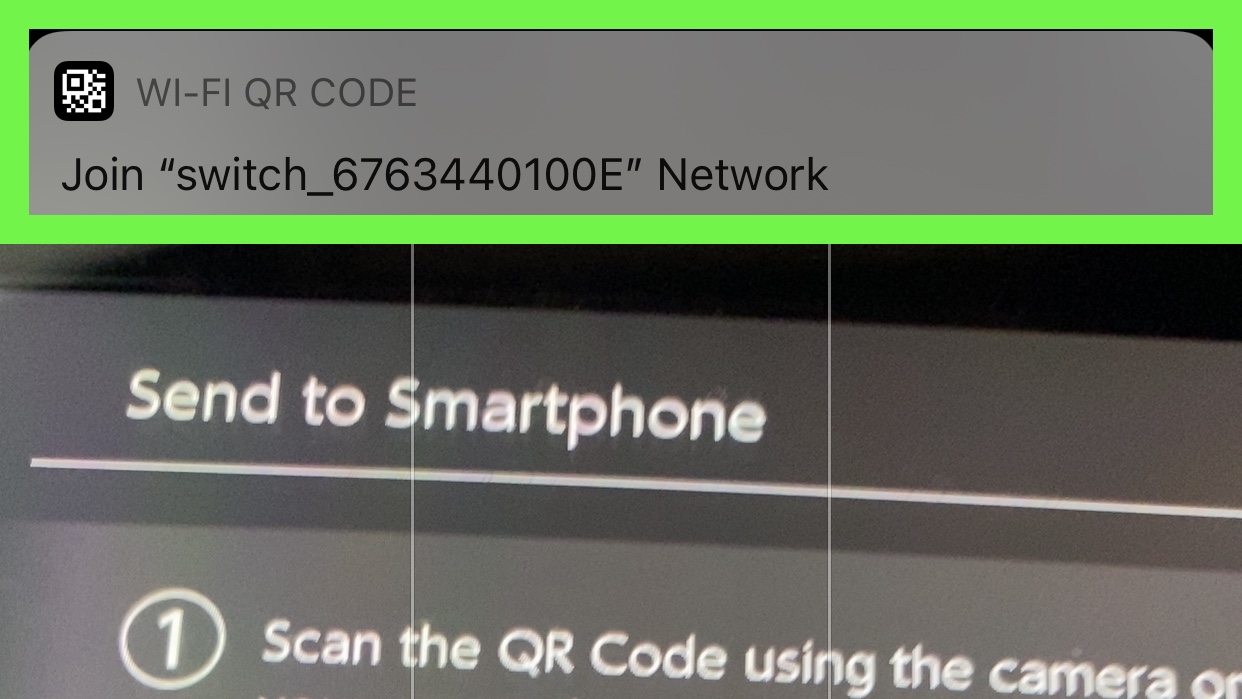
7. Tap the join network prompt
8. Focus your device camera on the new QR code.
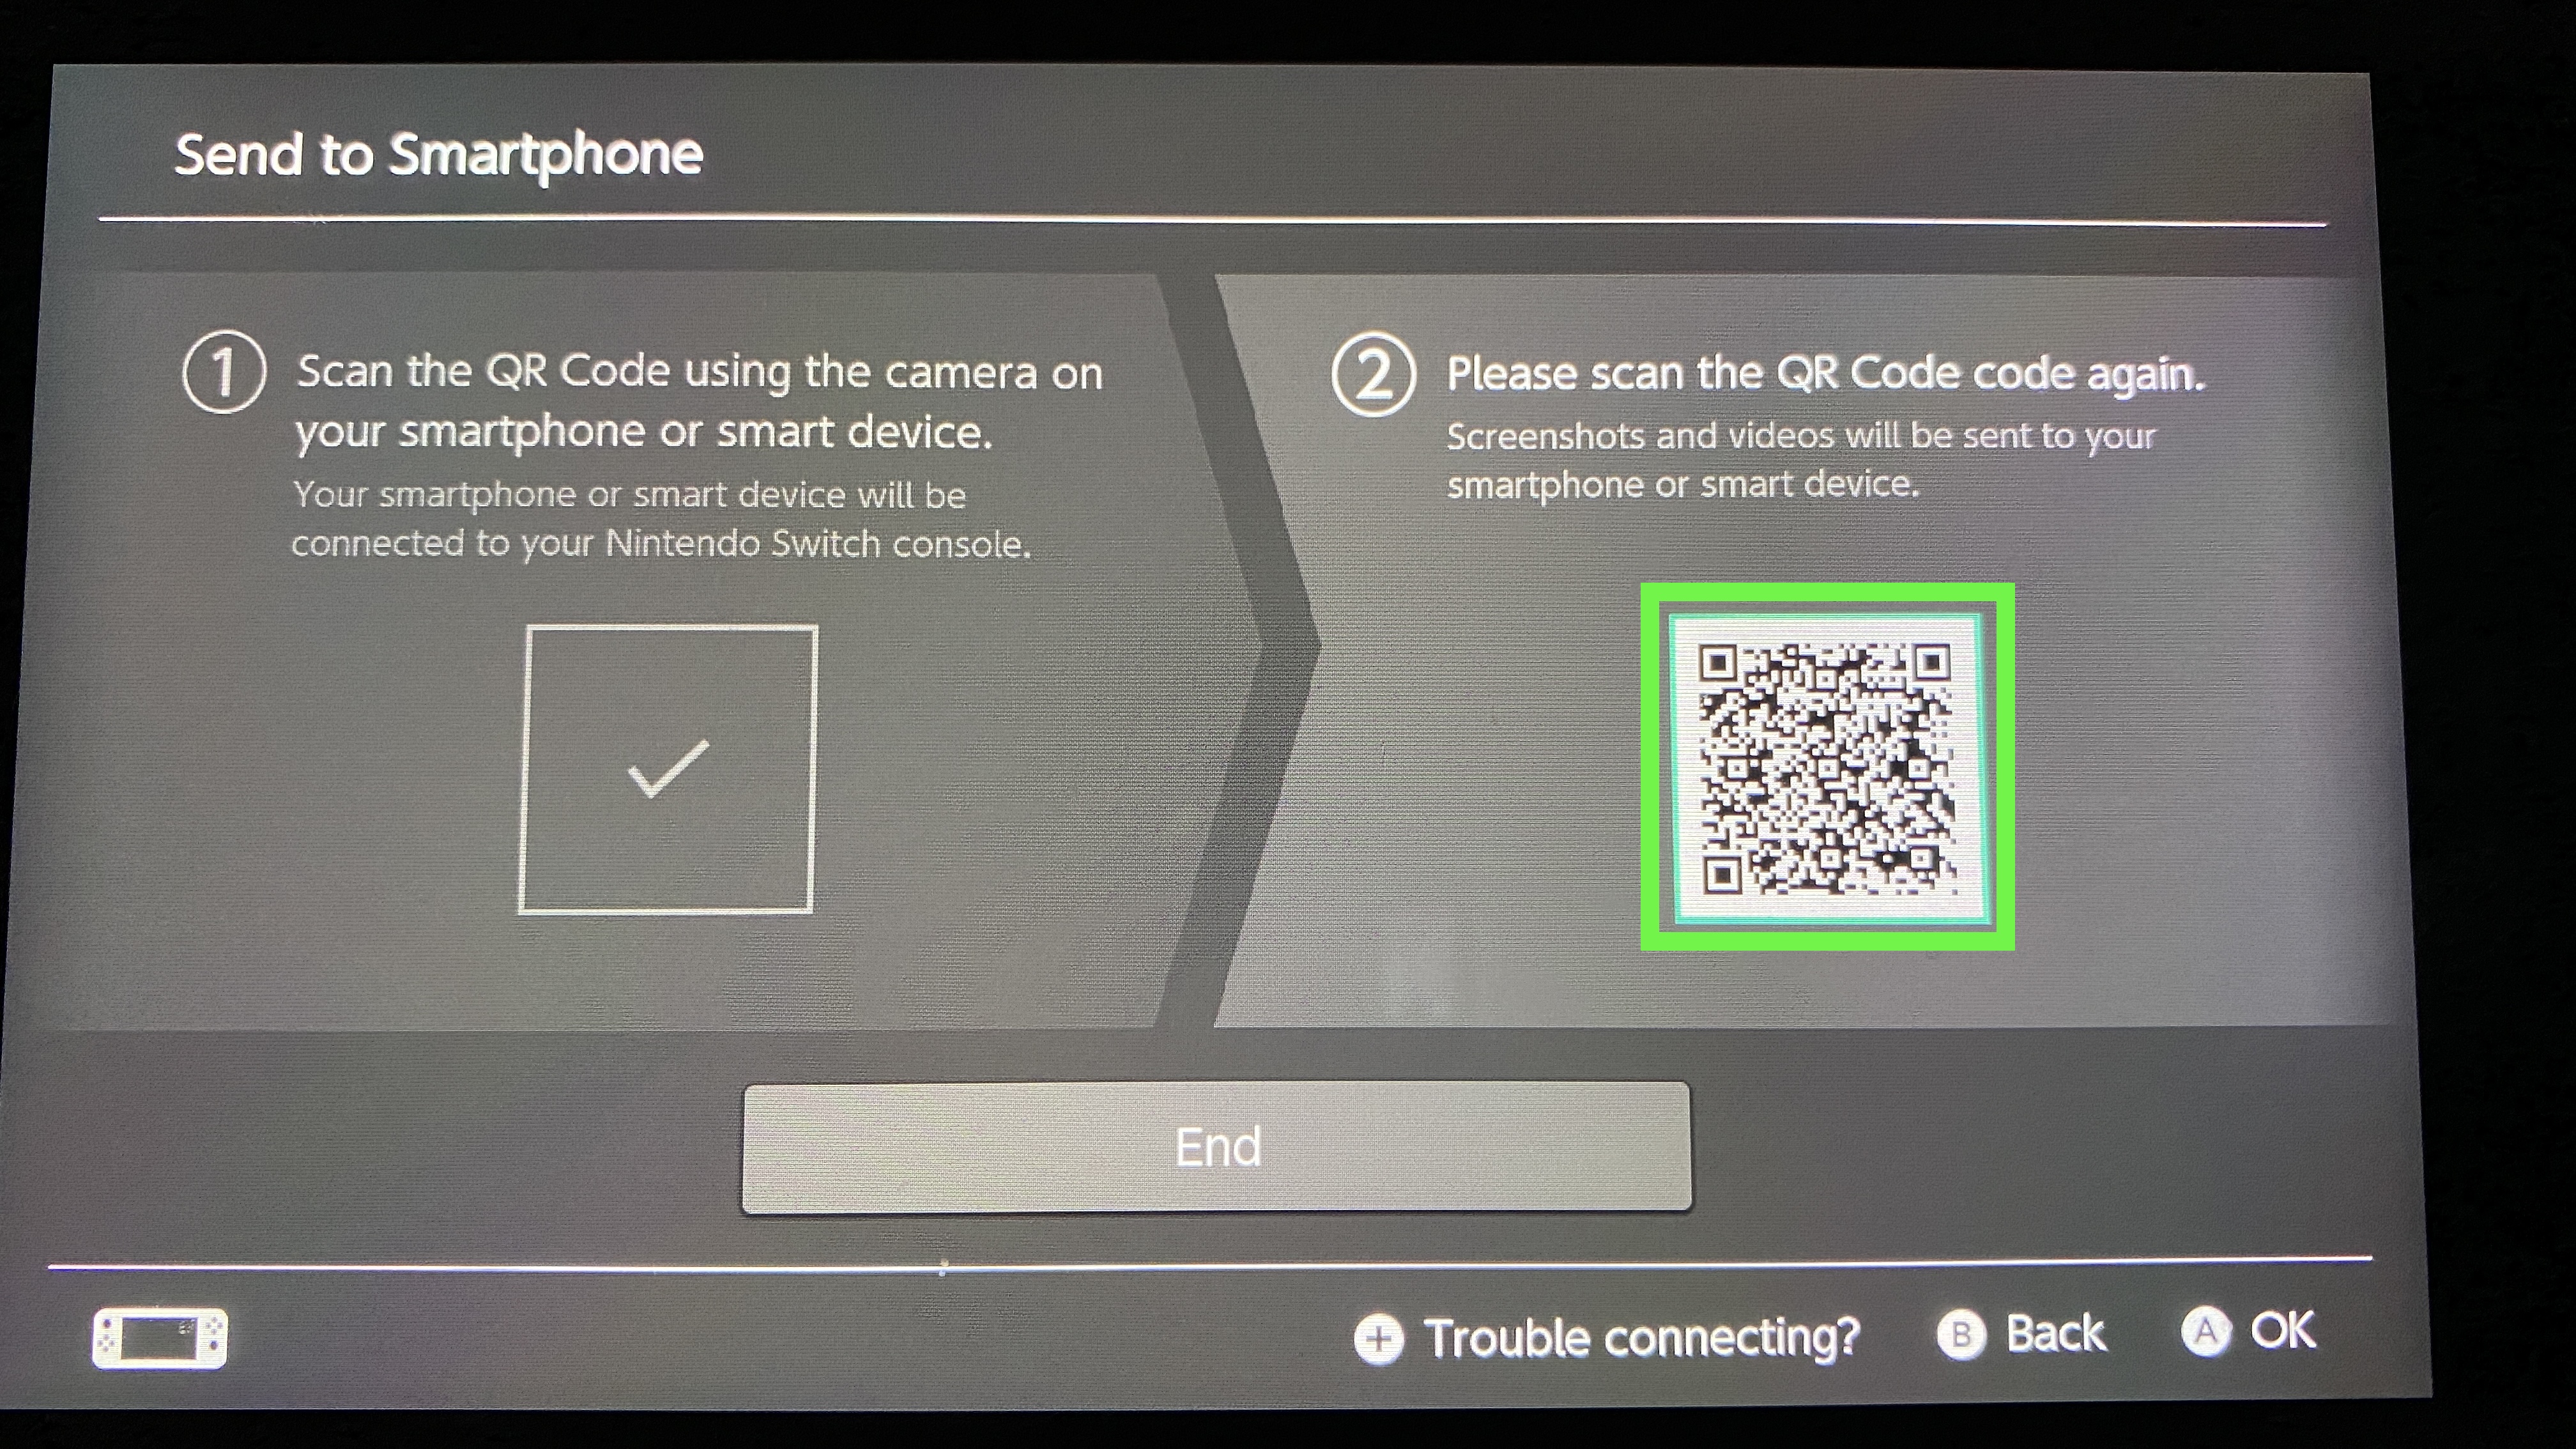
9. Tap the open network prompt.
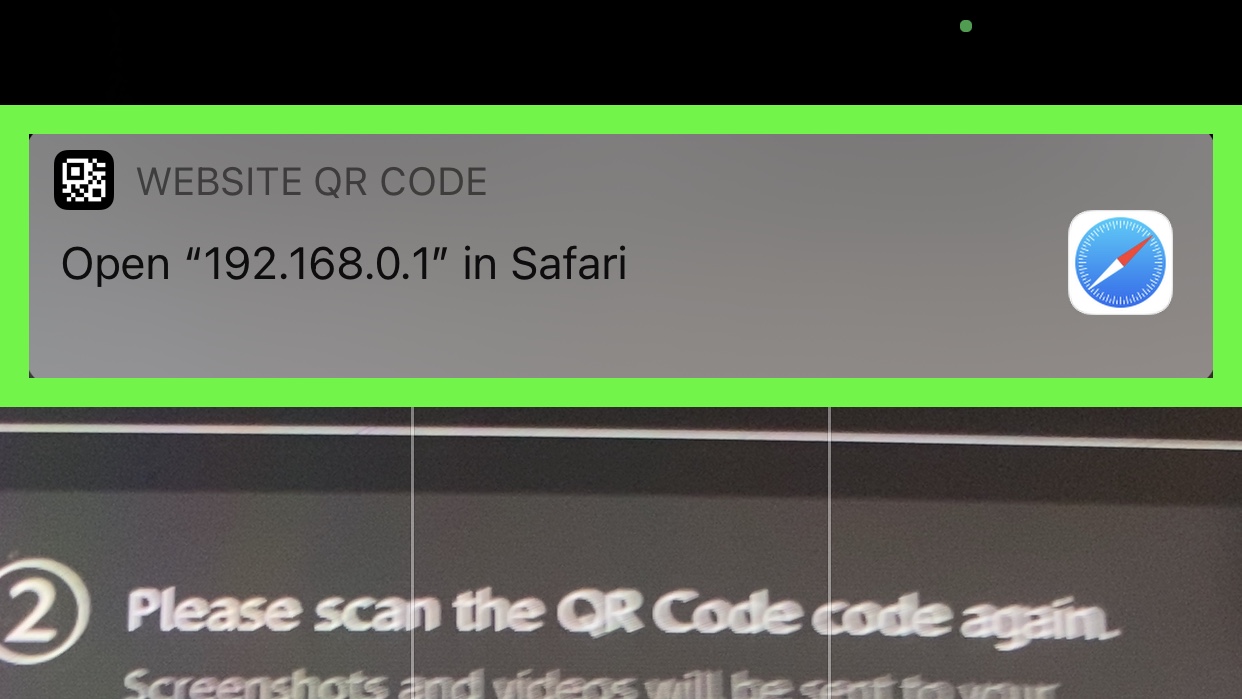
10. Tap on a photo
If you sent a video, you'll see a download button underneath it.
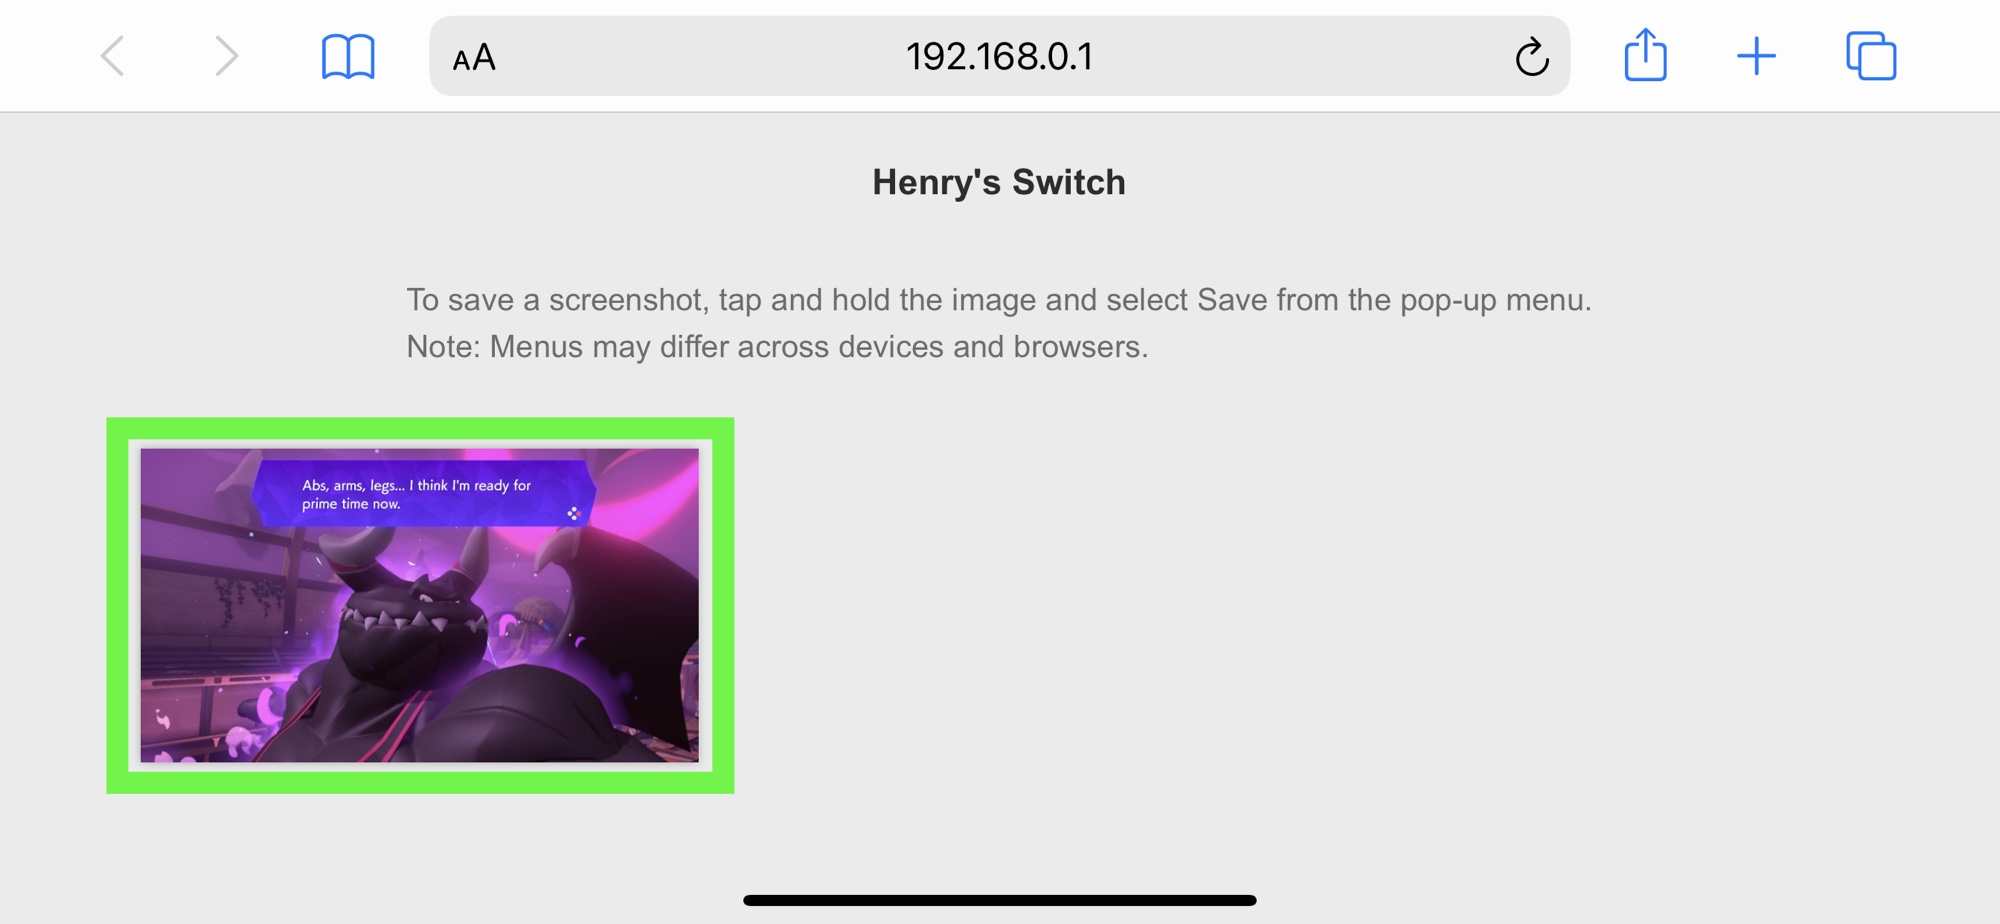
11. Long press on the photo
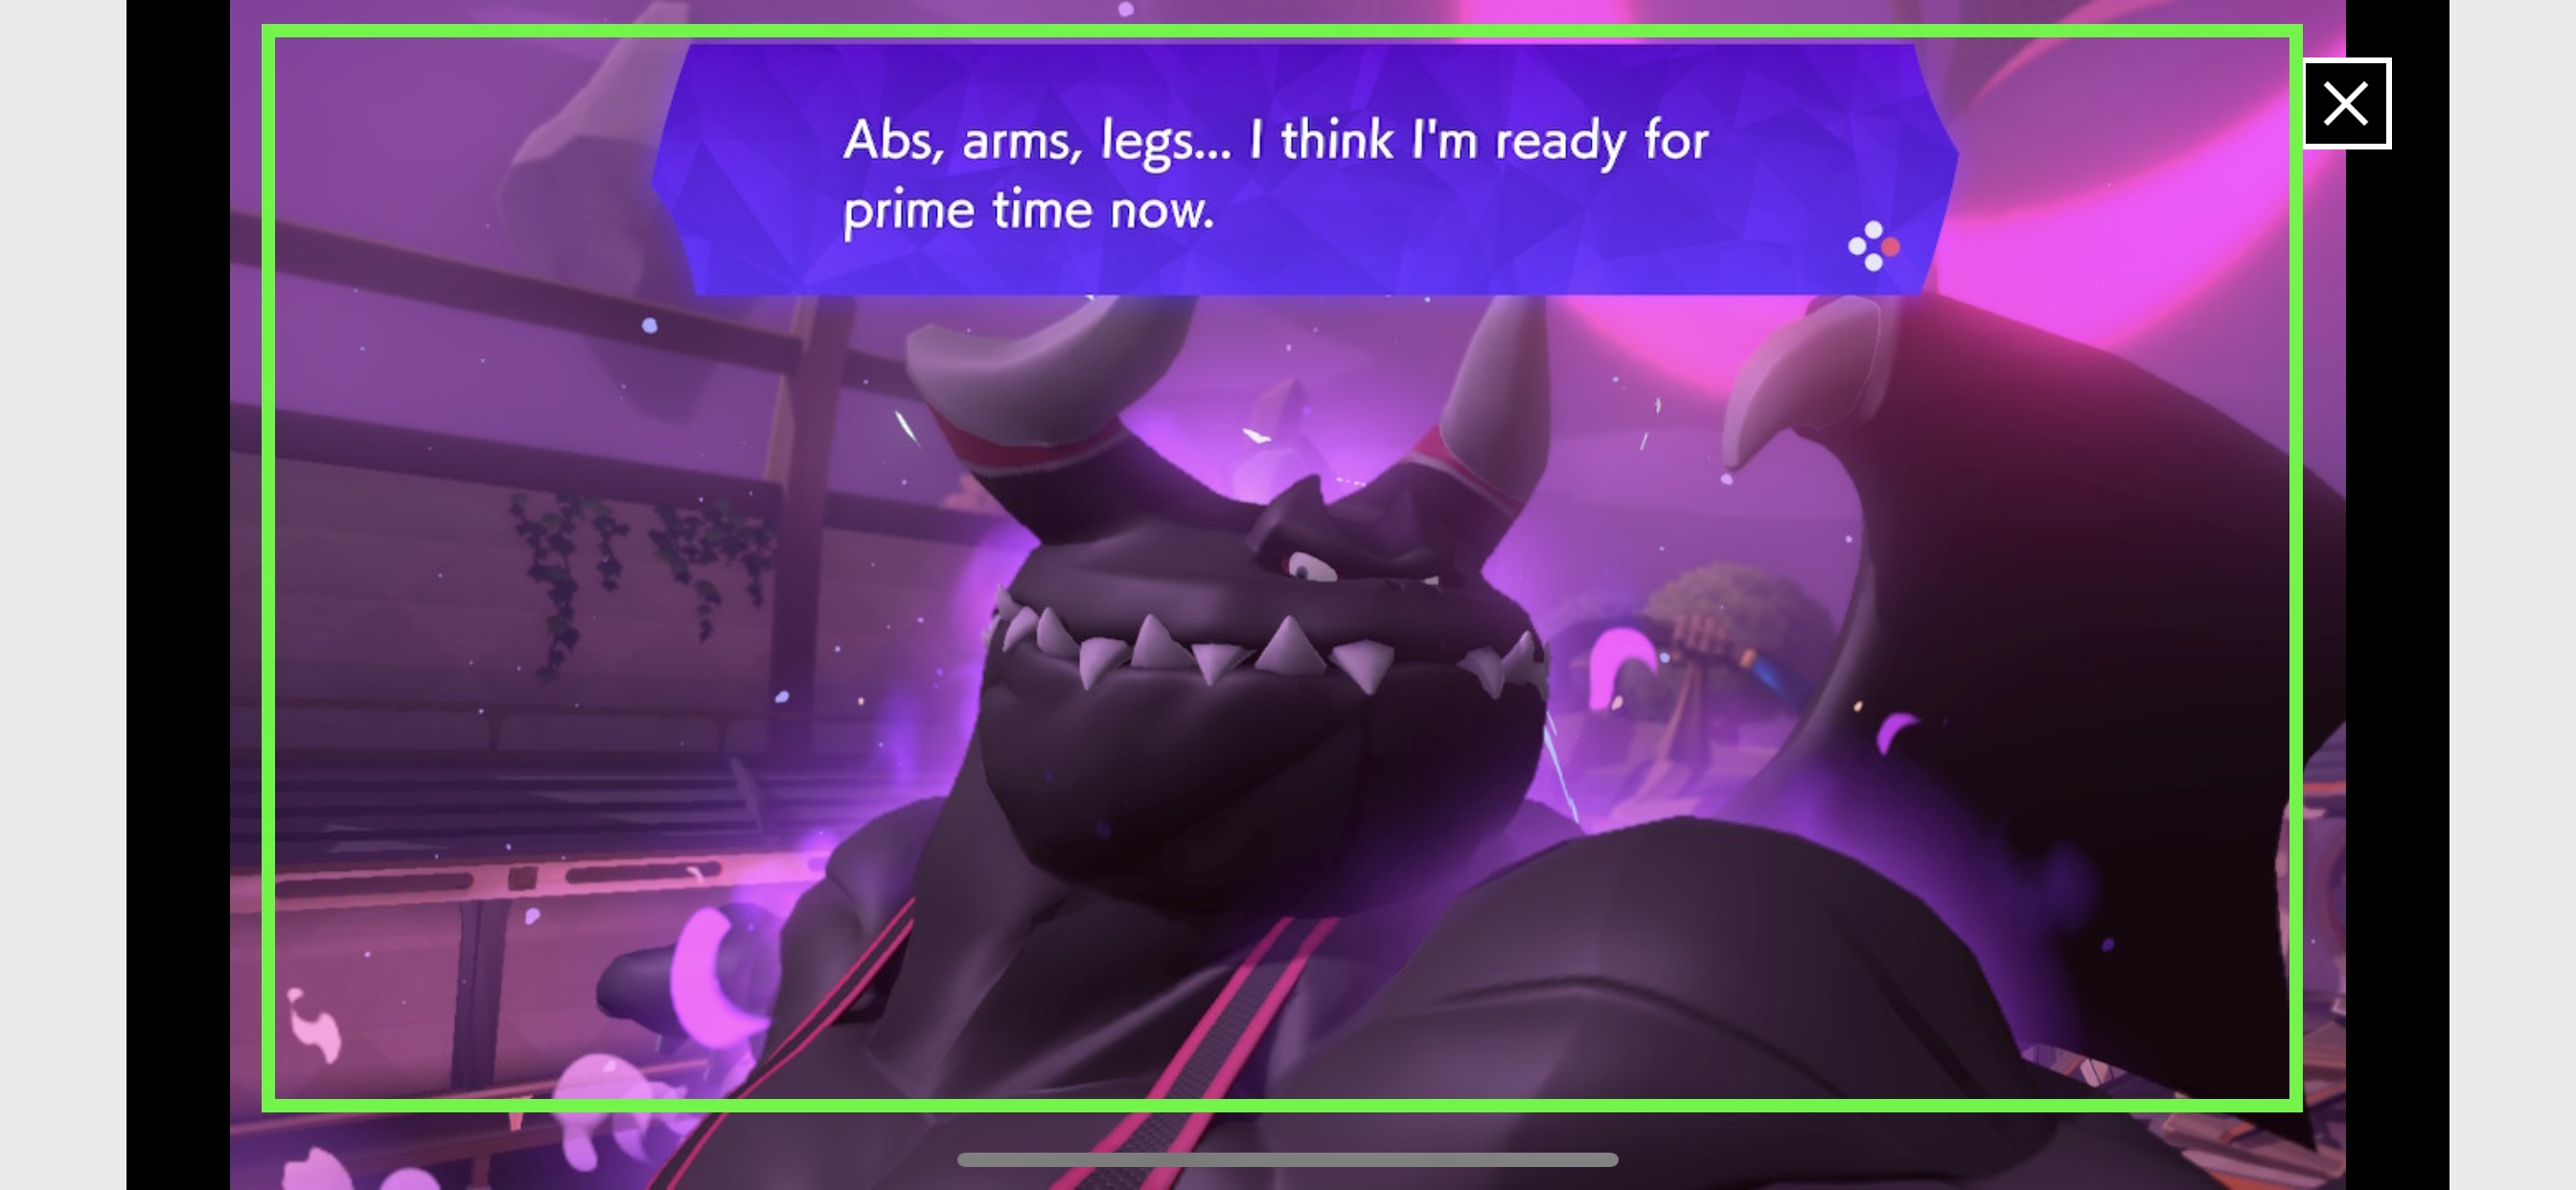
12. Tap Add to Photos
Your options may vary, as I'm testing this on an iPhone — and Android file management looks different.
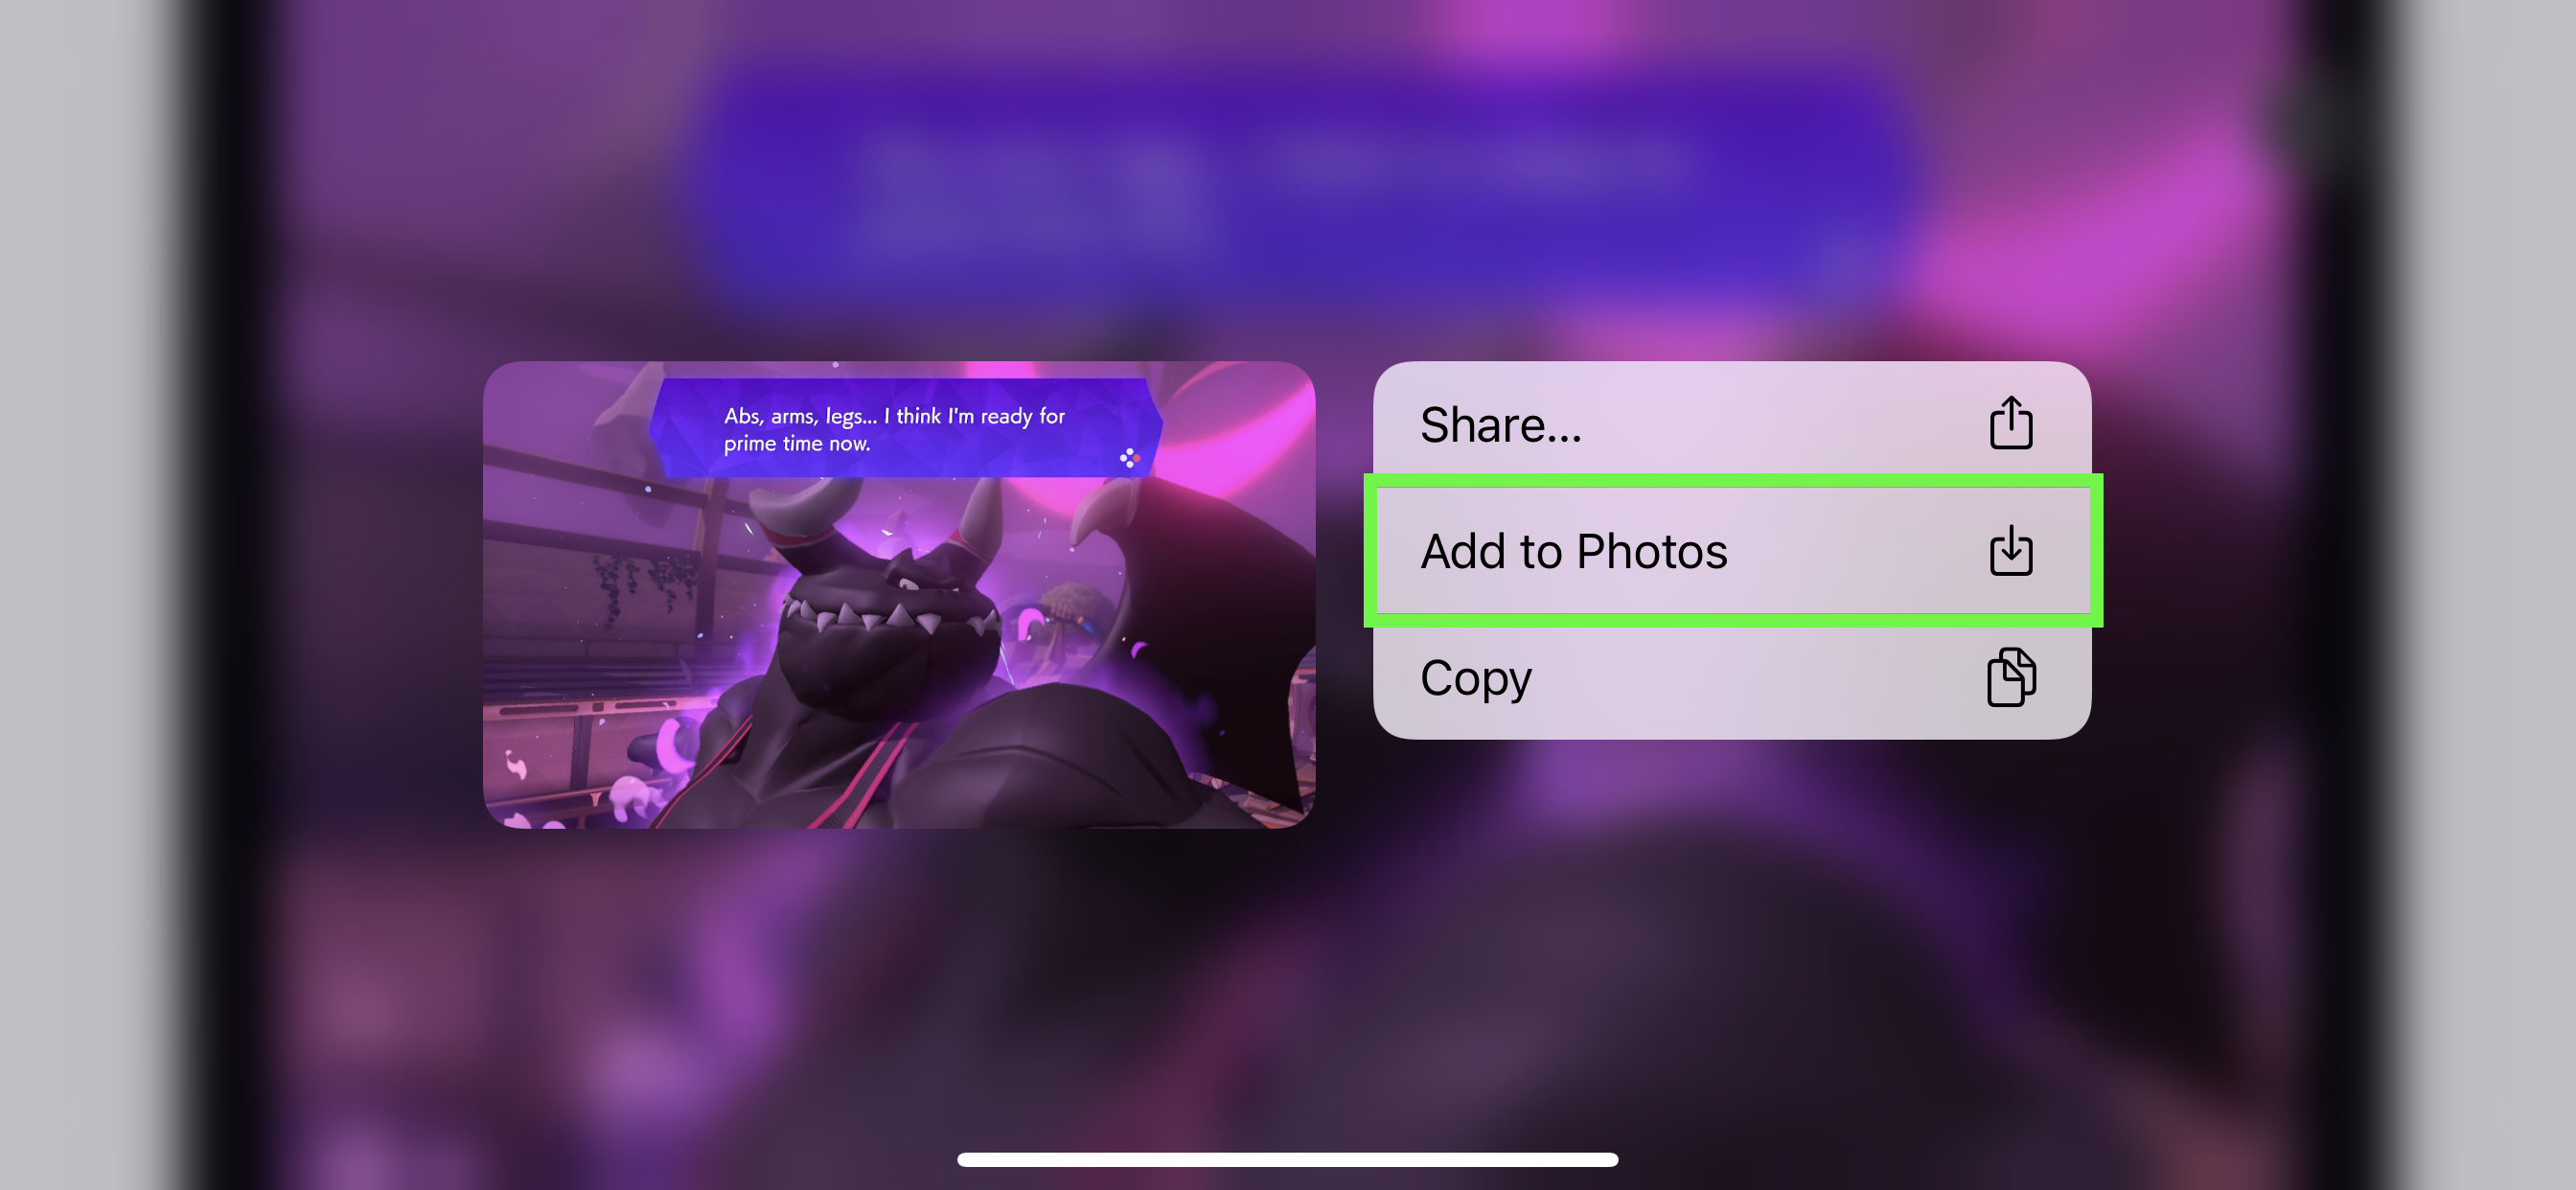
If you're using an iPhone, I'd suggest using Add to Photos, as Share doesn't always work for me when taking a photo from a website — it often just sends a link to the site.
How to send Nintendo Switch screenshots to your computer
As noted above, this process did not work on Macs during our testing. It requires a USB-C to USB-C or USB-C to USB-A cable, depending on your computer's ports.
1. Select System Settings on the home screen.
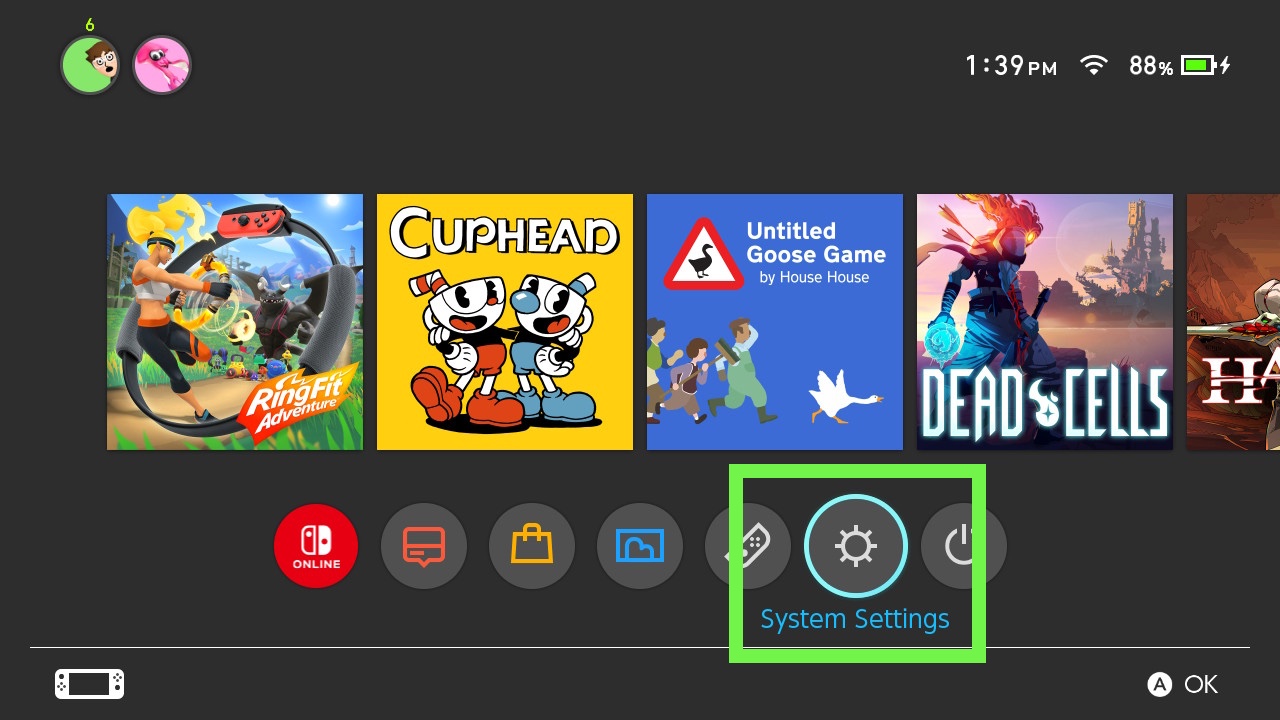
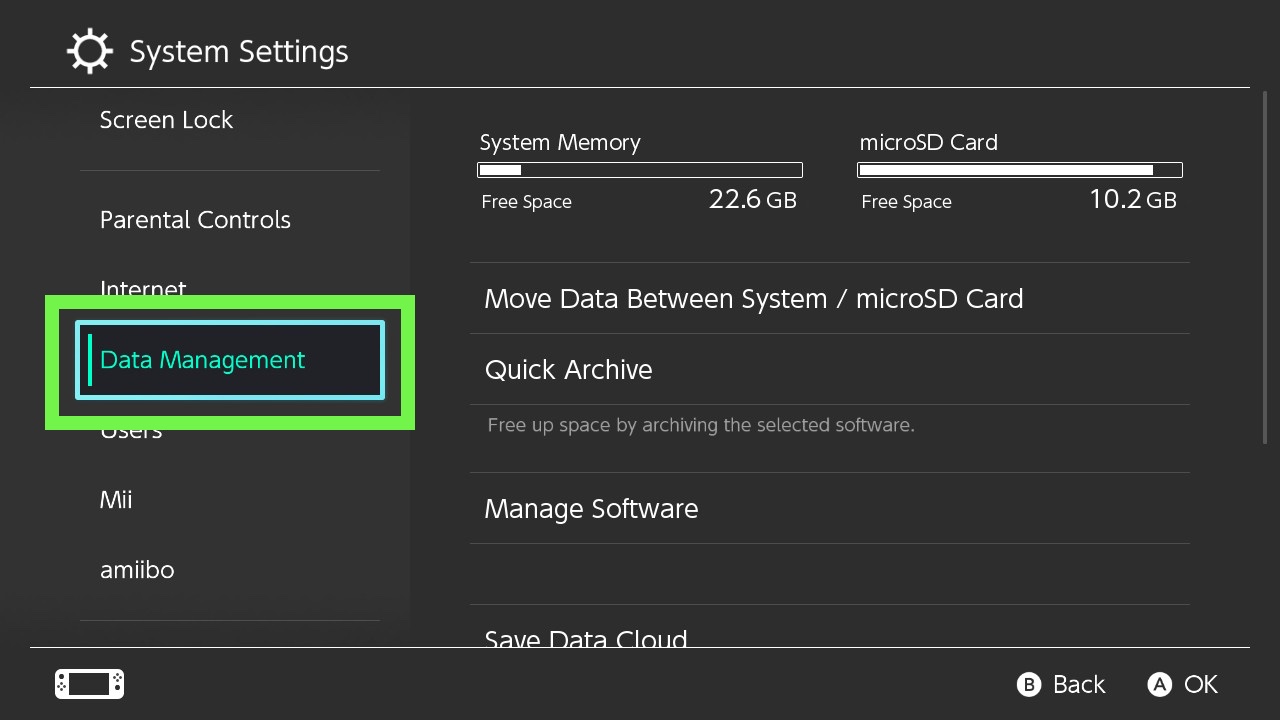
2. Select Data Management in the left-hand menu
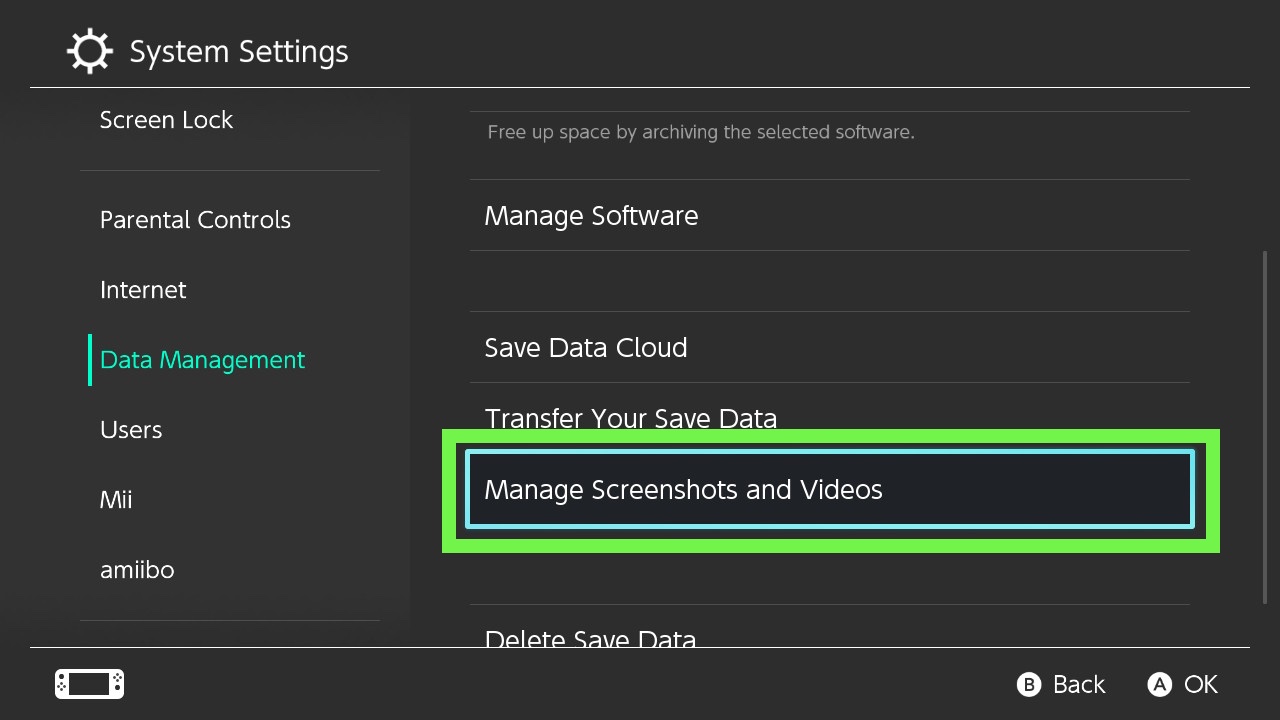
3. Select Manage Screenshots and Videos
4. Select Copy to a Computer via USB Connection
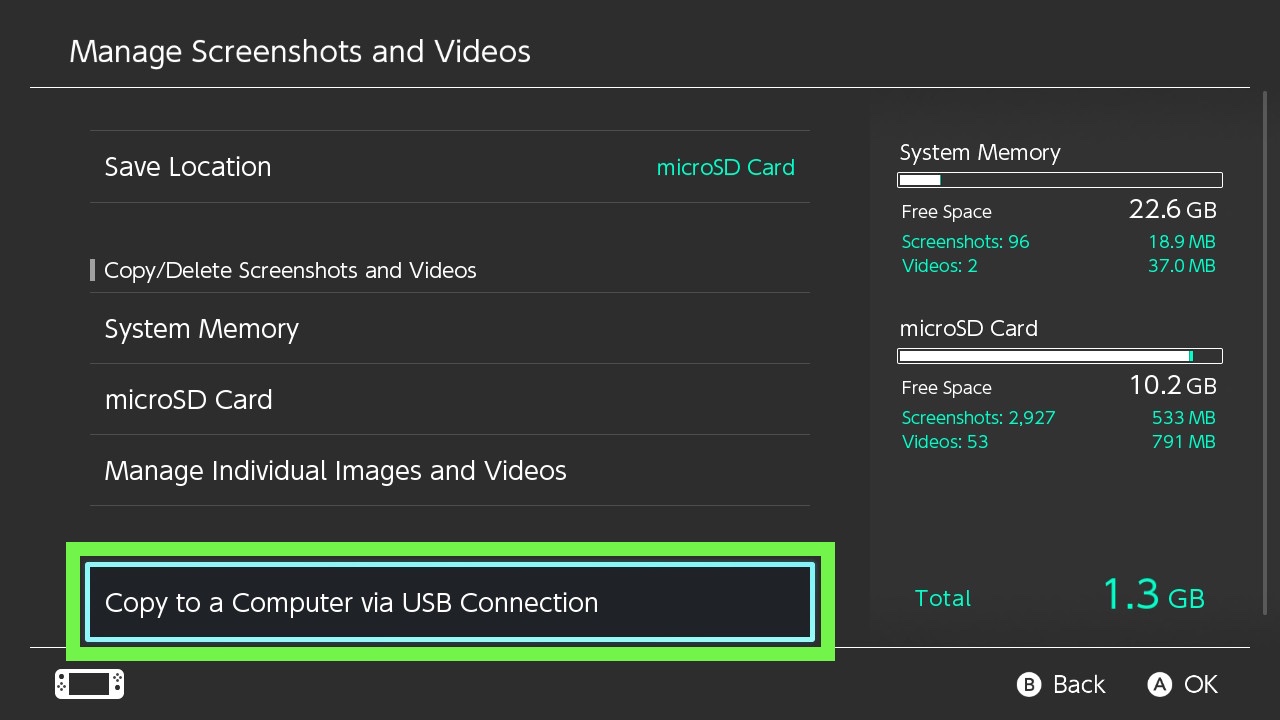
5. Connect your Switch to a PC via USB cable
You'll need a USB-C to USB-C cable if your computer has a USB-C port, or a USB-C to USB-A cable if it does not.
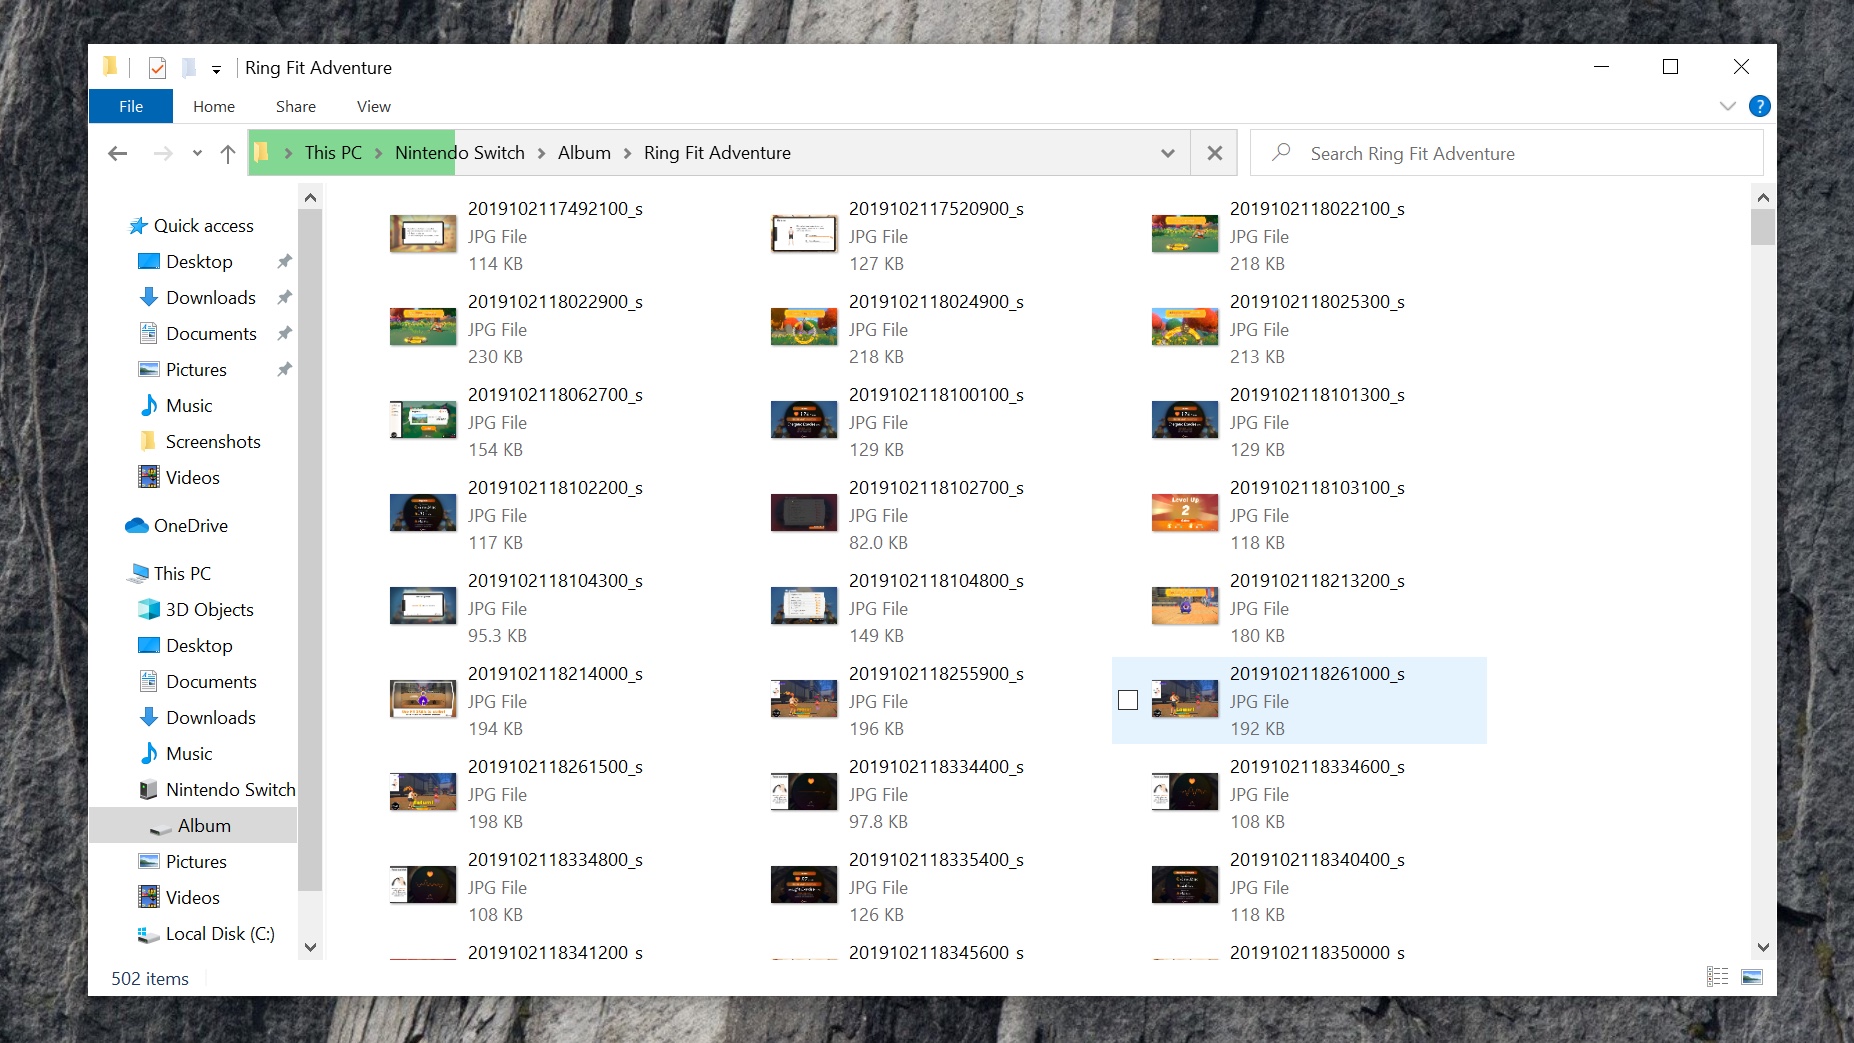
6. Select Nintendo Switch in your file manager
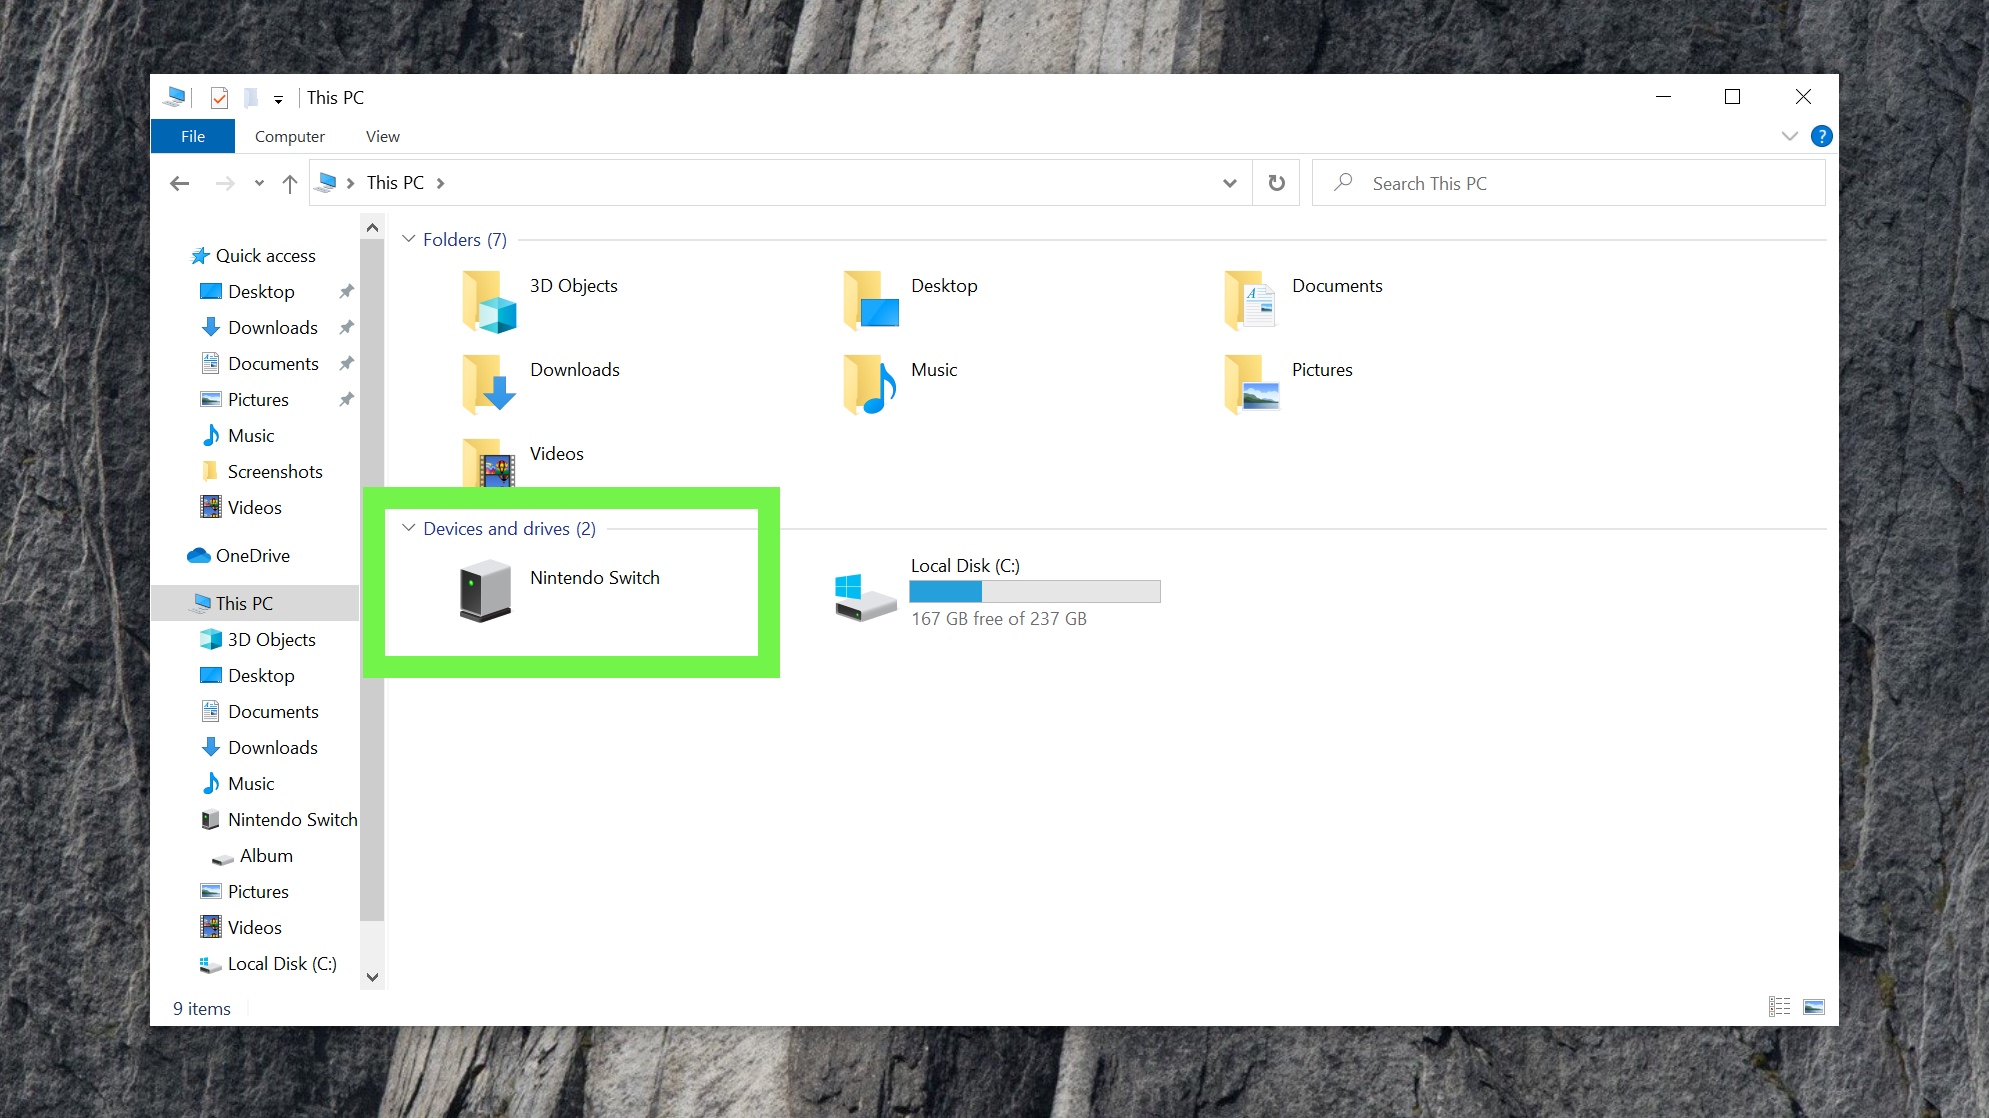
7. Open Album
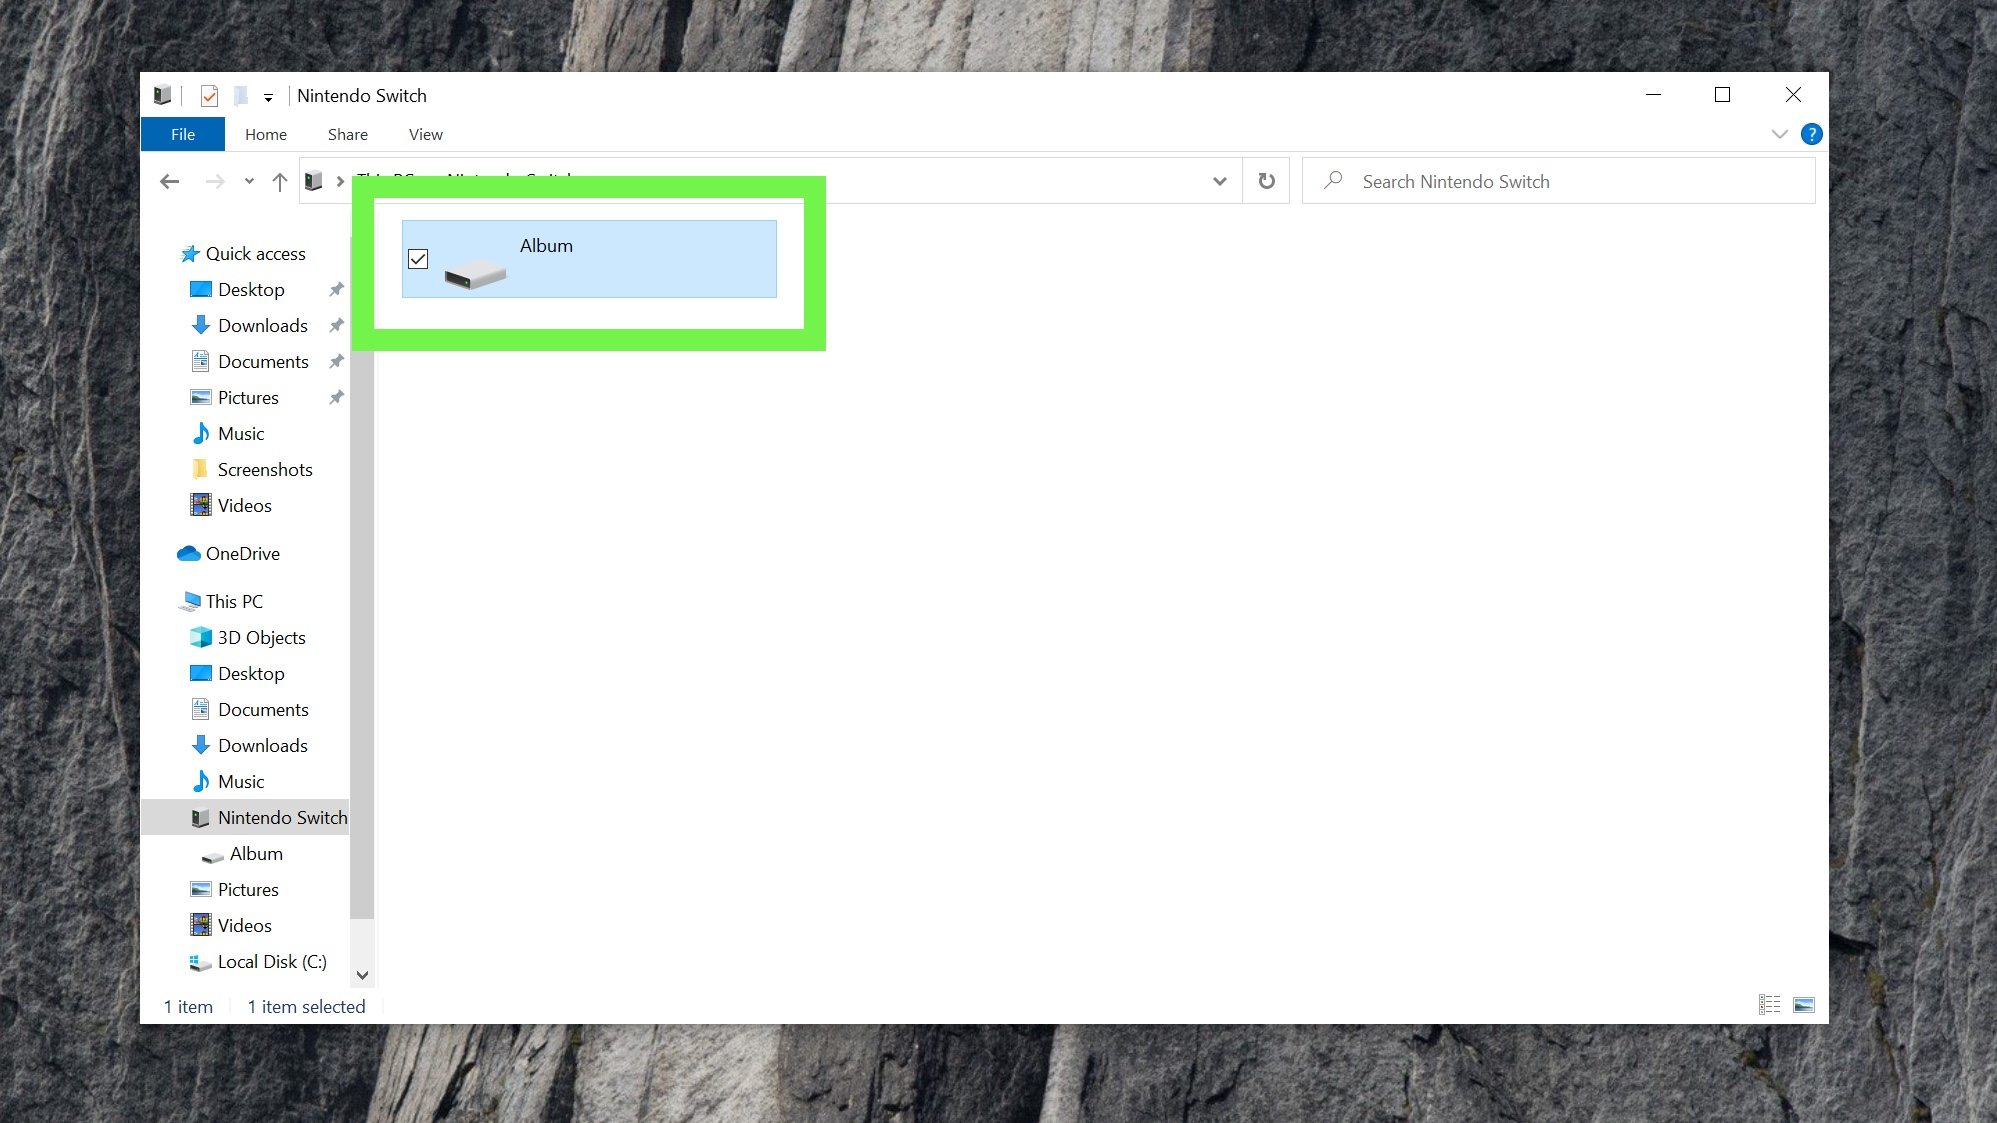
8. Find the folder of the game you're using
Screenshots and video of the Switch interface will be in Other.
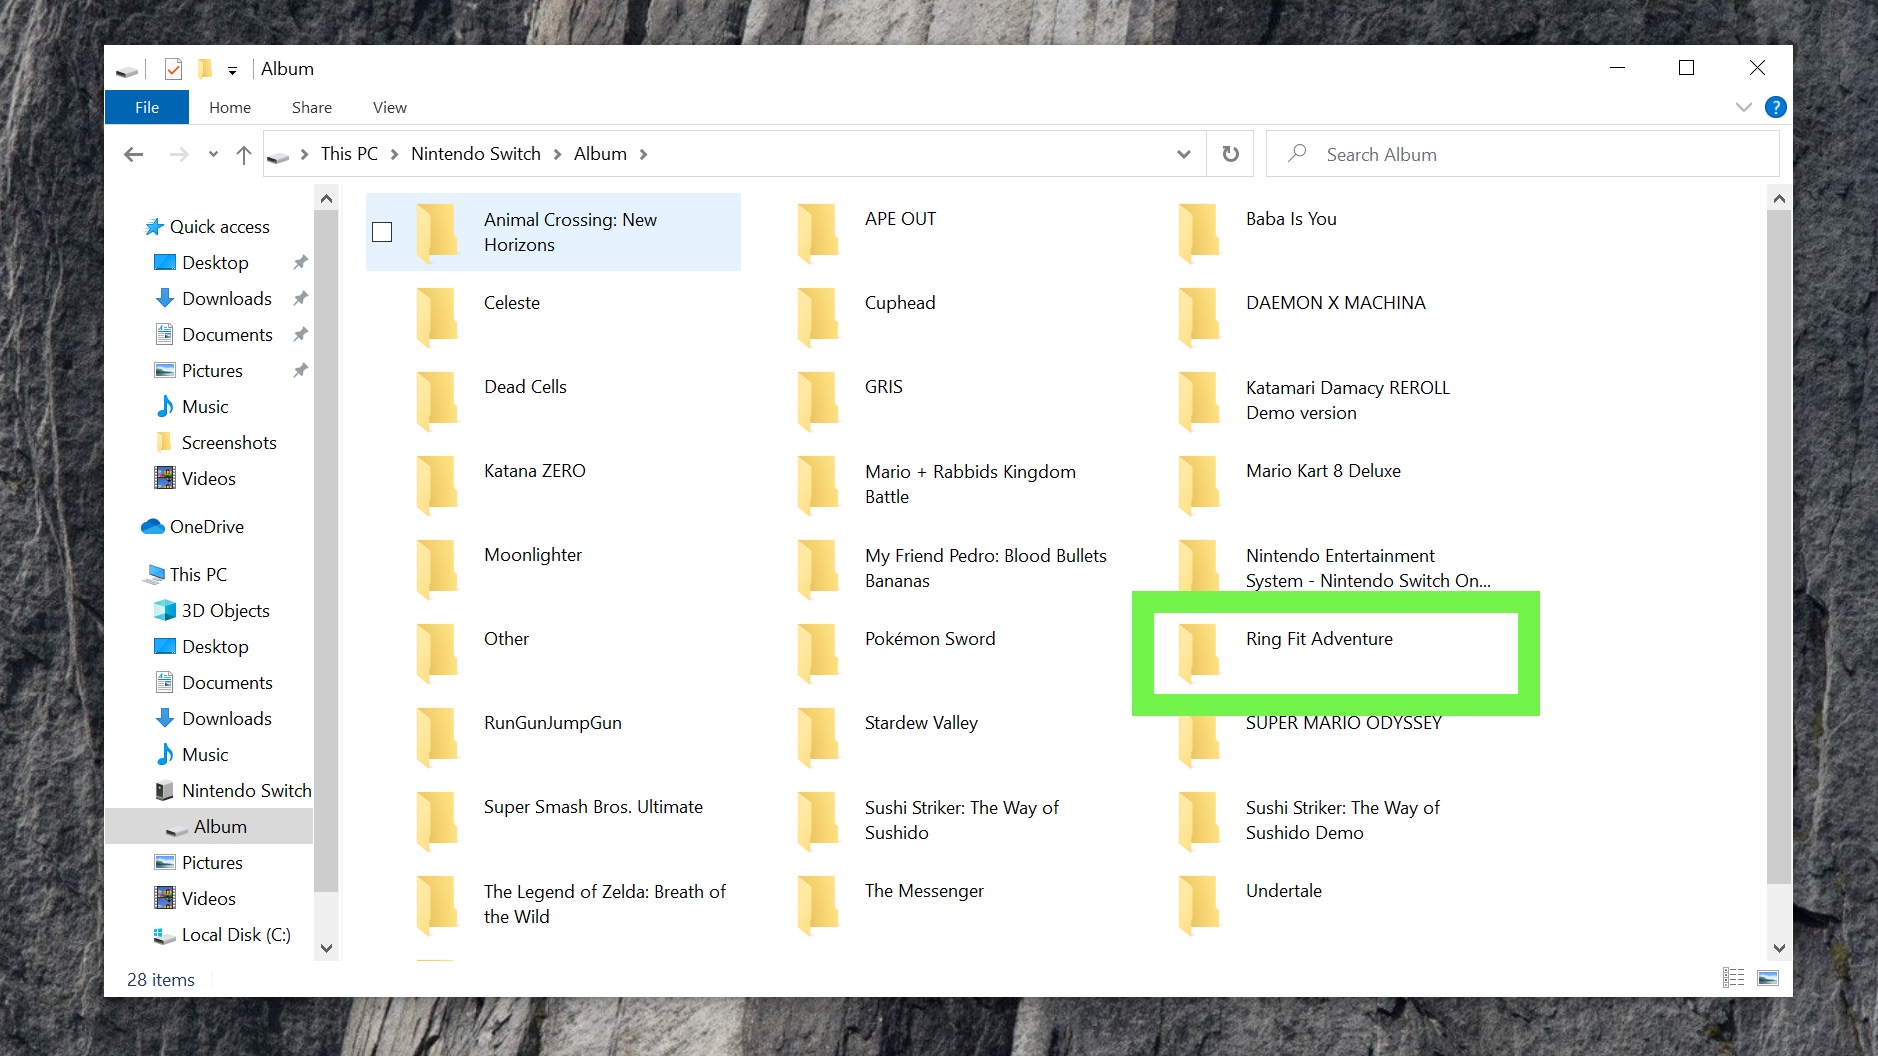
9. You've found your screenshots
Drag and drop them onto your desktop or into other directories.
There you have it! You're no longer limited to just social media and your microSD card when it comes to getting your screenshots off your Switch!

Henry is a managing editor at Tom’s Guide covering streaming media, laptops and all things Apple, reviewing devices and services for the past seven years. Prior to joining Tom's Guide, he reviewed software and hardware for TechRadar Pro, and interviewed artists for Patek Philippe International Magazine. He's also covered the wild world of professional wrestling for Cageside Seats, interviewing athletes and other industry veterans.
