Holding a kettlebell isn’t exactly a science: you pick one up and throw some reps, right? Not exactly. Kettlebell training takes some technique. Whether it’s a kettlebell swing, clean and press, or kettlebell snatch you’re performing, there are holding positions and grips that will save you and your wrists from disaster.
And it doesn’t matter if you’re a kettlebell beginner or weightlifter. It’s best practice to learn how to hold a kettlebell properly from the ground up. Doing so will help develop grip, strength, and technique for your chosen kettlebell exercise so you can maximize the benefits of kettlebell training and keep yourself (and others) injury-free. After all, if you witness a fellow gym-goer launching a heavy cast iron kettlebell above their head, you’d hope they knew what they were doing.
We spoke to Mike Silverman, kettlebell course instructor and Living.Fit contributor, to learn five kettlebell holds and grips to master and why learning how to hold a kettlebell is beneficial before you pick one up. Grab the best cross-training shoes to train in, and read on.
Benefits of kettlebell training
Benefits of kettlebell training include developing core strength and power, boosting your cardio fitness, and increasing muscle mass across your entire body using exercises like cleans, presses, and rows. Whether you prefer to train using one kettlebell (known as unilateral training) or increase intensity with two, research has shown that kettlebell workouts improve strength and power by recruiting multiple major muscle groups and training the body’s coordination.
If you’re a beginner, these are the 5 best kettlebell exercises for beginners to build muscle and strength.
By working out regularly with kettlebells, you’ll target most of the muscles in your chest, back, shoulders, core, and leg muscles. But it takes some skill to lift them, and learning how could improve energy efficiency and protect your forearms and wrists.
5 best kettlebell holding positions and grips
Kettlebells feature a handle with the weight located underneath, which allows freedom to move the kettlebell in various ways, but improper technique will send the weight onto your wrists and forearms. Depending on your chosen model, kettlebell exercises like the jerk, Turkish get-up, and snatch all favor specific hand positions.
Sign up to get the BEST of Tom's Guide direct to your inbox.
Get instant access to breaking news, the hottest reviews, great deals and helpful tips.
How to hold a kettlebell depends on the move and kettlebell type — most of which fall into two main categories: competition kettlebells and cast iron kettlebells. Cast iron models are characterized by a large, wide handle that comfortably supports two-handed moves. These models are better for beginners or CrossFit-style classes because the extra space provides versatility between exercises.
Comp bells, as the name suggests, suit competitions and athletes mastering technical one-arm moves like cleans and snatches; the handle and space between are much smaller.
1. Kettlebell hook grip
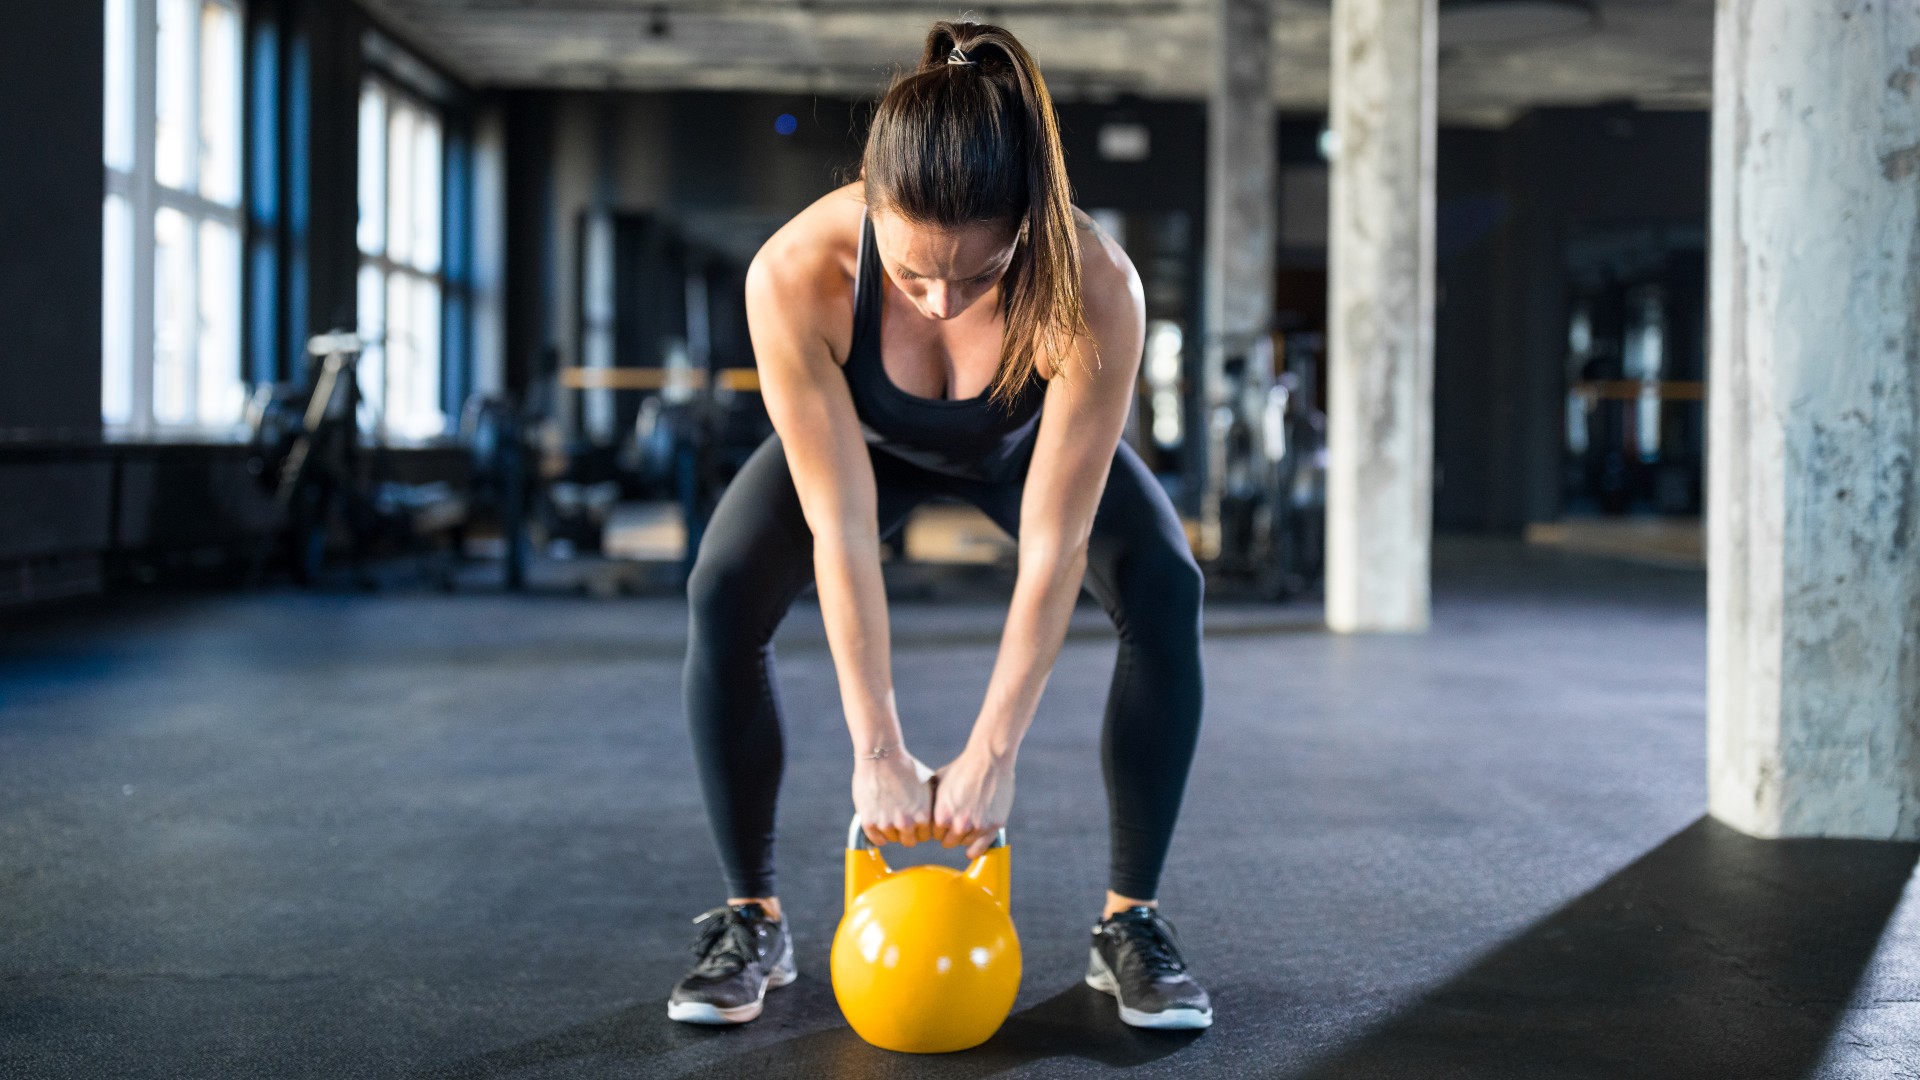
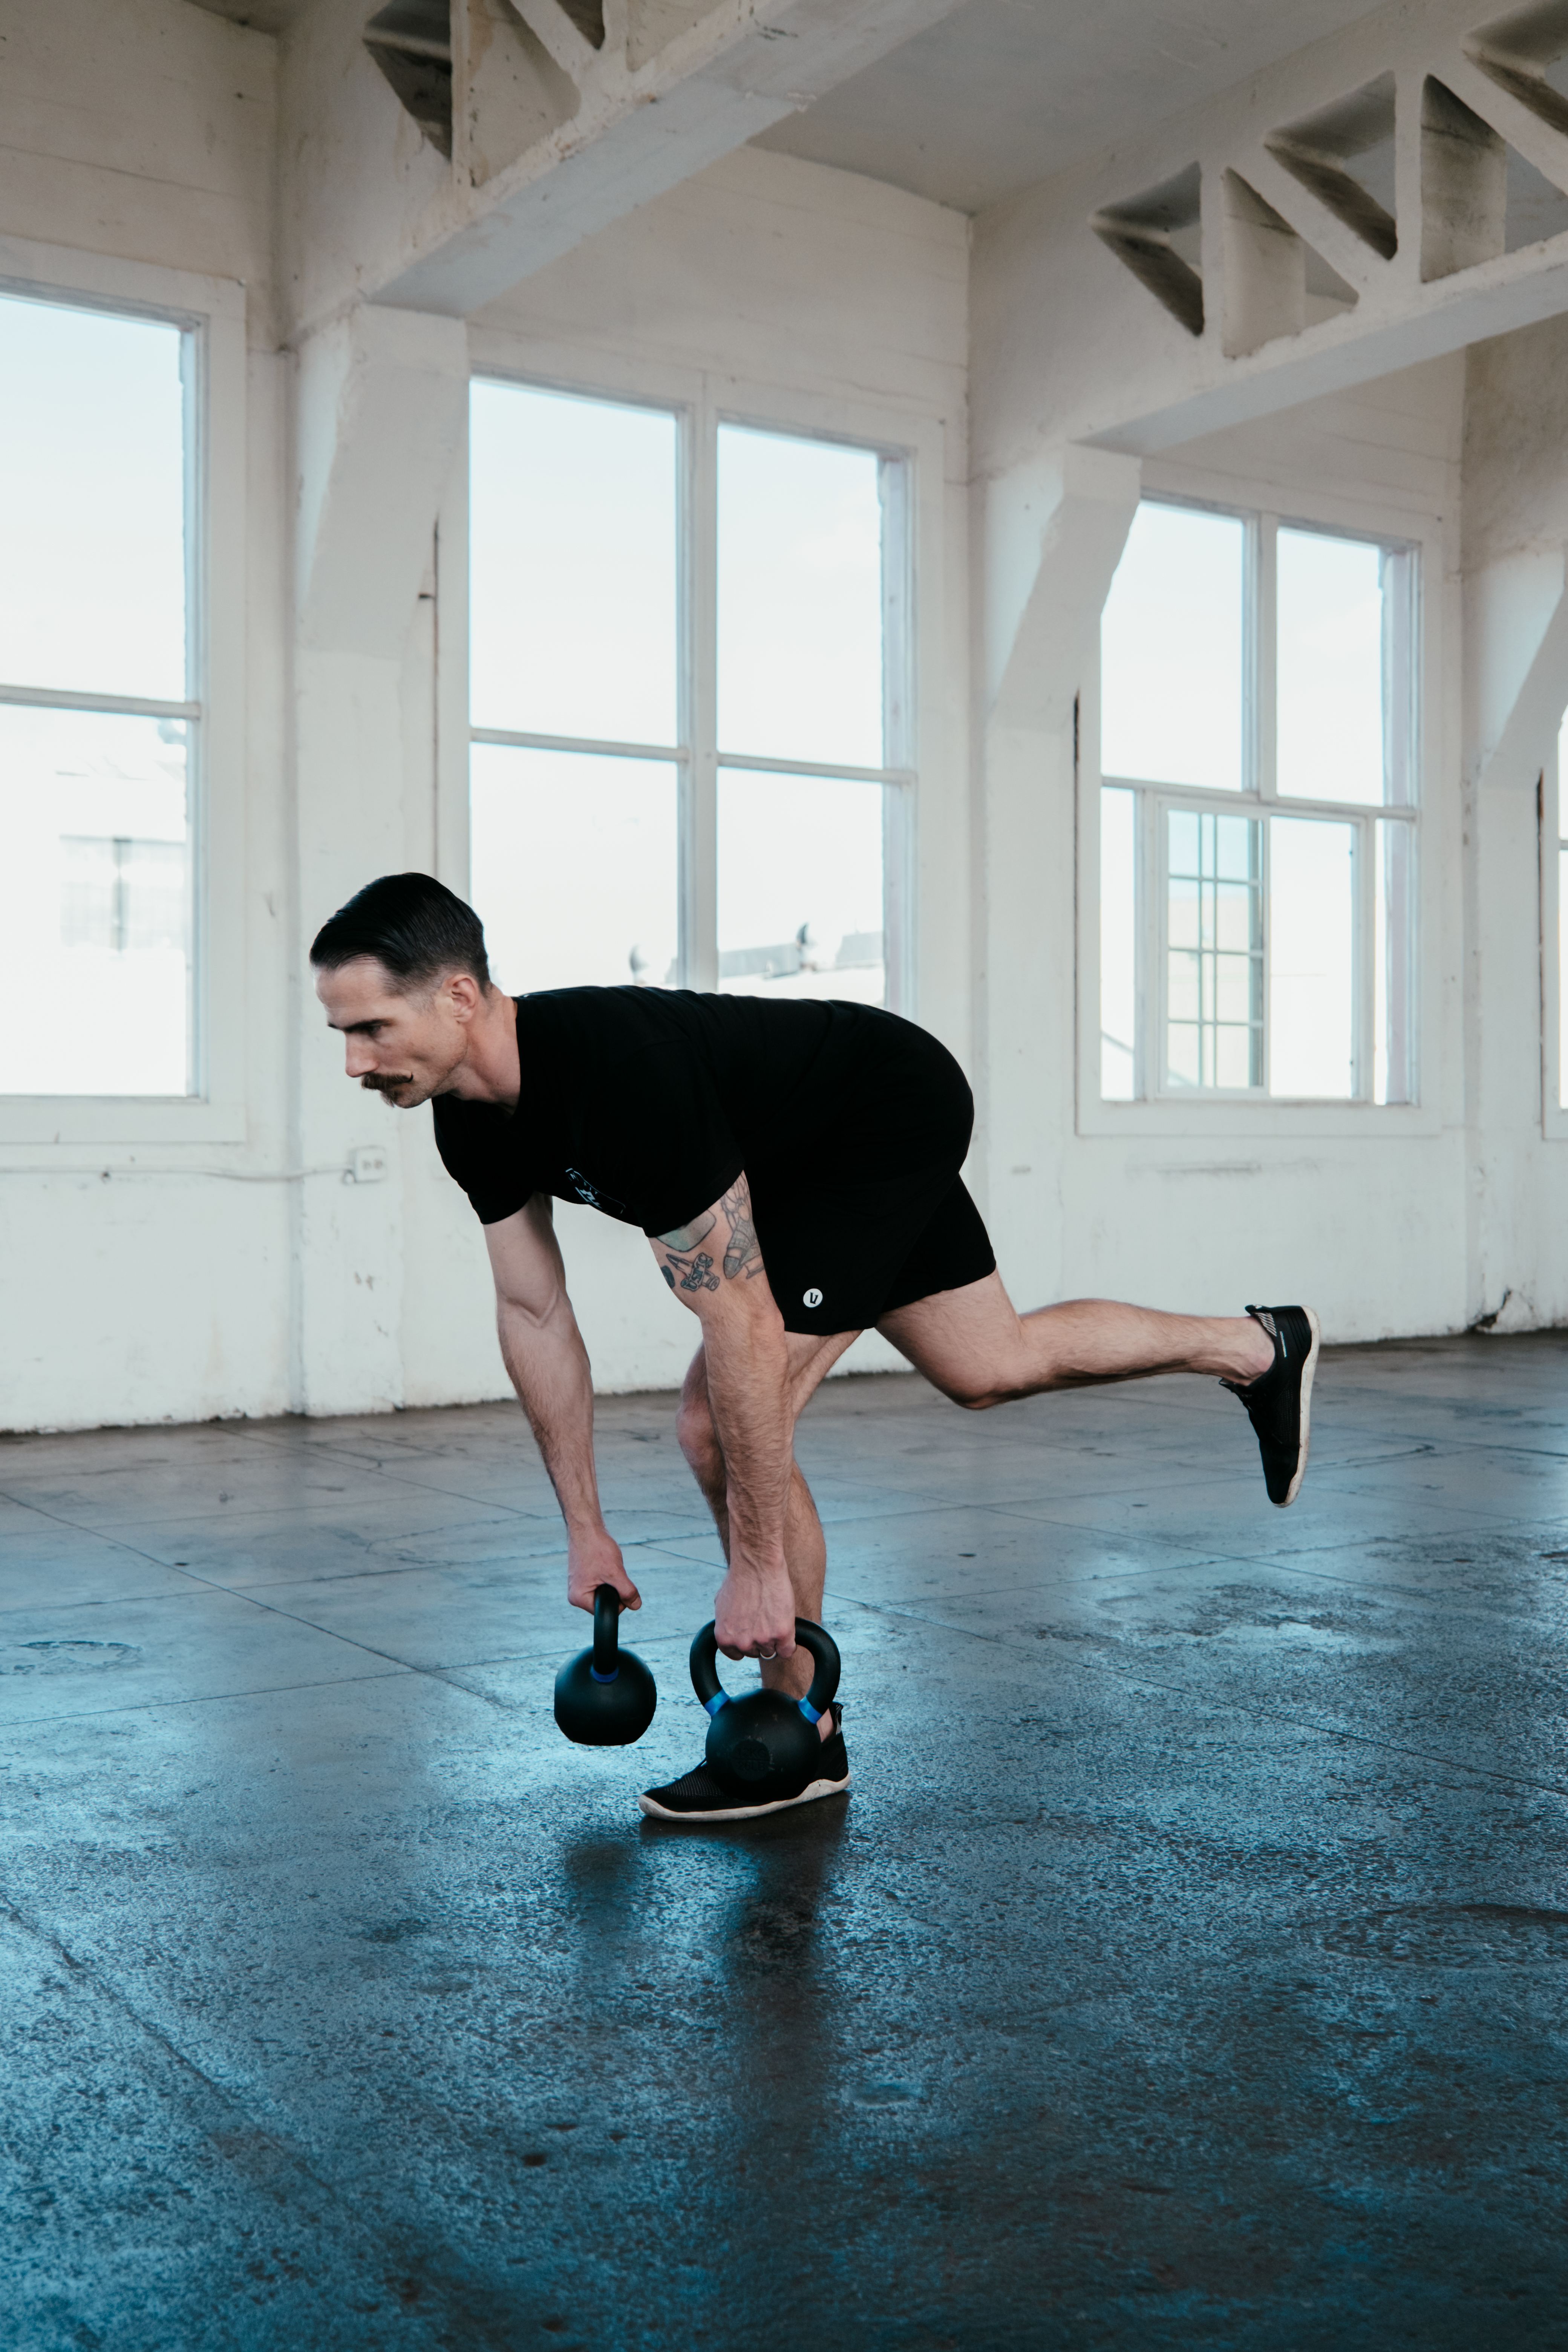
“This is the most common grip for below-the-waist moves, and for most people, very easy to use,” Silverman says. If you're working with one hand, Silverman advises wrapping your grip around the center of the bell handle. Working with two can be a trick for folks with bigger hands, but that will vary by bell size and hands.
“The most common mistake I see in hook grips is that people turn it into a false grip by having their thumb and fingers on the same side of the handle. Your thumb should be going in the opposite direction for maximum strength.”
Avoid gripping too hard and keep a relaxed but firm position on the handle, especially during exercises like snatches that require some fluidity from the wrists, with your grip just off-center on the bell. Hook grips also work for Turkish get-ups and kettlebell swings.
2. Kettlebell fitness rack position
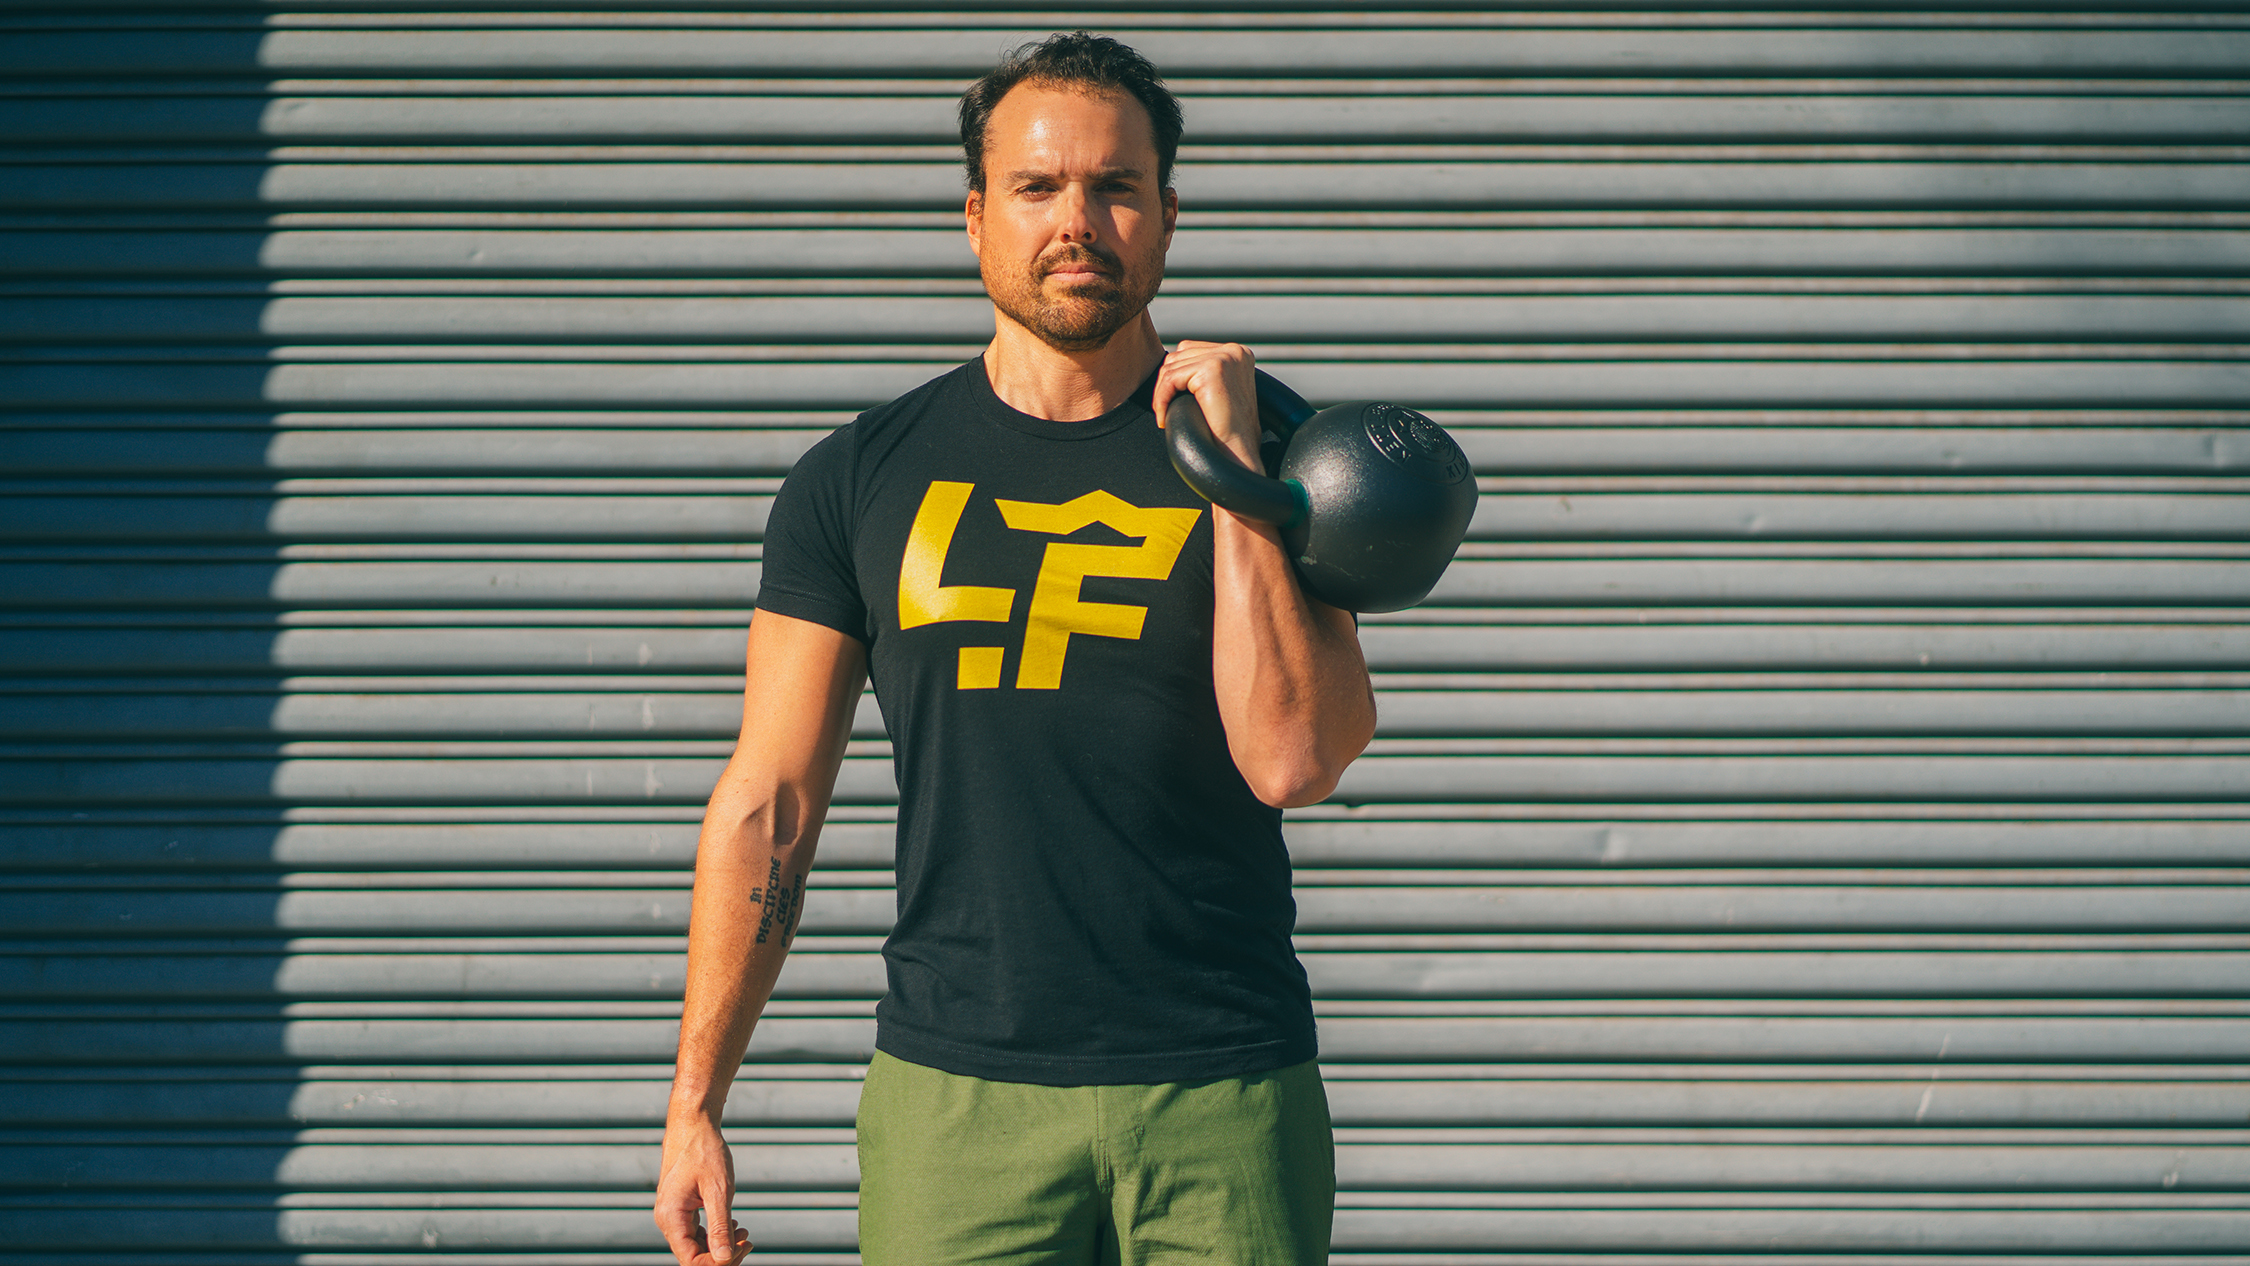
Silverman advises holding the bell with a hook grip. “Then clean the bell and insert your hand into the window firmly. Your finish position is with your forearm perpendicular to the floor and parallel to your torso,” he adds, “ aim to have your hand finish at, or just slightly above, your shoulder. You should be able to look across your knuckles.”
Silverman typically tells people to aim their thumb toward the bra strap. “I train a lot of women, but the boys seem to understand this one!” he says.
Common errors to look out for are letting your wrist go into extension, which makes your grip weak and tires you out, and letting your forearm fall outward — this puts a lot of stress on your shoulder. For most people, this rack works well as a launching point for overhead presses and rack squats.
3. Kettlebell goblet hold
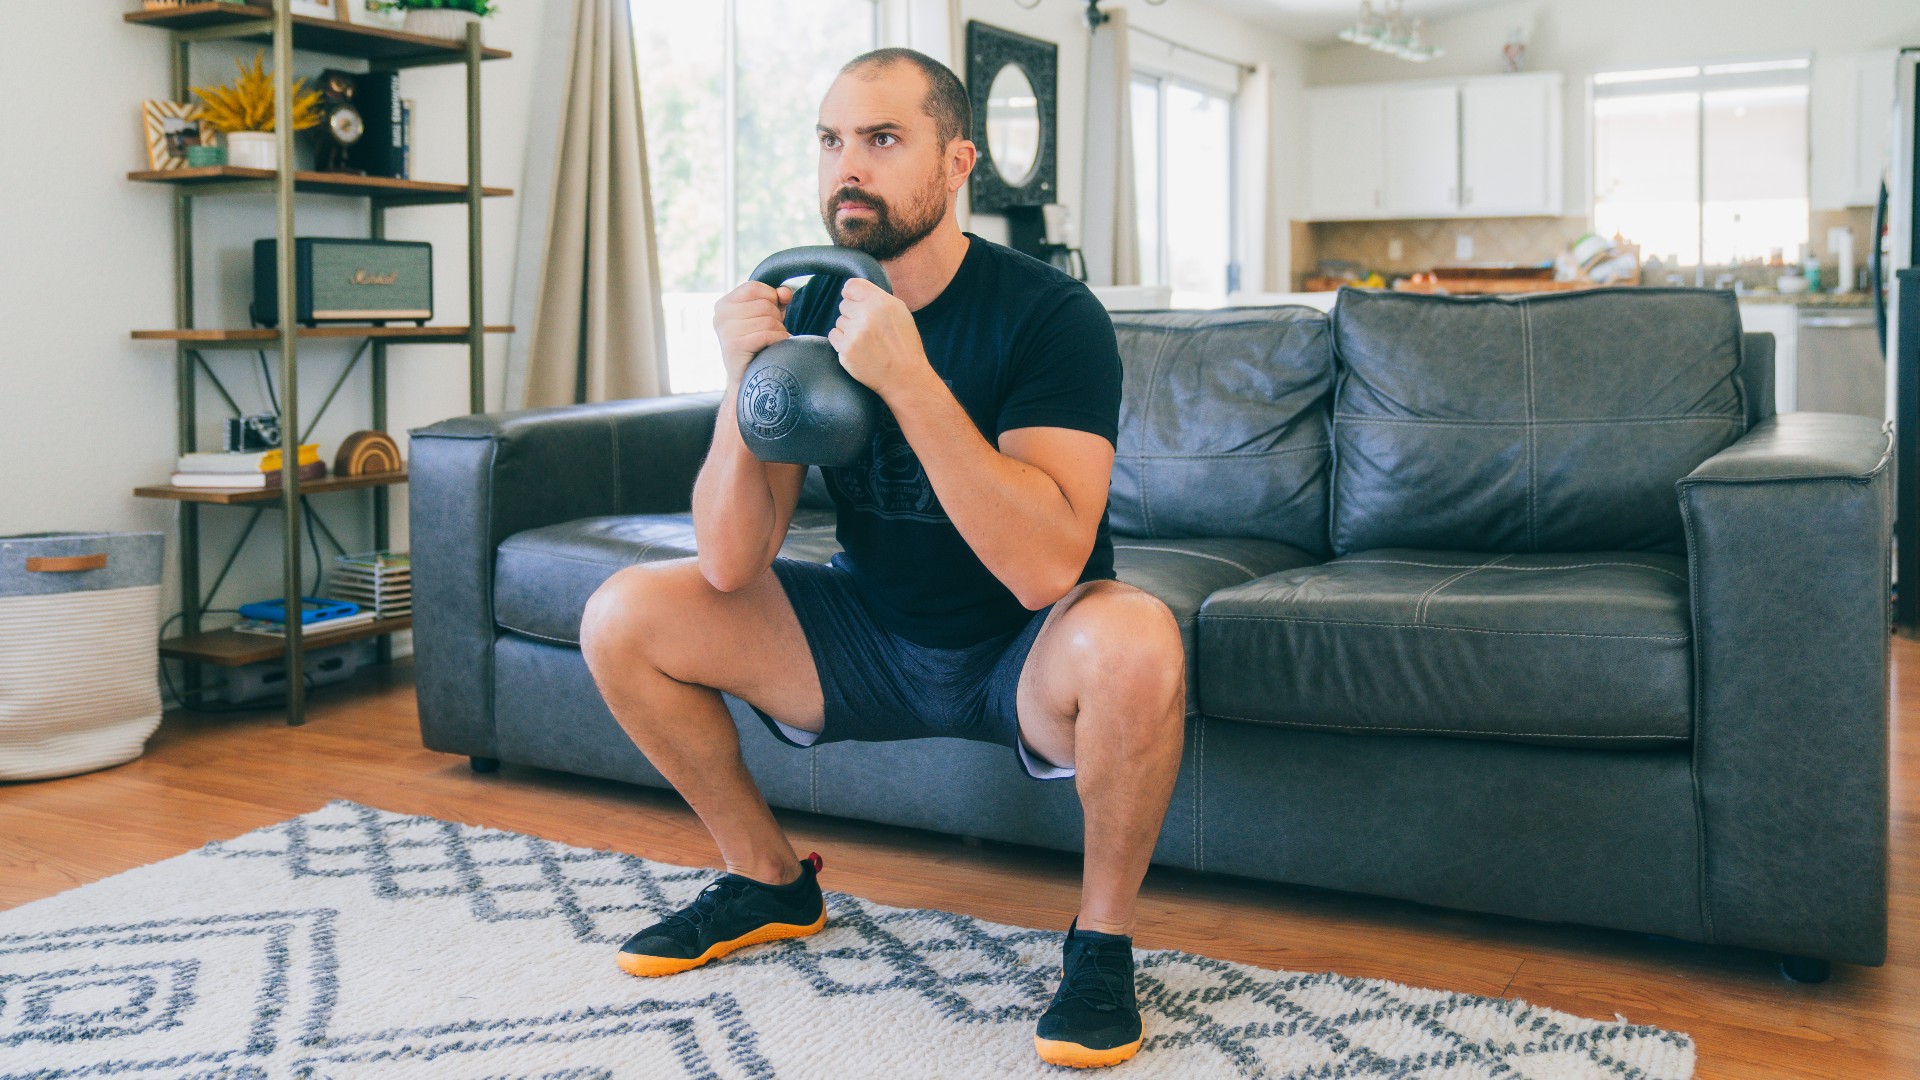
“A truly simple position,” Silverman tells us. “The goblet lets you use the whole of both hands to hold a bell to a stable position close to your chest. This position is great for goblet squats, walking lunges, box squats, and thrusters.”
When you've got competition bells, this may be tough - so feel free to flip it upside down and use a variant called a chalice position. Either hold the sides of the bell or handles (called the horns) and press your hands to activate your shoulders.
4. Kettlebell bottoms up
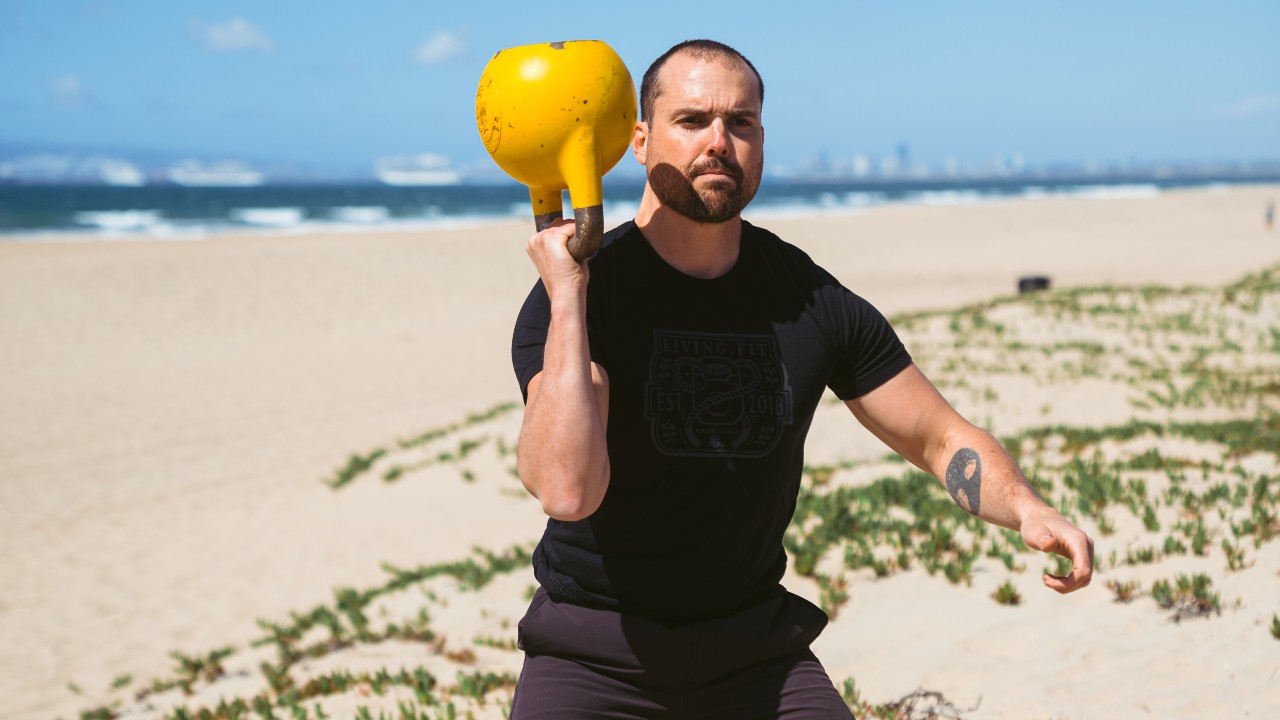
This position involves holding the kettlebell by the handle and flipping it upside down. Your forearms and wrists are doing a ton of work to balance the kettlebell by the handle. Try and keep your entire arm switched on and the kettlebell close to your shoulder in a central position.
“This is one of my favorite positions to emphasize grip strength and stability,” says Silverman. “It's also great for making small bells feel bigger. I like to do a shortened range of motion presses and marches from this position to find all of those little spots in the shoulder girdle that get forgotten.”
5. Kettlebell sport rack
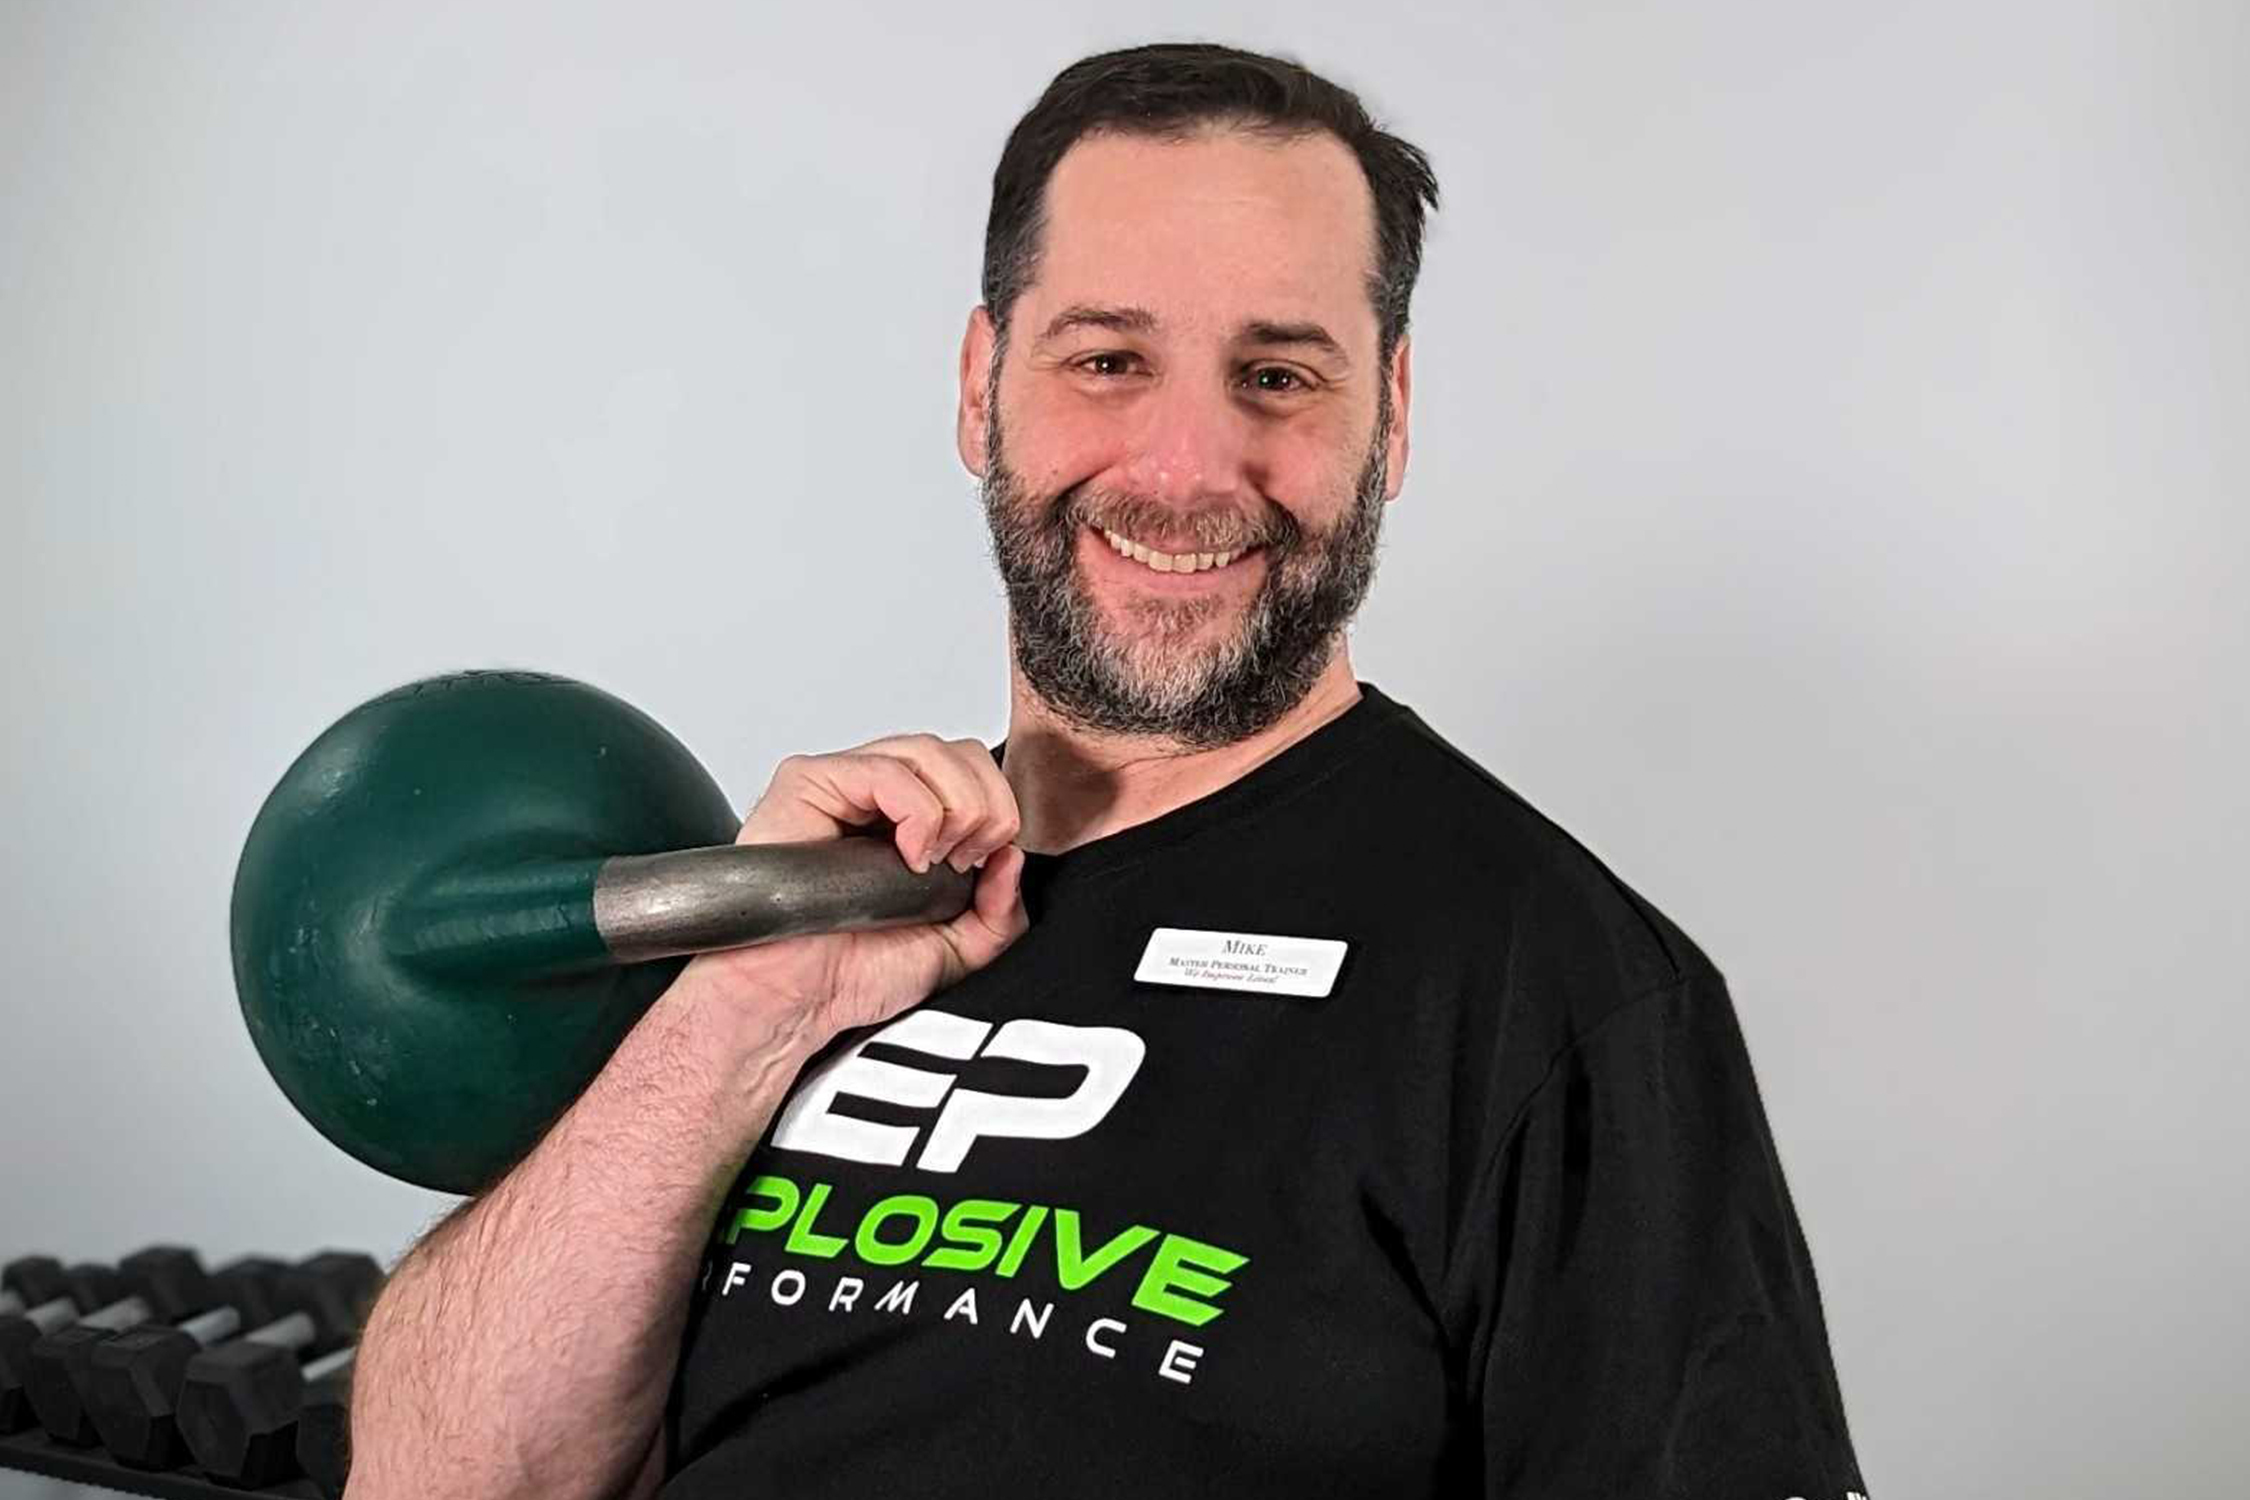
“Contrary to some beliefs, there's more than one way to rack a kettlebell,” Silverman reveals. “Clean the bell, aiming for a deeper hand insertion than the hook rack, and aim towards the inside corner of the bell,” he explains. “Your hand will reach through almost to the wrist with the weight across the thumb webbing and palm at a 45' angle.”
Another difference is that your thumb will be closer to the notch in your neck — far more centered than in a fitness rack. “This excels for double bell work like long cycles and double jerks, but it's also great for thrusters and front squats because it's stable and low-stress on your shoulder.”
Are you looking for kettlebell workouts to try? You just need 10 minutes and one kettlebell for this one, we love this 7-move kettlebell leg workout, and this kettlebell workout only takes 15 minutes. Here's a 30-day kettlebell challenge,

Sam Hopes is a level 3 qualified trainer, level 2 reiki practitioner and senior fitness writer at Tom's Guide. She is also currently undertaking her Yoga For Athletes training course. Sam has written for various fitness brands and websites over the years and has experience across brands at Future such as Live Science, Fit&Well, Coach, and T3.
Having worked with fitness studios like F45 and Virgin Active, Sam now primarily teaches outdoor bootcamps, bodyweight, calisthenics and kettlebells. She also coaches mobility and stretching-focused classes several times a week and believes that true strength comes from a holistic approach to training your body.
Sam has completed two mixed doubles Hyrox competitions in London and the Netherlands and finished her first doubles attempt in 1:11.
