3 Microsoft PowerToys I install on every new PC—and you should too
Supercharge your Windows PC with these free Microsoft tools
Microsoft Windows is already pretty good, but it could be better.
As much as I've come to like Windows 11 since its slightly underwhelming debut in 2021, there are still some things I regularly do that are a pain in Windows. I often have to reorganize my windows or edit and rename big batches of files of photos for work, for example, and such menial tasks start to feel tiresome pretty quick.
And as much as I appreciate the best features of macOS Sonoma, I'm a Windows user most of the time, and I miss some longtime macOS features like Spotlight Search and Quick Look. That's why I install Microsoft's PowerToys on every new PC—it gives me a handful of really useful features I can use to make my work go a little smoother, including a few that replicate my favorite macOS features pretty well.
If you're not familiar with PowerToys, it's a well-established package of Windows tools and tweaks that has been available in some form since Windows 95. It's open-source and easier to use than ever now that it's available as a free in the Microsoft Store.
With that in mind, I thought I'd share some of my must-have PowerToys with you to give you a sense of how useful they can be, and what you can do with this free toolset. So if you don't have PowerToys installed yet, check out our quick and easy guide to how to get PowerToys in Windows 11 and then give a few of these features a try. I think you'll be pleasantly surprised!
Get into FancyZones
I love FancyZones because it's basically a more capable, more customizable version of the Snap Layouts feature that Microsoft advertised as a key feature of Windows 11. And while Windows 11's easy-to-use Snap Layouts (which let you drag a window to the top of the screen to summon a series of window layouts you can use to quickly slot the window into, say, the lefthand half of the screen) is great, PowerToys' FancyZones is better.
However, it is a bit more complex to configure. So once you've installed PowerToys, open it (the fastest way is to hit the Start button and type PowerToys, then hit Enter) and navigate to the FancyZones settings via the navigation menu on the left side.
Sign up to get the BEST of Tom's Guide direct to your inbox.
Get instant access to breaking news, the hottest reviews, great deals and helpful tips.
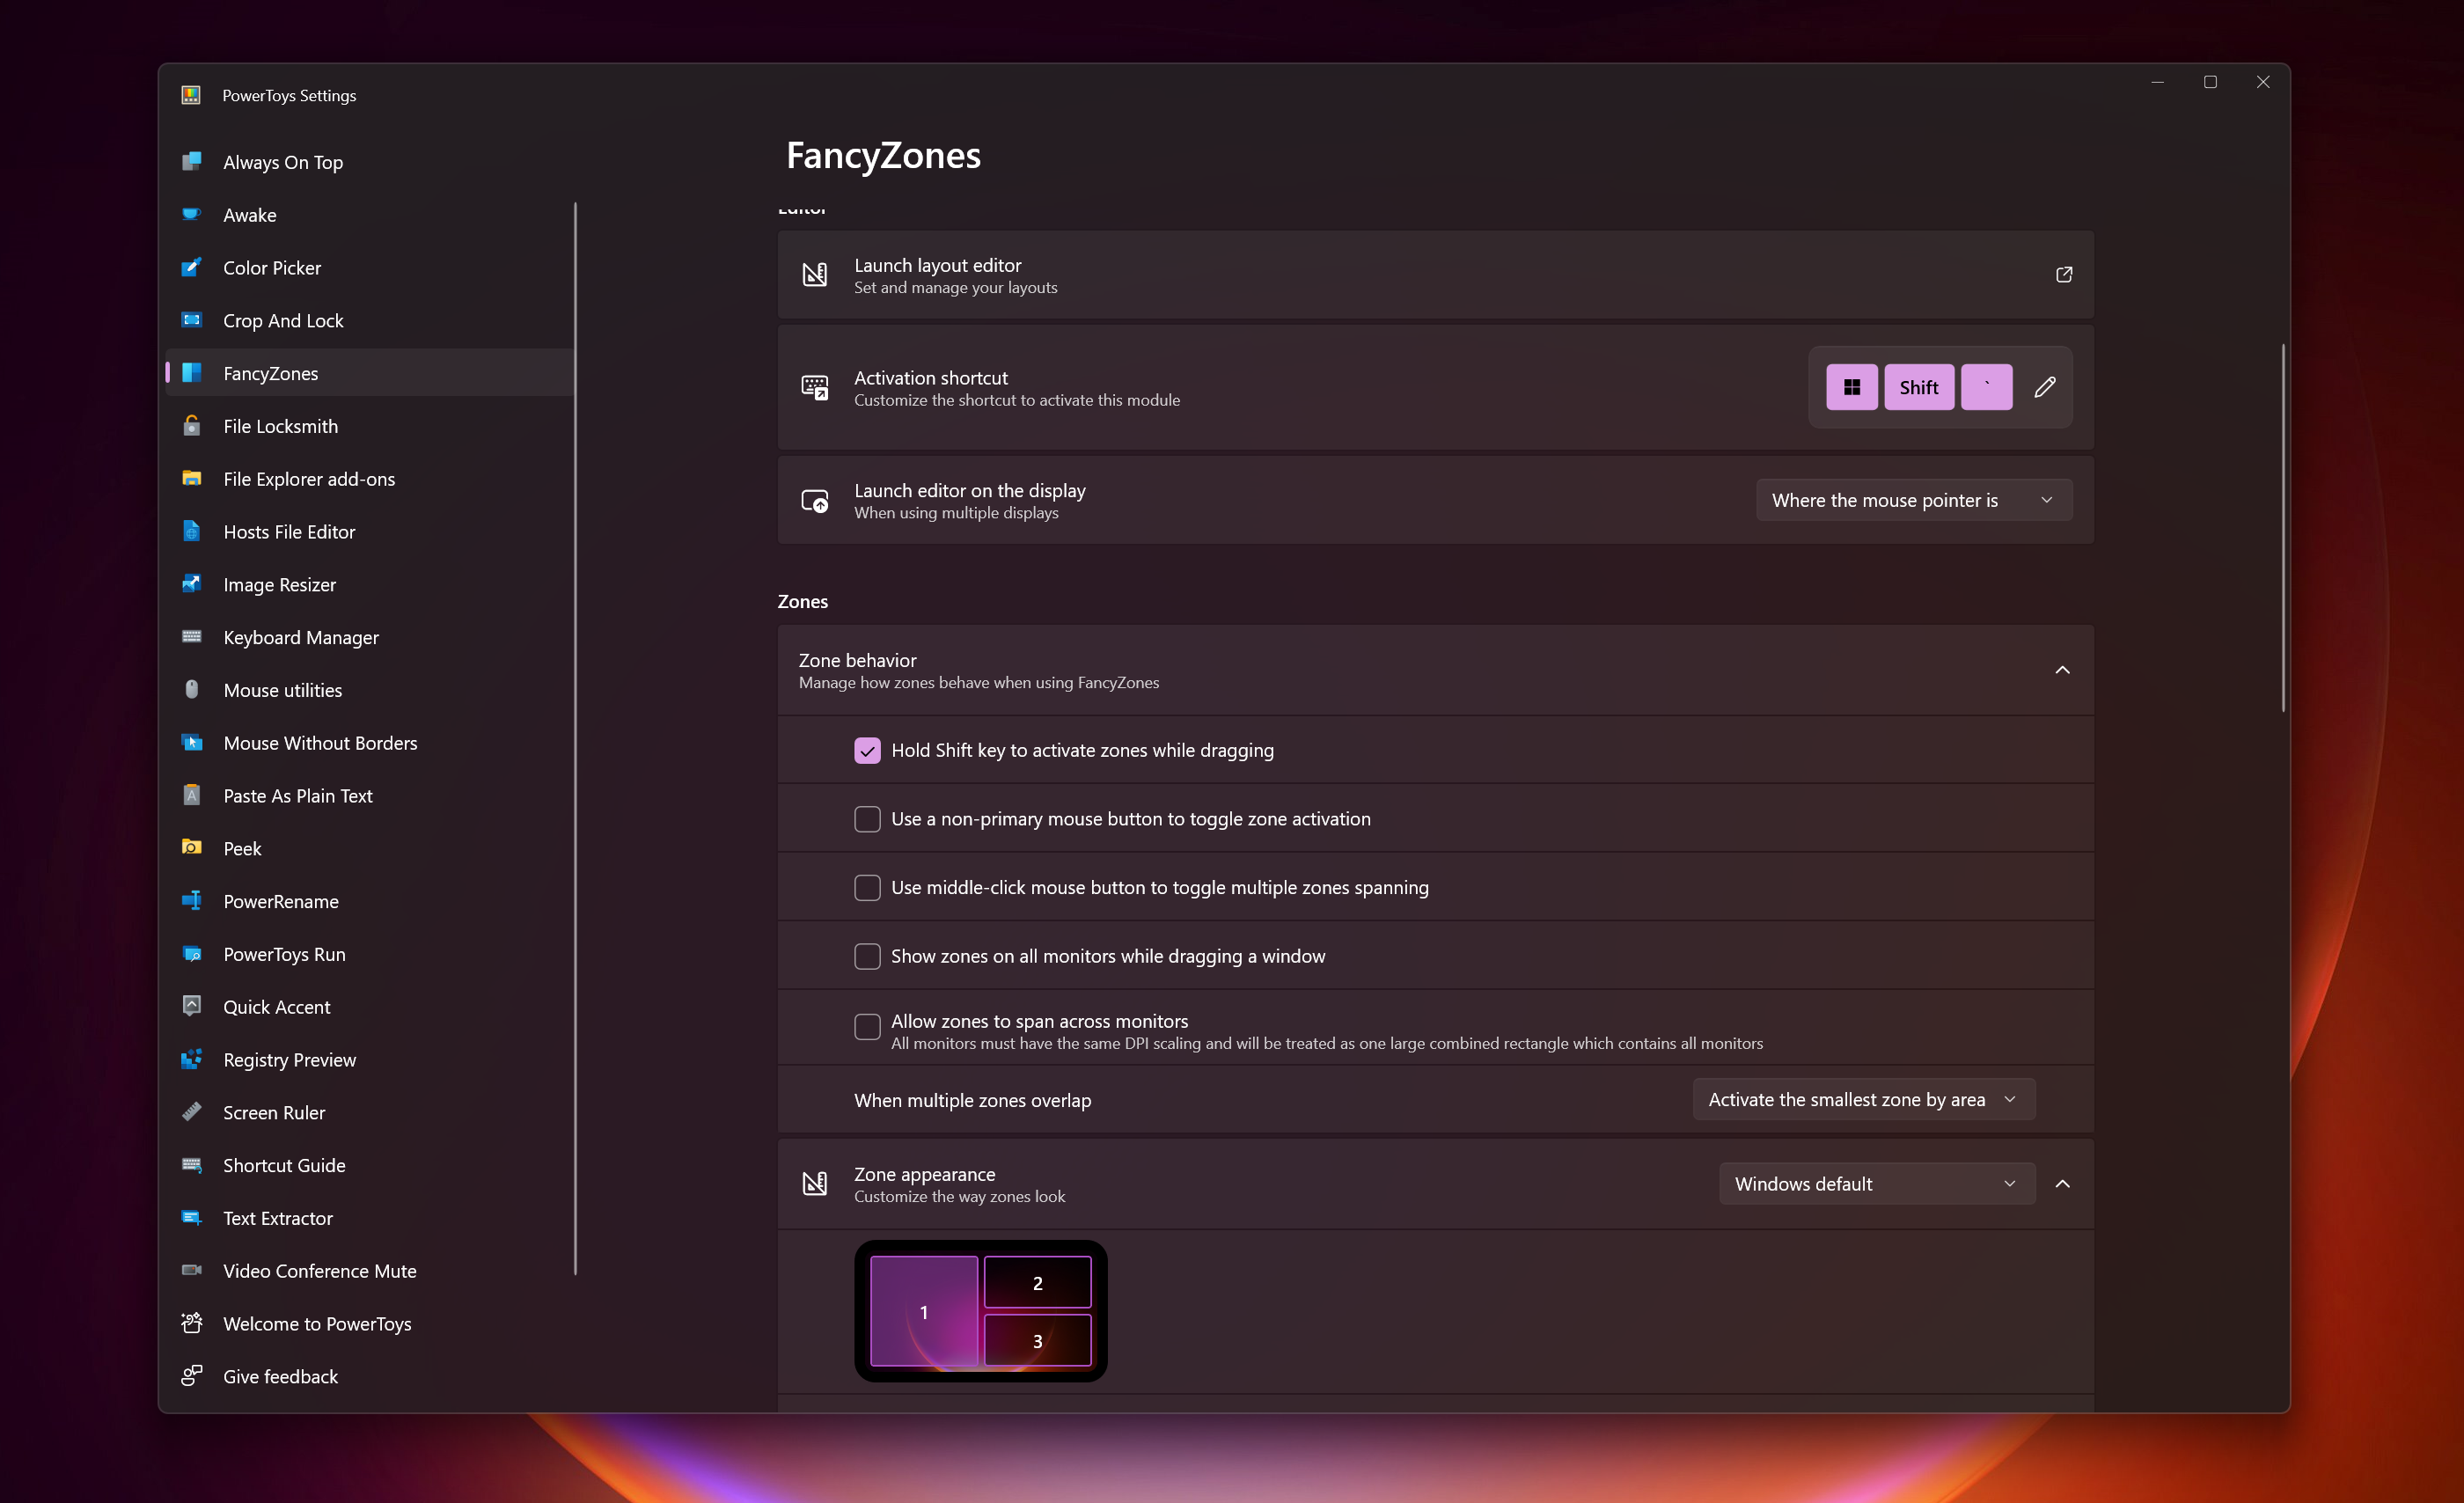
There are lots of settings to mess with in here, and I encourage you to spend some time playing with them to see all the different ways you can configure your window layouts.
If you're not sure where to start, get familiar with the FancyZones Editor and pick a window layout you like or create your own. You do this by hitting the Launch Layout Editor button in the Editor subsection, at which point you can pick a layout you like or design one yourself.
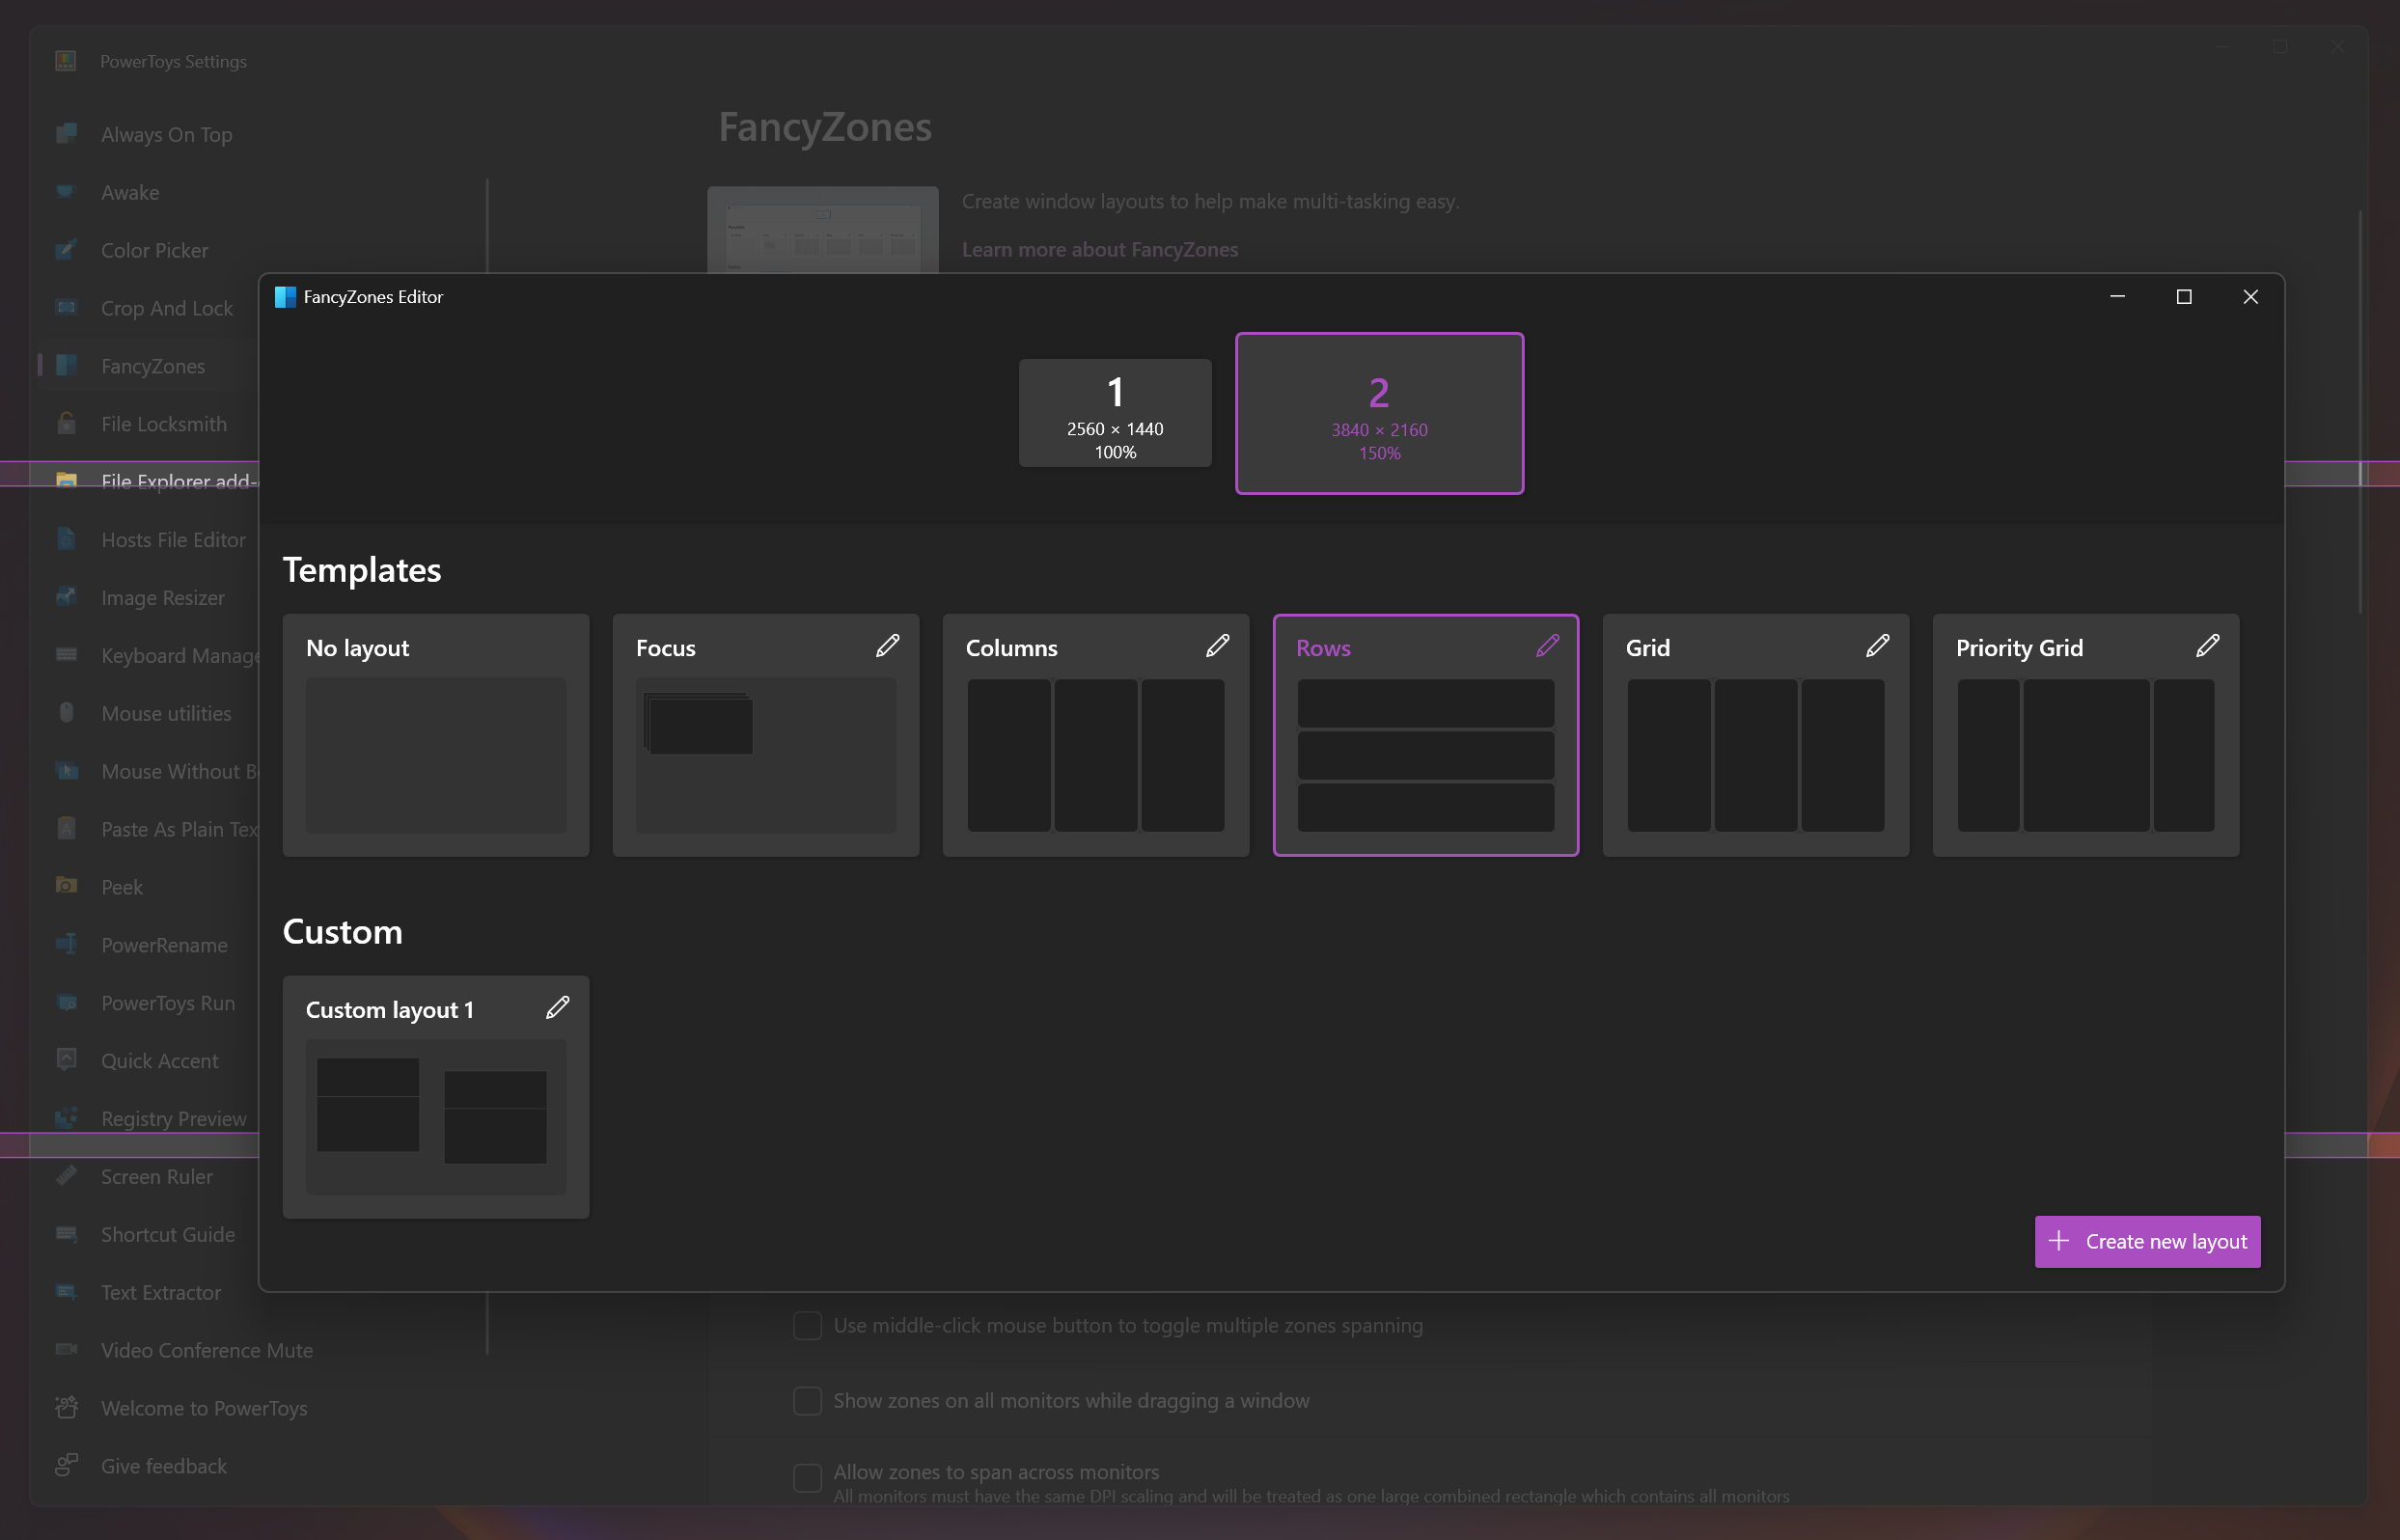
Once you have a FancyZones layout you like, you can hold the Shift key (by default) while moving a window around your desktop to cause your FancyZones to appear. Drag the window over a FancyZone and it will light up, at which point you can let go of Shift to drop the window into your zone of choice.
You can fine-tune how this works for you by messing around with the other options in the FancyZones menu, which let you do things like allow zones to span multiple monitors, change zone appearances, exclude specific apps from playing along, activate zones with the mouse instead of the keyboard, and more.
Run PowerToys Run
I like the way Windows 11 lets you hit the Start button and start typing the name of whatever app or file you're looking to launch, but it has some weaknesses.
I hate the way Microsoft forces you to see web search results alongside files and apps, for example, and I hate how easy it is to accidentally hit Enter and summon an Edge window when I'm actually trying to open Steam or something.
It makes me jealous of the Spotlight Search feature in macOS, which gives you an incredible depth of search across your Mac and the web in an easy-to-summon search box that—and this is key—never forces me to open Safari when I don't want to.
That's why I love PowerToys Run, a simple tool in the PowerToys arsenal that lets you summon a search bar that's similar to Spotlight Search.
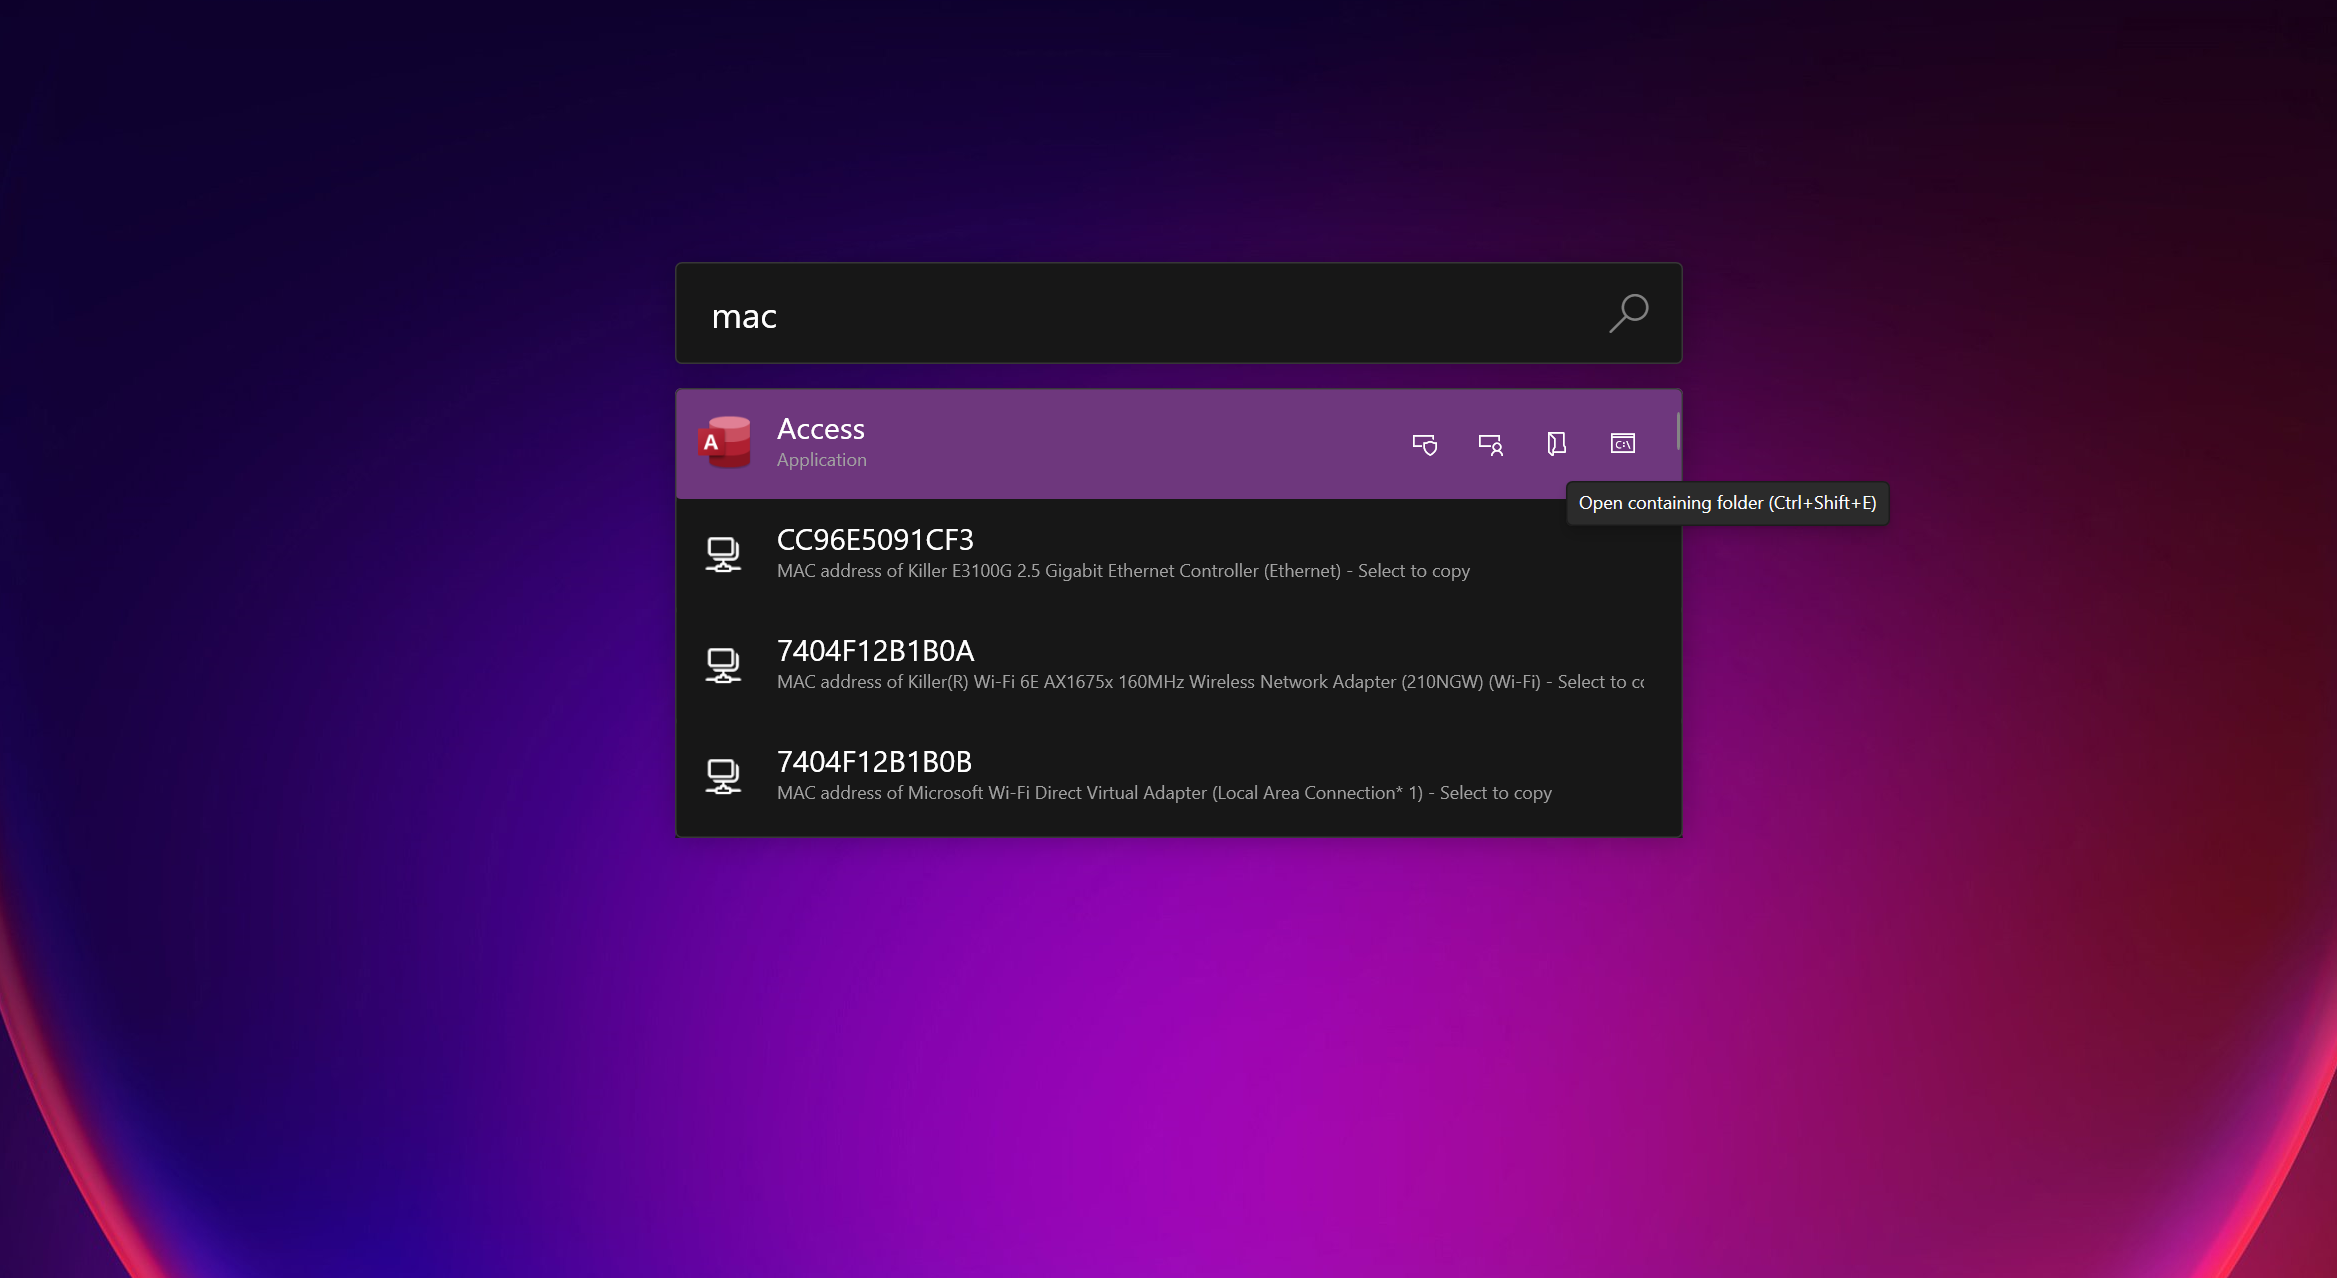
When enabled, all you have to do to use PowerToys Run is hit the hotkey (Alt+Space by default) and a plain search bar will superimpose itself in the middle of your screen. From here you can type whatever you want, and Windows will try to find it on your PC or the web.
So while you can use this tool to quickly find files, apps, folders, you can find a lot more with it. Not only can you use it to quickly open a website in your browser of choice—which is key since I prefer Chrome and PowerToys Run defaults to my preferred browser, whereas the Windows Start menu search results force you to open sites in Edge—you can also use PowerToys Run to find esoteric data like, say, the IP or MAC address of your PC, find registry keys, or execute system commands like shut down, sleep and the like.
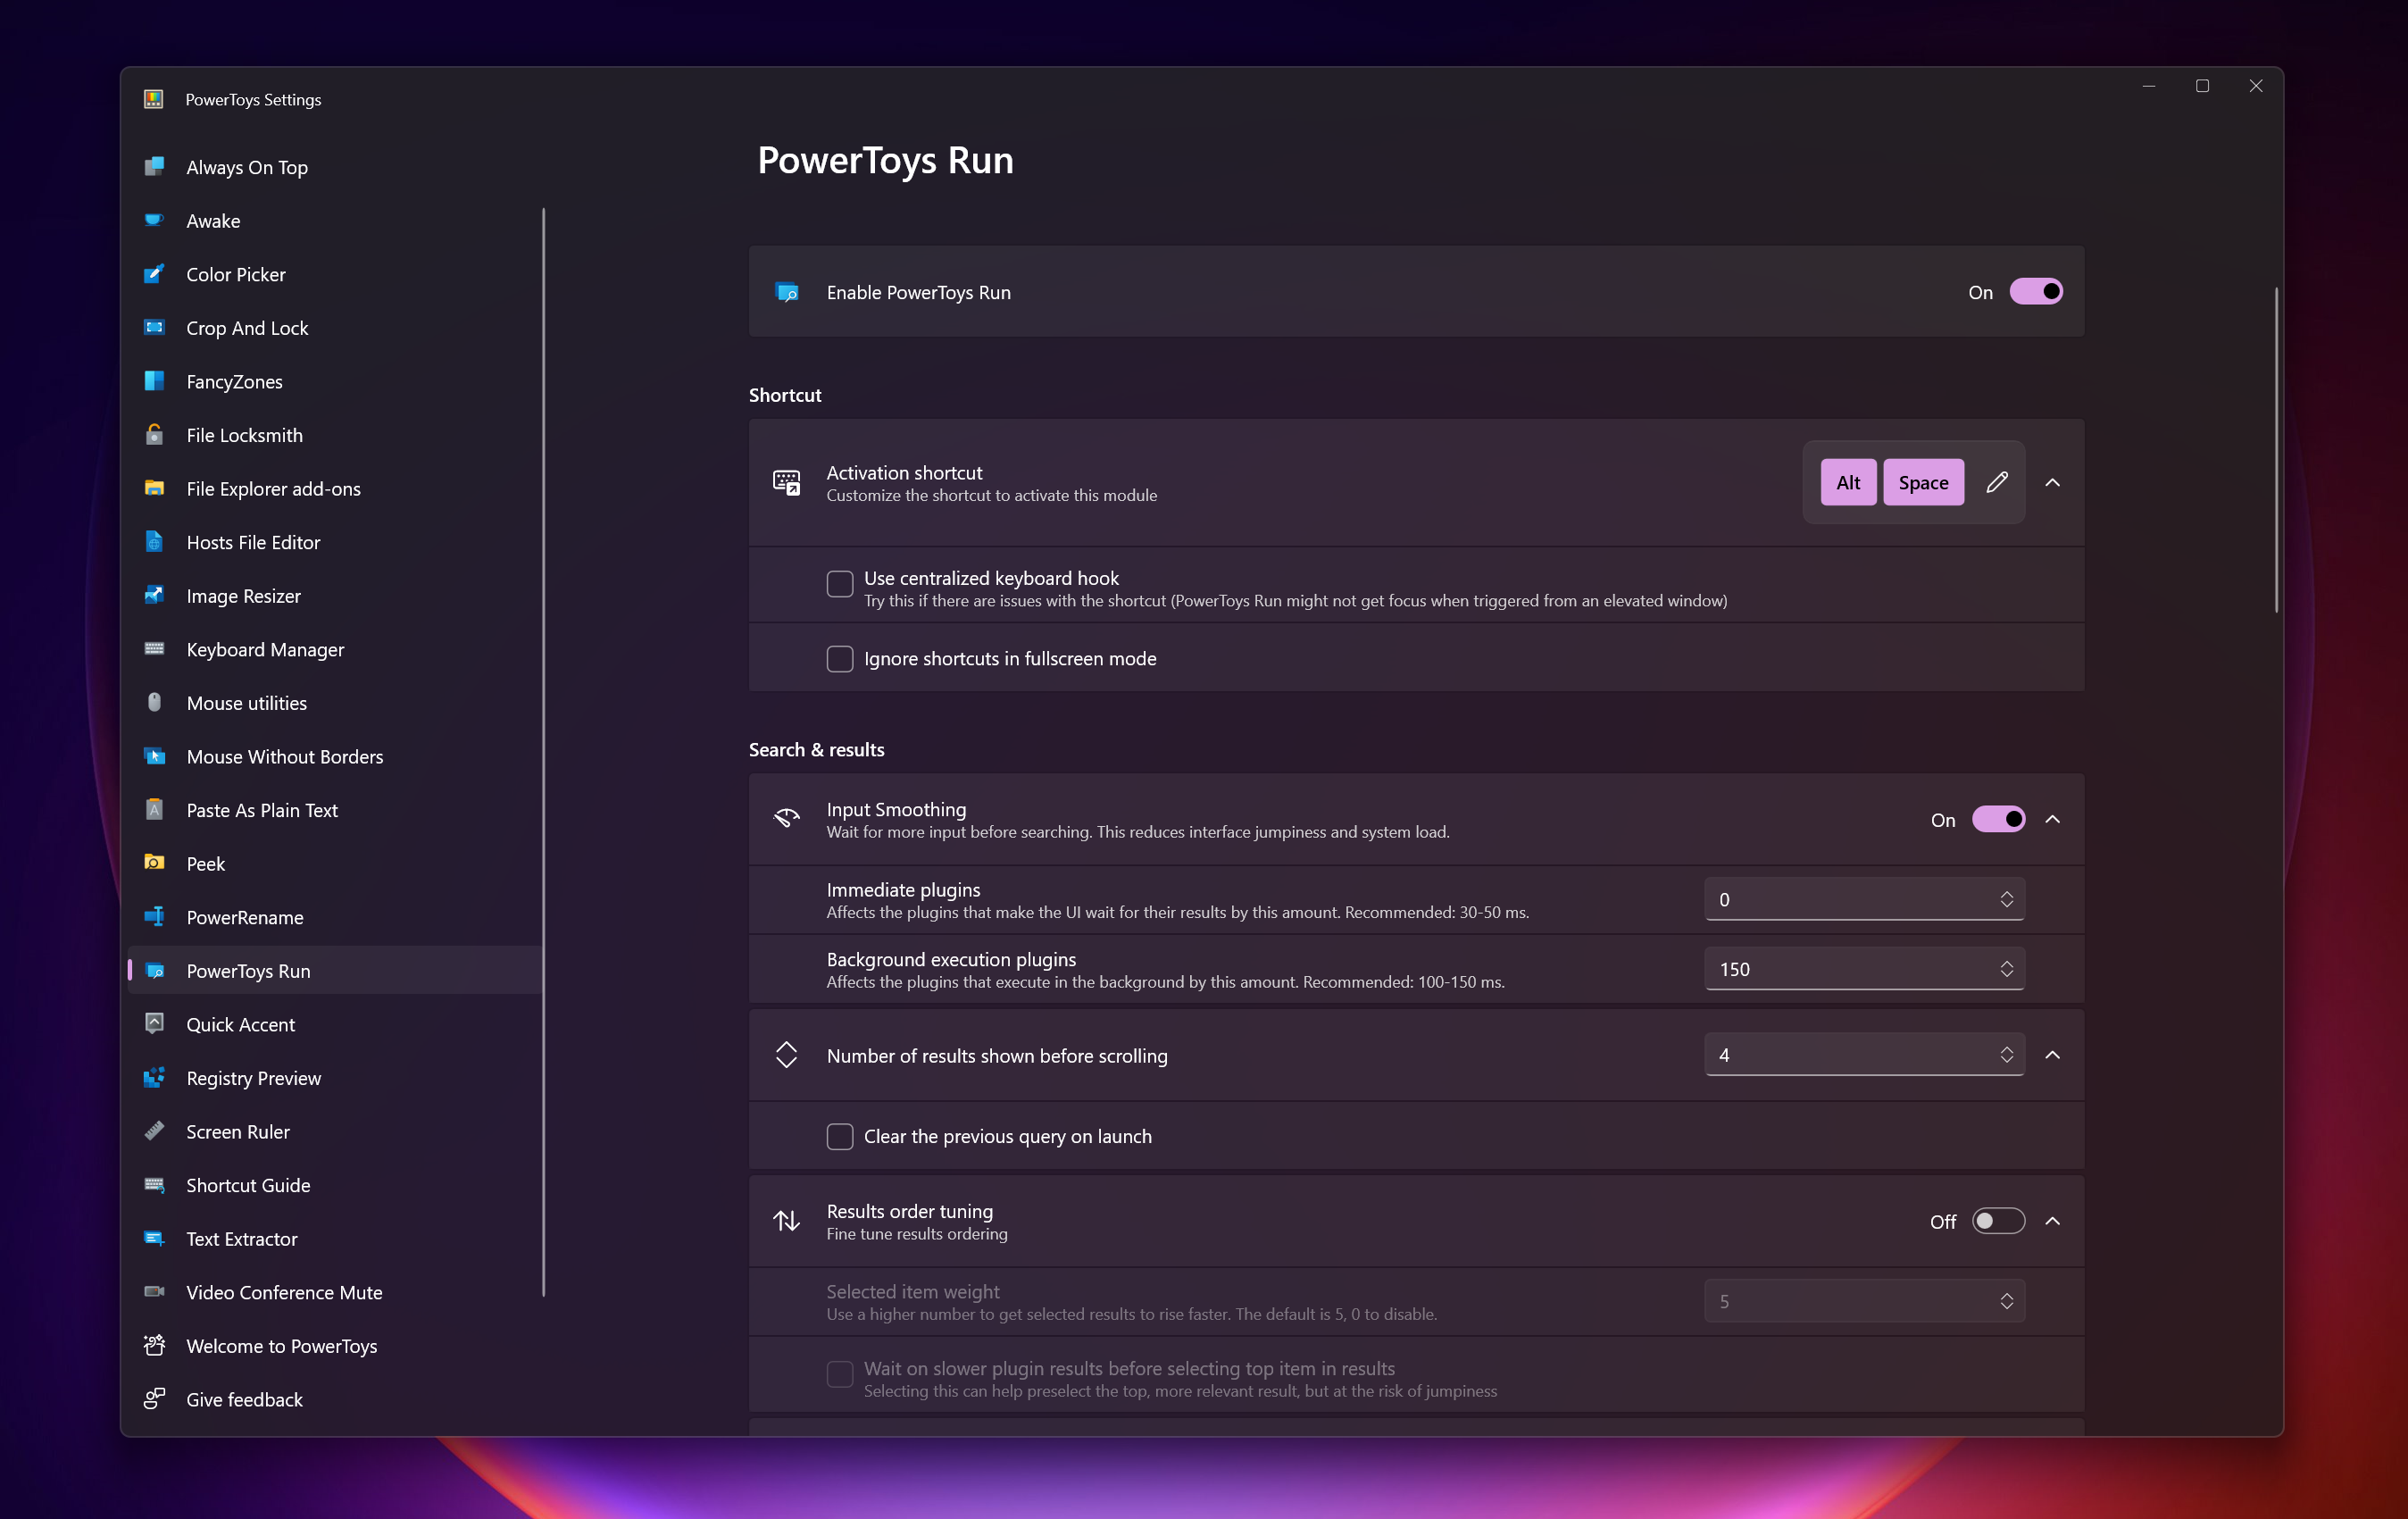
You can enable/disable PowerToys Run and fine-tune how it works by navigating to the PowerToys Run subsection of the PowerToys settings menu. From here you can do things like change the keyboard shortcut which launches PowerToys Run, configure how it returns results, change which plugins (which let it do additional things like search the Registry or calculate math problems) you're using or find new ones and more.
Try it out and I think you, like me, won't be able to go back to plain ol' Windows search.
Mouse Without Borders and make your Mac-using pals jealous
Apple's Universal Control, a feature which lets you use the same keyboard and mouse across multiple Macs and iPads, was a big deal back in 2022 when it debuted in macOS Monterey. It's convenient and improves upon AirDrop because you can use it to drag and drop files between Macs or iPads, and I know at least a few Windows users who were jealous of that kind of multi-PC utility.
If you were among them, good news: Microsoft PowerToys offers basically the same functionality in a feature called Mouse Without Borders. When enabled, Mouse Without Borders lets you use the same keyboard and mouse with multiple PCs, so you can work with multiple computers on your desk and easily share files between them.
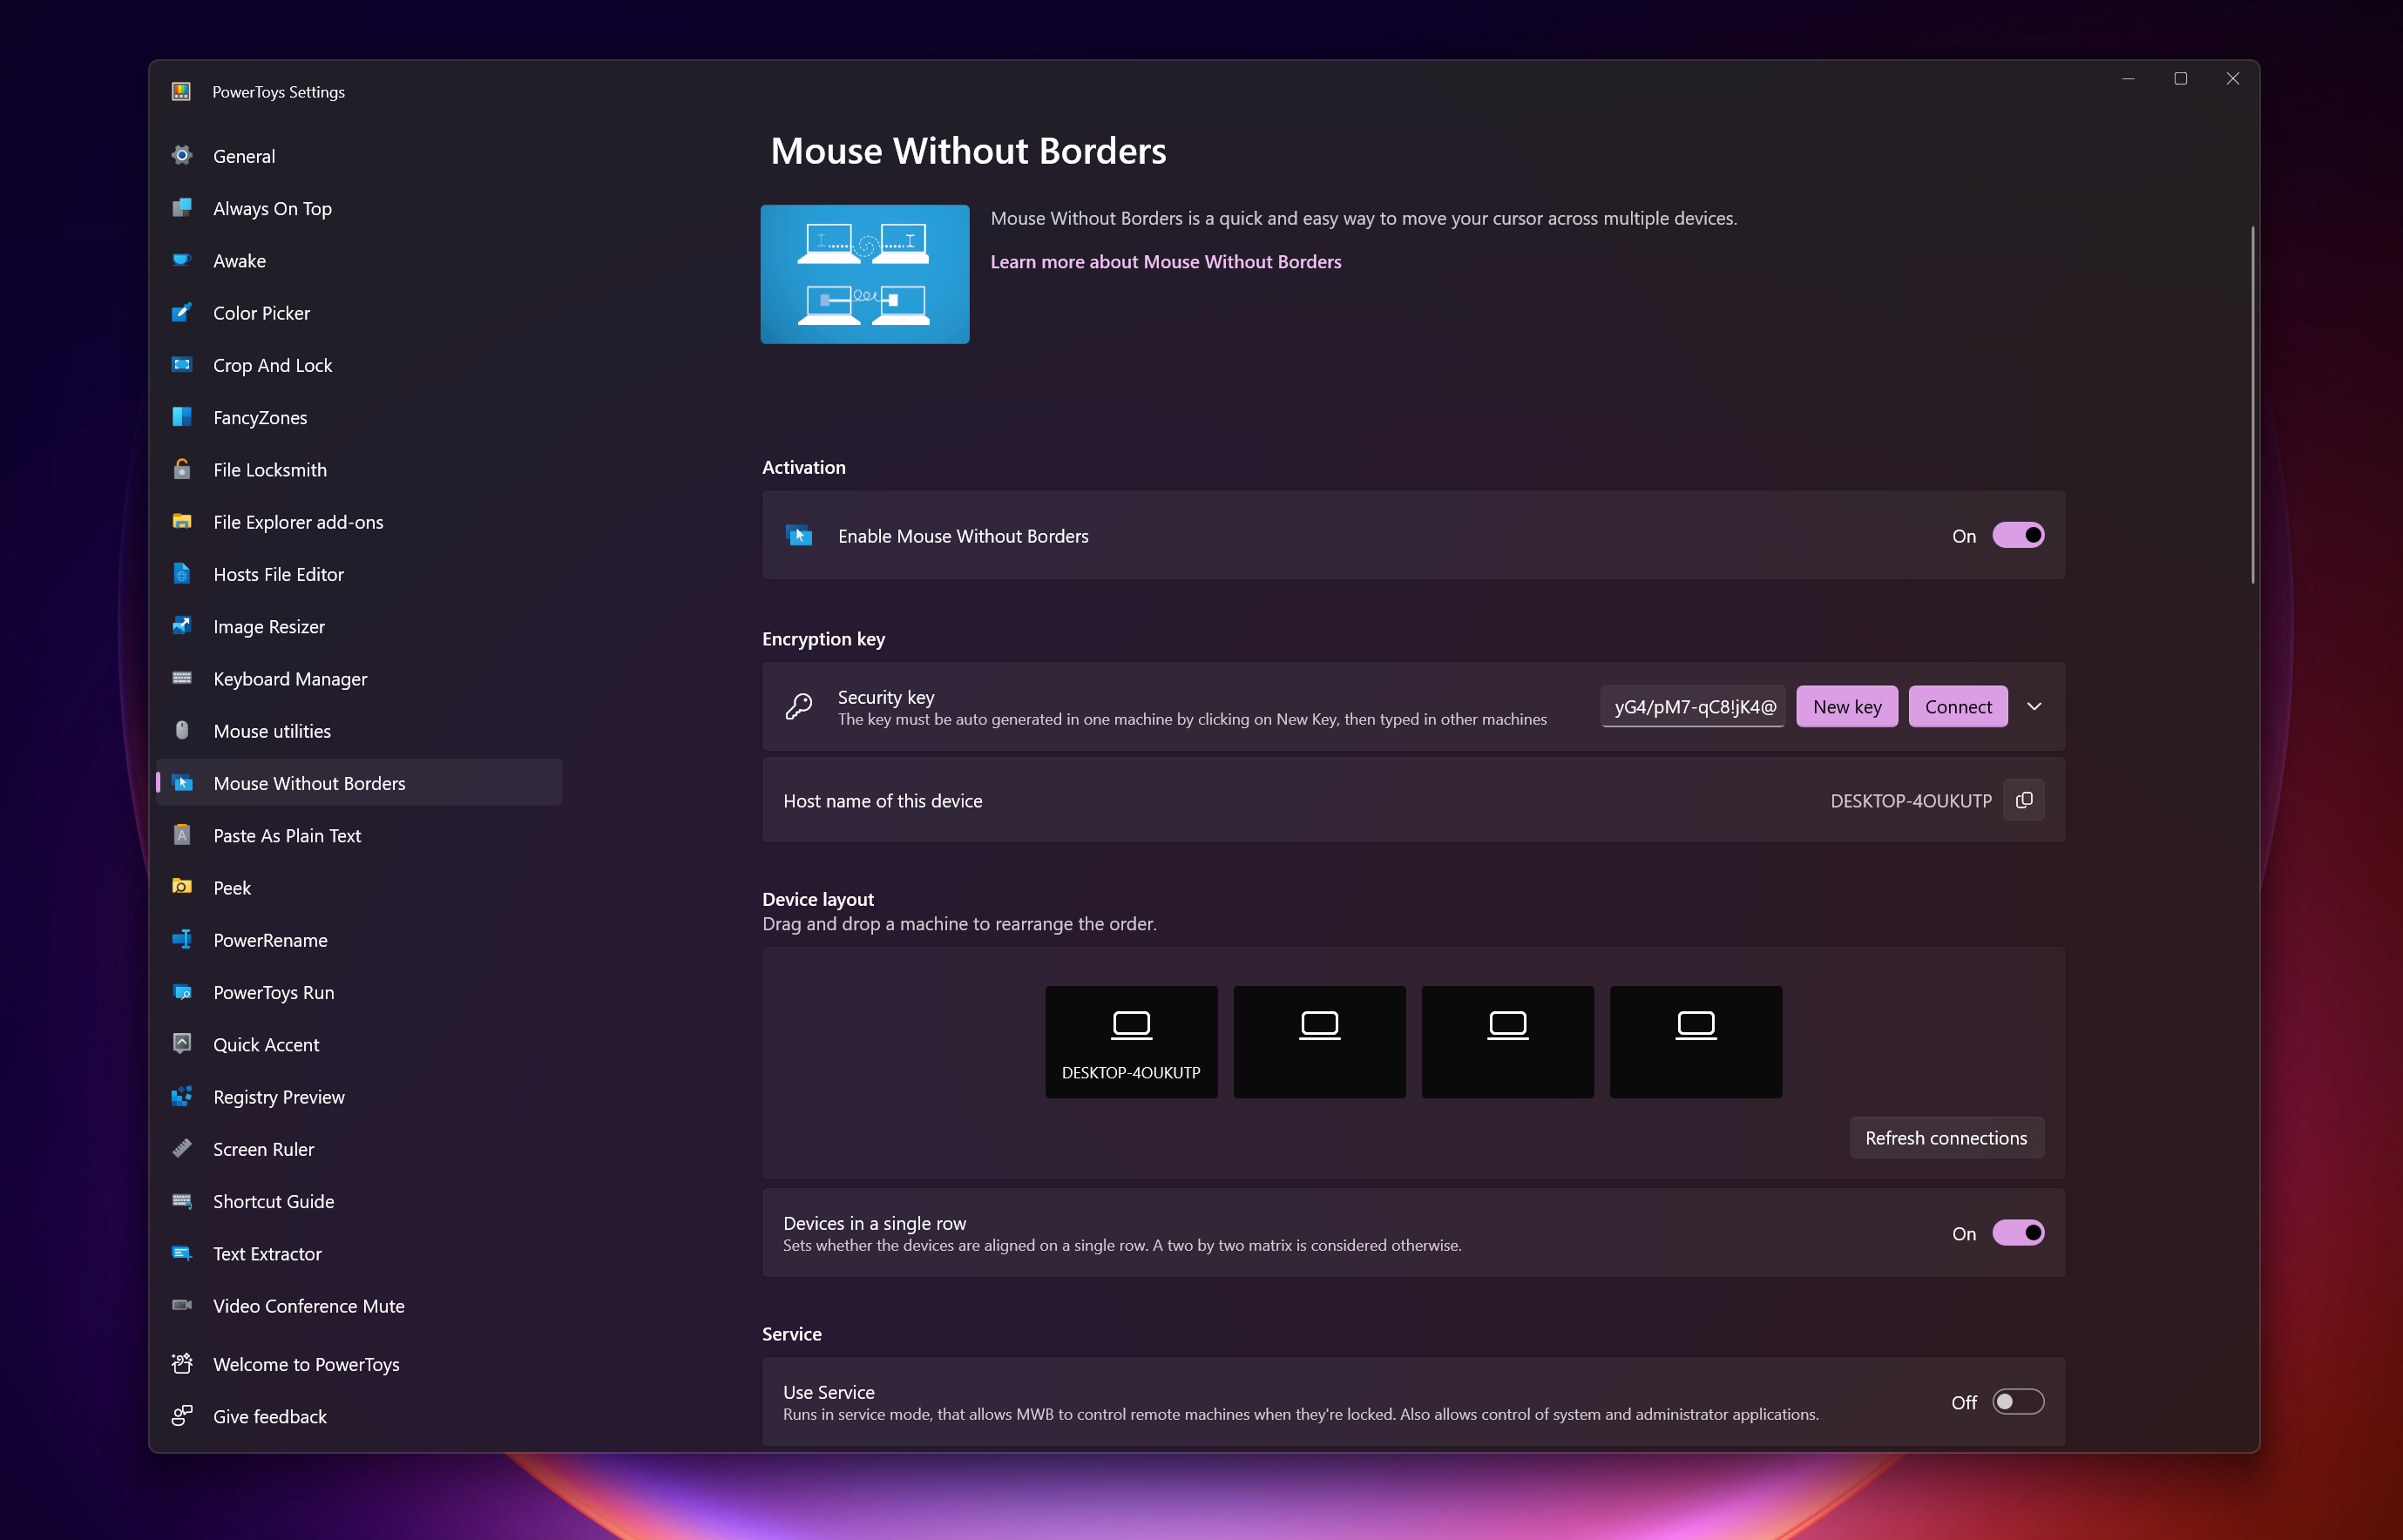
It's a little tricky to set up, but once you have it running the multitasking powers at your fingertips are formidable. To get started, navigate to the Mouse Without Borders subsection of the PowerToys settings and make sure it's enabled, then generate a security key on your primary PC. You'll use this key to securely connect other PCs on the same network via Mouse Without Borders, plugging the key into each PC via the same PowerToys menu.
Once you've connected two or more PCs using Mouse Without Borders, you can fine-tune what you can do with it using the Mouse Without Borders section of the PowerToys settings. You get more control than you get with Apple's Universal Control, and you can configure Mouse Without Borders to do things like only move the mouse between displays when you hold a hotkey, configure a hotkey to instantly lock all attached PCs (which is great when you walk away for lunch) and more.
So if you, like me, use multiple PCs and like the idea of being able to easily control and work between them with one keyboard and mouse, skip a KVM switch and download PowerToys!
These are the PowerToys I use on every new PC I set up, but there are lots more to explore and I encourage you to dive in when you feel comfortable.
We have a few helpful guides on some of the other great PowerToys too, so make sure to check out how to use the Always On Top PowerToy, how to use PowerRename (great for working with big batches of files) and how to keep your PC awake without touching it using PowerToys.
More from Tom's Guide
- Microsoft Surface Event news: Surface Laptop Studio 2, Windows 11 Copilot and more
- Microsoft is fixing one of the things I hate most about Windows 11
- These AI-generated YouTube tutorials are spreading dangerous malware

Alex Wawro is a lifelong tech and games enthusiast with more than a decade of experience covering both for outlets like Game Developer, Black Hat, and PC World magazine. A lifelong PC builder, he currently serves as a senior editor at Tom's Guide covering all things computing, from laptops and desktops to keyboards and mice.
-
BillR5 ReplyWhen enabled, all you have to do to use PowerToys Run is hit the hotkey (Alt+Space by default)
Warning: Installing PowerToys breaks (overrides) standard Win11/Win10 ALT+SPACE keyboard shortcut behavior.
Misguided and sloppy: ALT+SPACE has been the standard Windows default for "Open the shortcut menu for the active window" (aka "title bar menu", "system menu", "window controls menu", or "window system menu") for at least 30 years (Windows 3.1 or earlier). MS Windows official standards mandated this and the corresponding icon in the extreme left edge of the menu bar for decades. While the icon is no longer implemented on some window title bars in Win11, my understanding is the menu and shortcut are still supposed to be present in Win10 and Win11. When Windows glitches, this is often the only(?) way to restore/resize a windows that has disappeared without closing it.
Example for Win11 (and Win10 via tab on that page) -- although not from the official standards, as I no longer develop. https://support.microsoft.com/en-us/windows/keyboard-shortcuts-in-windows-dcc61a57-8ff0-cffe-9796-cb9706c75eec#WindowsVersion=Windows_11
PowerToys should not have chosen to override this by default!
