Just got a new Mac? Here are the 11 features to try first
If you’re looking to get the most from your computer then check out these 11 tips for setting up your new Mac
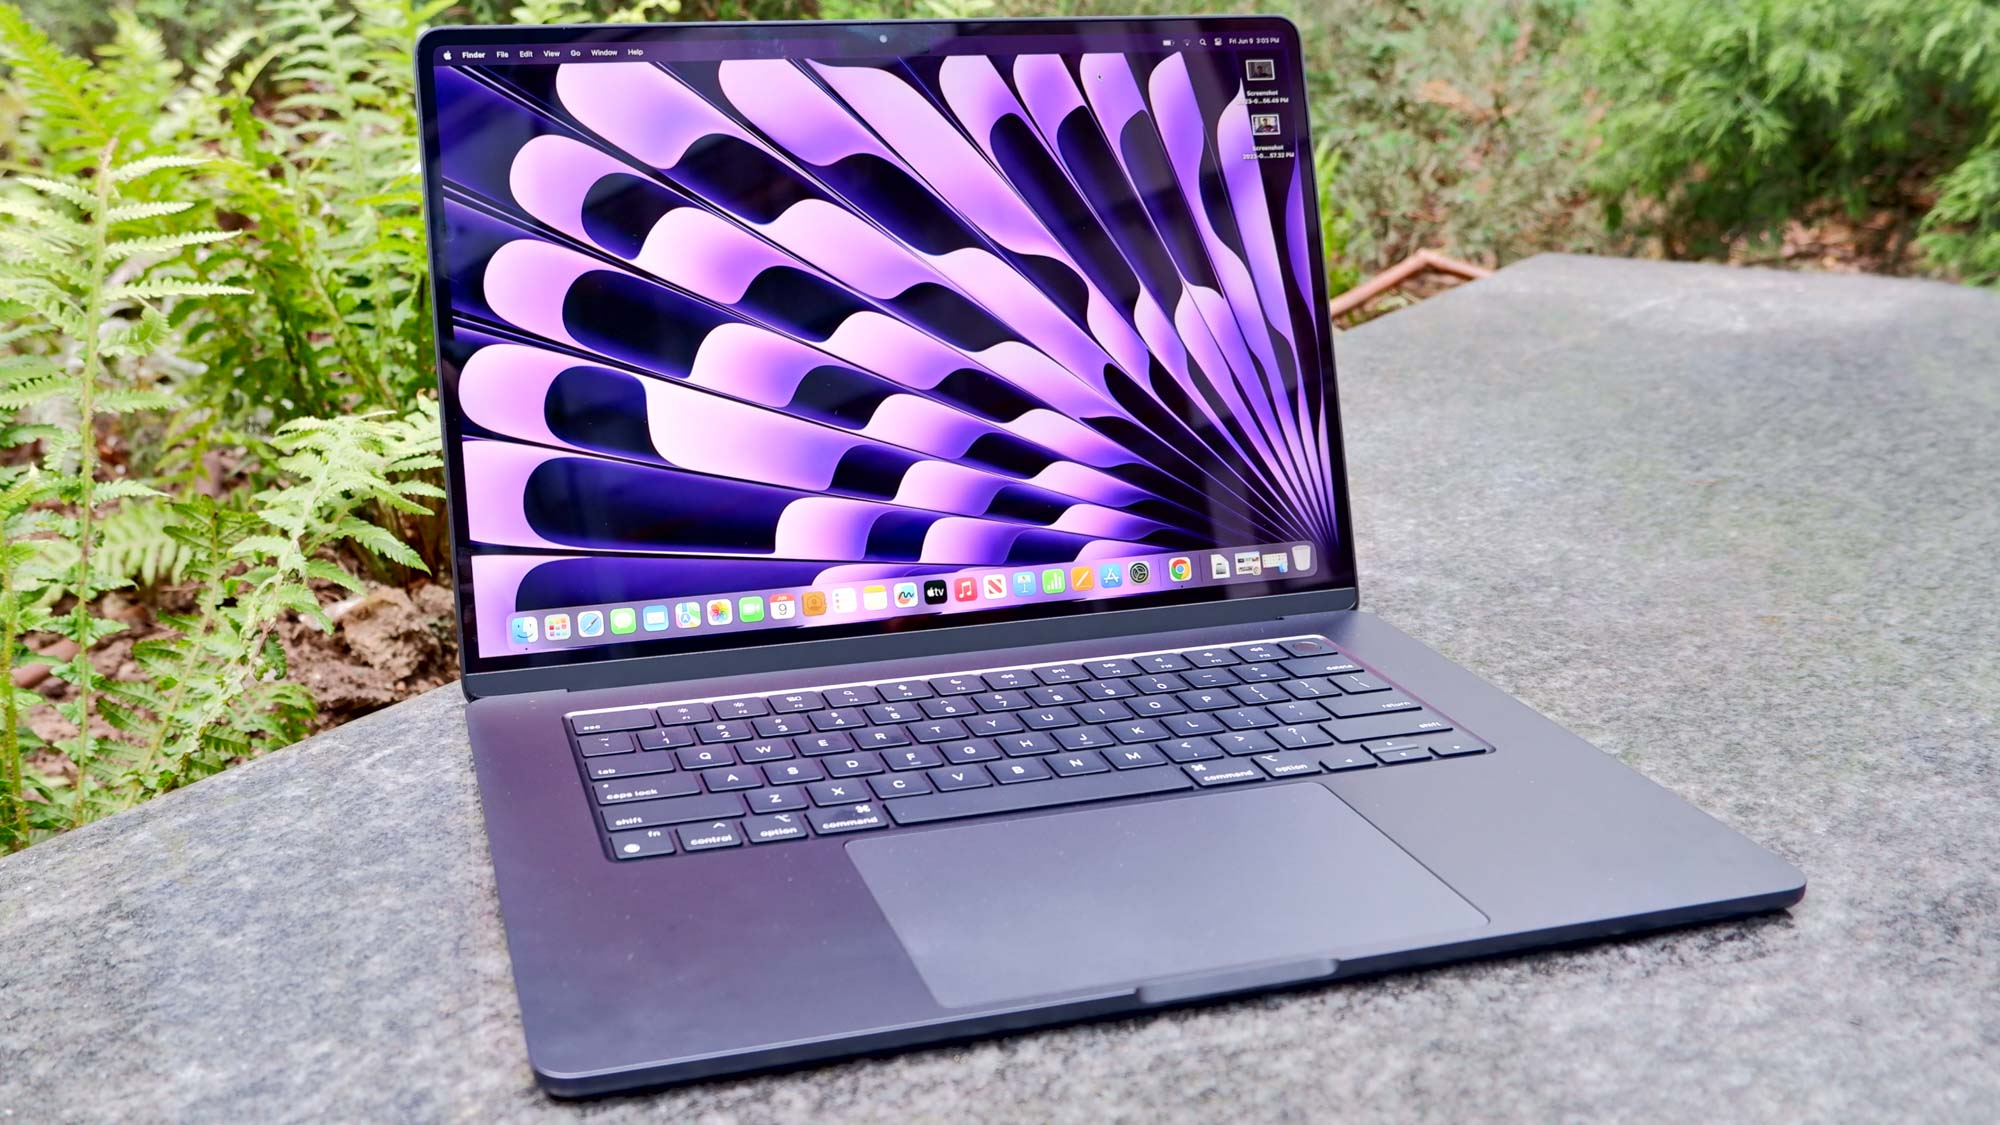
If you've just got a brand new Mac, regardless of whether it's a MacBook Pro, MacBook Air or iMac, there are various universal settings and features you should consider from the start. If you're feeling a little bit baffled by macOS — if you've only ever used Windows, for example — some of these may also help you get adjusted to the new OS. A few tweaks here and there can also make a big difference to how you use your Mac, allowing your computing time to feel more fluid and productive.
Here we present 11 tips for setting up your new Mac, none of which will cost you a penny but all of which could prove their weight in gold. By following them, you will ensure that you’re bang up-to-date and able to use your data from the past. You’ll also find navigation is easier and information is much more readily available at your fingertips.
11 tips for setting up your new Mac
These tips have been based on macOS Sonoma. Some features are not available for older operating systems.
1. Take a screenshot or record the screen
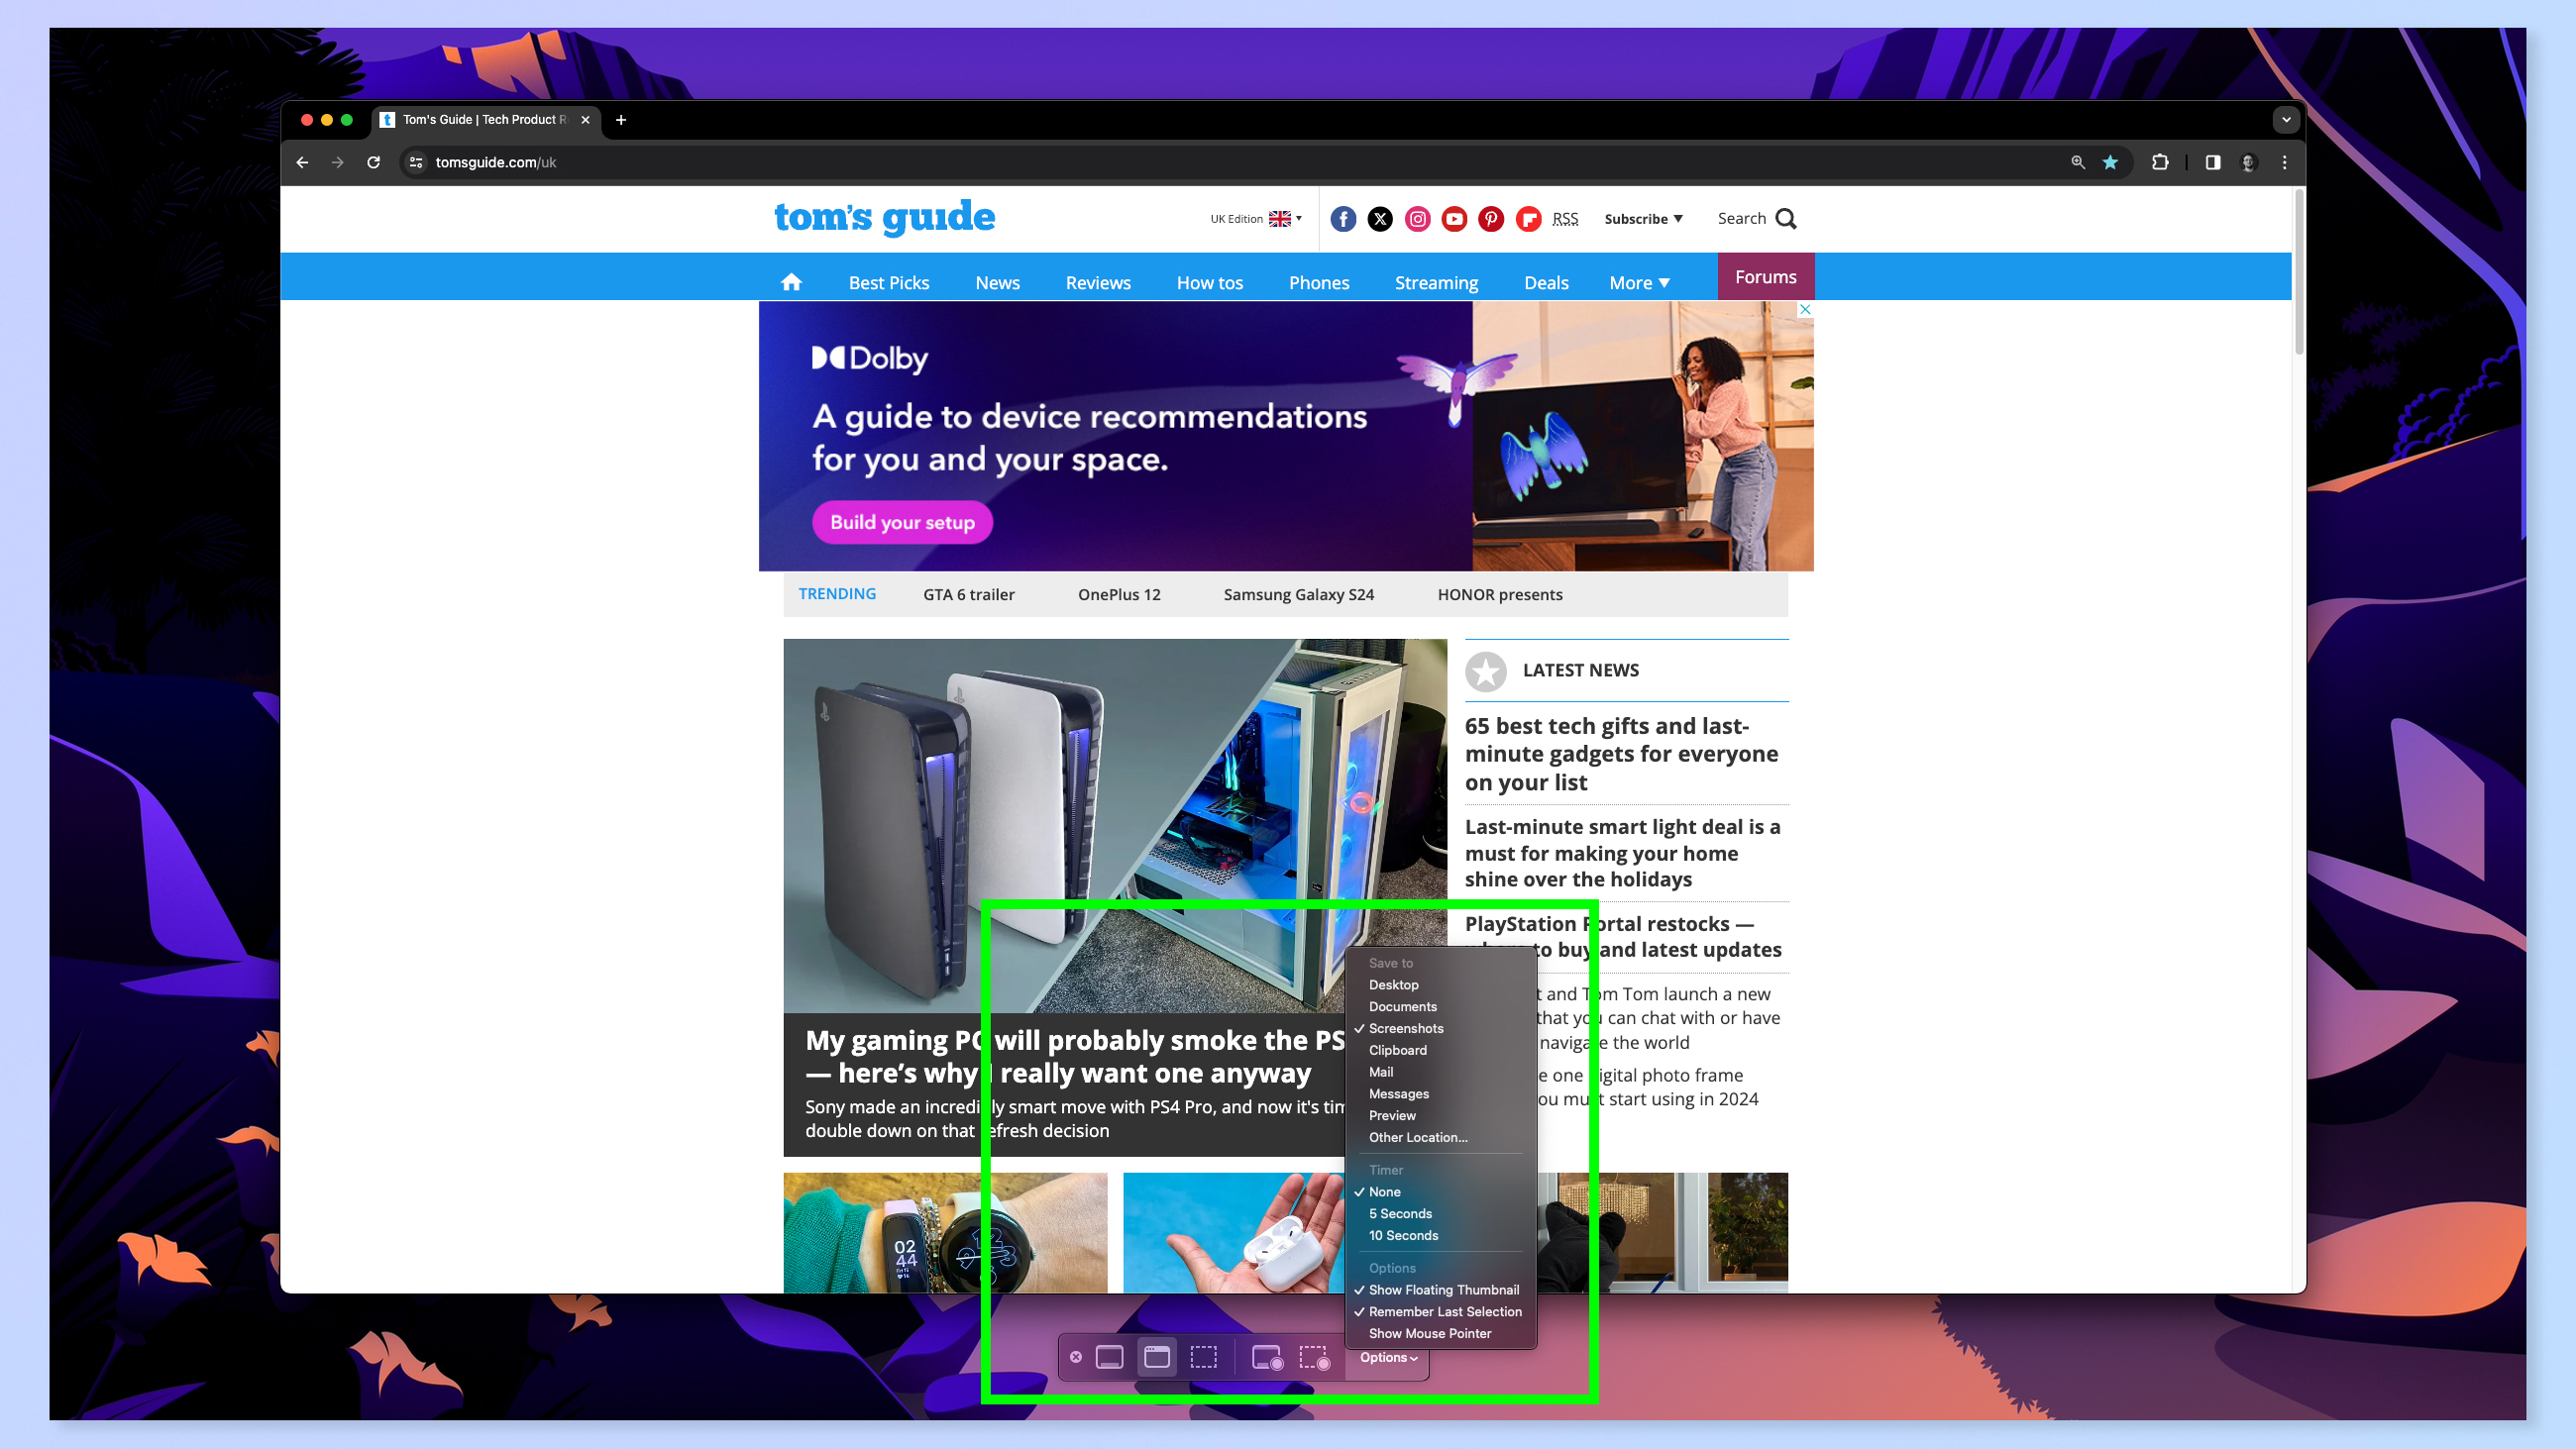
It’s very easy to take a screenshot on a Mac thanks to the built-in snipping tool in macOS. The method you choose, however, depends on what you’re trying to achieve. For example, if you want to take a screenshot of the entire screen then you need to press Command + Shift + 3 on your keyboard. If you’d rather take a screenshot of a section of the screen, you’d press Command + Shift + 4 on your keyboard then click and drag the pointer around the part you want to capture – just let go to take the shot.
There are additional options available, one of which is the ability to record the Mac screen. For this, press Command + Shift + 5, select a recording option and click Record. You can then click Stop when you’re finished.
Full guide: How to take a screenshot on a Mac
2. How to force quit on Mac
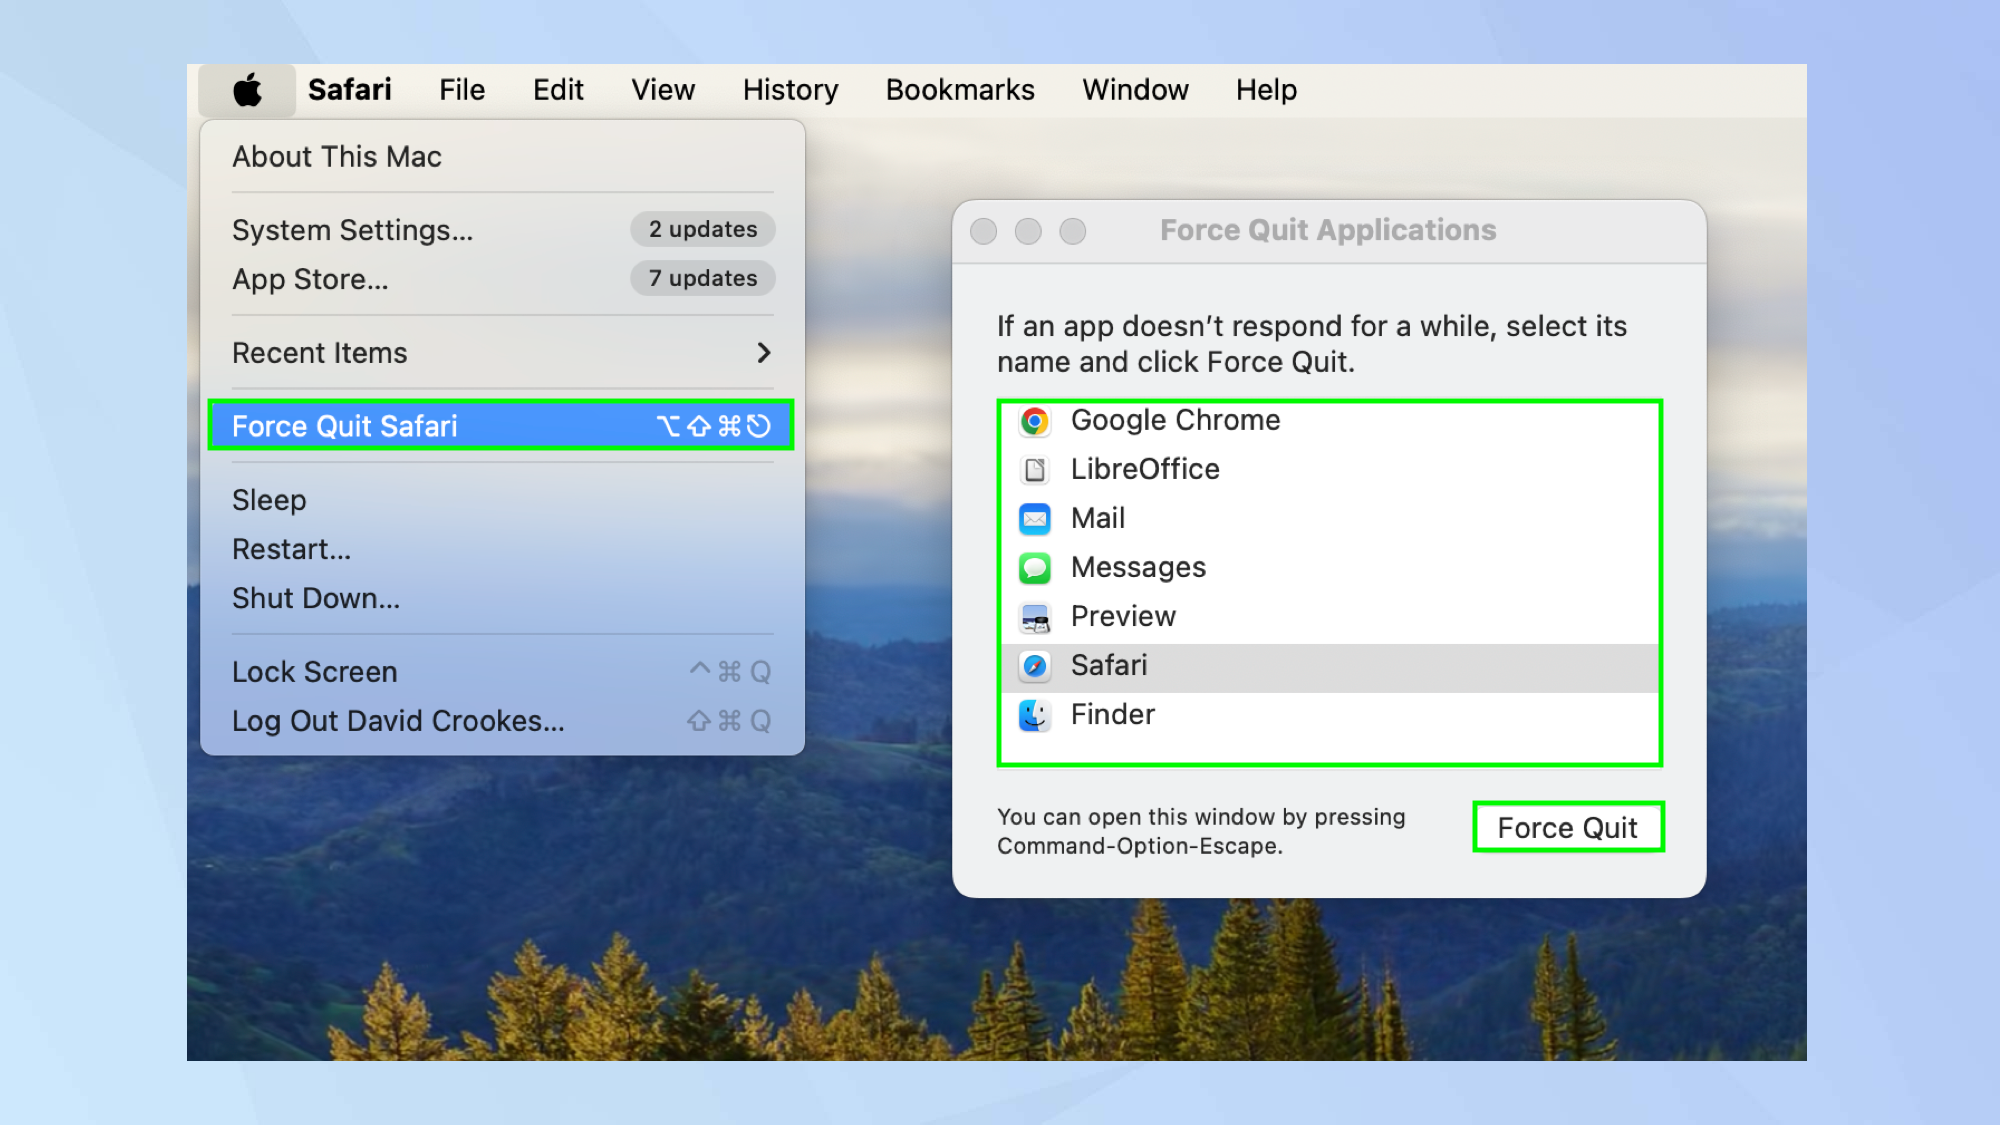
If an app is freezing or not running properly and simply want to fully pull the plug, then a force quit will do the trick. There are multiple ways of doing this.
You could right-click on an app in the Dock (learn how to right-click on Mac if you’re not sure) then select Force Quit.
You could also click the Apple logo in the top left of the screen, select Force Quit and choose the app you want to quit.
Or, for an app that is open, hold Command + Shift + Option and click Escape.
Full guide: How to force quit on Mac
3. Use split screen
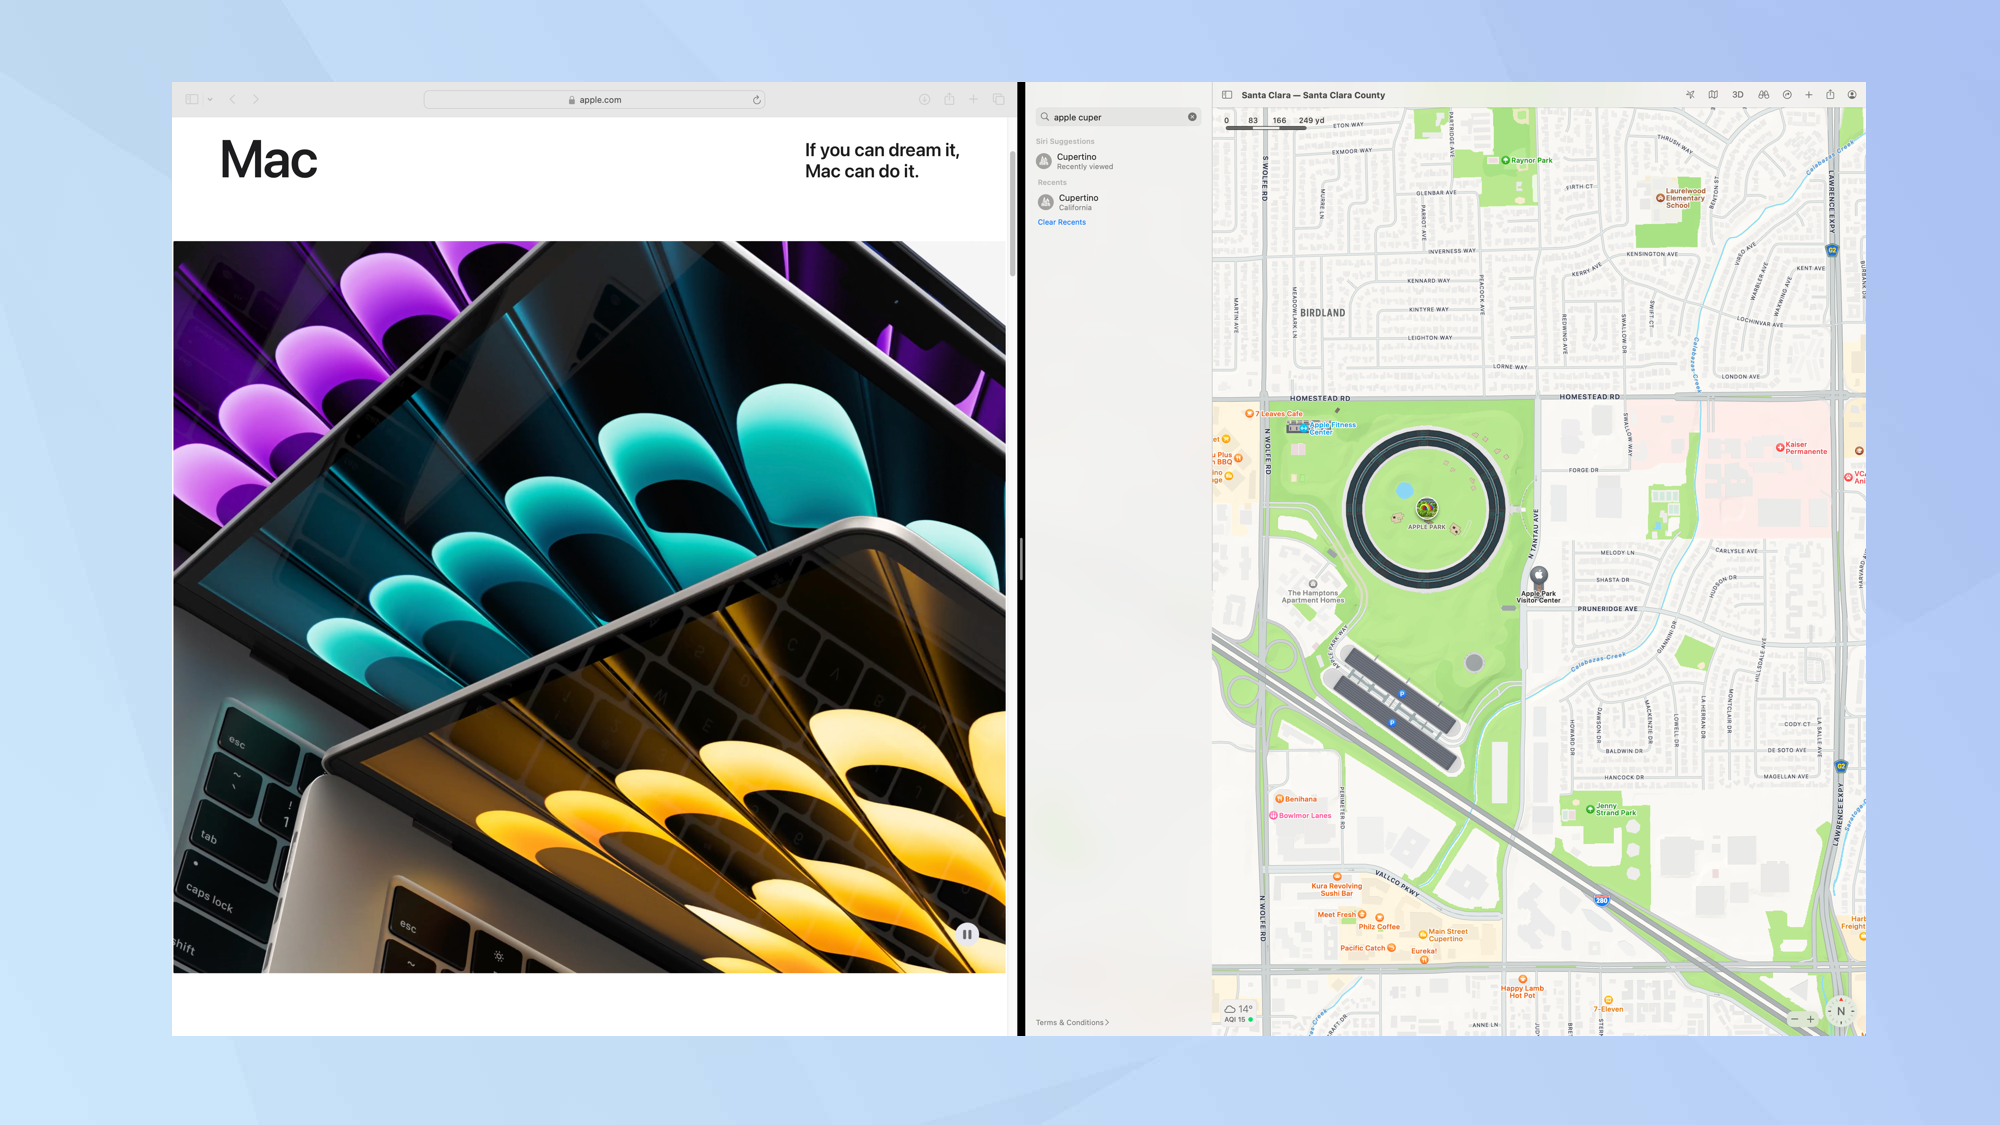
The split screen option is perfect for multitasking, allowing two apps to run simultaneously, side-by-side on your Mac’s display. Rather than go to the hassle of resizing windows, you allow both apps to fill their portion of their screen.
Simply open two or more apps. Then hover over the green full screen button on one app and click Tile Window to Left/Right of Screen. Next, select another app from the other side of the screen. This app will appear next to the first. You can drag the slider in the middle to adjust how much space each app is allowed to take up. Press Escape to quit the Split Screen mode.
Full guide: How to split your screen on Mac
4. Control your Mac from your iPhone
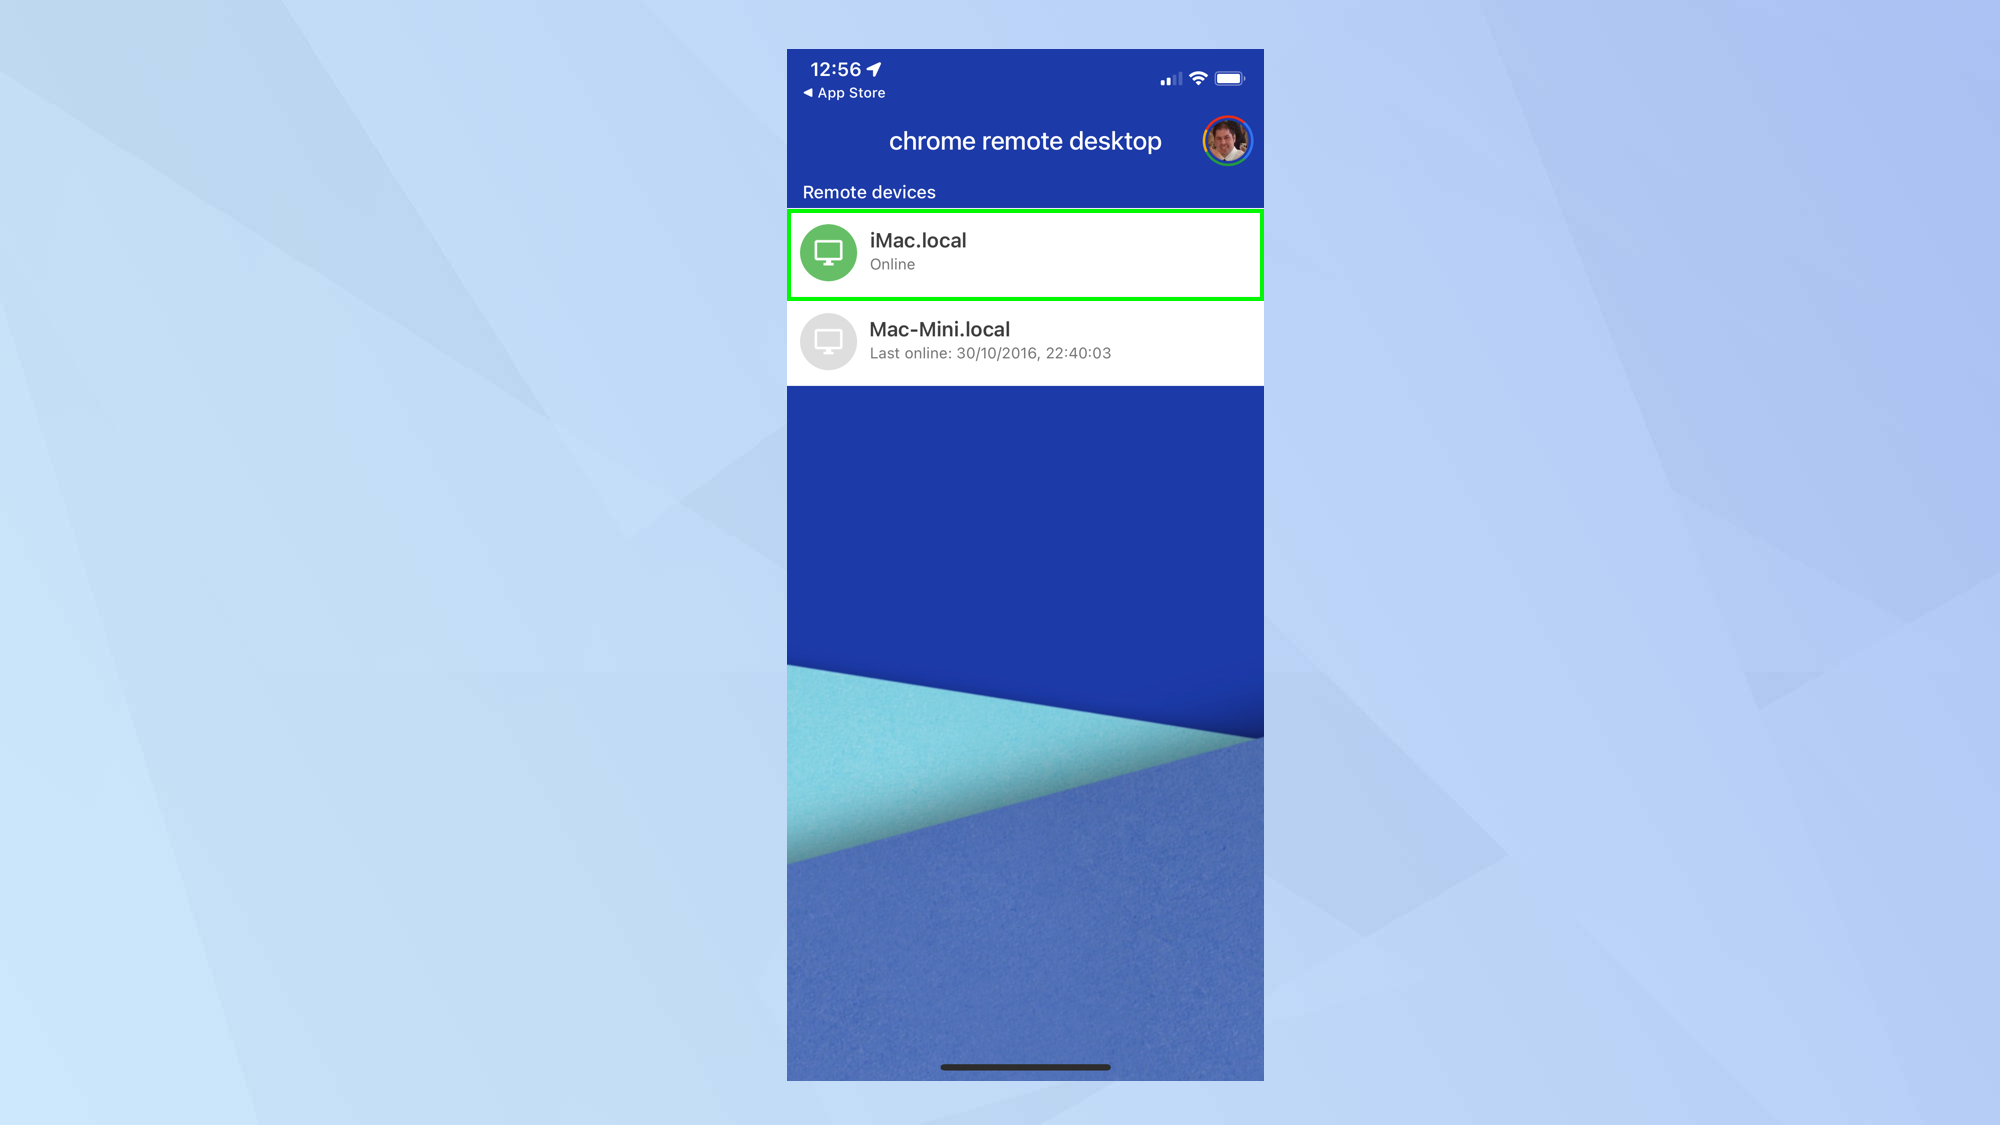
If you have a Mac, it’s also likely that you have an iPhone and, if that is the case, then you can get even more out of your computer. Your iPhone will allow you to access your Mac when you’re out and about. You just need to get your computer set up, using Google’s Remote Desktop app.
Rather than try and explain everything here because it’s a relatively involved process, you should check out our full guide. Suffice to say that you will be able to connect to your Mac from afar and control it. You can also access files across your devices if you use cloud storage apps such as iCloud, Dropbox, OneDrive or Google Drive.
Full guide: how to remote control your Mac from your iPhone or iPad
5. Add widgets to the desktops
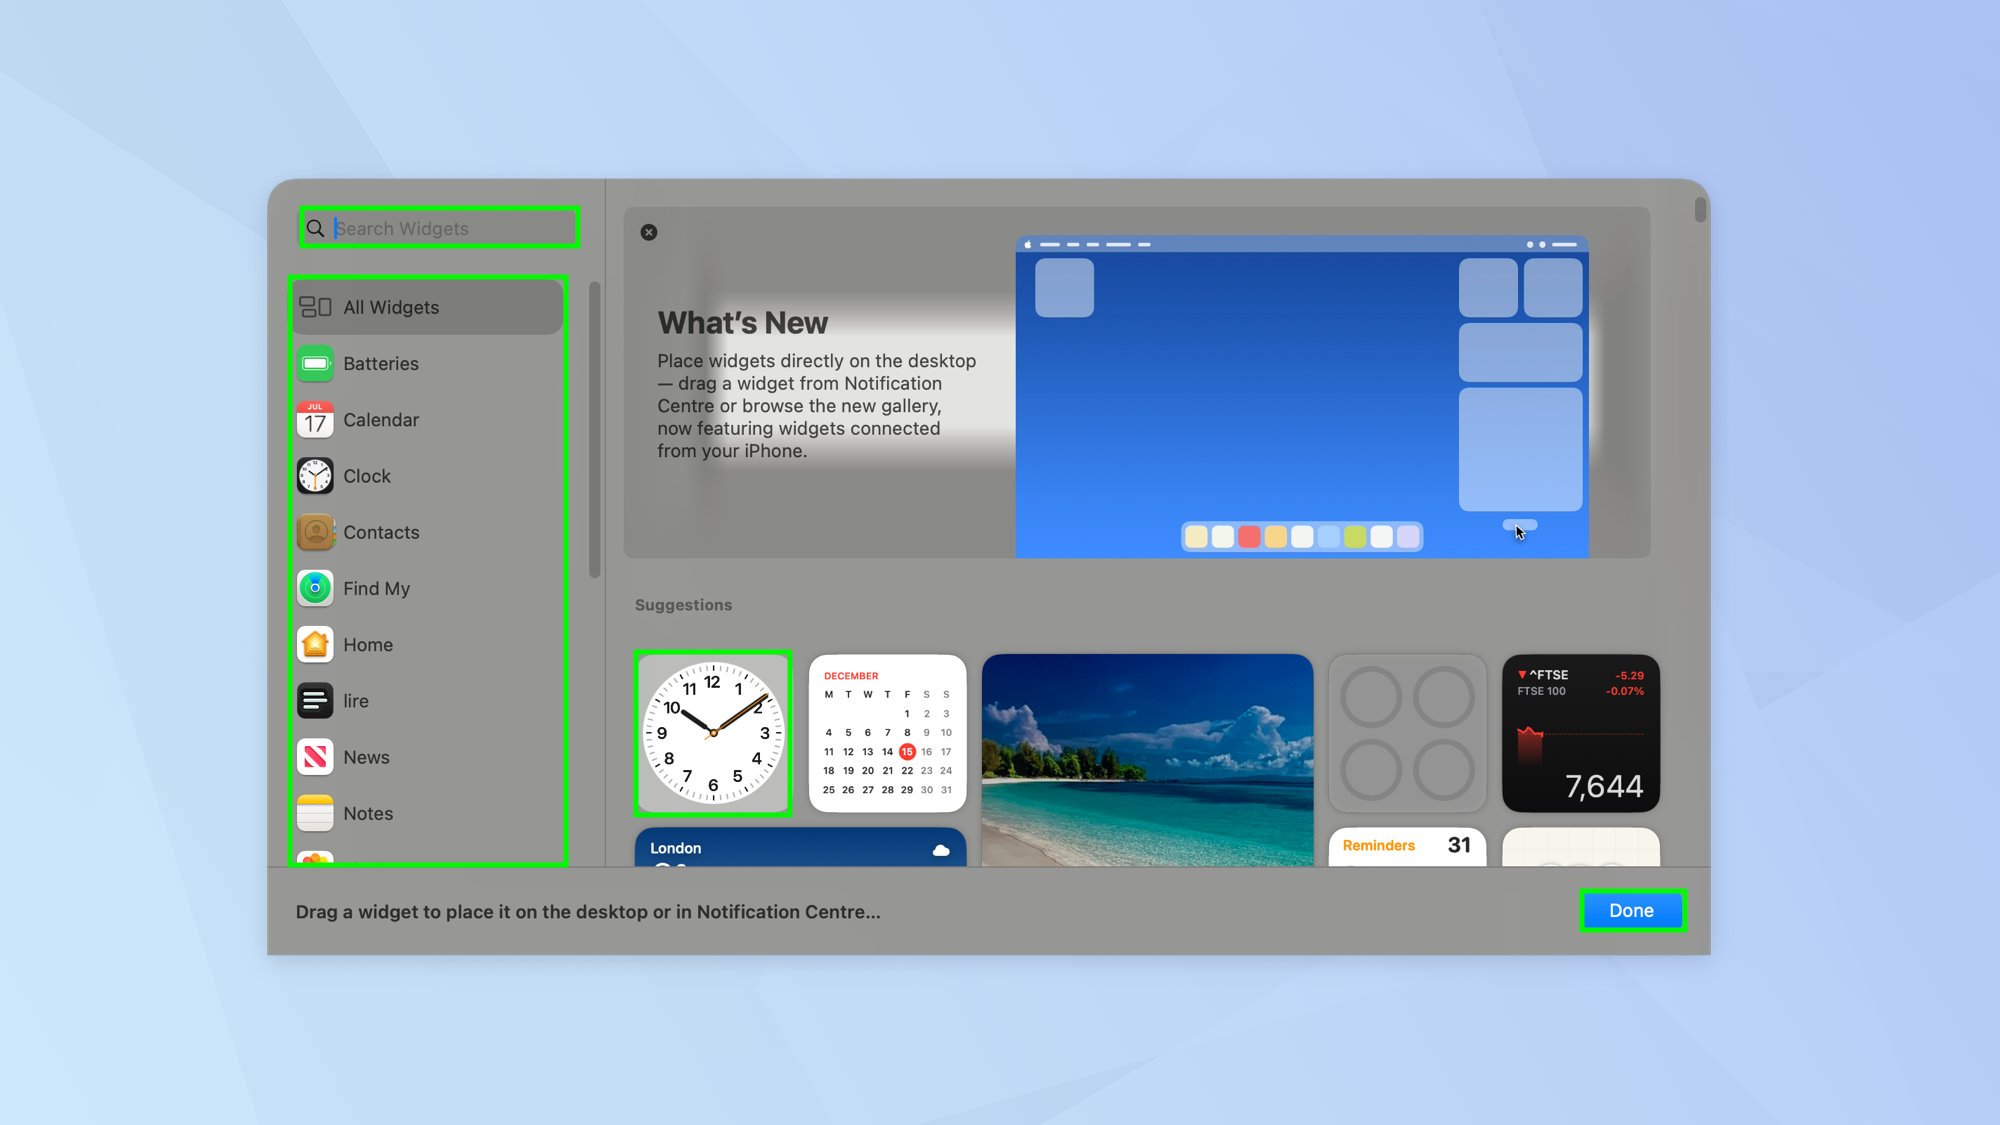
With macOS Sonoma, it’s now possible to add widgets, including interactive widgets, to your Mac desktop so why not get stuck in right away and find ones that will prove useful to you. Click the date and time in the top-right corner to show the Notification Center then scroll to the bottom and select Edit Widgets. You can now browse the available widgets and drag the widgets you want to the desktop.
Full guide: how to use macOS Widgets
6. Set up Safari profiles
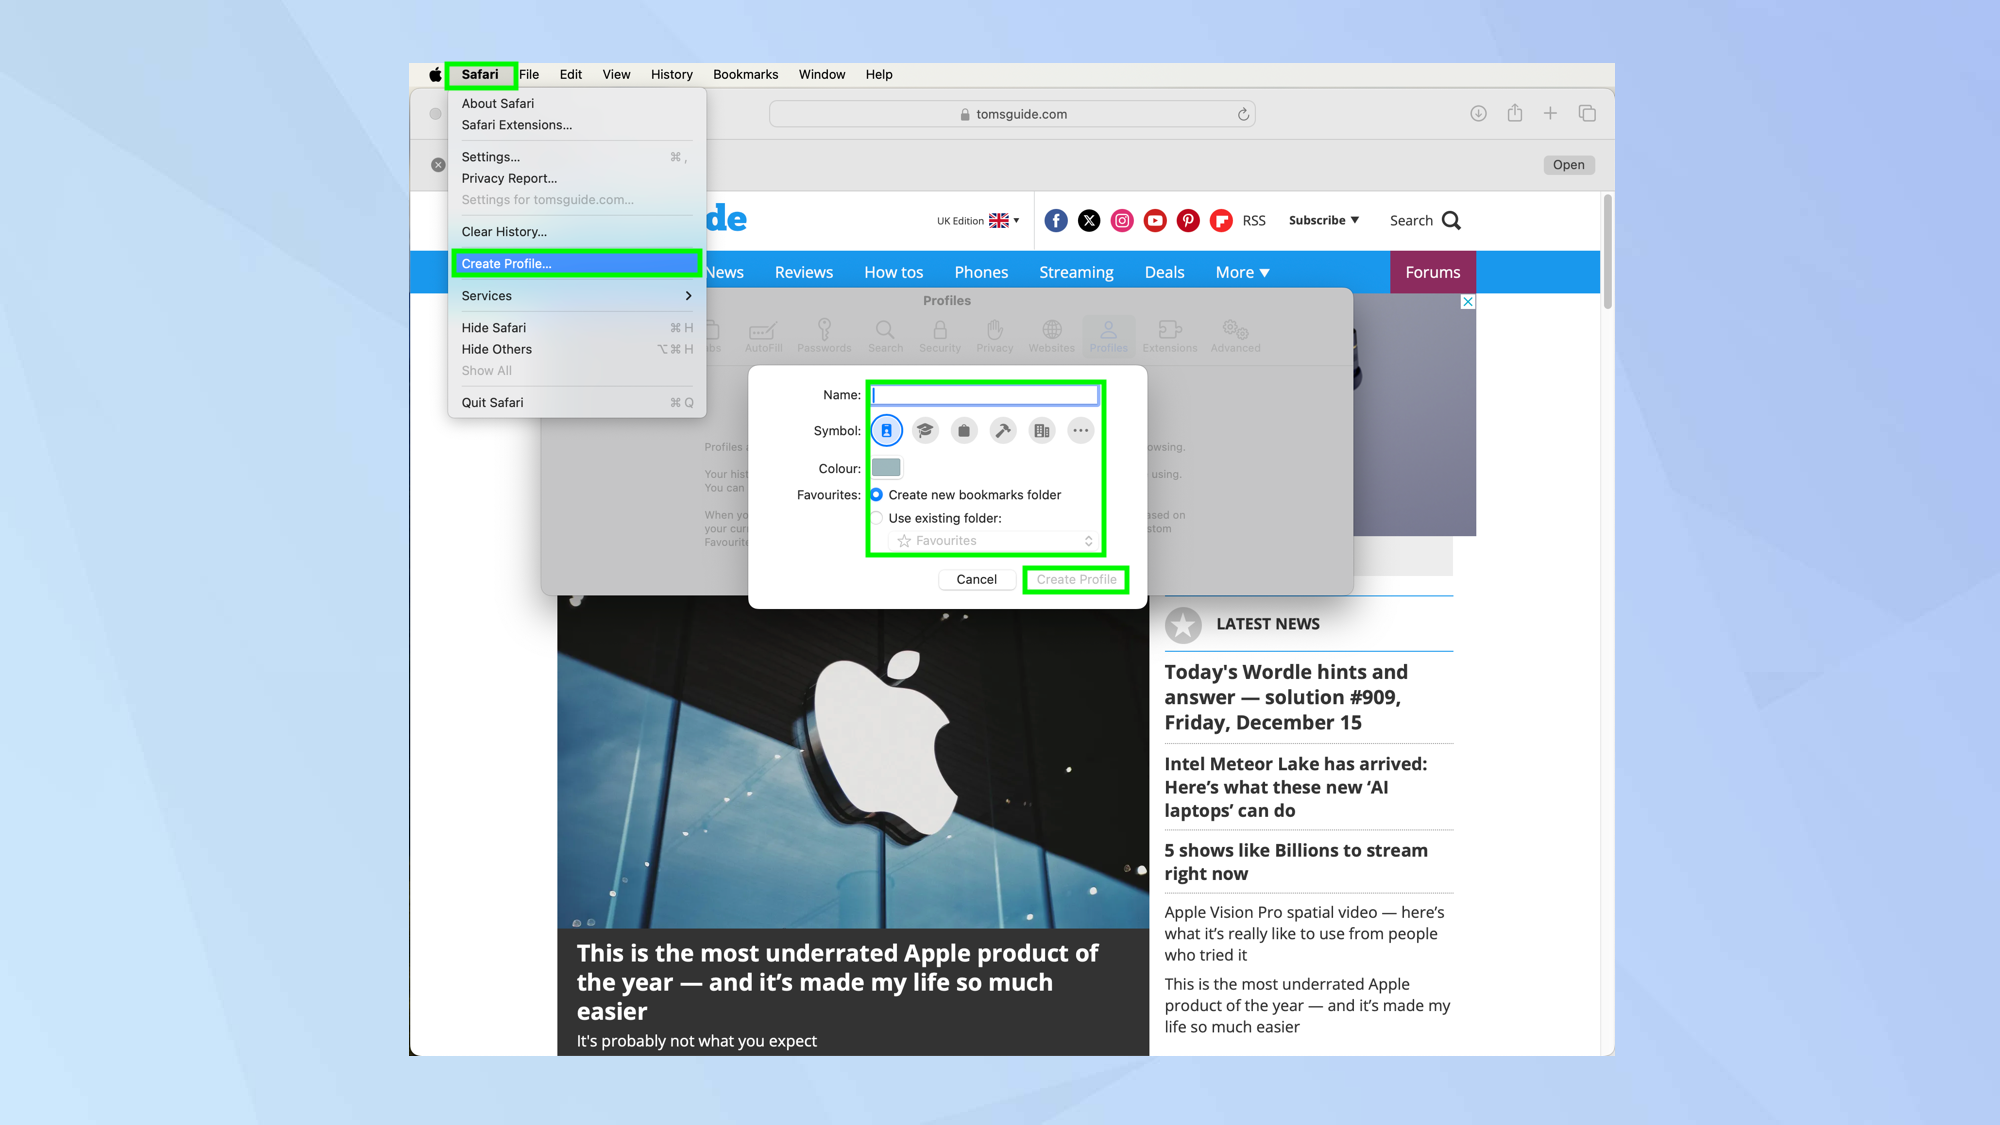
With Safari 17 and later, you can create separate profiles and group websites depending on the situation. You could have Safari profiles for family members or – meaning they’ll have their own histories, tabs, tab groups and favorites – or ones for personal use and work. These can be created in Safari itself so open the Safari app then select Safari and click Create Profile. Select Start Using Profiles and add a profile name, customize the profile icon and select how you want to display Favorites. Click Create Profile and you’ll find the different ones located towards the left of the Safari pane.
7. Turn your most-used websites into apps
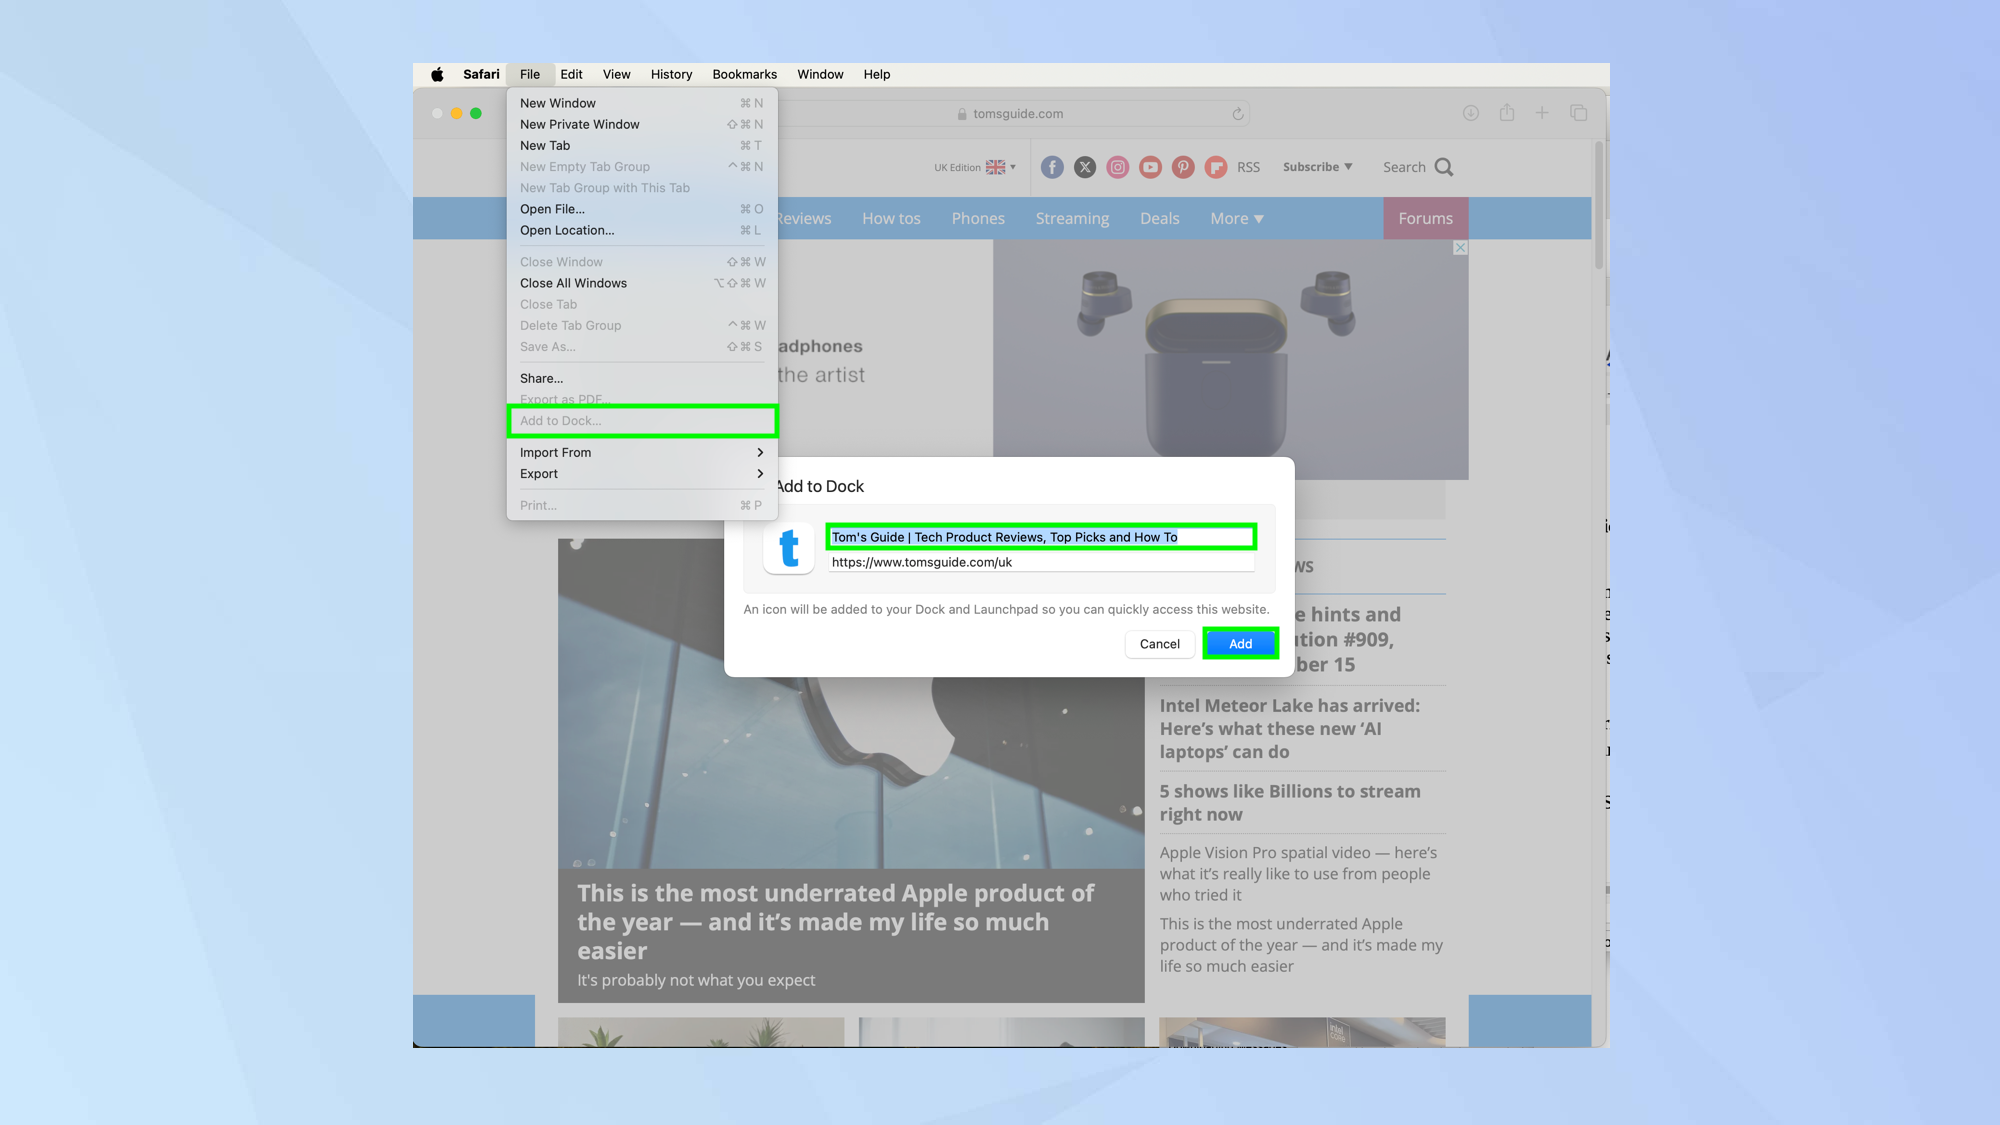
If you have websites that you use on a regular basis (tomsguide.com perhaps), then you can turn them into apps that can sit in the Dock. With macOS Sonoma, you just need to navigate to a website, click File and select Add to Dock. Give the app a name and select Add. When you launch the app you’ve just created, you’ll find that it looks and feels like an app with its own navigation buttons and toolbar.
8. Enable hot corners
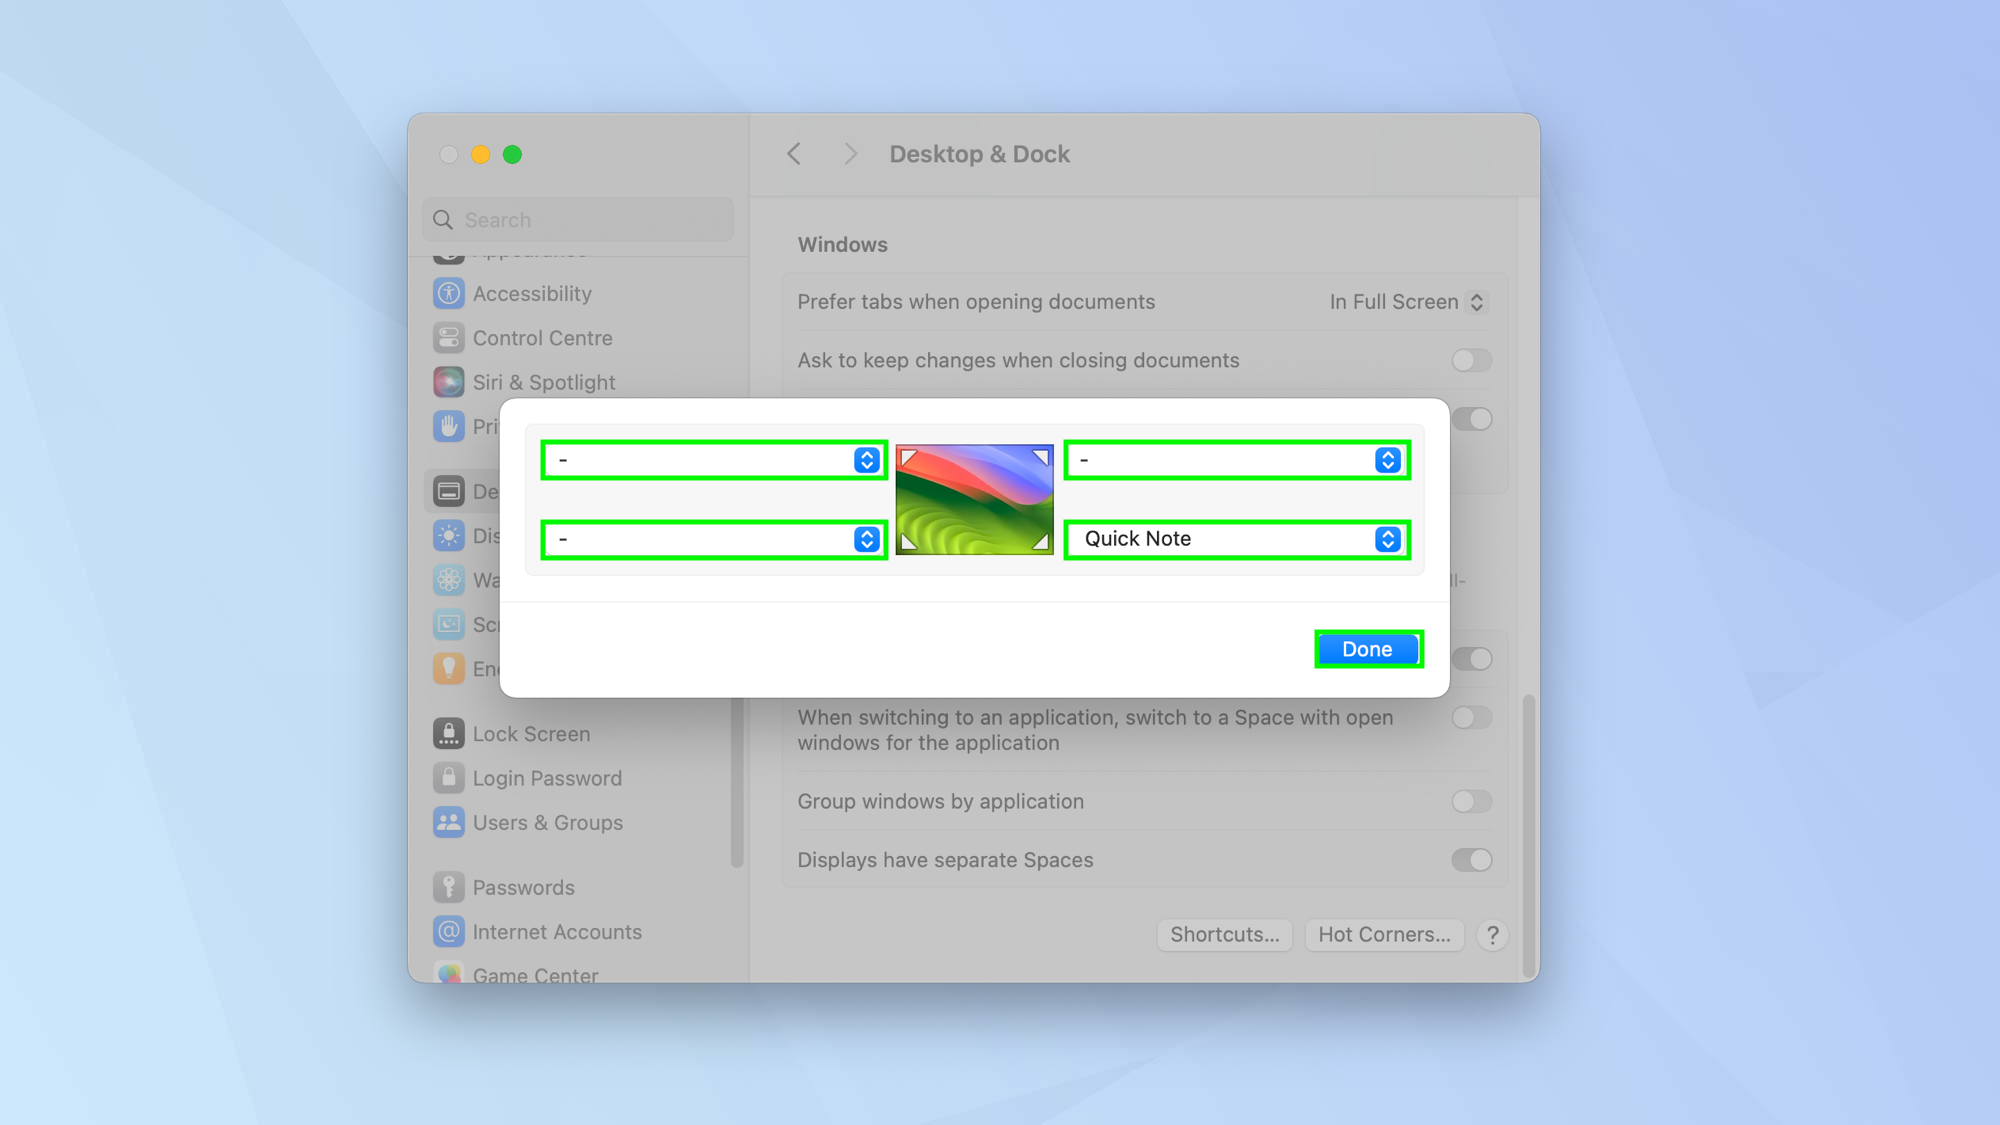
Hot corners are very useful and you only realise how useful once you start using the feature. It allows you to assign functions to the corner of each screen making it easier to lock the screen, put the Mac to sleep or launch functions and apps, for example. You need to set them up beforehand so click the Apple logo in the top-left corner and select System Settings. Now choose Desktop & Dock and scroll to the very bottom to click Hot Corners. You can now use the drop-down menus to select a function for each corner of the screen and click Done. When you hover the pointer in those corners, the function will be activated.
9. Find the emoji keyboard on Mac
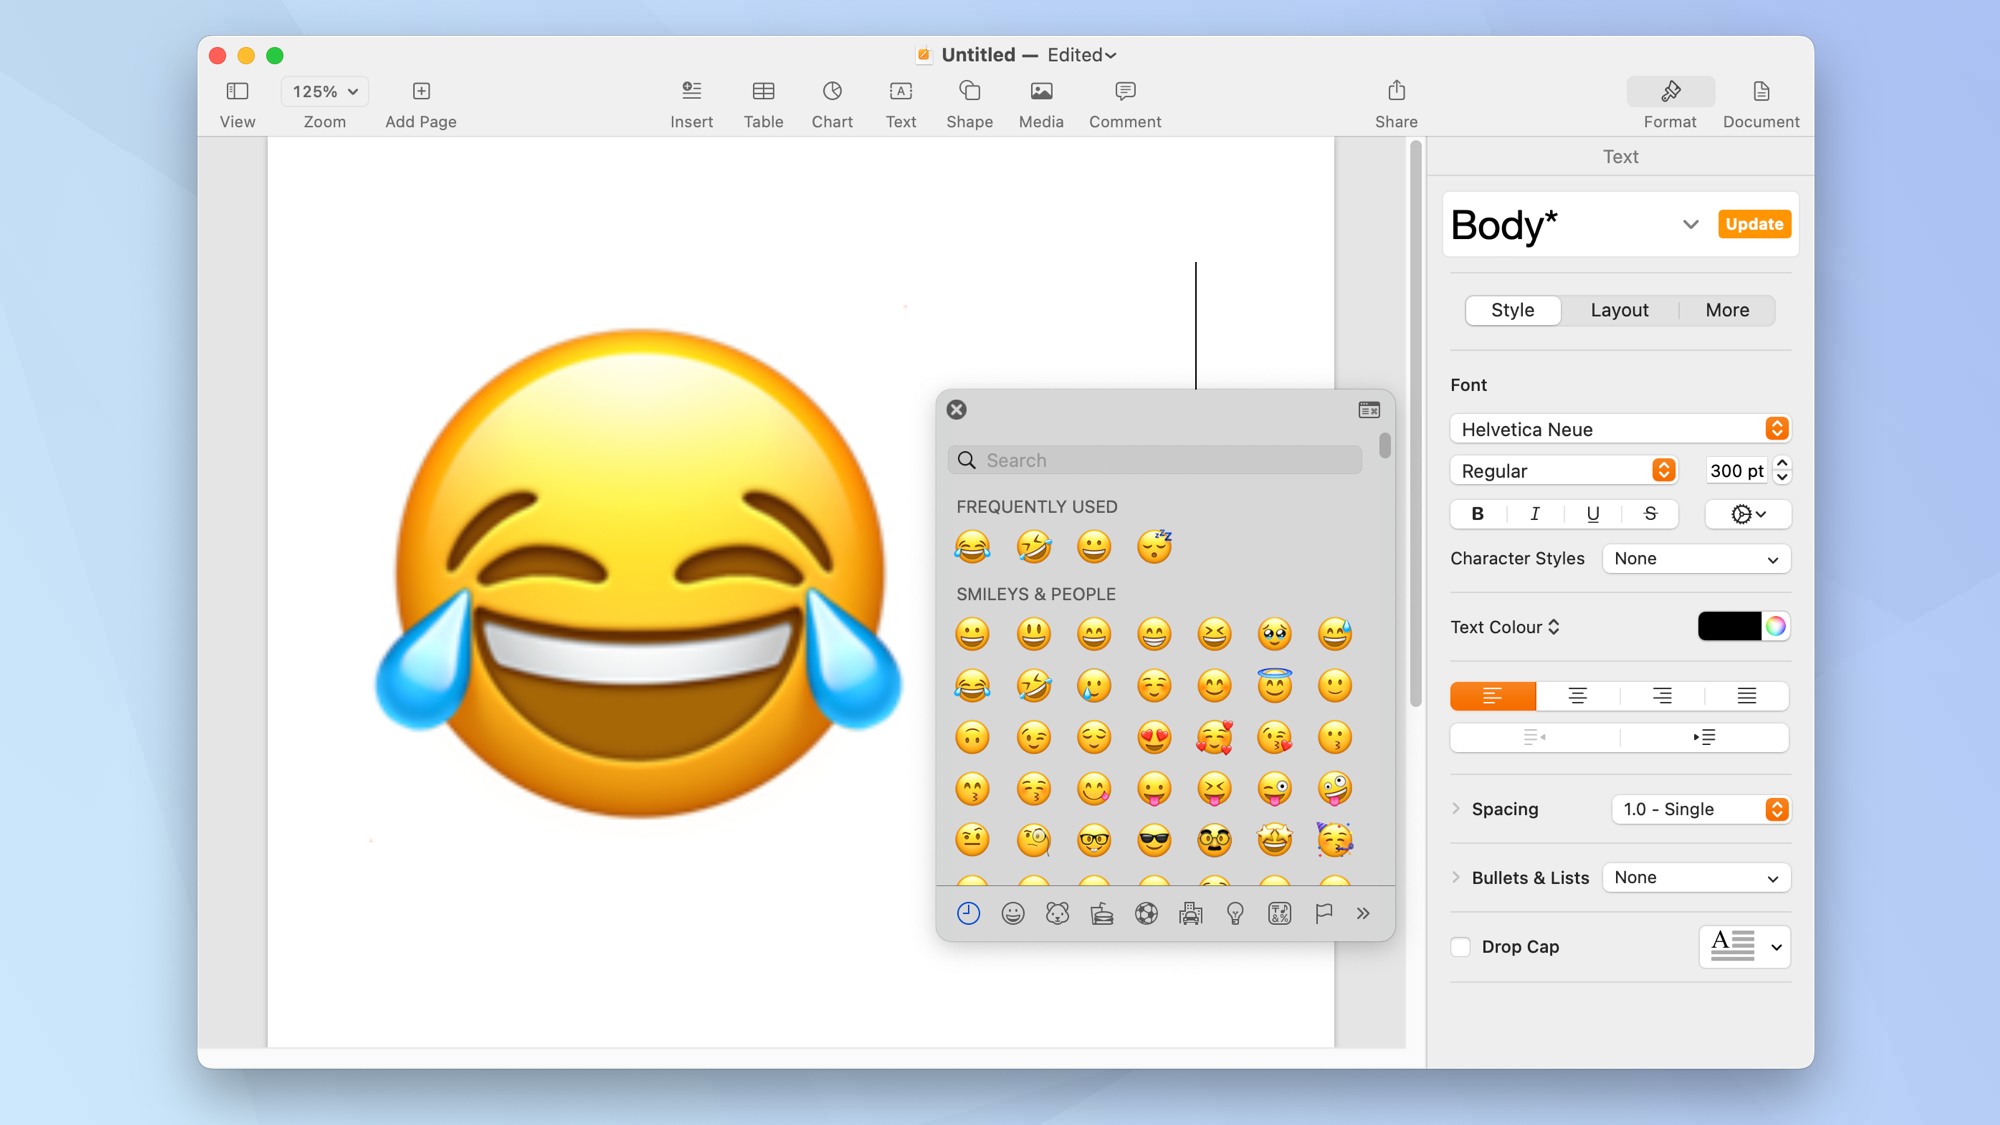
You will undoubtedly know where your Mac’s keyboard is – it’s sits right in front of you when you’re using your computer. But, as well as being able to tap away at letters, numbers and symbols, you can also make use of an emoji keyboard.
To access it, press Control + Command + Space. The emoji keyboard will then appear. You can click an emoji to add it to a document or you can use the search bar if you can’t find what you want.
10. Enable Stacks
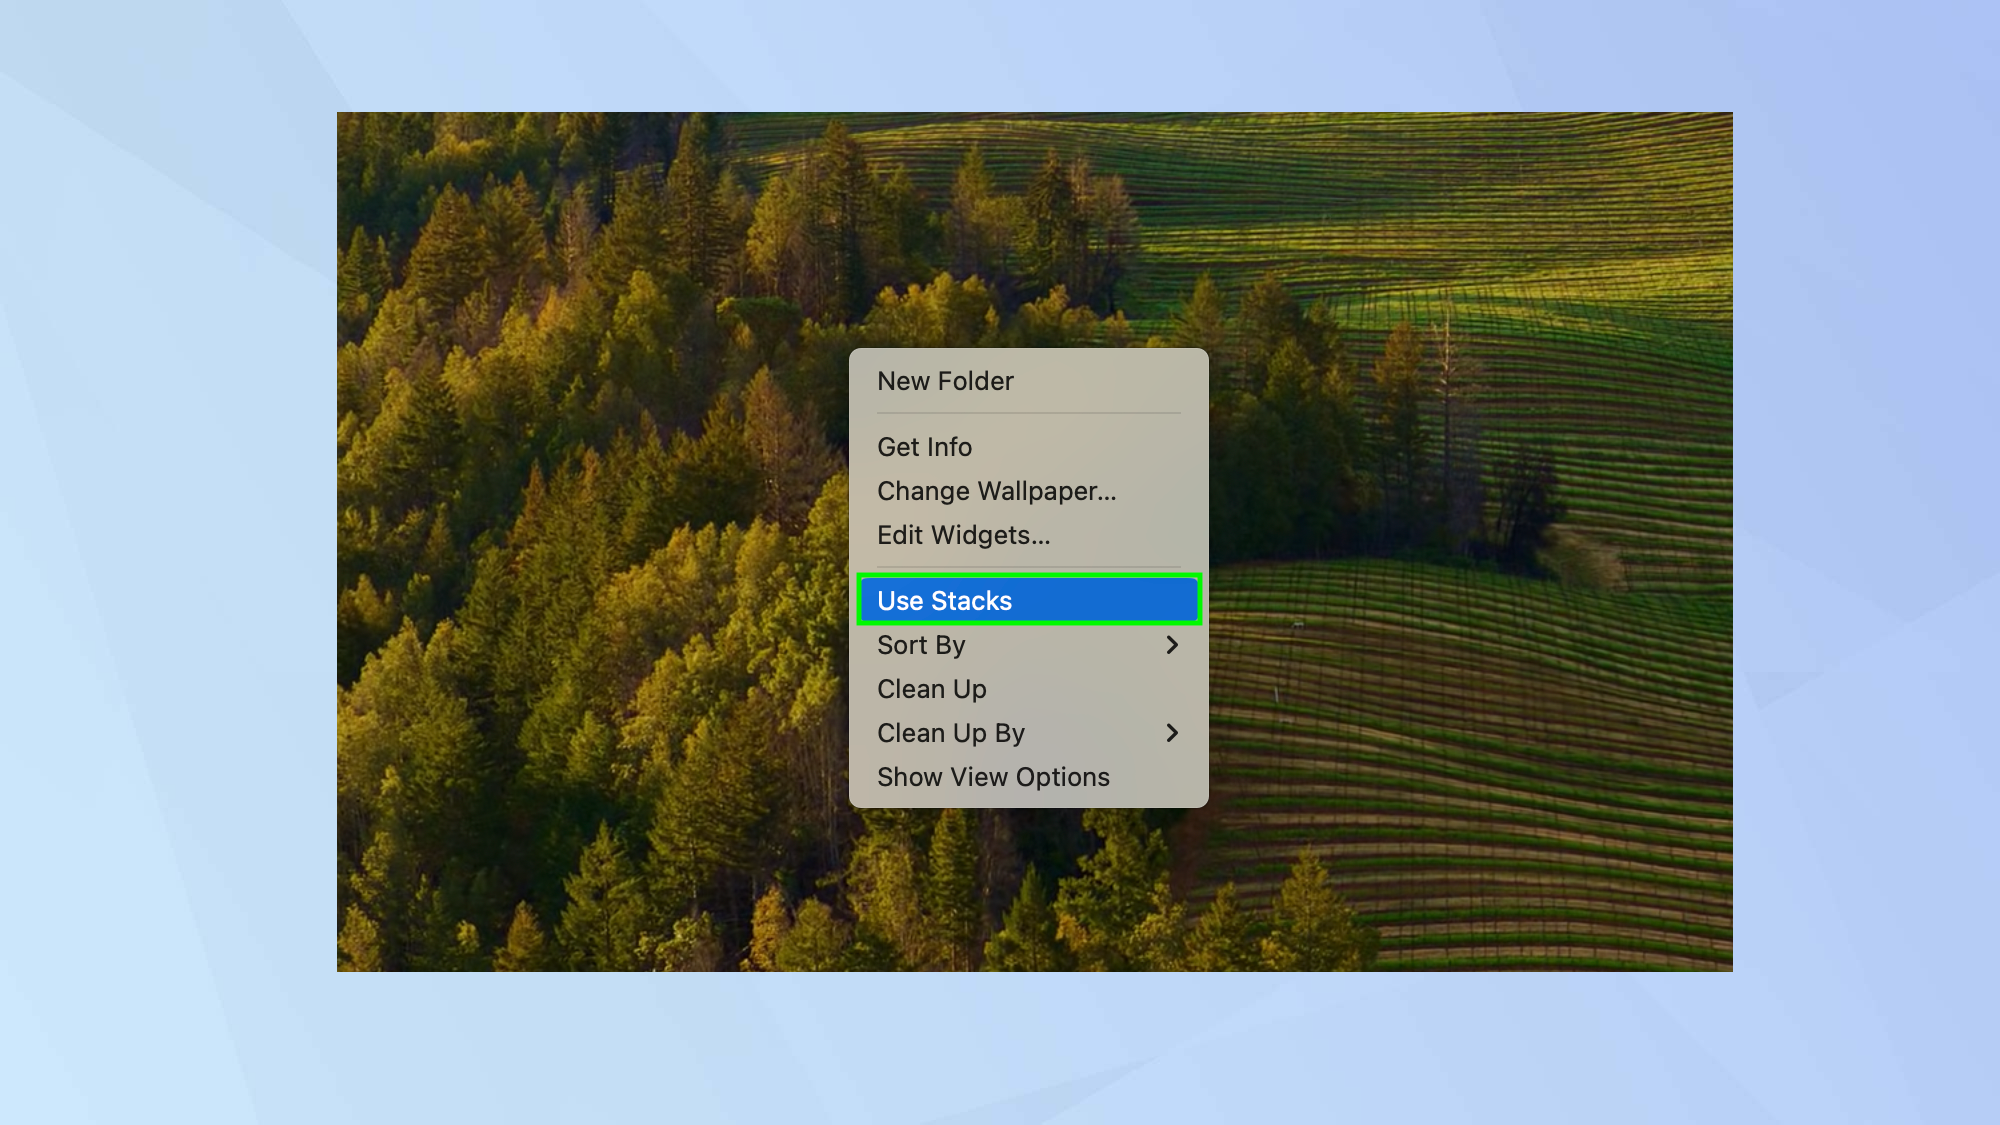
You can organize files into groups using Stacks on your desktop. For example, you could bunch all of your images together and have documents in another stack, ready to be clicked and expanded. You will need to turn the feature on, however. So click the desktop and select View. Now click Use Stacks. Your files will instantly be stacked, making for a neater desktop.
11. Turn off Hey Siri
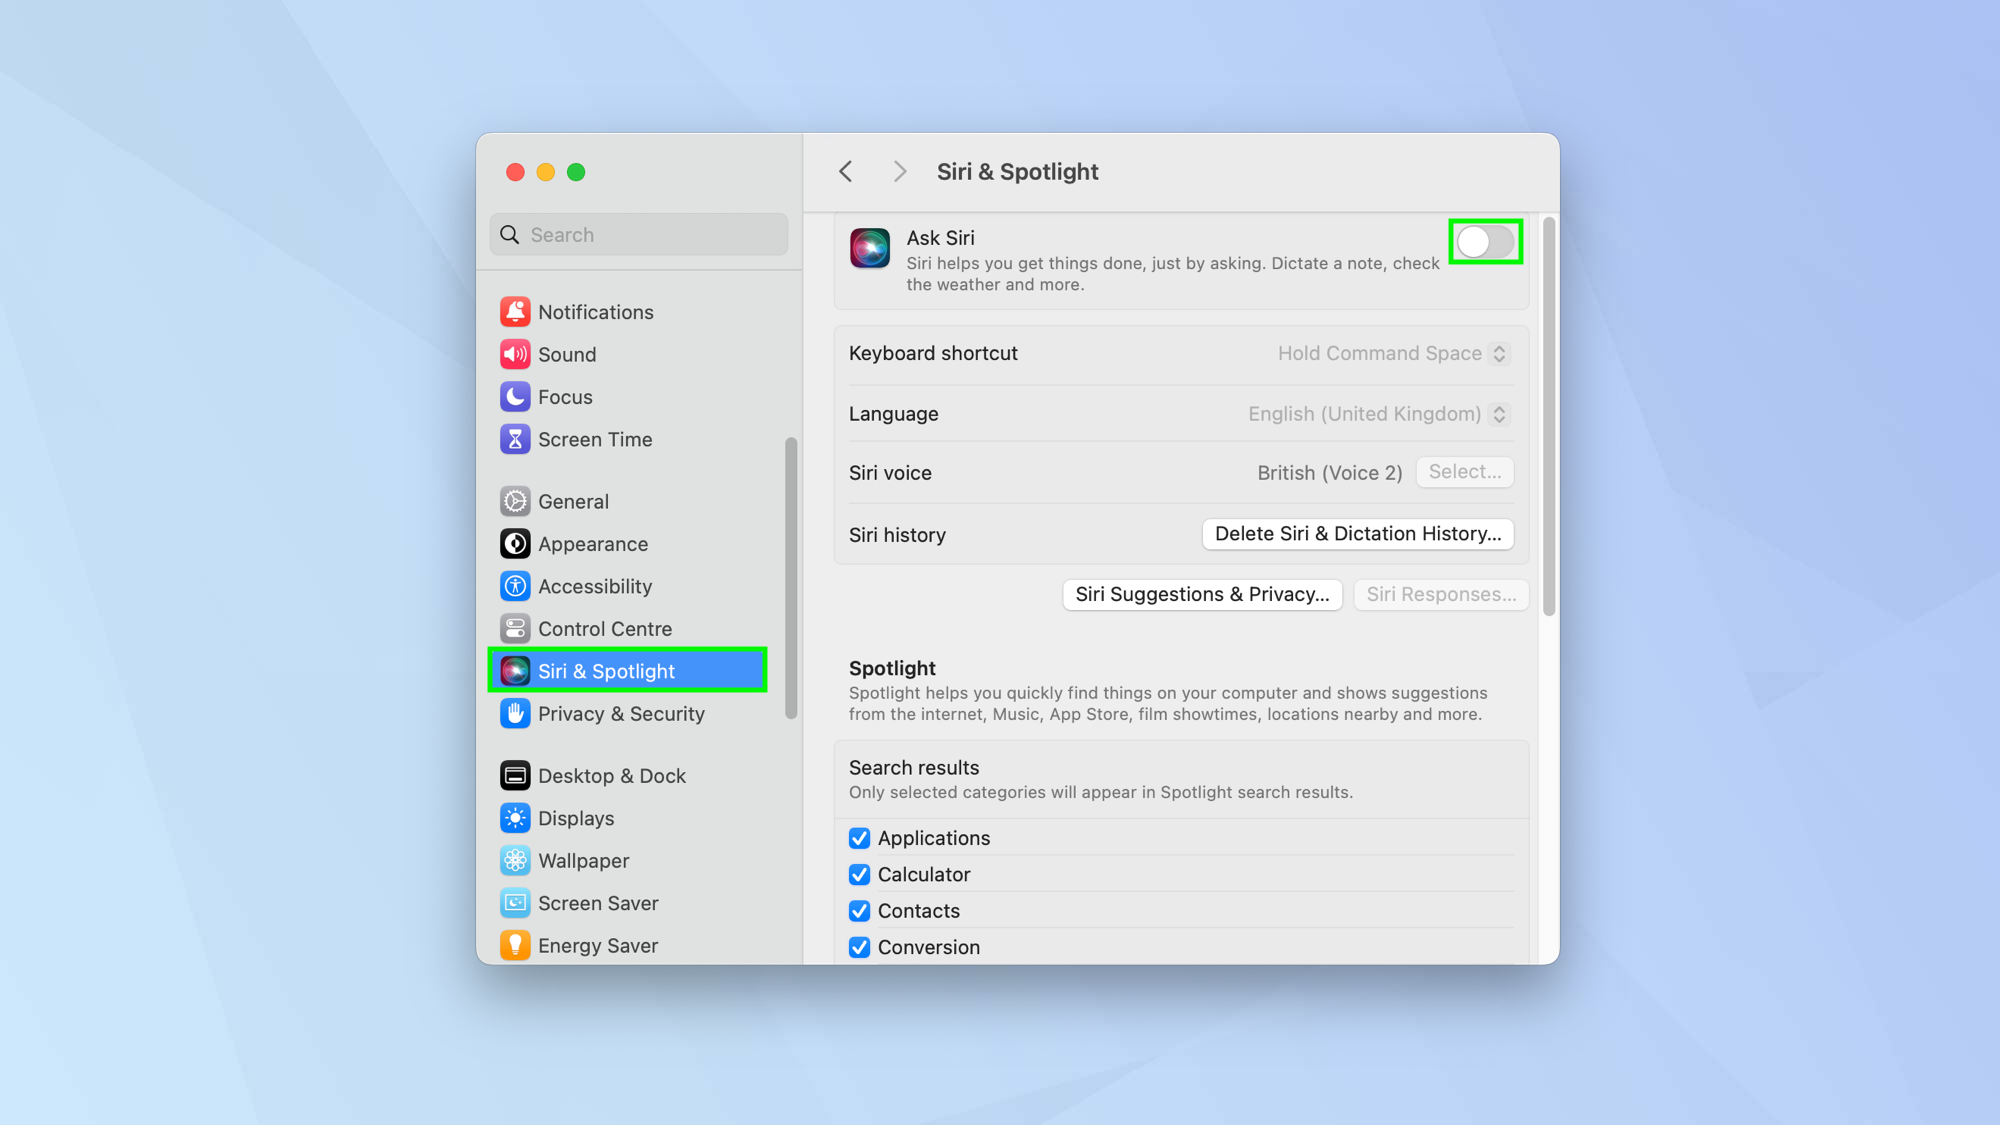
Hey Siri is actually useful. It allows you to ask a bunch of questions and complete tasks. But it can also be very annoying if you have an iPhone or an iPad – issuing a command to one of these devices could accidentally set Siri off on your Mac. You can turn Hey Siri off if you click the Apple icon, select System Settings, choose Siri & Spotlightand toggle Ask Siri off.
And there you go: 11 tips for setting up your new Mac! You can also go into more depth with your Mac by trying 18 macOS Terminal commands to turn you into a power user. You can also learn how to set default apps on Mac discover how to show the hidden files in Mac and find out how to clear the cache on Mac.
Sign up to get the BEST of Tom's Guide direct to your inbox.
Get instant access to breaking news, the hottest reviews, great deals and helpful tips.

David Crookes is a freelance writer, reporter, editor and author. He has written for technology and gaming magazines including Retro Gamer, Web User, Micro Mart, MagPi, Android, iCreate, Total PC Gaming, T3 and Macworld. He has also covered crime, history, politics, education, health, sport, film, music and more, and been a producer for BBC Radio 5 Live.
