iOS 17's new Check In feature is a game changer — here’s how to use it
Let people know you've arrived safely with this Messages feature
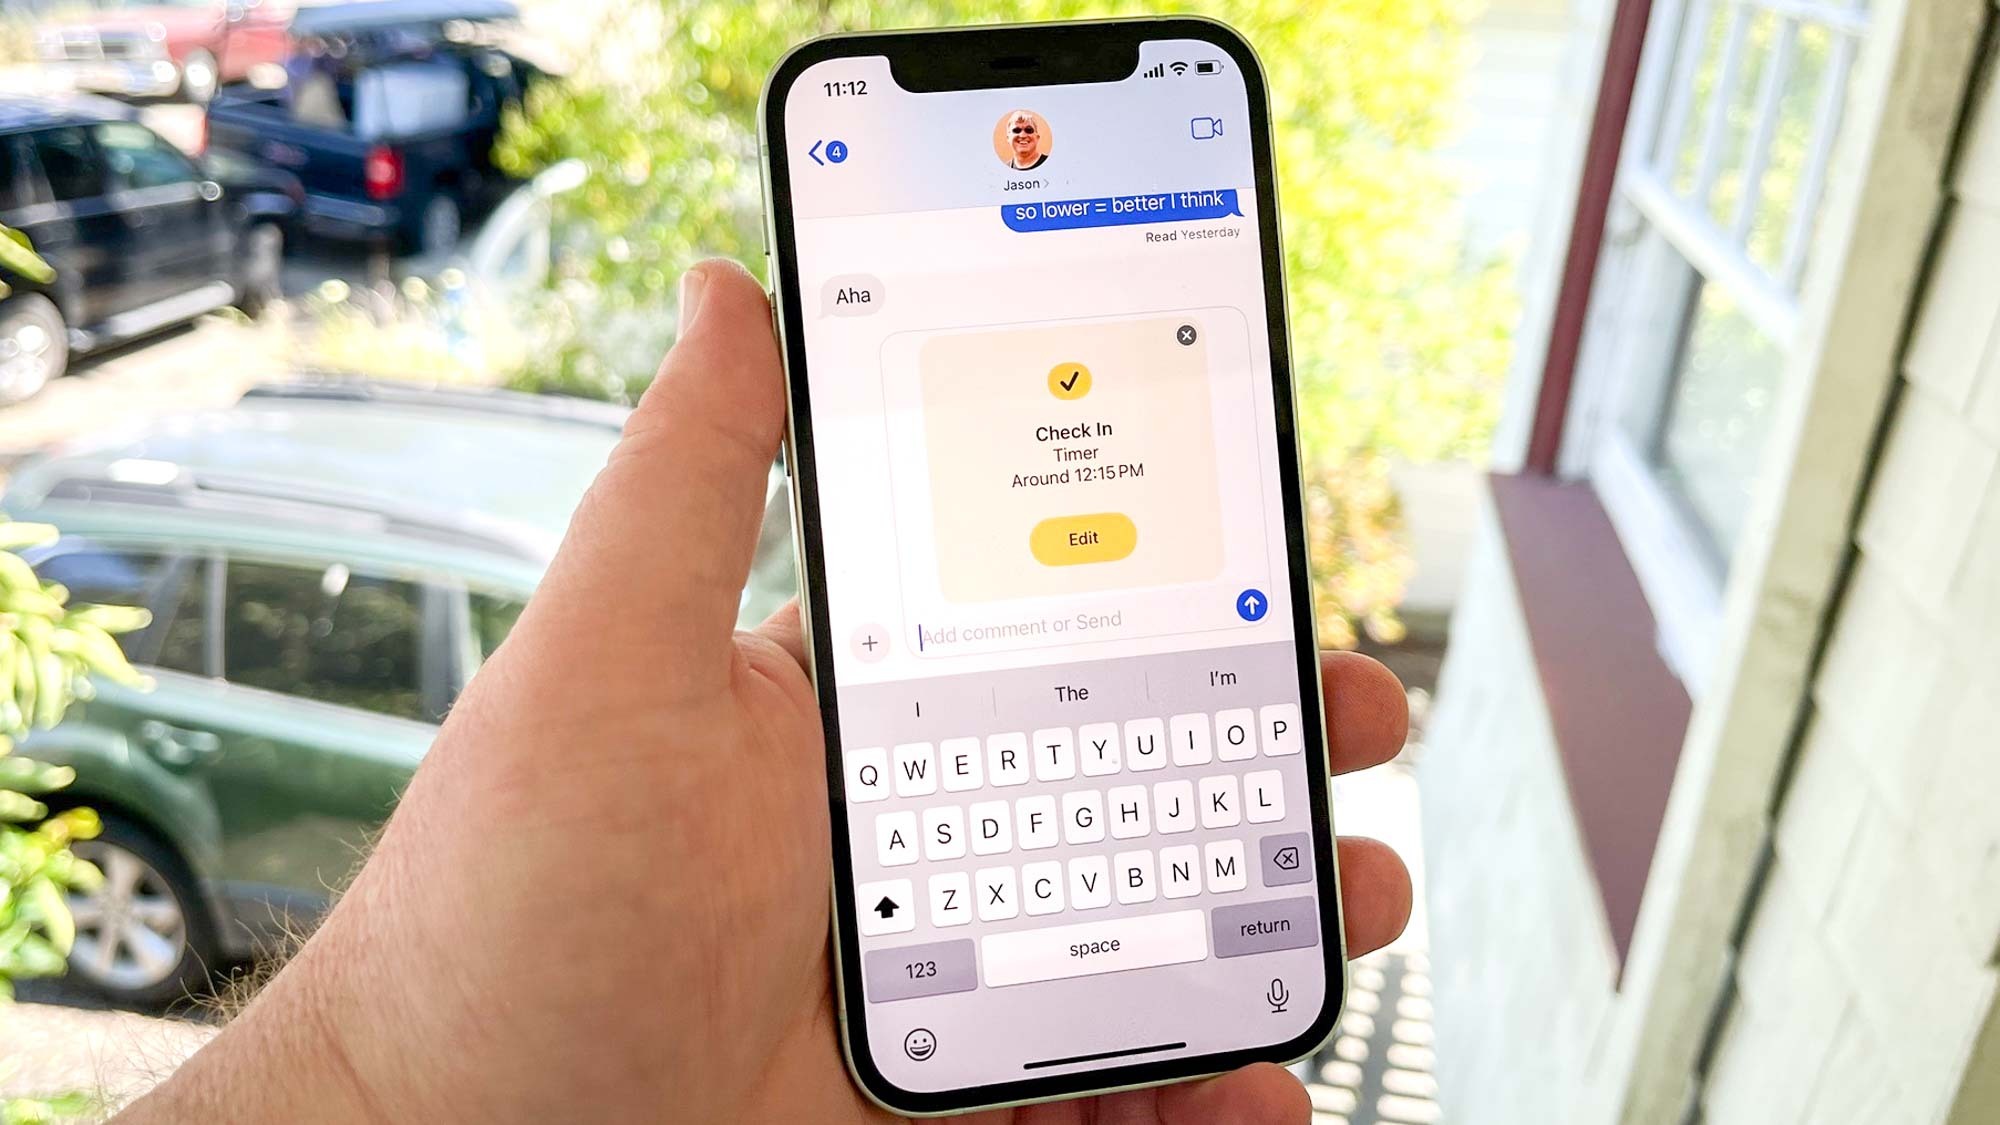
iOS 17 adds a feature to Messages that just might come in handy if you ever run into trouble getting from Point A to Point B. And if nothing else, it will provide some extra peace of mind to you and your loved ones.
The feature's called Check In, and it allows you to let people that you message with when you've arrived somewhere safely. Even better, the Check In feature that's part of iOS 17 Messages works with very little intervention on your part — all you have to do is start a Check In and begin your journey. Check In automatically lets other people know when you've arrived or if you've been delayed.
Should you experience any delay in your travels, Check In will ping you to see if you want to tack on extra time to your trip. If you don't respond, the feature will alert the people you're sharing with, providing them data on your last location. (You'll be able to determine just how much data gets shared.)
Check In is part of the iOS 17 update coming to iPhones in the fall, but you don't have to wait until then to try out, so long as you install the iOS 17 public beta that's now available for download. You and the person you're checking in with both need to be running iOS 17 on your phones, and you'll need to have Location Services enabled.
Here's our step-by-step guide on how to use Check In in Messages on your iPhone.
How to send a Check In using Messages on your iPhone
1. Start a Check In
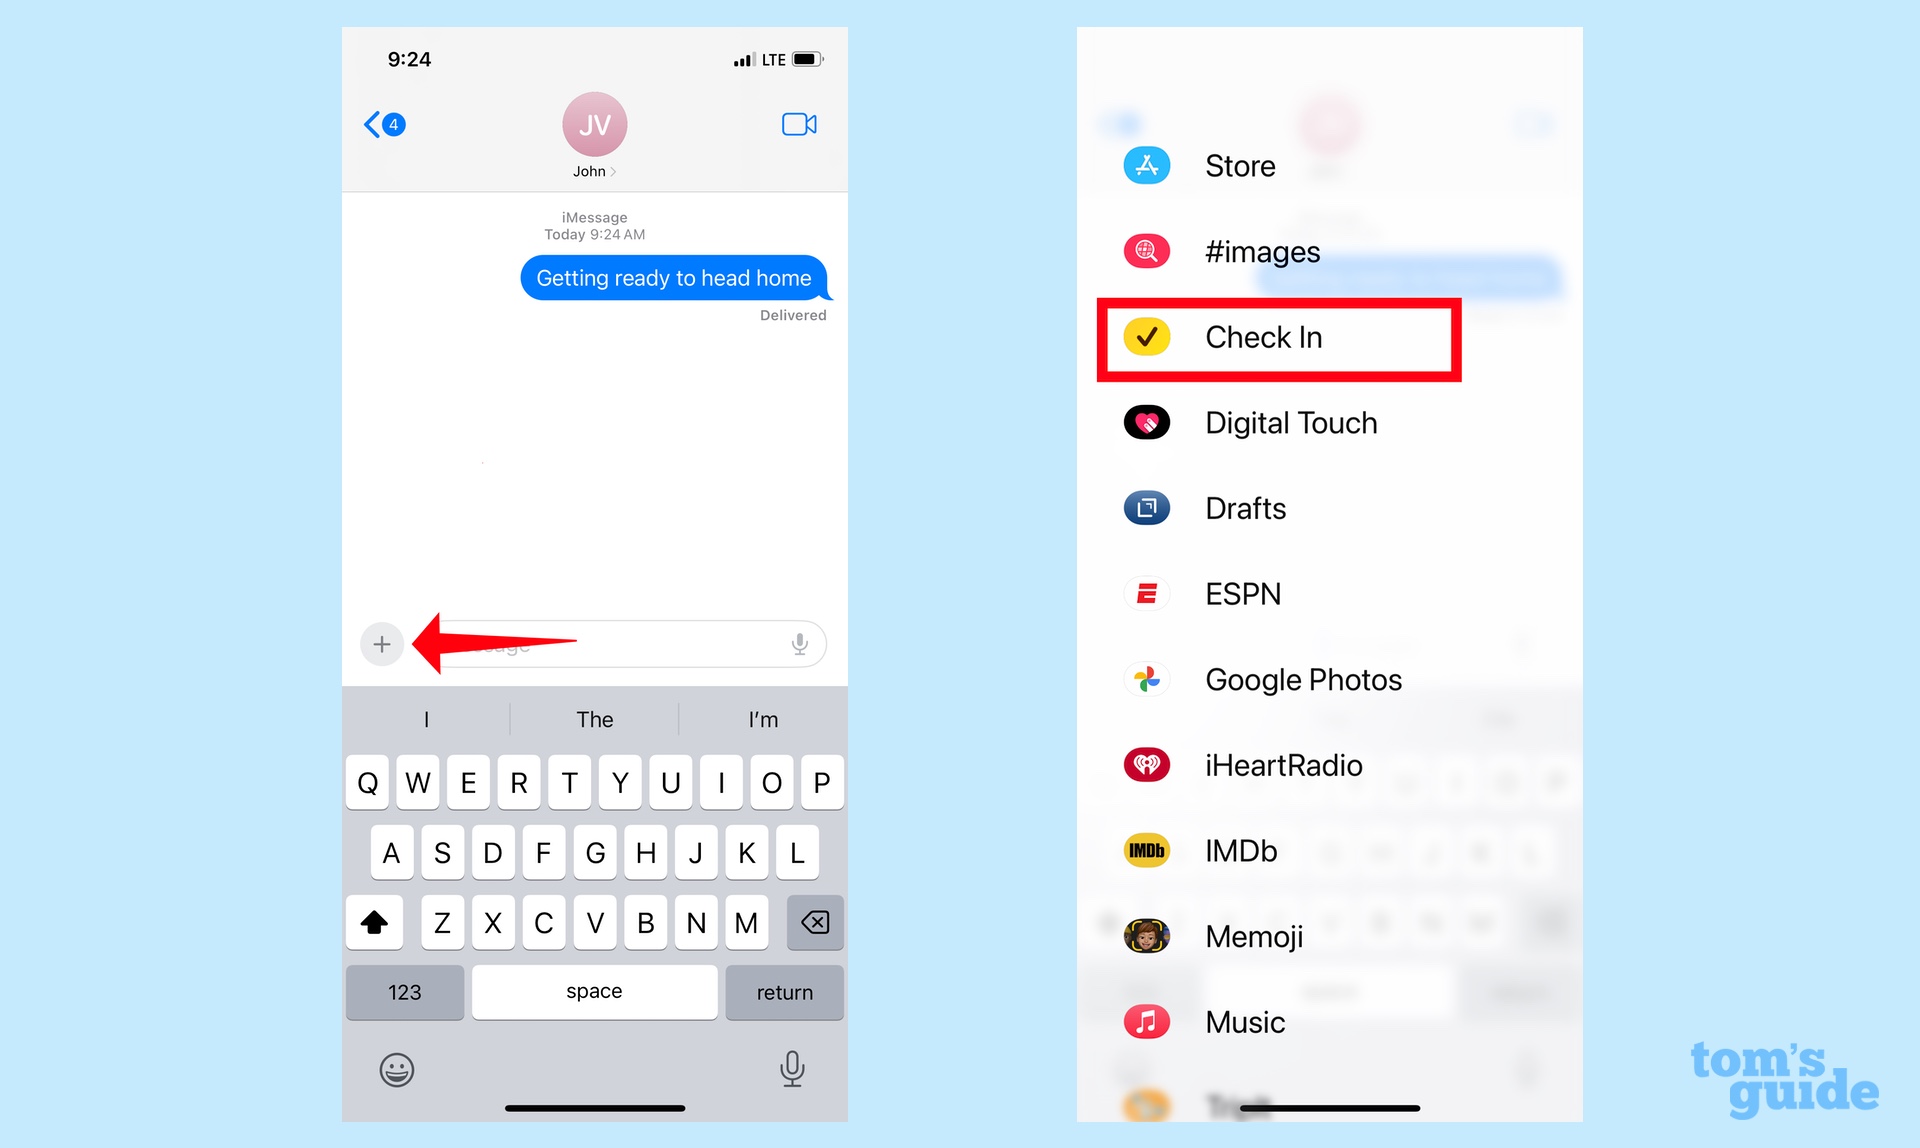
In the Messages app, go to the conversation with the person you want to check in with. Tap the plus button (+) to the left of the text field. Scroll through the menu of iMessage apps that appears and select Check In.
2. Set up Check In
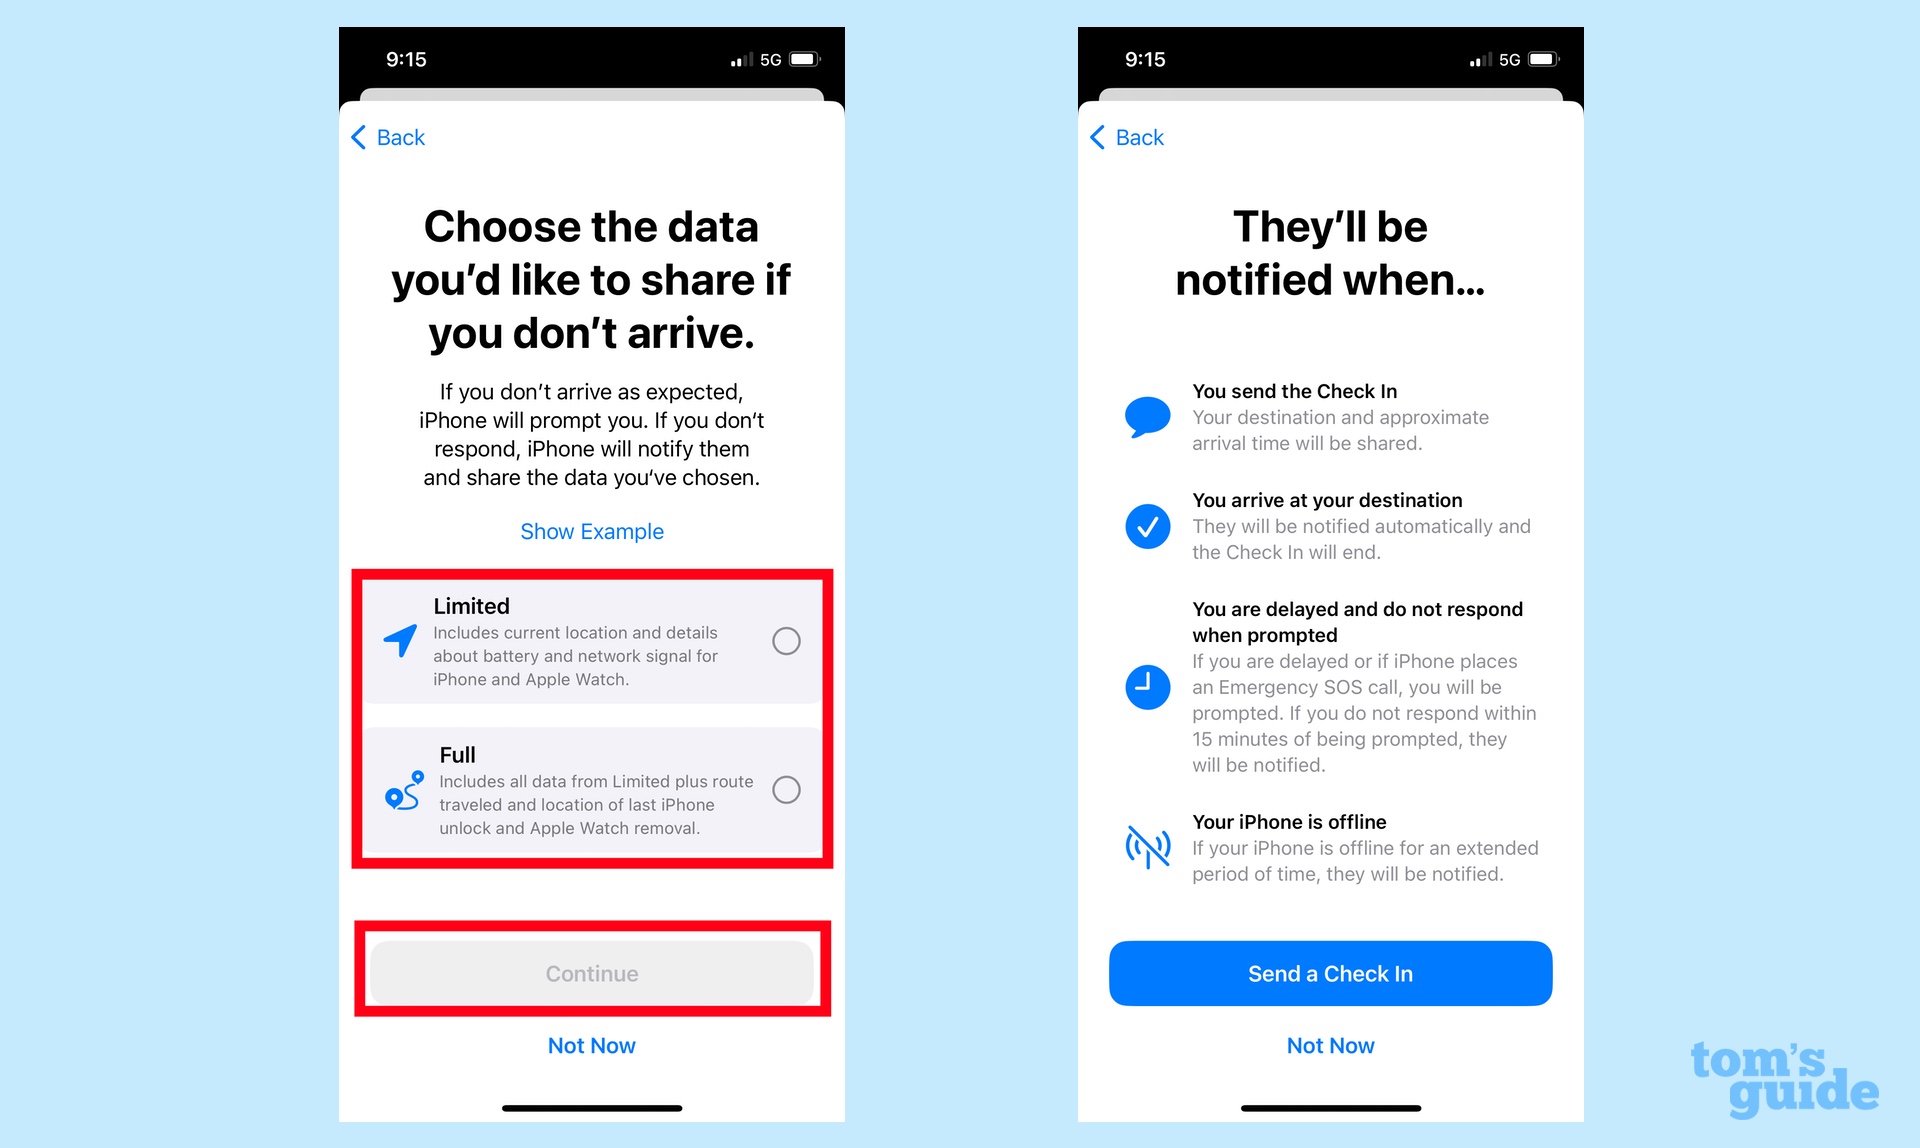
If this is the first time you're launching Check In, you'll see a series of screens explaining the feature to you. The most relevant screen will prompt you to choose how much information you share with people. The Limited option shares your current location and details about the battery status and network signal for your iPhone and your Apple Watch (if you're using the latter).
The Full option includes that data plus the route you've taken and information on your last iPhone unlock or Apple Watch removal.
Tap Continue after you've made your selection, and on the final screen of the Check In tutorial, tap Send a Check In to continue.
You can always change what you want to share with people you check in with. We'll walk through those steps after we show you how to use Check In.
3. Send your Check In
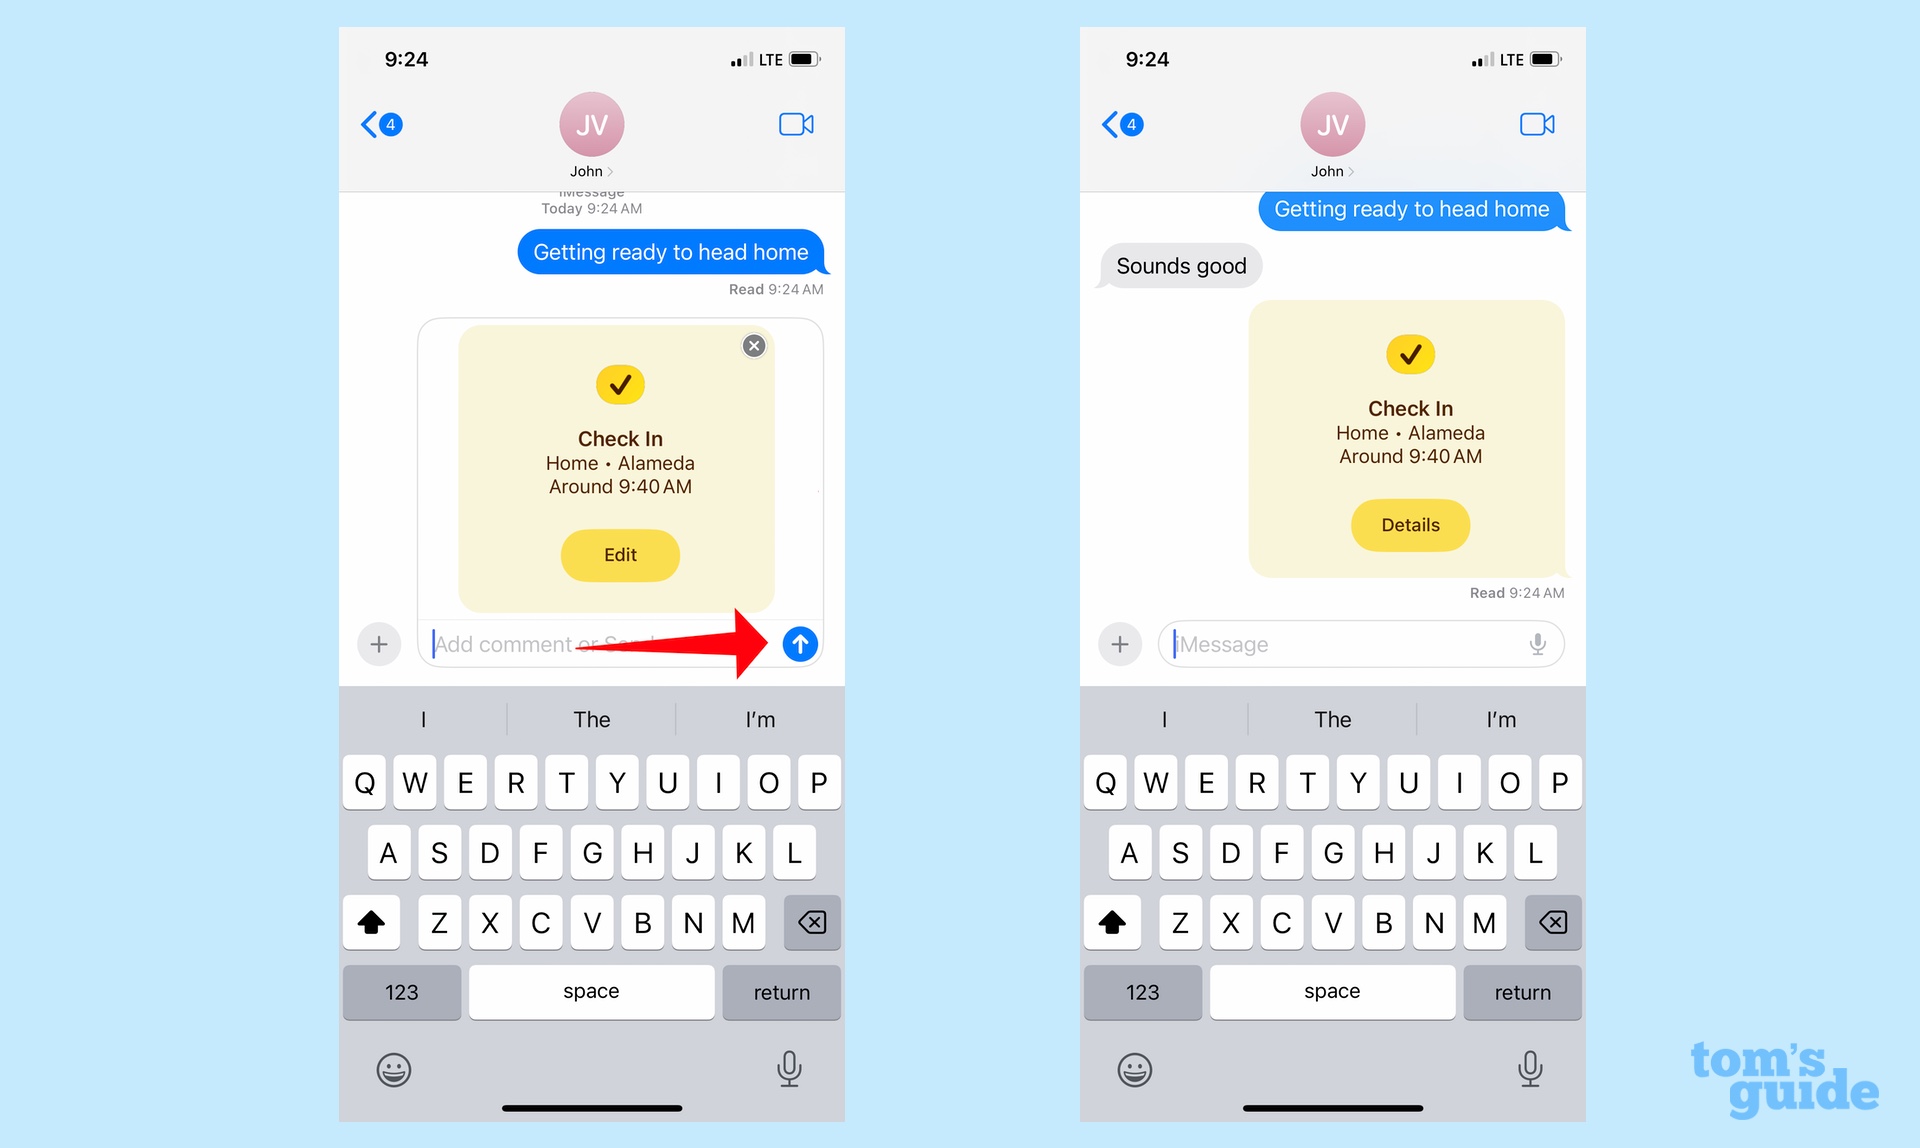
You'll need to tap the blue arrow in the text field to send your Check In. You can also tap the edit button to change your destination or set your Check In to a specific time. (We'll show you how in a little bit.)
Once you send your Check In, a text will appear in your conversation that shows your destination and your ETA.
4. Manage your Check In
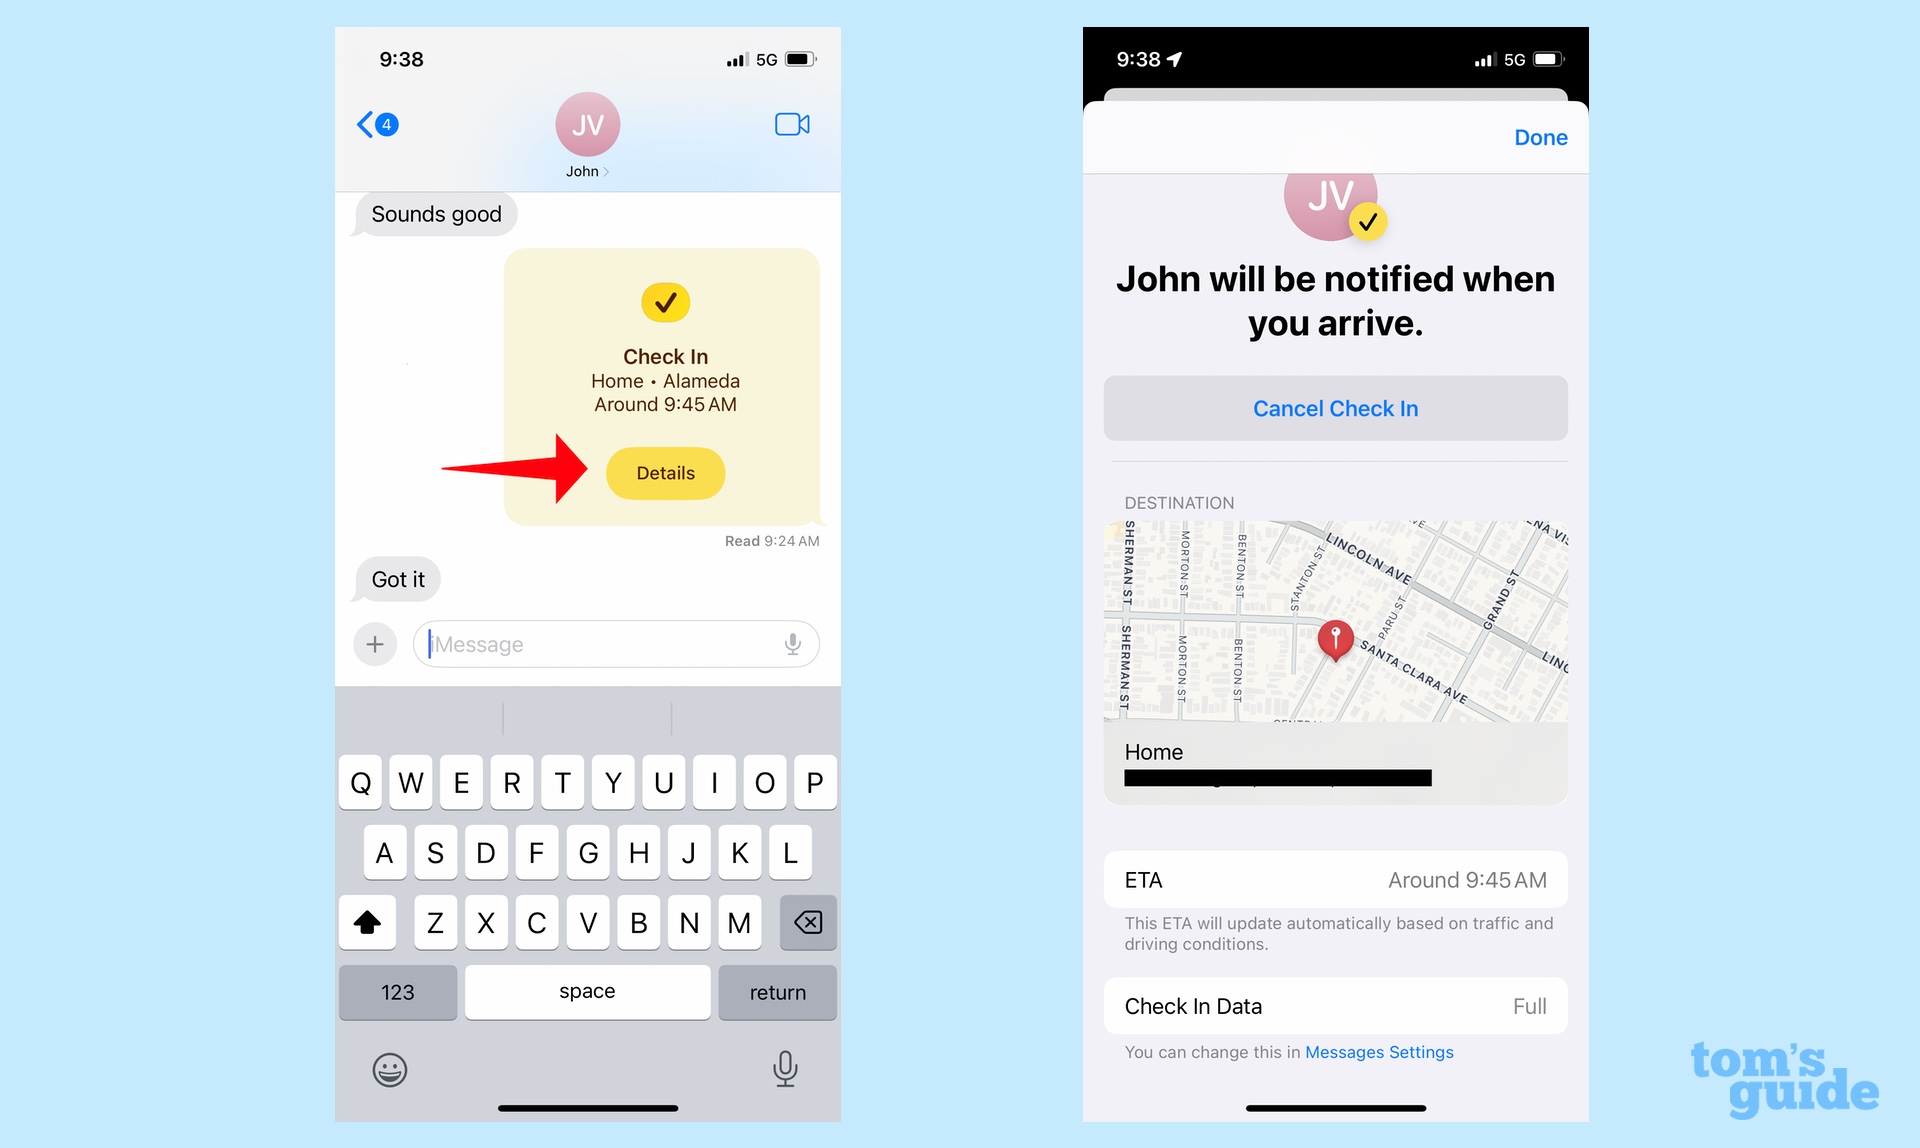
From here on out, all you have to do is head to your final destination and Check In takes care of the rest. But if you decide to cancel your Check In, tap the Details button on the Check In message. You'll see a screen with a Cancel Check In option.
That same screen also shows your destination and ETA as well as how much information you're sharing.
5. Add time to your Check In
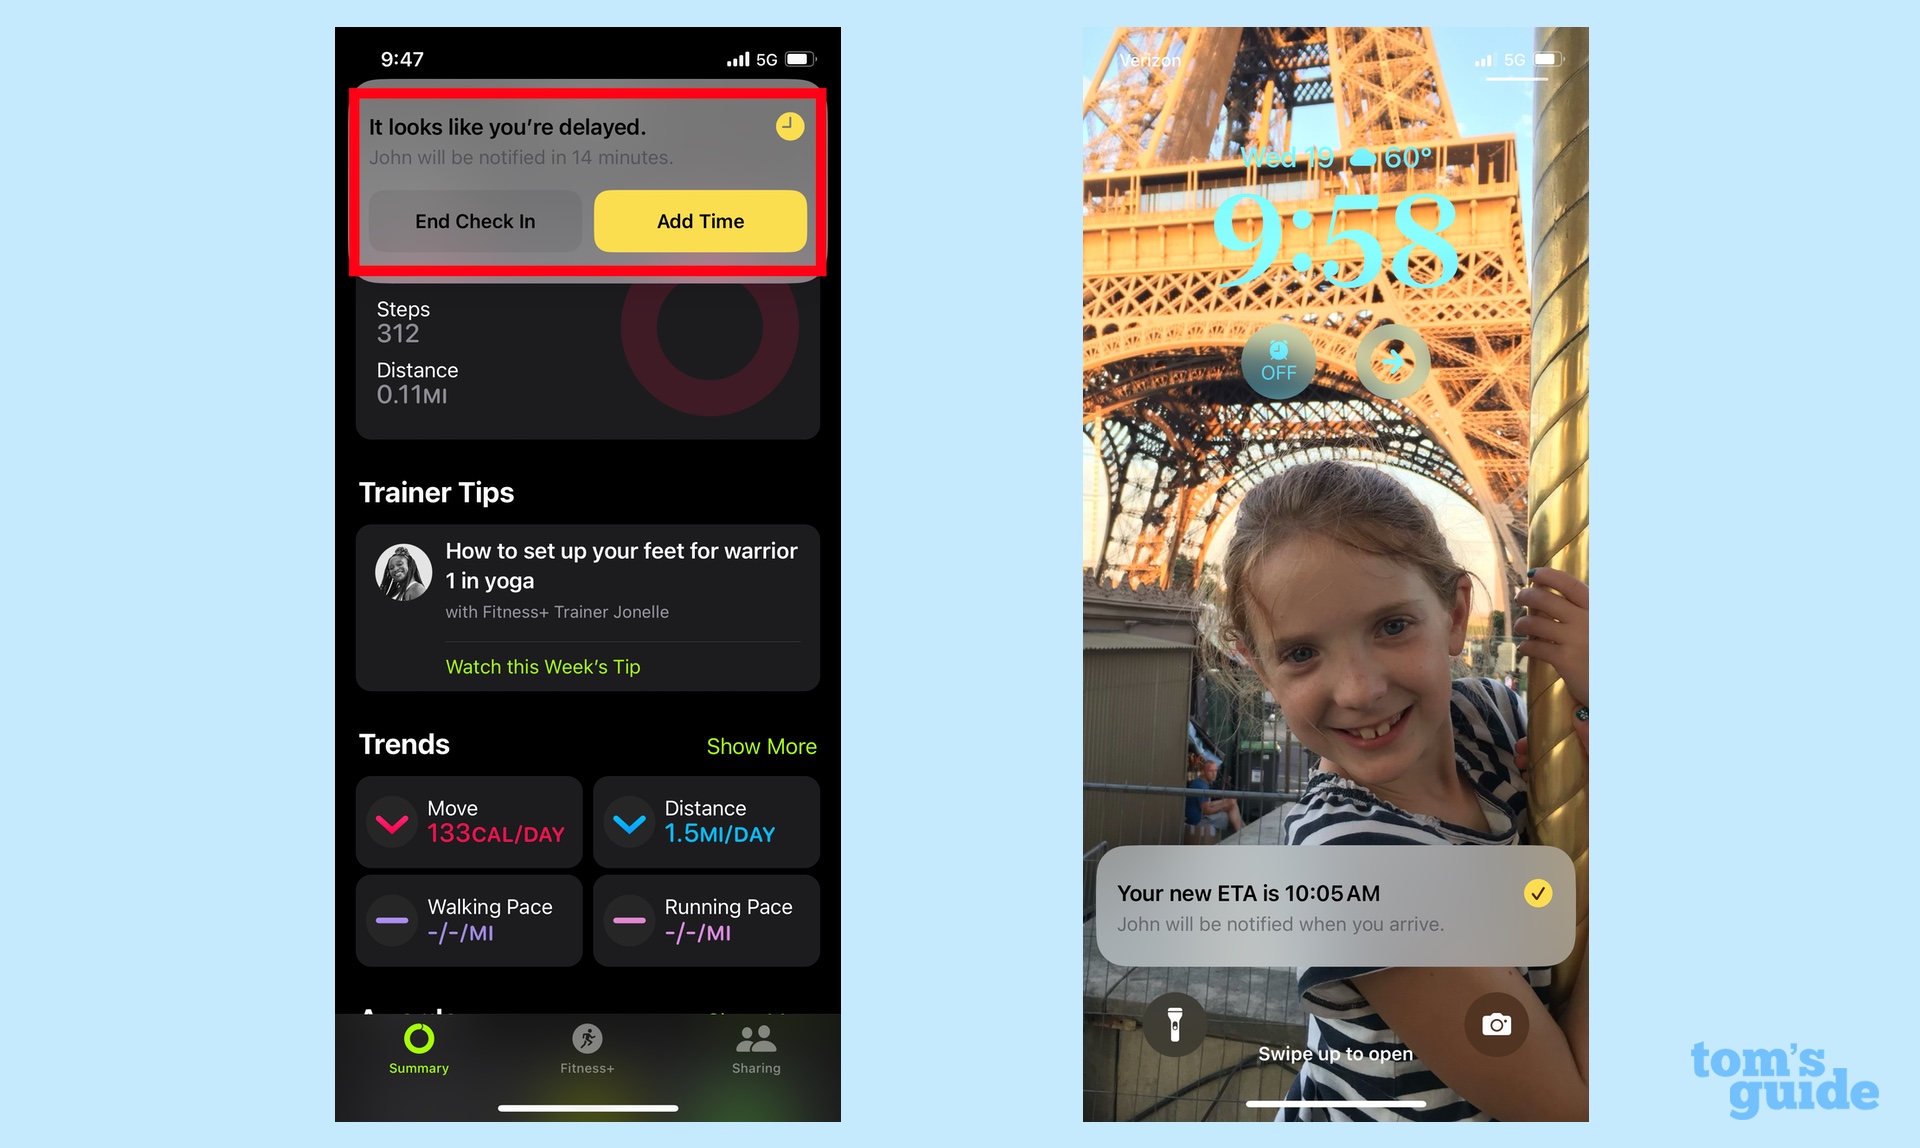
If you get delayed on your journey, you'll receive a prompt from Check In to add time to your trip. If you don't respond within 15 minutes, Check In will alert the people you've checked in with, sending the location data you've agreed to share. Once you do add time, your ETA will be updated.
6. Arrive at your destination
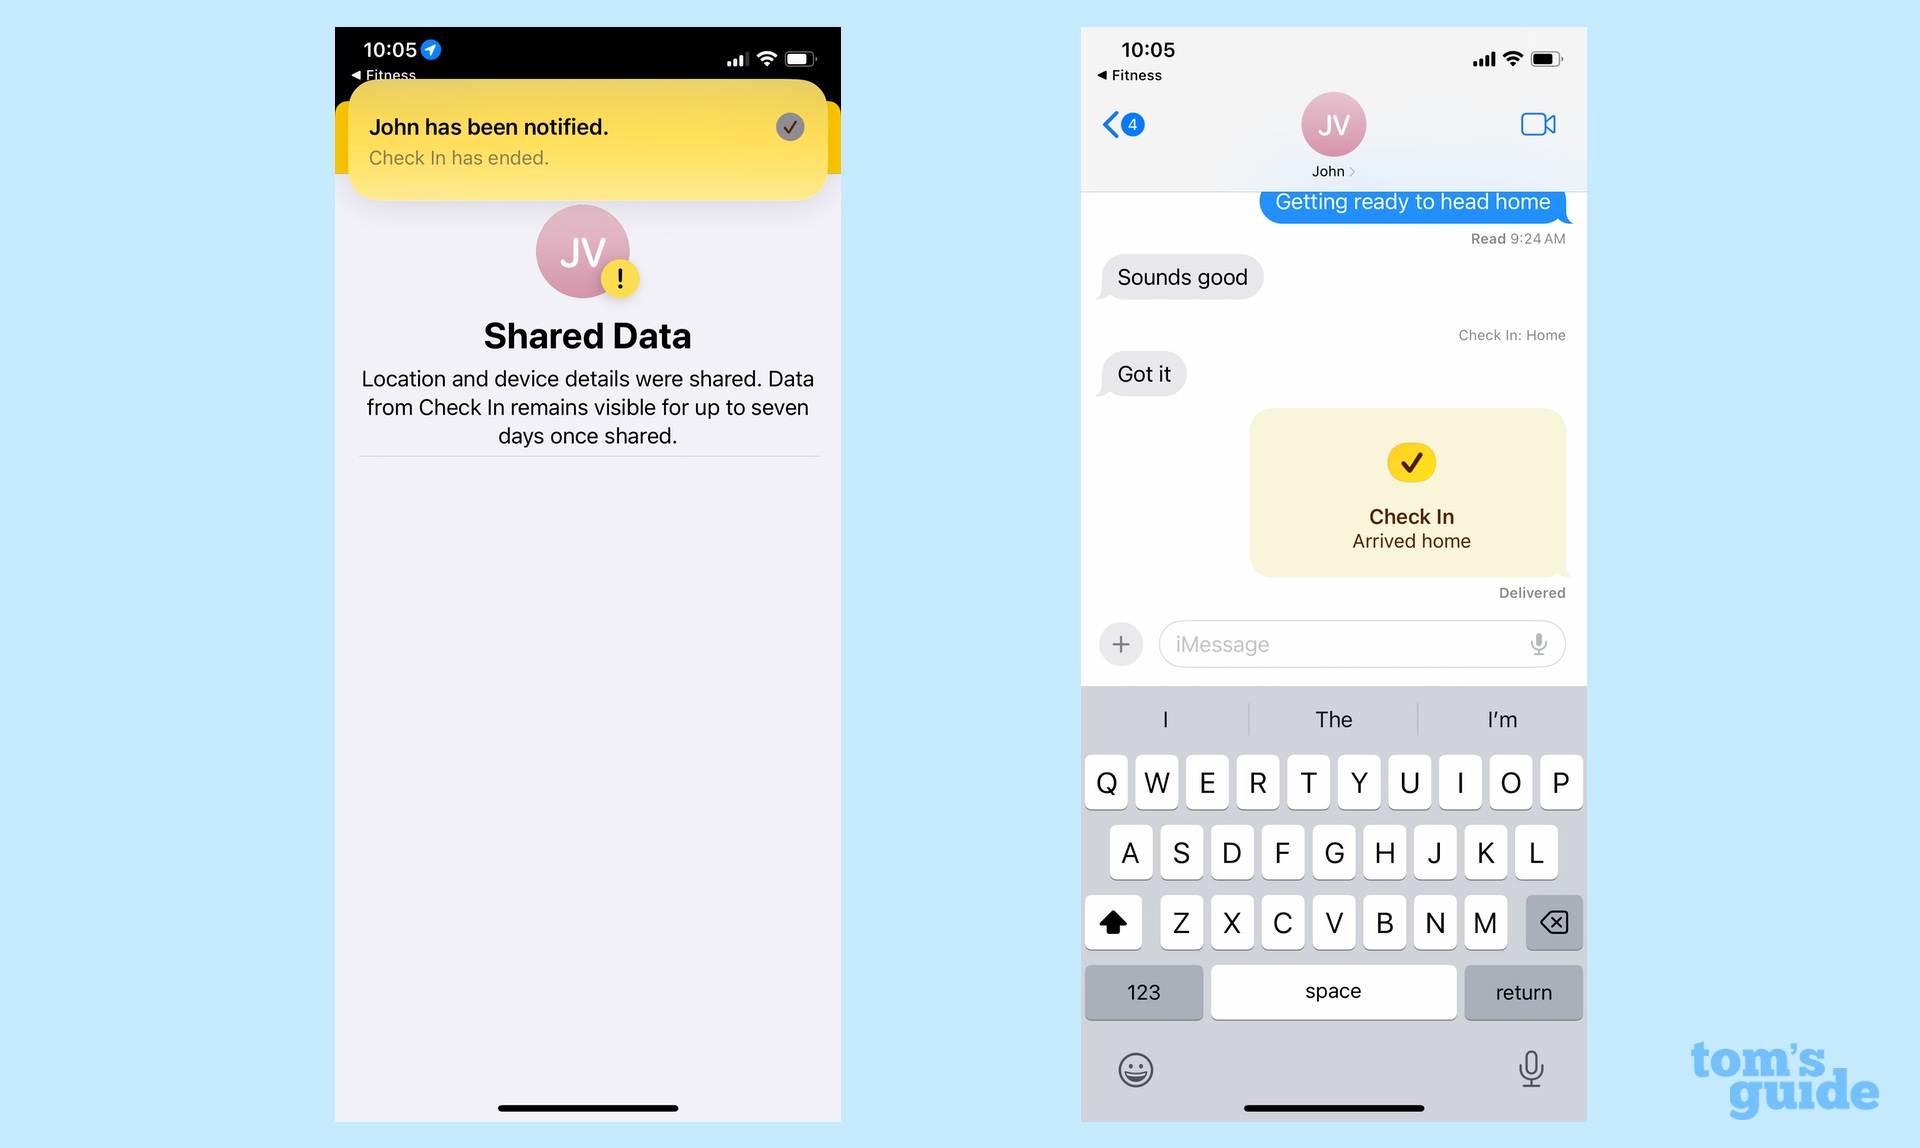
This step requires you to do nothing more than arrive safely. Check In will come to an end, and you'll stop sharing your data.
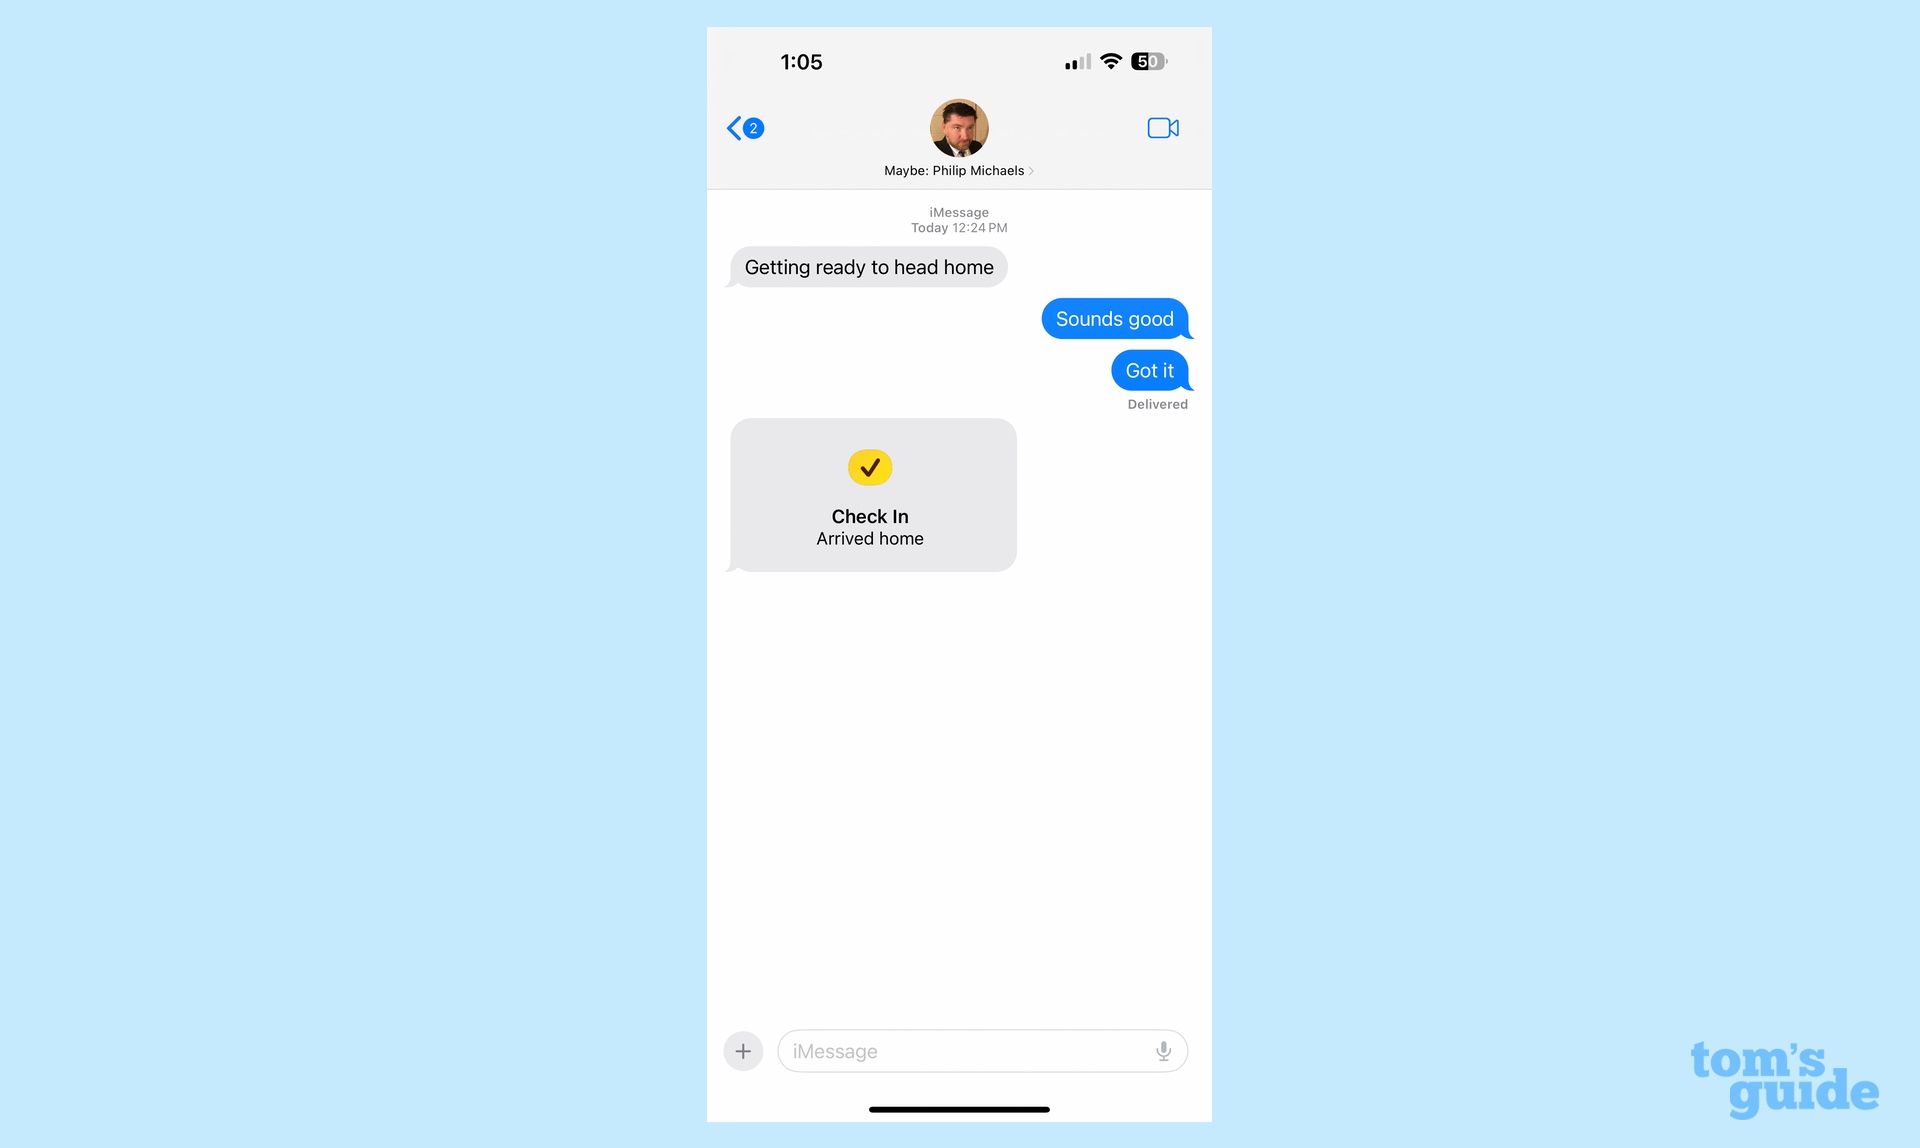
The person you're sharing with will get a notification once you've arrived at your destination, and the status of the Check In in your conversation will update to show that you made it safely.
How to edit your Check In destination
In the example above, Check In automatically detected that I was heading home. But what if you had a different destination in mind or you wanted to tie your Check In to a specific time? It's easy to edit that before you send your Check In out.
Sign up to get the BEST of Tom's Guide direct to your inbox.
Get instant access to breaking news, the hottest reviews, great deals and helpful tips.
1. Edit your Check In
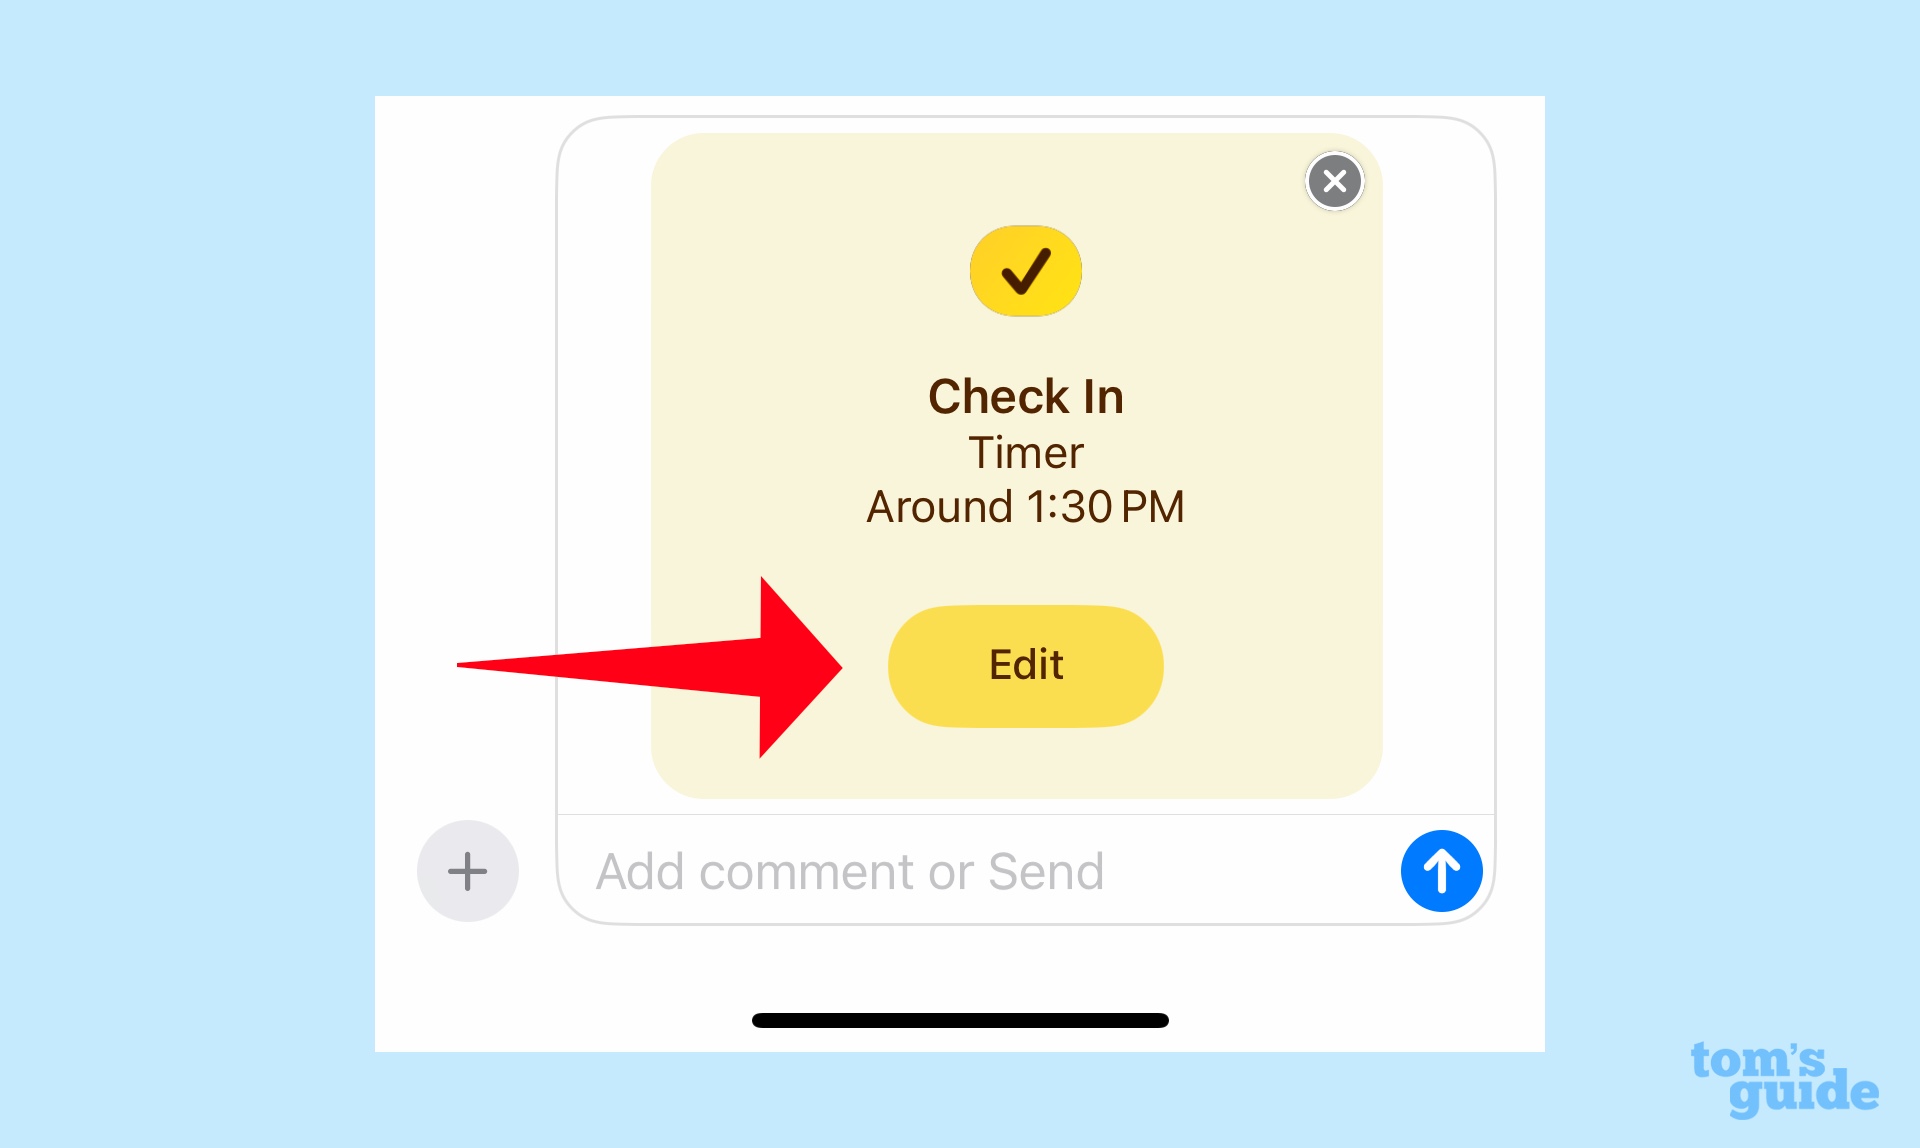
Starting with Step 3 from above, tap on the Edit button in the Check In window.
2. Change your Check In destination
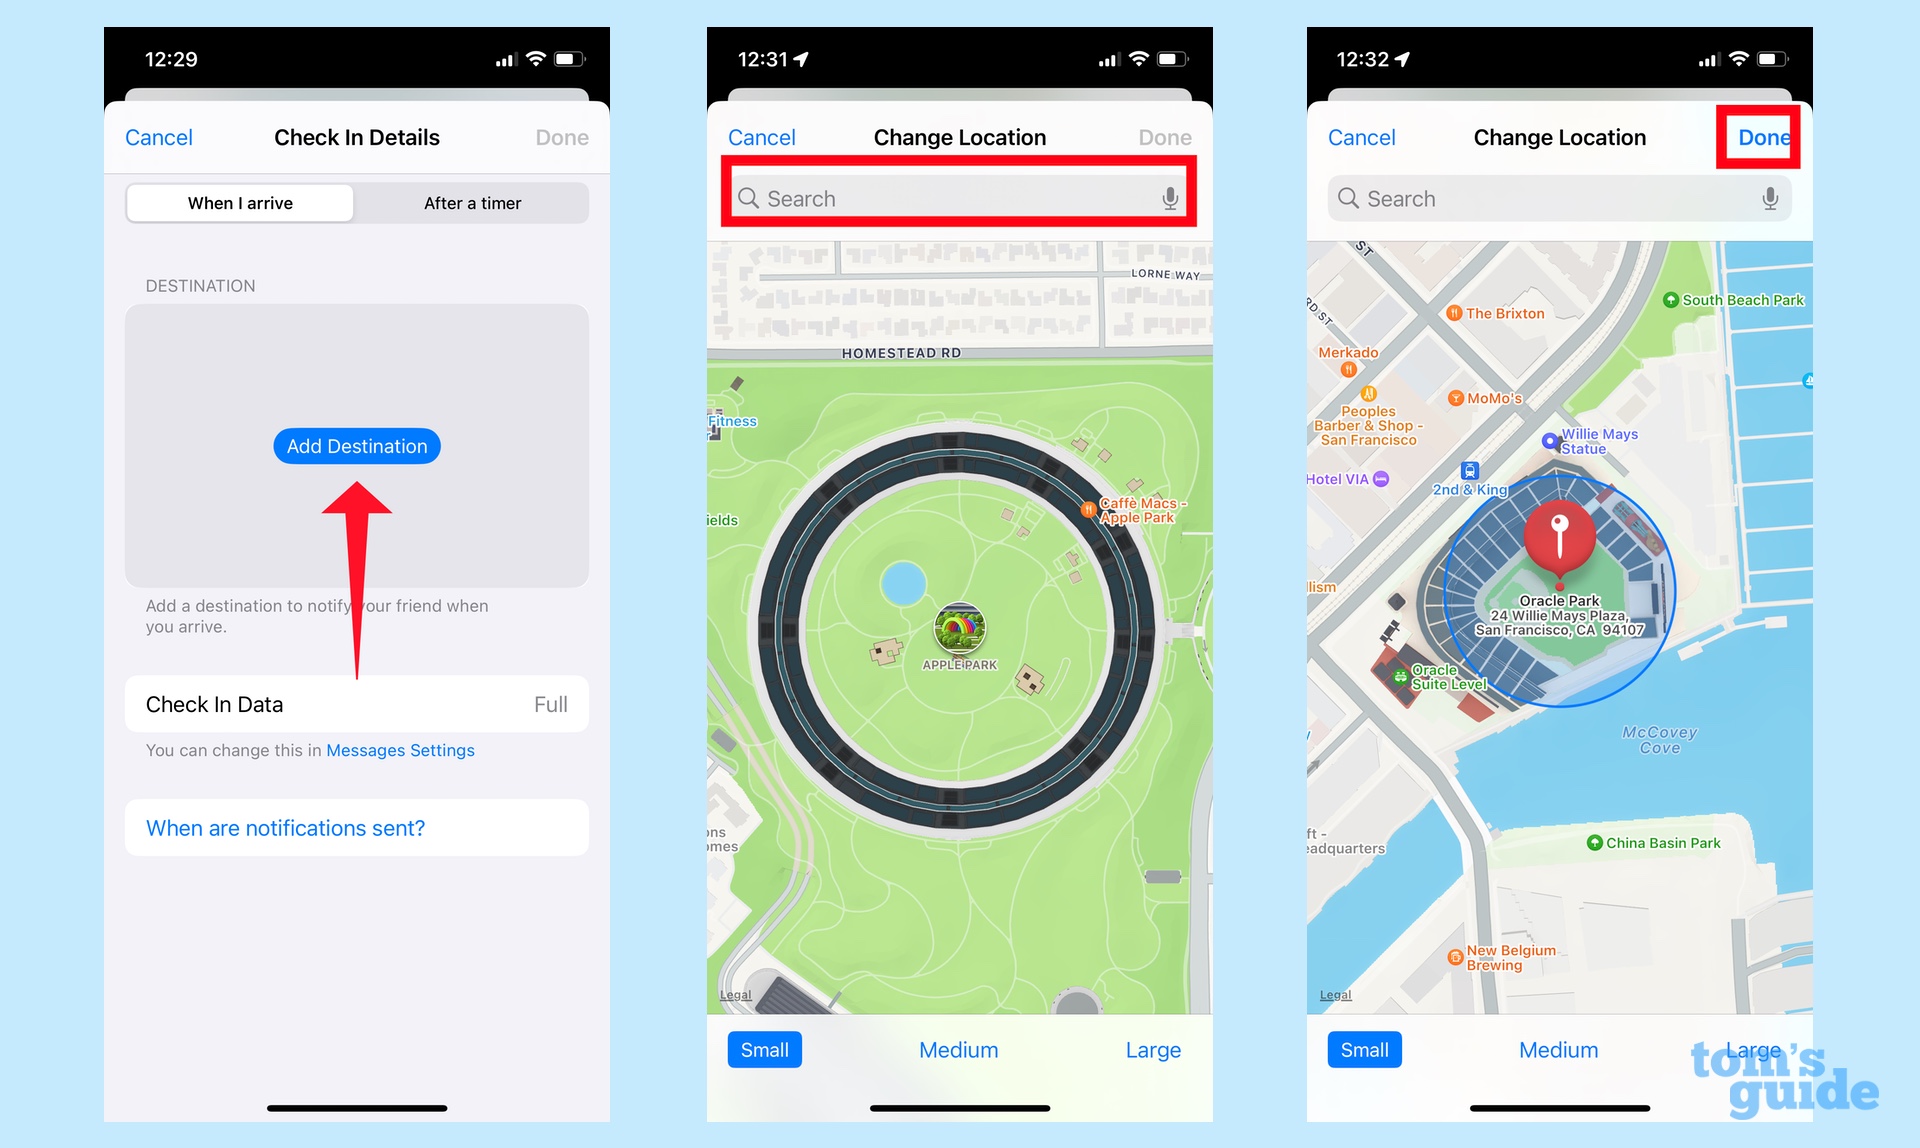
To change your destination, make sure the top tab shows When I arrive. Tap Add Desintation. On the ensuing screen, type in your destination in a search bar. Once you've selected the proper destination, tap Done.
3. Change to a timer
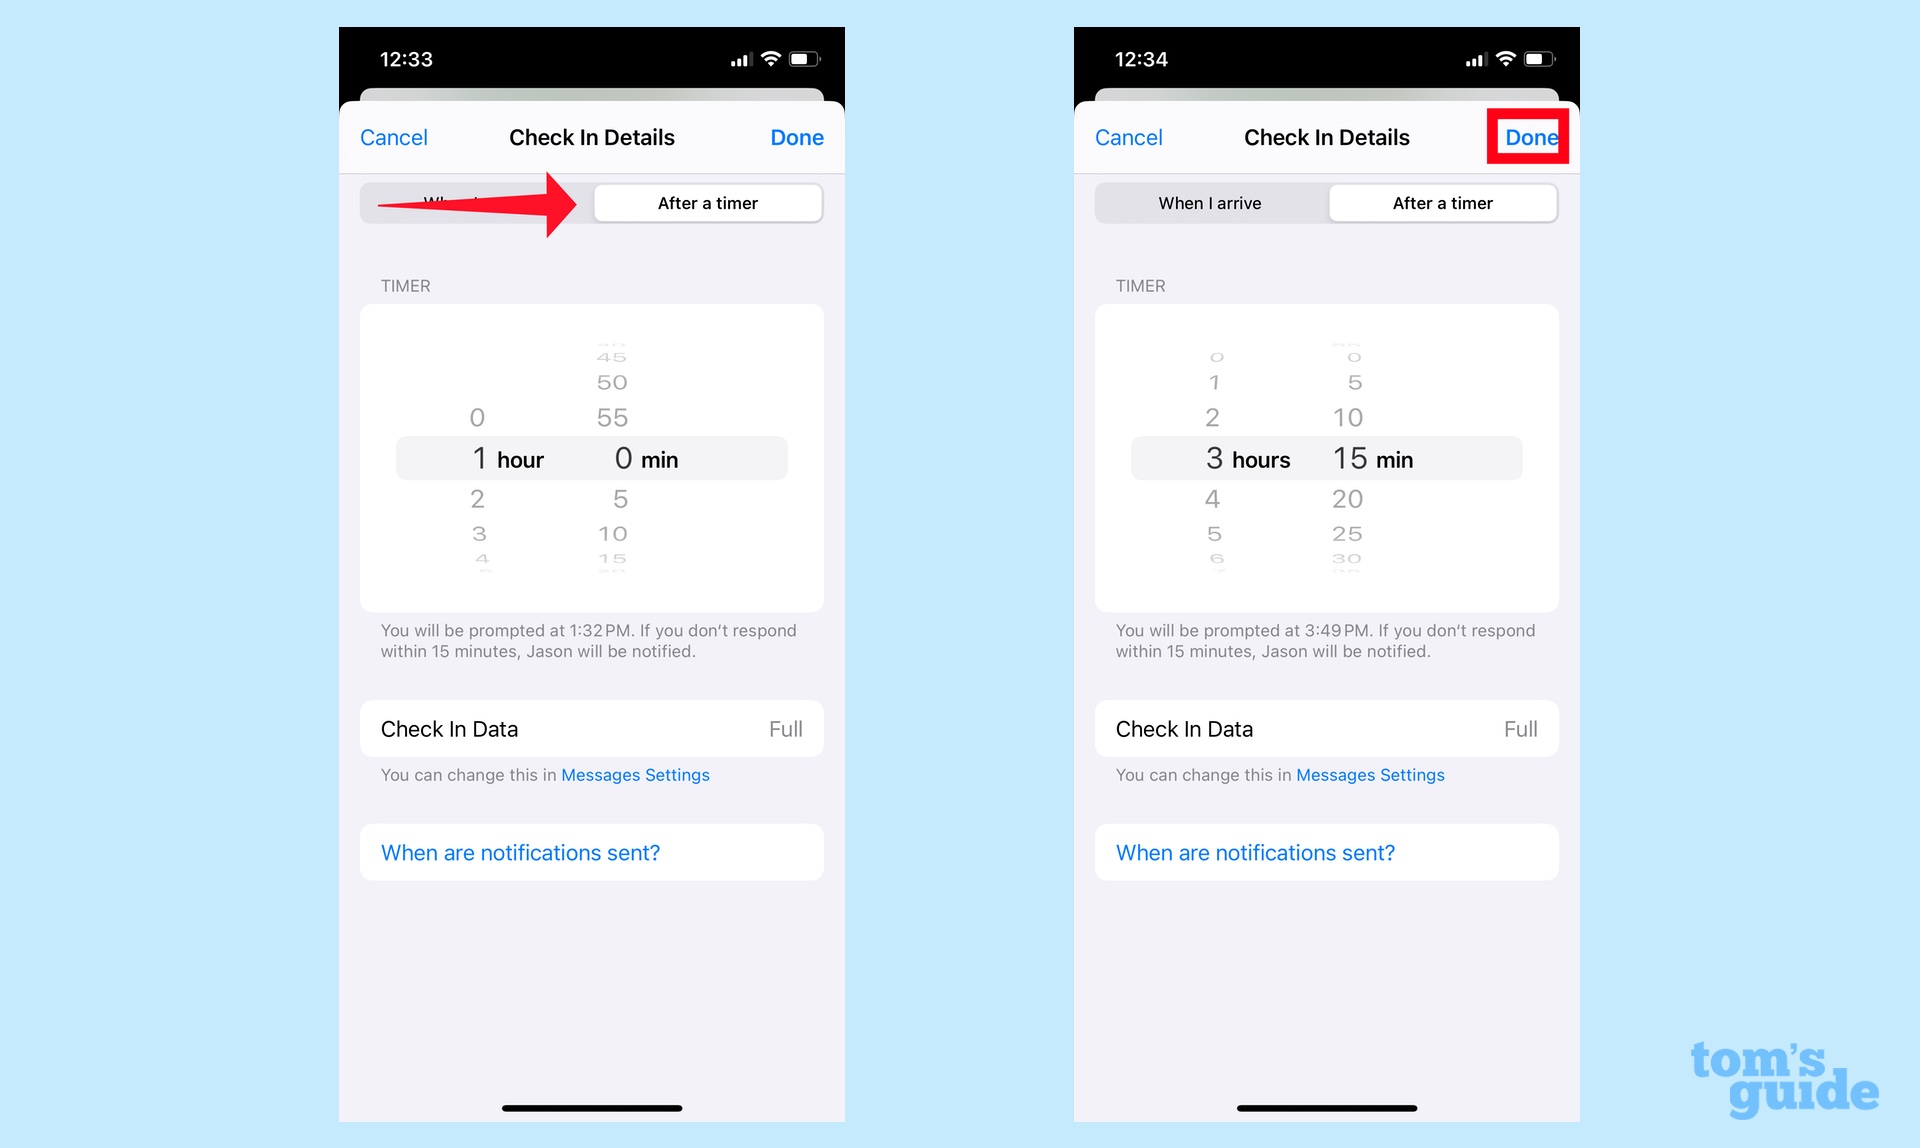
To set your Check In to a specific time, tap the After a Timer Tab. Use the Timer menu to select when the Check In should end and tap Done.
How to manage what information you share through Check In
You're only asked if you want to share Limited or Full data the first time you start a Check In. After that, your initial choice is the default option. If you want to change that, you'll need to head to the Settings app.
1. Go to Settings
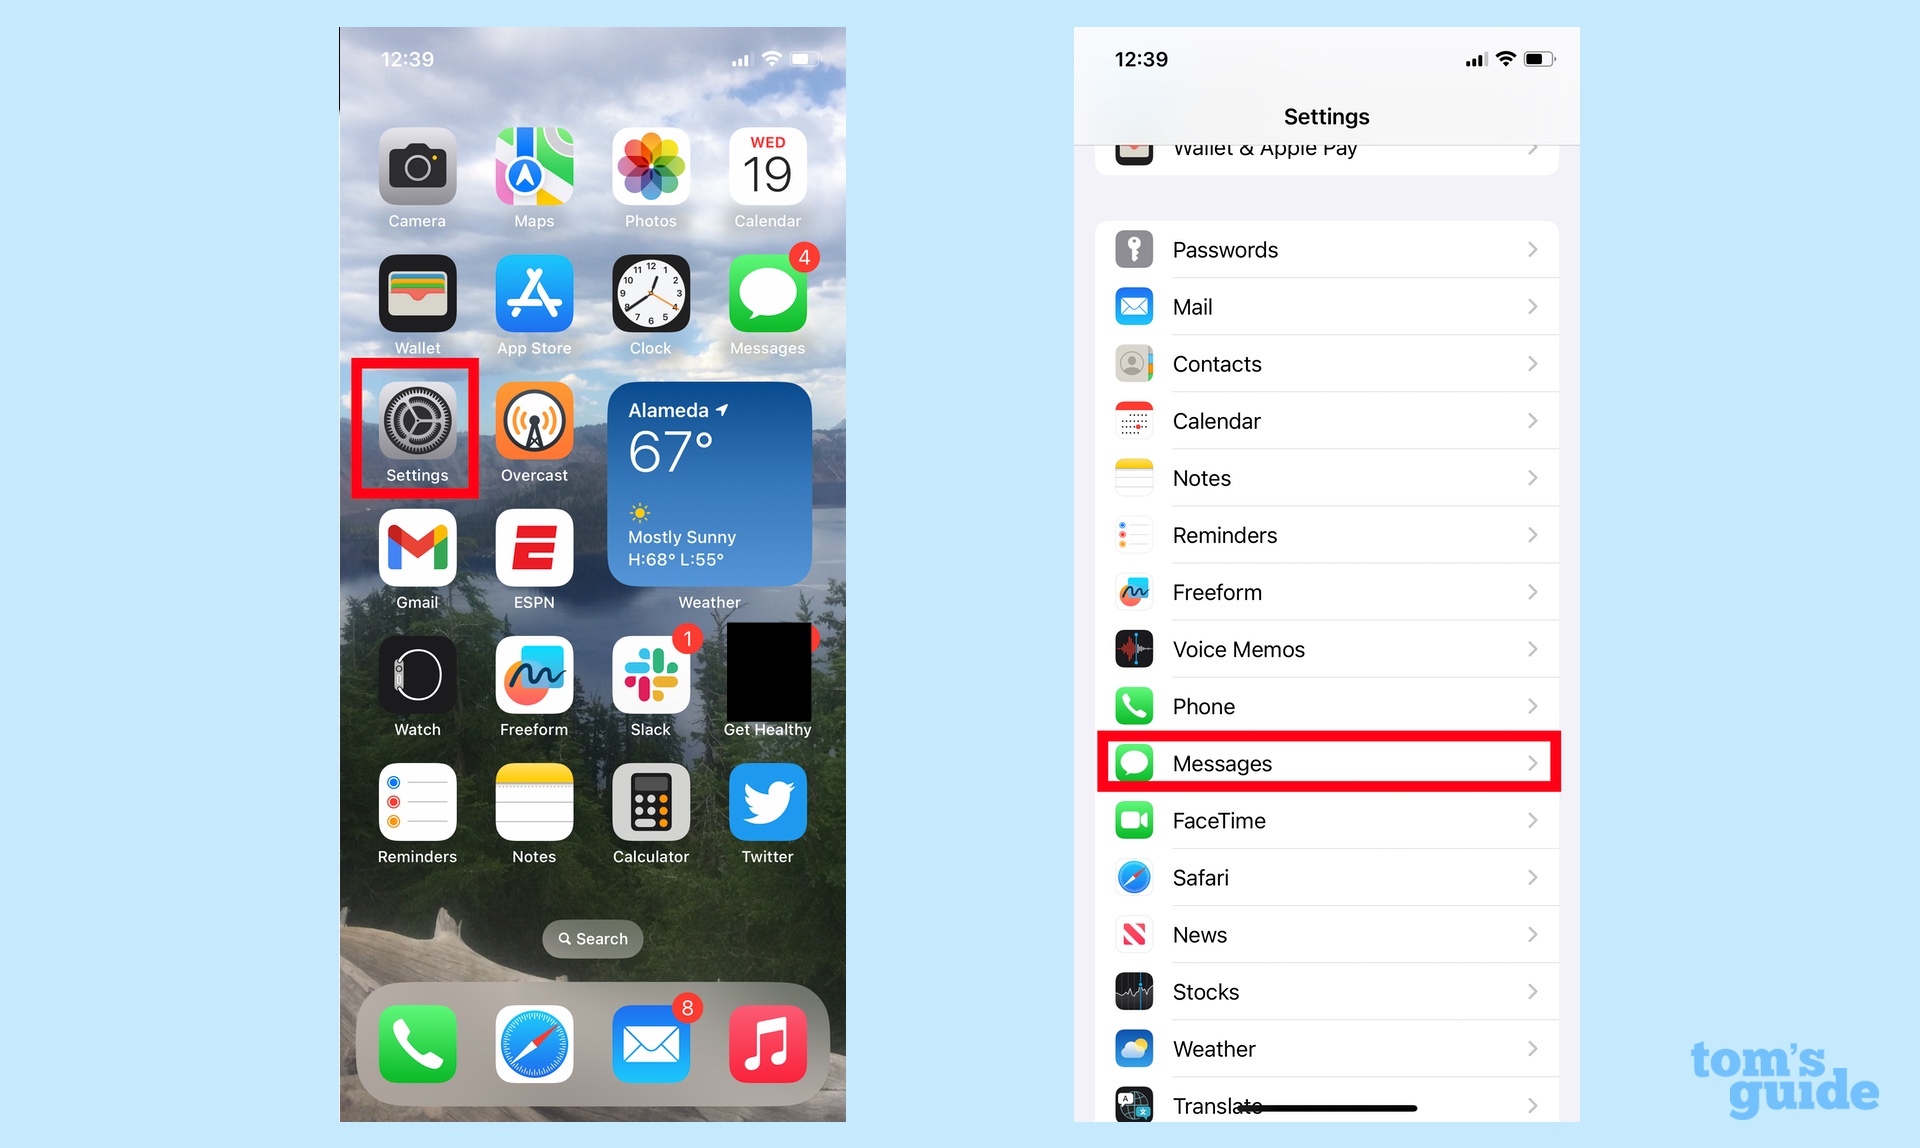
Launch Settings, and select Messages.
2. Change your Check In data
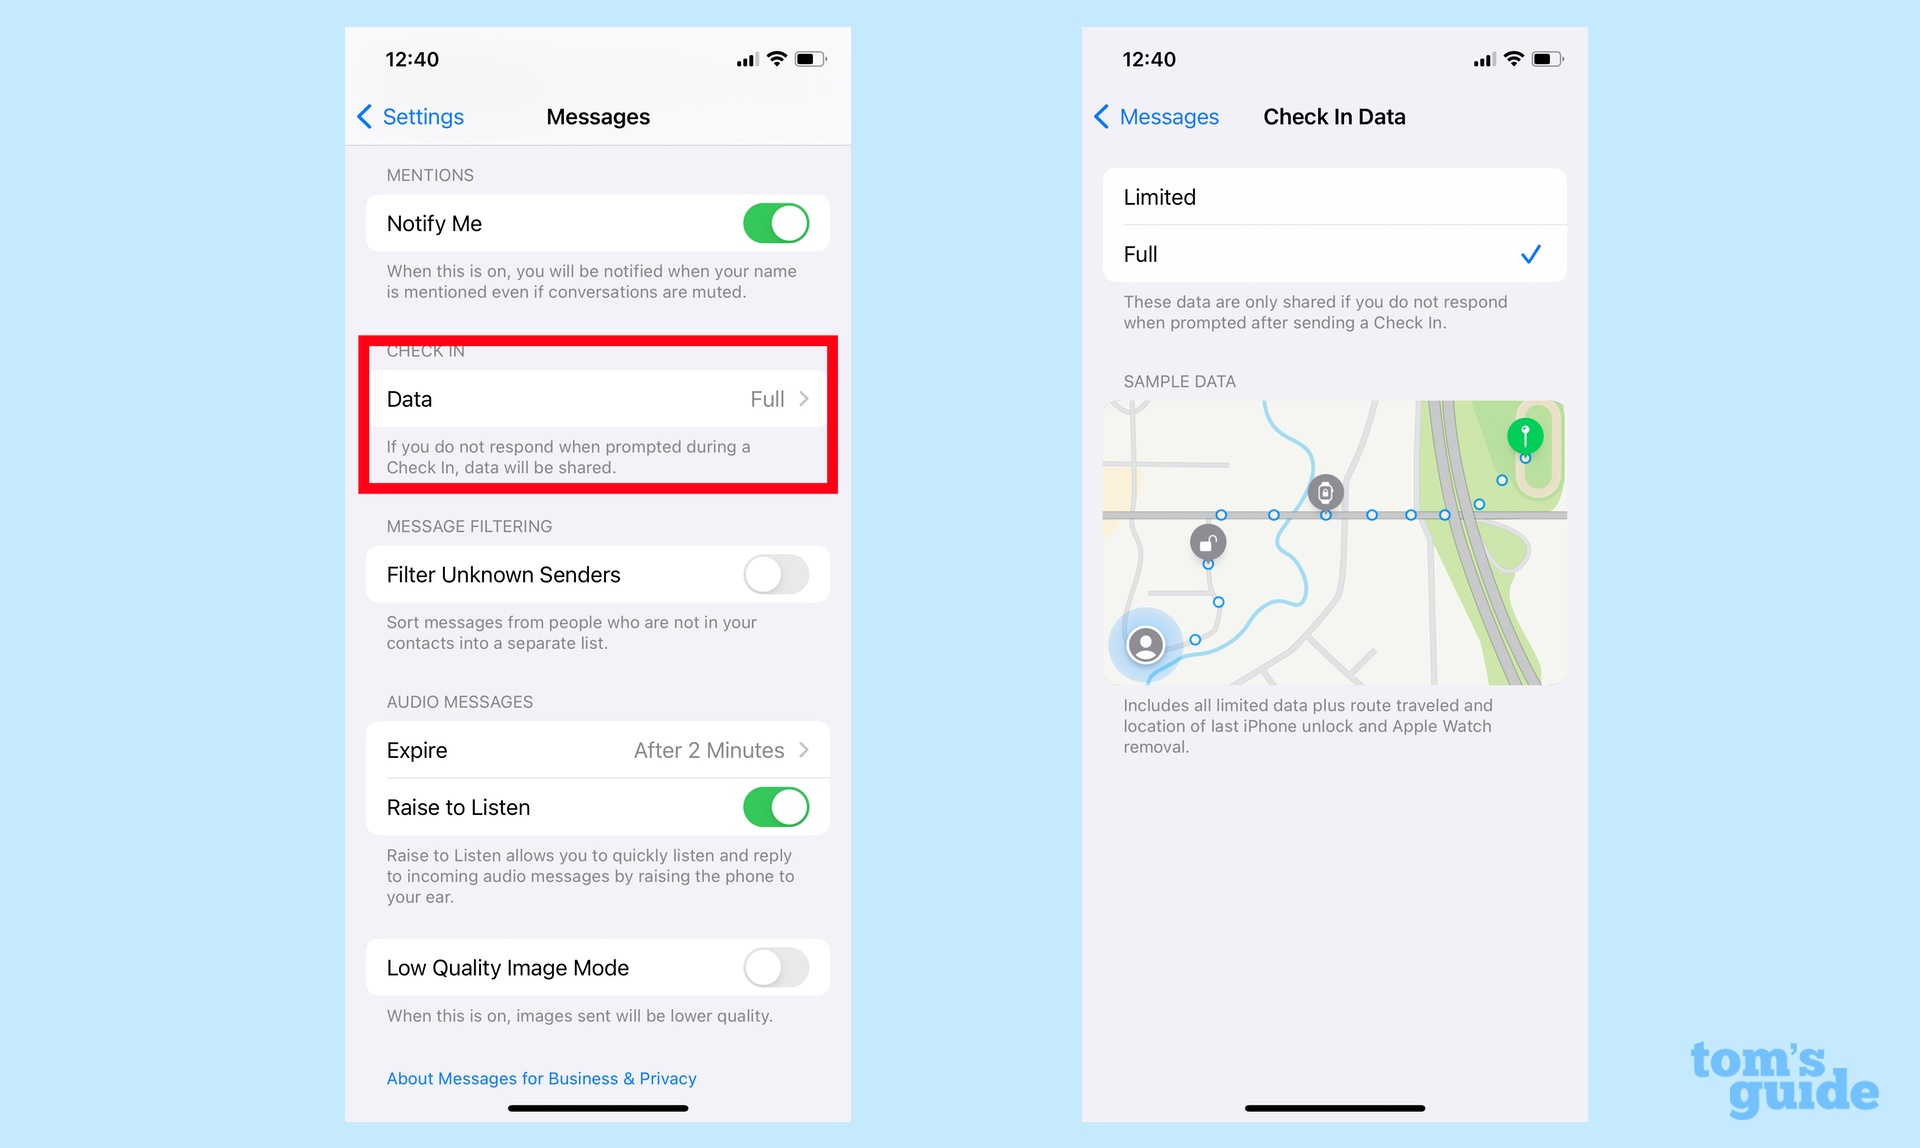
Scroll down to the Check In section of the Messages app and tap Data. On the ensuing screen, choose between Limited and Full, then tap the back arrow in the upper left to save your choice.
And that's all there is to managing Check In. But we've got more on Apple's latest iPhone software update based on our hands-on time with the iOS 17 public beta.
We can show you how to set up StandBy mode as well as how to enable the iPhone camera level. If you want to know about the new features in iOS 17 Safari, we can tell you how to set up browsing profiles and how to get Siri to read articles to you in the Safari app.
Philip Michaels is a Managing Editor at Tom's Guide. He's been covering personal technology since 1999 and was in the building when Steve Jobs showed off the iPhone for the first time. He's been evaluating smartphones since that first iPhone debuted in 2007, and he's been following phone carriers and smartphone plans since 2015. He has strong opinions about Apple, the Oakland Athletics, old movies and proper butchery techniques. Follow him at @PhilipMichaels.

