How to use PowerRename on Windows 11
PowerRename is a Windows Shell extension that enables easy bulk renaming
If you've not yet heard of Windows PowerRename, you've been missing out, as it's awesome. Part of the Microsoft PowerToys selection of Shell extensions, it's a handy feature for anyone who has to deal with lots of files on a regular basis.
By default, Windows 11's renaming function is pretty limited. You can rename a single file, or rename a group of files to the same filename with a numeric extension, but there's no way to perform complex naming functions like case changes or find and replace. PowerRename changes that, offering numerous ways to play with batch renaming.
It isn't perfect, and in my opinion is still not as good as the default macOS renaming tool. This is because, while PowerRename is great, it is limited to finding and replacing in order to rename. You have to specify text to replace in order to replace it, meaning you cant just blanket rename all files from scratch. This is a pain if you're dealing with a bunch of files that all have different names. Something that macOS doesn't have, though, is the case changing tools, which allow you to quickly change cases in a variety of ways with just a mouse click.
Regardless, PowerRename is a big step up over the default renaming function of Windows, and here's how to use it.
How to use PowerRename on Windows 11
To use this feature, you'll need to have Microsoft PowerToys installed. We can show you how to get PowerToys in Windows 11 if you aren't sure how.
1. Switch PowerRename on

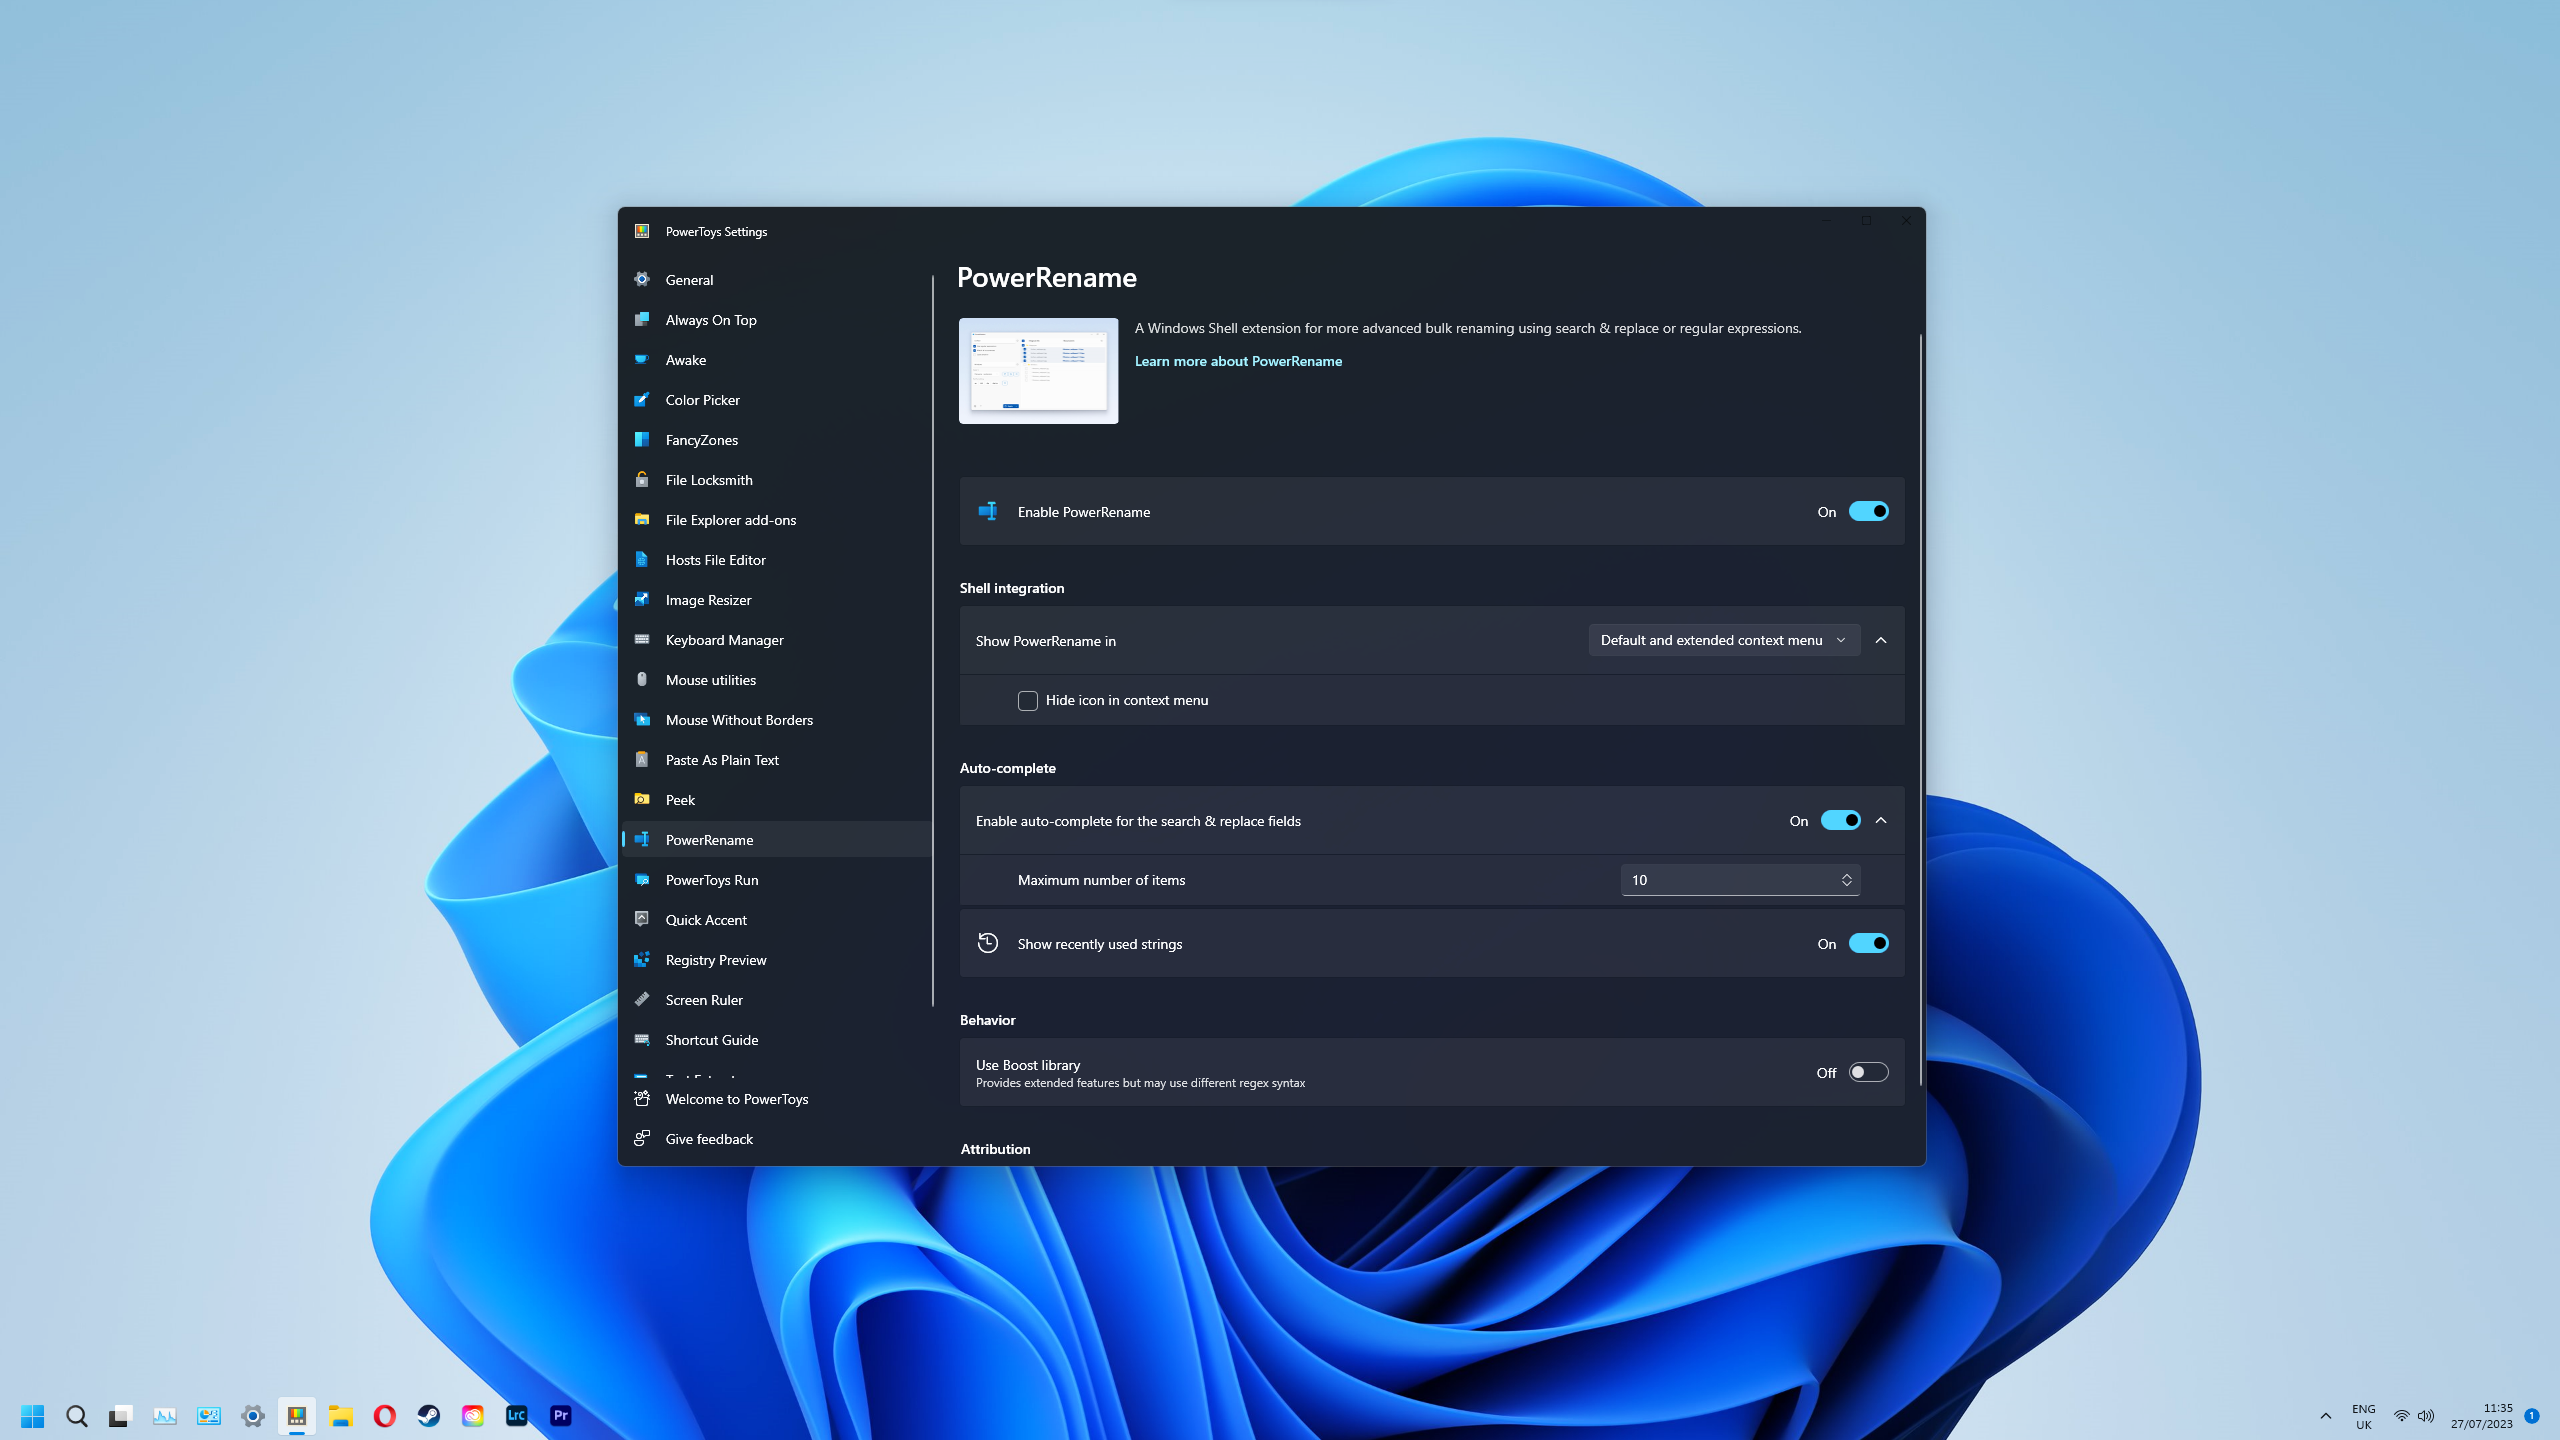
First you need to ensure PowerRename is enabled in PowerToys. Open PowerToys via the Start menu, then scroll down to PowerRename and toggle on Enable PowerRename.
2. Right-click files in Explorer
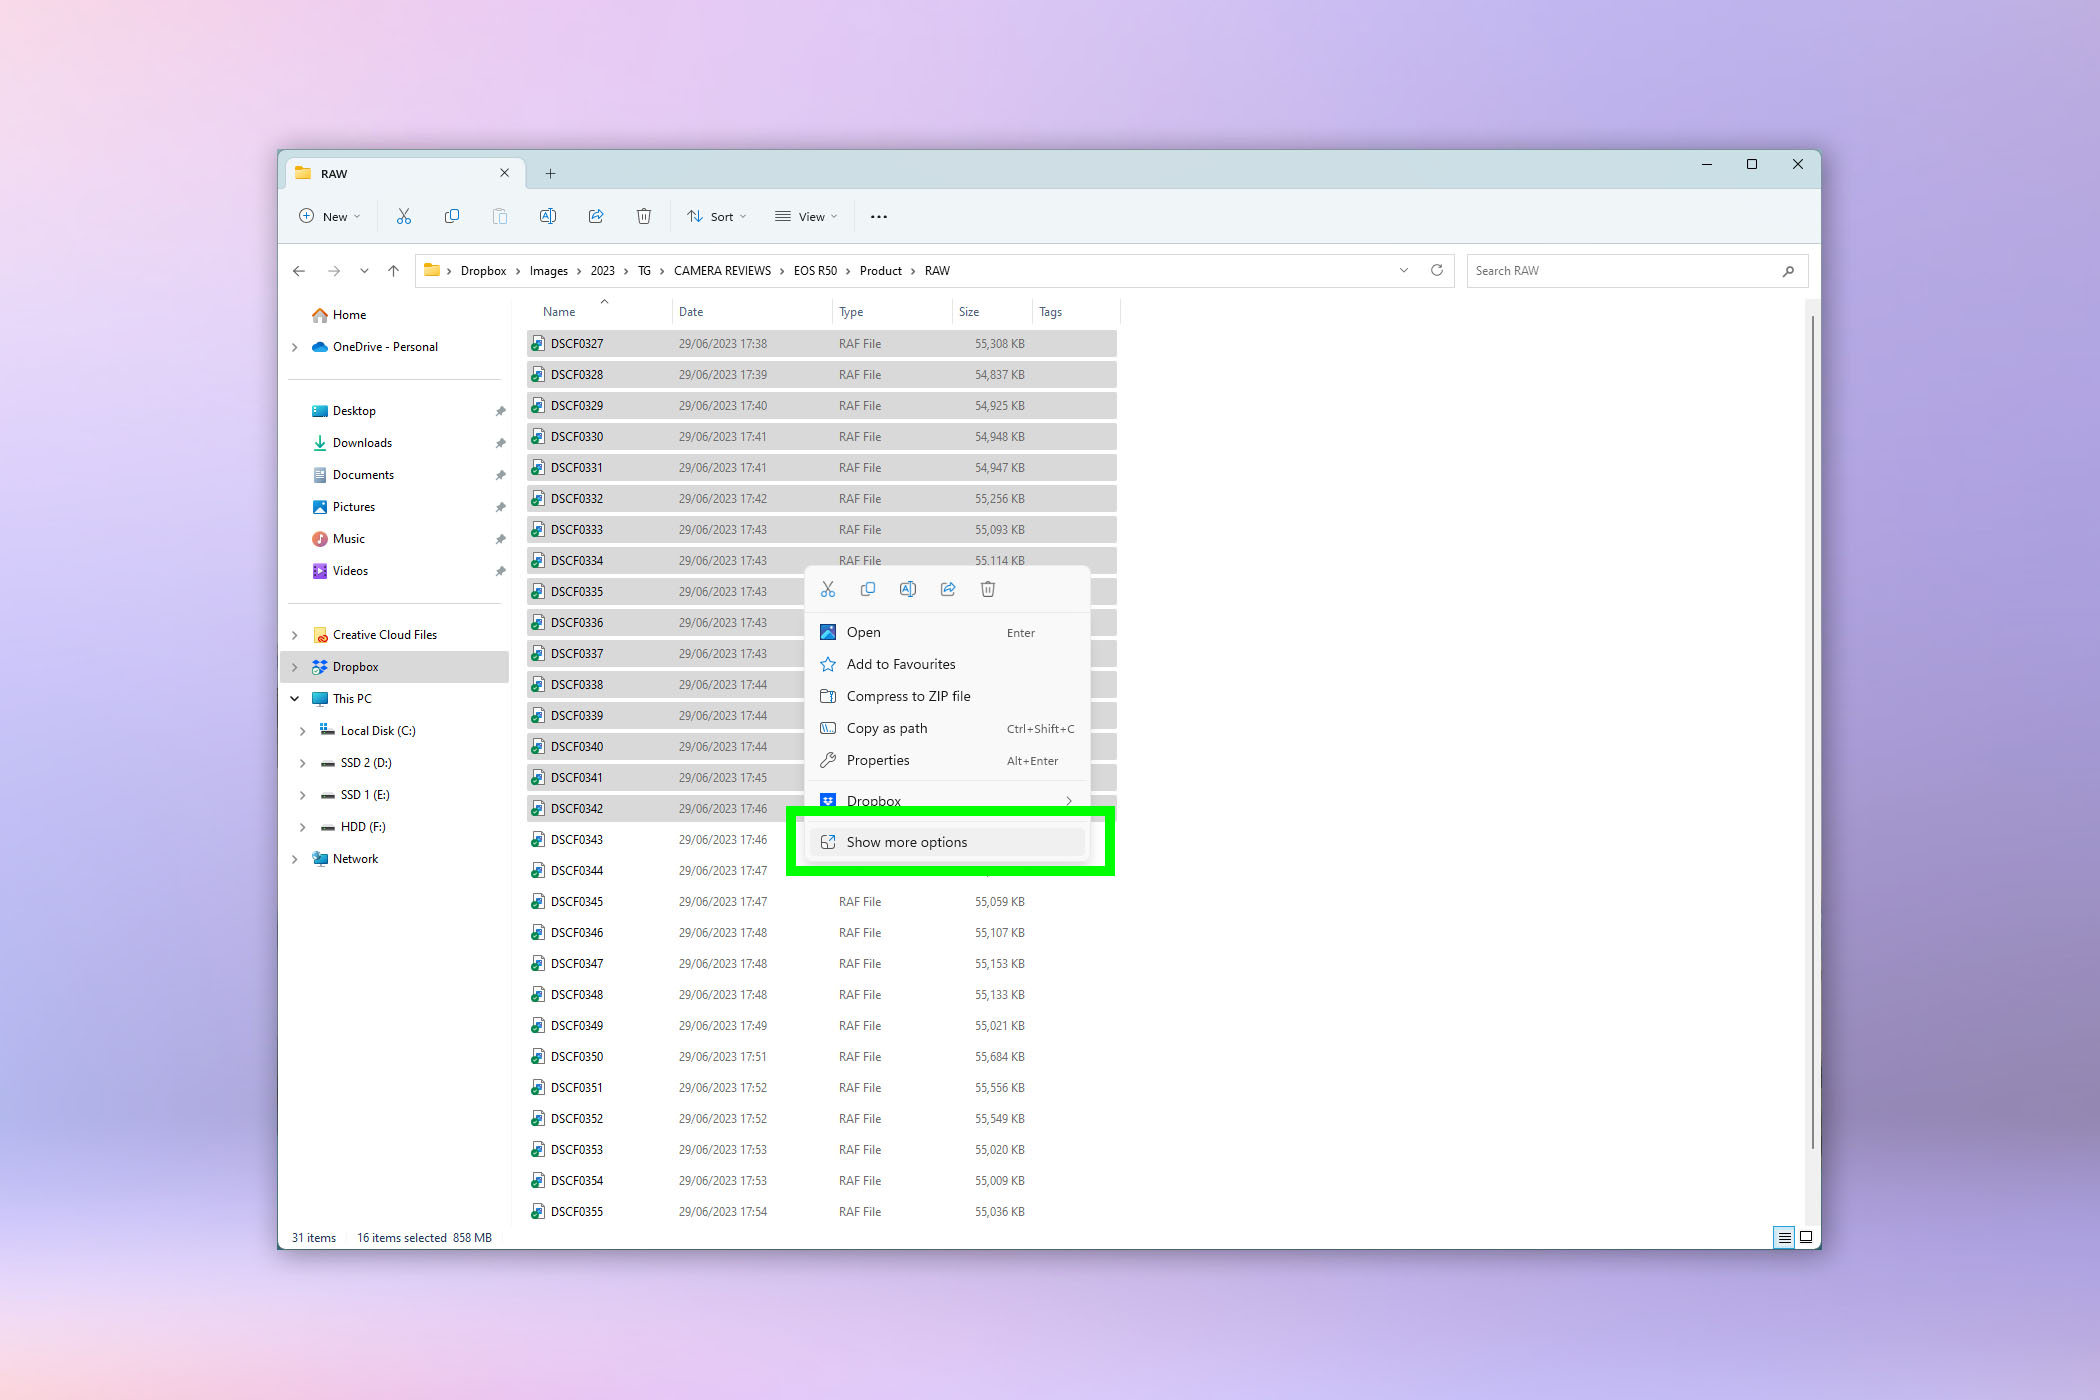
Now find the files you want to rename in Explorer and select them all. Now right-click them and select Show more options.
3. Click PowerRename
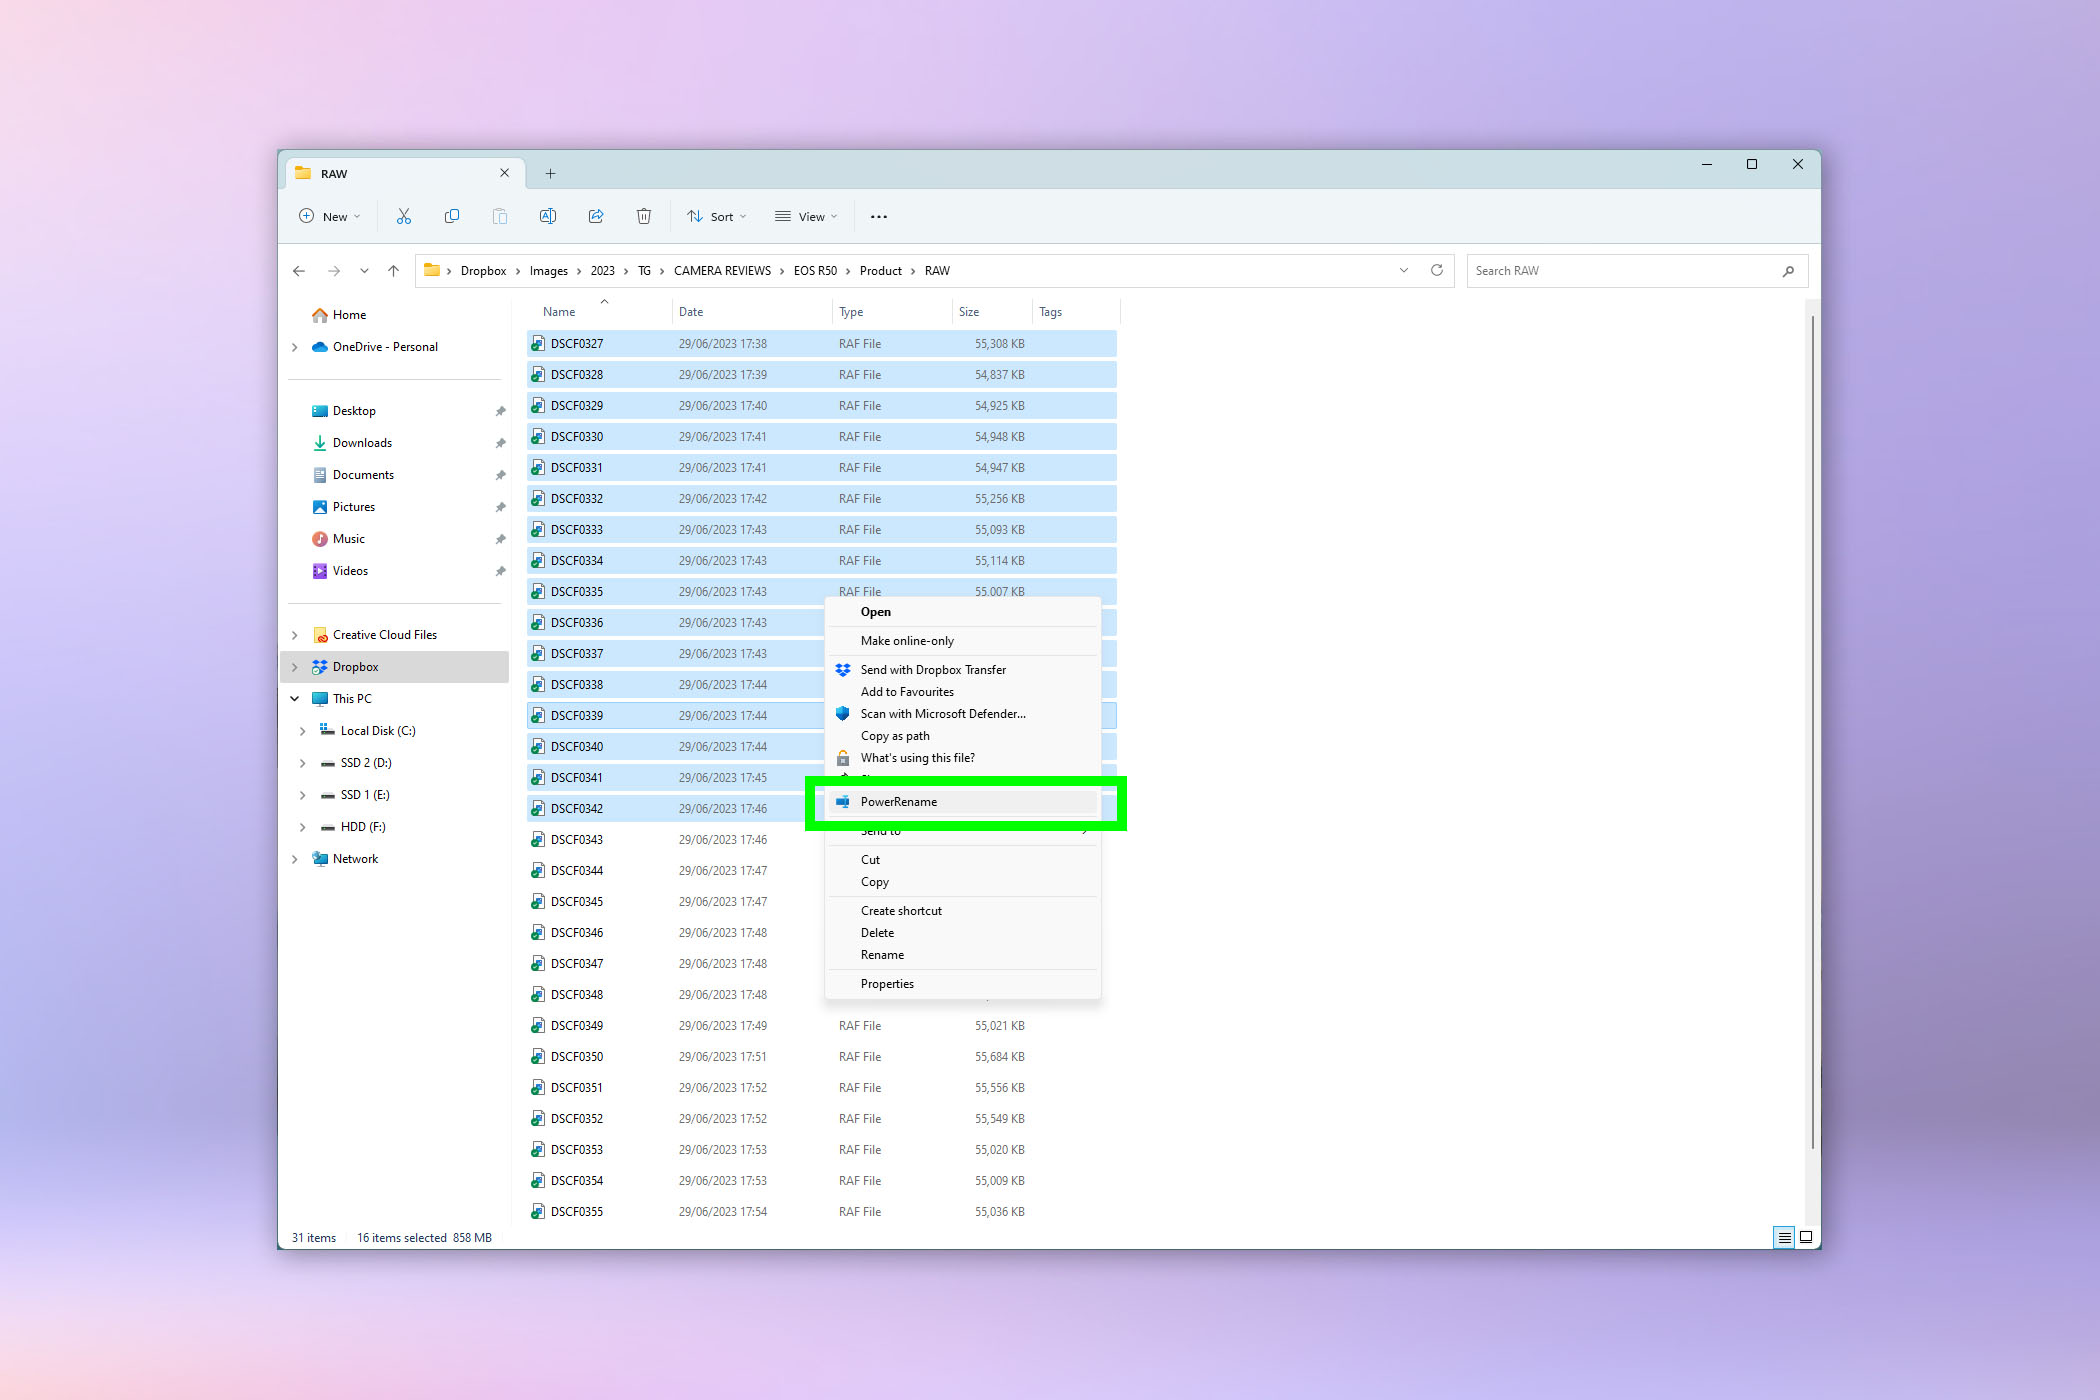
From the more options list (which is essentially the classic right click menu without the silly Windows 11 skin over it), click powerRename. The PowerRename application will now open.
4. Quickly change text formatting

We'll now run you through a few PowerRename tools. Ensure you have all the files selected that you want to rename by checking each box next to the file name. To quickly change text formatting, click one of the aa/AA/Aa/Aa Aa buttons under Text formatting. You'll see the new format in the Renamed column on the right hand side.
5. Find characters in filenames

To locate specific characters in file names, enter a value into the Find field.
6. Replace text in filenames

To replace found text in filenames, enter characters into the replace field.
7. Apply (and close)

When you're happy, click Apply to rename the files. If you don't have any more renaming to do on this batch, click the chevron next to Apply, then click Apple and close. Your files will now be renamed.

Learn more ways to use Windows 11 with our range of tutorials. We can show you how to get a transparent taskbar on Windows 11. We can also teach you how to customize the Windows 11 Start menu and how to change the Windows 11 Start menu back to Windows 10, if you're sick of the Windows 11 layout.
Sign up to get the BEST of Tom's Guide direct to your inbox.
Get instant access to breaking news, the hottest reviews, great deals and helpful tips.

Peter is Reviews Editor at Tom's Guide. As a writer, he covers topics including tech, photography, gaming, hardware, motoring and food & drink. Outside of work, he's an avid photographer, specialising in architectural and portrait photography. When he's not snapping away on his beloved Fujifilm camera, he can usually be found telling everyone about his greyhounds, riding his motorcycle, squeezing as many FPS as possible out of PC games, and perfecting his espresso shots.
-
Colotecho I'm sure this was derived from MS-DOS, not the Mac. If anything Apple stole this from a DOS or Unix OS.Reply
