How to use Instagram Reels — everything you need to know about the TikTok competitor
Here's how to use Instagram Reels
Instagram now allows you to share short videos in the format of "Instagram Reels," a dedicated section of the application that's currently rivaling TikTok, another short-form video creation platform that's gained immense popularity over the past few years.
Similar to TikTok, Instagram Reels lets you record, edit and post 15-second-long videos (up to 60 seconds) with other users via a separate Feed page on Instagram's Explore page. First released in 2019, the feature is now accessible in over 50 countries, including the US, UK, Canada, Australia, and more, on both iOS and Android devices.
- How to turn on Instagram's two-factor authentication
- Here's how to save photos from Instagram
- You can now hide Facebook and Instagram likes — here's how
Although Instagram Reels became widely available after TikTok become a big hit with Gen Z, the feature has still turned out to be successful. Many brands and content creators alike have been experimenting with the feature all the while producing videos on TikTok. And we've already seen a handful of big brands like Walmart taking advantage of Instagram Reels.
So if you're curious about Instagram Reels or eager to give your content creator career a try, we've got you covered. Below we've included a simple guide on how to use Instagram Reels, including creating content, editing it and posting your masterpiece for the world to see.
And to make sure that your content truly stands out, we'll also talk about all the different tools that are at your disposal, including audio overlay, creative filters, stickers and more. One thing to note, however, is that we've put together this guide using an iPhone, so some of the steps may differ if you're an Android user.
How to use Instagram Reels
How to create Instagram Reels
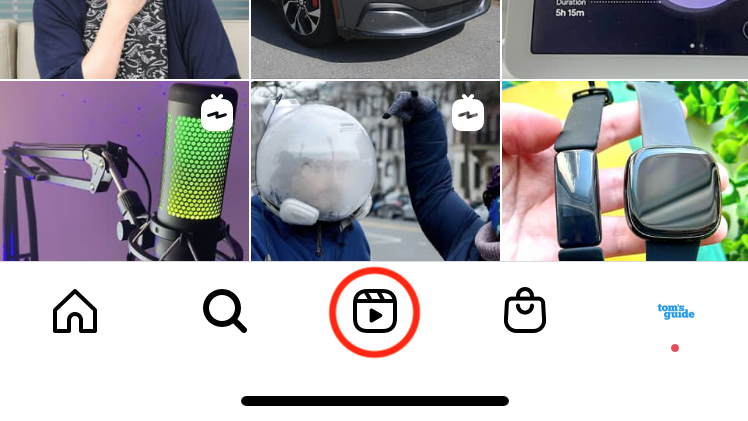
1. Launch the Instagram app, and you should be able to see a navigation bar at the bottom of the screen. Now, click on the icon in the middle indicating a film clapper with a play button located in the center.
2. You have now launched Instagram Reels. You can swipe from the bottom to the top of your screen to browse through your feed and view recommended channels. Next, tap on the camera icon located at the top right center of the screen as indicated below.
Sign up to get the BEST of Tom's Guide direct to your inbox.
Get instant access to breaking news, the hottest reviews, great deals and helpful tips.
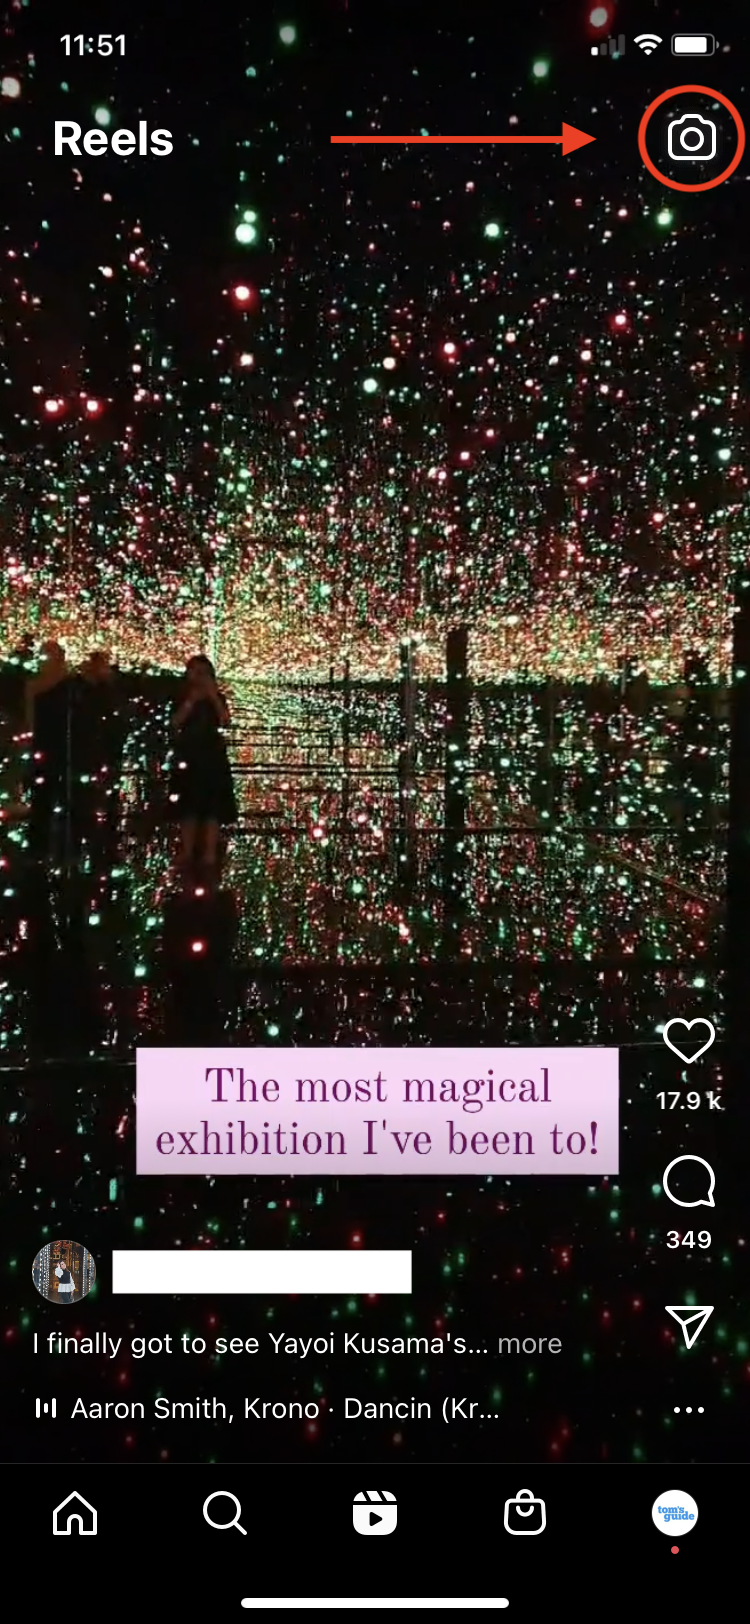
Alternatively, you can create a new Reels post by going to your Home Feed Page and tapping the plus icon located at the top right corner of the screen.
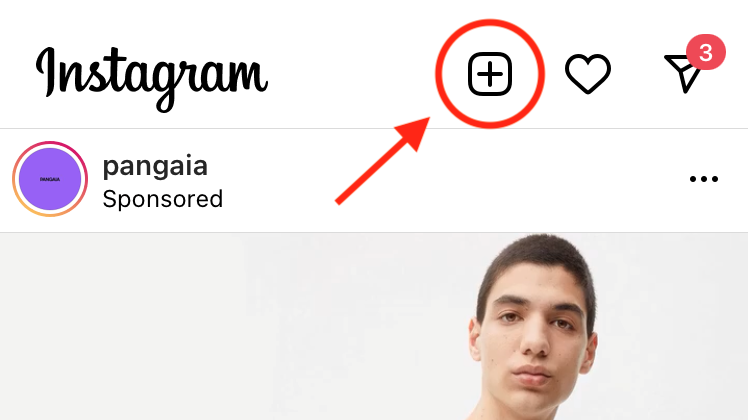
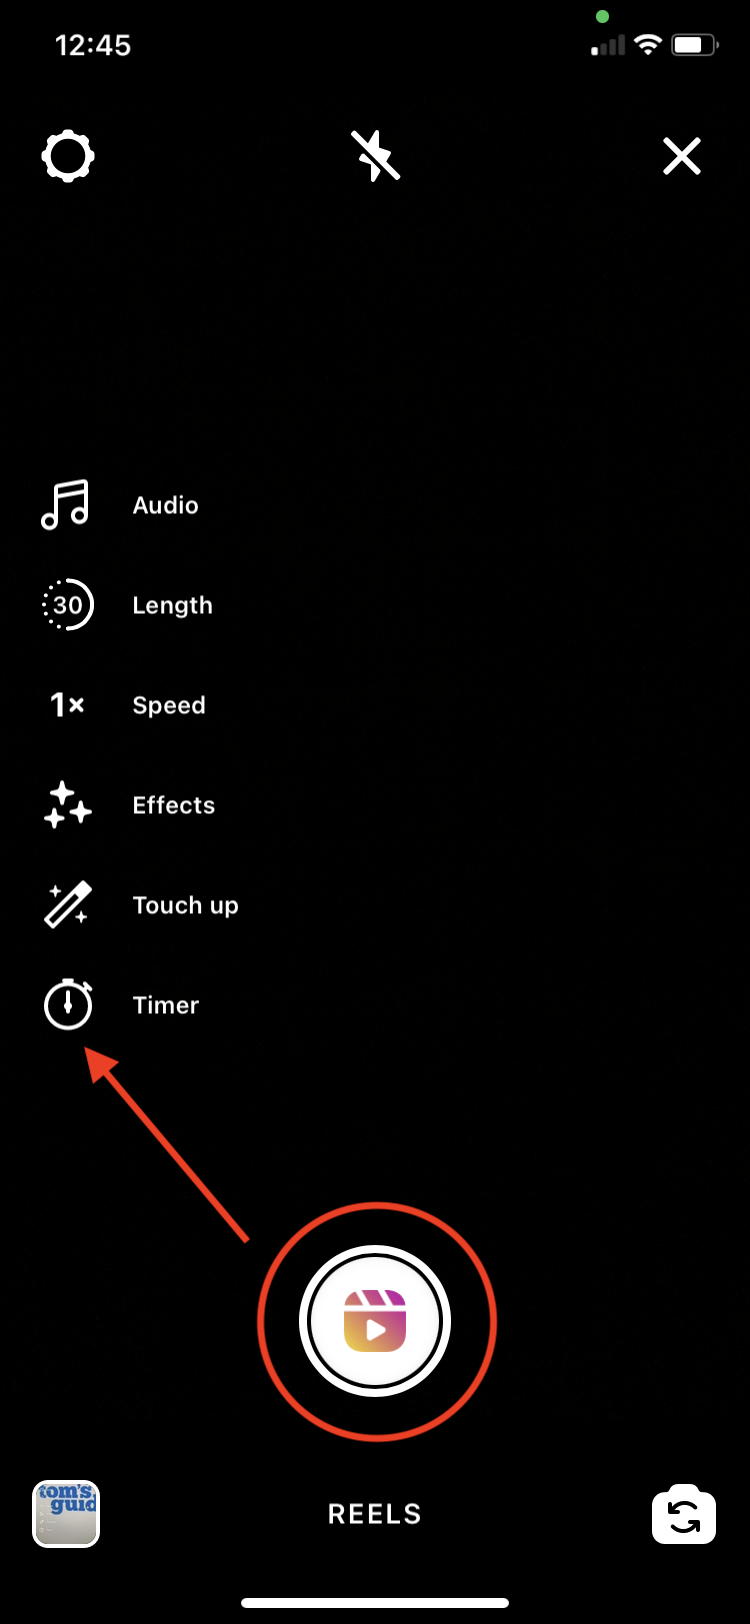
3. Now that you've opened the creator tab, feel free to record your first Instagram Reel by holding the round button (as indicated below). The recording will pause as soon as you let go of the button and can resume if you press it again.
On the left sidebar, you will also be presented with a number of tools and features that you can use to unleash your creativity. For example, you can:
- Add audio overlay to your Reel by either selecting a voiceover option or to adding the music of your choice from Instagram's library.
- Change the length of your Reel (15-30-60 seconds)
- Adjust the speed at which your video is recorded
- Add filters and special effects
- Use Instagram's "Touch up" feature
- Set a countdown timer that will start before the recording commences
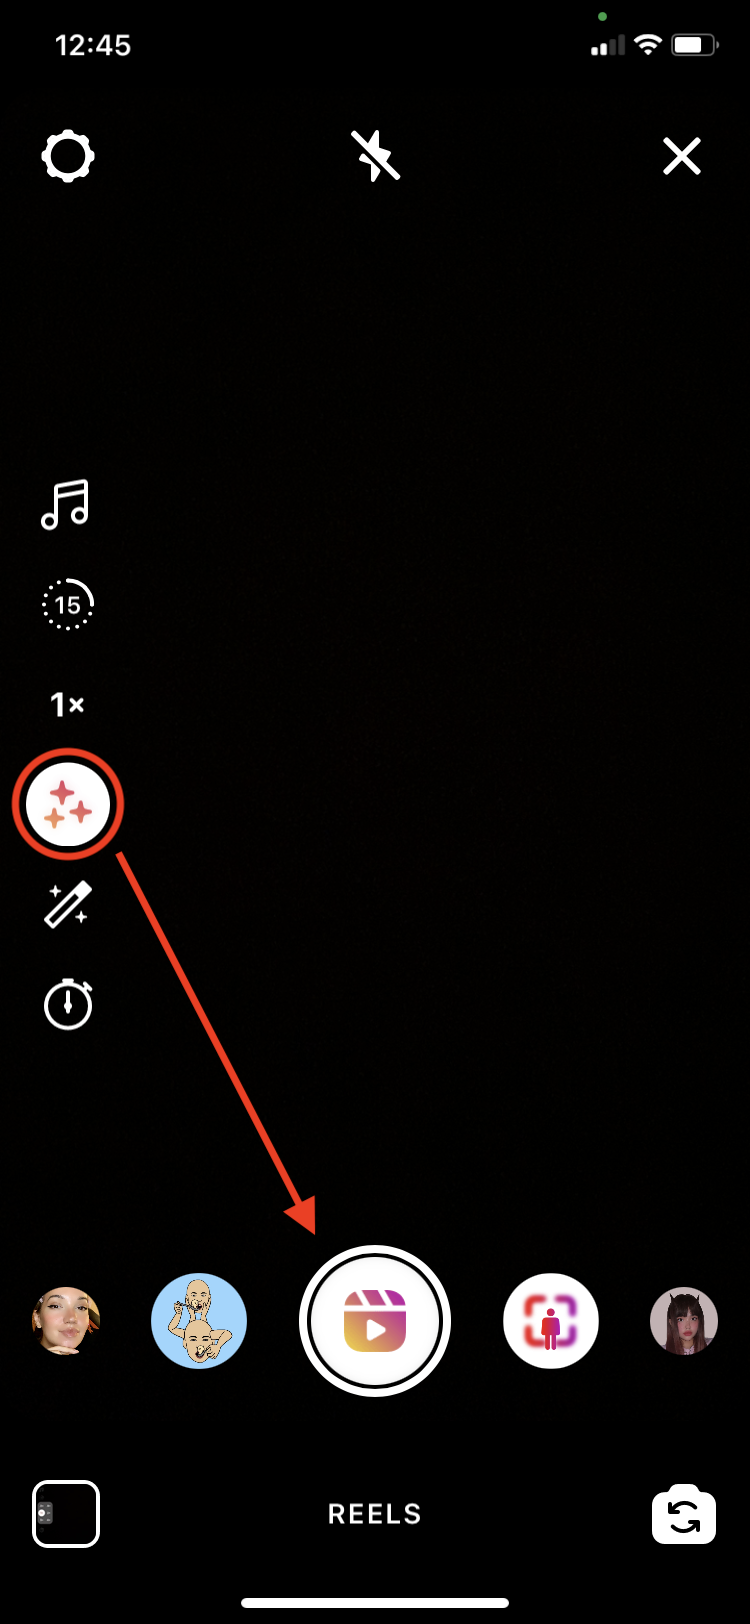
As shown below, you can select from an abundance of different filters and special effects, so feel free to experiment at this stage until you find the one that fits your video most.
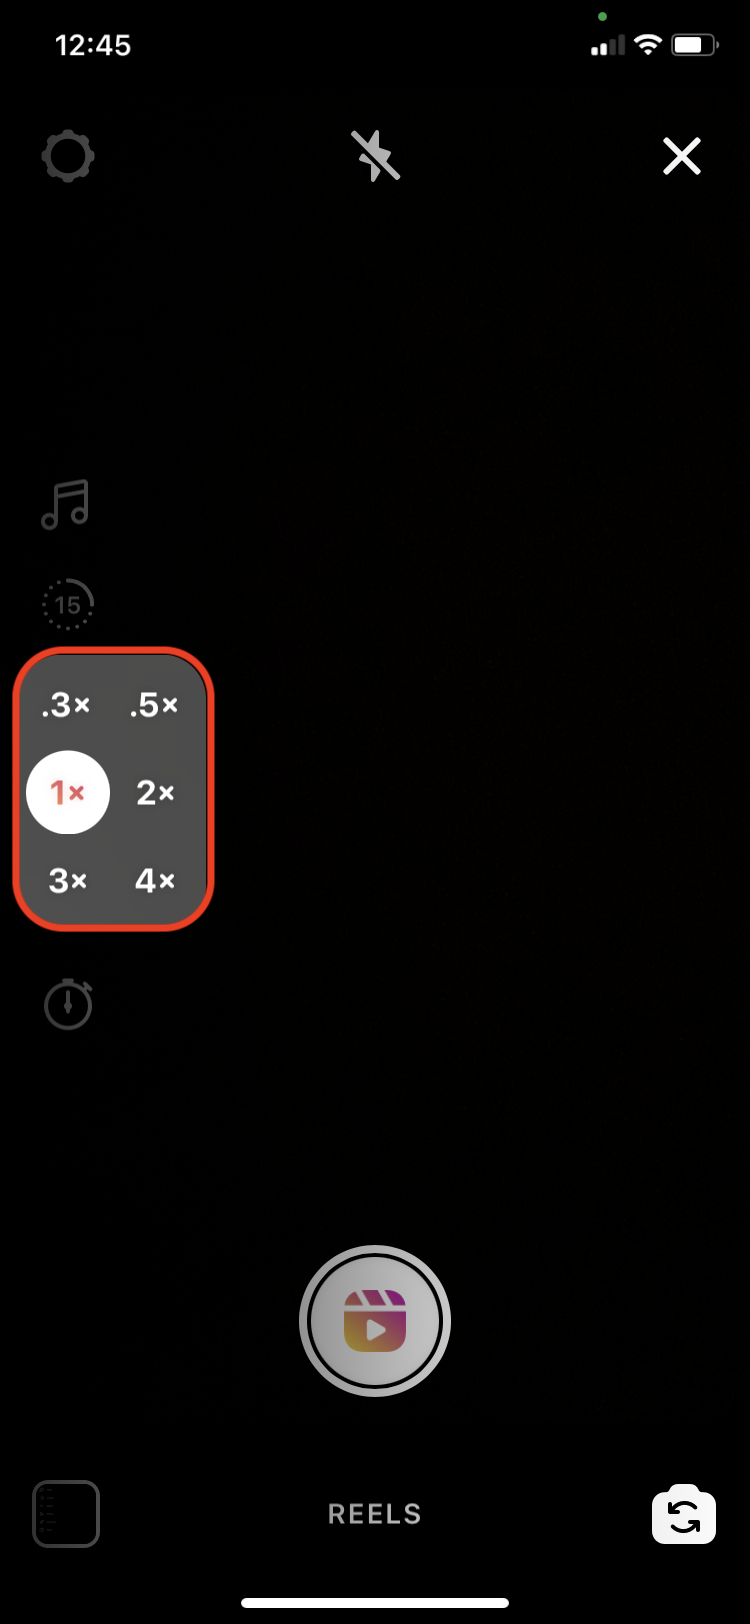
If you want to add that slow-mo effect to your Reels, you can easily do so by adjusting the speed at which your video is recorded. As indicated below, you can choose from six different speeds.
This tool will come in handy if you're recording the video by yourself and want to avoid that awkward "setting-up shot" at the beginning of your Reel. As we mentioned earlier, you can easily set up a countdown timer to give yourself some time to strike the right pose before recording starts.
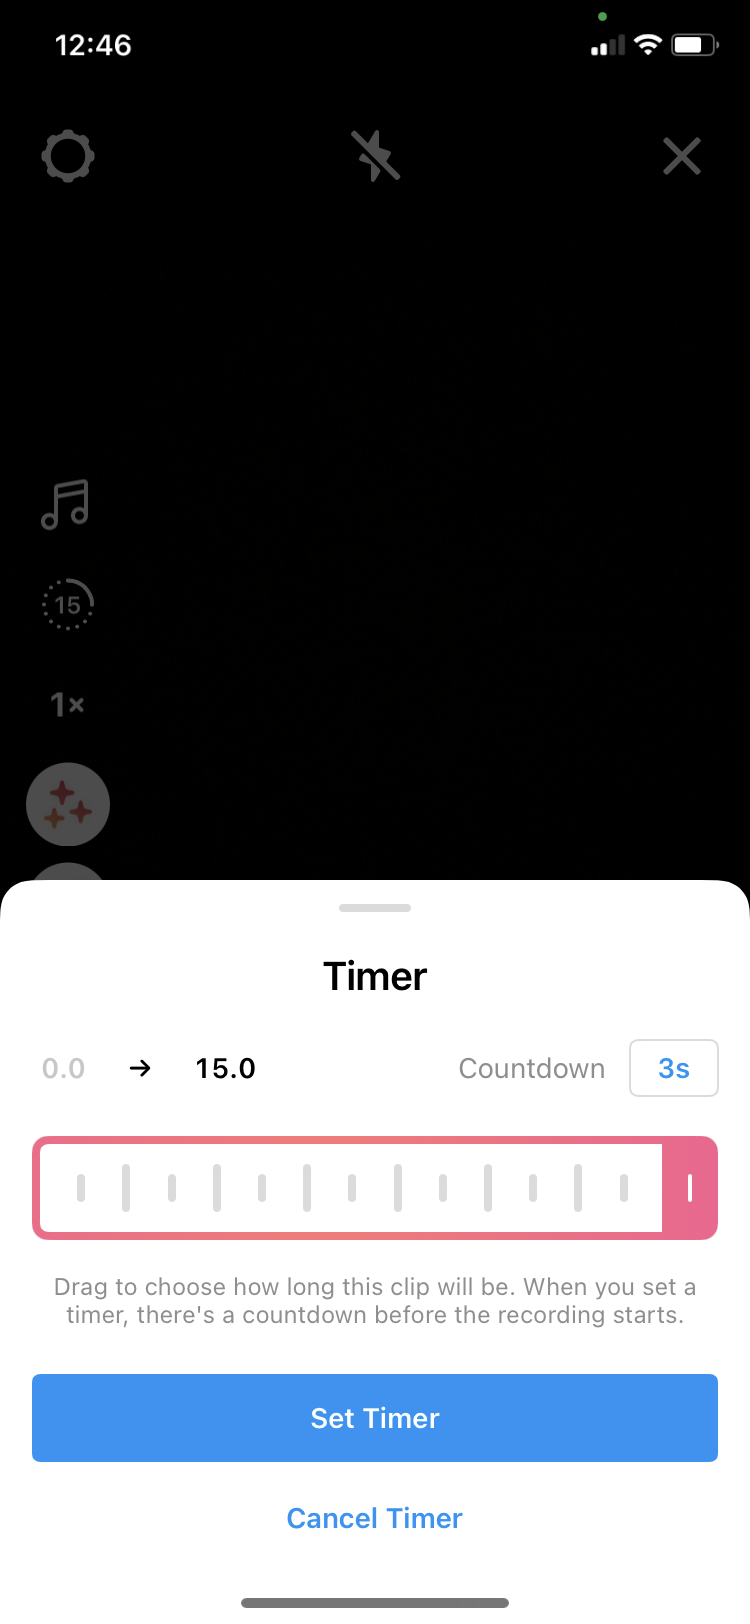
4. This is not an essential step, though it could come in handy before recording, editing, and posting your Instagram Reel. Back in Step 3, you can select the settings icon located at the top left corner of the screen, which will trigger your camera settings.
You can now browse through all the controls available, and adjust those to your preference. For example, you can set your front camera as default and/or choose which side of the screen you want your camera toolbar to be on.
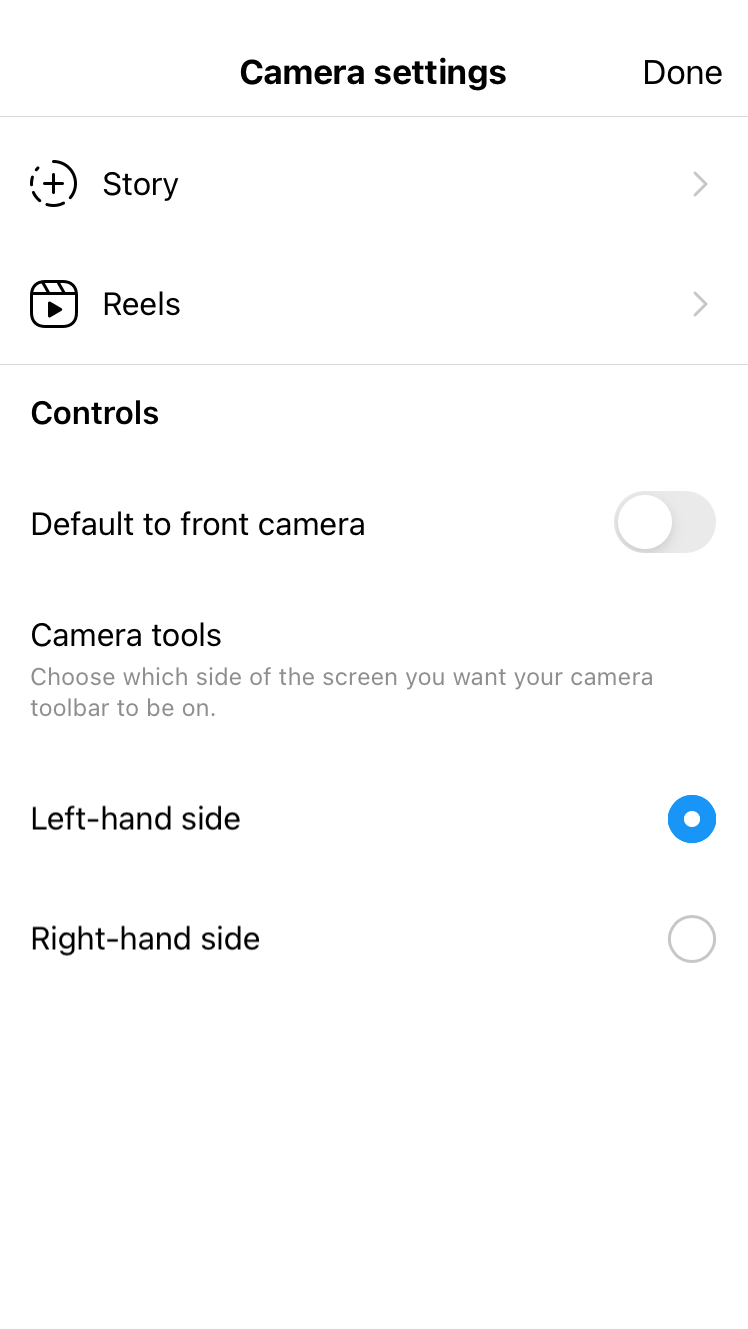
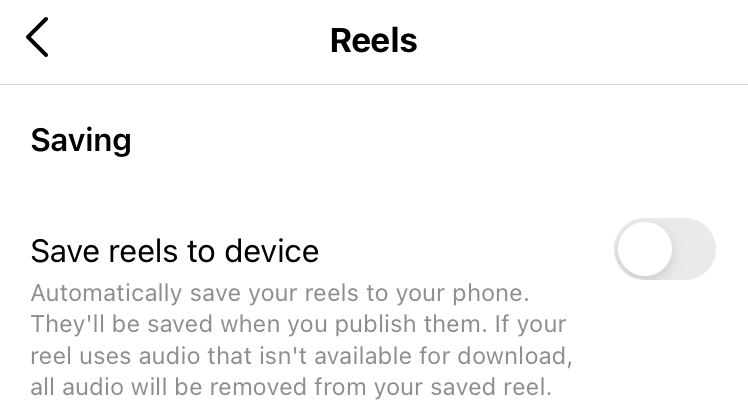
You can also tap on the Reels settings, which should open a new option to 'save your reels to device'. This will automatically save all of your reels directly to your library as soon as they're published.
One thing to note, however, is that if your Reel happens to use audio that either isn't available for download or subject to copyright, all audio will be removed from your saved Reel.
How to edit and share Instagram Reels
How to edit & share Instagram Reels
Congrats on recording your first Instagram Reel! Now comes the most exciting part: editing.
1. As soon as you've recorded your Reel, feel free to click on the 'Preview' button, which should in turn open the editing menu.
As you can see on the screenshot below, you will have access to a variety of tools and controls, with which you can:
- Save your recorded Reel
- Add audio overlay by selecting music of your choice
- Add audio overlay by recording a voiceover
- Use additional filters and special effects
- Add funky still or GIF stickers to help better illustrate your content
- Draw directly on your Reel
- Type and add text of your choice
And yes, we've tried it all, so just a fair warning: you could easily spend 20 minutes at this stage of the process.
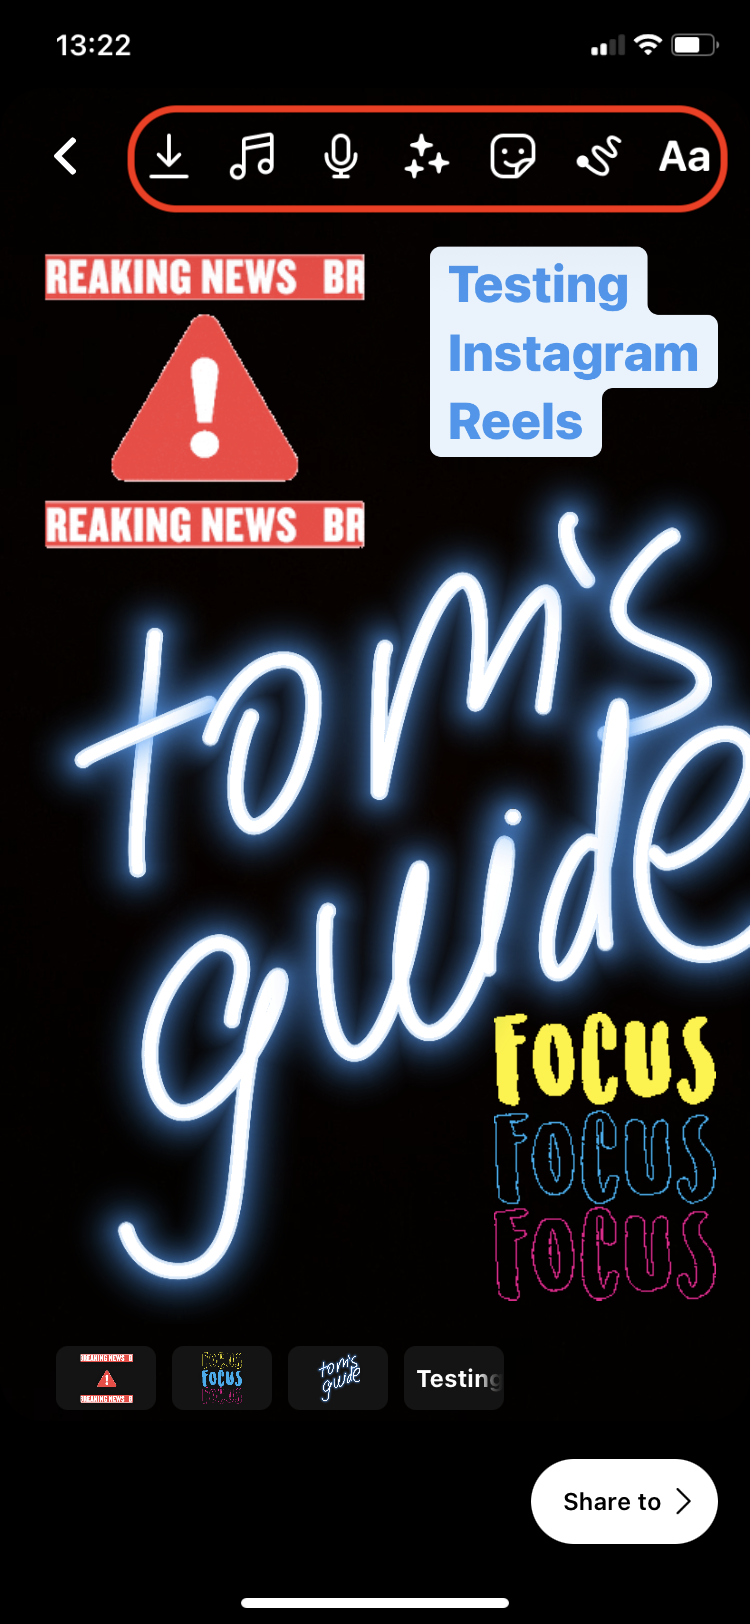
2. Once you're satisfied with the finished product, go ahead and click on 'Share to' button in order to share your first Instagram Reel. Here you can write an appropriate caption with a few of the trending hashtags, tag people and select whether you want the Reel to be shared on your profile feed.
You can also crop the profile image so that it best suits your profile grid.
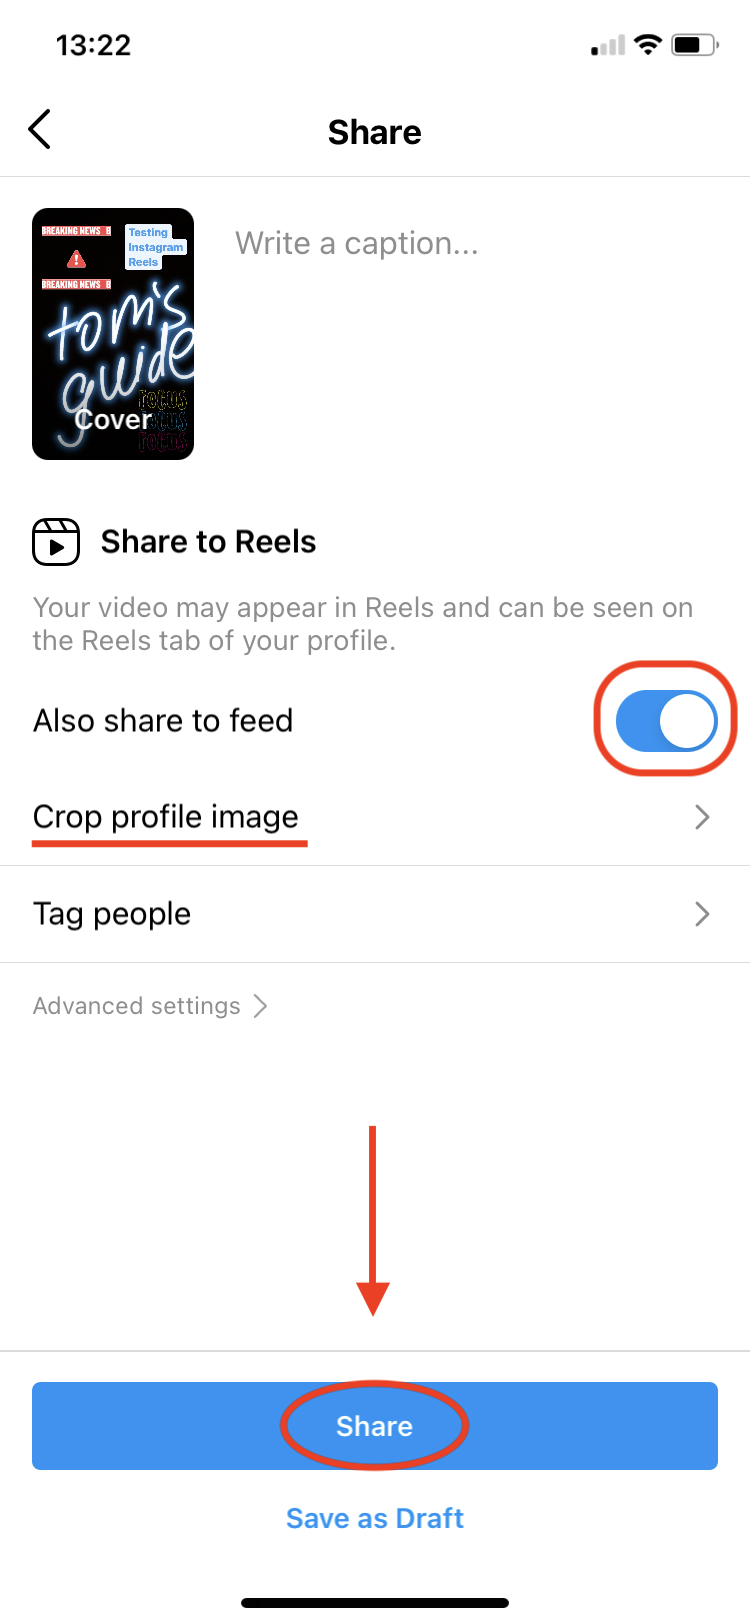
3. You can now either click on 'Share' or 'Save as Draft' if you wanted to post at a later time. Et voilà, you're all done. Congrats on sharing your first Instagram Reel!
- MORE: These are the best camera phones you can buy
- How to delete an Instagram account
- How to delete a TikTok account
- How to download Instagram Reels Videos

Denise is a Life Reporter at Newsweek, covering everything lifestyle-related, including health, relationships, personal finance, beauty and more. She was formerly a news writer at Tom’s Guide, regularly producing stories on all things tech, gaming software/hardware, fitness, streaming, and more. Her published content ranges from short-form news articles to long-form pieces, including reviews, buying guides, how-tos, and features. When she's not playing horror games, she can be found exploring East London with her adorable puppy. She’s also a part-time piano enthusiast and regularly experiments in the kitchen.
