How to use hot corners on Mac
Here's how to use hot corners on Mac and make the extremities of your screen useful
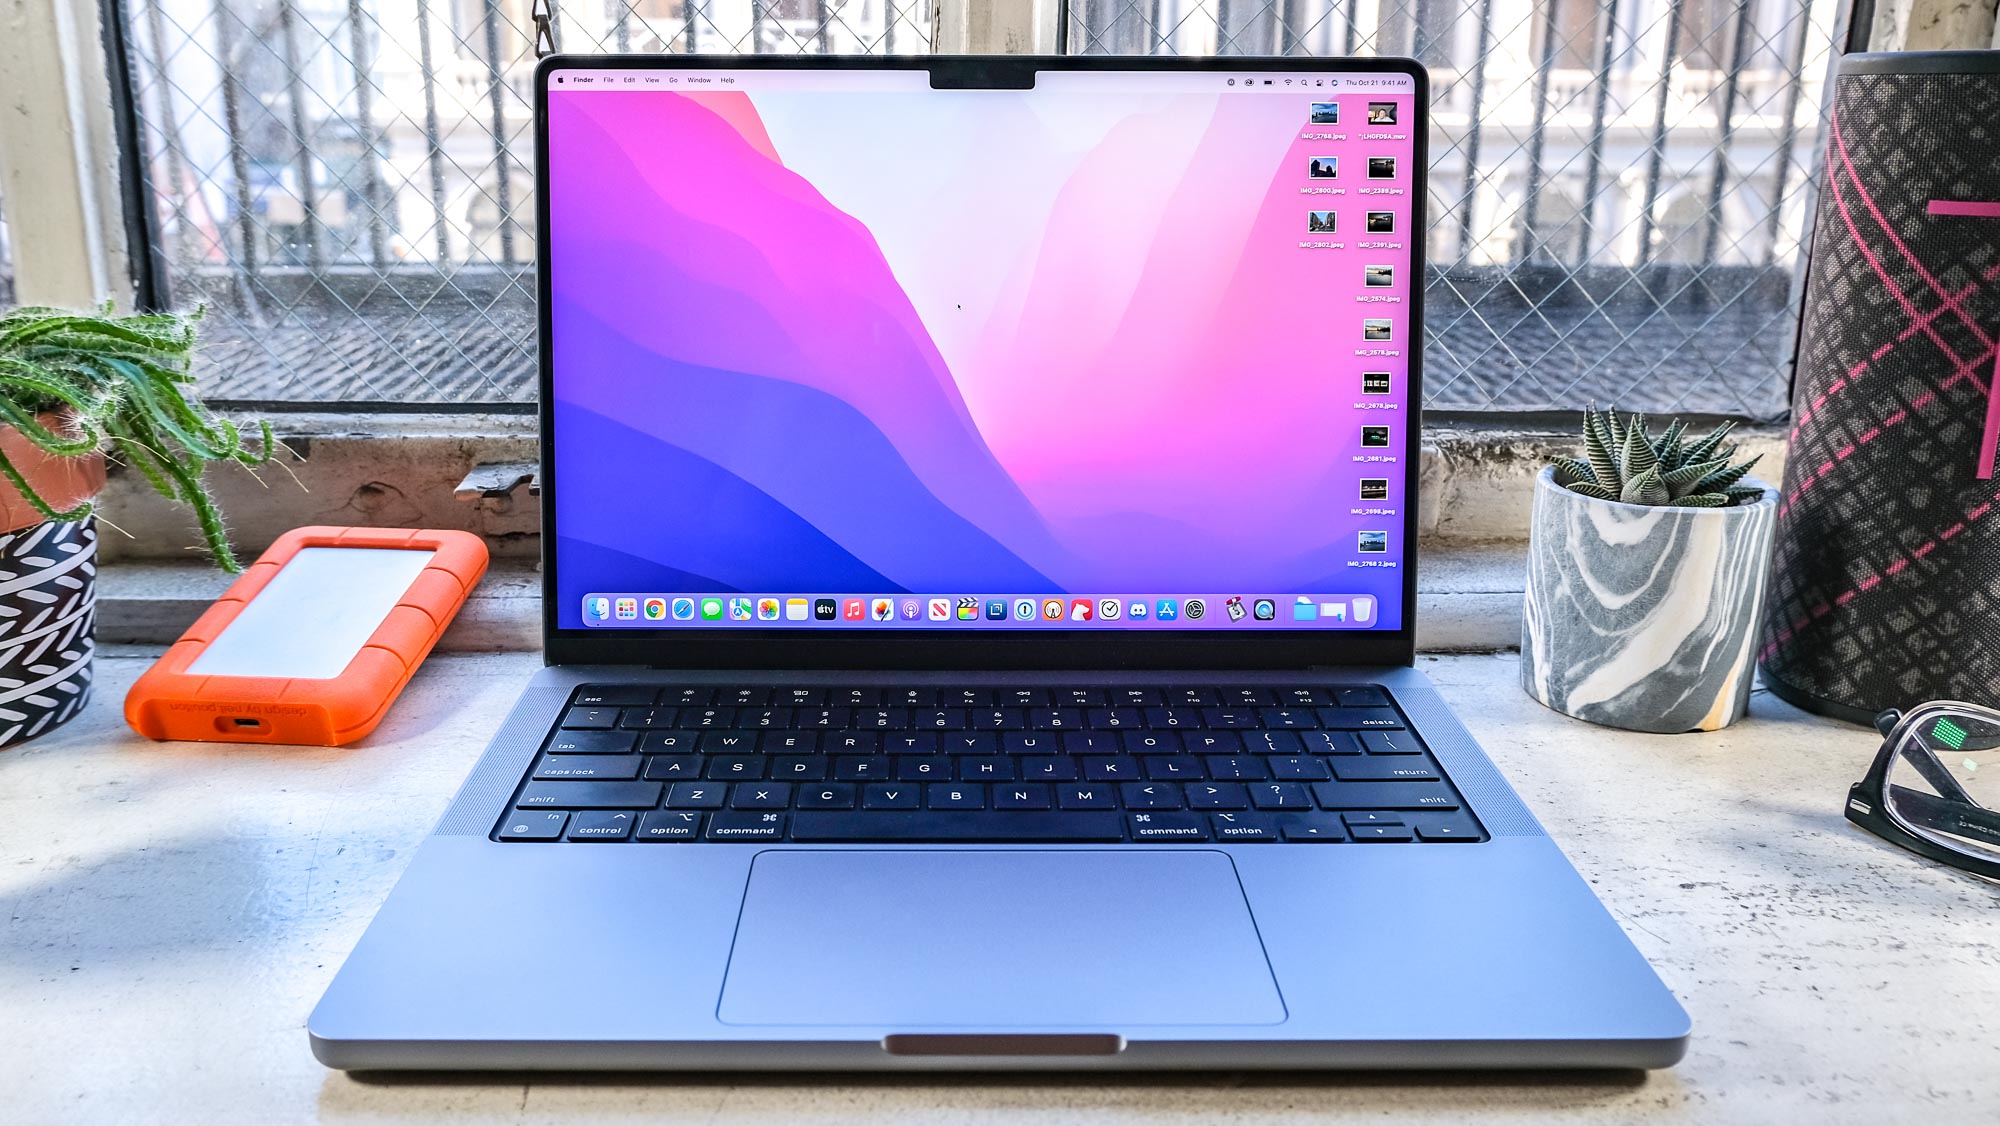
The hot corners feature of macOS is one of those modest, subtle features of the OS that has a disproportionately large impact on how I use my Mac. I'd equate this nifty little feature to the introduction of trackpad gestures (yes, I remember when those weren't a thing), which although not game changing, quickly became fundamental to how I use my Mac and feel like second nature today.
With hot corners, you can assign one of a set number of functions to each corner of the screen. When you mouse into a hot corner, your assigned function or application will run, giving you a super quick way to open, for example, Mission Control, Notification Center or Launchpad. You can even set your hot corners to lock your screen or put your Mac to sleep. Doing these things isn't exactly long winded in the first place, granted, but hot corners is yet another demonstration of Apple making things easier for users navigating their Mac at speed, which for me is what makes Macs and MacBooks some of the best computers and best laptops around.
Personally, I use most applications in windowed mode, so don't really go to the corners of my screen that much, meaning this feature also makes use of what previously was effectively dead space. However, if you do use screen corners and think this might get annoying, you can easily turn hot corners off altogether (Quick Note in the bottom right is on by default).
If this all sounds interesting, then read on as we walk through how to use hot corners on Mac.
How to use hot corners on Mac
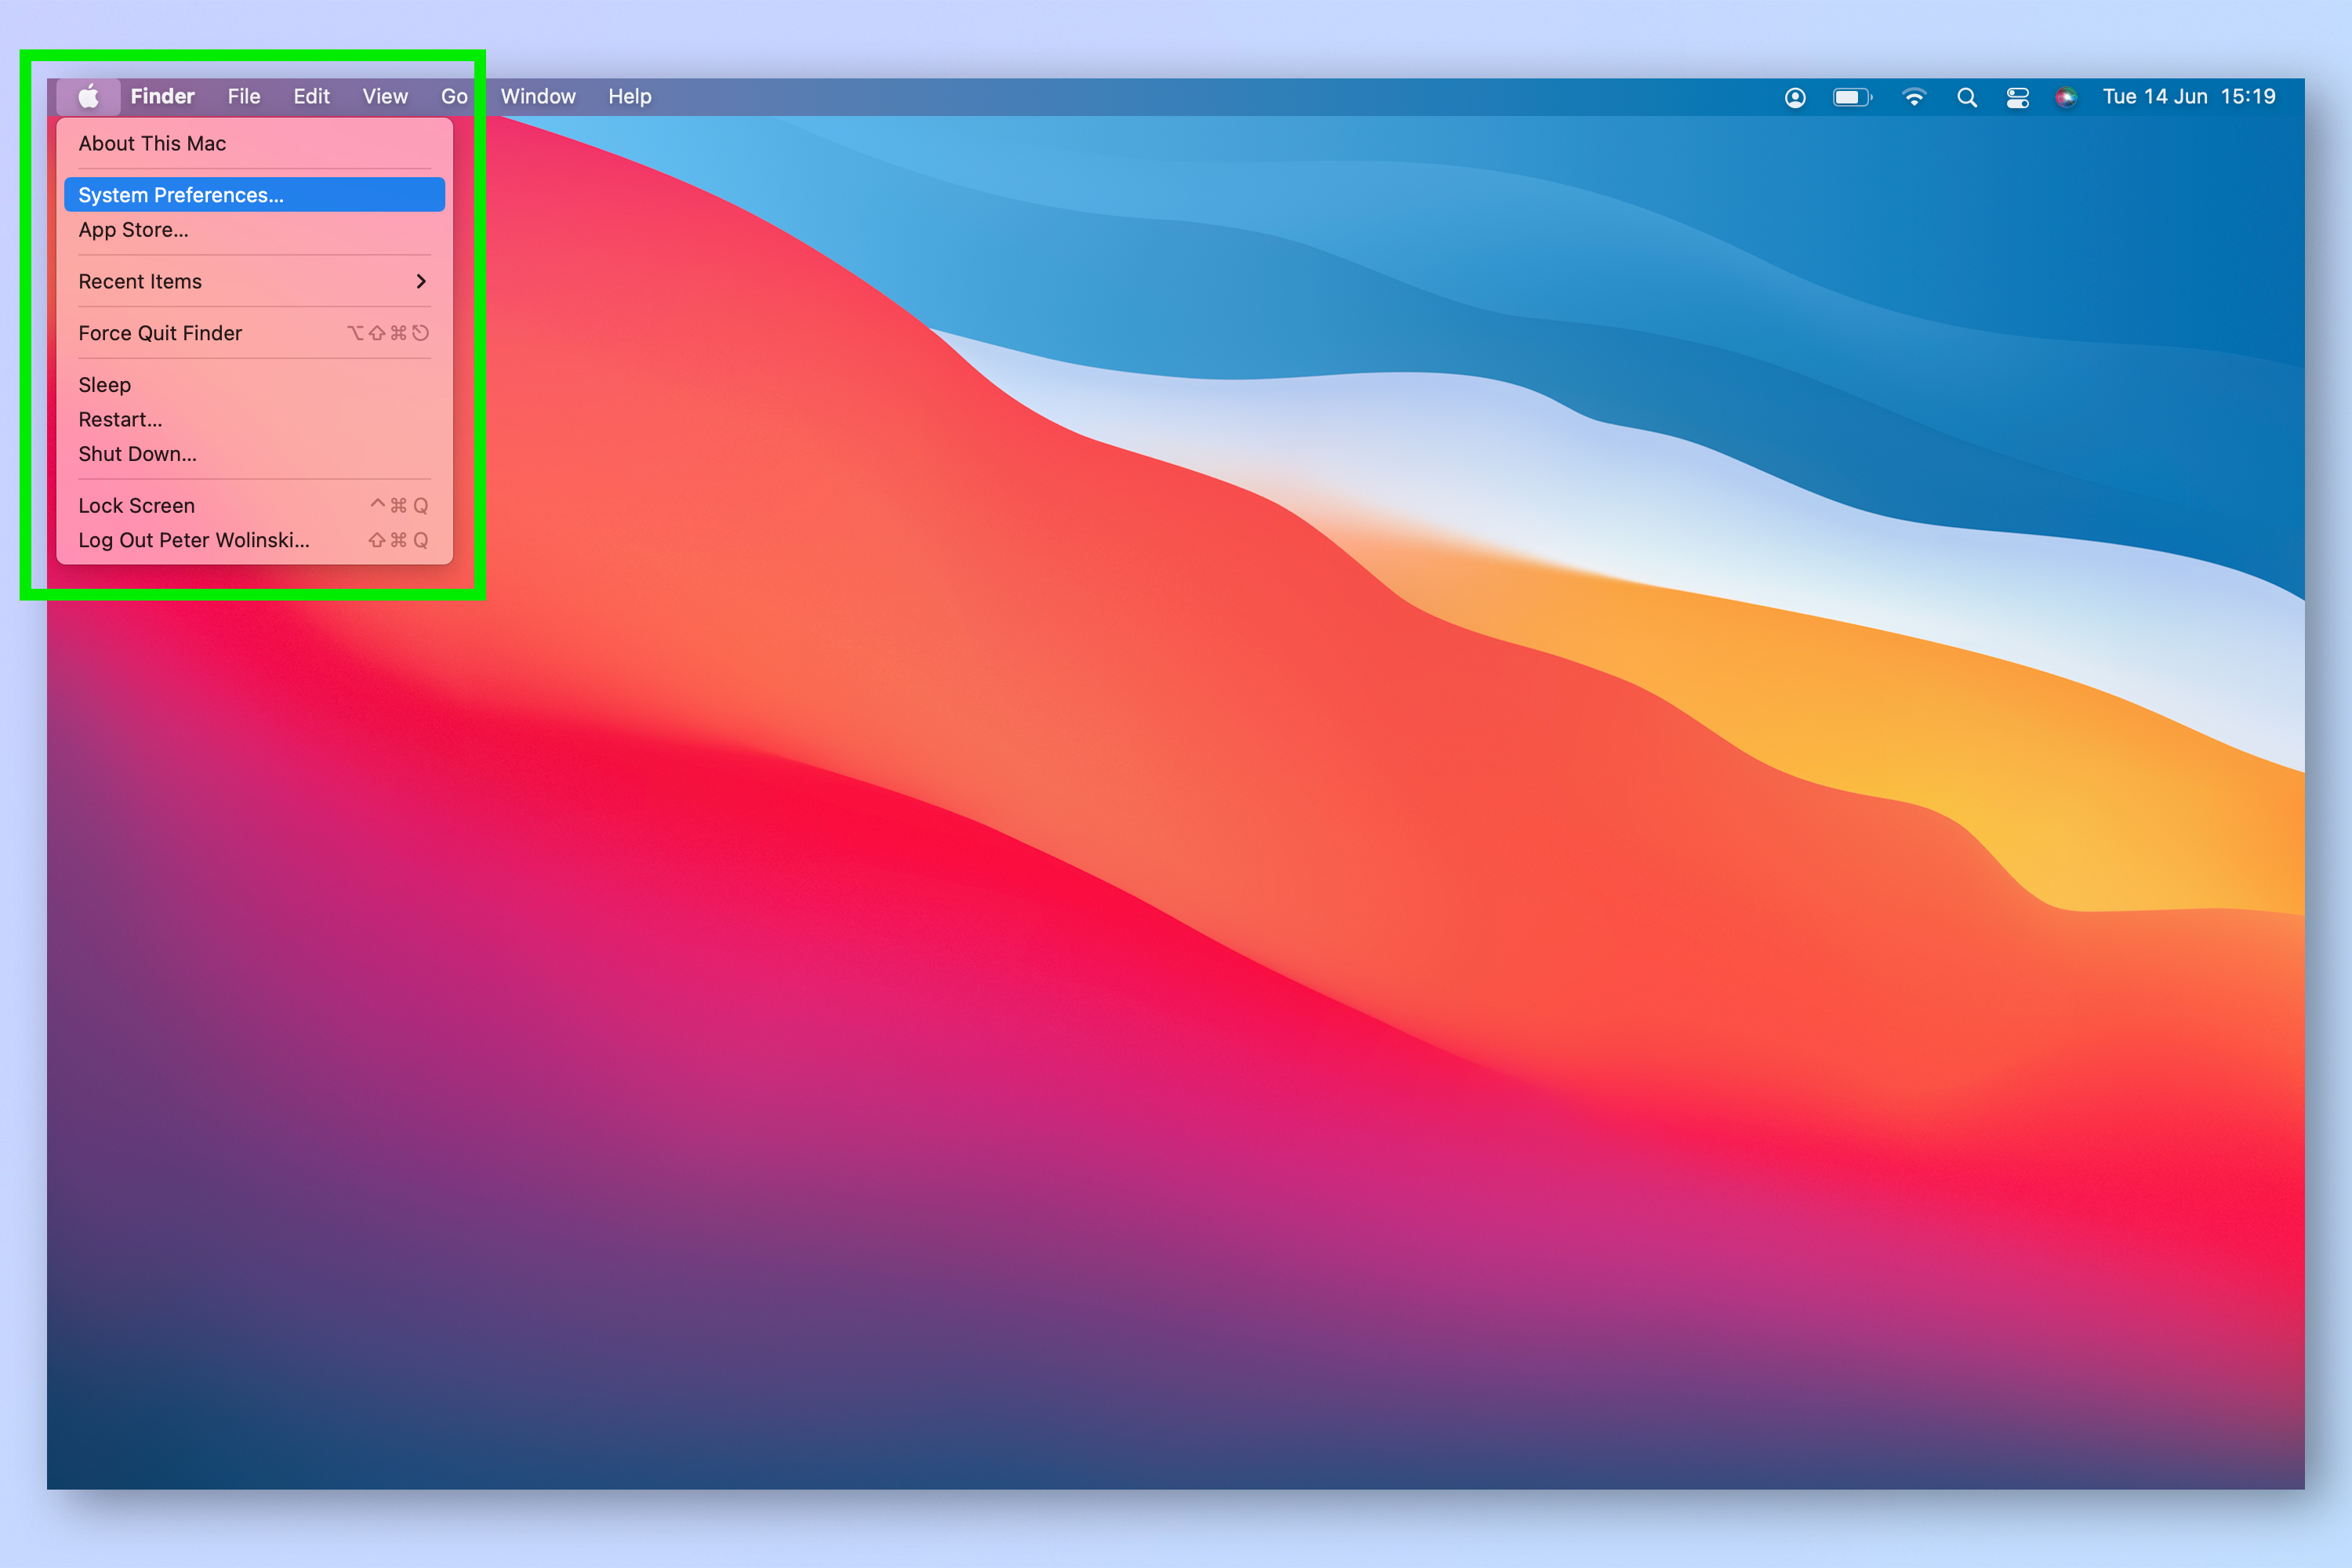
- Click the Apple Logo, top left
- Go to System Preferences
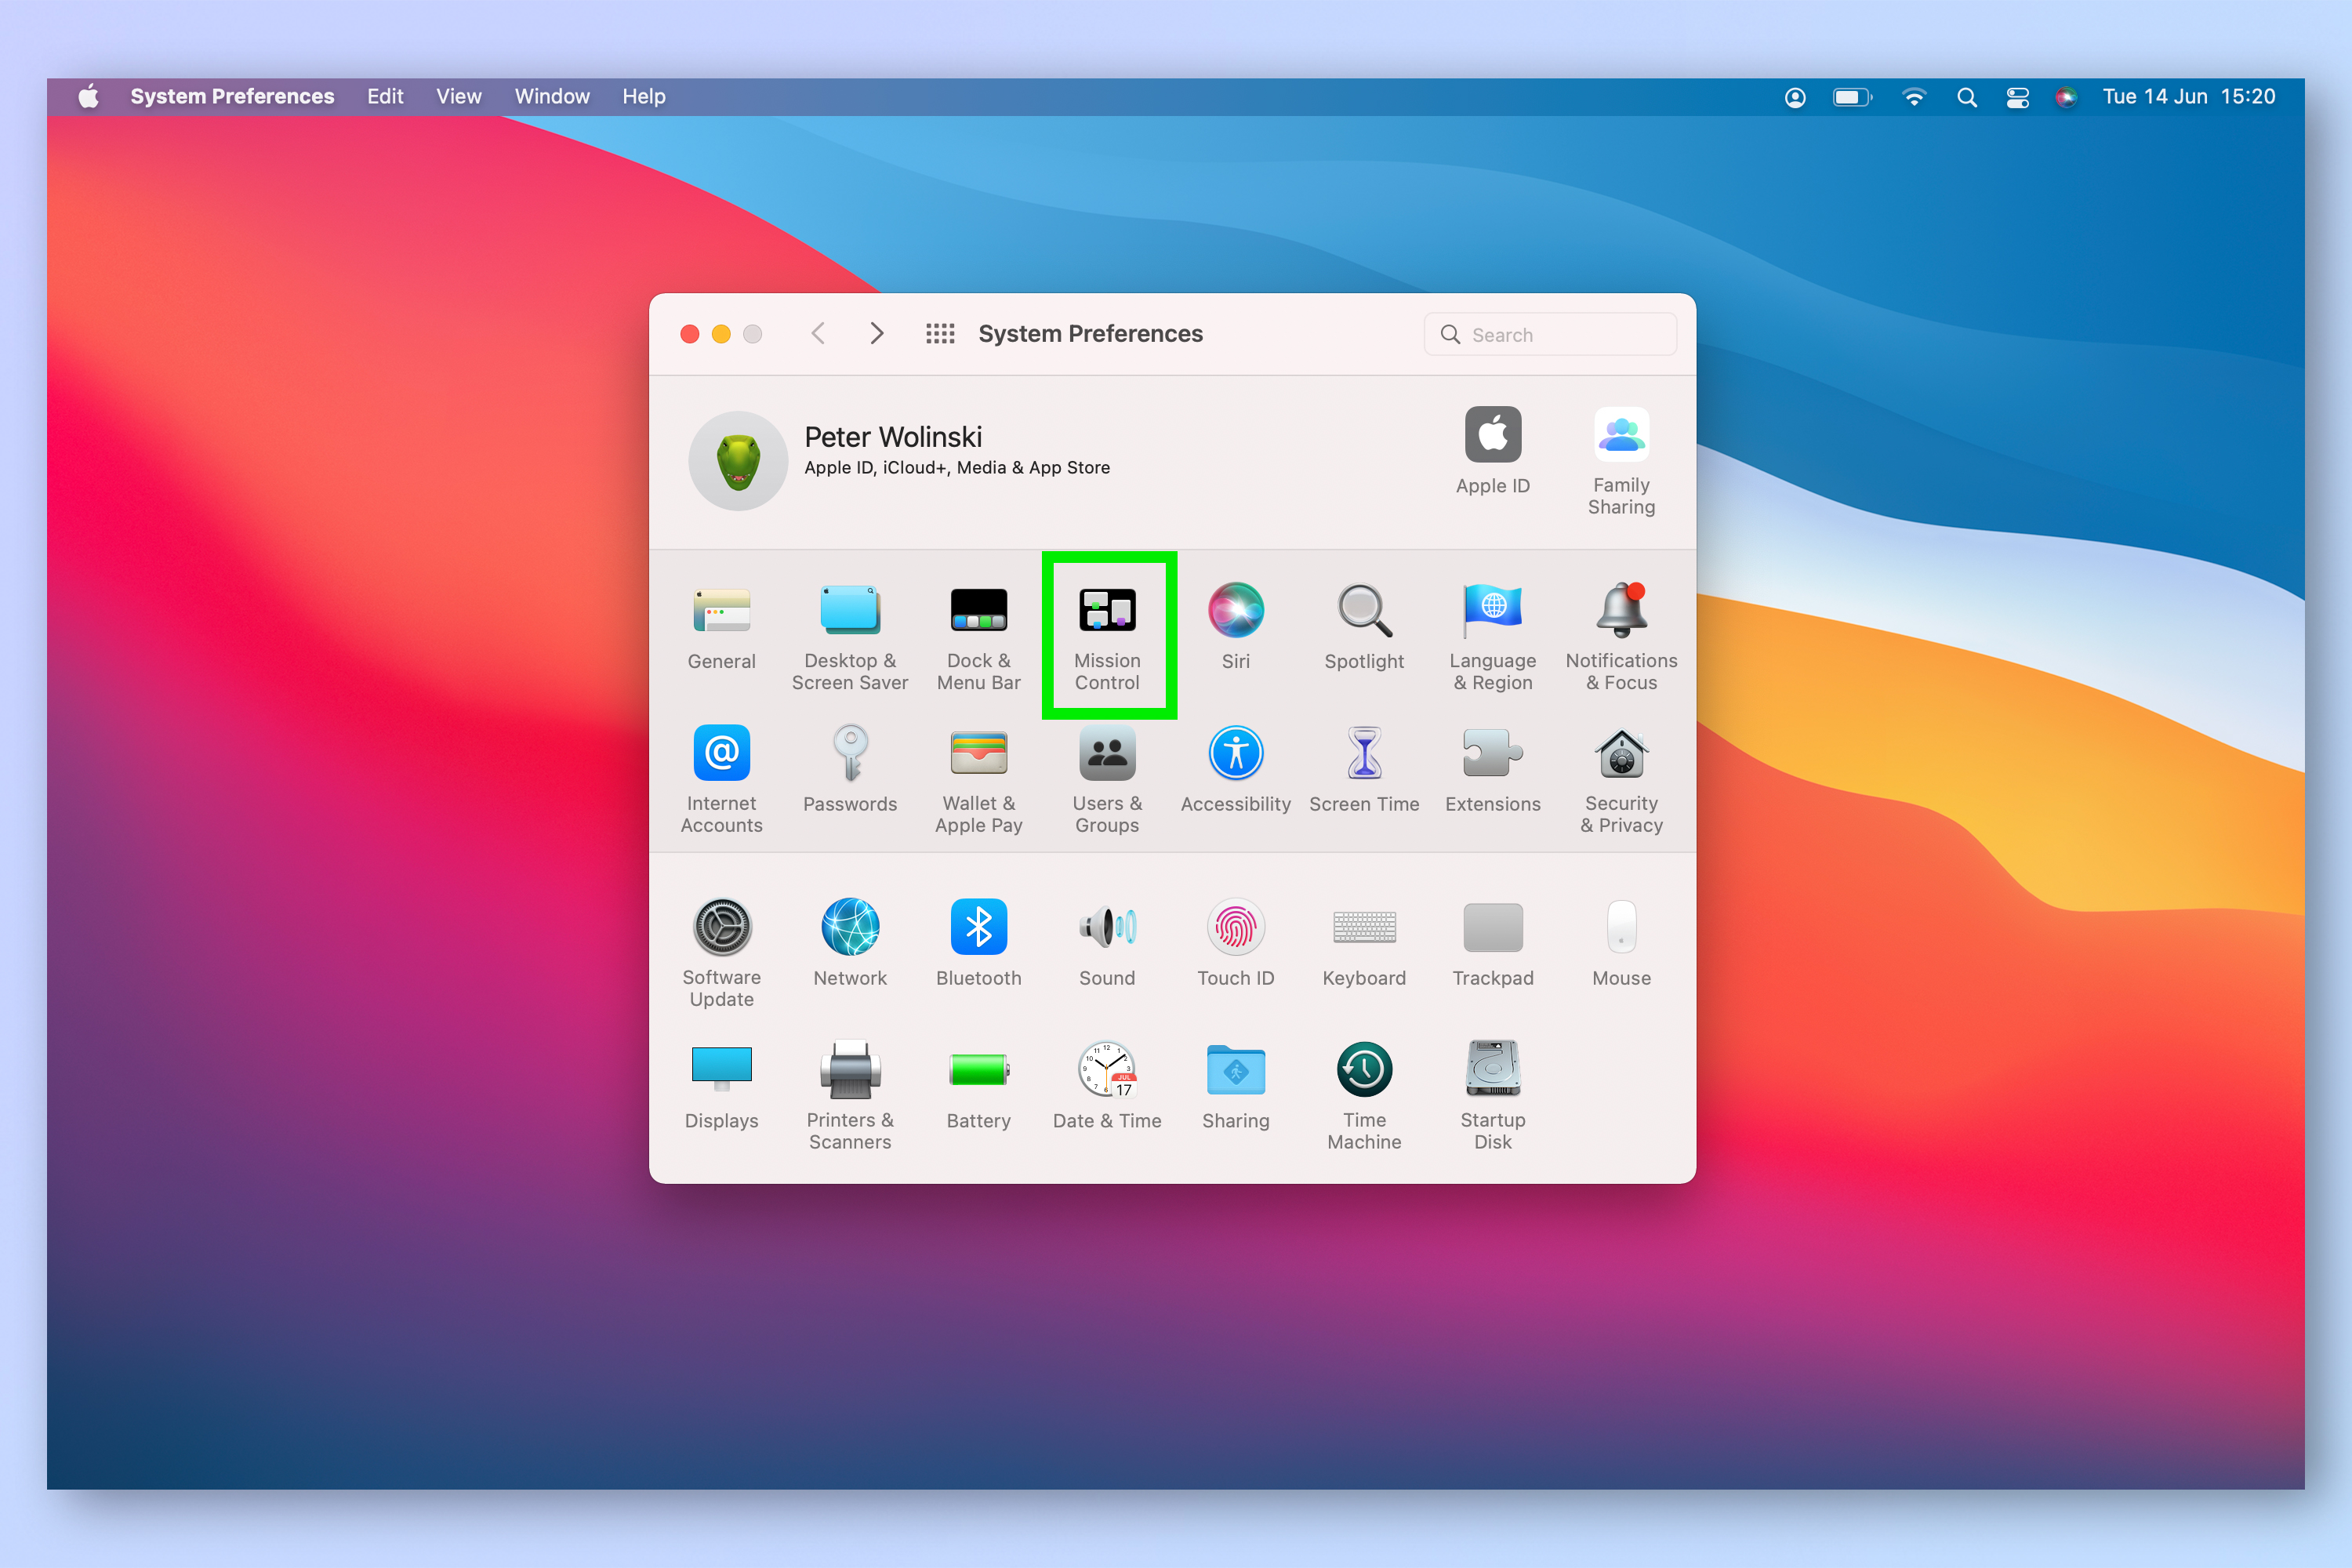
- Select Mission Control
- Click Hot Corners
- Assign/remove functions to/from each screen corner
Read on to see detailed instructions for each step.
1. Click the Apple logo, top left, then select System Preferences.
2. Head to Mission Control.
Sign up to get the BEST of Tom's Guide direct to your inbox.
Get instant access to breaking news, the hottest reviews, great deals and helpful tips.
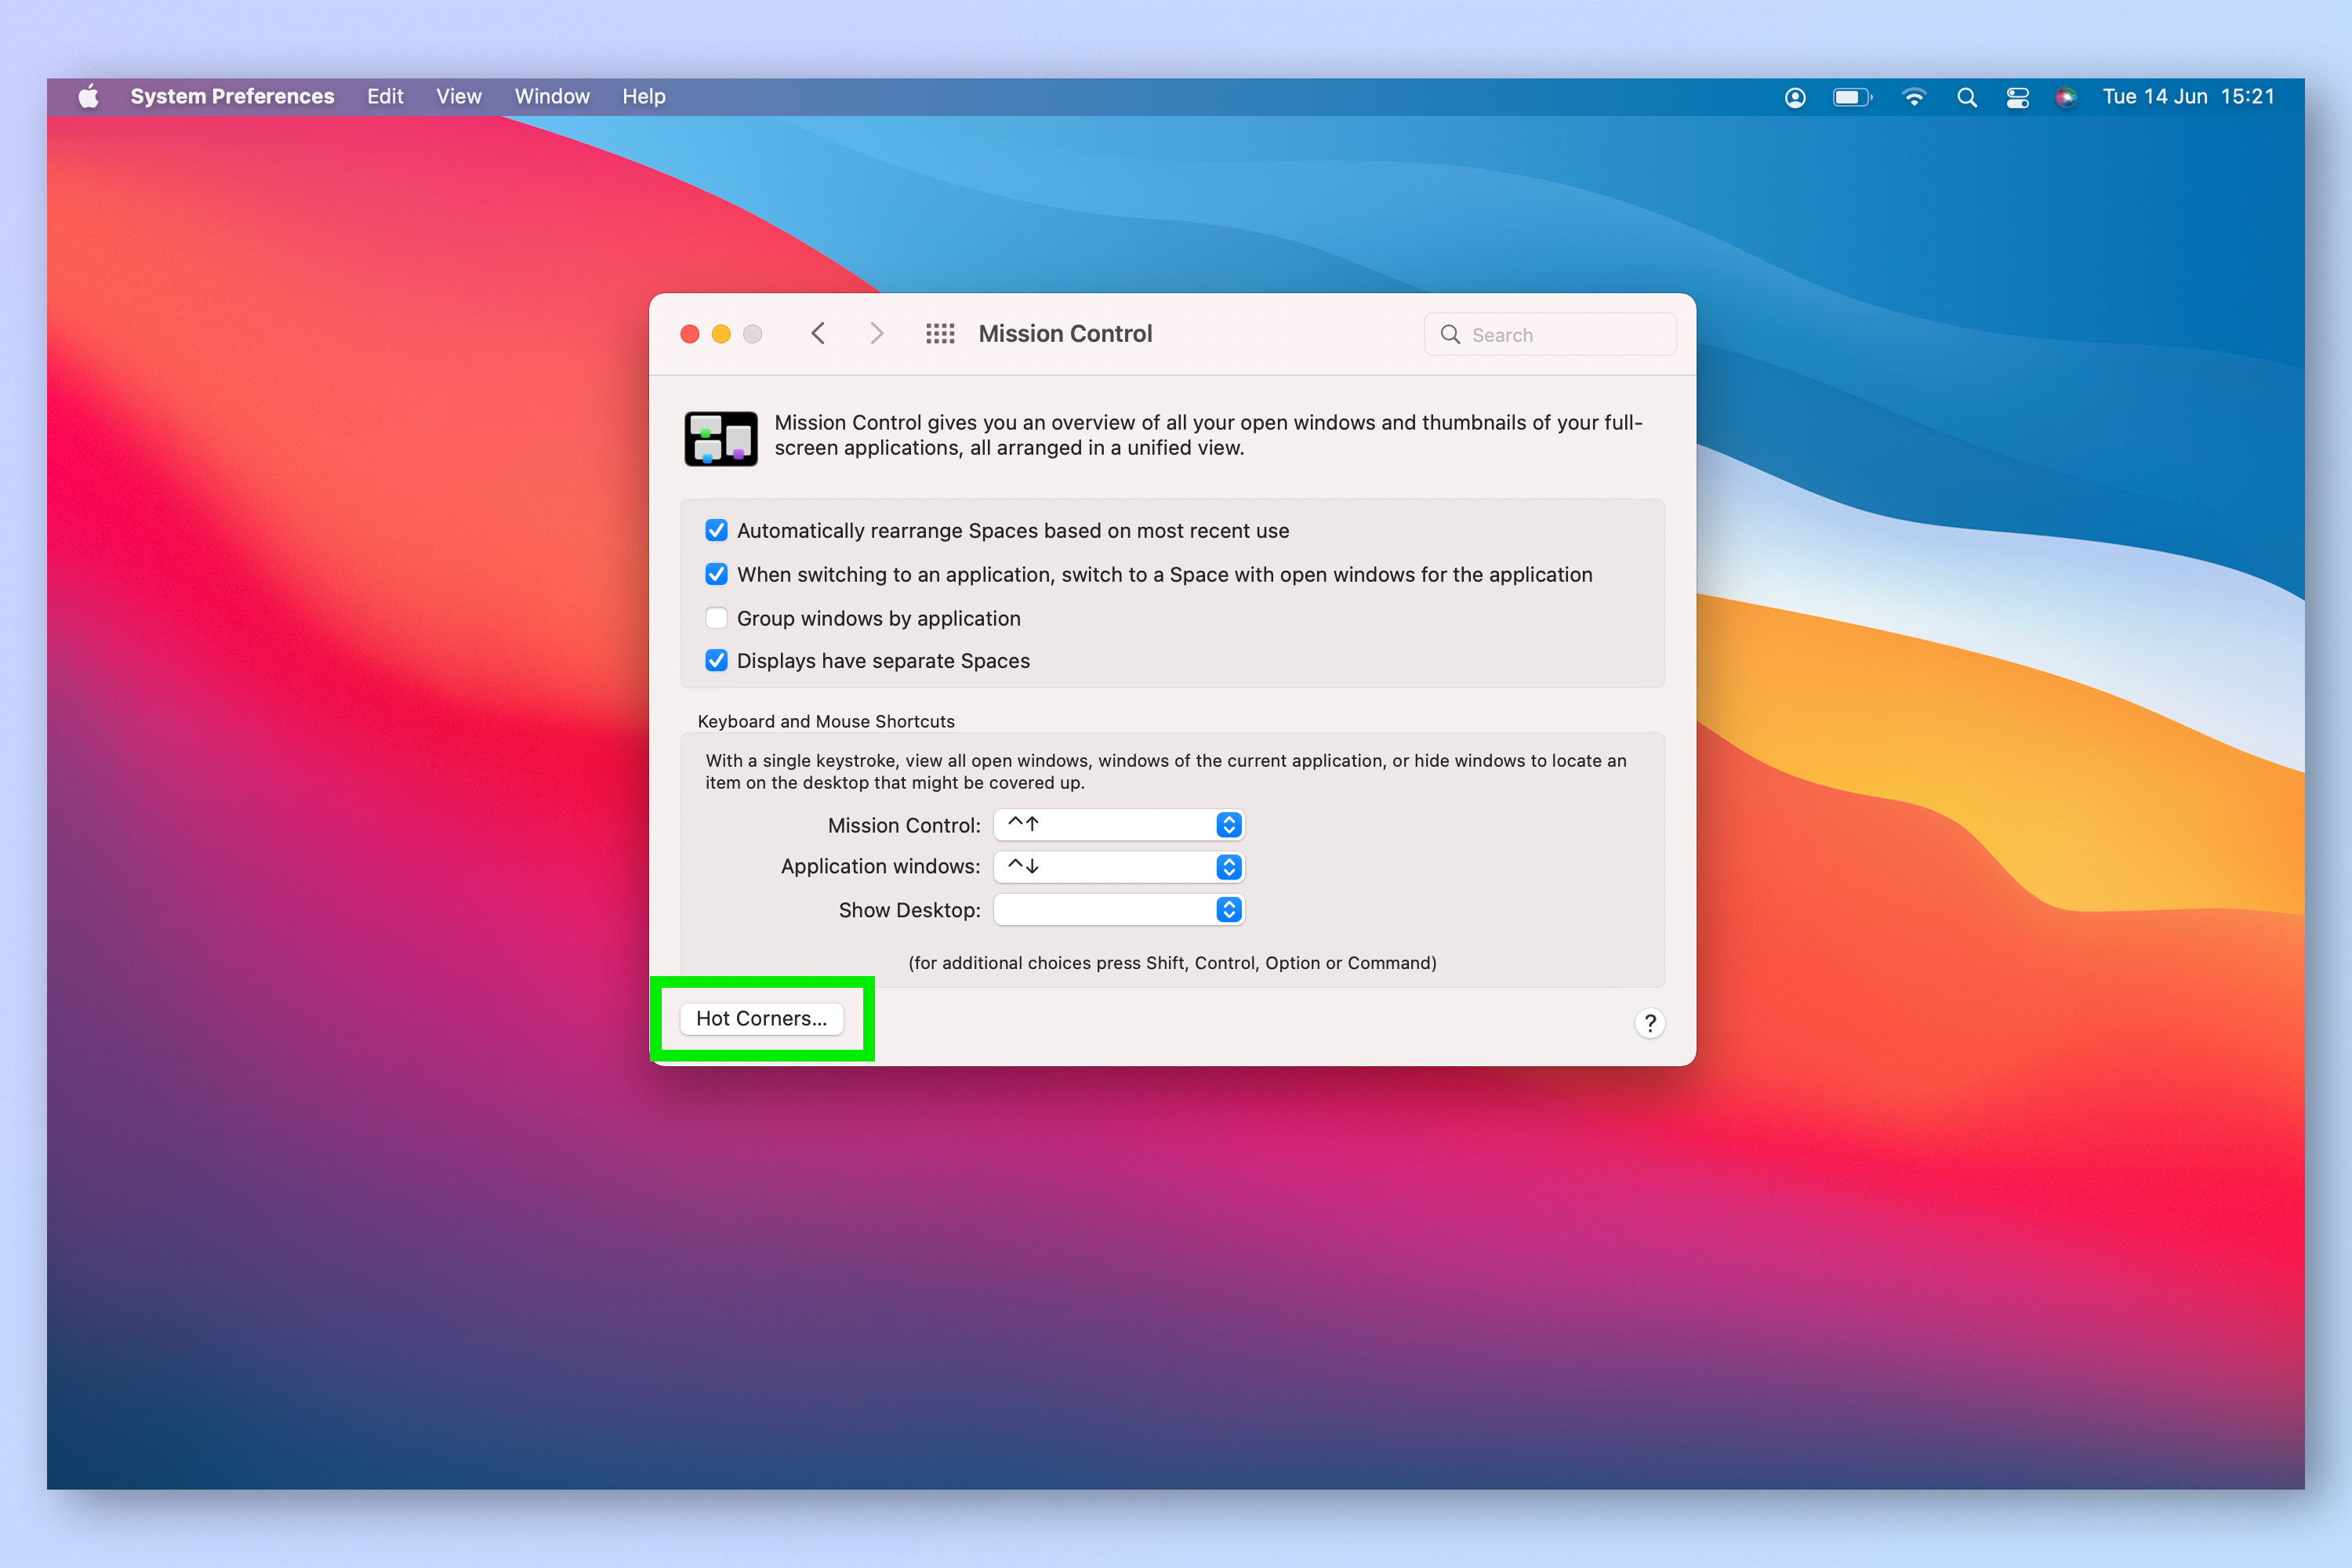
3. Click Hot Corners, bottom left.
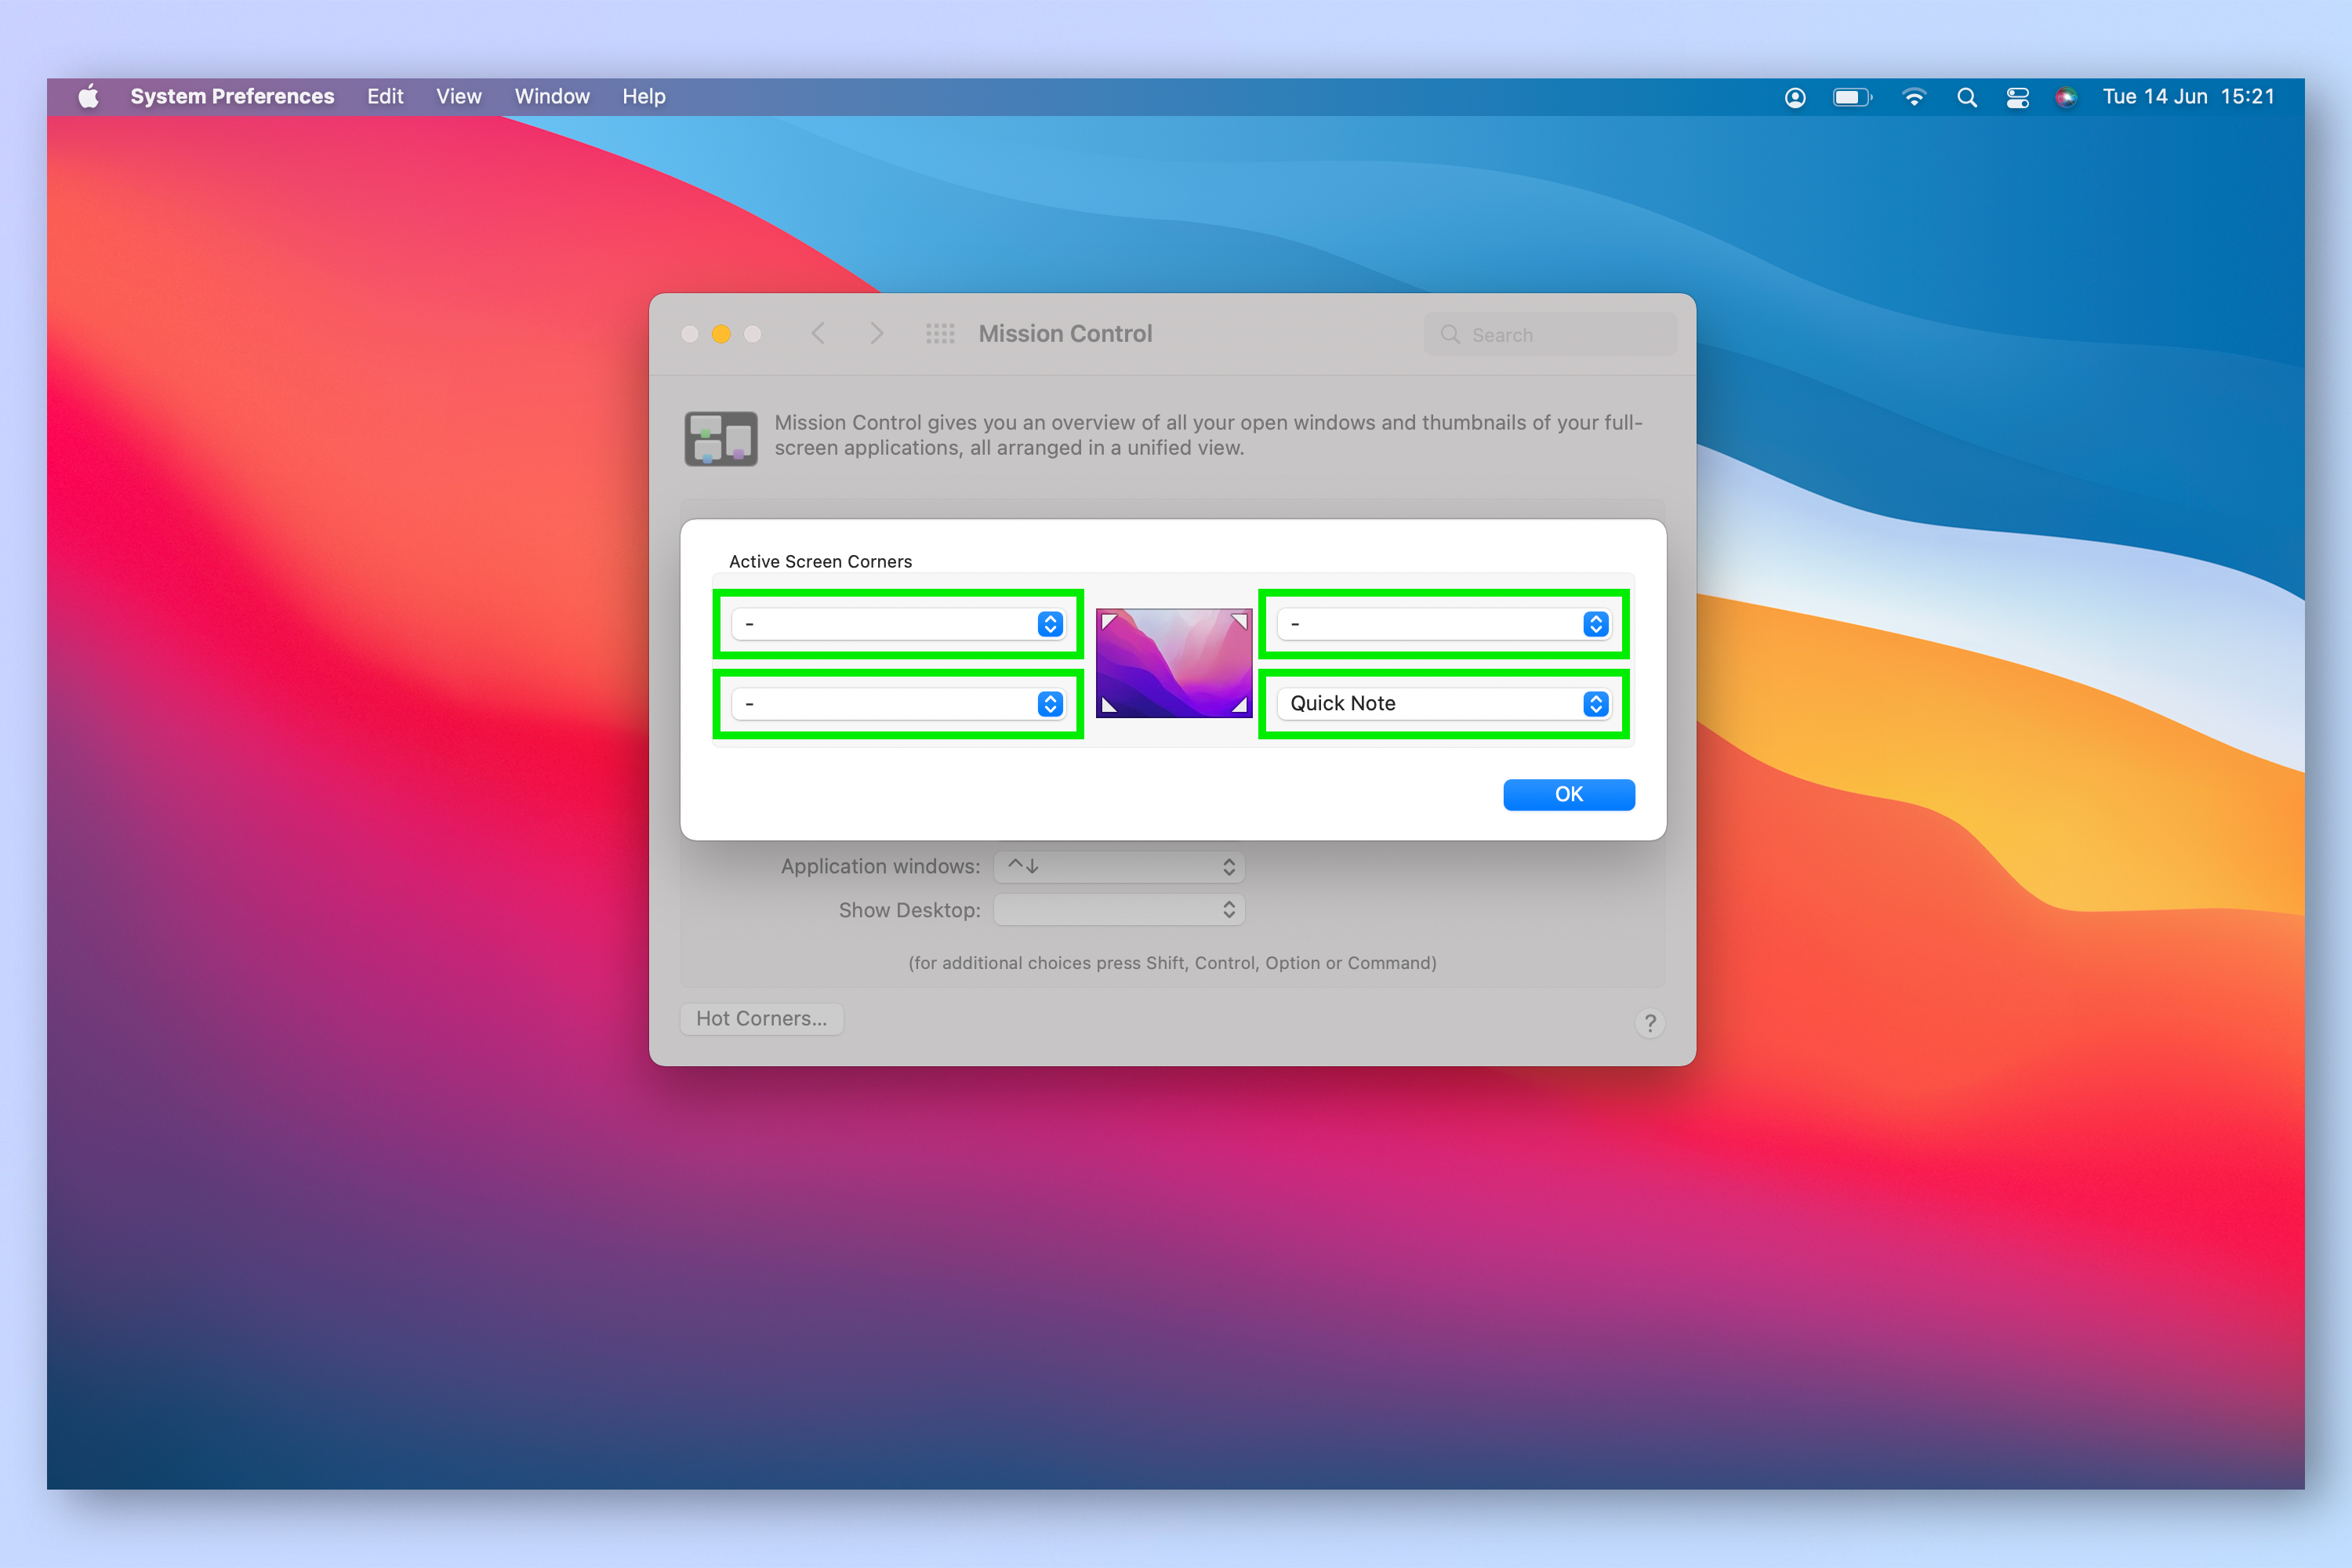
4. Quick Note is the only one on by default. Select one of the drop down boxes to open a list of functions for that corner.
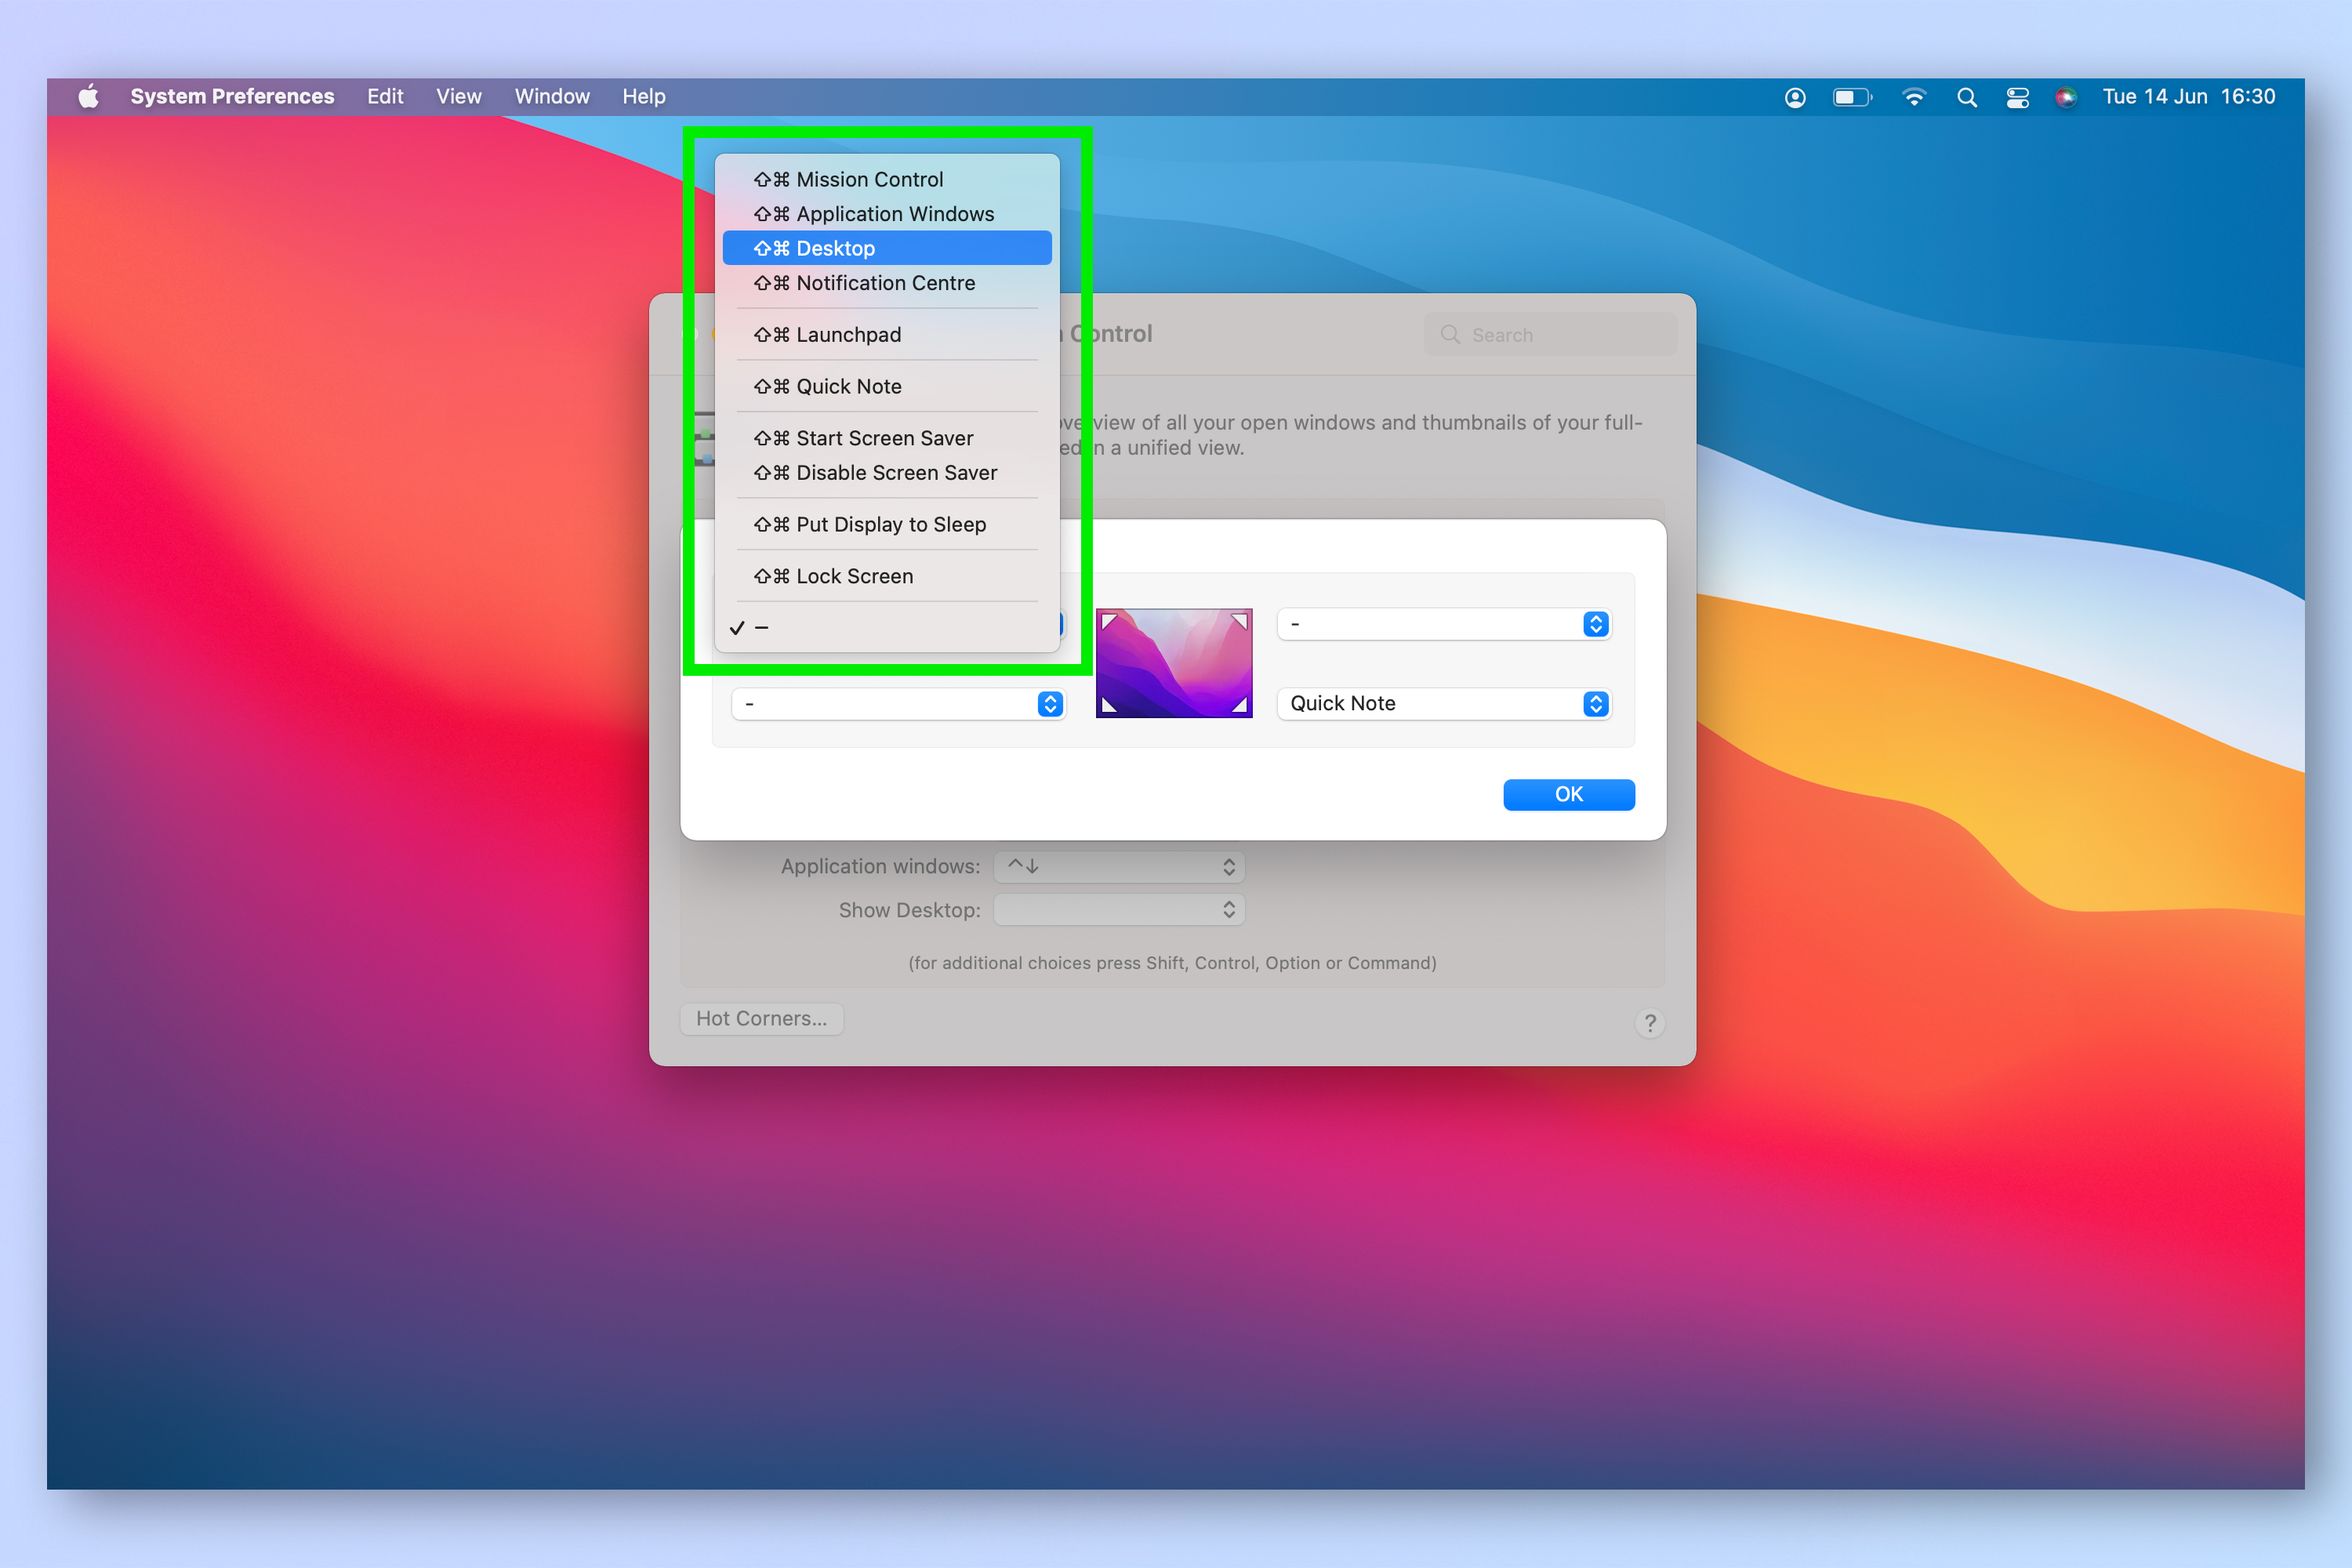
5. Choose a function for a corner from the menu to make it a hot corner. If you want to remove a function, select the dash (—).
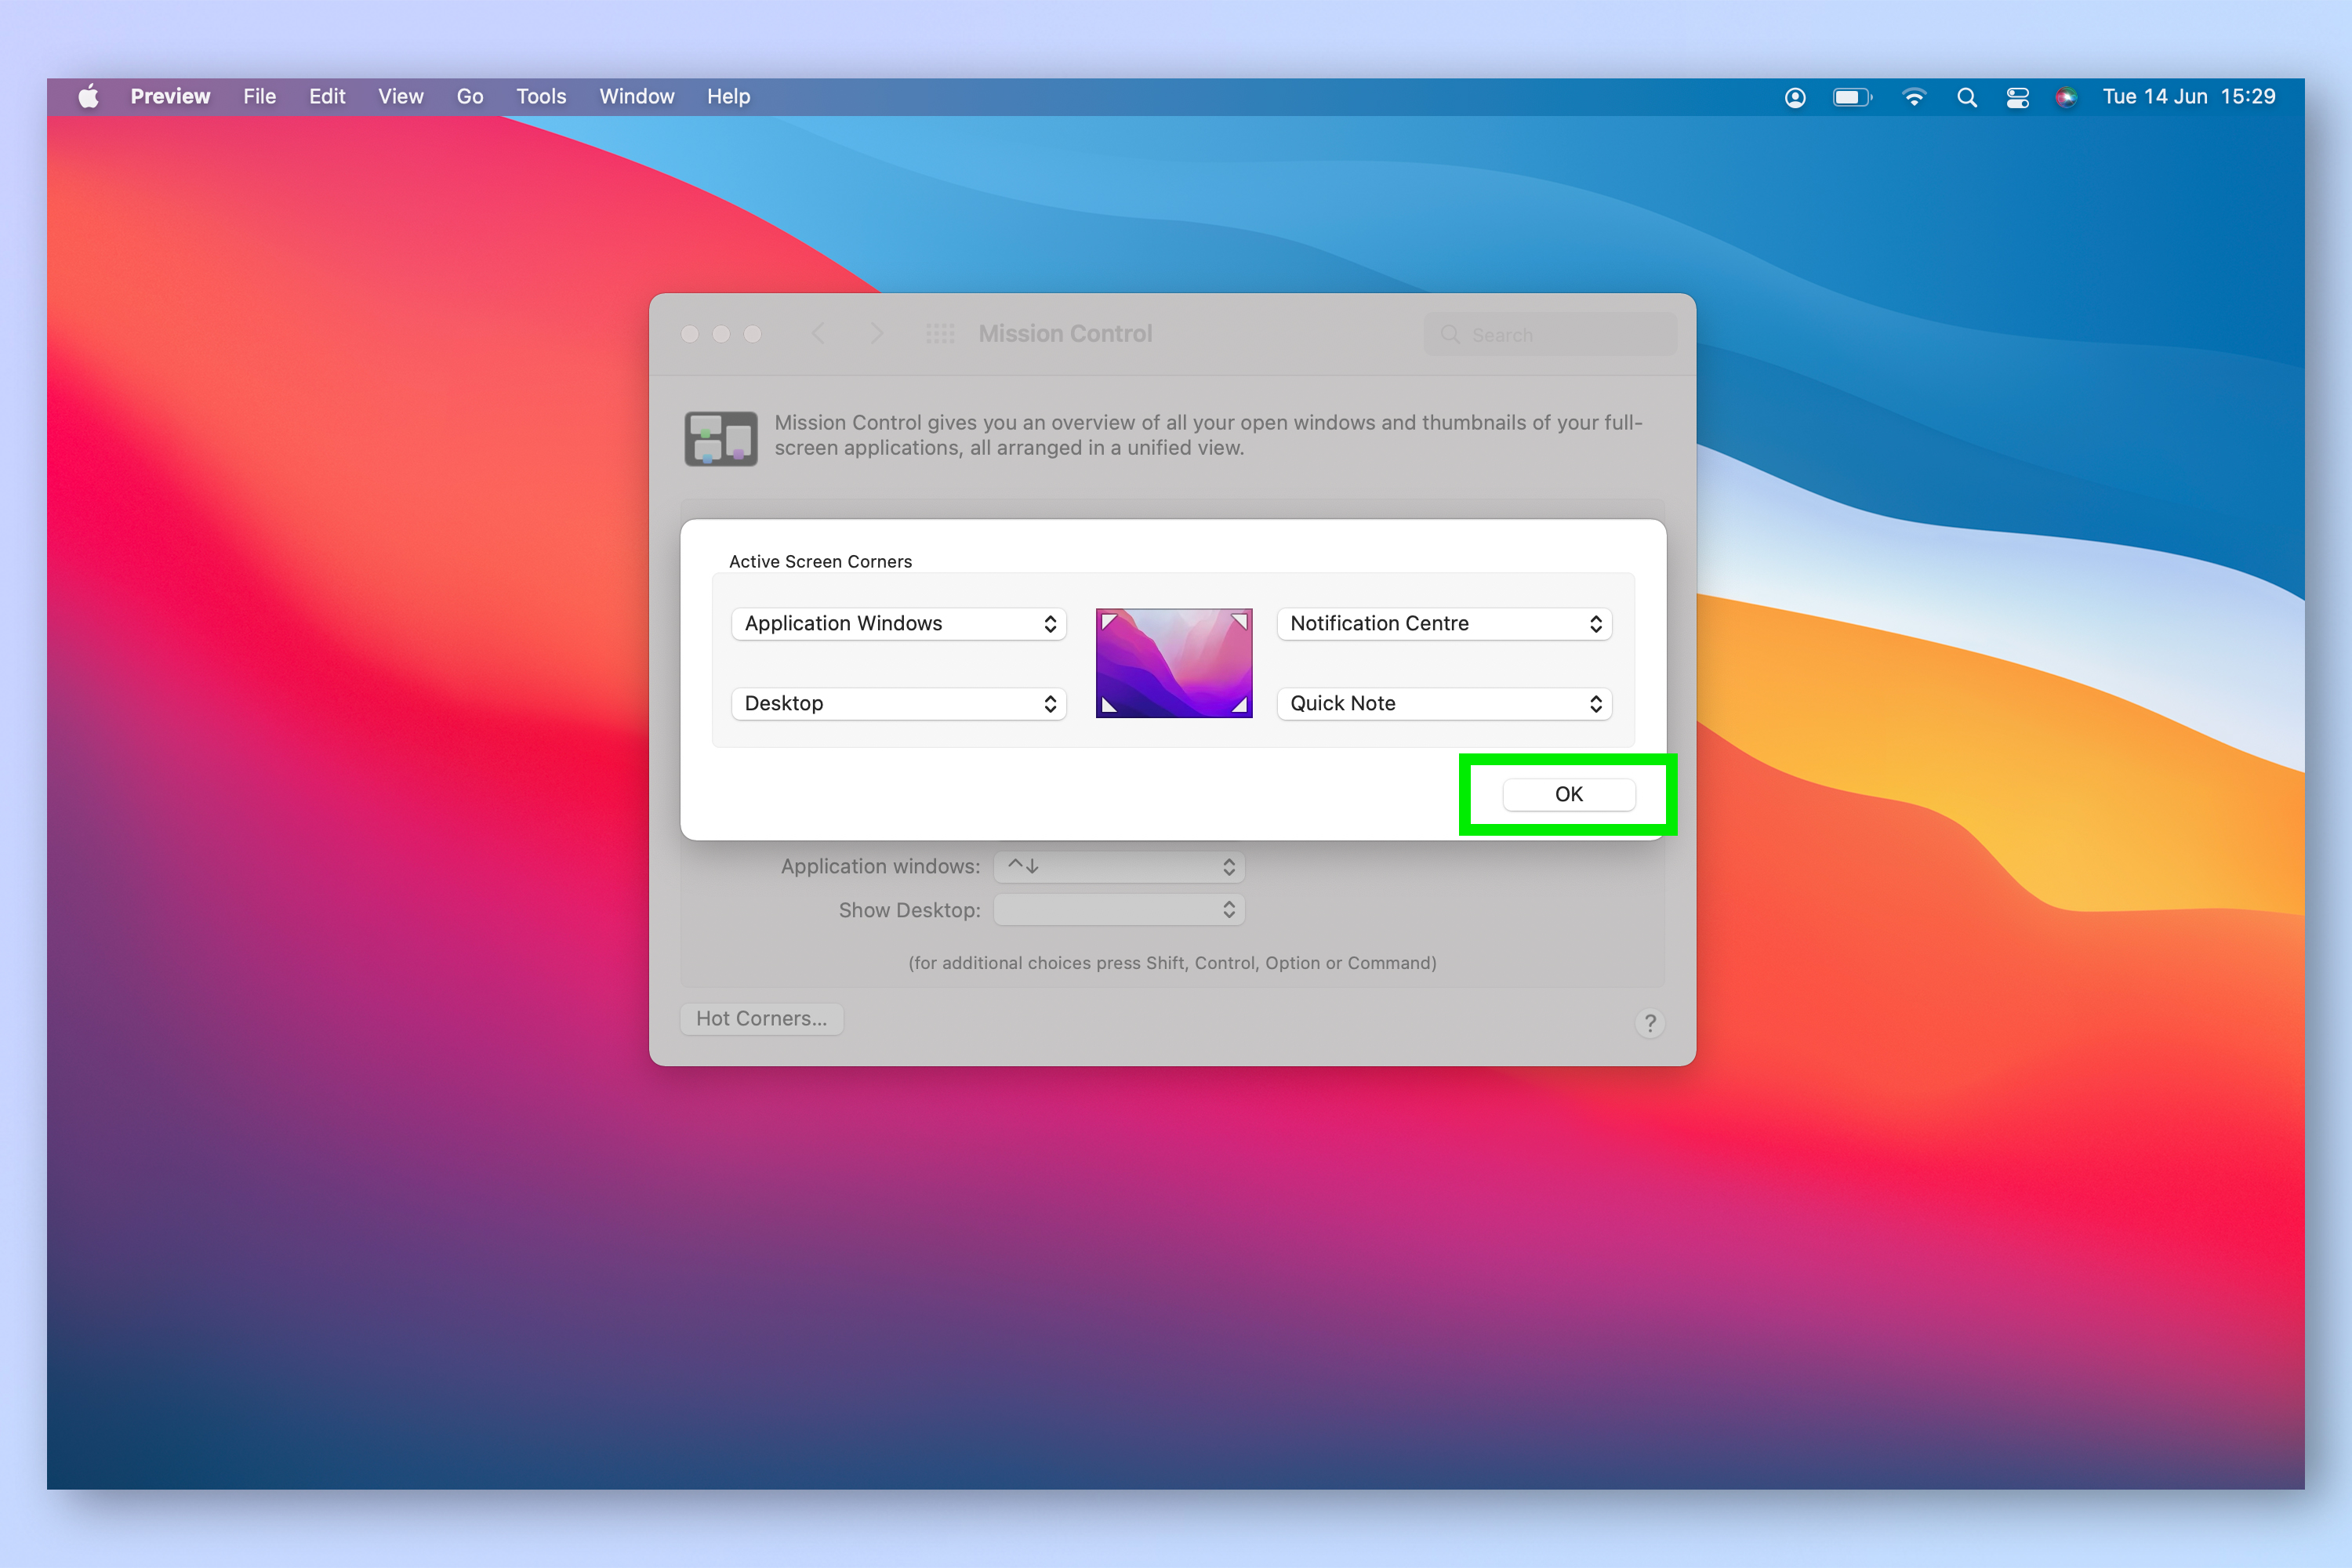
6. Hit OK.
7. Move your cursor to a corner to run the assigned hot corner function. Where Quick Note is assigned, a note icon will appear. Click the icon to open your Quick Notes.
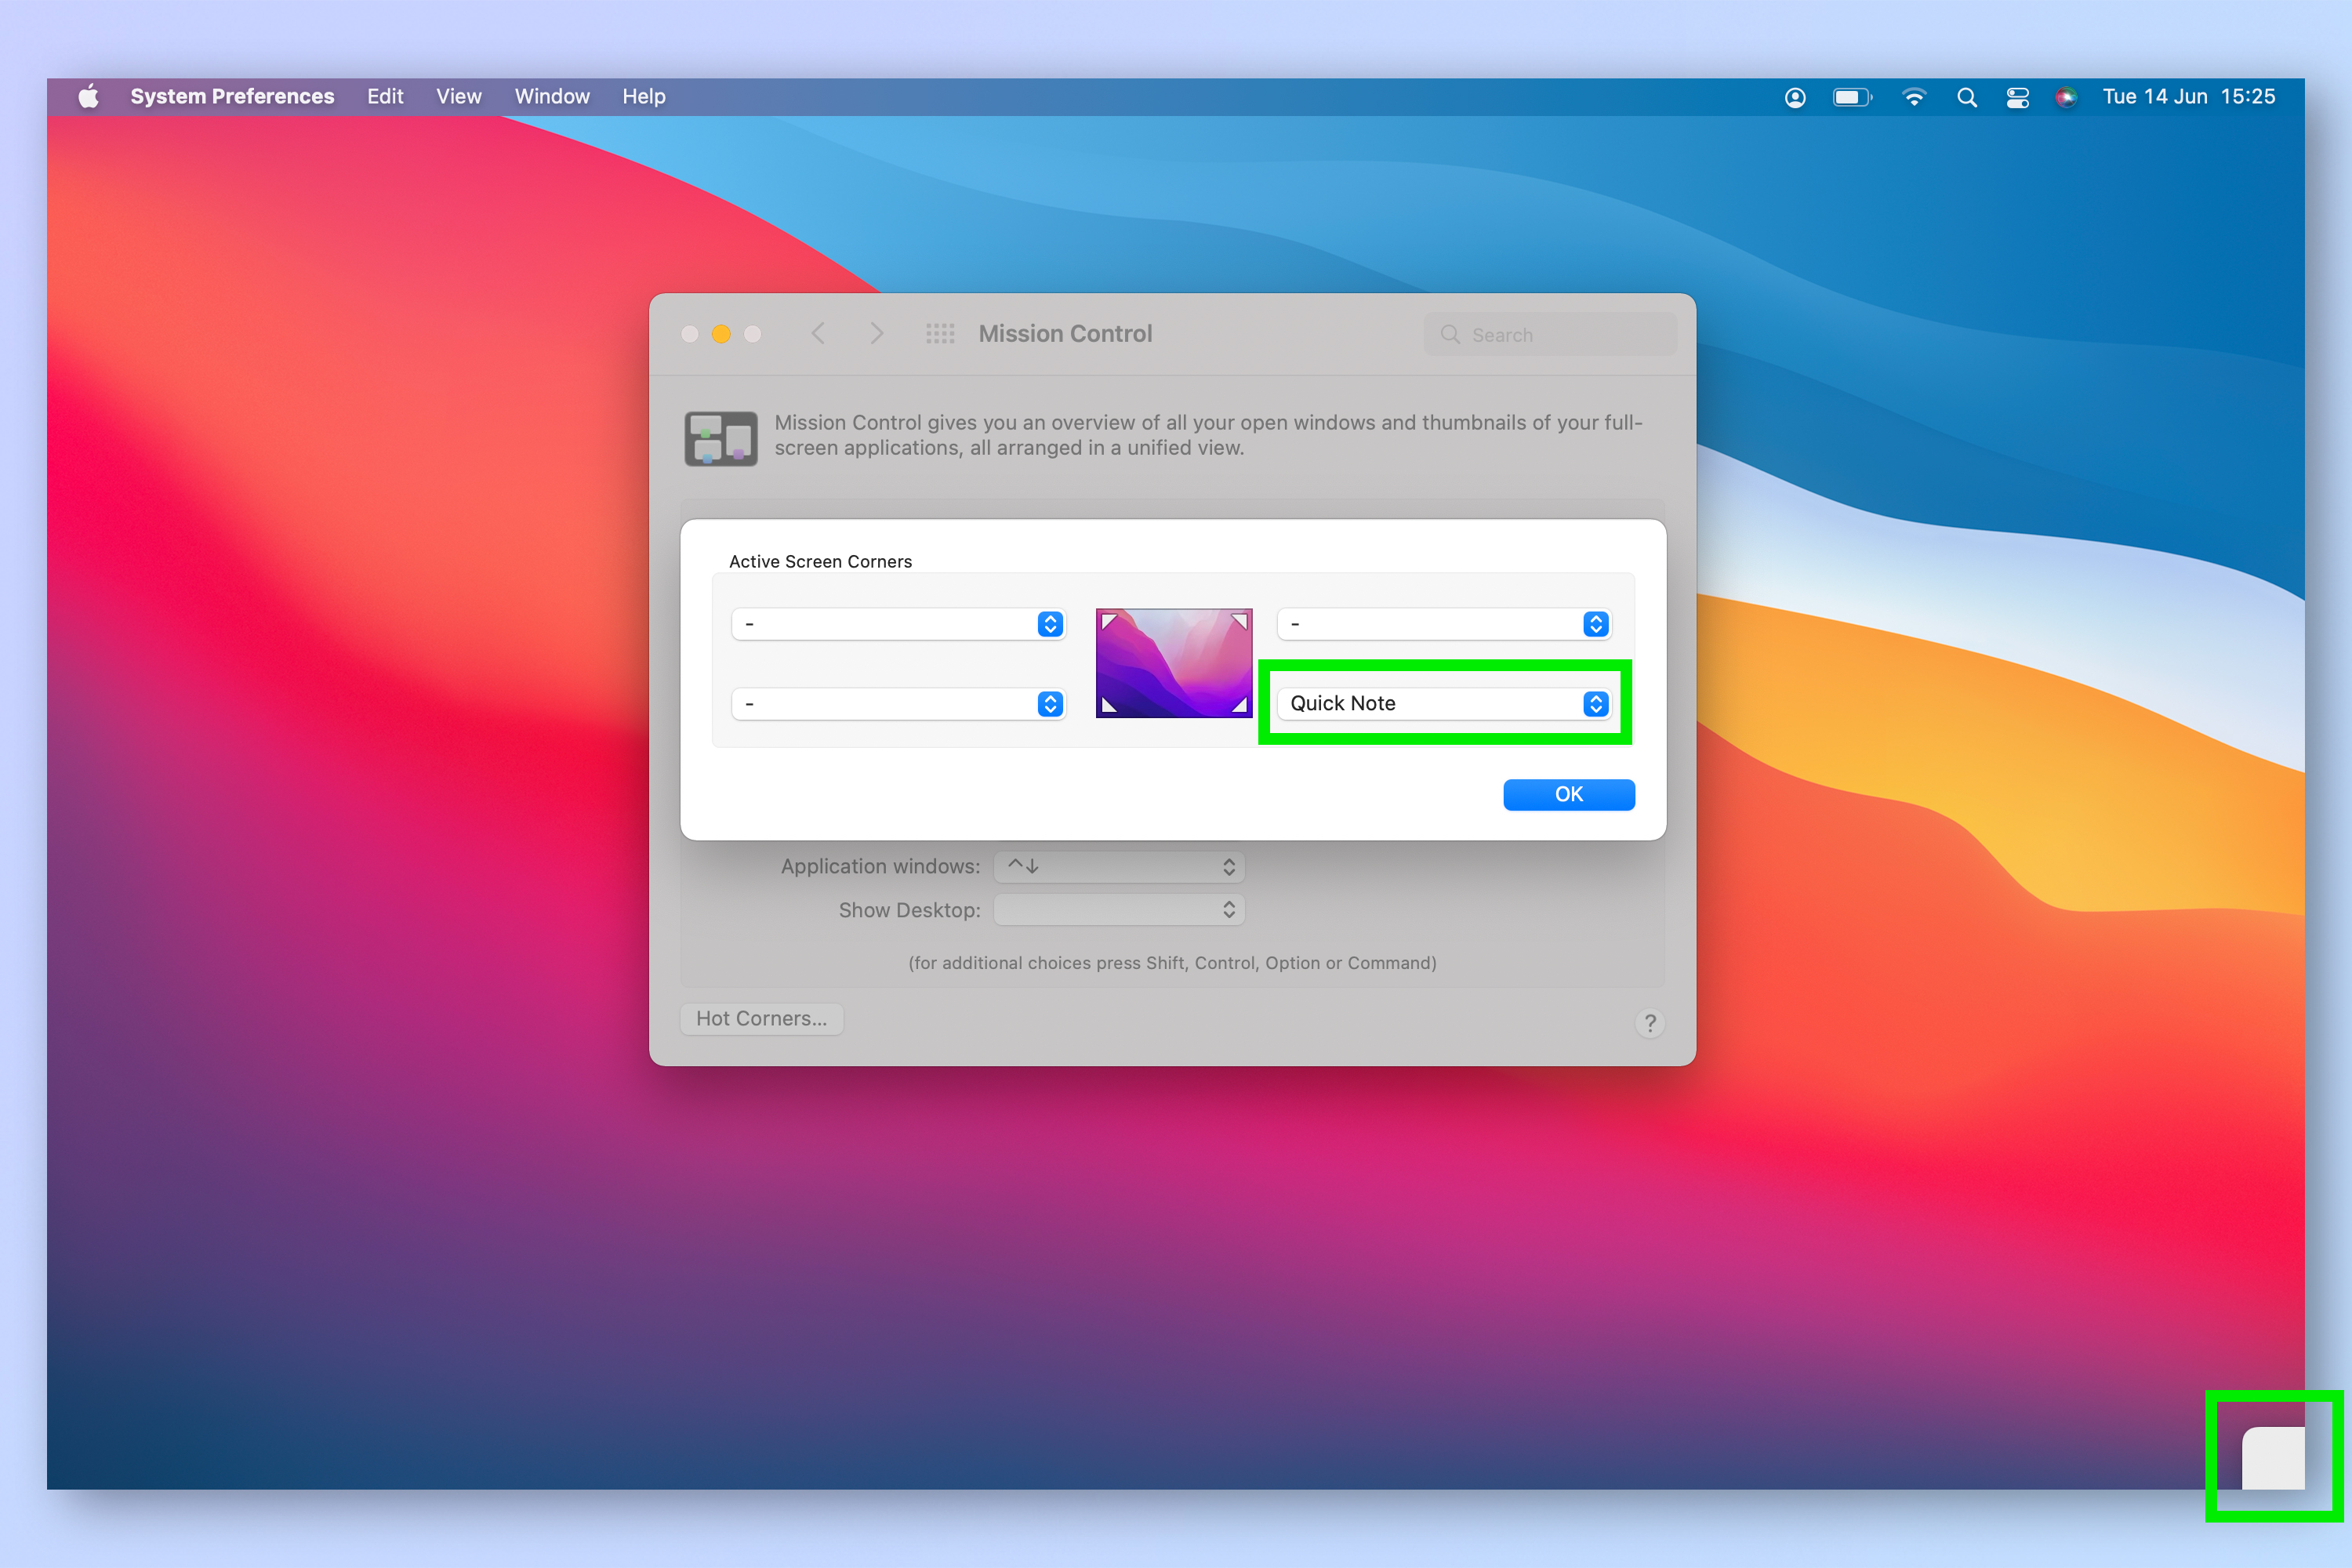
Quickly write down your thoughts and ensure the enlightened moment isn't lost!
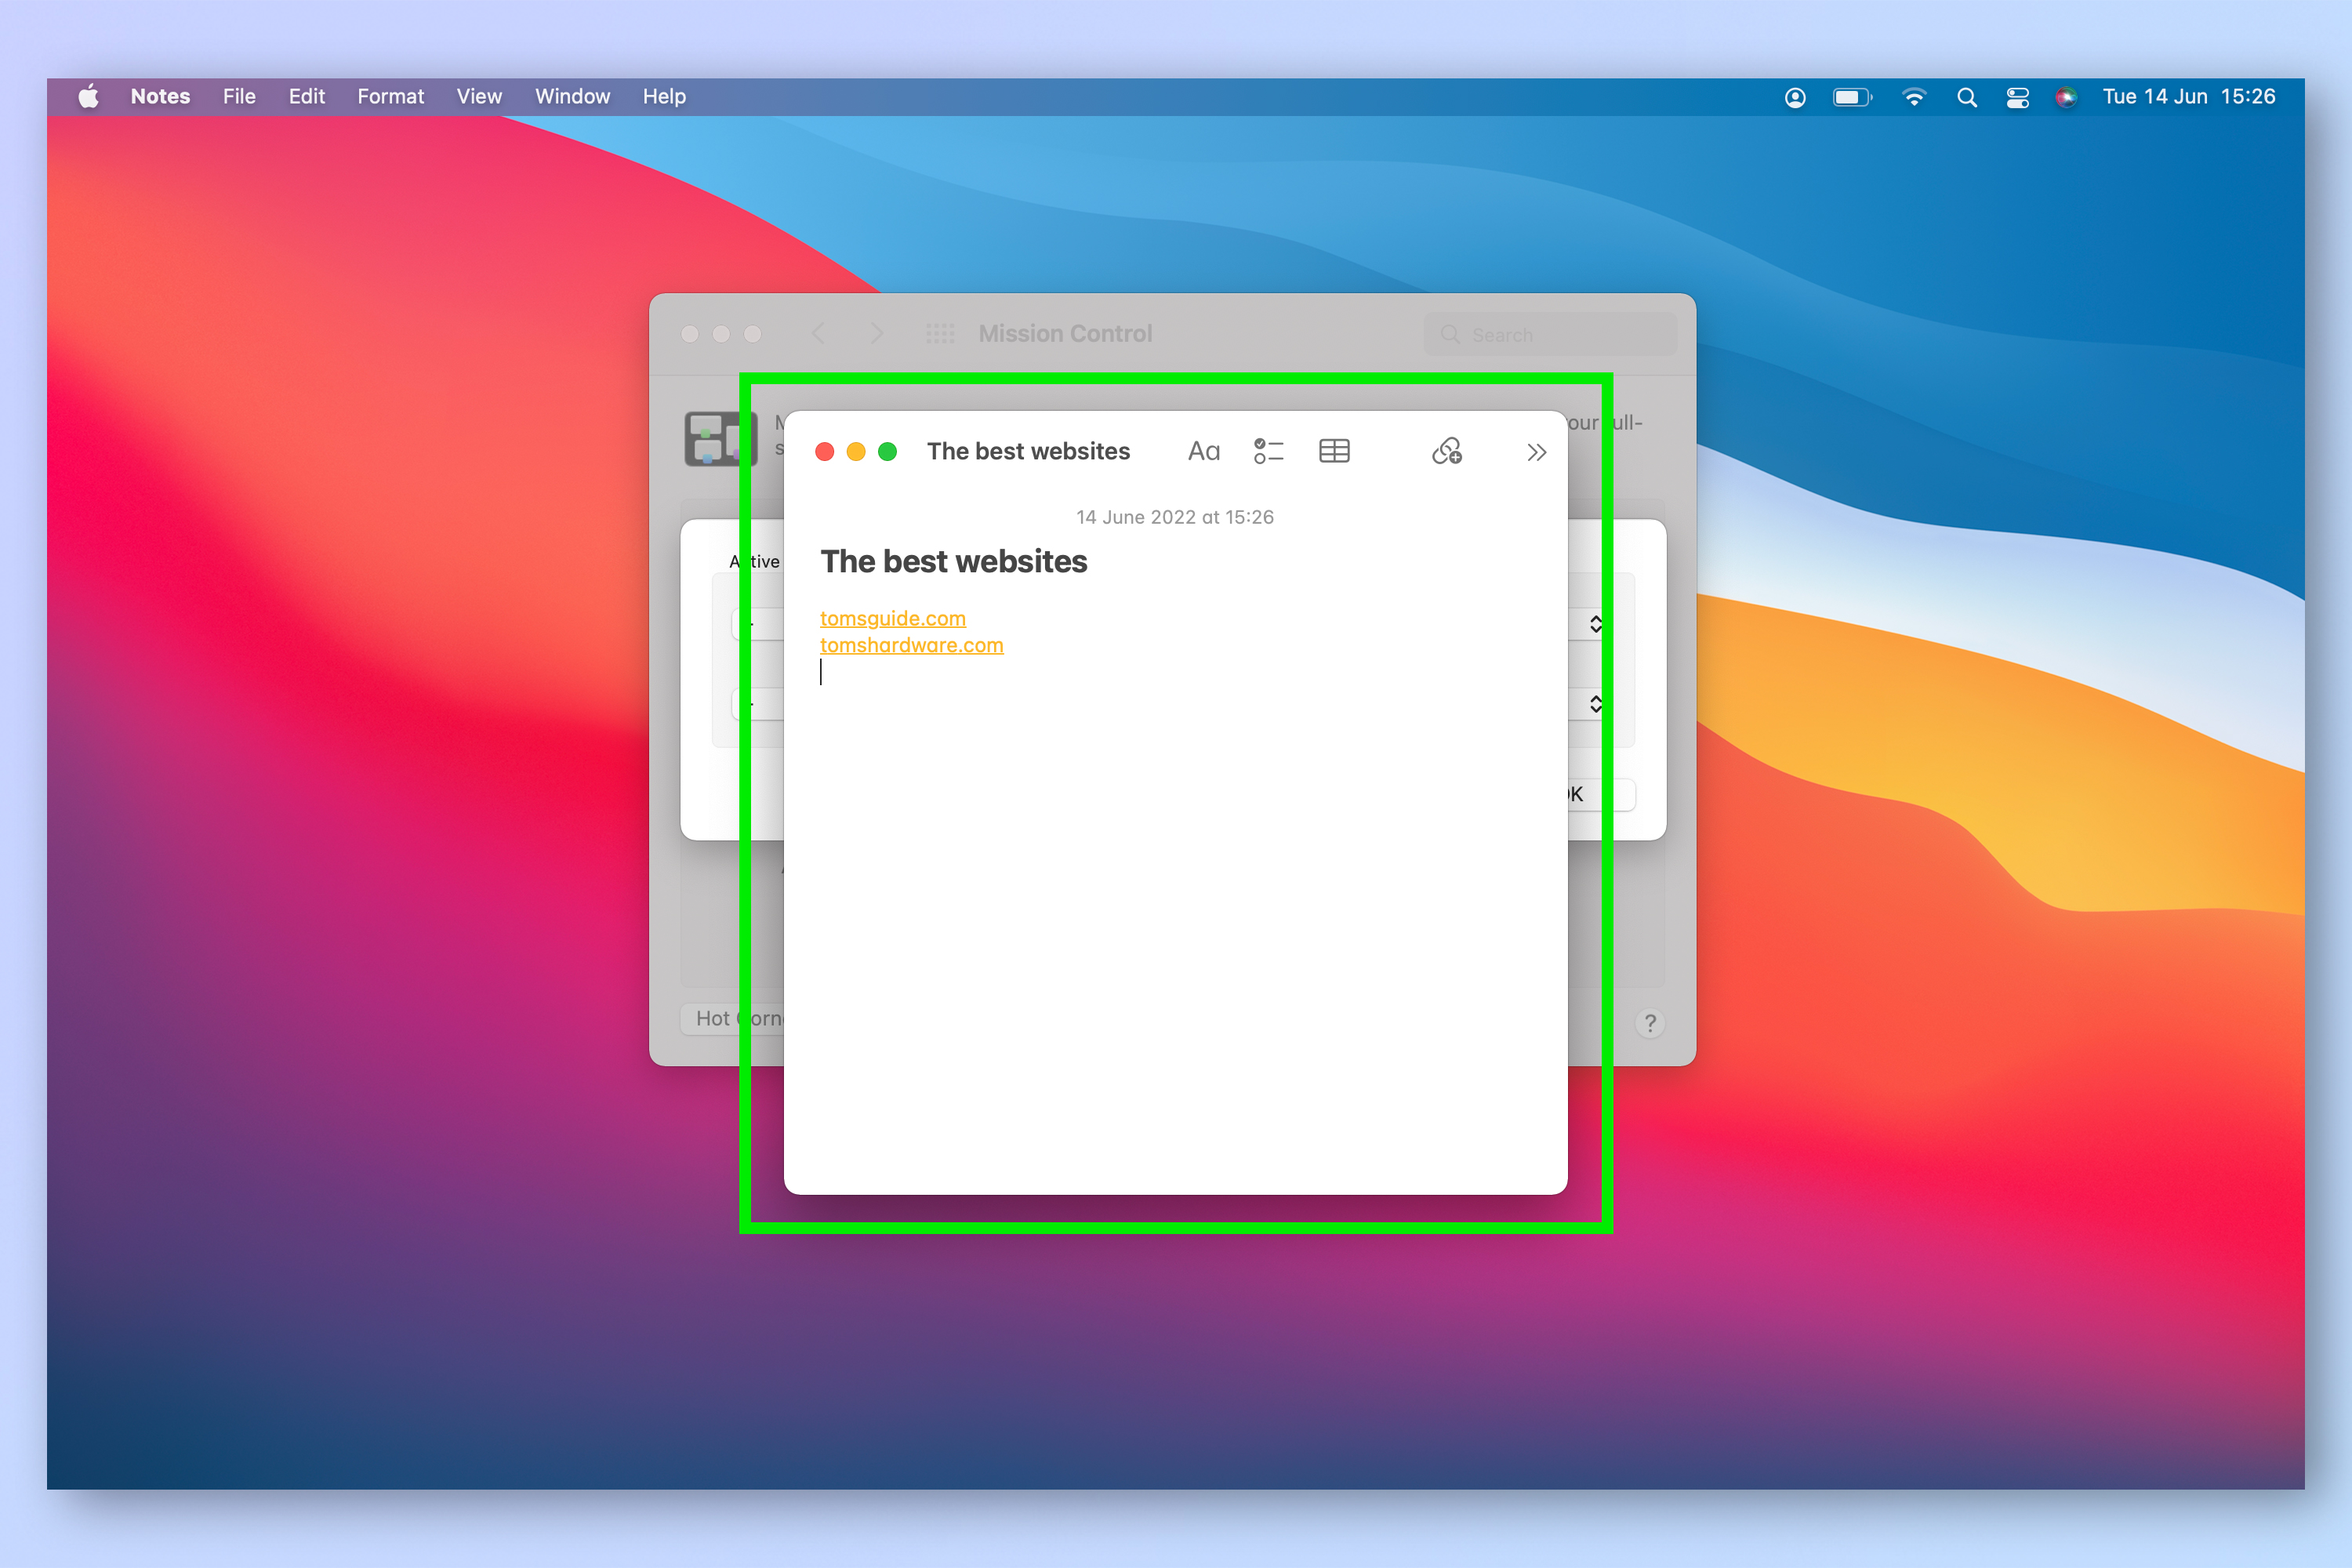
And there you have it. Your corners are now officially hot. If you enjoyed this tutorial and would like to read more macOS-based how to articles, why not check out our other guides, including how to troubleshoot and reset Bluetooth on Mac, how to split your screen on Mac and how to use Universal Control on Mac and iPad, as well as how to recover data from a hard drive and how to transfer photos from iPhone to a computer, which both include advice specifically for Mac users. We also have security-themed guides for Mac, including how to encrypt files on Mac and how to password protect a folder on Mac.

Peter is a Senior Editor at Tom's Guide, heading up the site's Reviews team and Cameras section. As a writer, he covers topics including tech, photography, gaming, hardware, motoring and food & drink. Outside of work, he's an avid photographer, specialising in architectural and portrait photography. When he's not snapping away on his beloved Fujifilm camera, he can usually be found telling everyone about his greyhounds, riding his motorcycle, squeezing as many FPS as possible out of PC games, and perfecting his espresso shots.
