This underrated Mac feature automatically tidies your desktop — try it now
Messy desktop? You need to start using stacks
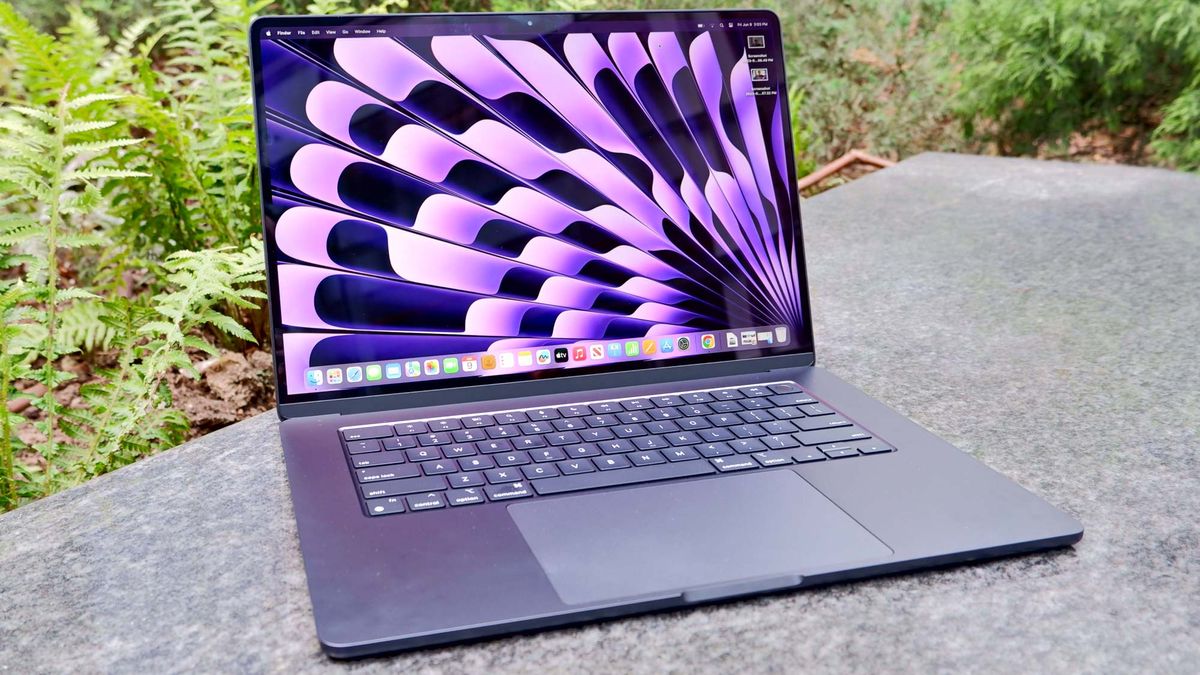
If you aren't using desktop stacks on your Mac, you should be. In fact, I'm a little annoyed at myself for not having used this nifty feature up until now.
Is your desktop cluttered up with various images, documents and other files or folders? There's no shame in it if so — it's a pretty common problem, and I'm used to both making and hearing embarrassed excuses about the state of desktops when sharing screens. The idea of manually sorting and cleaning up your desktop can also be a daunting prospect to start, resulting in the problem only getting worse.
As it happens, though, macOS comes with a built-in feature which automatically tidies your desktop, allowing your lovely background to shine through and making you look neat and organized in the process. It's called desktop stacks, and essentially sorts any file on your desktop into stacks, usually based on overarching file type (although you can set files to stack by other criteria, like tags or last opened date).
It's a super simple feature, but one that I know a lot of Mac users will appreciate, especially those who aren't the most organized. It's little functions like these that help make Macs some of the best laptops to use on a day-to-day basis.
Better still, desktop stacks are incredibly easy to enable, although you may have missed the feature if you didn't know where to look. In this guide, we'll show you how to use desktop stacks on Mac. All you have to do is read on.
How to use desktop stacks on Mac
- Right click the desktop
- Click use Stacks
- Click Group Stacks By
- Select a stack criteria
Read on to see full illustrated instructions.
1. Right click the desktop
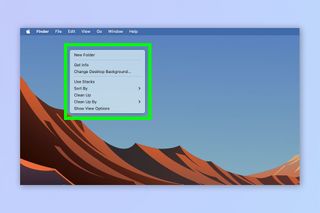
Right click your desktop (the actual desktop background, rather than the Desktop folder in Finder) to bring up the right click menu. We can show you how to right click on Mac if you aren't sure how.
2. Click Use Stacks
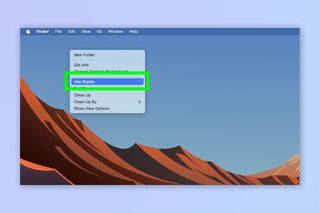
Click Use Stacks.
As you can see by the screenshot below, we've gone from a cluttered arrangement of files on the left to a tidy group of stacks on the right!
Sign up to get the BEST of Tom's Guide direct to your inbox.
Get instant access to breaking news, the hottest reviews, great deals and helpful tips.
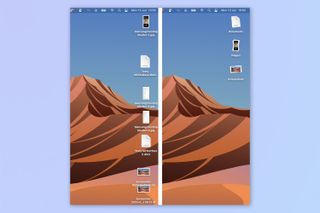
3. Select a criteria to stack by (Optional)
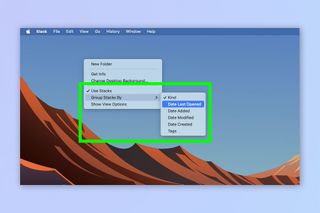
By default, stacks are grouped by Kind, such as images or documents. Your Mac will group all image file types together, all screenshots, or all documents etc. To change this, right click on the desktop and click Group Stacks By.
Now, select an option to stack by. Apart from Tags and Kind, the other options will group your stacks by date. You can see an example below, where I selected Date Last Opened, and my files were grouped accordingly.
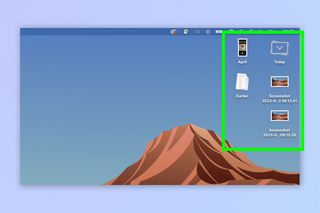
That's all there is to it. With a few clicks, you'll have totally cleaned up your Mac's desktop without needing to tidy everything away manually. If you'd like more help using your Mac, our range of tutorials has you covered. Learn how to clear the cache on Mac if your machine is a little sluggish. We can also show you how to update a Mac, in addition to the macOS tricks every new Mac owner should know.

Peter is Reviews Editor at Tom's Guide. As a writer, he covers topics including tech, photography, gaming, hardware, motoring and food & drink. Outside of work, he's an avid photographer, specialising in architectural and portrait photography. When he's not snapping away on his beloved Fujifilm camera, he can usually be found telling everyone about his greyhounds, riding his motorcycle, squeezing as many FPS as possible out of PC games, and perfecting his espresso shots.

