AirPods Pro 2 just got a killer upgrade with iOS 17 — here's how to turn it on
Find out how to enable Adaptive Audio with AirPods Pro 2 and never miss a beat
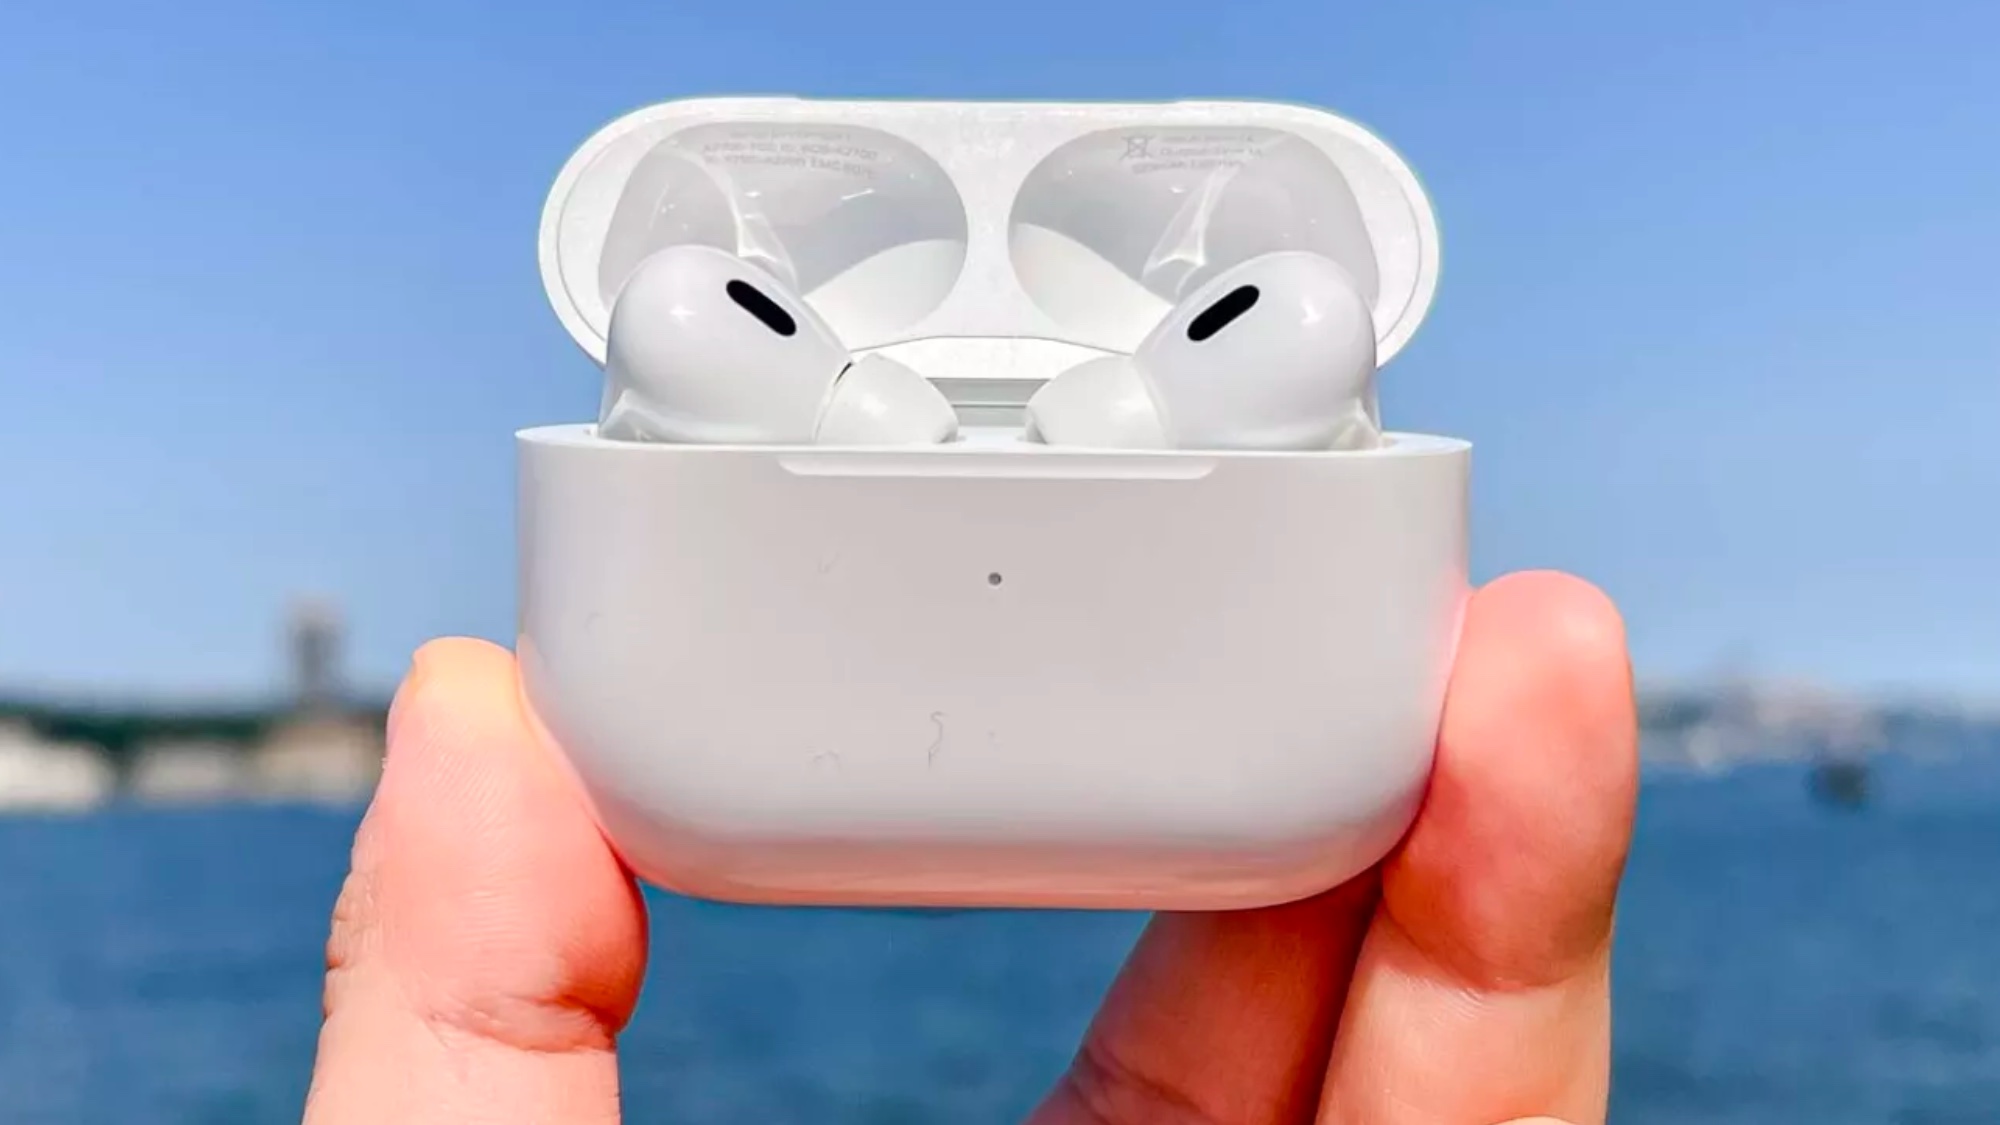
September 2023's Apple Event was awash with announcements, as you'd expect. In the audio space, Apple announced the AirPods Pro 2 USB-C, but you may have missed some of the smaller features coming to both sets of AirPods Pro 2, which have rolled out as part of iOS 17.
We've already covered two awesome AirPods features to arrive with iOS 17: Conversation Awareness, which dips noise cancellation and audio as you speak; and muting during calls using the AirPods stems, which is a long overdue feature in our opinion. But there's yet another killer new feature feature, and that's Adaptive Audio.
Enabling Adaptive Audio brings a wealth of benefits to the AirPods Pro 2 (it's only available on the Pro 2 at the time of writing) by dynamically adjusting external noise and adjusting the volume of the buds in response to the environment. This is similar to Conversation Awareness, but that feature only kicks in when your AirPods sense you talking — Adaptive Audio adjusts parameters based on external noise that isn't only coming from you.
In doing so, Adaptive Audio takes away a lot of hassle: you’re not having to constantly change the volume manually nor are you running the risk of ruining a song or missing a part of an audiobook or podcast. Before this was introduced, you’d have needed to keep switching between Active Noise Cancellation and Transparency mode depending on the circumstances.
By blending Active Noise Cancellation and Transparency mode, however, listening becomes more comfortable. If there is loud noise, your AirPods will seek to cancel it out but, vitally, you’ll still be able to hear other sounds like train announcements or car horns. And you don’t have to do anything except switch it on. So let’s find out how to enable Adaptive Audio with AirPods Pro 2.
How to enable Adaptive Audio with AirPods Pro 2 using the Settings app
Your AirPods case will need to be open, or you'll need to have the earbuds in your ears before you follow these steps. Remember, you'll also need iOS 17 to use this feature. We can show you how to download and install iOS 17 if you need to upgrade your iPhone software.
1. Select your AirPods
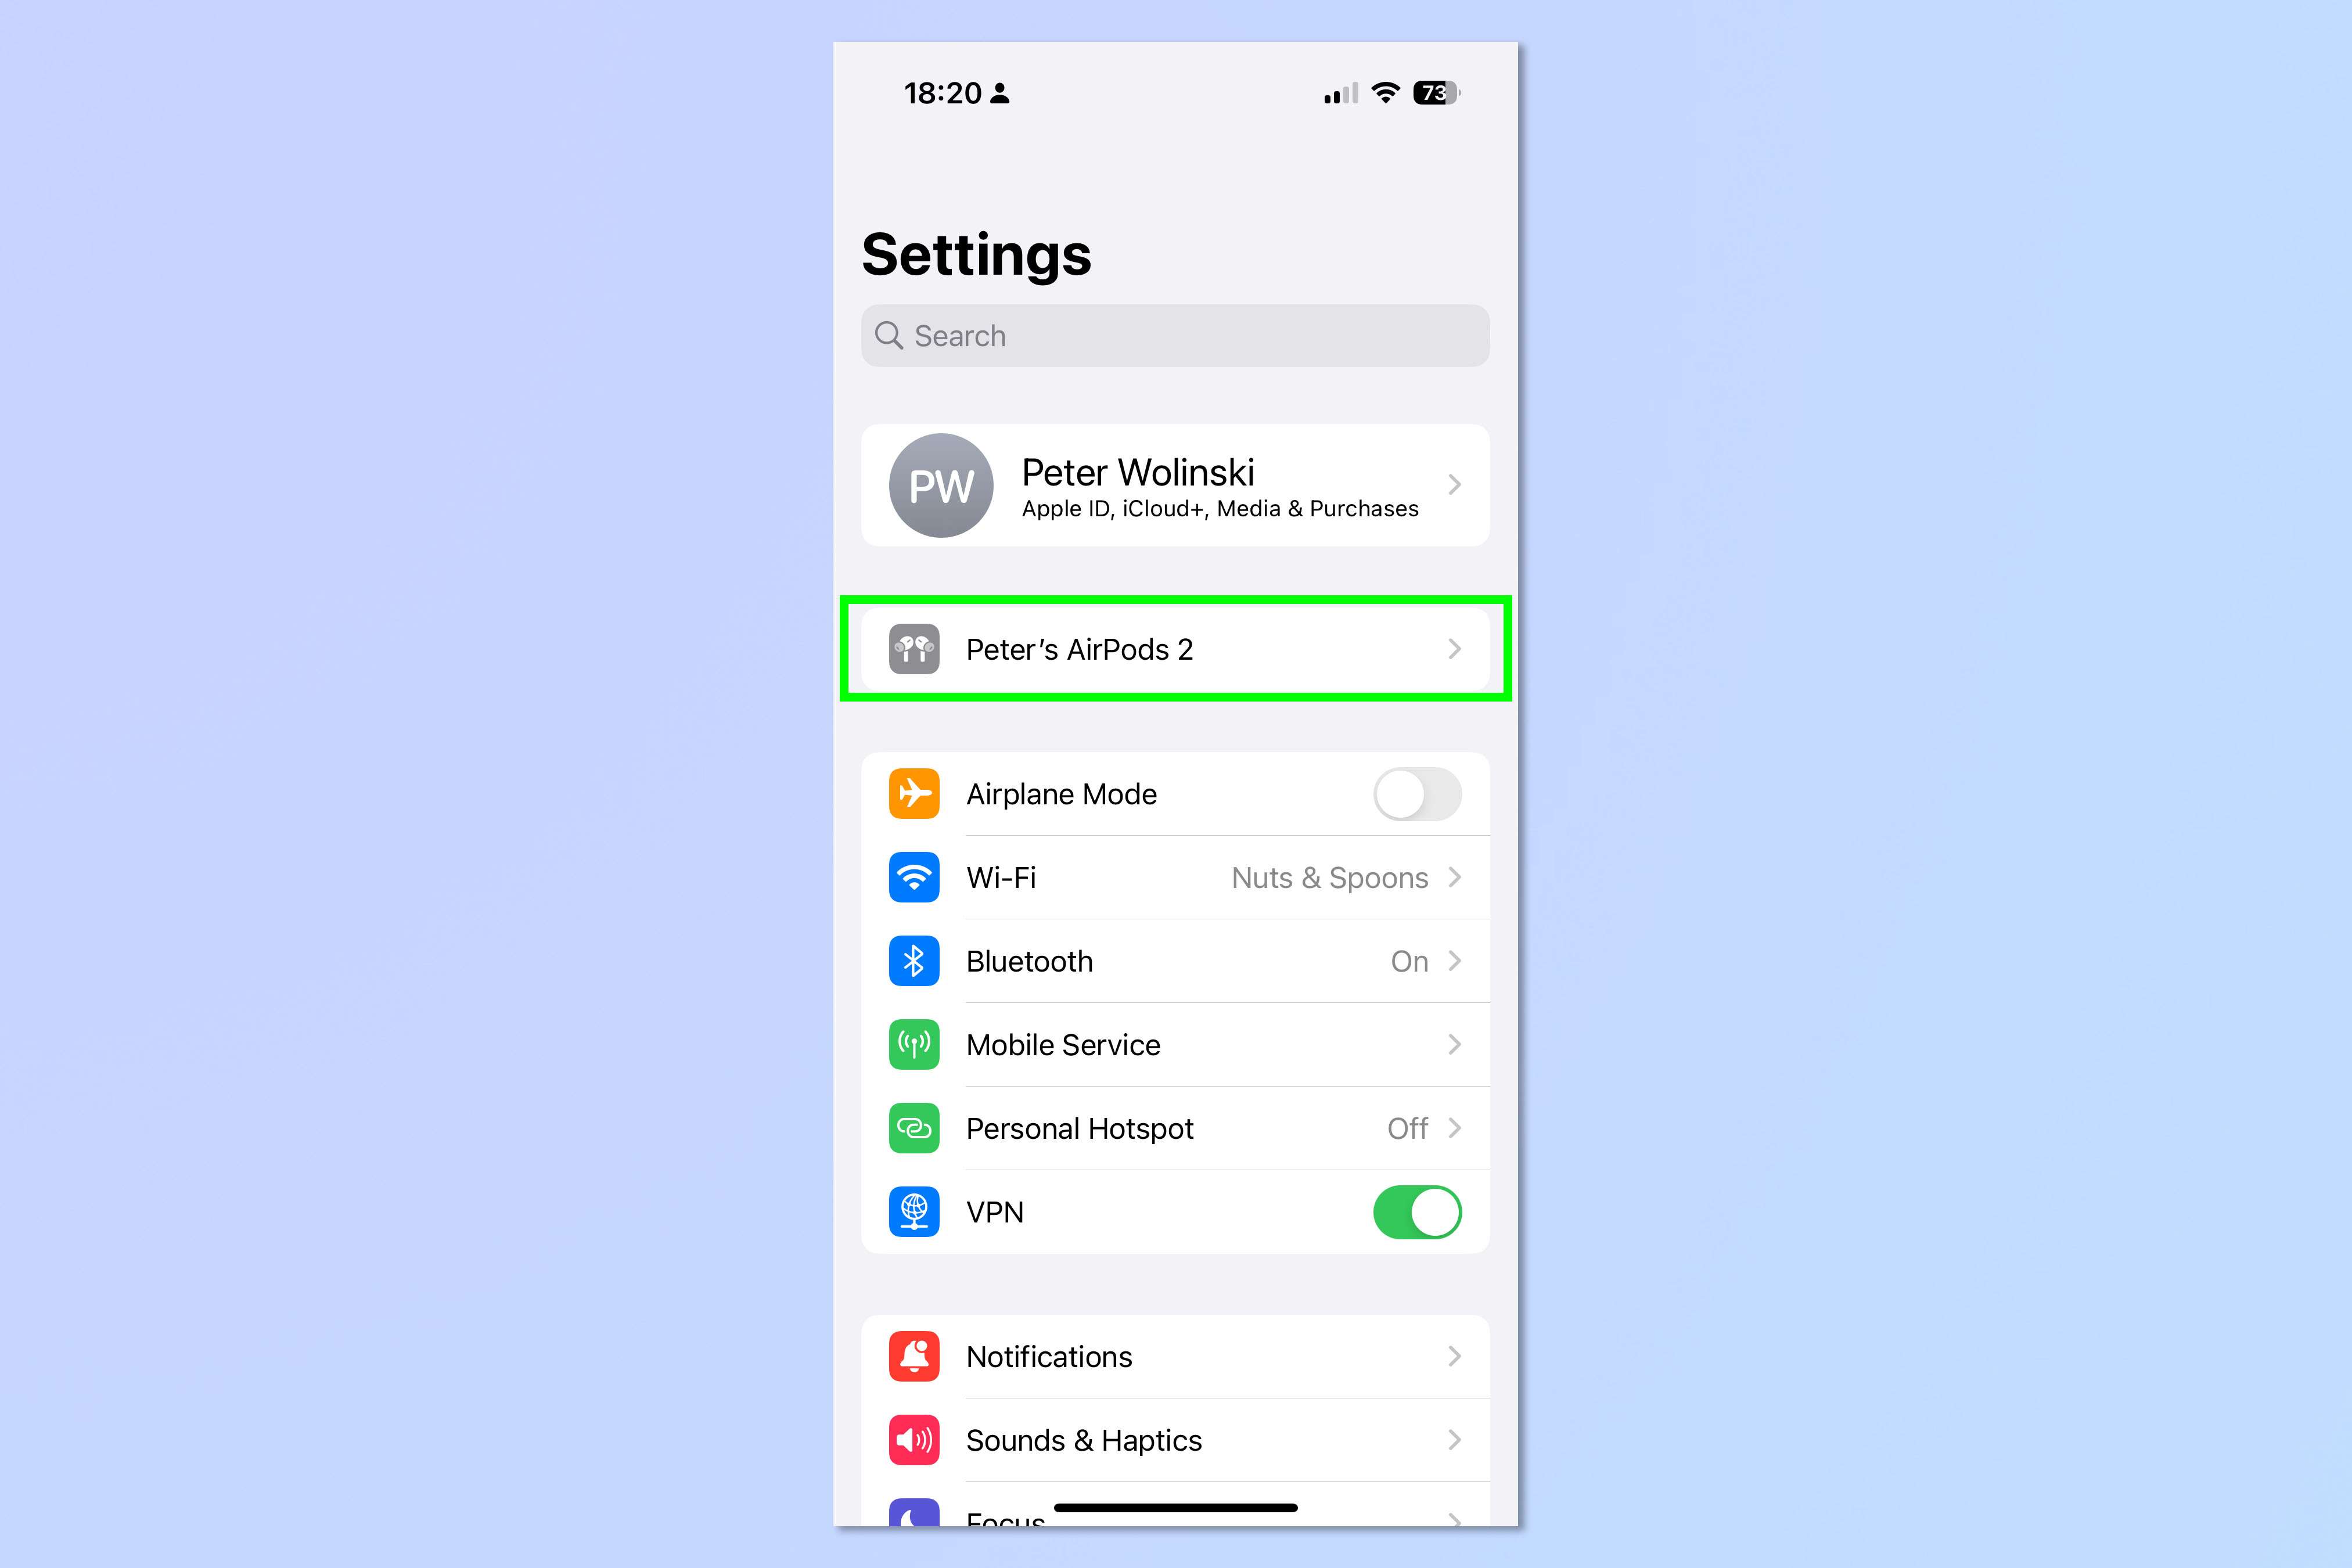
Open the Settings app on your iPhone and, with your AirPods Pro 2 connected (learn how to connect AirPods to an iPhone or iPad if you’re not sure), tap the name of your AirPods Pro 2 which should appear at the top of the screen.
2. Select Adaptive
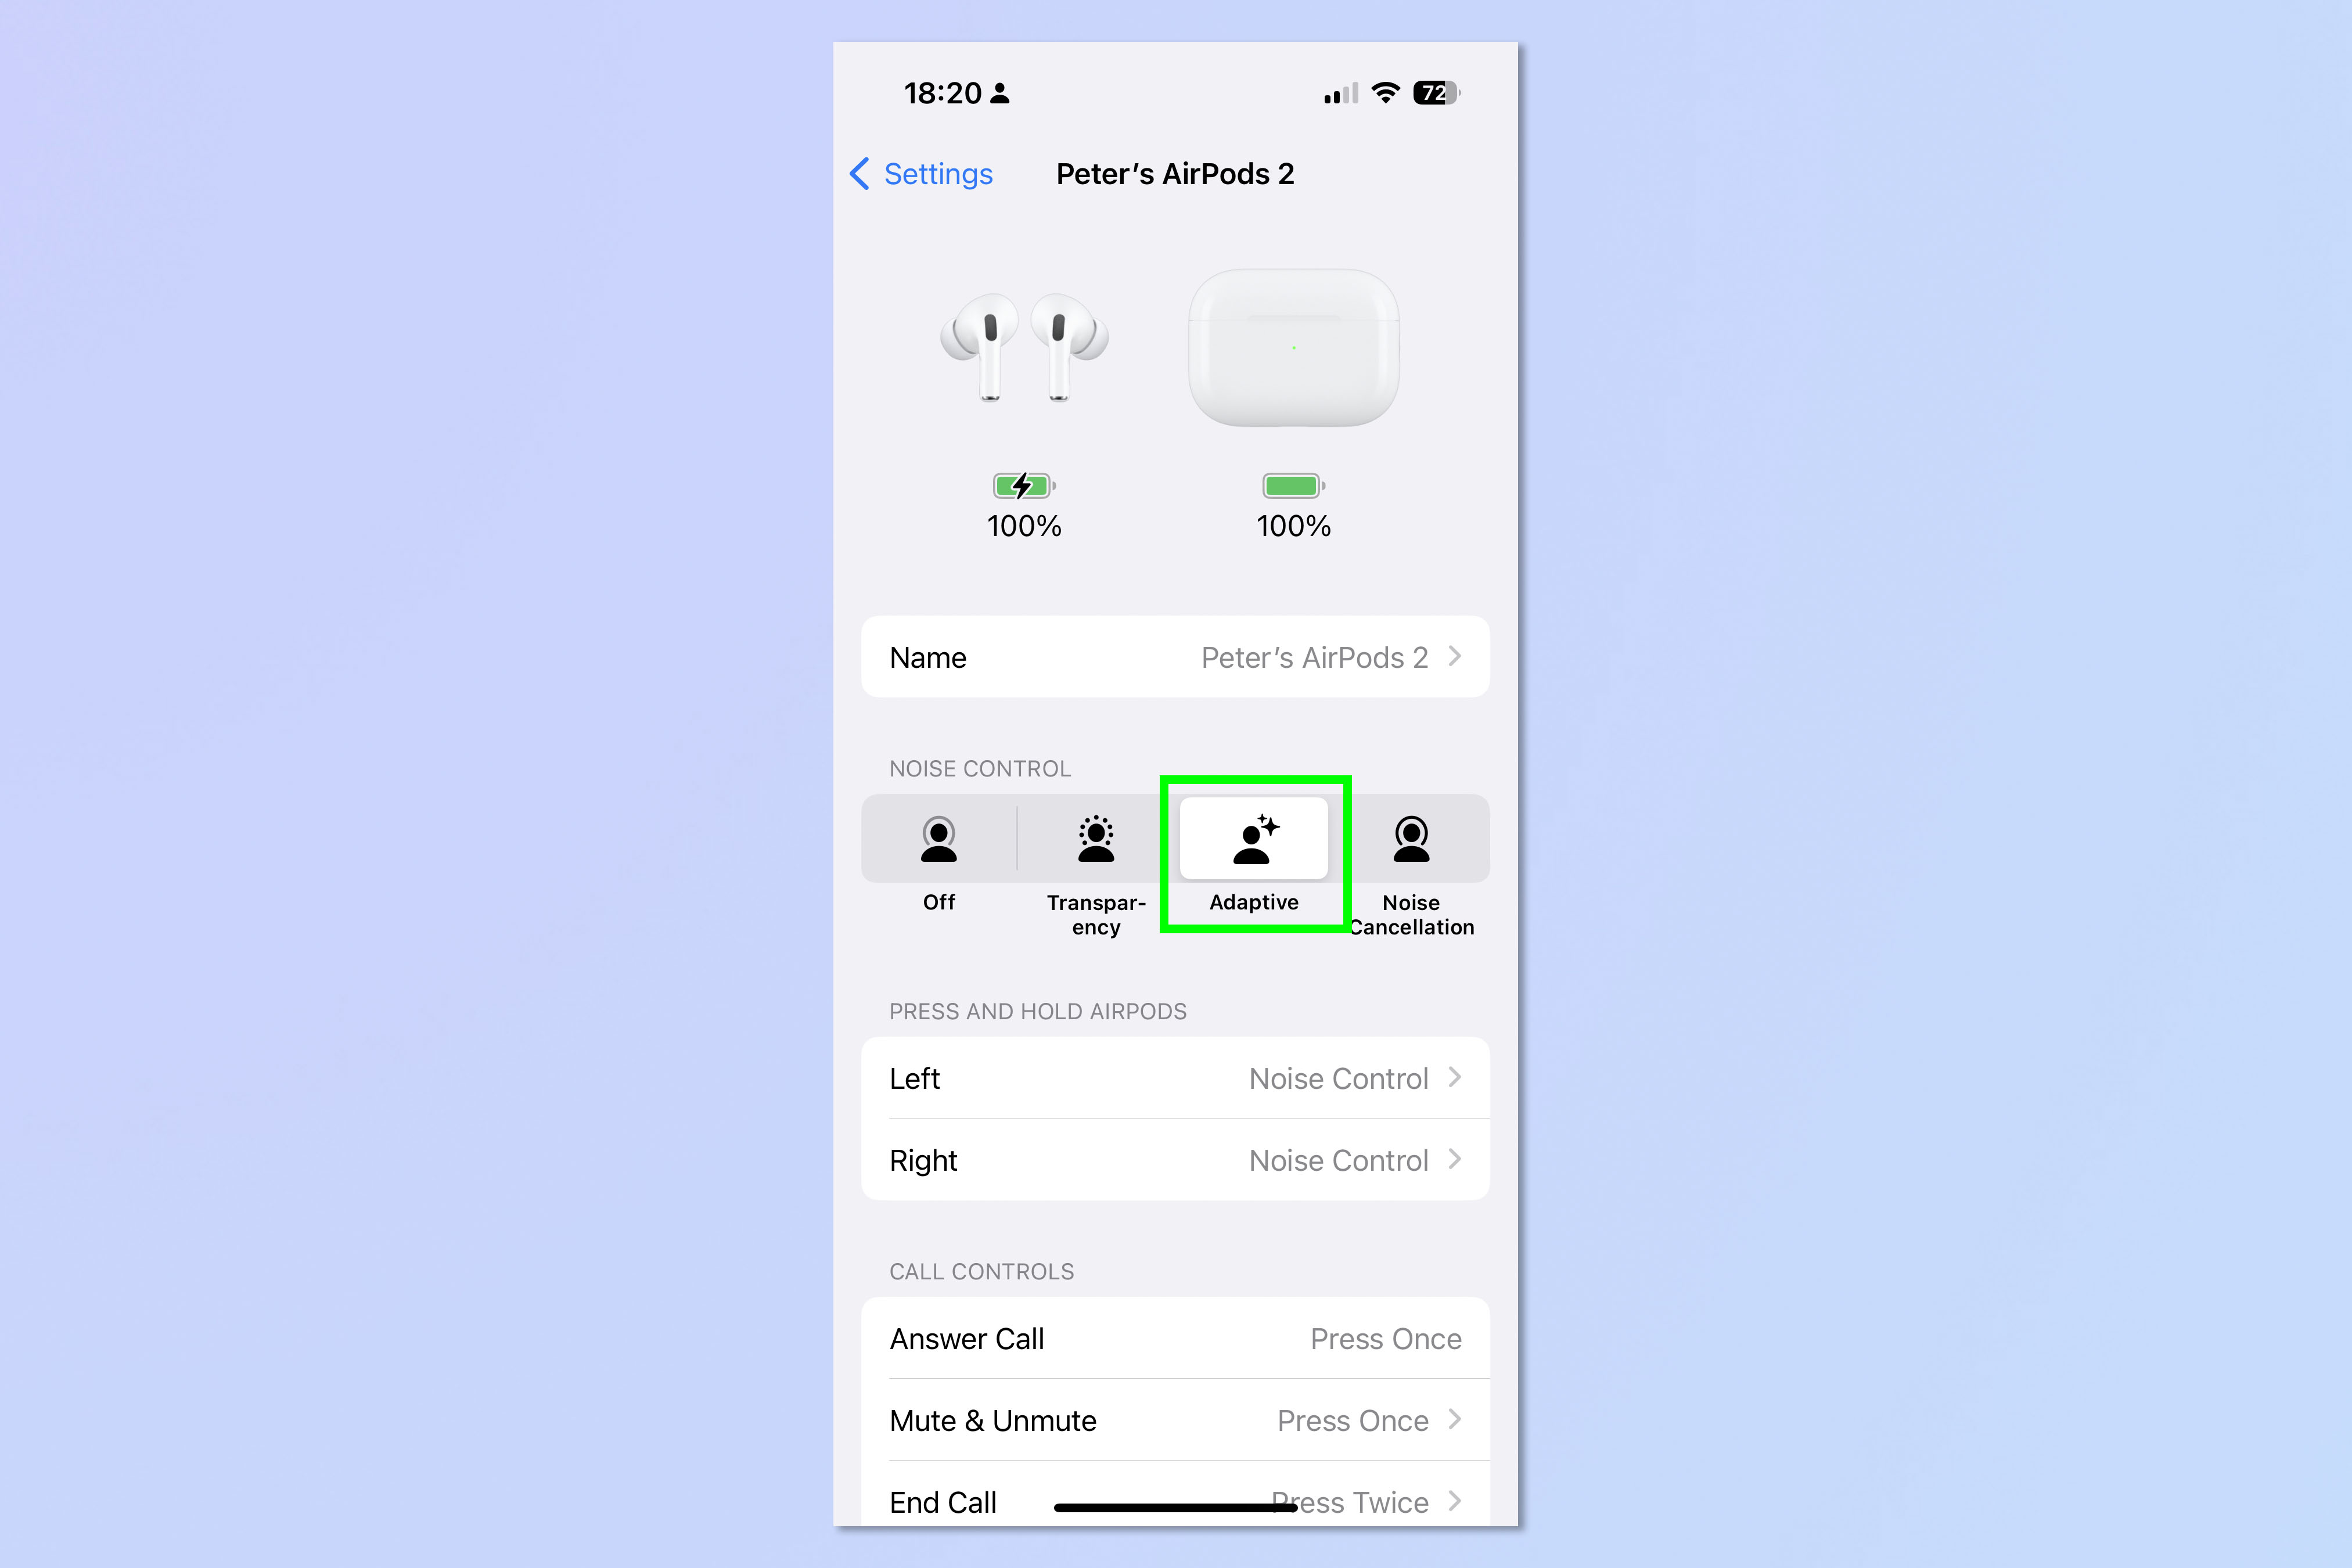
You will see the settings for your AirPods Pro 2. Simply tap the Adaptive button in the Noise Control section. Adaptive Audio will be enabled.
How to enable Adaptive Audio with AirPods Pro 2 using the Control Center
You can also enable Adaptive Audio with a few taps via the Control Center. Your AirPods will need to be in your ears before you follow these steps.
Sign up to get the BEST of Tom's Guide direct to your inbox.
Get instant access to breaking news, the hottest reviews, great deals and helpful tips.
1. Tap the volume button
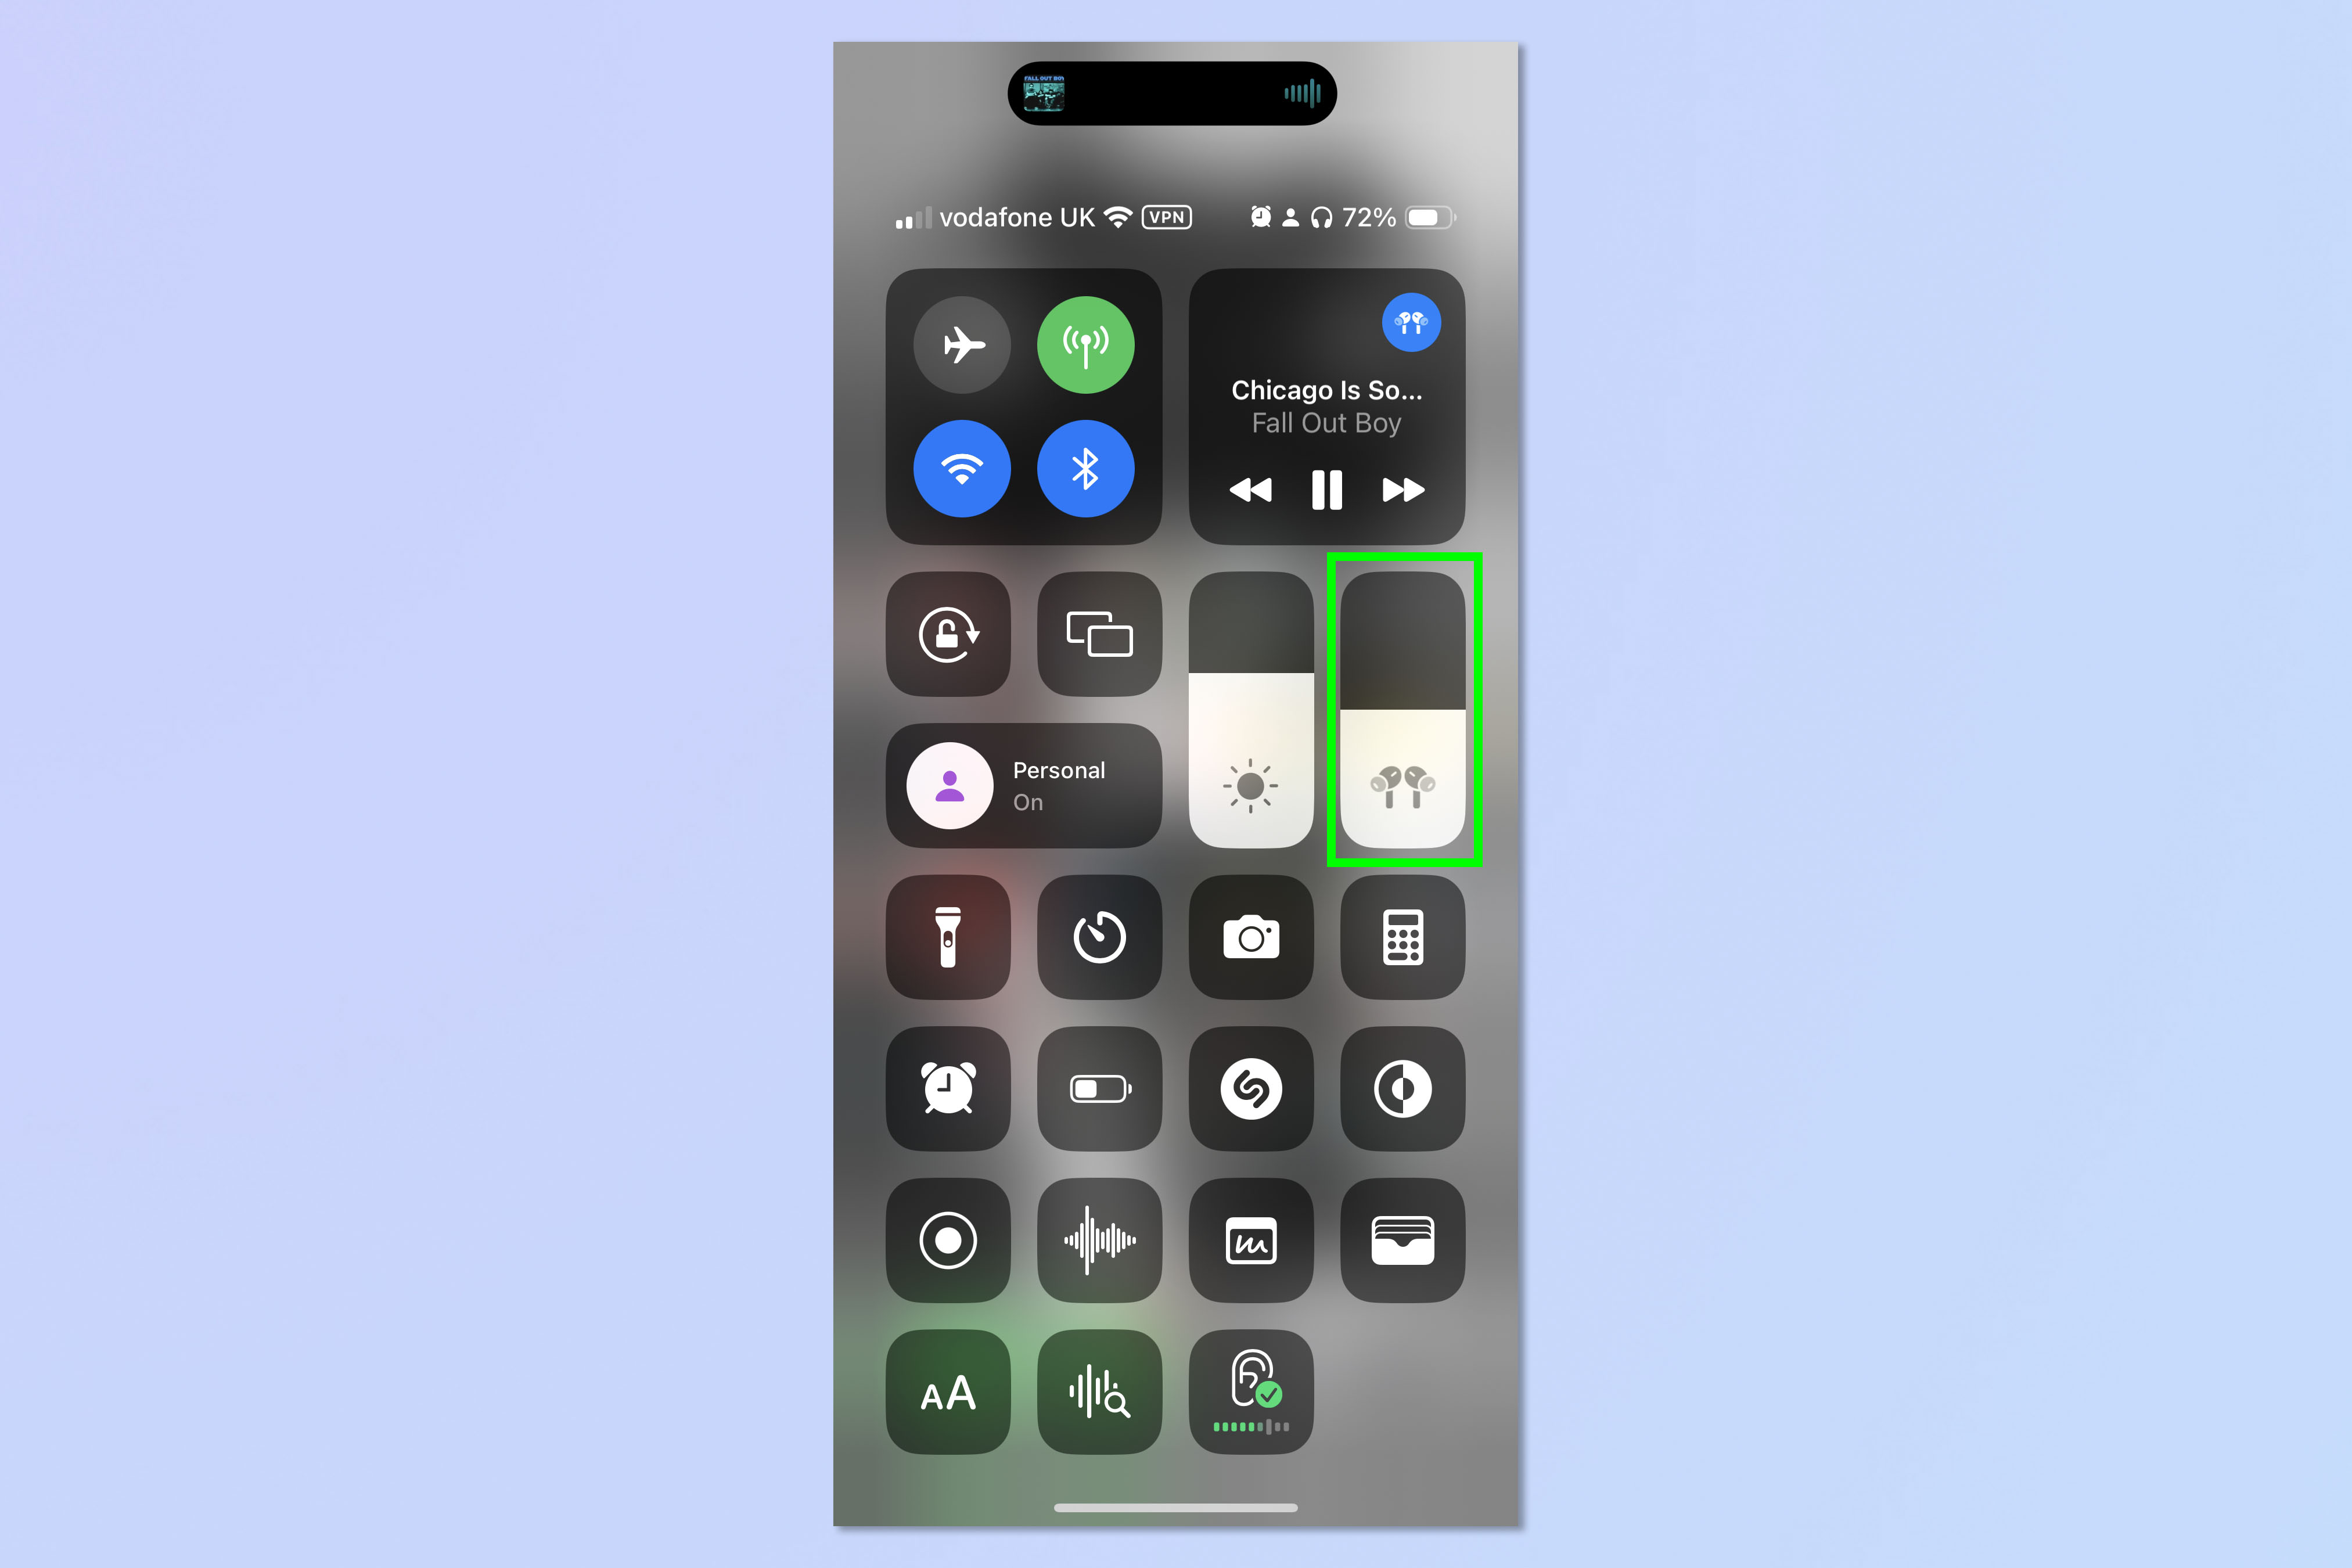
Open the Control Center (to do this swipe down from the upper-right corner of the screen on an iPhone with Face ID or swipe up from the bottom of the screen on an iPhone without Face ID). Then, with your AirPods Pro 2 connected (learn how to connect AirPods to an iPhone or iPad if you’re not sure), long press the volume control for your AirPods Pro 2.
2. Select Noise Control
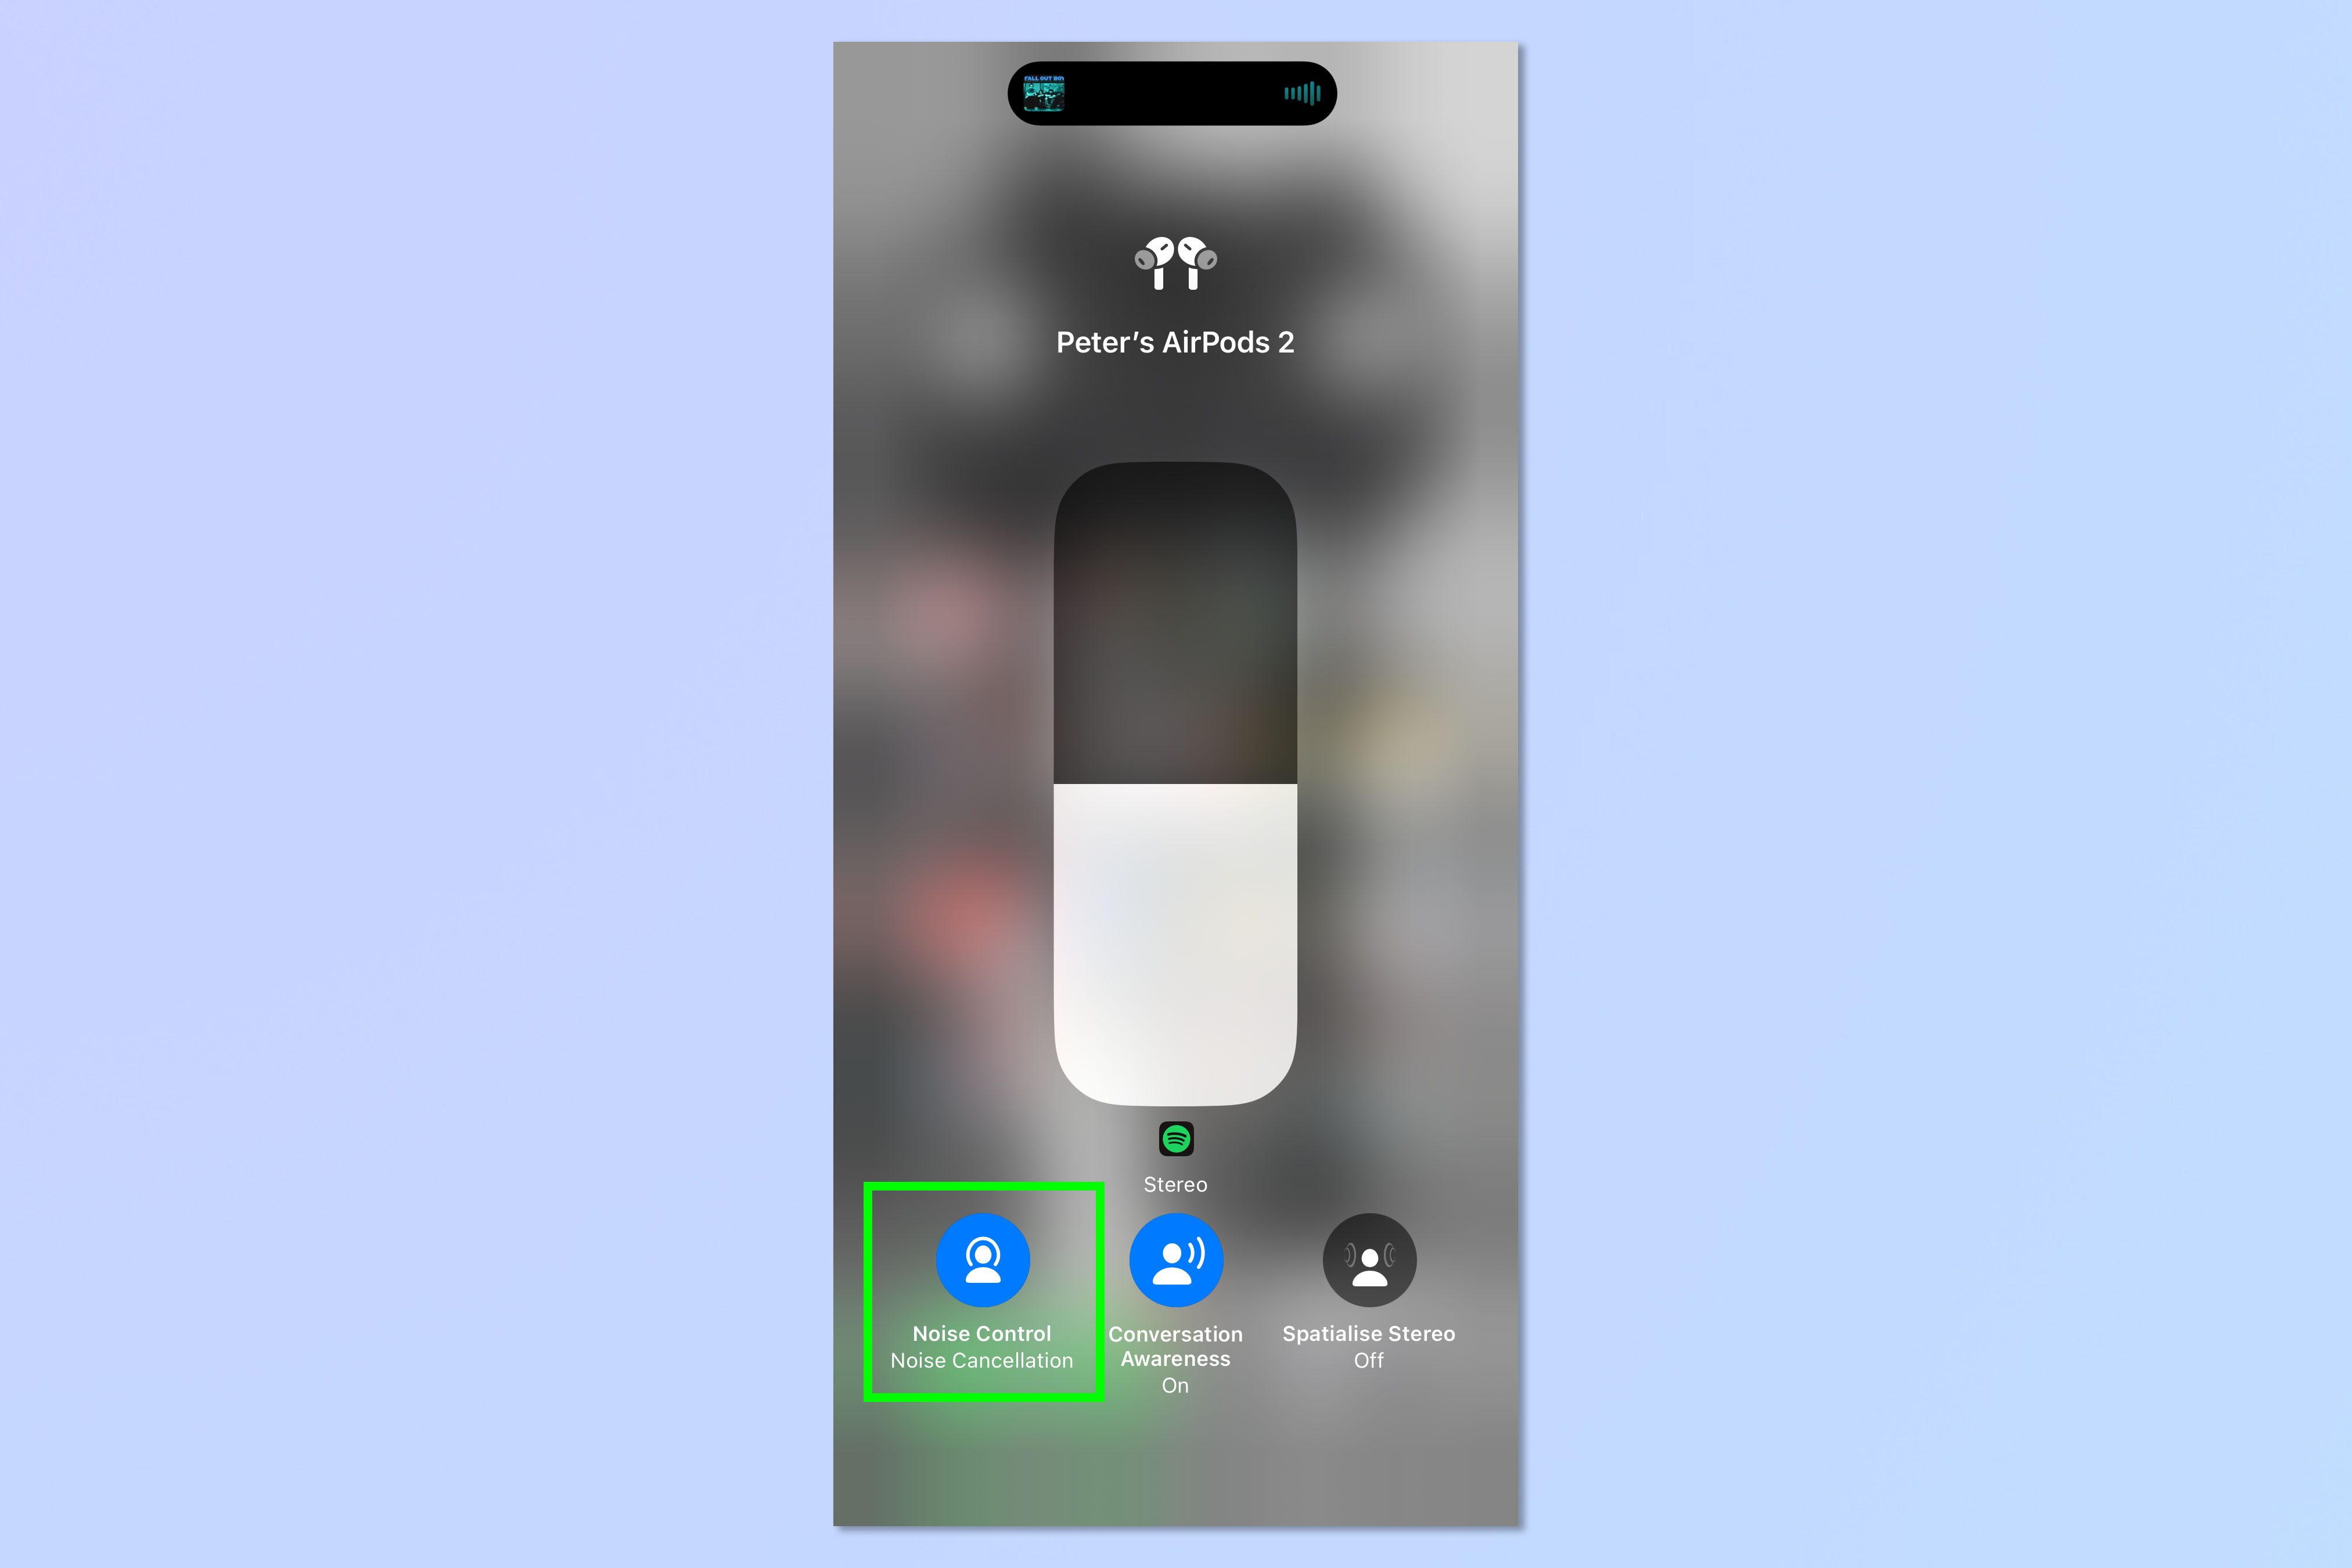
You will see a set of options beneath the large volume slider. Tap Noise Control.
3. Select Adaptive
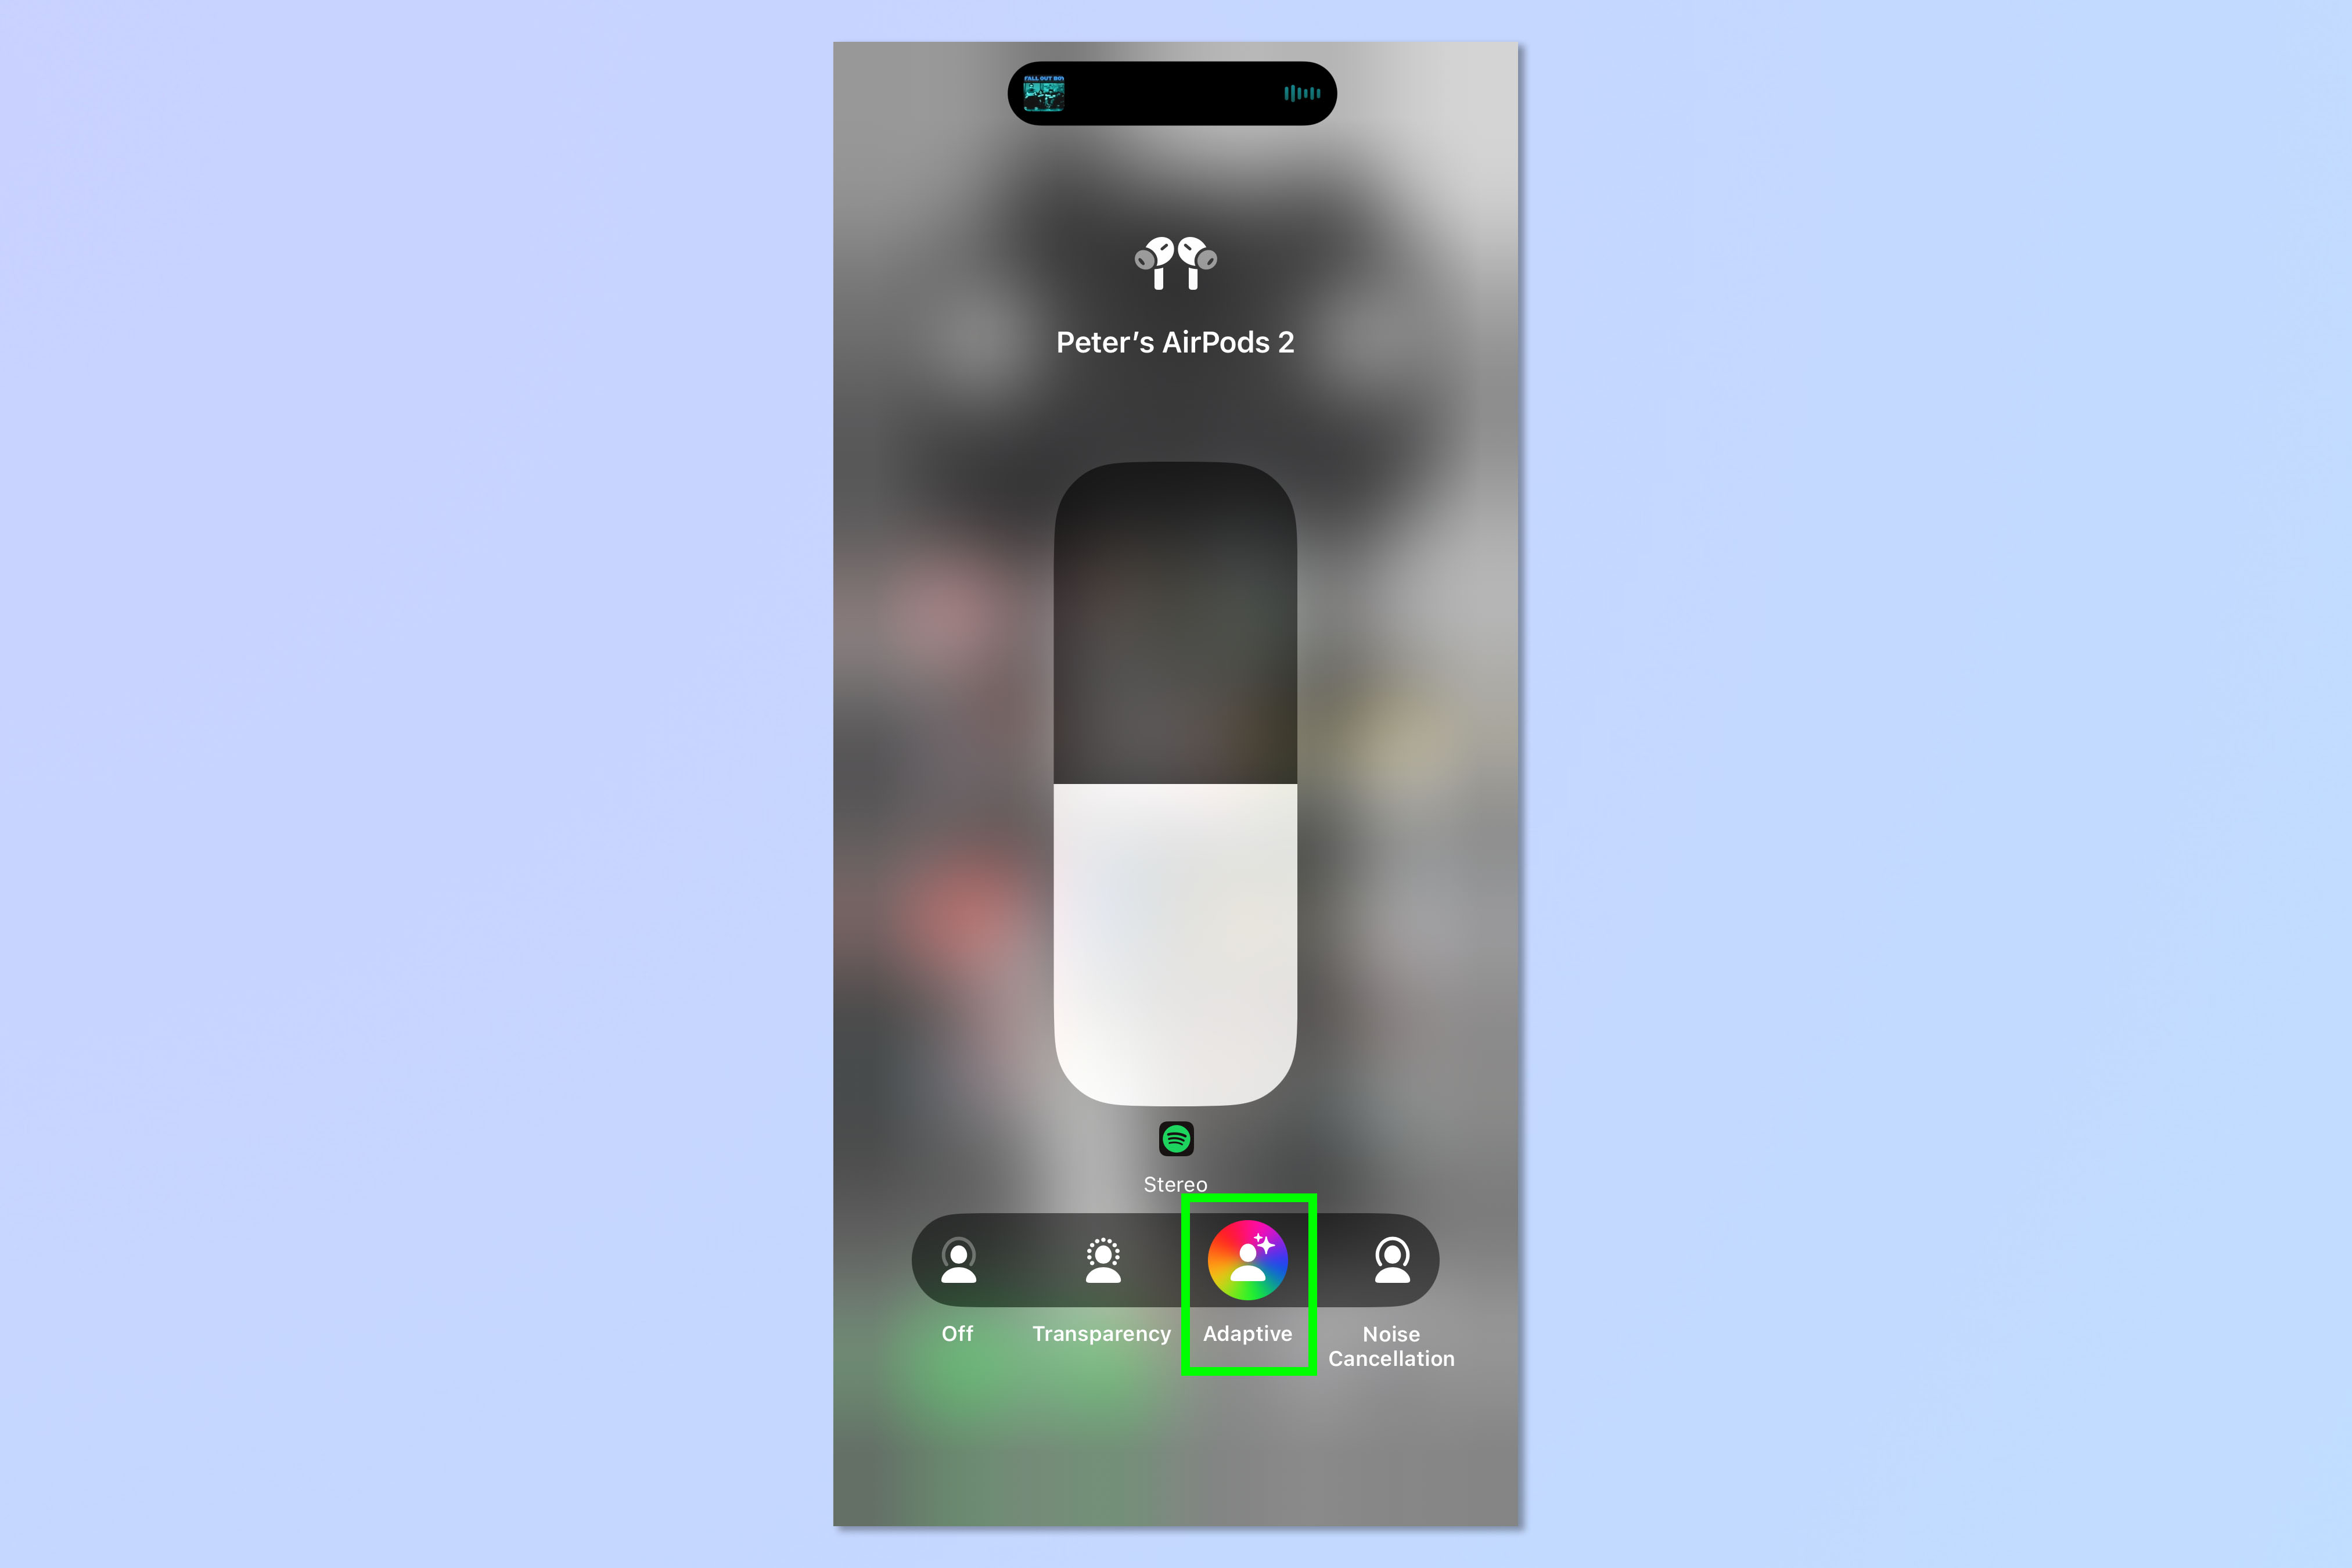
Simply tap the Adaptive button in the options bar at the bottom of the screen. Adaptive Audio will be enabled.
And there you go. You now know how to enable Adaptive Audio with AirPods Pro 2. Just to note, you can't switch between other noise control modes and Adaptive Audio using a long press on the AirPods stem. This is a little annoying, as that's how you switch between the other noise control modes, but unfortunately that's just the way to seems to work for now,
Want to learn more iOS 17 tricks? Make sure you know how to enable StandBy Mode on iPhone, to turn your device into a smart home display when you aren't using it. You'll also want to know how to use NameDrop on iPhone to share contact details easily. And we definitely think you should learn how to change your default search engine in Safari's Privacy Mode, as this will allow you to customize and maximize your online privacy when browsing.

David Crookes is a freelance writer, reporter, editor and author. He has written for technology and gaming magazines including Retro Gamer, Web User, Micro Mart, MagPi, Android, iCreate, Total PC Gaming, T3 and Macworld. He has also covered crime, history, politics, education, health, sport, film, music and more, and been a producer for BBC Radio 5 Live.
