How to upload and publish a video on YouTube
Find out how to share your video content with the world

After you create a video, you'll want to share it with the world, and there's no better way than uploading it to YouTube. If you use the best video editing software for your needs and the right video hosting platform, you will be able to share your video content in a fast, efficient manner. And what’s more, many popular video hosting platforms, including YouTube, are completely free to use.
In this guide, we outline everything you need to know to upload to YouTube, which is arguably the world’s most popular video-sharing platform. The process is actually surprisingly simple, even if you have no video creation experience, and there are various tools at your disposal to make it even easier.
How to upload and publish a video on YouTube: Preparation
Before you can upload to YouTube, there are a few things you need to do. For starters, make sure that you have an active YouTube account. Create a new channel if required, and make sure its name and appearance are relevant to the content you’re planning to share.
Additionally, you need to make sure that the visual side of your video is edited and compiled as you want it. If you require voice-overs or other sound effects, you can add them as well, but keep in mind that YouTube has a large, free audio library that allows you to add music and other sound effects after uploading.
You also need to make sure that your video file type is supported by YouTube. In saying that, most common video formats are fine. You can find a full list of YouTube-supported file types here.
1. Log in to your YouTube account and click the create button
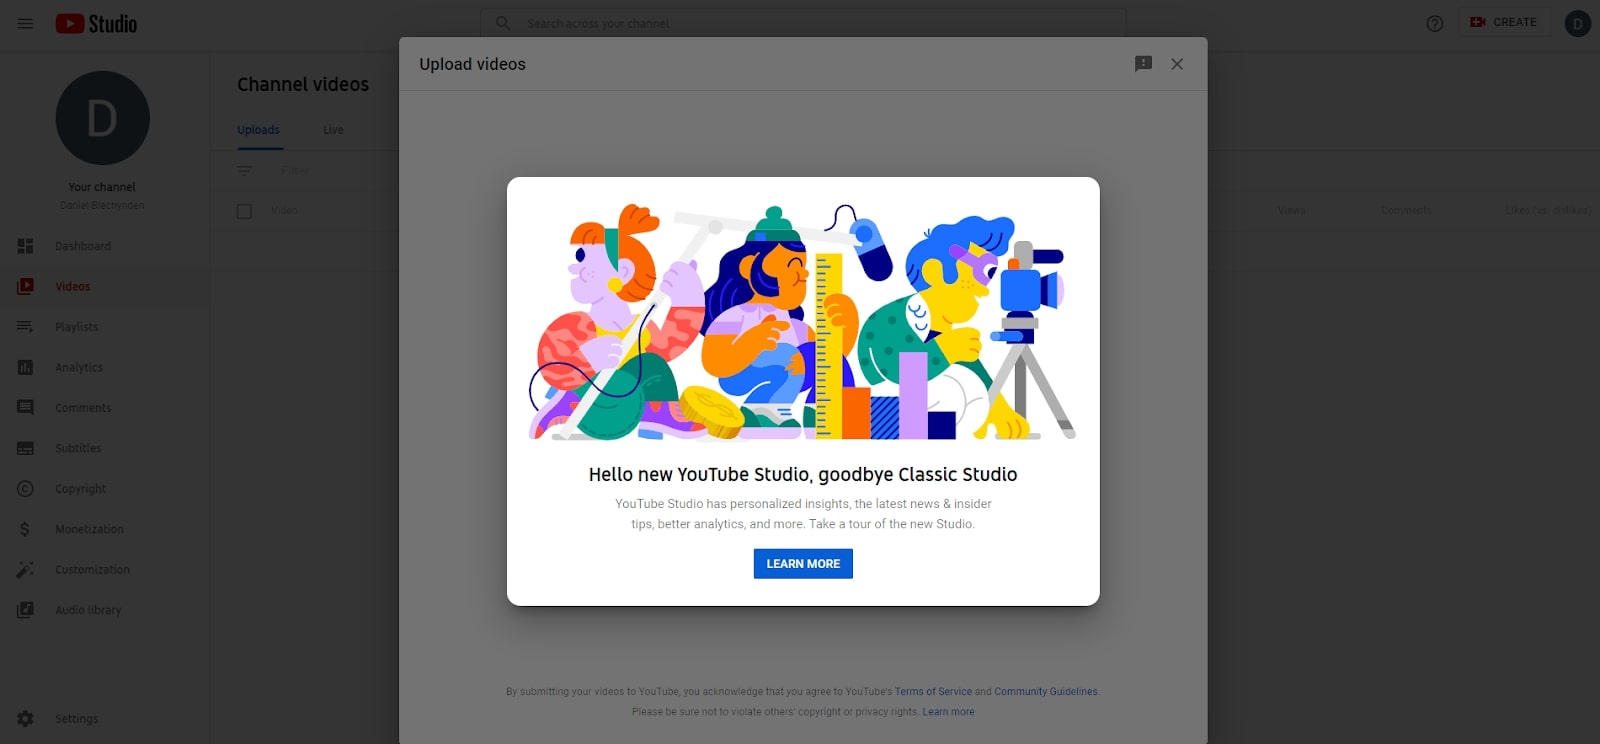
When you log in to your YouTube account, you will see a small video camera icon with a plus in the center located in the top right corner of the screen. Click on this, and two options will appear: Upload video and go live. Click the upload video option, and you will be taken to the YouTube Studio.
2. Select your video
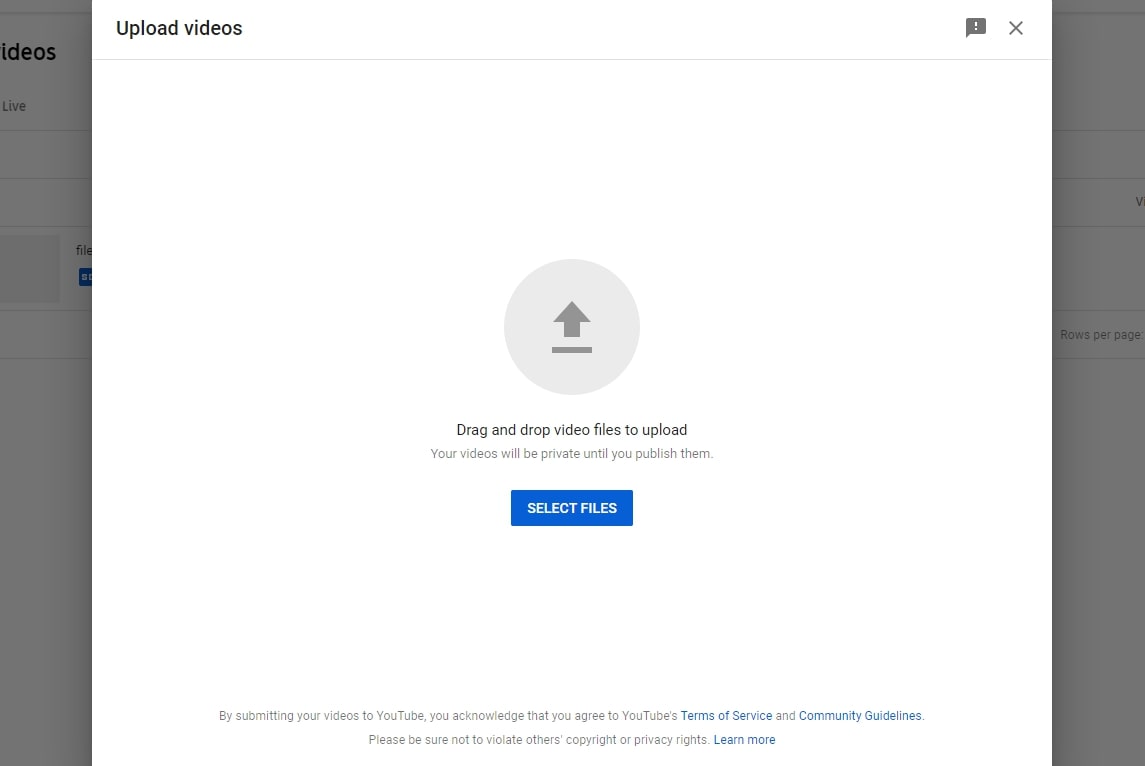
Here, you will be shown a screen that allows you to upload your raw video file from your computer or other device. Click the Select Files button or drag and drop your video file to begin the upload process.
Sign up to get the BEST of Tom's Guide direct to your inbox.
Get instant access to breaking news, the hottest reviews, great deals and helpful tips.
3. Fill in video information
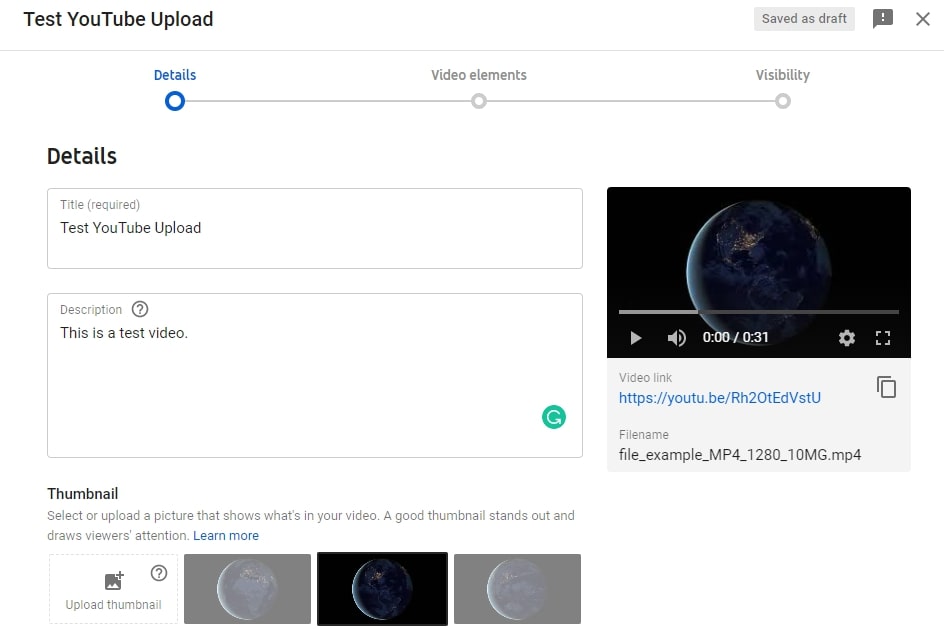
Once you’ve selected your video file, you will be taken to a screen that allows you to specify information for your audience. Create an attractive file name that’s relevant to your content. Remember, it’s a good idea to use keywords and phrases that people are likely to search for.
Similarly, make sure you put together a clear description that tells viewers exactly what they can expect to find in your video. Ensure it’s clear and well written. Select a suggested thumbnail from your video file or upload a custom one. This will be shown in search results and suggested video menus, so make sure it’s neat and attractive.
You can also add your video to a playlist here and specify whether or not it’s appropriate for children.
4. Add more info to your video
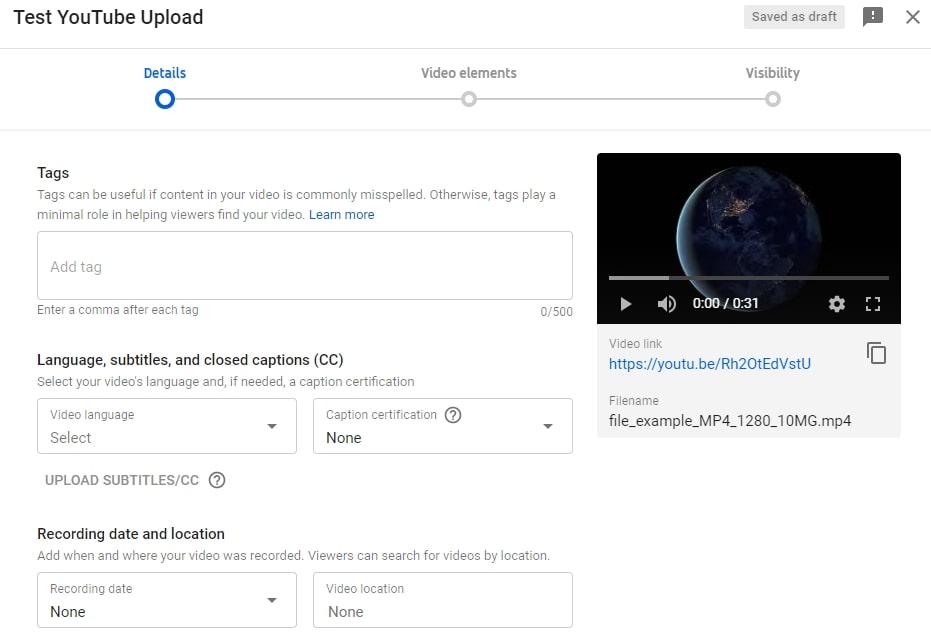
At the bottom of the initial detail page, you will find a More Options button. We highly recommend clicking this and filling in as much information as possible, as it will help you gain visibility and grow your audience.
You can add relevant tags, select and upload subtitles if required, and add a video recording date and location. Specifying a video category will help people find your content, and you can also choose how comments are shown—if you want them to be shown at all.
5. Add call-to-action elements
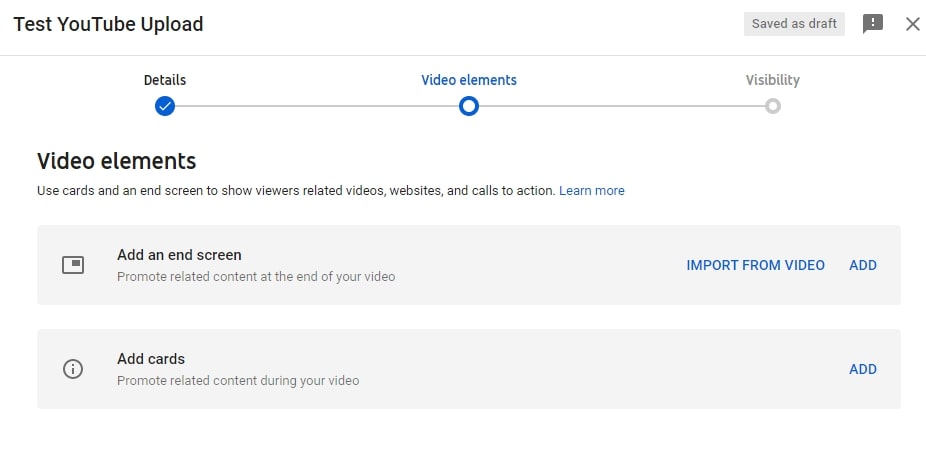
Hitting the next button will take you to a video elements section. Here, you can choose to add an end screen or in-video cards to promote relevant content or products. If you have a website, it’s a good idea to add a link here to help drive extra traffic. Or, if you’re working alongside a business to promote a product or service, you might like to add information about them. In many cases, a disclaimer is a good idea as well.
6. Make sure everything is right and hit publish
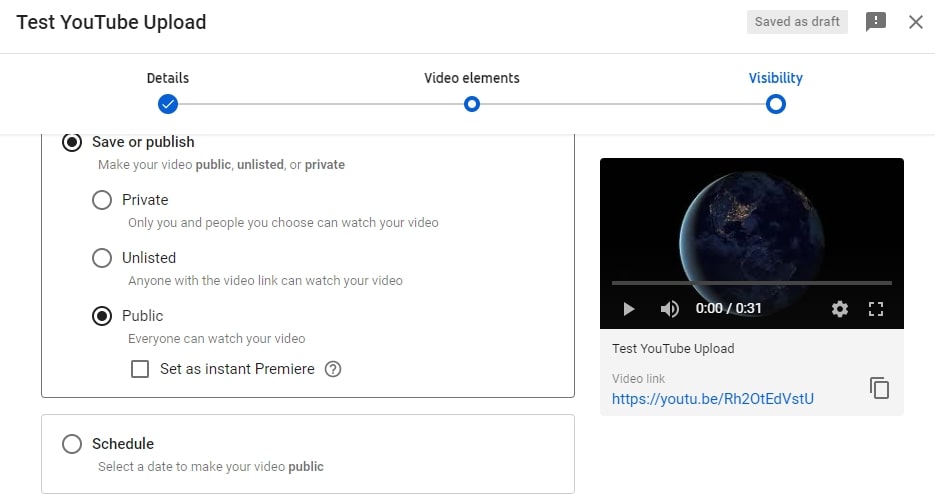
If you’ve made it this far, all the hard work is done. Now, you just need to select whether you want your video to be private, unlisted, or available to the public. You can also schedule it to be uploaded at a later date if required.
Before you hit the publish button, we recommend heading back to the beginning and checking your information. Proofread your title, description, and other written content to make sure there aren’t any spelling or grammar errors. Ensure the correct thumbnail and call-to-action elements are selected, and make sure you’ve complied with YouTube’s Community Guidelines.
Once you’re sure everything is correct, hit the publish button and send your video live.
Bonus step 1: Fine-tune your video
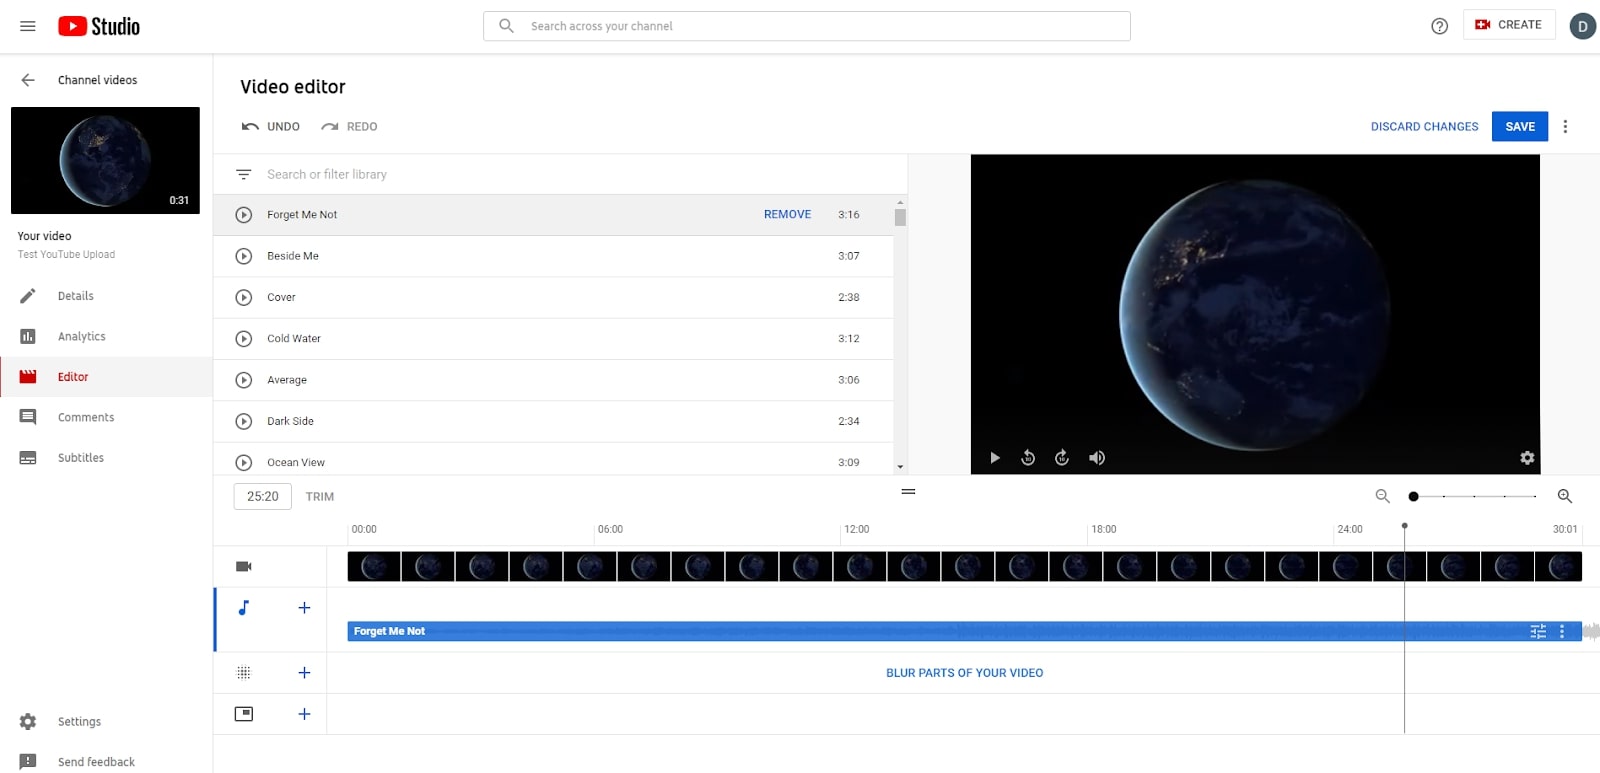
While it's not as robust as the best free video editing software, YouTube has a few tools to enhance your movie. Once your video has been uploaded, you can edit it by navigating to the YouTube Editor tab. Here, you can perform a number of actions, including adding audio, blurring faces or other sensitive parts of your video, and adding or customizing your end screen.
You can also split your video into sections, which is a great way to add different audio tracks in different places. There are numerous music and sound files available, but unfortunately, you can’t upload your own audio files here. If you want to add custom audio, make sure you do it before uploading your video.
Bonus step 2: Promote your creation
Once you’ve uploaded and customized your video, it’s time to get people watching it. Make sure you share a link to your social media channels and encourage people to click through and view your content. If you have a website, consider embedding it in a blog post or on one of your main pages.
Who knows, if you do things right, you may even gain enough interest to be able to monetize your content!
How to upload to YouTube: Summary
At the end of the day, uploading and publishing a video on YouTube is actually a very straightforward process. It requires little technical expertise and really shouldn’t take you more than half an hour or so—unless, of course, your video is large and requires more time to upload.
If you’d like to find out more about putting a custom video together, check out our guides to the best free video editing software and the best video editing software. Or, if you’re working from a mobile device, consider reading about the best video editing apps for phones and tablets.
Daniel is a freelance copywriter with over six years experience writing for publications such as TechRadar, Tom’s Guide, and Hosting Review. He specializes in tech and finance, with a particular focus on website building, web hosting, and related fields.

