I turned an old iPad into a digital photo frame — and it works so well
If you need a digital photo frame, save your money and use an old iPad
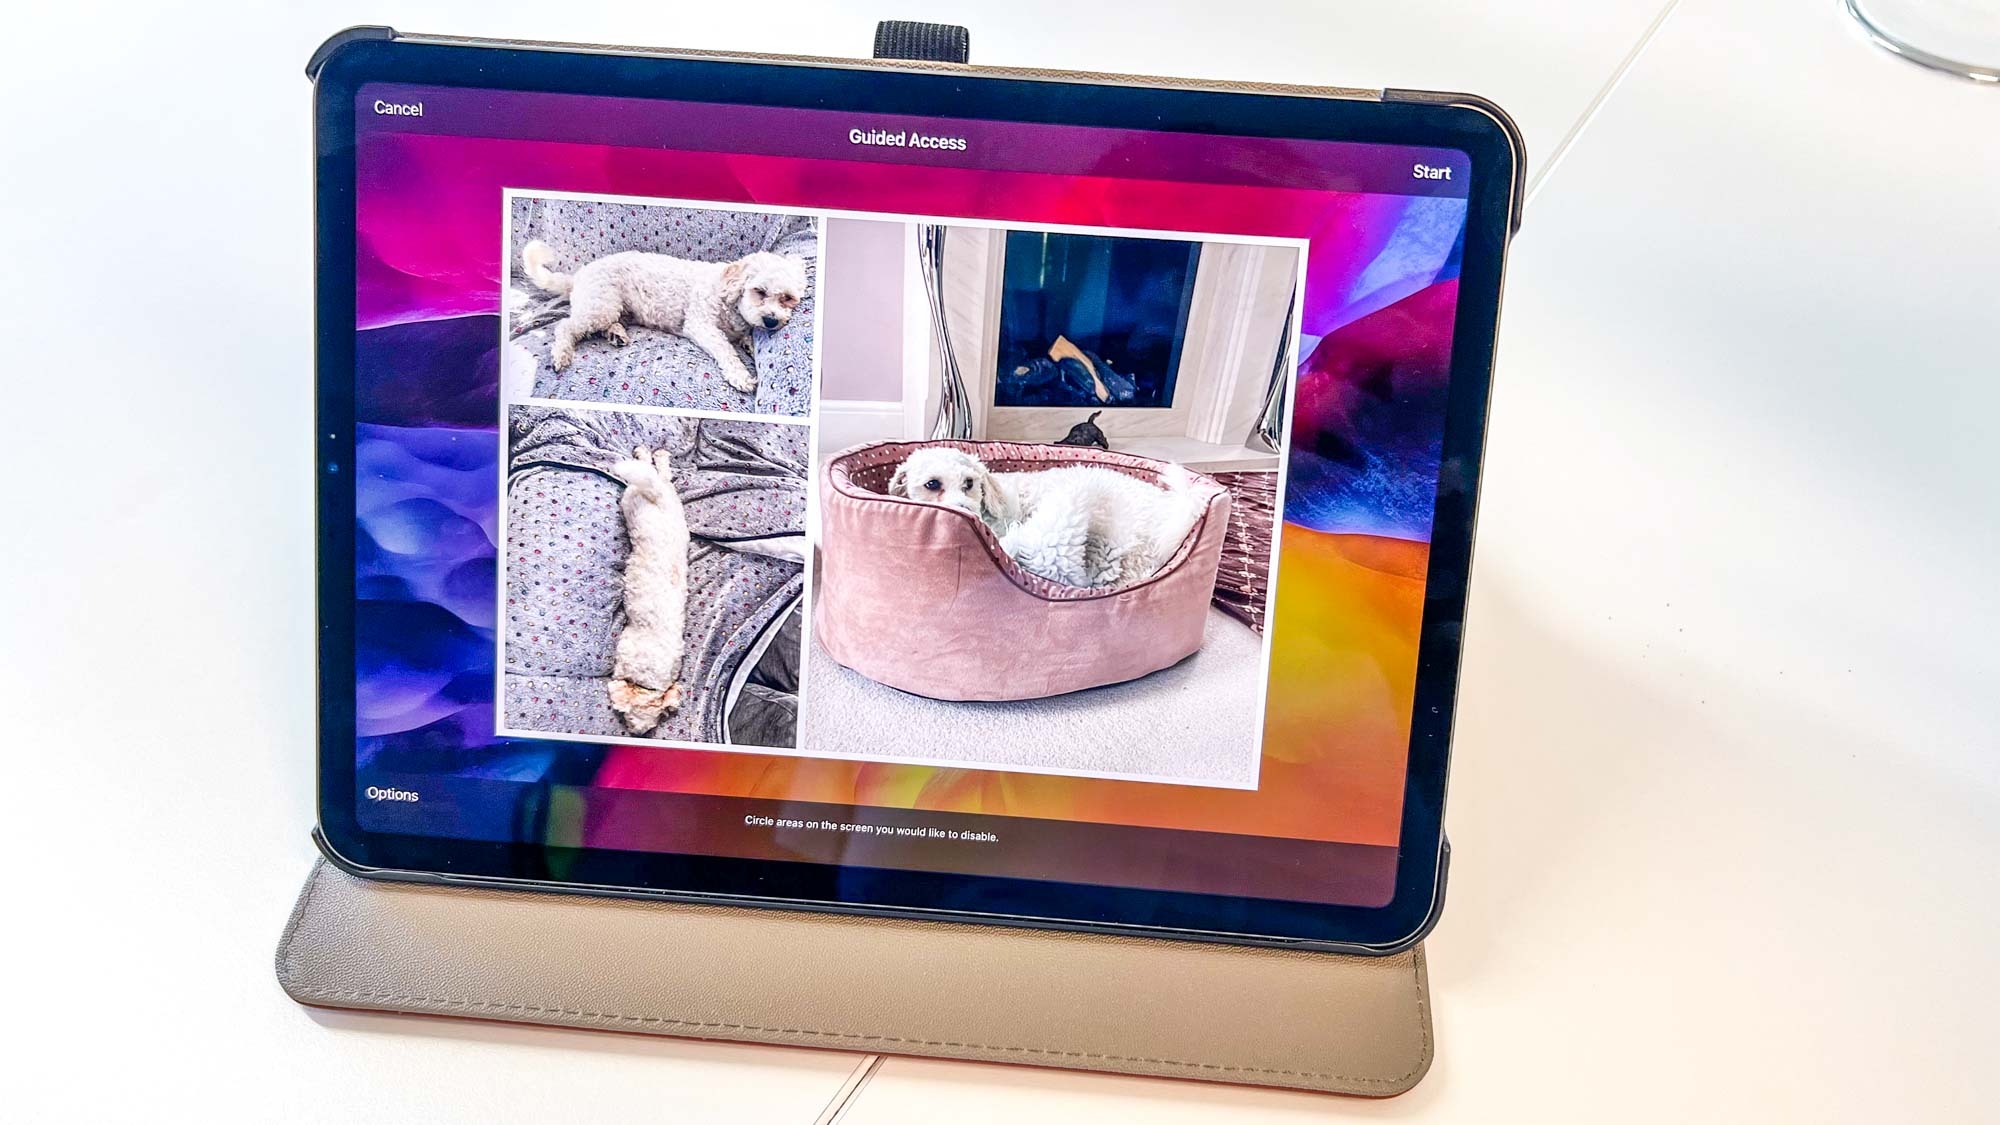
If you happen to have an old spare iPad floating around your house like I do, you may be interested to know that there's a way to turn it into a digital photo frame. I gave it a try as soon as I learned how, and the result is quite impressive.
By using one of the iPad's accessibility features, I was able to easily turn my retired iPad into a moving photo frame, saving me from having to buy a dedicated device or pay for an app. Even better, this process is reversible. Should I need to use the iPad again normally, it's simple to stop the photo slideshow and get back into tablet mode.
If this sounds appealing to you, then read on for the quick rundown of what I did, followed by some more detailed instructions of the process, on how to turn your iPad into a digital photo frame.
How to turn your iPad into a digital photo frame
Note: These screenshots and photos come from an iPad Pro running iPadOS 15. Your iPad may behave differently if it has a home button, or if it's running an earlier iPadOS version.
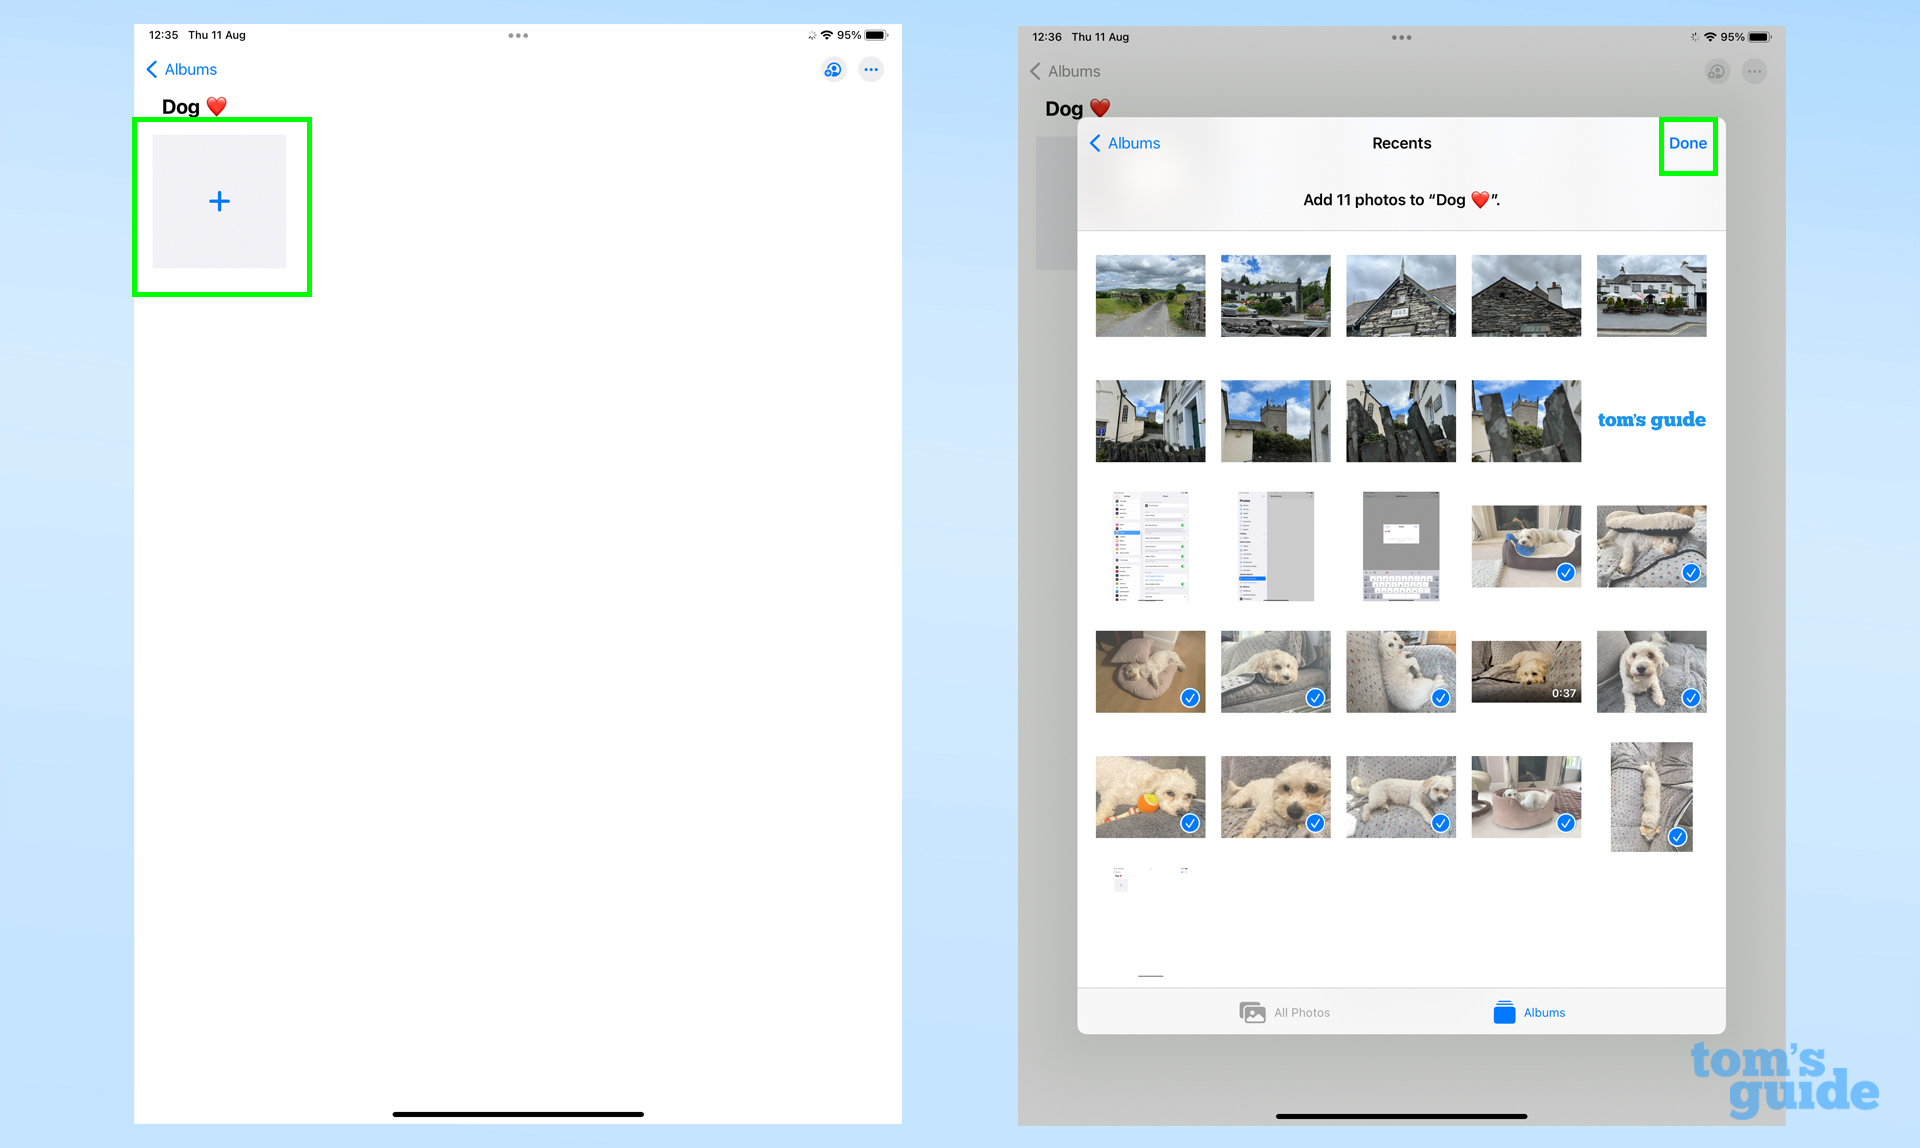
1. Before you start, select or create an album, and add photos to it. You can do this with photos already on the iPad, or share them from other Apple devices using iCloud Photo Sharing. This lets you add more photos to the iPad photo frame without having to navigate away from the Photos app. However, you will need to restart the slideshow before any newly added images show up.
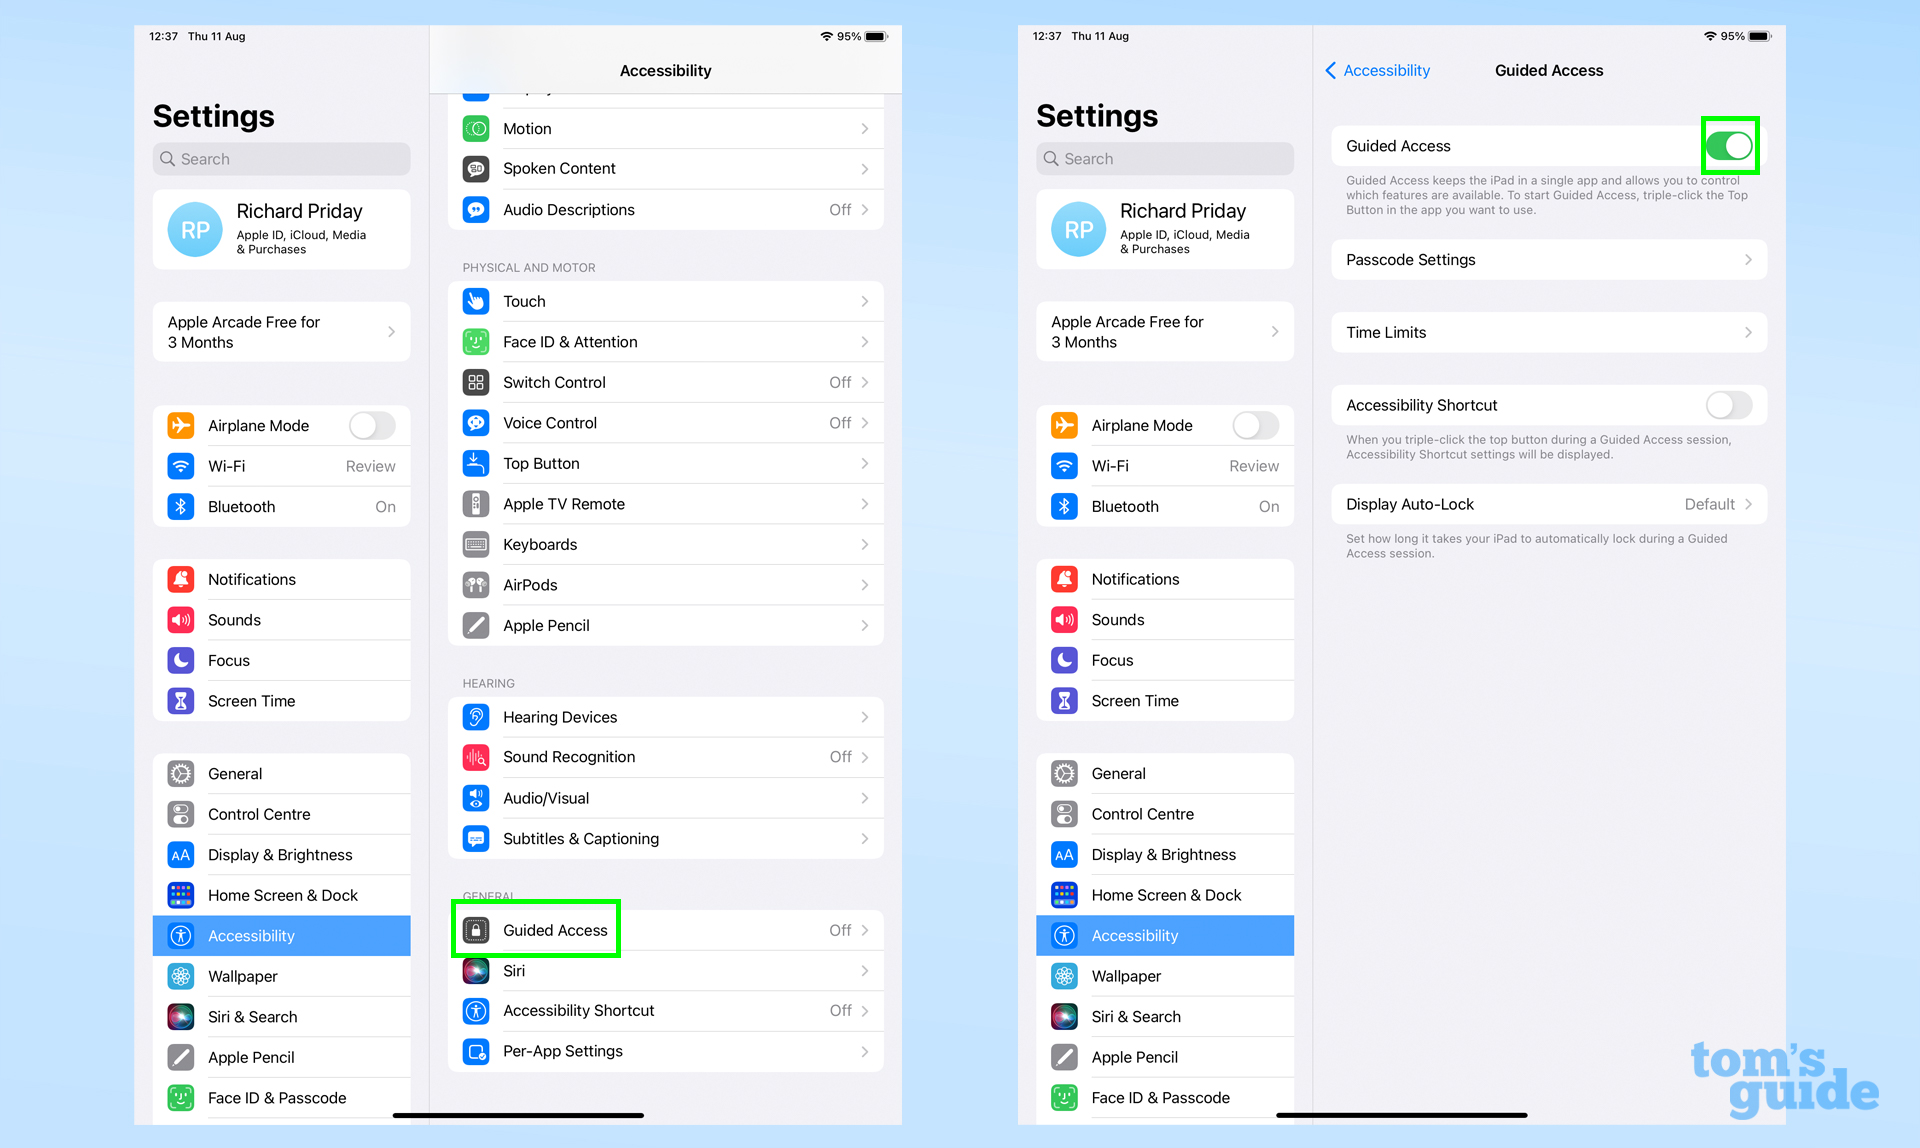
2. To make sure the iPad doesn't respond to other controls, you need to enable Guided Access. This is a feature found by going to Accessibility and Guided Access in the Settings app. Guided Access lets you lock your iPad to an app by triple-pressing the Home button (on iPads with one) or the power button (on iPads without a Home button).
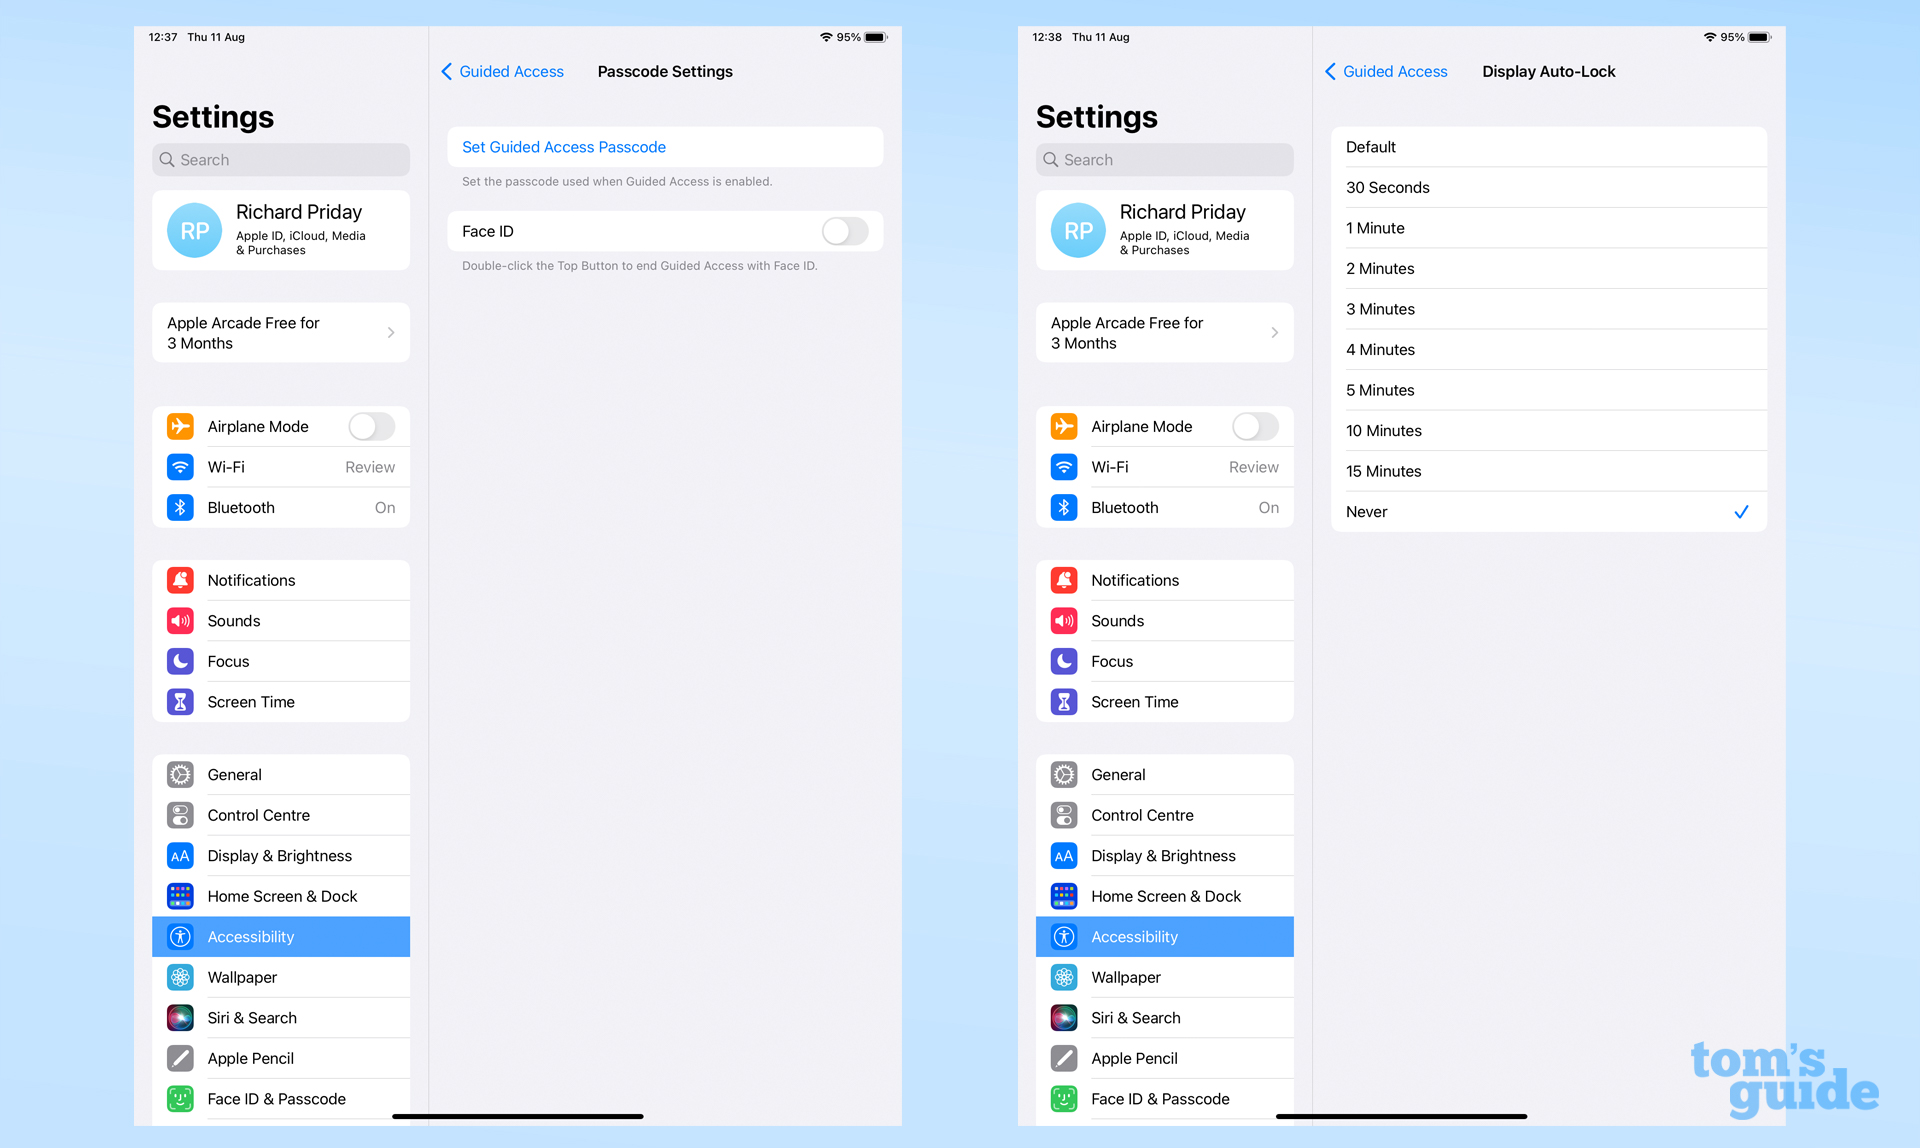
While you're here, set the Display Auto-Lock to Never to make sure the iPad stays on, and set up a Guided Access passcode so only you and others you trust can disable Guided Access. Just make sure you make a note of what the passcode is!
Sign up to get the BEST of Tom's Guide direct to your inbox.
Get instant access to breaking news, the hottest reviews, great deals and helpful tips.
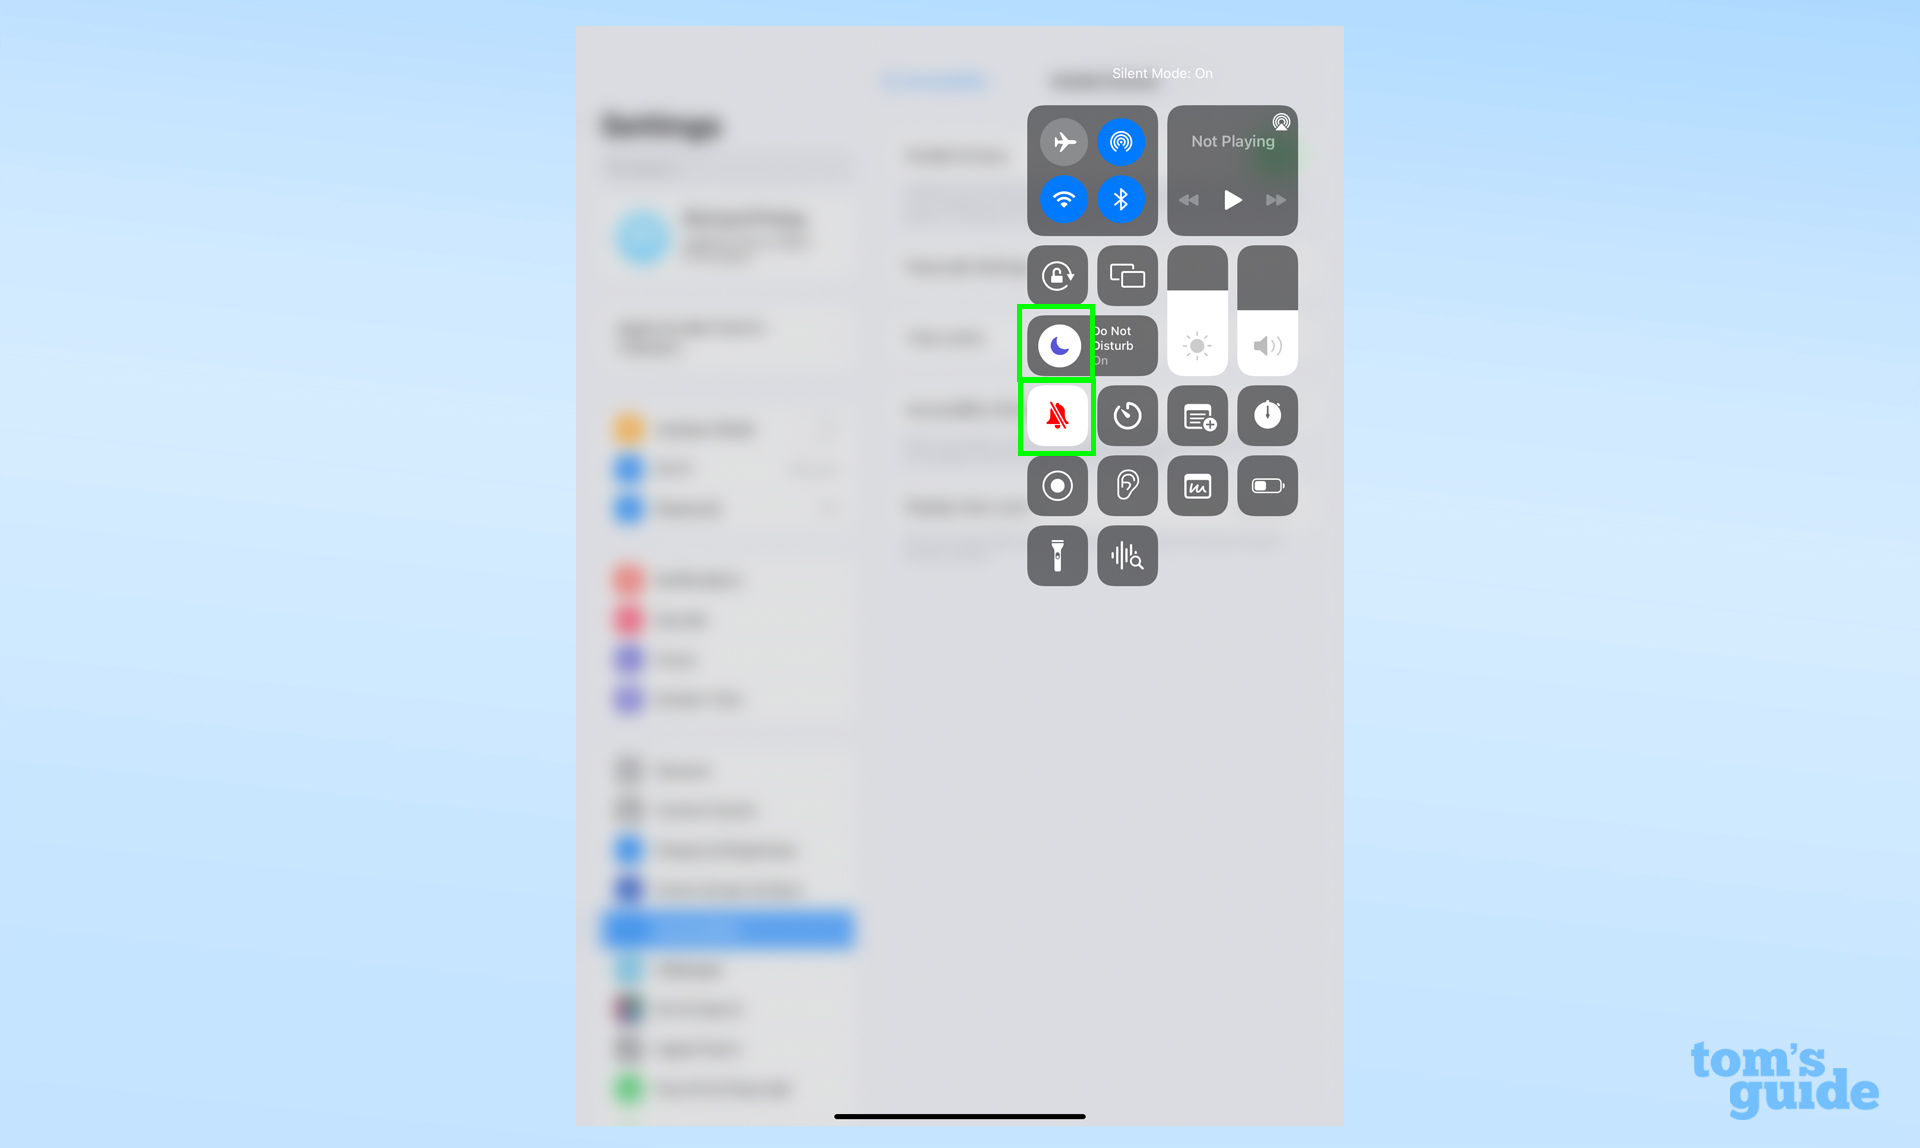
3. A non-essential but useful step to take now is enabling Do Not Disturb and Silent mode. These will prevent notifications or other pop-ups from interrupting your photos. You can do this by opening Control Center (swiping downwards from the top right corner) and tapping the crescent moon and crossed-through bell icons. They'll turn from grayscale to colored icons when they're active. If there isn't a DND/moon symbol, tap and hold the button to open the Focus mode menu, and select DND from there.
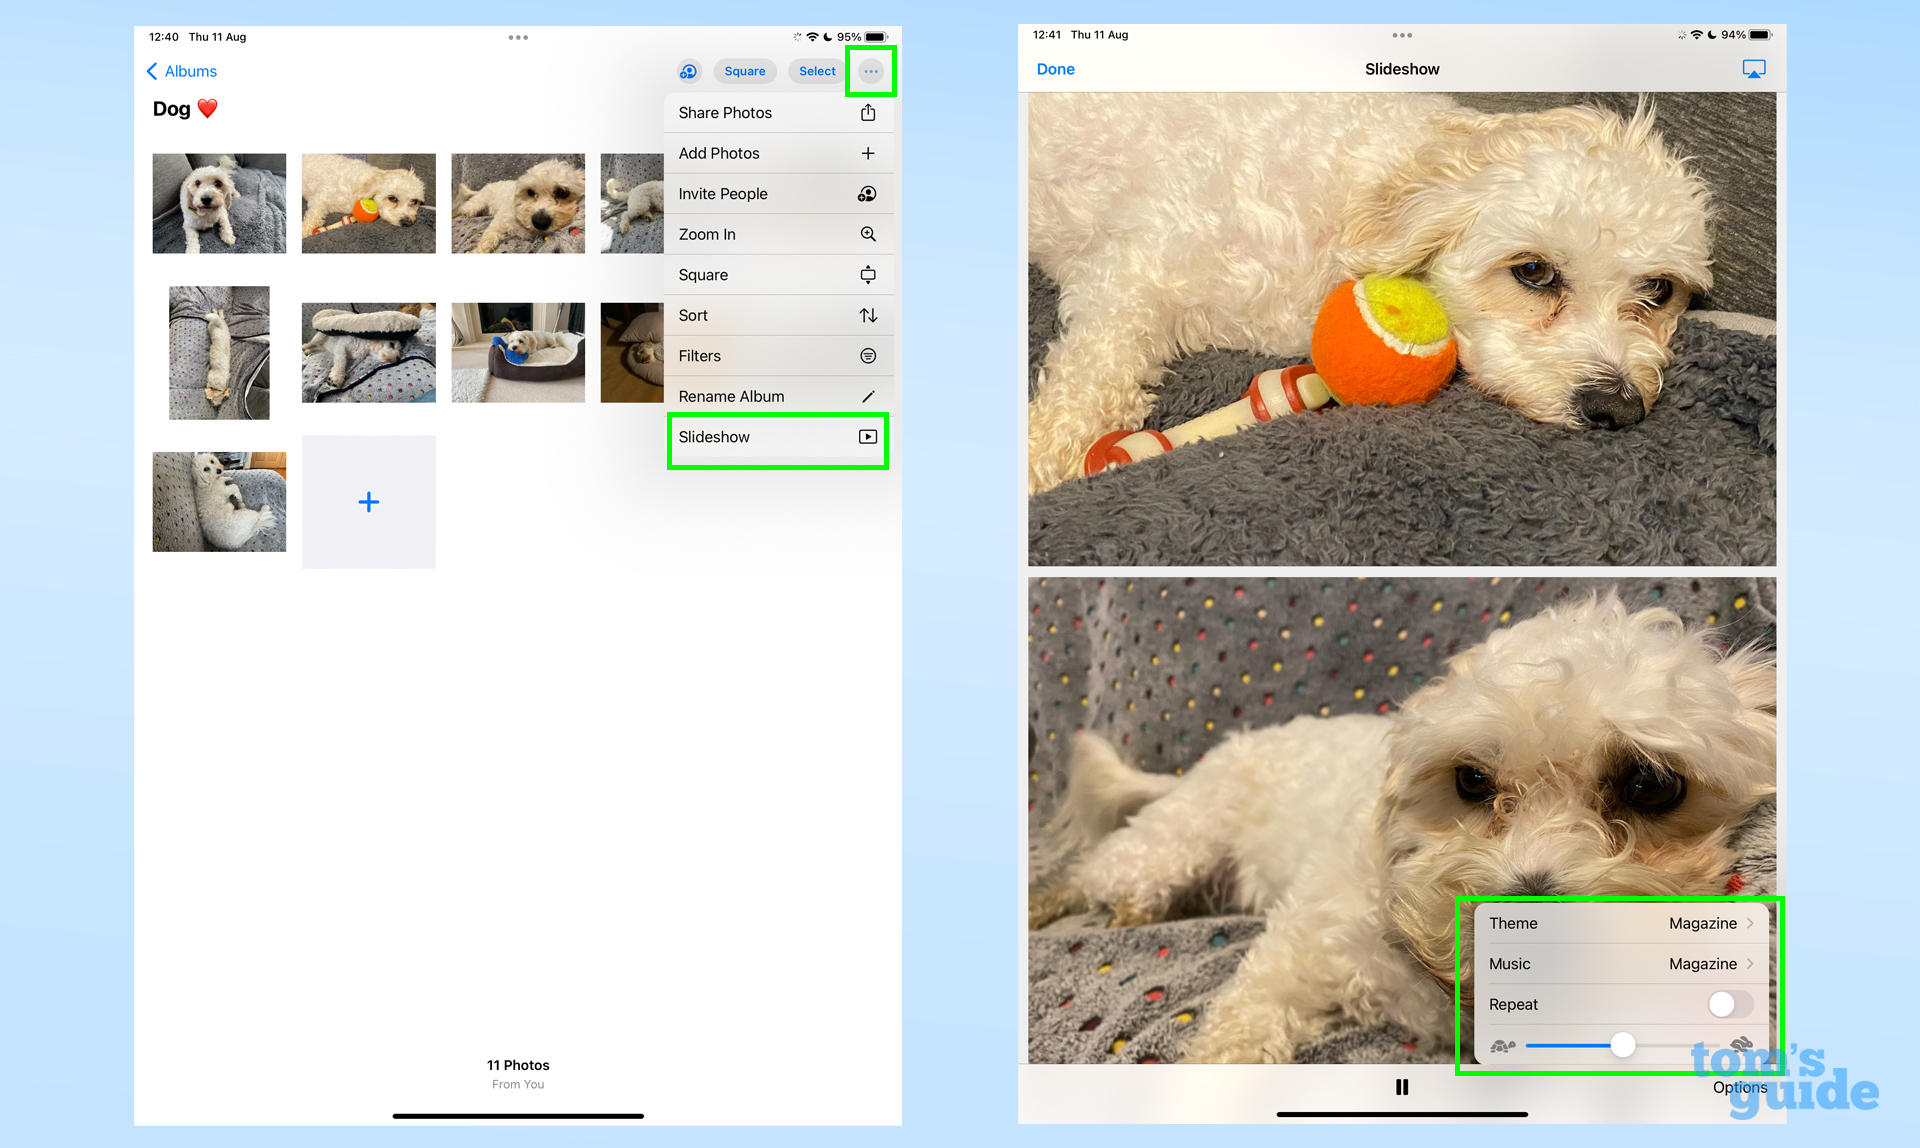
4. Now it's time to set the slideshow going. In the Photos app, open the album you want to use, and enable the slideshow feature by tapping the three dots button in the top right corner and selecting Slideshow. Use the Options button in the bottom right to adjust the background music, then set the speed and transition style to your liking. The slideshow should now be in motion, but if it isn't, press the Play button in the bottom center of the screen.
5. Once the slideshow's going, enable Guided Access to stop the iPad from turning off or using other apps. Do this by triple-pressing the home button or power button.

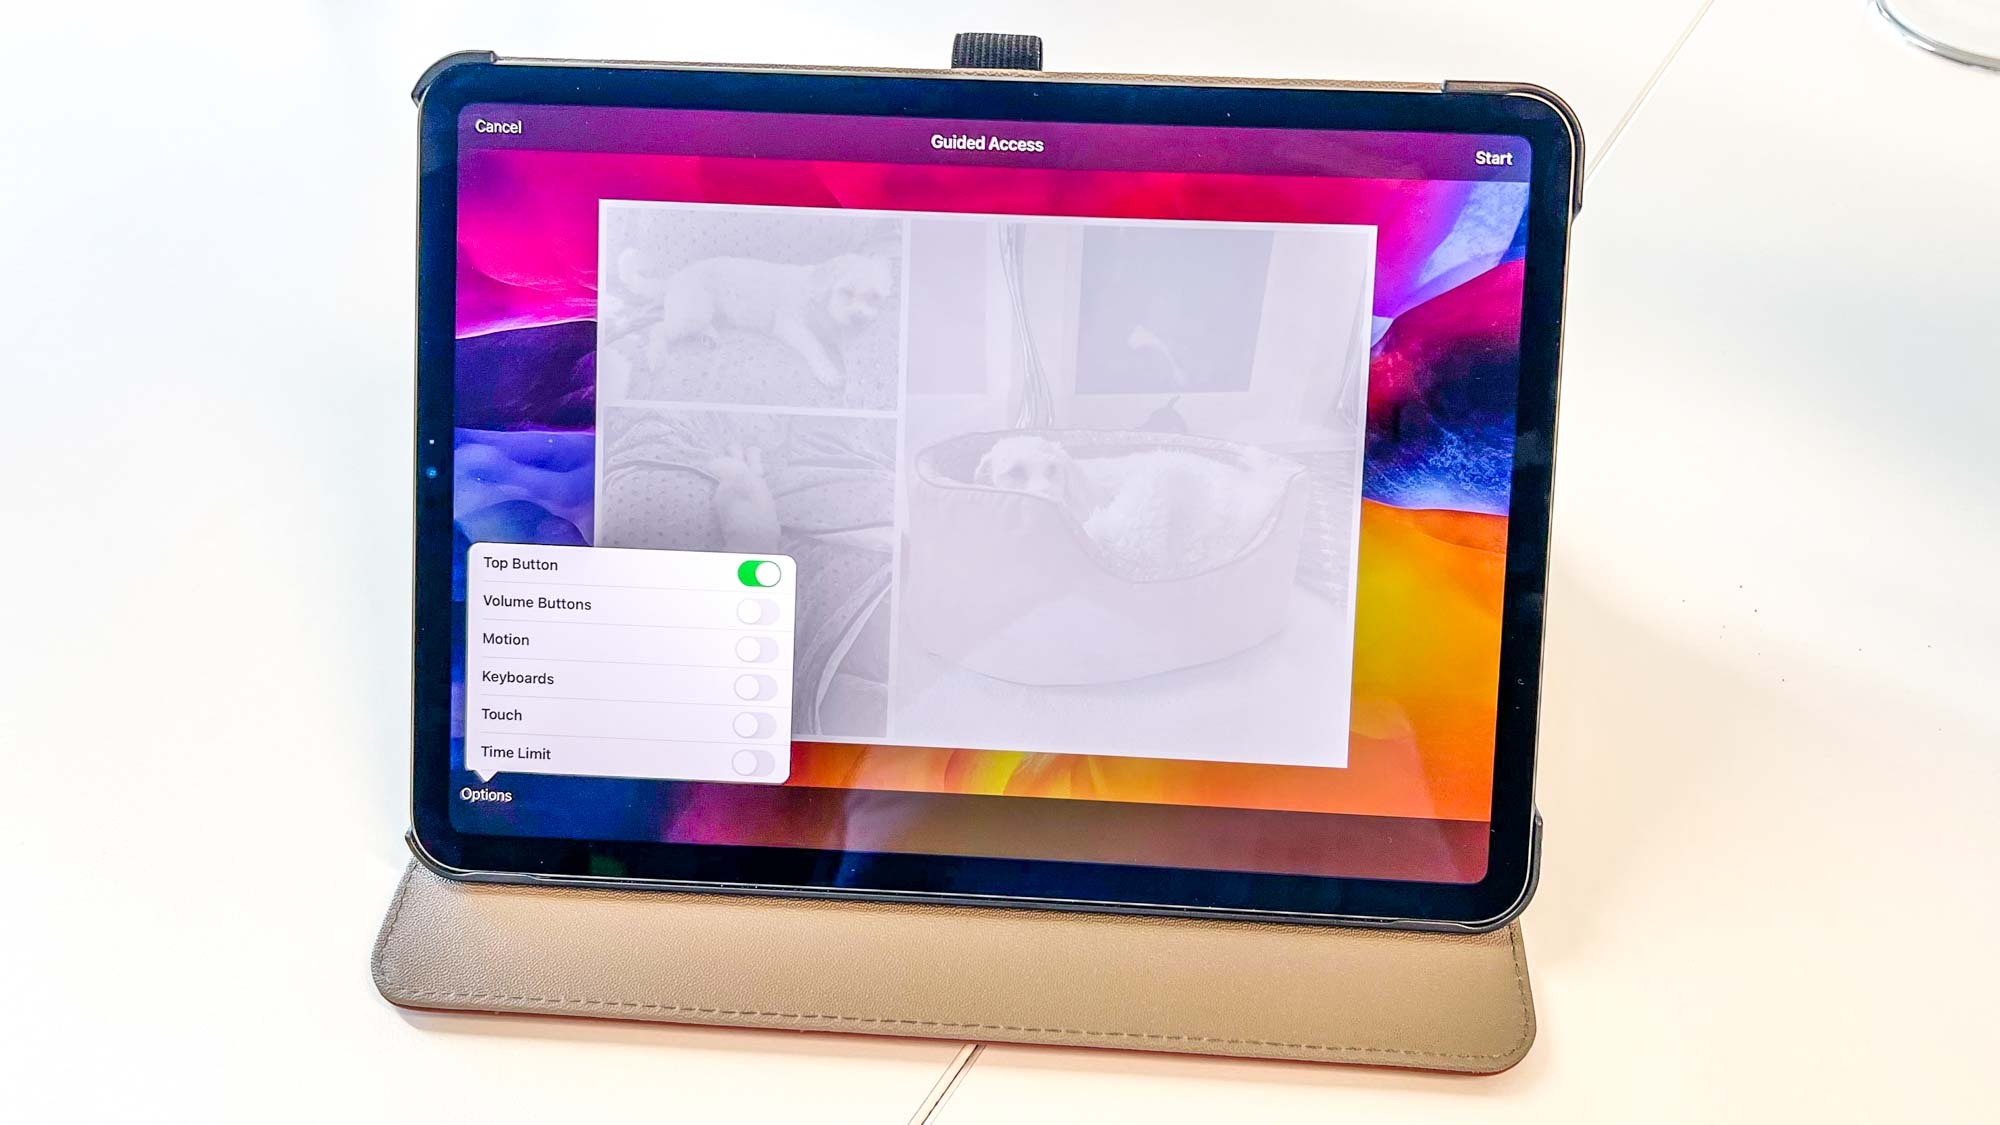
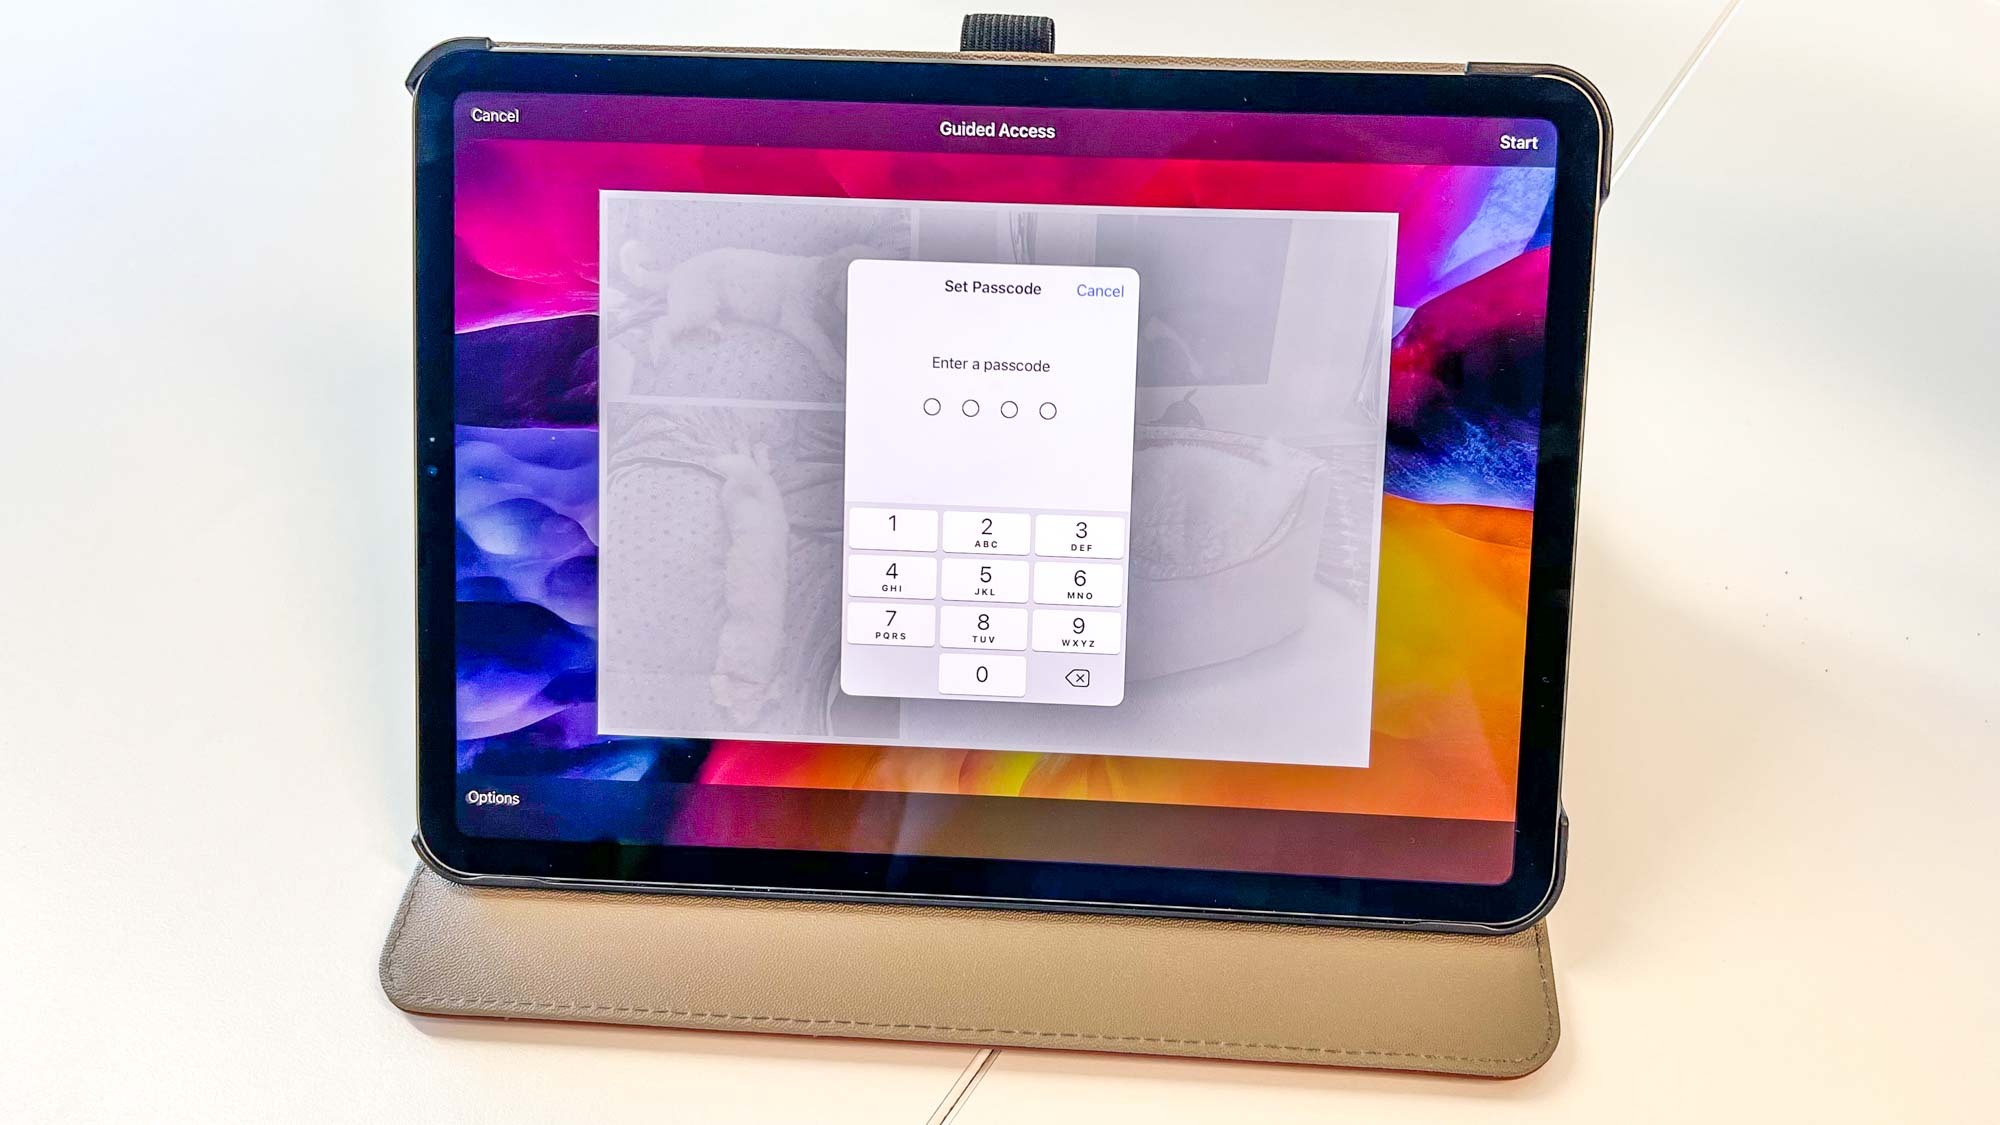
6. There are a few last-minute options to set here before your iPad is ready to start its job as your new photo frame. Tap the Options button in the bottom left, then Turn off the Touch, Home Button (if available), Top Button and Volume buttons to stop anyone deliberately or accidentally messing up your settings. After that, select Start. If you didn't do it before, you'll need to enter and re-enter a PIN code that will let you disable Guided Access later.
8. Sit back and enjoy the slideshow! If you want to do something else with the iPad, such as update its software, then triple press the home button/power button and enter your chosen PIN (not your regular PIN to unlock the iPad) to disable Guided Access mode. From here, you can exit the slideshow and navigate the iPad normally.
Just be aware that your iPad still has a finite amount of battery. Figure out whether you want to regularly move the iPad for charging, or plug it in permanently at a single spot.
You may also want a stand to keep the iPad upright rather than just propping it up against something. Fortunately, many of the best iPad cases offer a kickstand or similar features to help with this.
There's much more you can do with your iPad, in addition to just making it a photo frame. For example, you can now enable a desktop mode on certain models, and we'll tell you how in our how to use Stage Manager on iPad guide. On the other hand, we can help you learn how to transfer data from iPad to iPad and how to reset an iPad if you're swapping or selling your tablet.

Richard is based in London, covering news, reviews and how-tos for phones, tablets, gaming, and whatever else people need advice on. Following on from his MA in Magazine Journalism at the University of Sheffield, he's also written for WIRED U.K., The Register and Creative Bloq. When not at work, he's likely thinking about how to brew the perfect cup of specialty coffee.
