How to capture a long exposure on iPhone
Learn how to capture light trails by taking a long exposure on iPhone
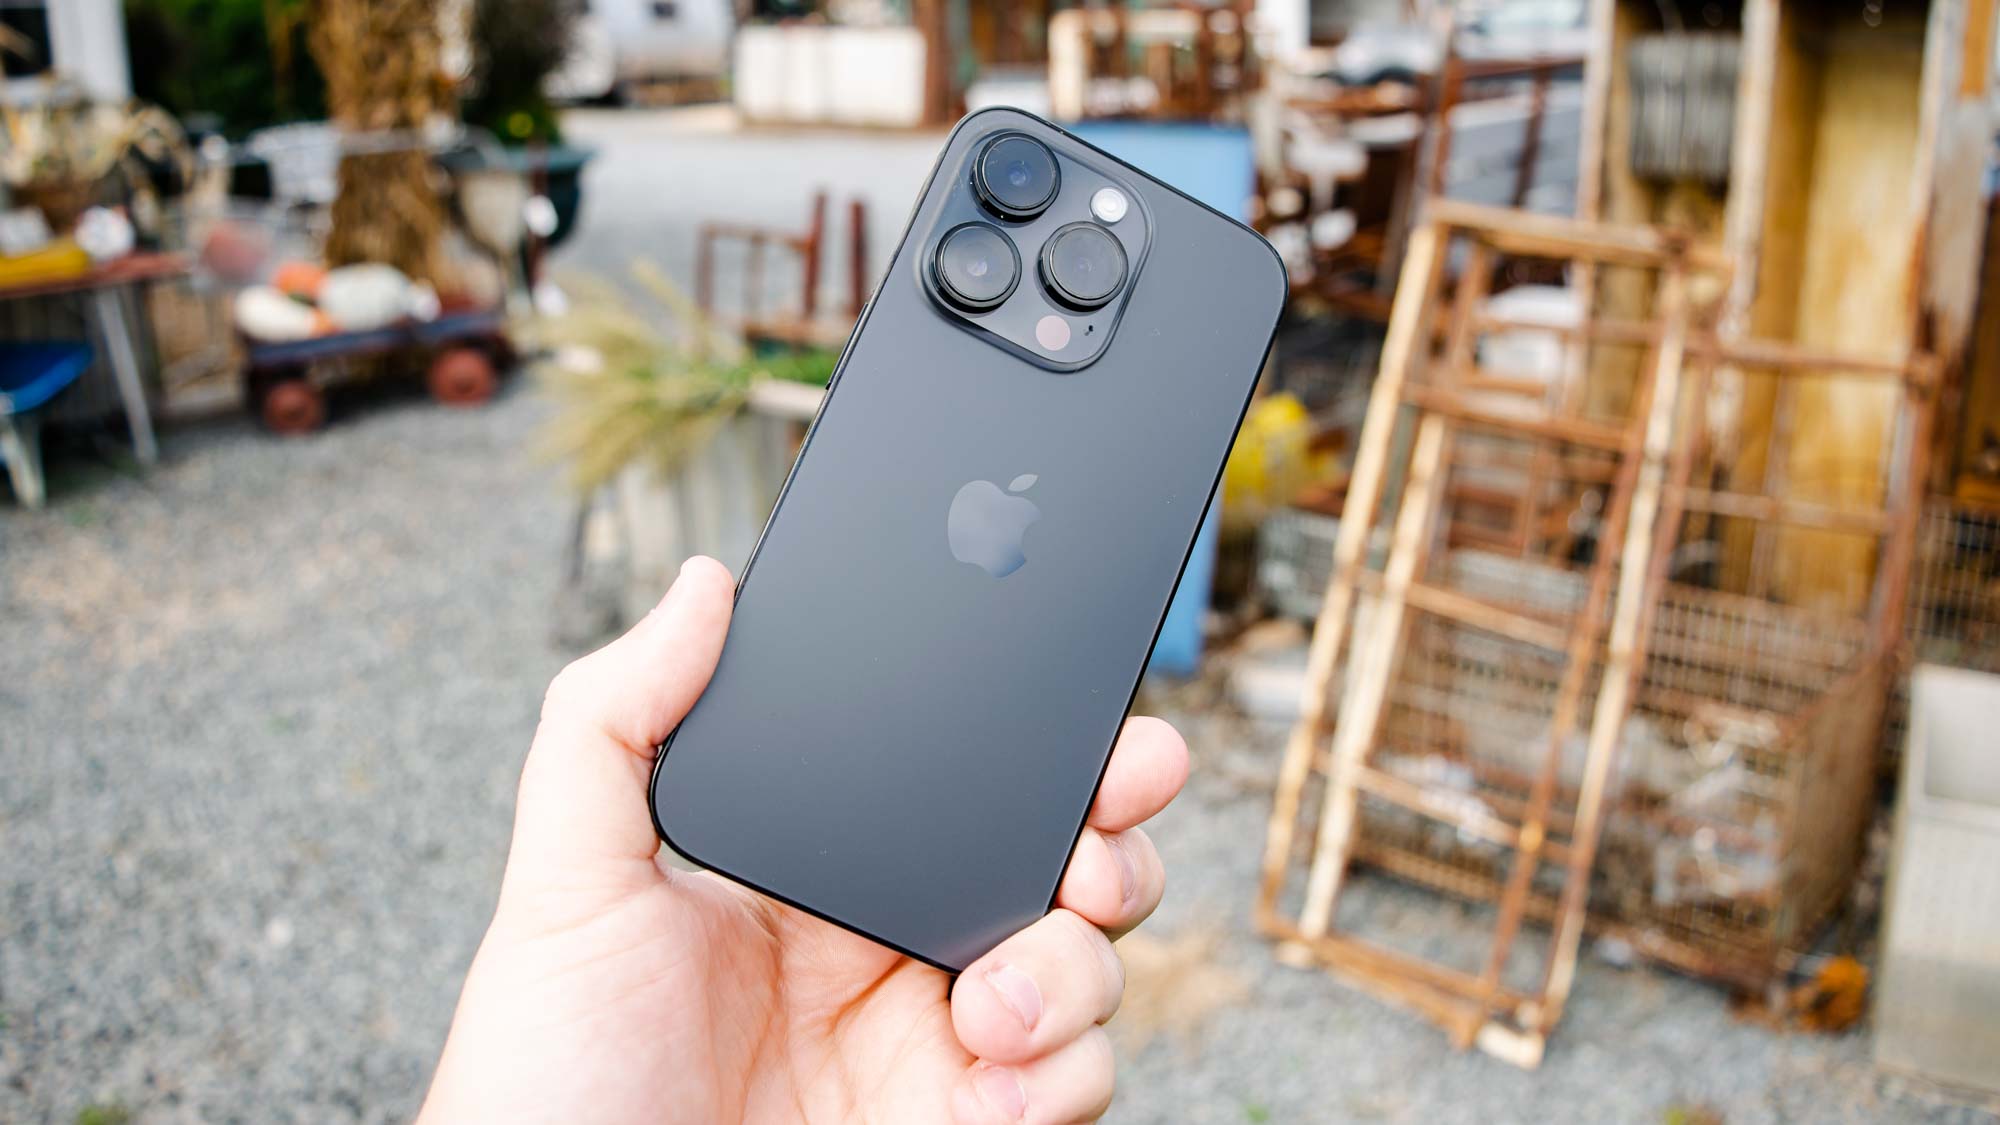
Learning how to take a long exposure on iPhone is great when you want to get creative with your smartphone photography.
In photography, a long exposure is where the camera’s shutter is left open for much longer. This results in moving subjects becoming blurred. When used deliberately, this results in artistic blurring and light trails going across the frame of the image.
Typically, however, you would use a larger camera for this, such as one of the best mirrorless cameras, and not a smartphone. This is because even the best camera phones don’t actually give you full manual control like a larger dedicated camera, and therefore you won’t have control of your phone’s shutter speed.
With the long exposure feature on iPhone, however, that is no longer necessarily the case. Admittedly, long exposure mode on the iPhone isn’t actually slowing down the shutter speed and, according to Apple, is instead creating blur to mimic the effect you’d get by doing it properly on a DSLR or mirrorless camera. However, in our testing, we found that under the right circumstances, the results can be pretty cool!
Better still, taking a long exposure on iPhone is really simple to do, but you’d definitely miss it unless you knew exactly where to find it. Thankfully, this guide is here to show you.
How to take a long exposure on iPhone
To make sure we're all on the same page, ensure your iPhone is up to date. We have a helpful guide to show you how to update an iPhone, if you aren't sure.
1. Open the Camera app and enable Live Photos
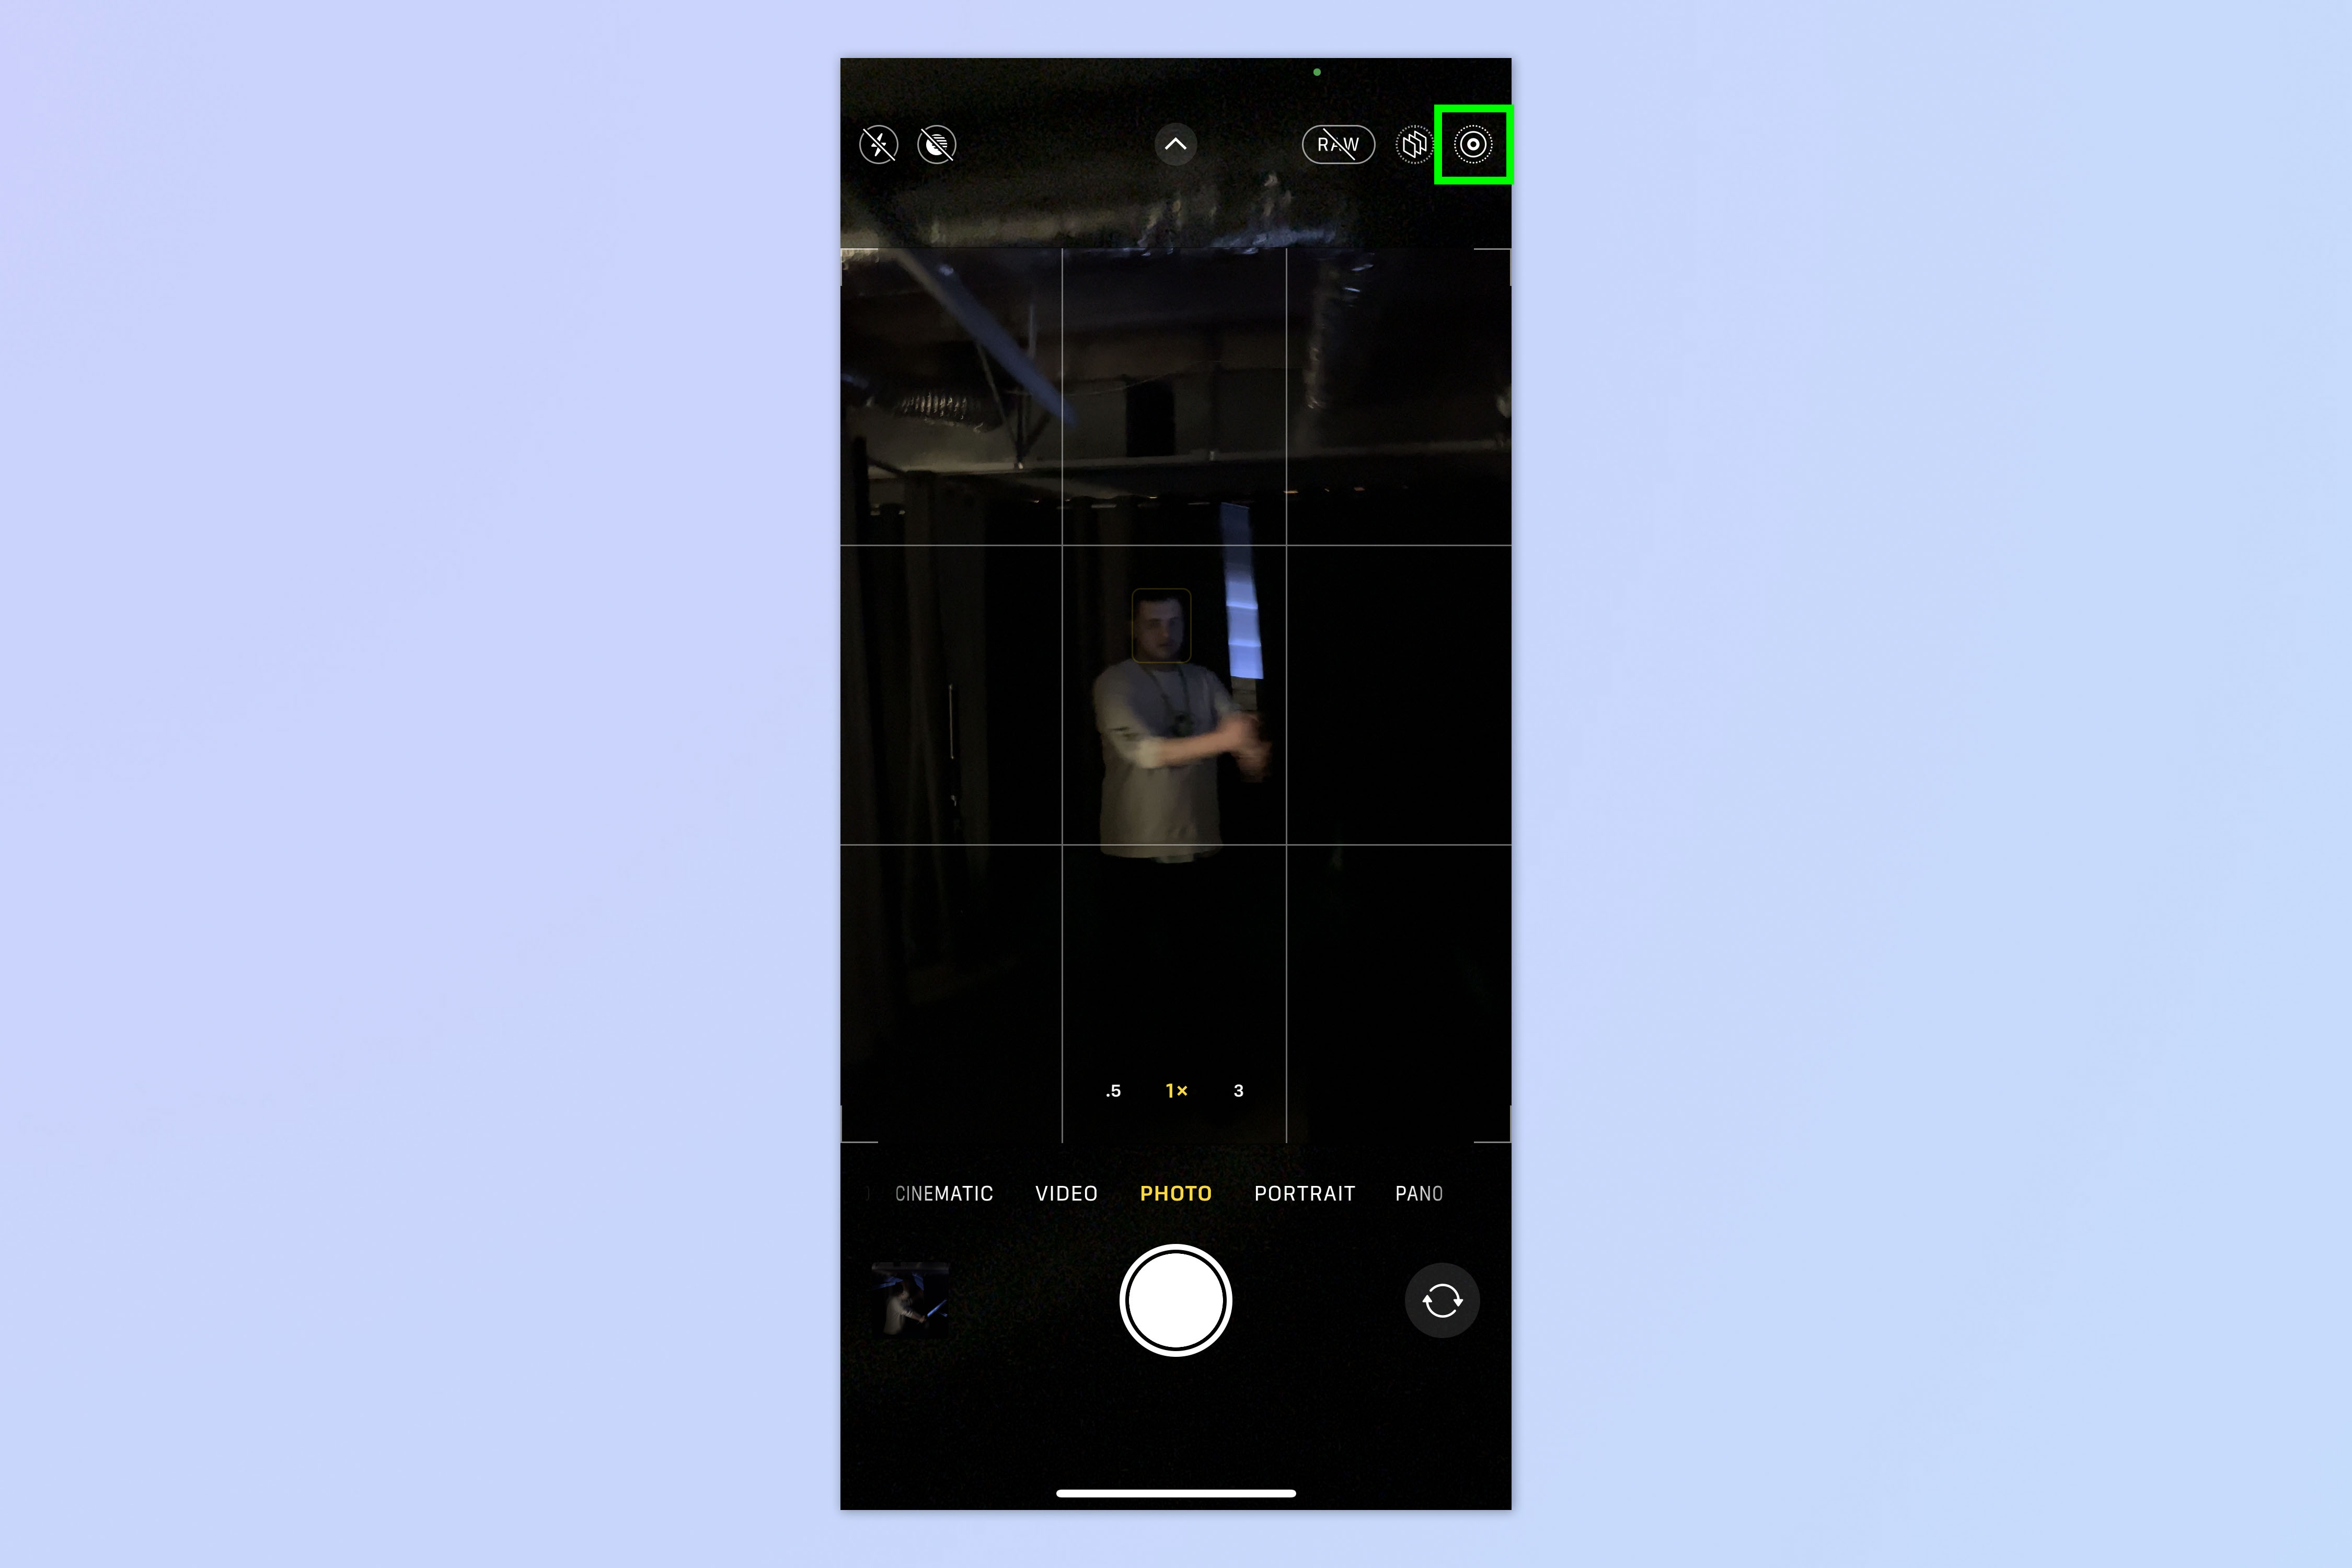
Open the Camera app and tap the Live Photos symbol to enable Live Photos. It will be struck through when disabled.
2. Take a photo
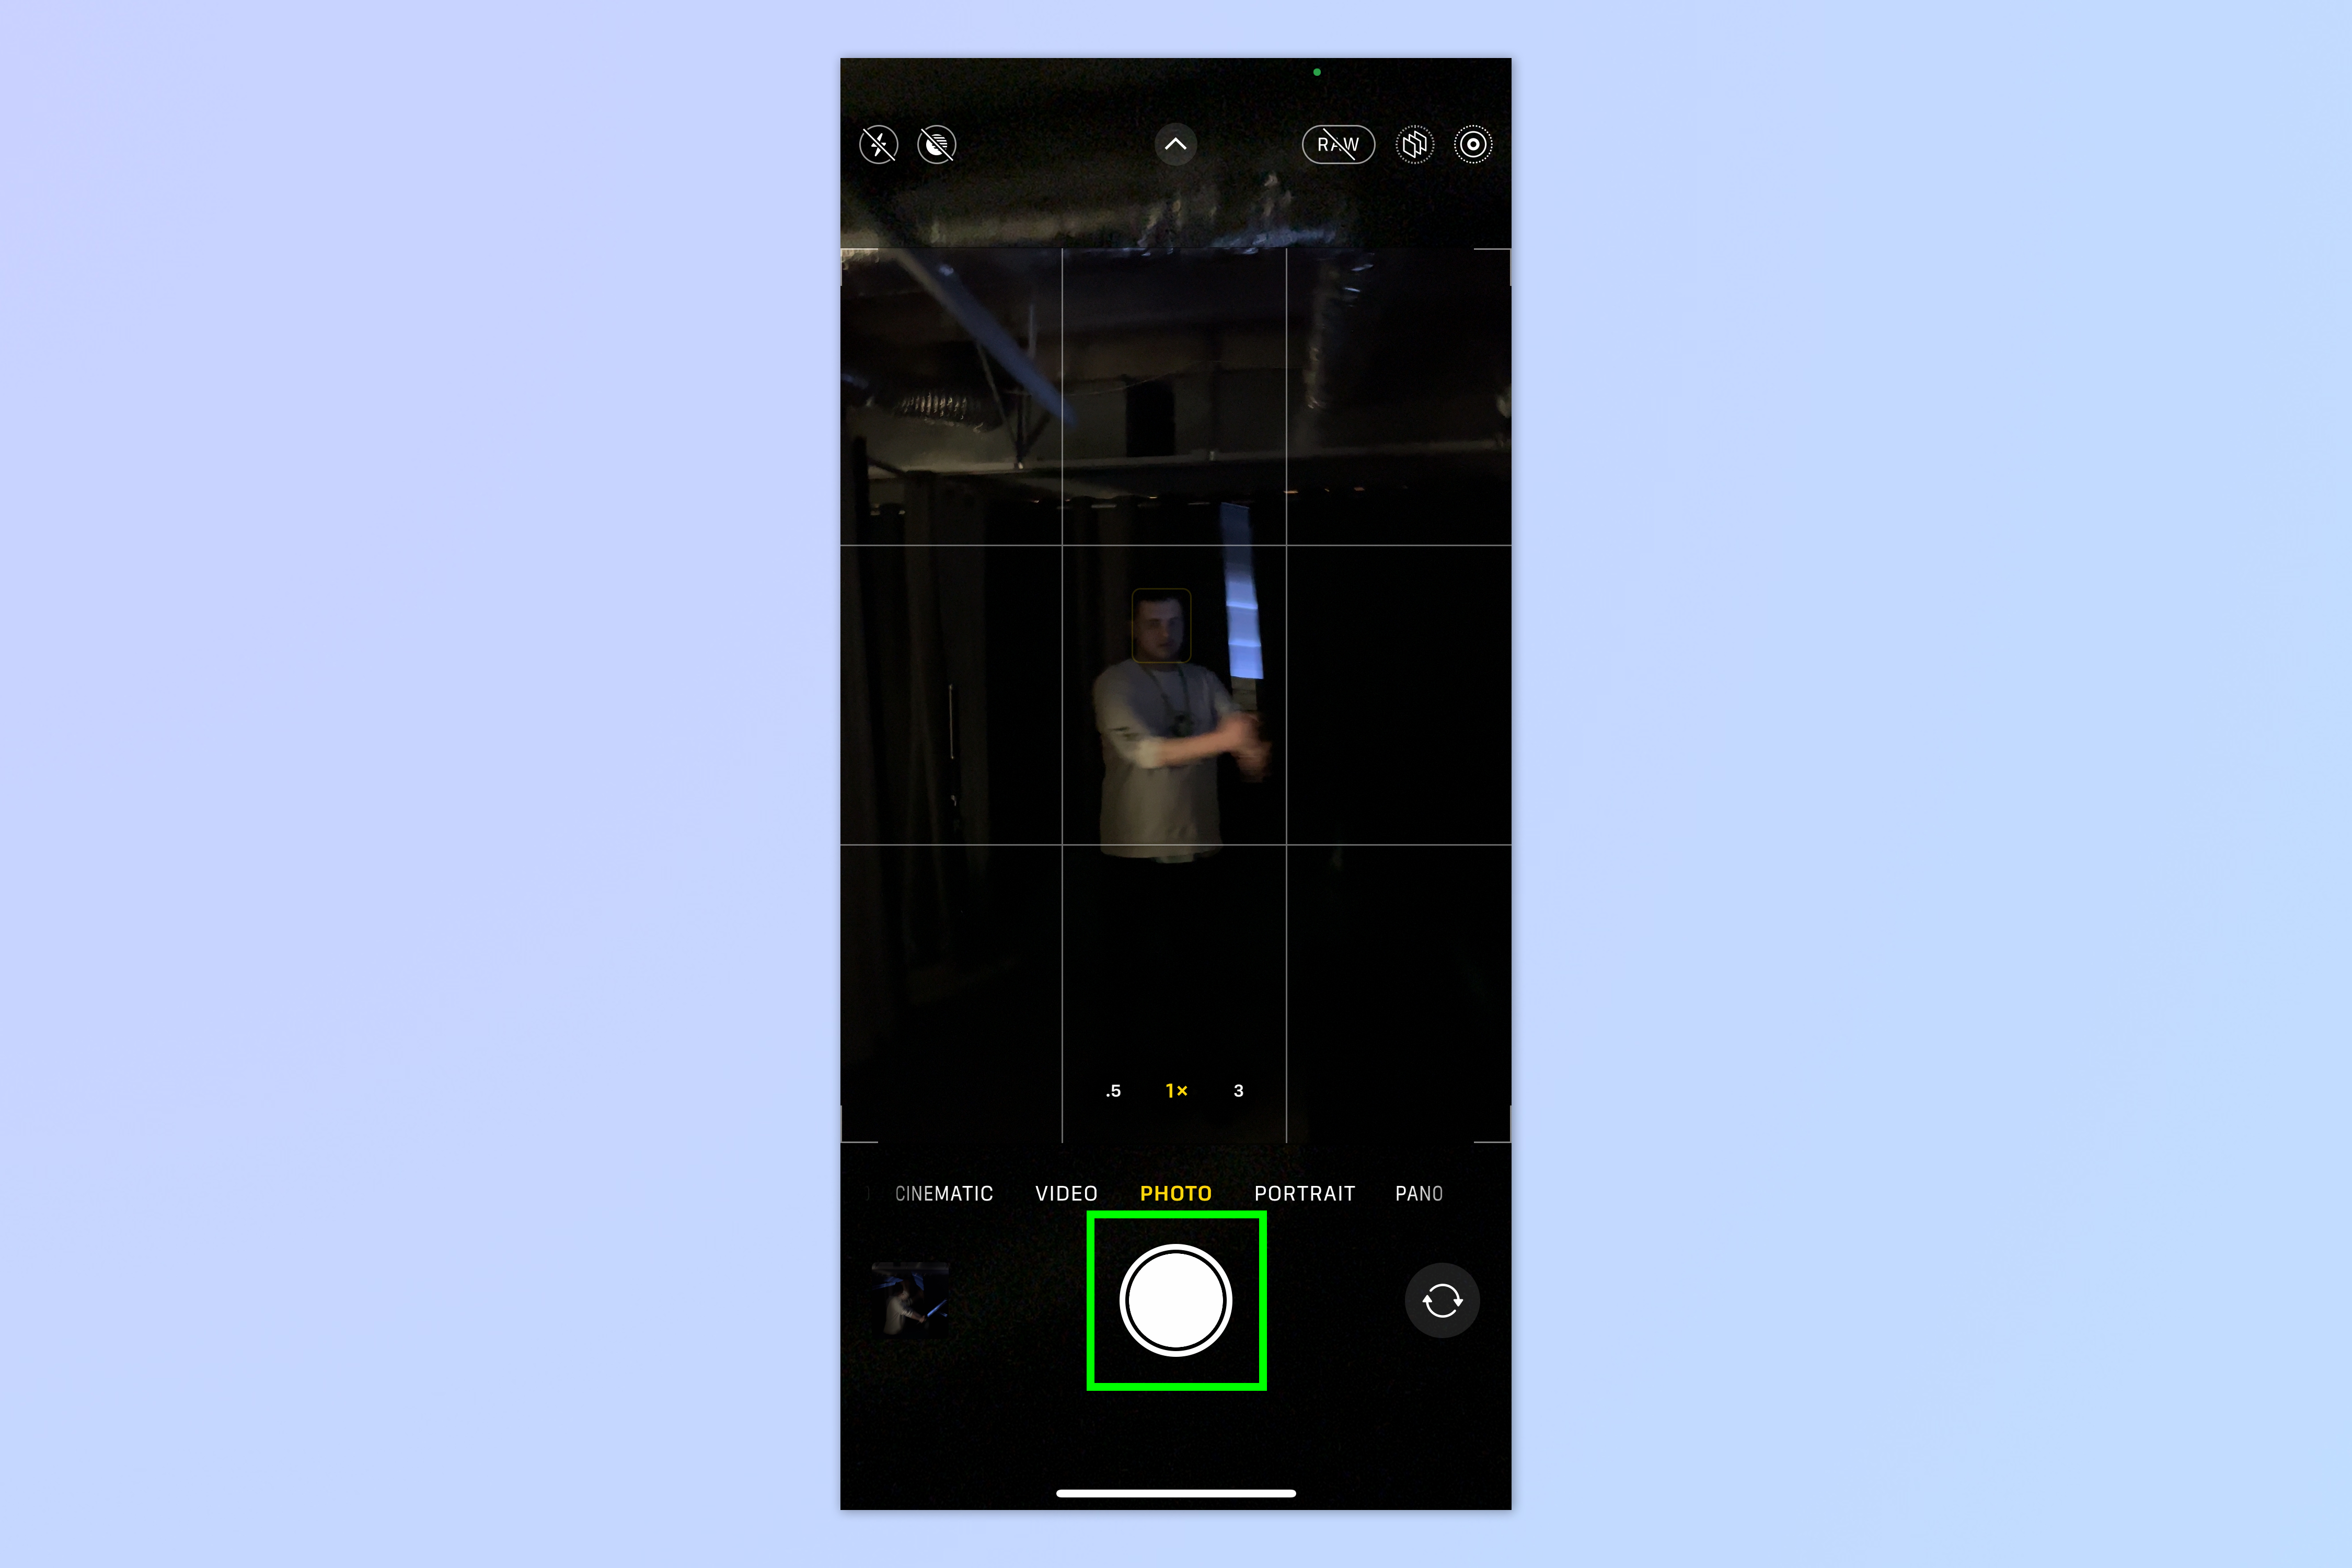
Tap the shutter button to take a photo.
3. Open the image in Photos
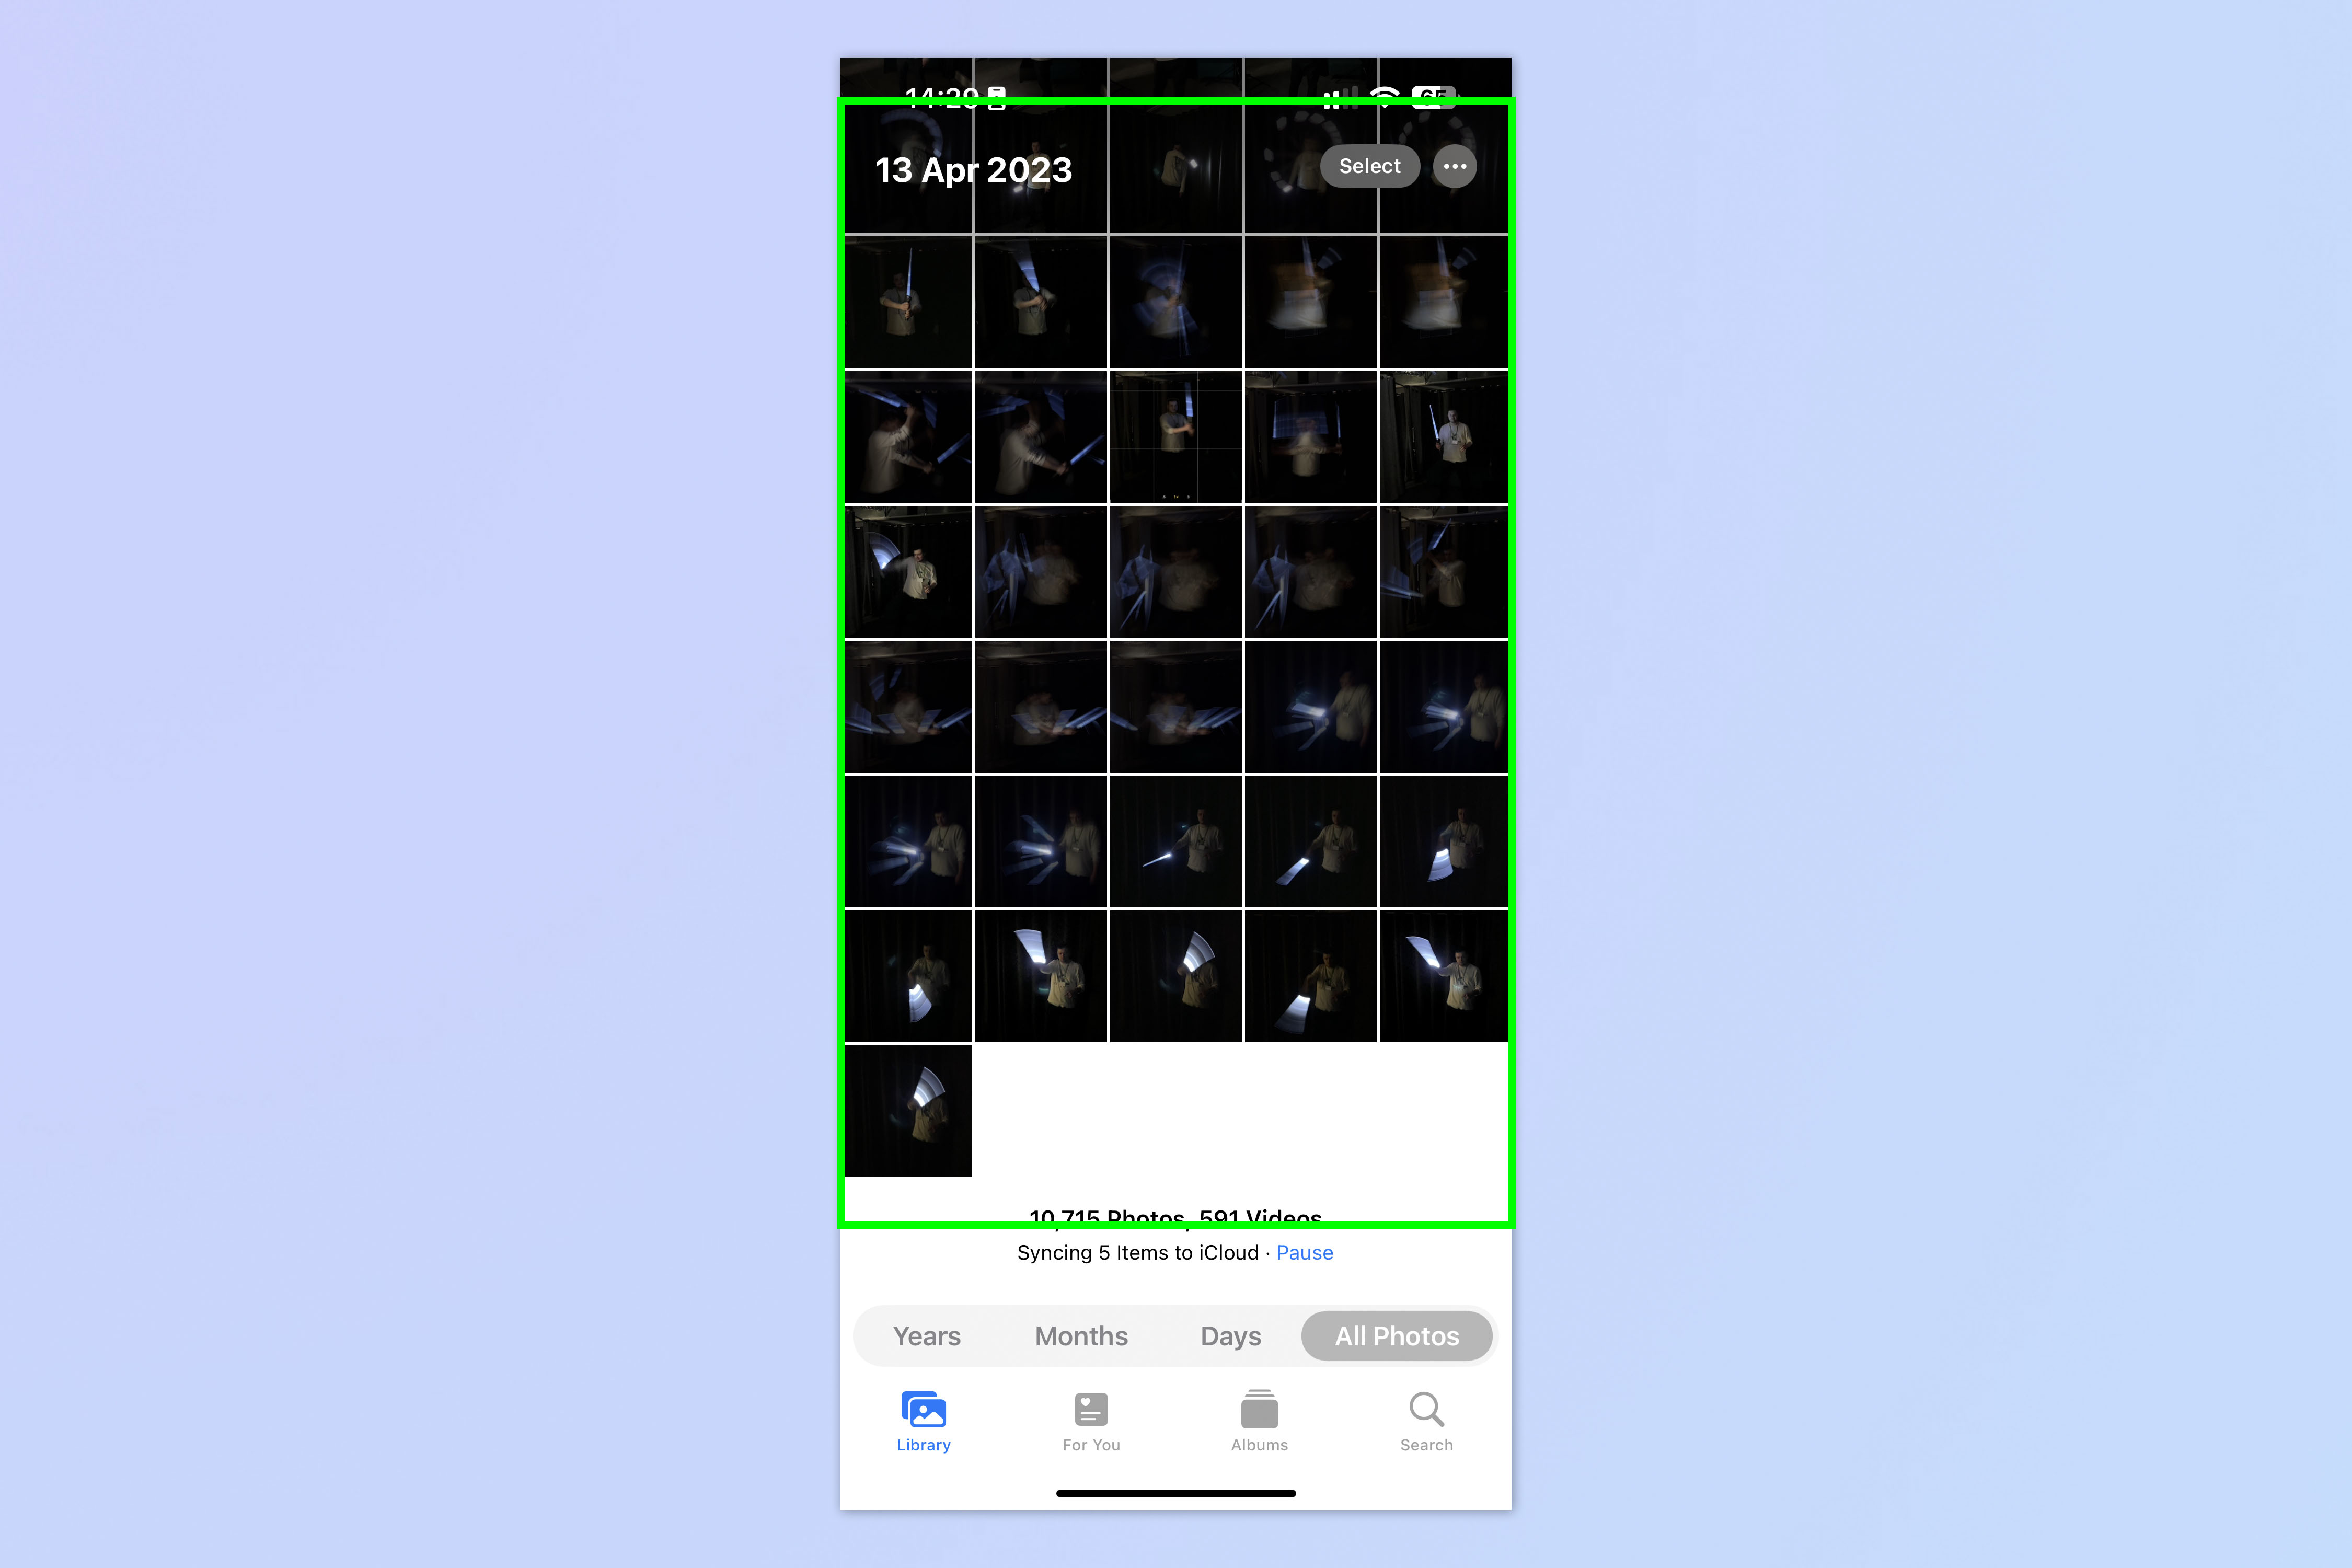
Open the Photos app and tap the Live Photo.
4. Tap the Live Photo dropdown
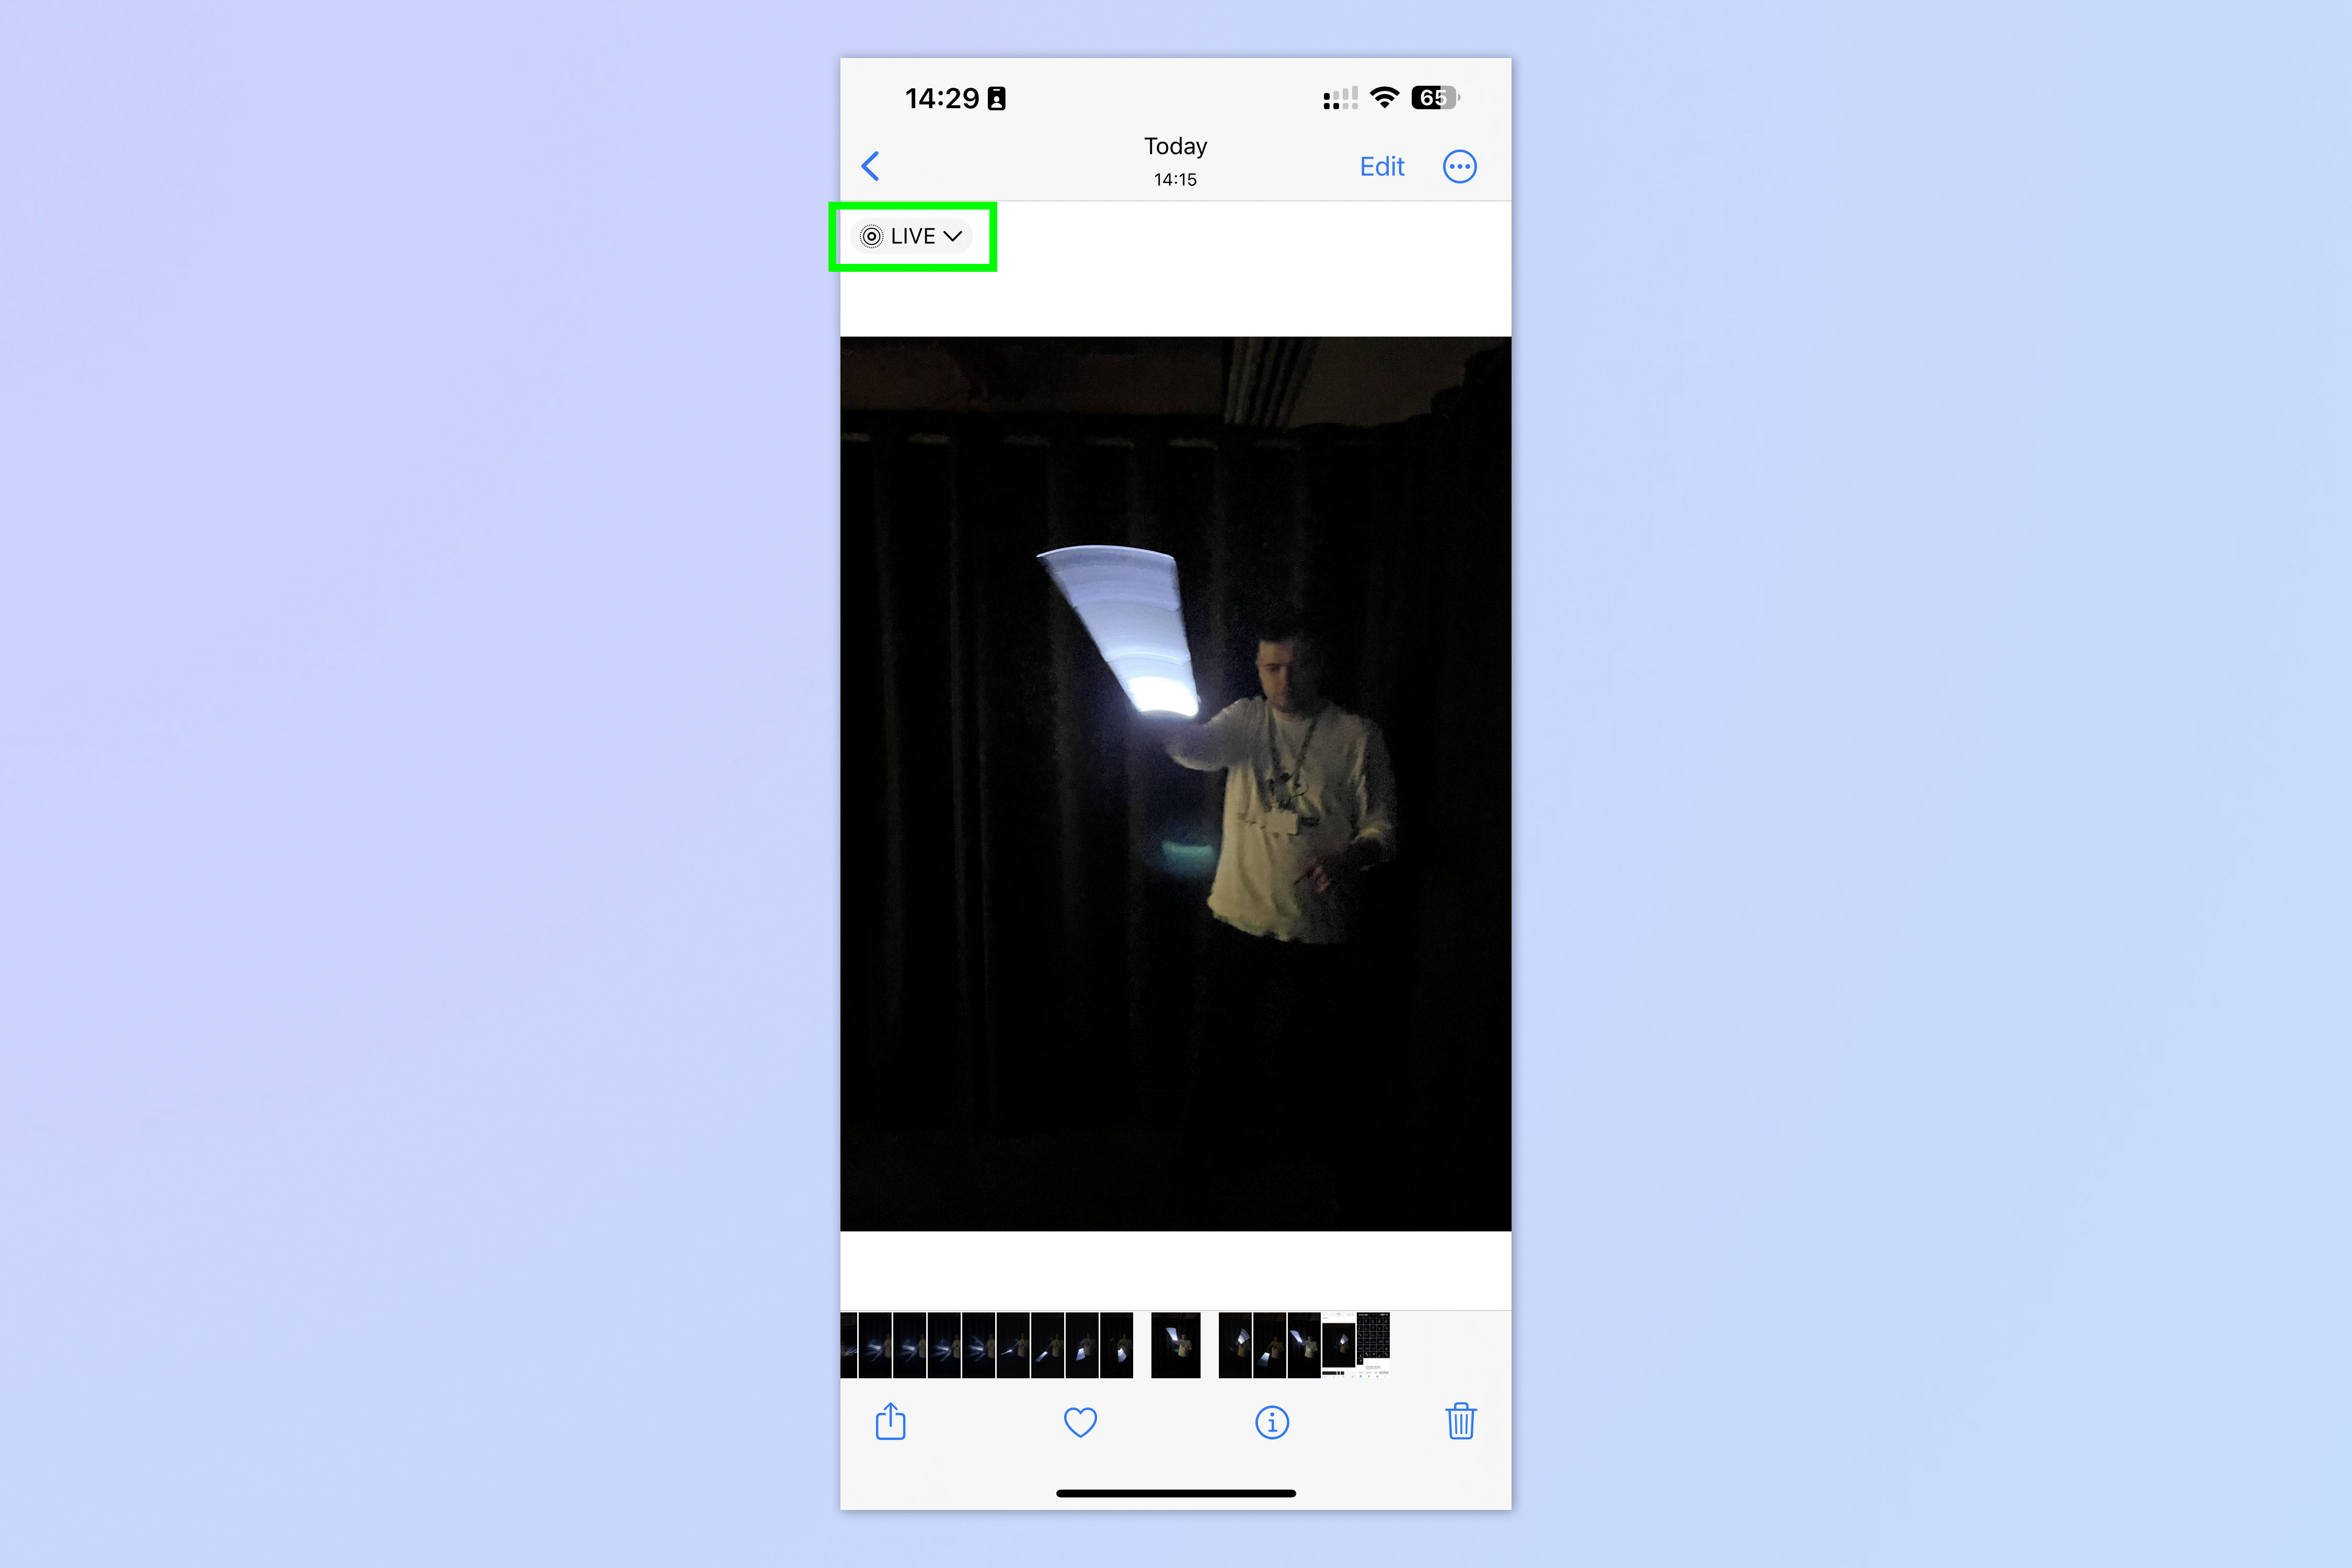
Tap the Live Photo dropdown in the top left of the photo.
5. Select Long Exposure
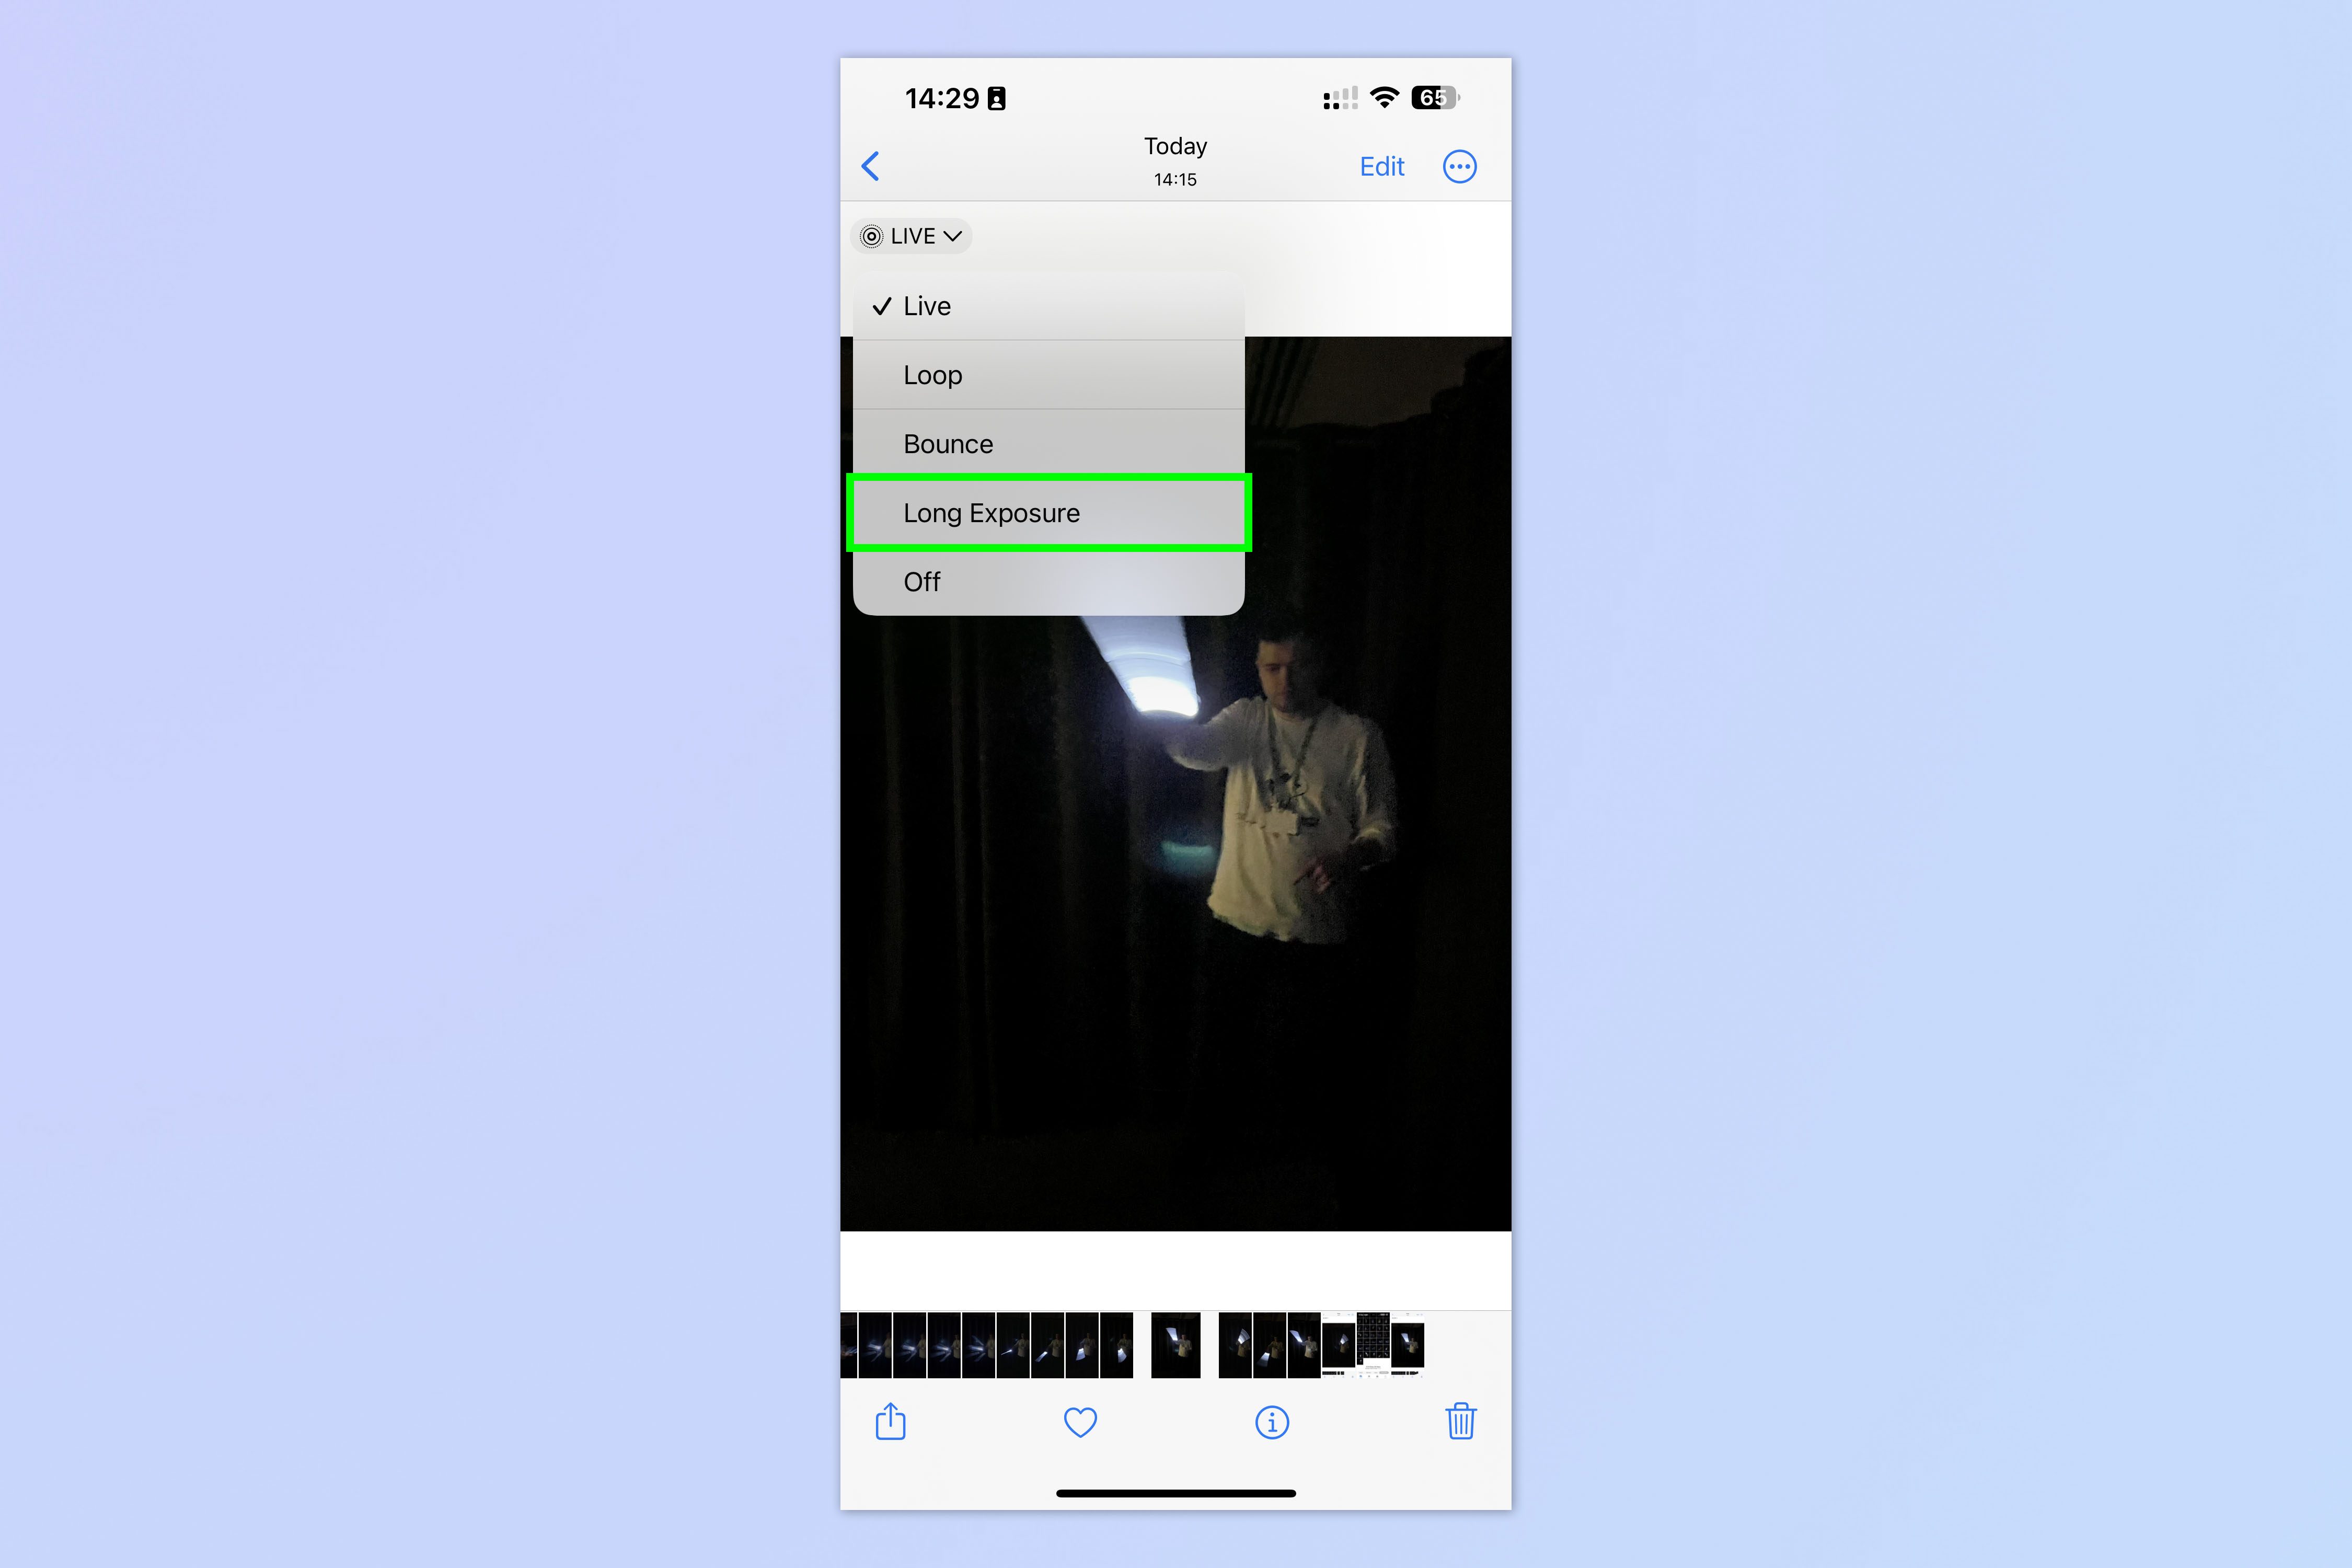
Select Long Exposure from the drop down list. Your Live Photo will be transformed into a long exposure-style image.
And there you have it. You now know how to take a long exposure on iPhone. The results aren't awe-inspiring, as you might expect given this feature is just simulating long exposures. However, when used in the right circumstances, it can produce some pretty cool blurs or light trails.
Sign up to get the BEST of Tom's Guide direct to your inbox.
Get instant access to breaking news, the hottest reviews, great deals and helpful tips.
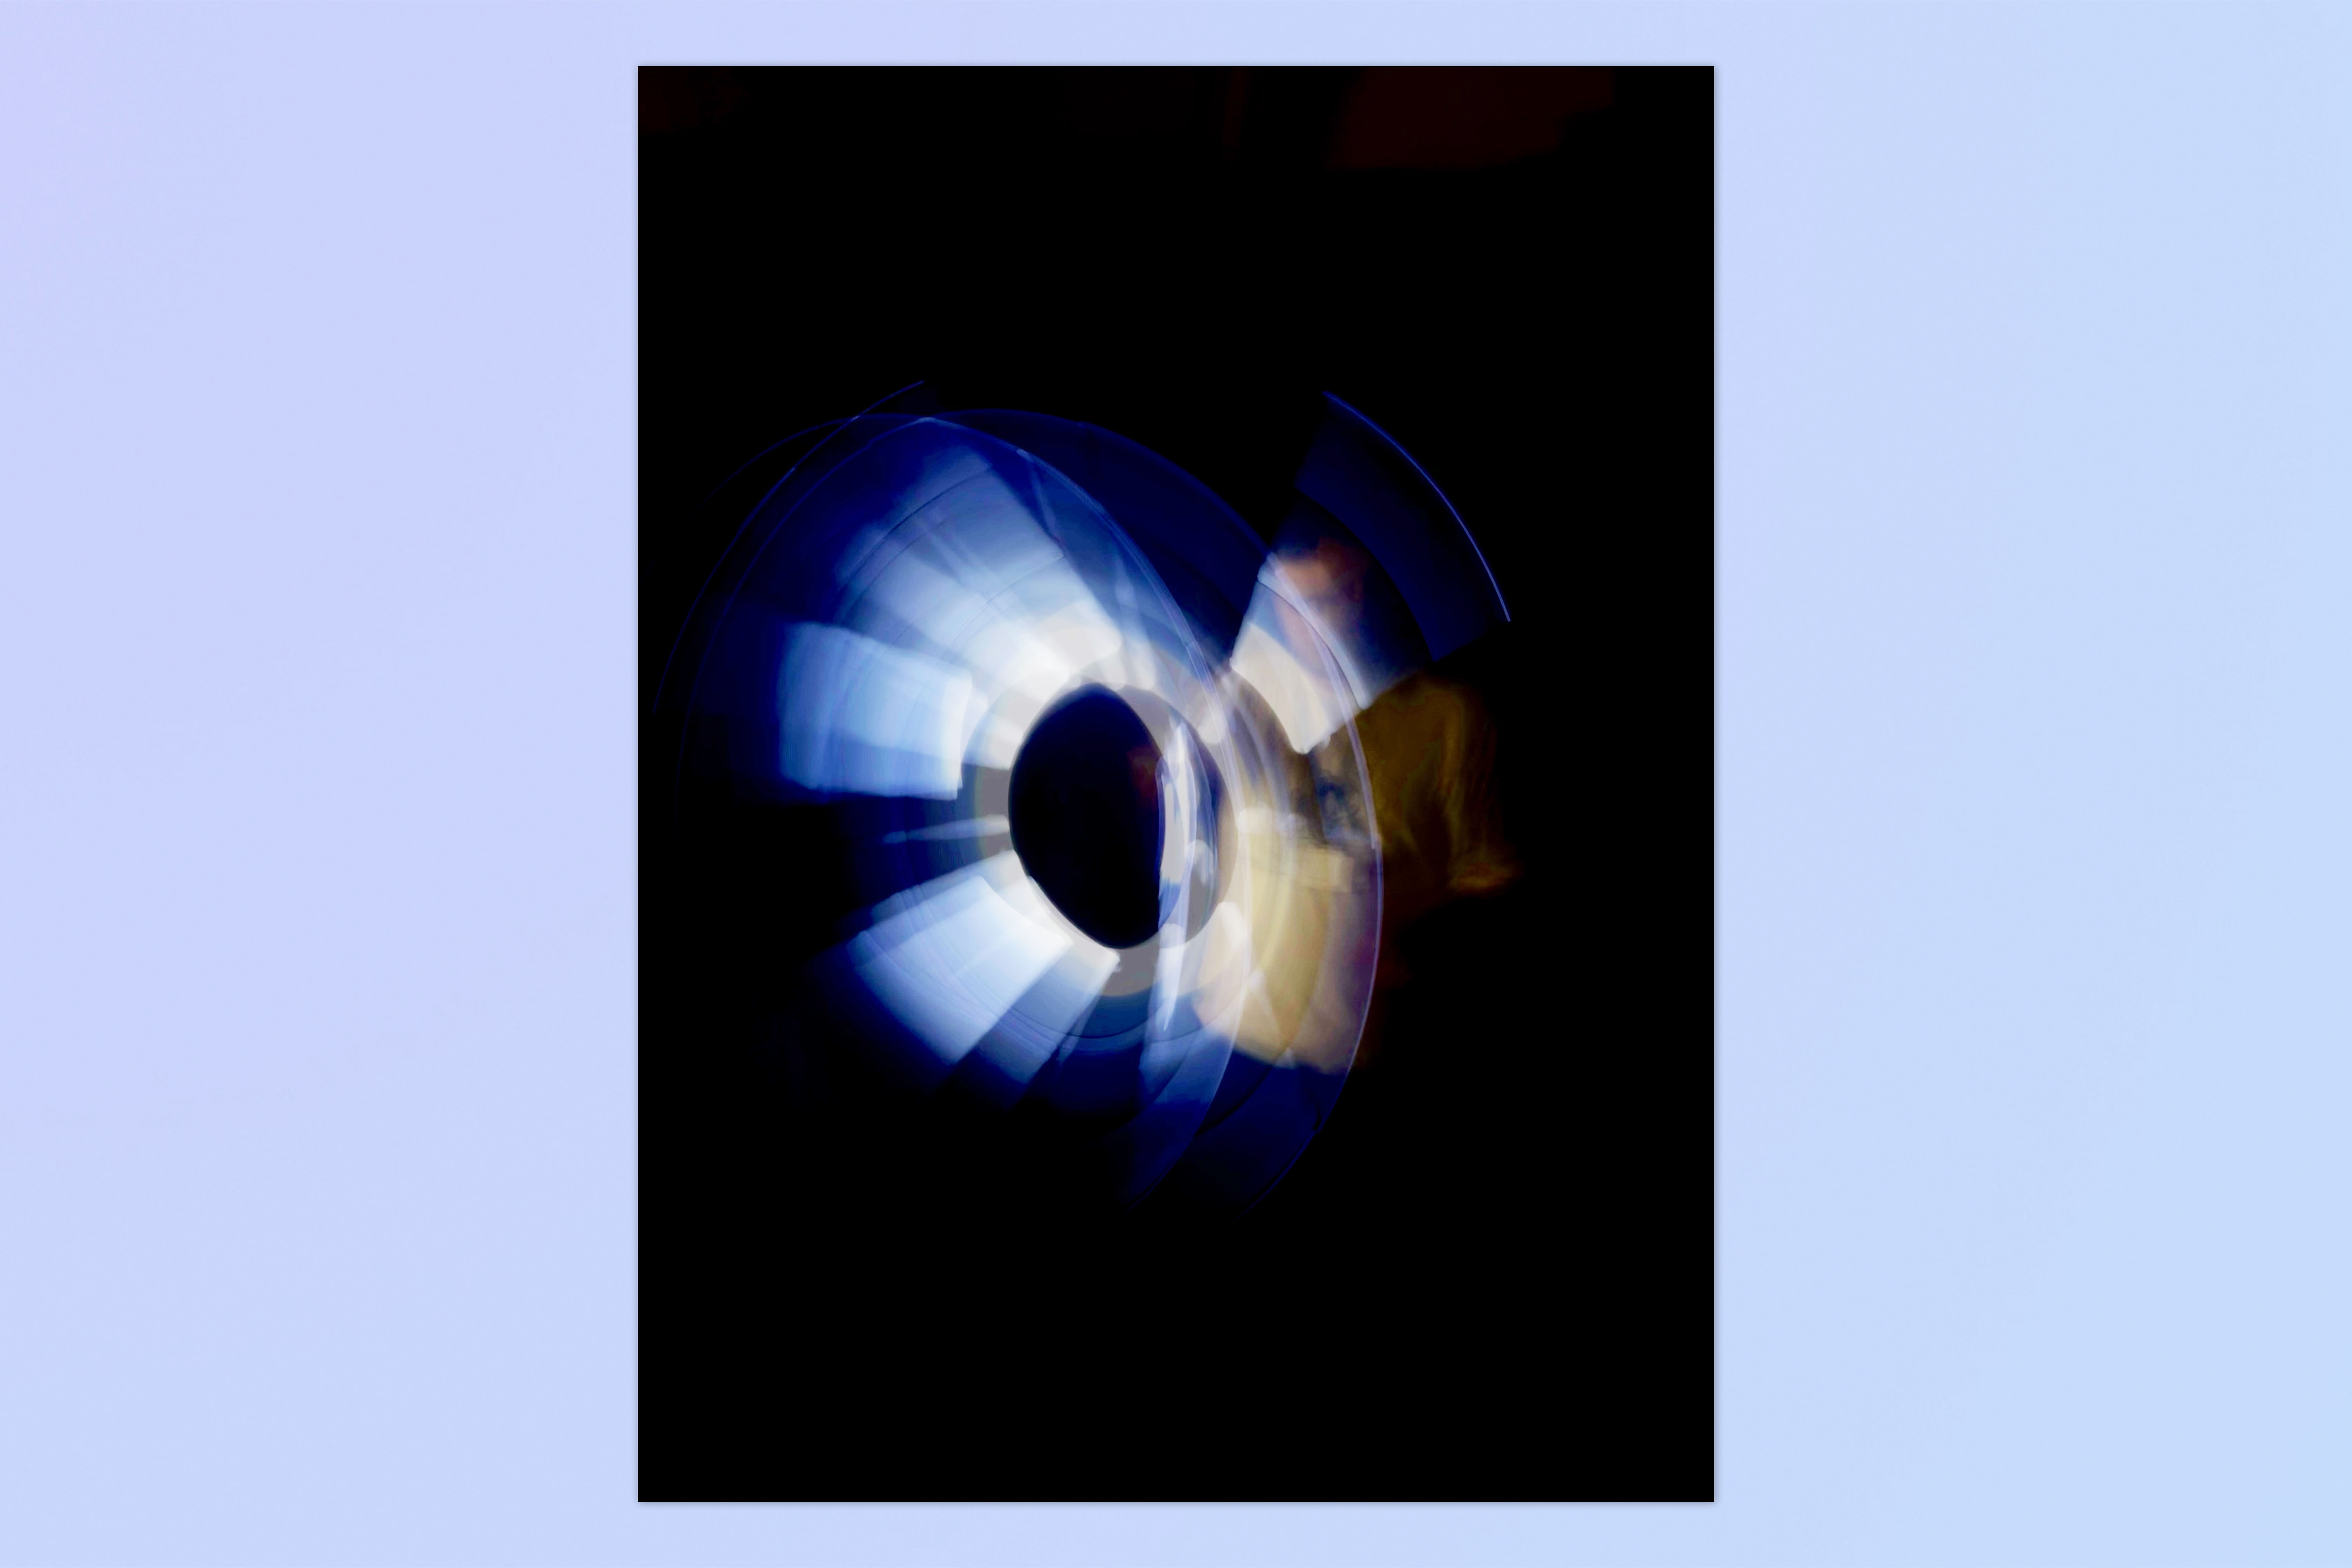
We managed to get some fun photos of Staff Writer Andy Sansom wielding a lightsaber! In testing this feature out, we found that long exposures tended to work better in low light, so this could be a really good feature for capturing the light trails from moving cars at night. We also found that the results were much smoother when the light source was moving faster. Otherwise, the light trails ended up looking a little staccato.
If you'd like to read more iPhone tutorials, check out our guides on how to unlock your iPhone using Voice Control, how to customize your iPhone's lock button and how to charge your iPhone faster.

Peter is a Senior Editor at Tom's Guide, heading up the site's Reviews team and Cameras section. As a writer, he covers topics including tech, photography, gaming, hardware, motoring and food & drink. Outside of work, he's an avid photographer, specialising in architectural and portrait photography. When he's not snapping away on his beloved Fujifilm camera, he can usually be found telling everyone about his greyhounds, riding his motorcycle, squeezing as many FPS as possible out of PC games, and perfecting his espresso shots.
