How to speed up Windows 10
Speed up your Windows 10 device with these tips
If you’re finding that your Windows 10 device is constantly lagging or taking minutes to perform tasks that should be almost instant it can be rage-inducing.
Windows 10 is a remarkably efficient operating system, but it’s still prone to the slowdown that can make using your laptop or desktop a chore. It’s understandable, of course; Windows 10 has plenty of systems all competing for your device’s resources, and that’s before we even talk about bloatware.
- How to use Windows 10 — easy-to-follow guides
- See how to sign a Word document
- How to check laptop battery health in Windows 10
- Our guide on how to use VLOOKUP in Excel
If you’re using a Windows 10 device every day, odds are there’s plenty of temporary files and additional programs that alongside the core functions of the OS are putting a significant strain on your machine. This is even more of a problem if you’re using older or less powerful hardware.
Don’t worry, you’re not doomed to a lifetime of slow loading and crawling through menus, as there are several things you can do to give your device a jolt. You don’t even need to be a computing whiz to do most of this stuff either.
As a first option, you could boot into safe mode; just follow our guide on how to boot into Windows 10 safe mode if you’re unsure of the process. If you’ve already tried that, or just want alternatives, below you’ll find several tips and tricks that you can use to speed up Windows 10.
Restart your device

You’d be surprised how many users don’t regularly restart their Windows 10 device. With the inclusion of sleep and low-power modes on most modern devices, it’s easy to go weeks without doing a full reset of your device.
This can dramatically slow down your device as it essentially never gets a break and processes carry on in the background nonstop. We’d recommend doing a full shutdown at least once a day if possible.
Sign up to get the BEST of Tom's Guide direct to your inbox.
Get instant access to breaking news, the hottest reviews, great deals and helpful tips.
Make sure you close any running programs and save any required work before doing so, of course.
Check for Windows 10 updates
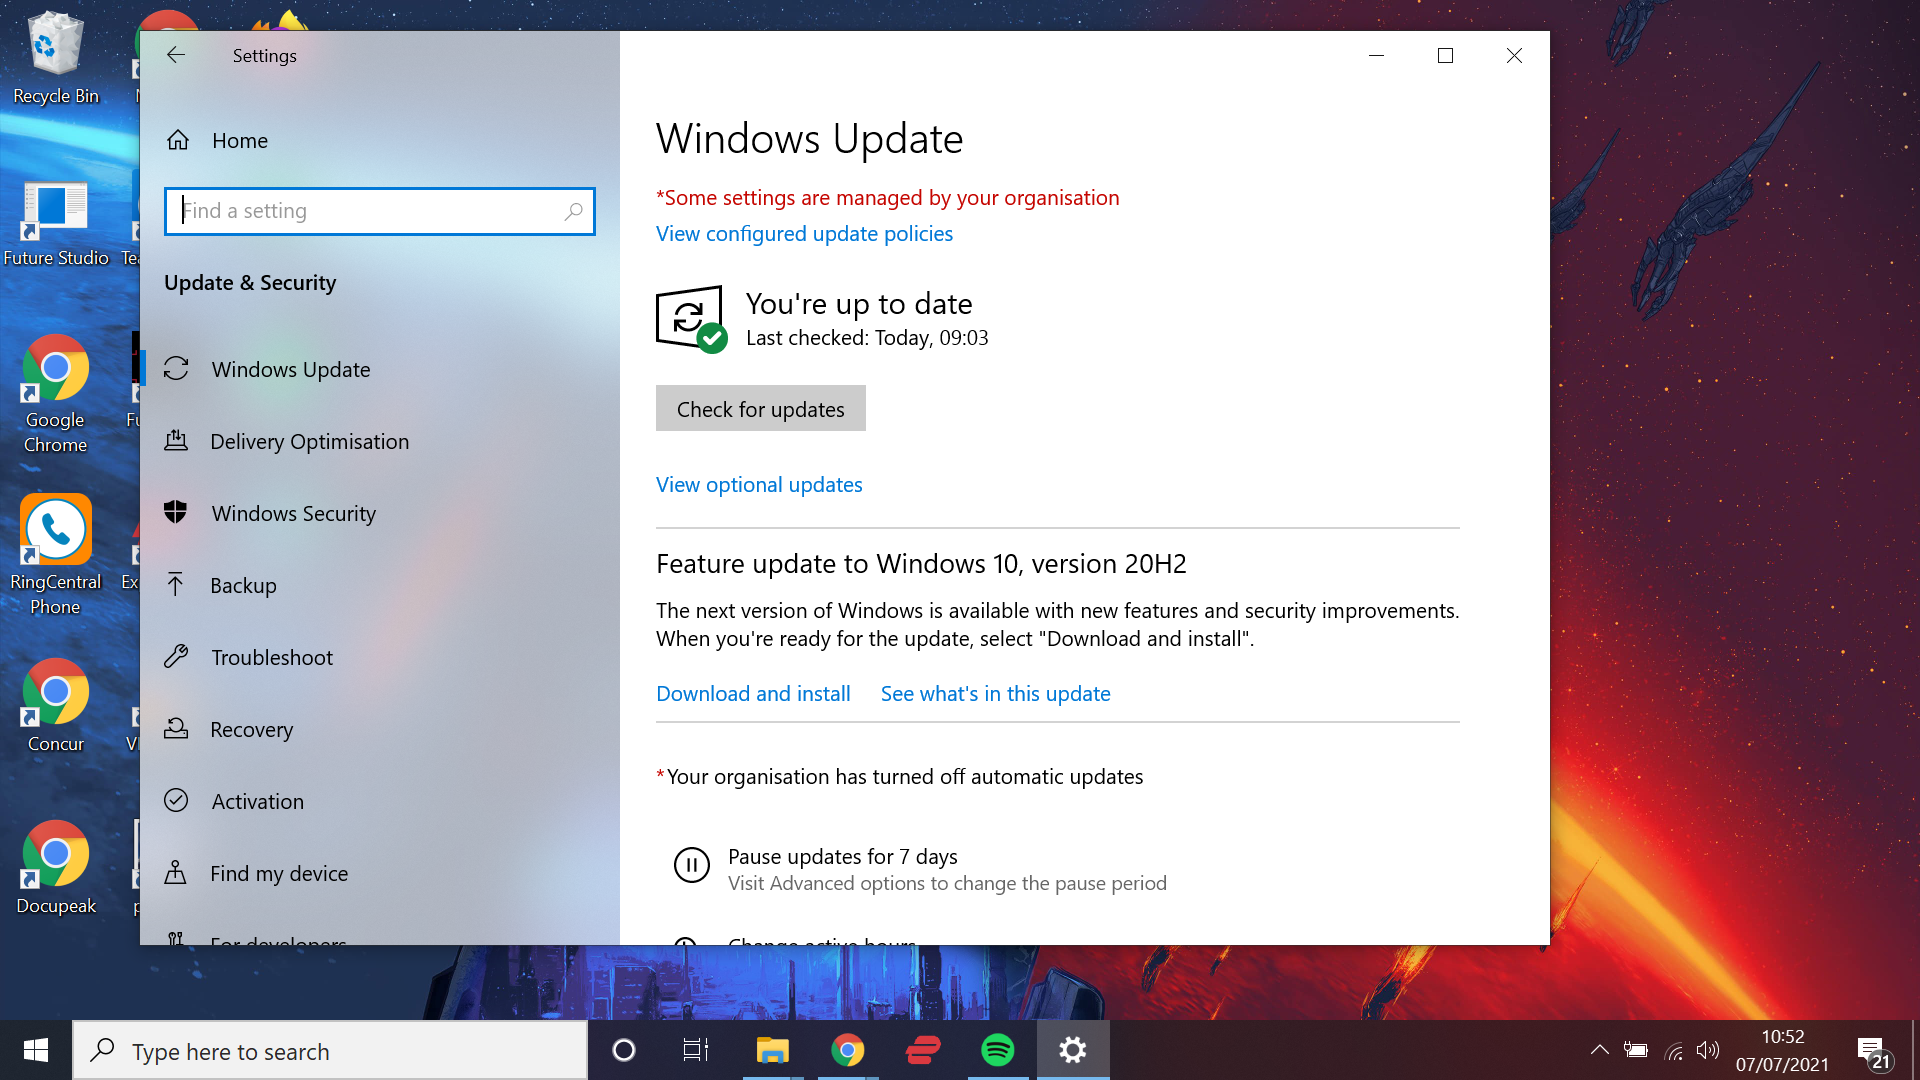
Constant updates might seem like a pesky annoyance, but Windows 10 is asking you to update for a reason. These updates fix common bugs and issues that could be causing your device to slow down. Here's how to check for a Windows 10 update:
1. Open Settings. You can easily find Settings using the search bar in the left-hand corner of your screen.
2. Select Update & Security. From the Settings menu locate the Update & Security submenu, there's a search bar at the top of the window if you're having any trouble locating it.
3. Click Check of updates. At the top of the Update & Security submenu, your device will tell you if you're fully up to date, and if not you can manually begin updating by pressing the "Check for updates" button. Make sure you’ve saved all required work beforehand, and be prepared for the process to take a little time as well.
Disable startup apps
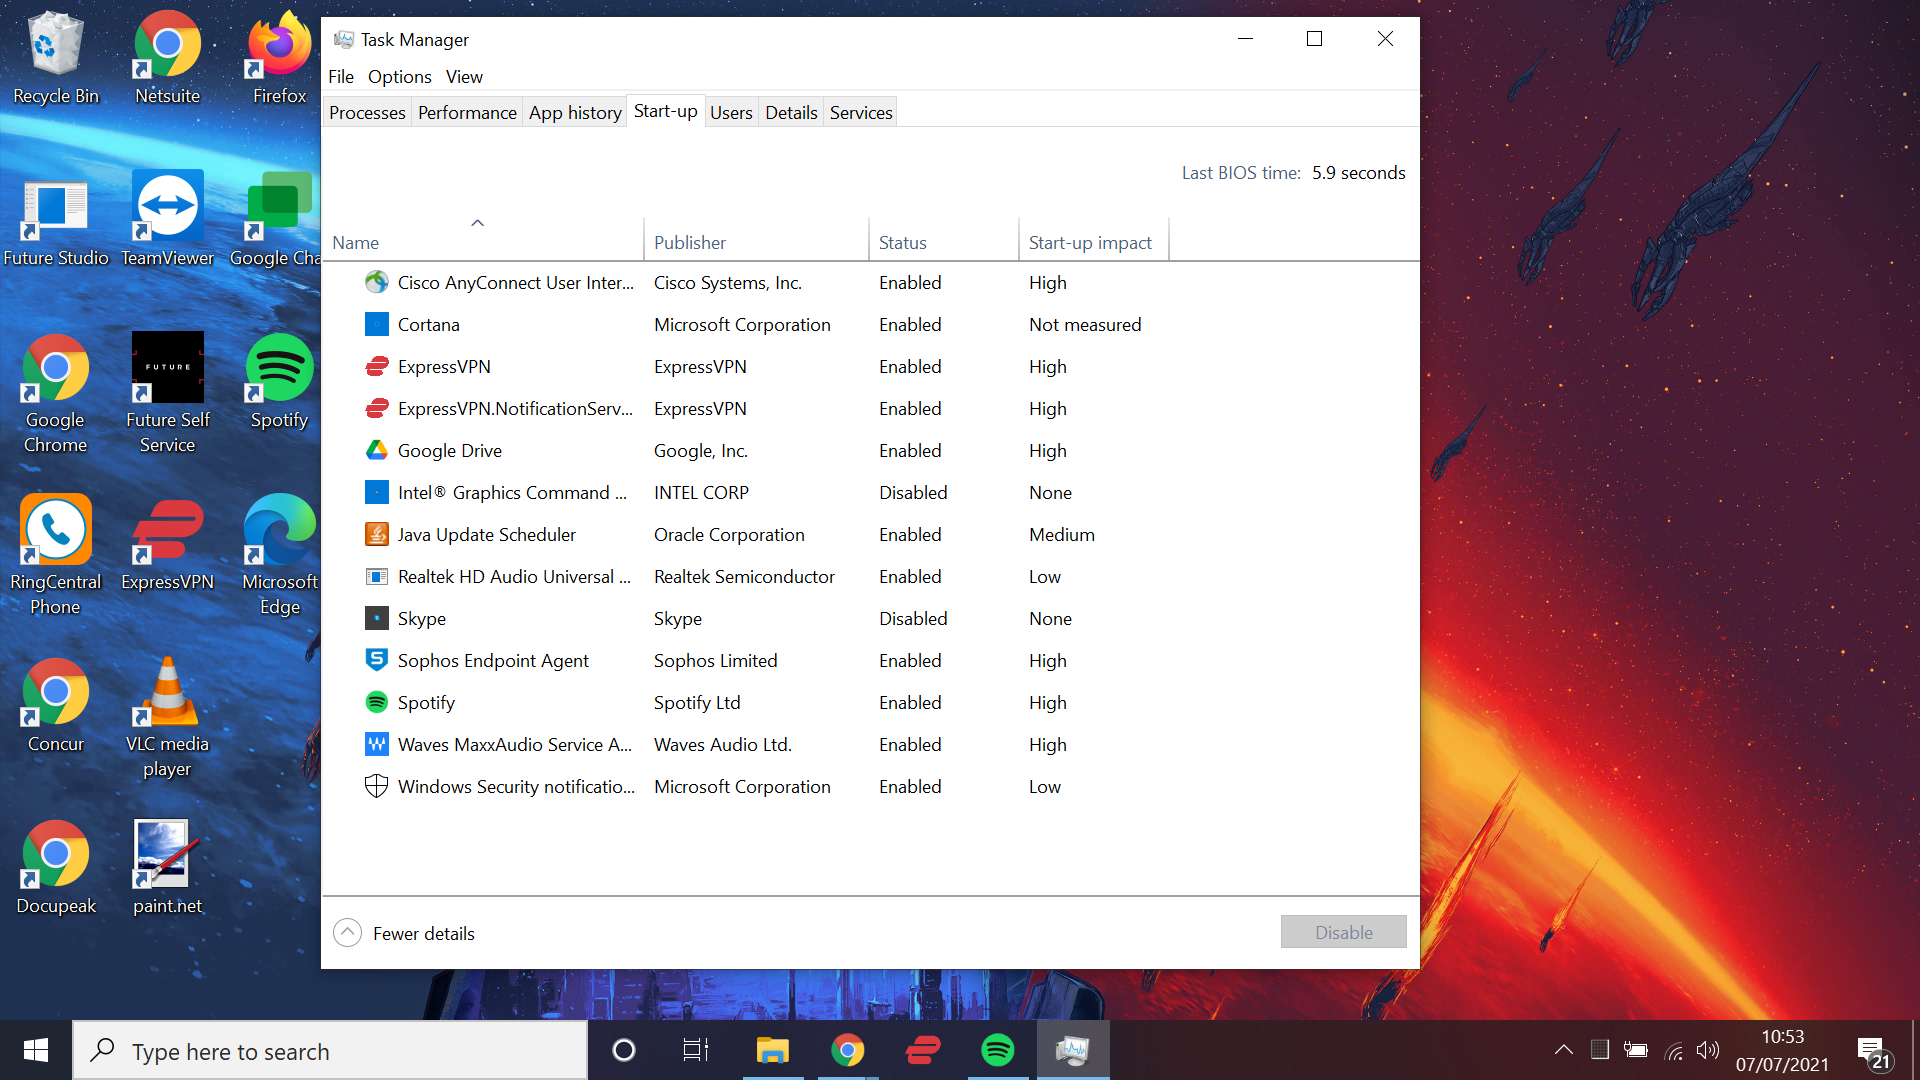
Do you ever boot up your device and find that several programs all automatically start up at once? Not only is this rather annoying, but it can also be a huge drain on your device’s resources.
In order to speed up your Windows 10 Wdevice, it's best to only have essential programs set as startup apps. Here's how to disable startup apps:
1. Press Ctrl+Alt+Del. Press the Ctrl+Alt+Del keys on your keyboard at the same time to bring up a blue screen (officially called the GINA screen) with several options.
2. Select Task Manager and navigate to the Start-up tab. From the GINA screen select Task Manager, then head over to the Start-up tab which is located on the top navigation bar.
3. Disable any non-essential programs. From the Start-up tab, you can see the "Start-up impact" value for each program, anything labeled as "High" is likely to slow your system down. If it's not essential then right-click and choose disable. This won’t remove the program from your device, it will just stop it from automatically opening every time you switch it on.
Clean up your disk
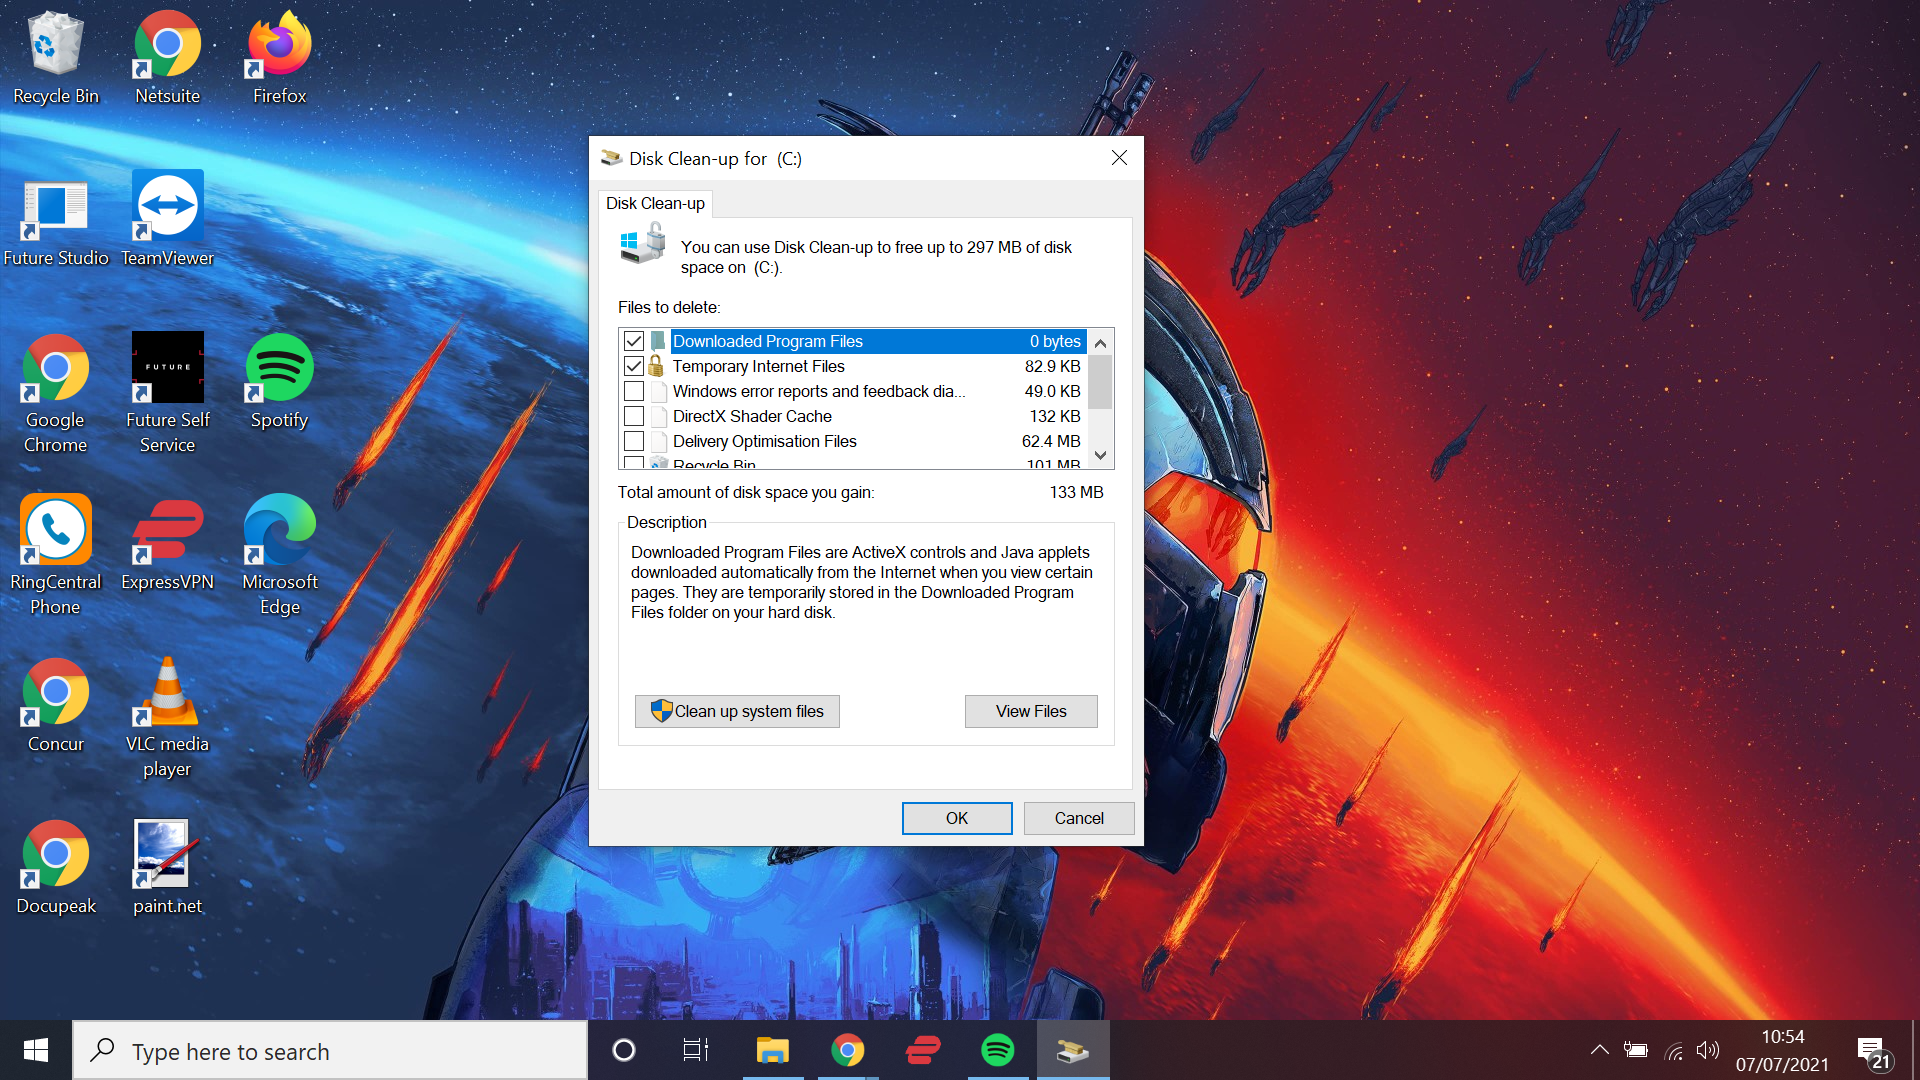
Did you know that Windows 10 has a Disk Cleanup ability built-in? This allows you to clear out any lingering temporary files that have accumulated, which can happen remarkably regularly as things like unneeded launchers stick around. Here's to up to clean up your disk:
1. Search for Disk Cleanup. Using the search bar in the left corner of your screen, locate Disk Cleanup.
2. Select the drive you wish to clean up. If you have multiple drives on your device then you will be asked which one you specifically want to clean up.
3. Remove unneeded files. The Disk Cleanup tool will offer you a choice of what files to remove, simply mark the ones you want rid of and then hit "clean up system files" to start the removal process.
At the same time, why not check your “downloads” folder for files you no longer need, it’s often a place that users neglect and can be a huge drain on system memory and in turn performance.
Uninstall software you don't need
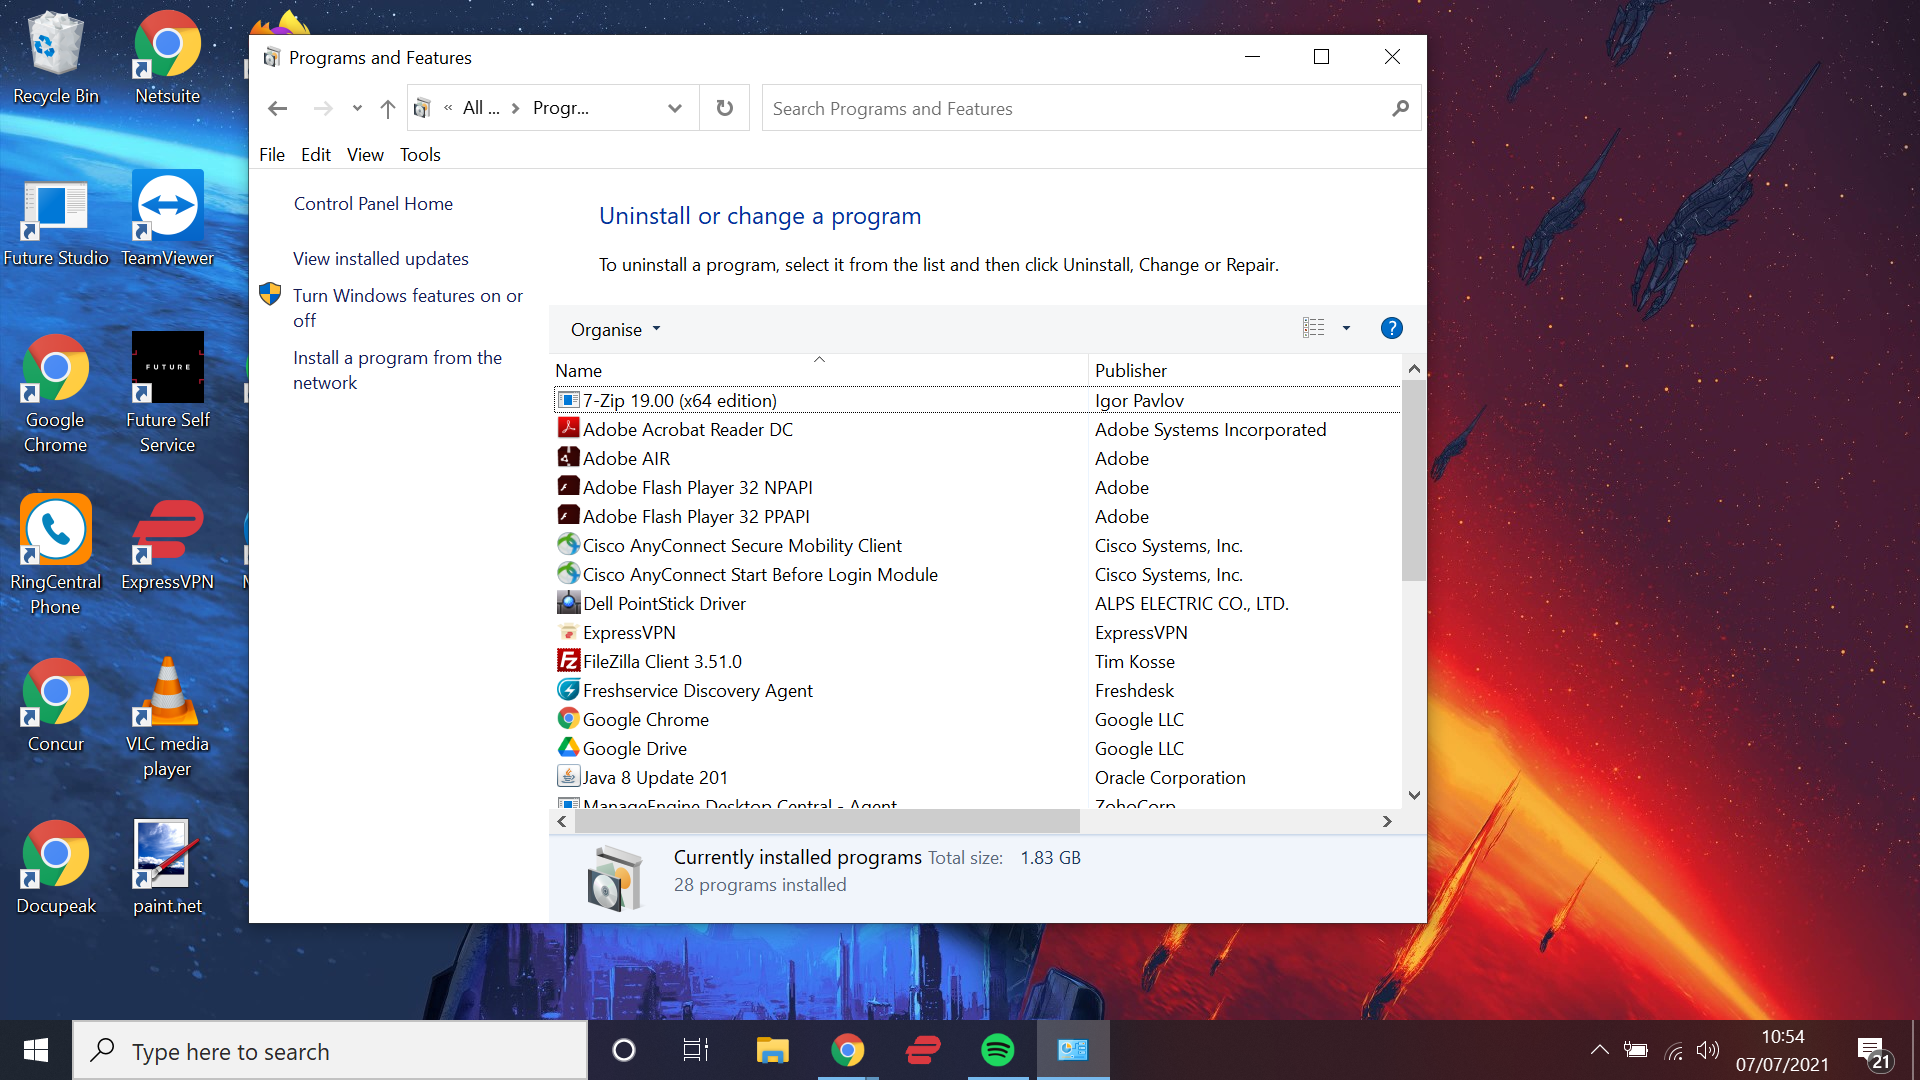
Many PCs come with a variety of software preinstalled. These often unnecessary programs are referred to as “bloatware,” and having them on your device can slow it down. Here's how to uninstall unneeded software:
1. Open Control Panel. The easiest way to open Control Panel is to search for it via the left-hand corner search bar.
2. Select Programs and Features. Once in the Control Panel, you need to locate the Programs and Features submenu.
3. Uninstall unneeded programs. The Programs and Features window will give you a list of all the programs currently installed on your device. Right-click on any programs that you’ve deemed not needed and select Uninstall. Windows might ask for permission to perform this task, so make sure you’re on an administrator account before doing this.
Disable effects
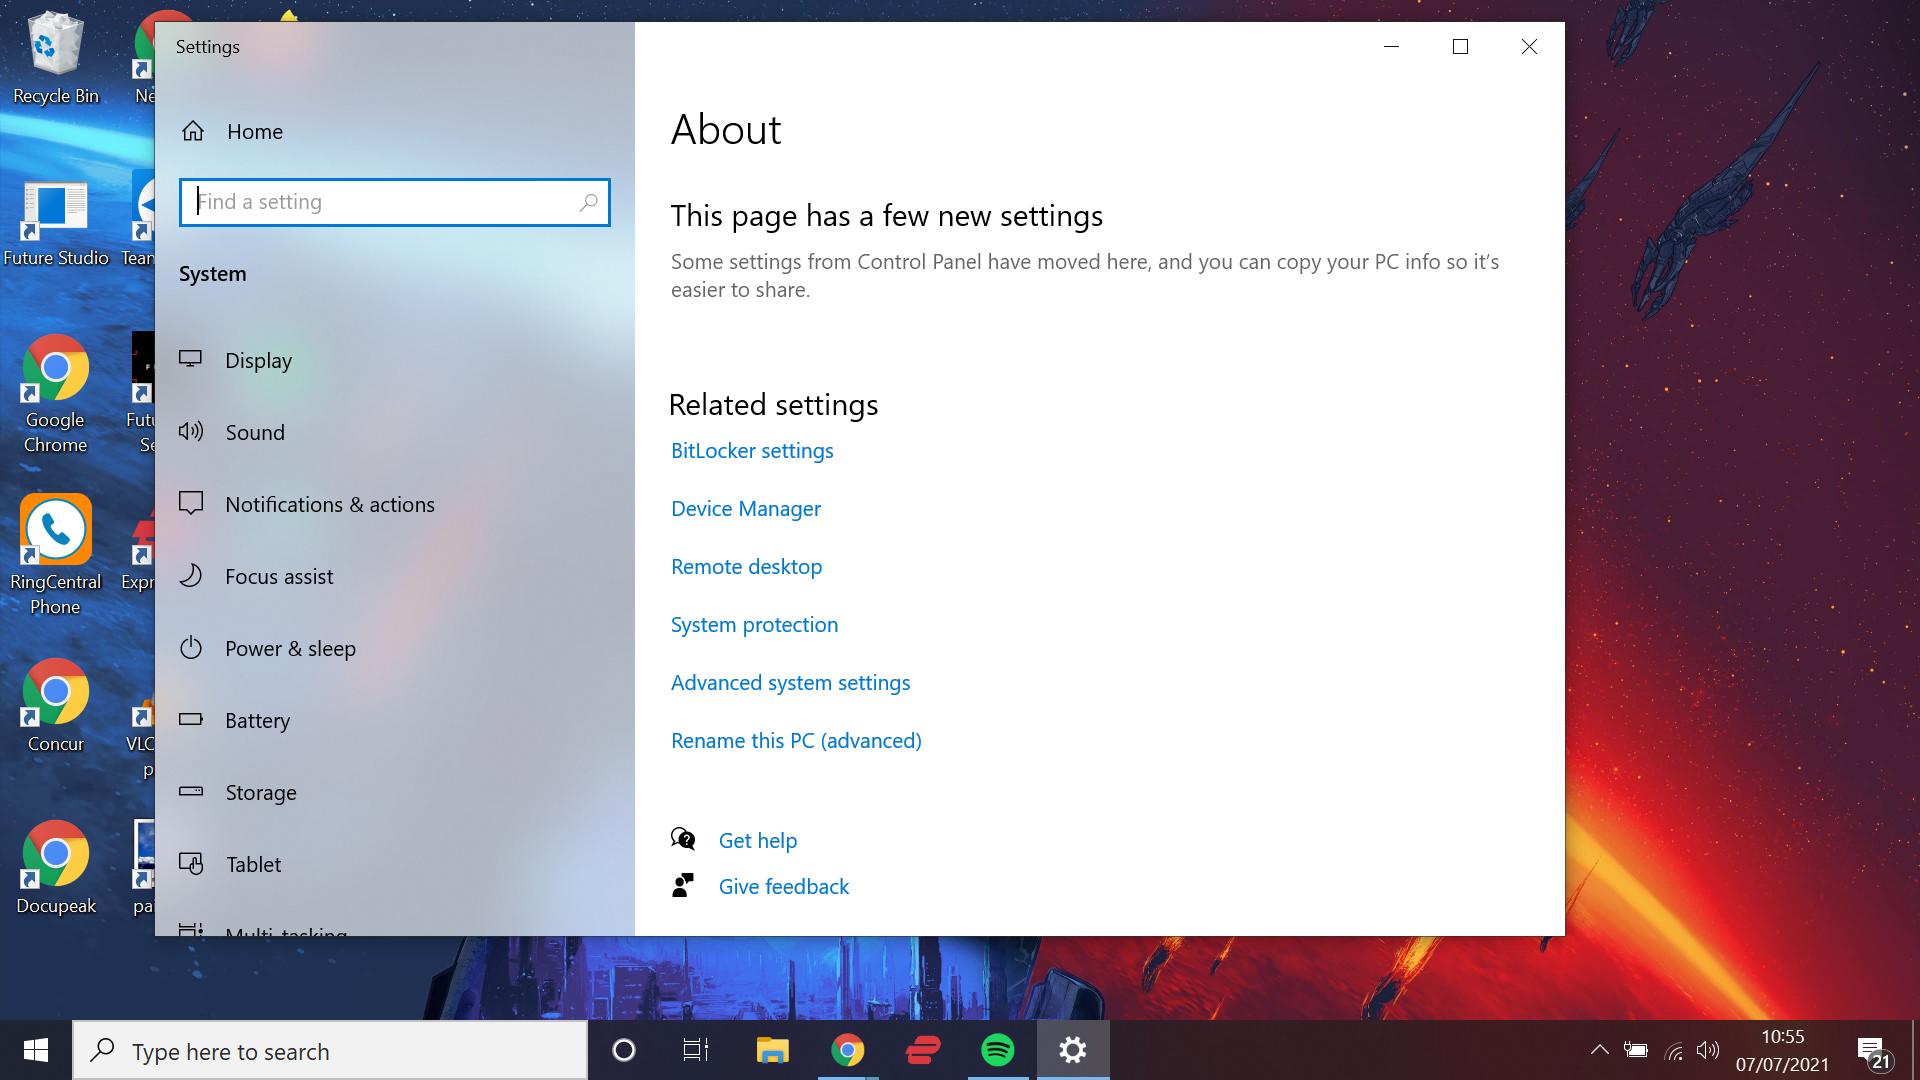
Windows 10 features a lot of cool visual flourishes like transparency effects and animations. Sure, these might look fairly pretty but they can actually be very taxing on your device’s resources. Here's how to disable effects:
1. Press Windows+X. Press the Windows key and X together to bring up a menu on the left side of your screen.
2. Select System. From this menu, select the System option which is located on the top half of the list.
3. Scroll down to Advanced system settings. From the window that pops up after selecting System, scroll down right to the bottom and you'll see an option labeled "Advanced system settings". Click it.
4. Open Performance Settings and disable Visual Effects. From within "Advanced system settings" there will be a tab called "Performance settings." In there you'll see a "Visual Effects" tab where you can uncheck any effects you want to disable. The more you get rid of the better impact it’ll have on system performance.
Run System Maintenance
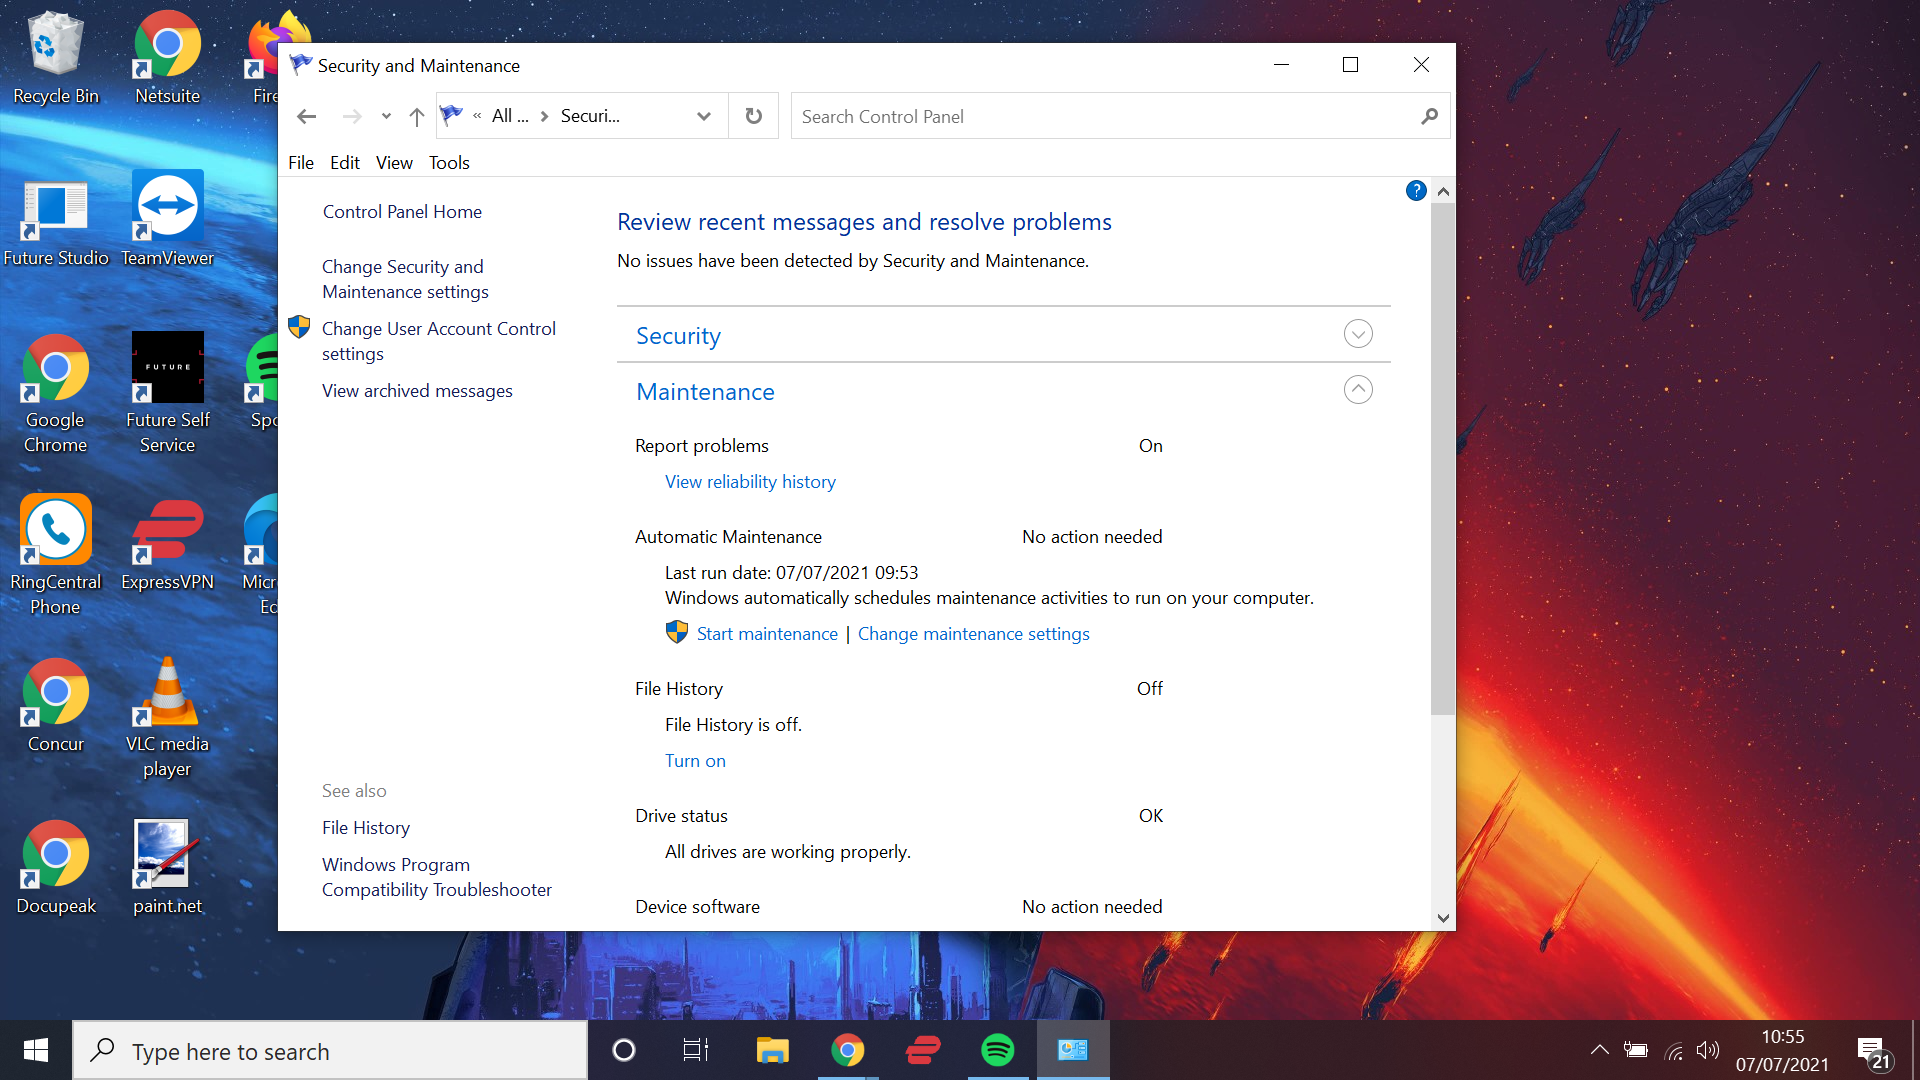
Another built-in feature of Windows 10 is the ability to run routine system maintenance. This is basically asking your device to scan for updates and check for any malware or viruses.
These checks do typically happen in the background by default, but you can set one up manually if your device is really starting to chug. Here's how to run system maintenance.
1. Open Control Panel. Using the search bar on your desktop toolbar, find Control Panel.
2. Select Security and Maintenace. From Control Panel, select the Security and Maintenance from the list of options.
3. Click Start Maintenance. Once in the Security and Maintenance window, you will be able to Start Maintenance, which is located within the Maintenance tab. This will begin a thorough check of your system and report the findings back to you. Note that this can take a little while and we strongly recommend saving any files you need before doing this.
Upgrade to an SSD
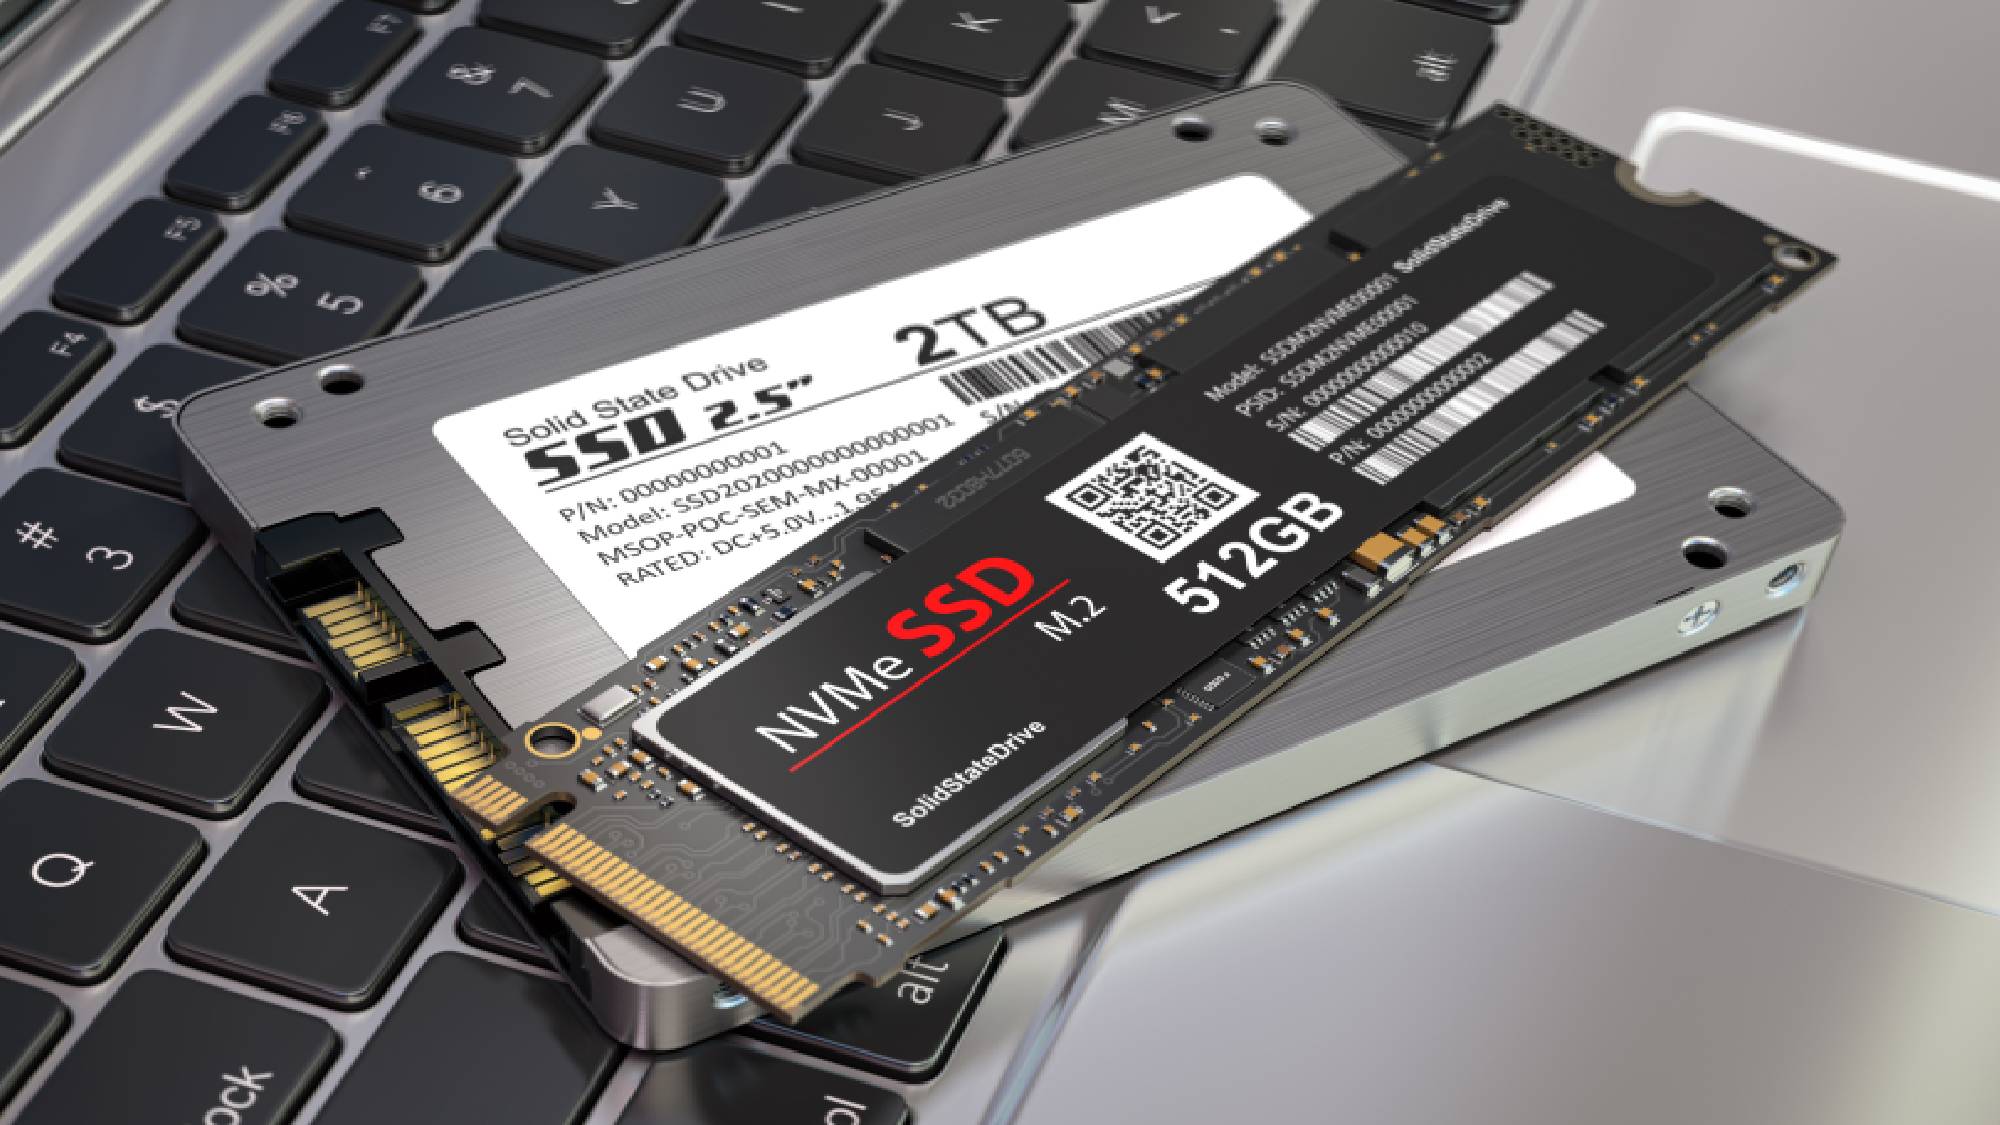
This one isn’t so handy for those using a laptop or tablet, but if you’ve got a desktop PC that is running slow then you could look to upgrade to a solid-state drive (SSD).
These drives are more expensive than traditional hard drives, but they’re significantly faster and will allow your Windows 10 device to run much quicker even with a more taxing load on its resources.
This method of speeding up Windows is a little more involved as you’ll need to make sure you get the right drive to fit your PC, and it’ll come with a cost, but if you have the ability it’s well worth the effort.
Our sister site, Tom's Hardware, has a list of the best SSDs you can buy.
More Windows 10 tips
How to find your Windows 10 product key | How to encrypt files on Windows 10 | How to install Windows 10 | How to turn on Bluetooth for Windows 10 | How to boot into Windows 10 safe mode | How to split the screen on Windows 10 | How to record a screen on Windows 10 | How to update drivers on Windows 10 | Mapping a network drive in Windows 10 | How to update Windows 10 | How to change the password on Windows 10 | How to factory reset on Windows 10 | How to screenshot on Windows 10 | How to reinstall Windows 10 | How to check your PC specs in Windows 10 | How to check your PC's CPU temperature

Rory is an Entertainment Editor at Tom’s Guide based in the UK. He covers a wide range of topics but with a particular focus on gaming and streaming. When he’s not reviewing the latest games, searching for hidden gems on Netflix, or writing hot takes on new gaming hardware, TV shows and movies, he can be found attending music festivals and getting far too emotionally invested in his favorite football team.
-
jack63ss The steps given in the article are a good start:Reply
1 - Restart - Use Task Scheduler to run shutdown /s at about 3am every 3 days
2 - Check for Updates - I have it configured to notify but not automatically install updates
3 - Disable startup apps - ABSOLUTELY disable ones you don't need (I have 5 enabled and 21 disabled)
4 - Clean up your disk - Should probably run this once a week
5 - Uninstall software you don't need - DEFINITELY remove stuff you will never use, BUT BE CAREFUL, as some of these are actually system applications
6 - Disable effects - I don't really use them anyway
7 - Run system maintenance - By default runs once a day at 2am, or "the next time the computer is not being used"
8 - Upgrade to an SSD - BEST CHOICE, but $$ - My laptop has an SSD & an HD, so the OS boots up really fast
However, if you are an Advanced Windows user and feel confident, or are looking for adventure try this:
It is possible to stop, or disable, some unnecessary System Services as well. I'll preface this first by saying, unless you are a fairly advanced user do NOT try the following, as you could easily get your system into a state where something would not work or even worse, totally hose your system.
First start windows in Safe Mode and note what Apps and Background Processes are started. Then restart Windows normally, check again, and make a list of what is running now that it was not in Safe Mode. Some of these processes are probably important, but some, like Adobe Acrobat Update Service, are not. The easiest way to stop these from running is using the Windows Services app. Type Services in the Search box and start the Services app (services.msc). Once it starts you should see the Services(Local) window with a list of all the Services available, running or not. Click on Status in the header bar until it shows Status=Running and Startup_Type=Automatic. Then find the Service you want to change and double-click on it. In General tab of the dialog box, click Stop to stop the service, and then change Startup Type to Manual (if you try this an the service still starts try using Disabled instead). Click on Okay and you should be done. Important: Make a note of what you changed, as if things go bad you may need to undo some of the changes. And as I said, BE VERY CAREFUL what you change, as you can cripple your system. When in doubt, DON'T CHANGE IT.
Good Luck !
