How to sign documents on iPhone
Important business? Here's how to sign documents on iPhone
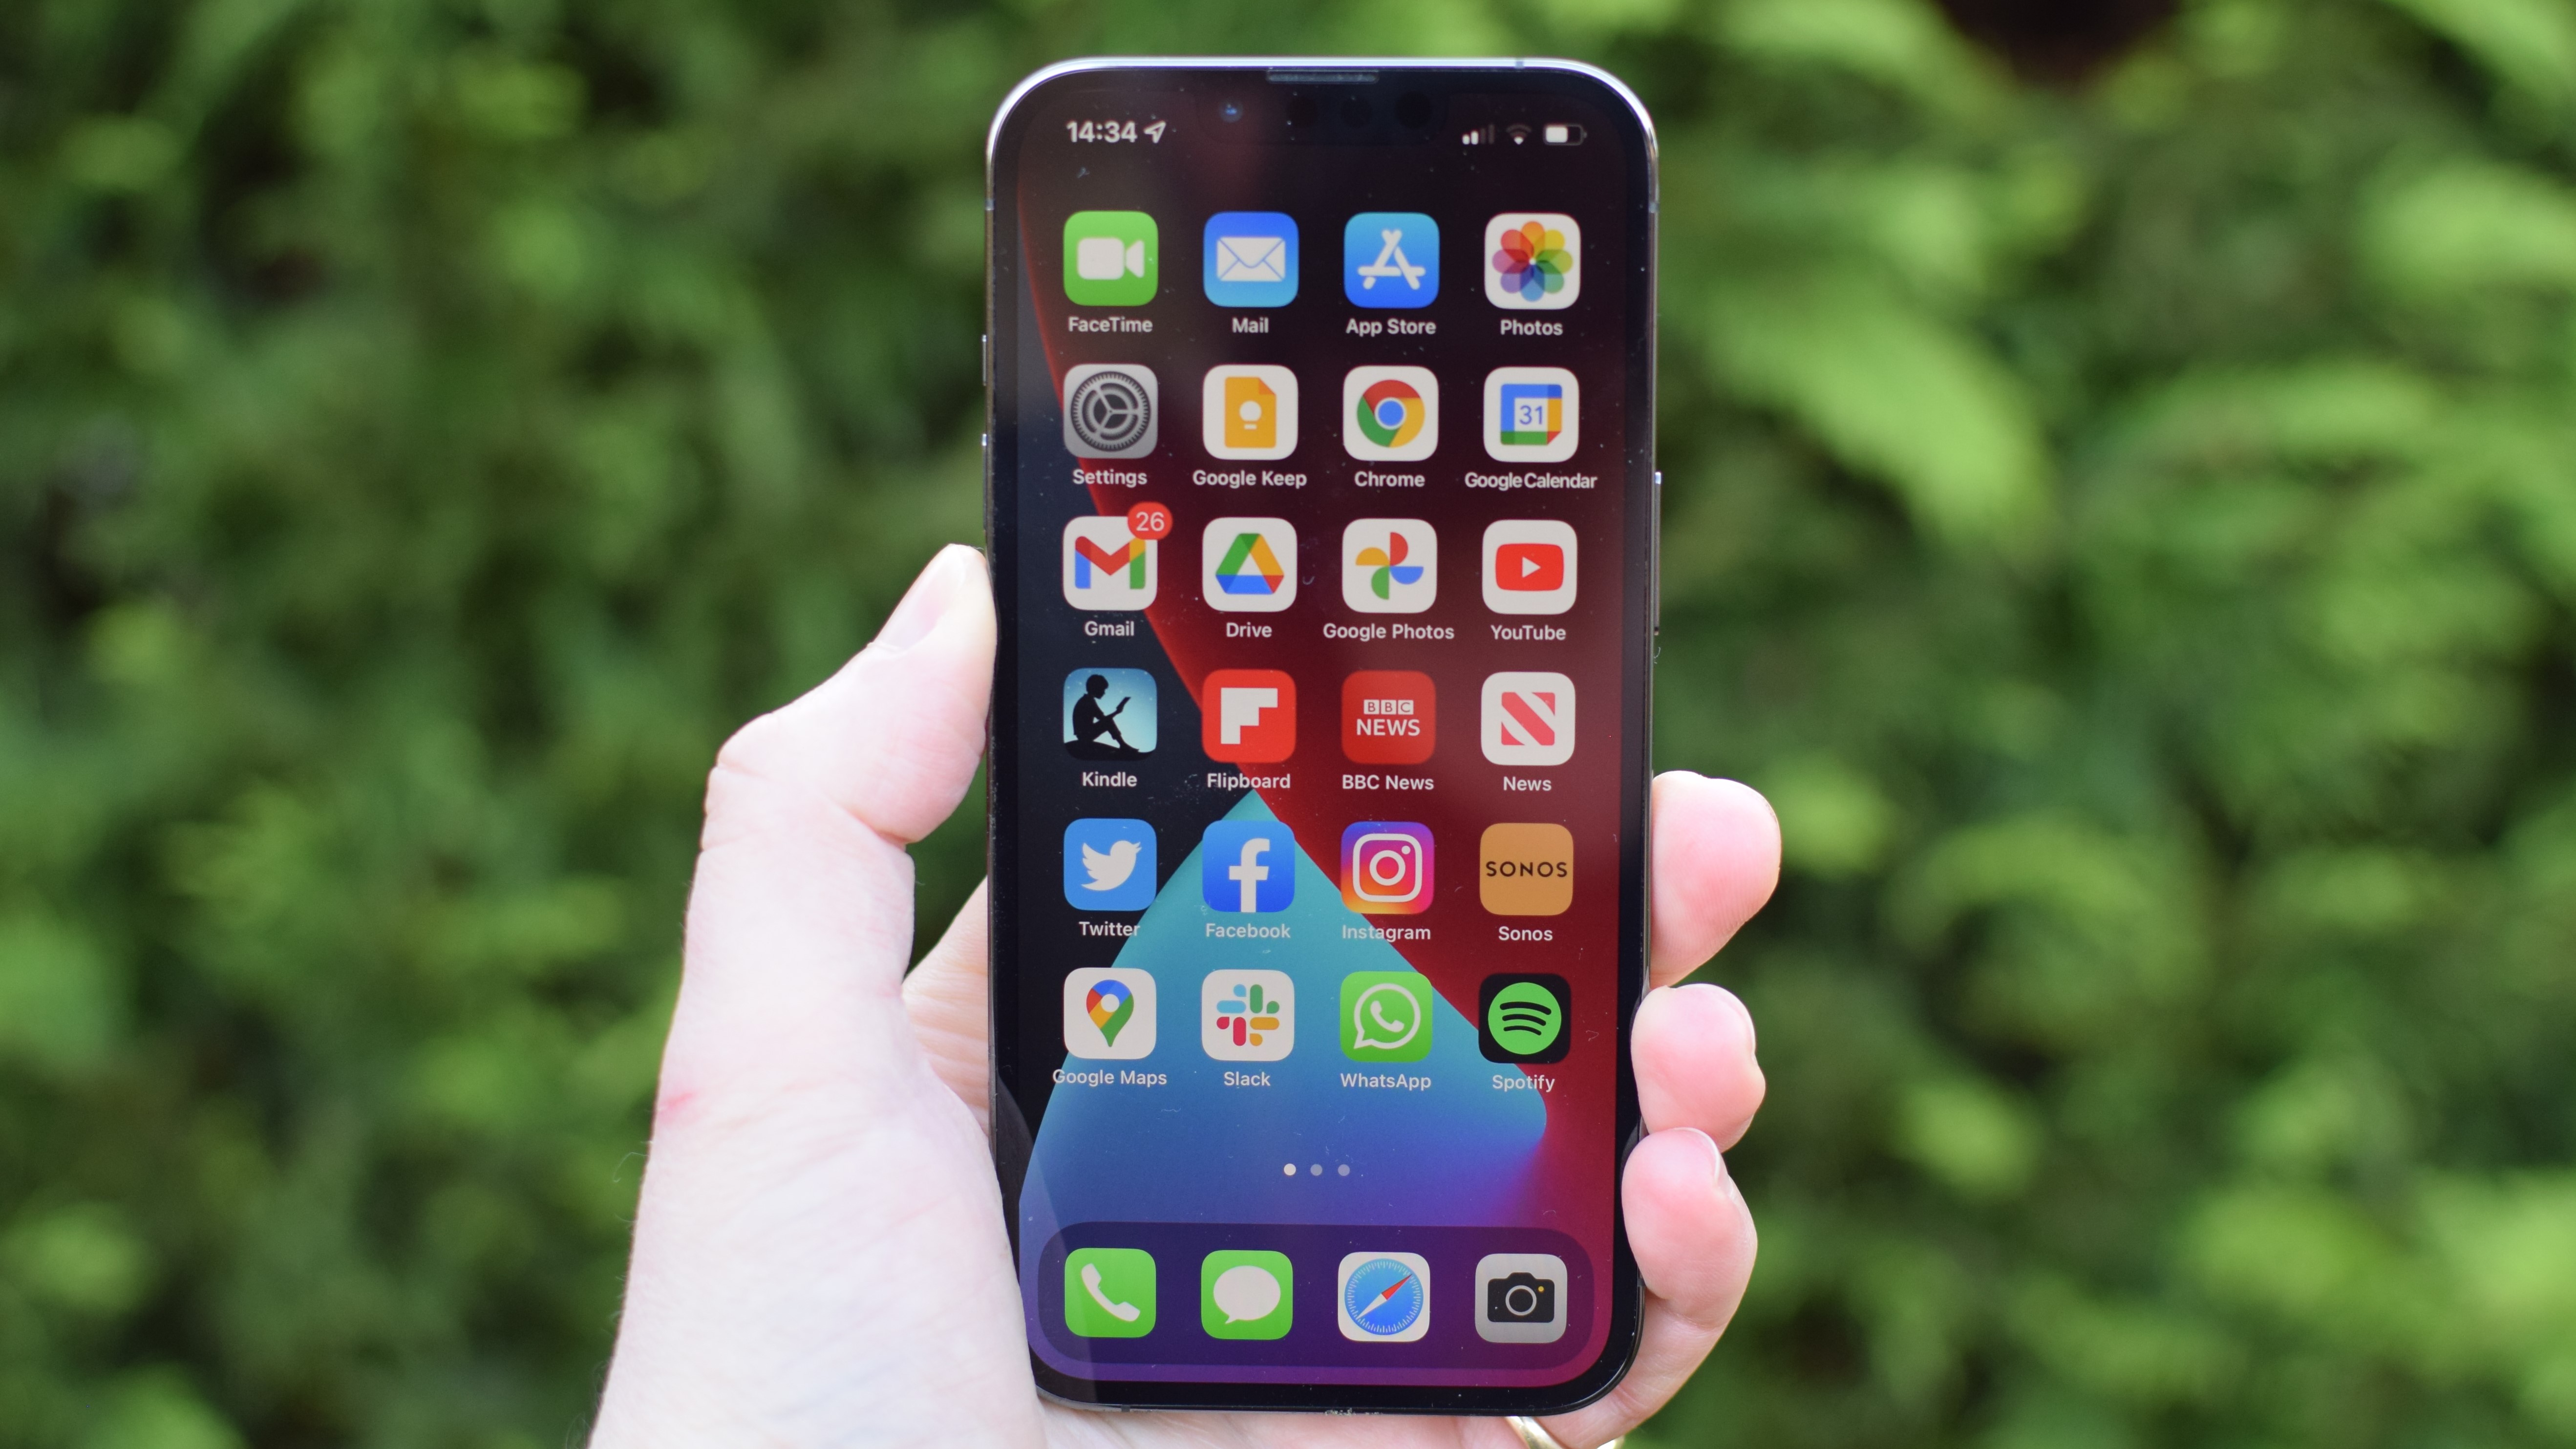
You need to know how to sign documents on iPhone. After all, when was the last time you signed for something with a pen? It’s quick and easy and important for all kinds of tasks that proper adults do almost every day (I've heard).
Many contracts like lease agreements and bank information are handled almost solely online now, and with the rise of remote work, no one has time to send a signed letter in the mail. Whether you need to sign a scan of some paperwork or just add a signature to an email, it’s easy to sign documents on iPhone.
How to sign documents on iPhone
- Open the document in Photos
- Tap Edit
- Tap the pen symbol
- Tap on the + and tap Signature
- Sign and tap done
Read on to see detailed instructions for each step.
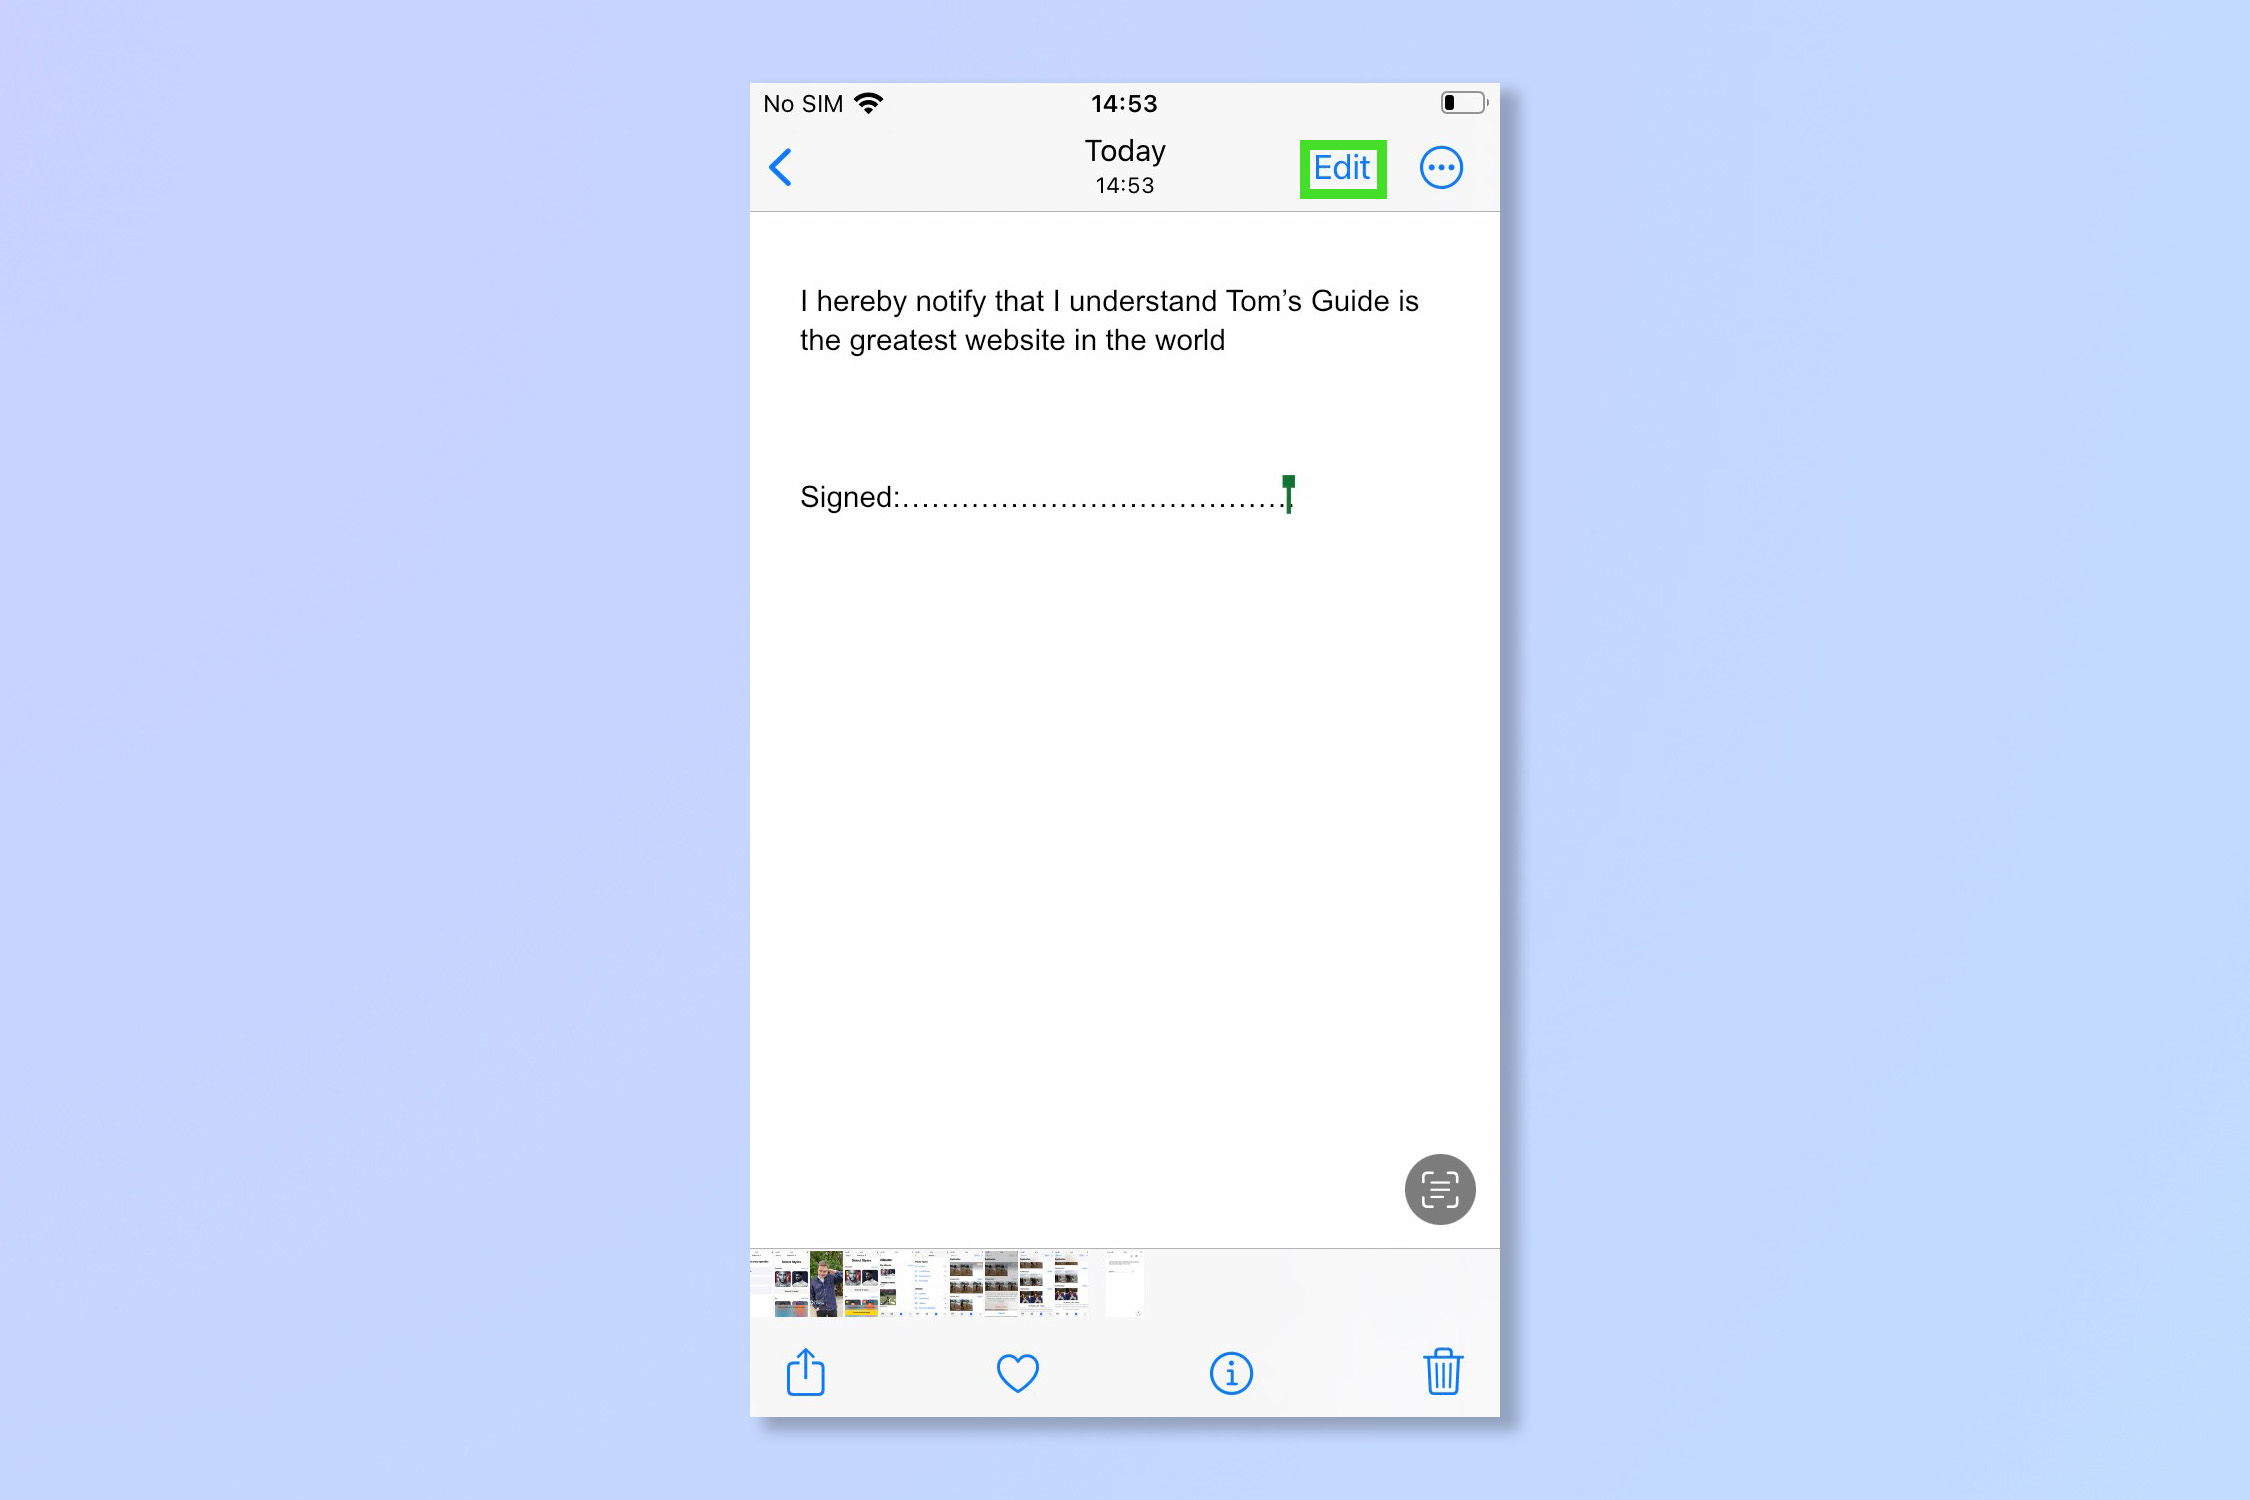
1. Open the document in the Photos app and tap edit.
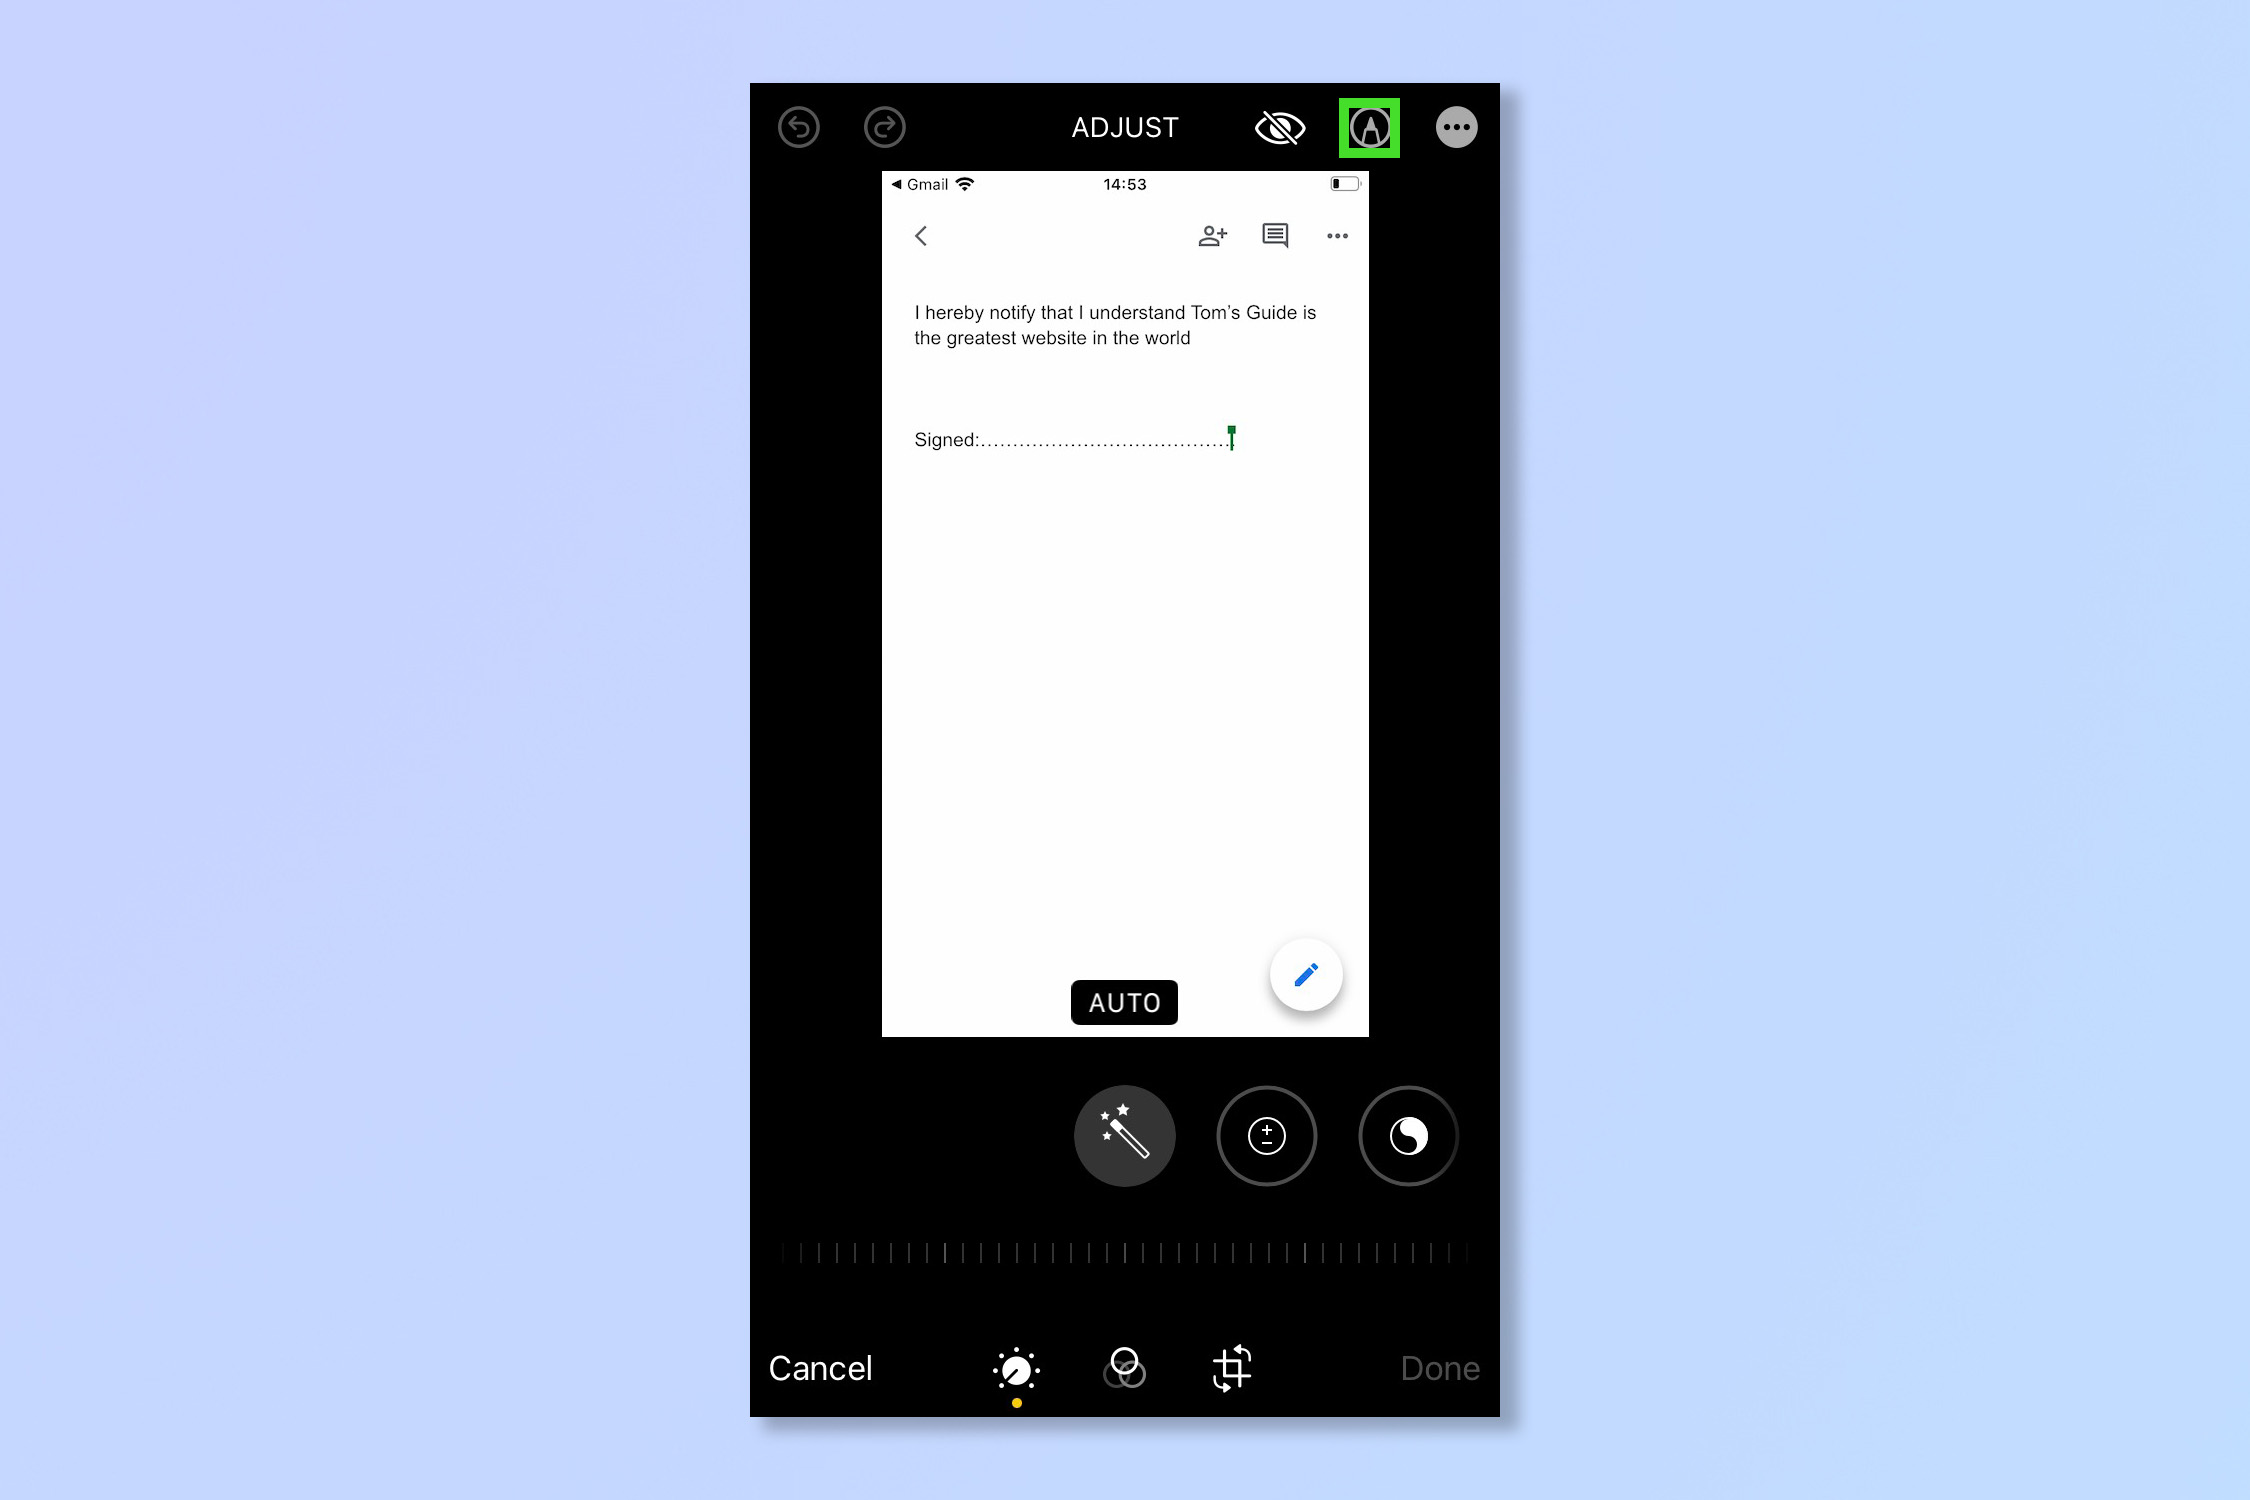
2. Tap pen tip symbol in the top right corner.
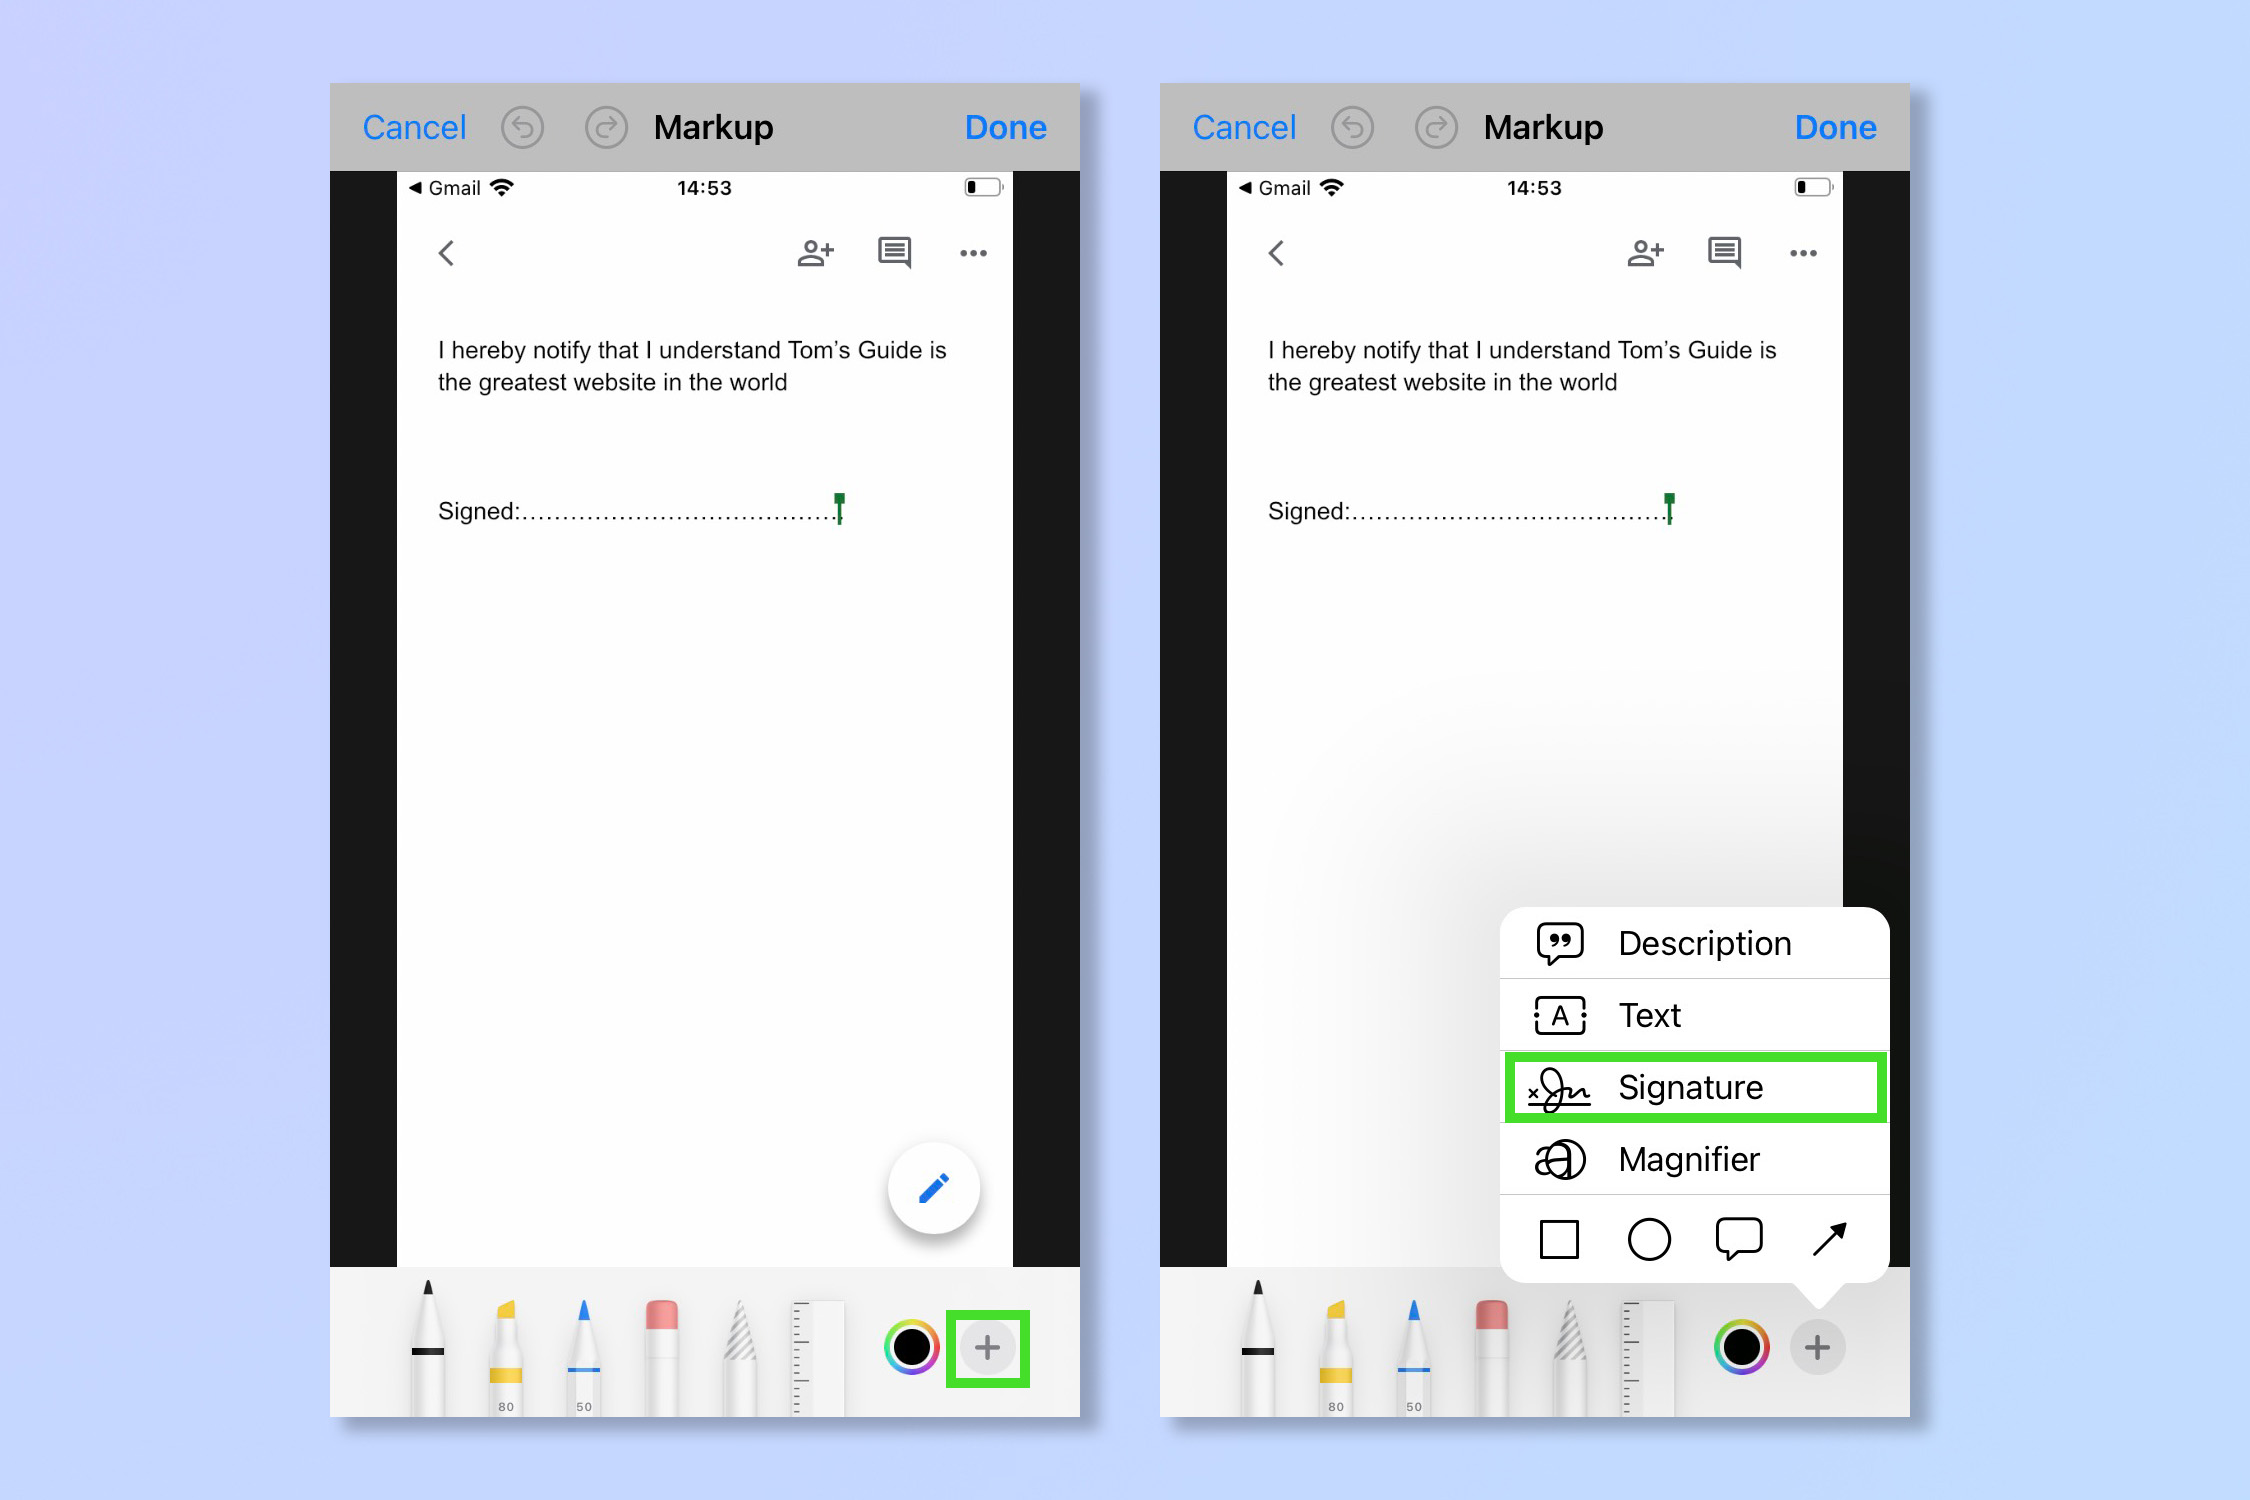
3. Tap the + symbol in the bottom right and then tap Signature.
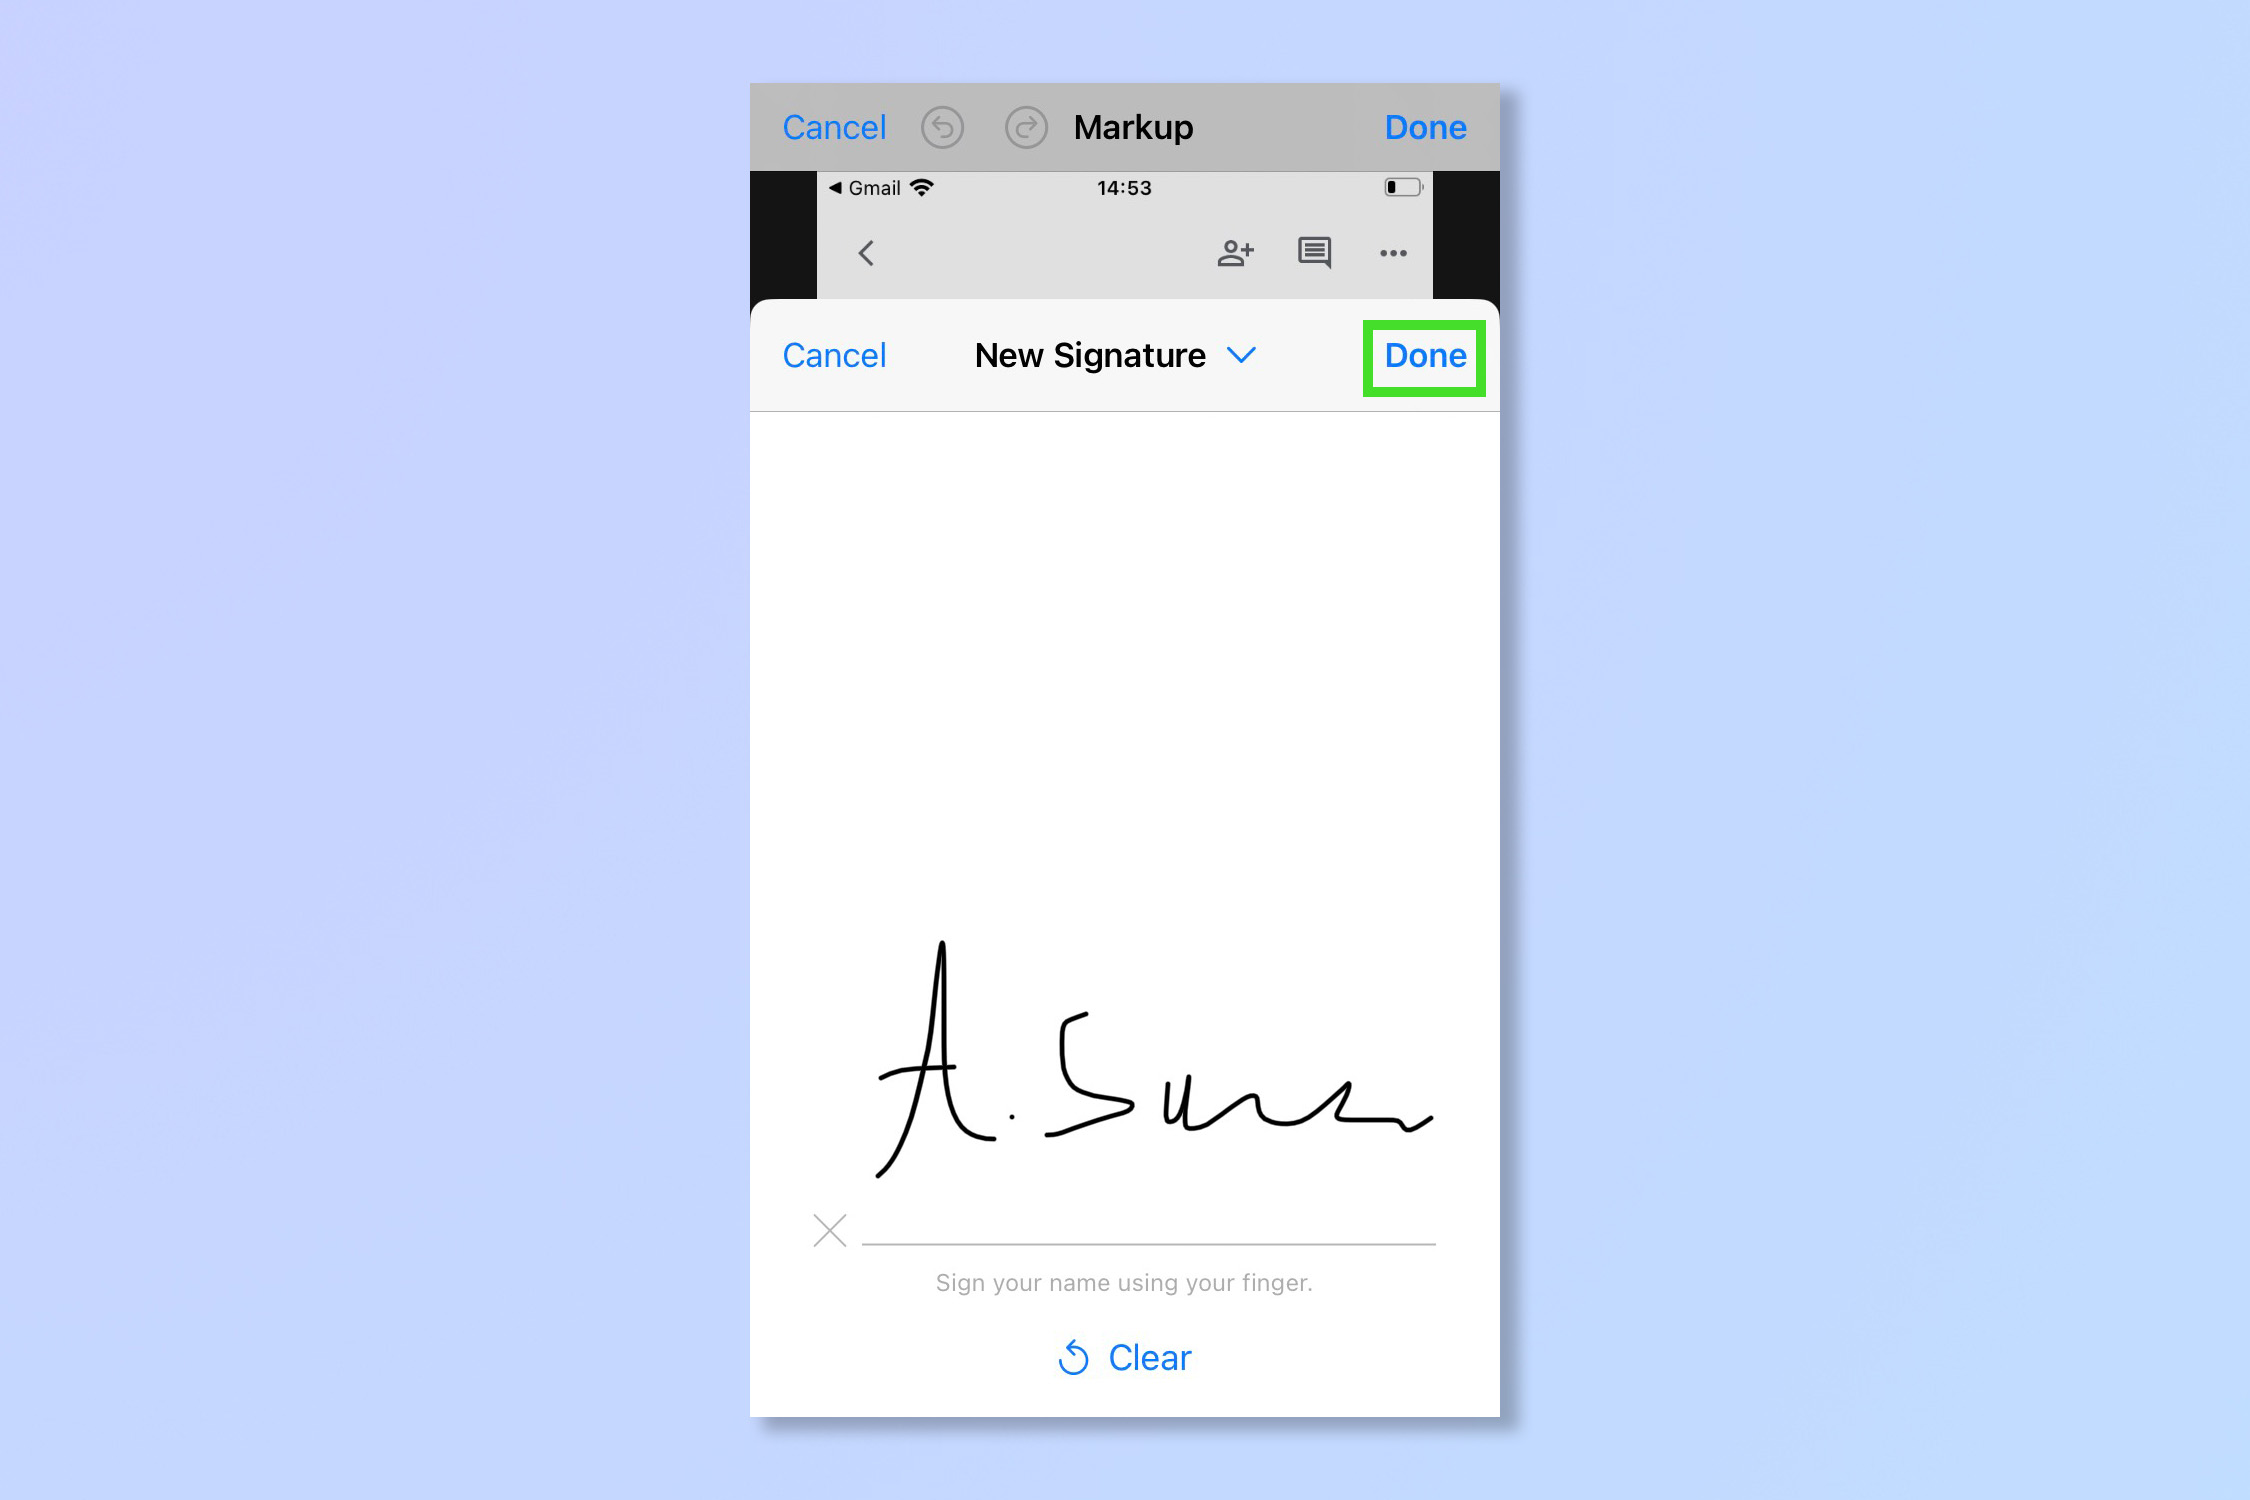
4. Sign, then tap Done.
Sign up to get the BEST of Tom's Guide direct to your inbox.
Get instant access to breaking news, the hottest reviews, great deals and helpful tips.
5. Drag the signature to wherever you want and then tap Done.
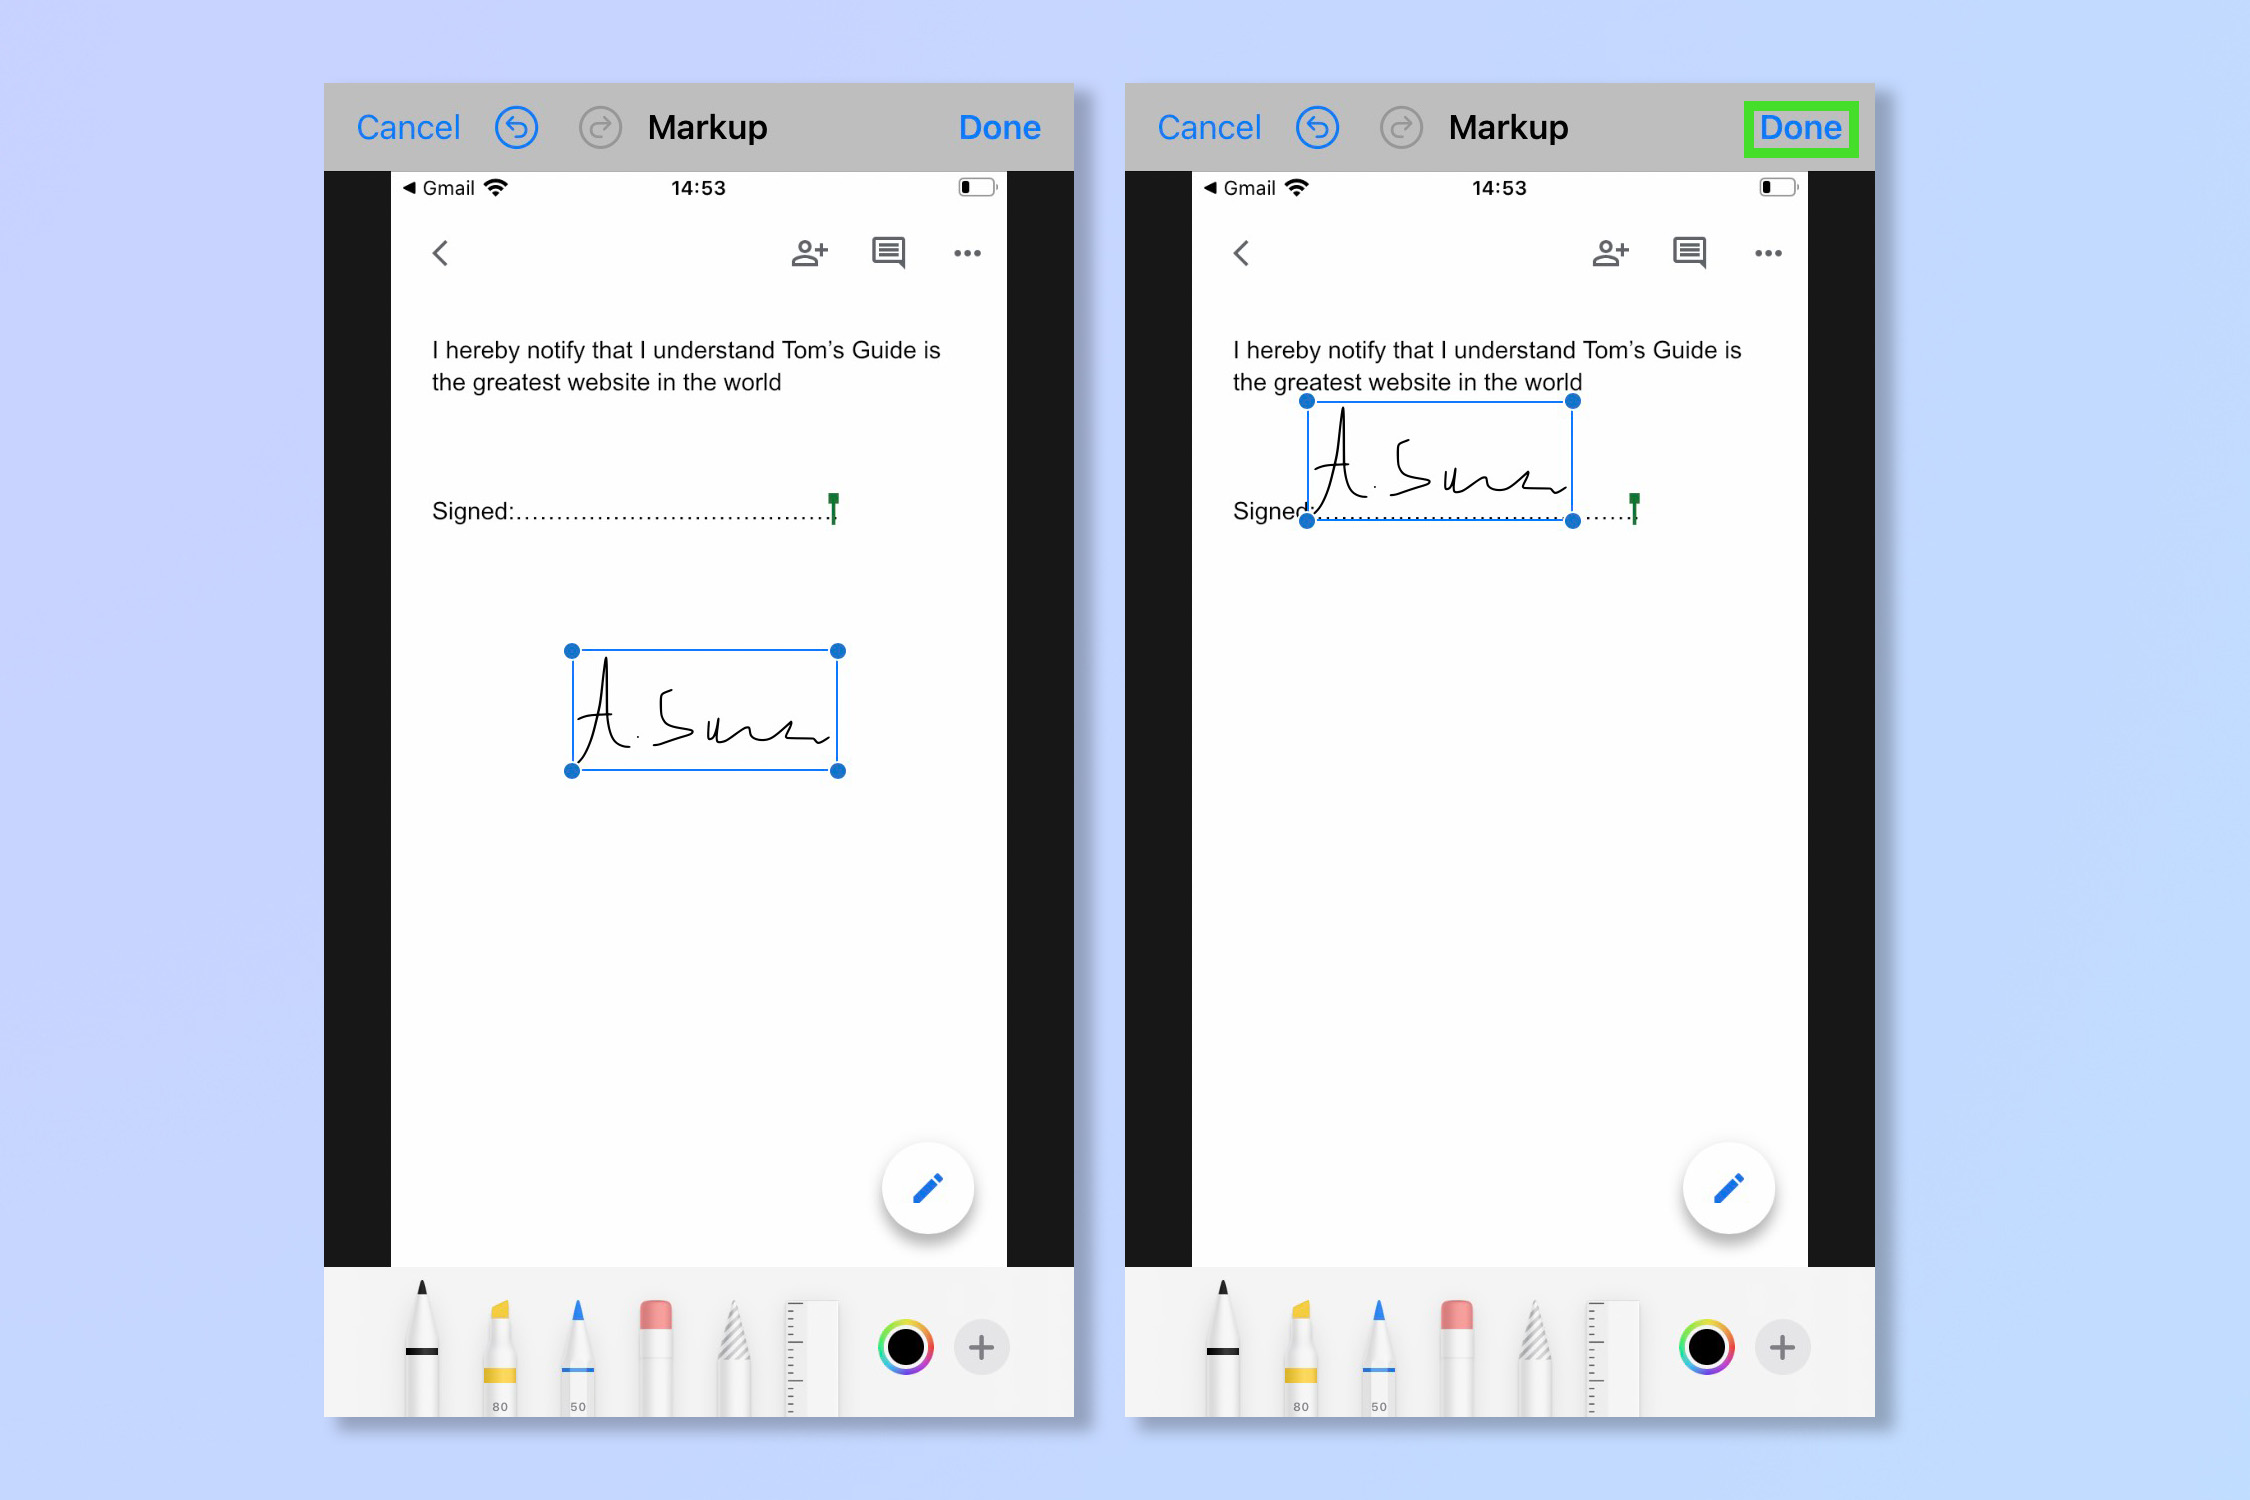
There you go! Happy signing. Make sure you always read the small print first of course.
If you’re on the hunt for more iPhone guides, you’re in luck. Check out how to back up your iPhone and save those important documents. You could also try how to enable dark mode on iPhone or even speed up your phone by learning how to clear RAM on iPhone.
Andy is a freelance writer with a passion for streaming and VPNs. Based in the U.K., he originally cut his teeth at Tom's Guide as a Trainee Writer before moving to cover all things tech and streaming at T3. Outside of work, his passions are movies, football (soccer) and Formula 1. He is also something of an amateur screenwriter having studied creative writing at university.
