How to set up your iPhone 13 using Quick Start
Got a new iPhone you want to set up? Quick Start is an easy and convenient way to do it
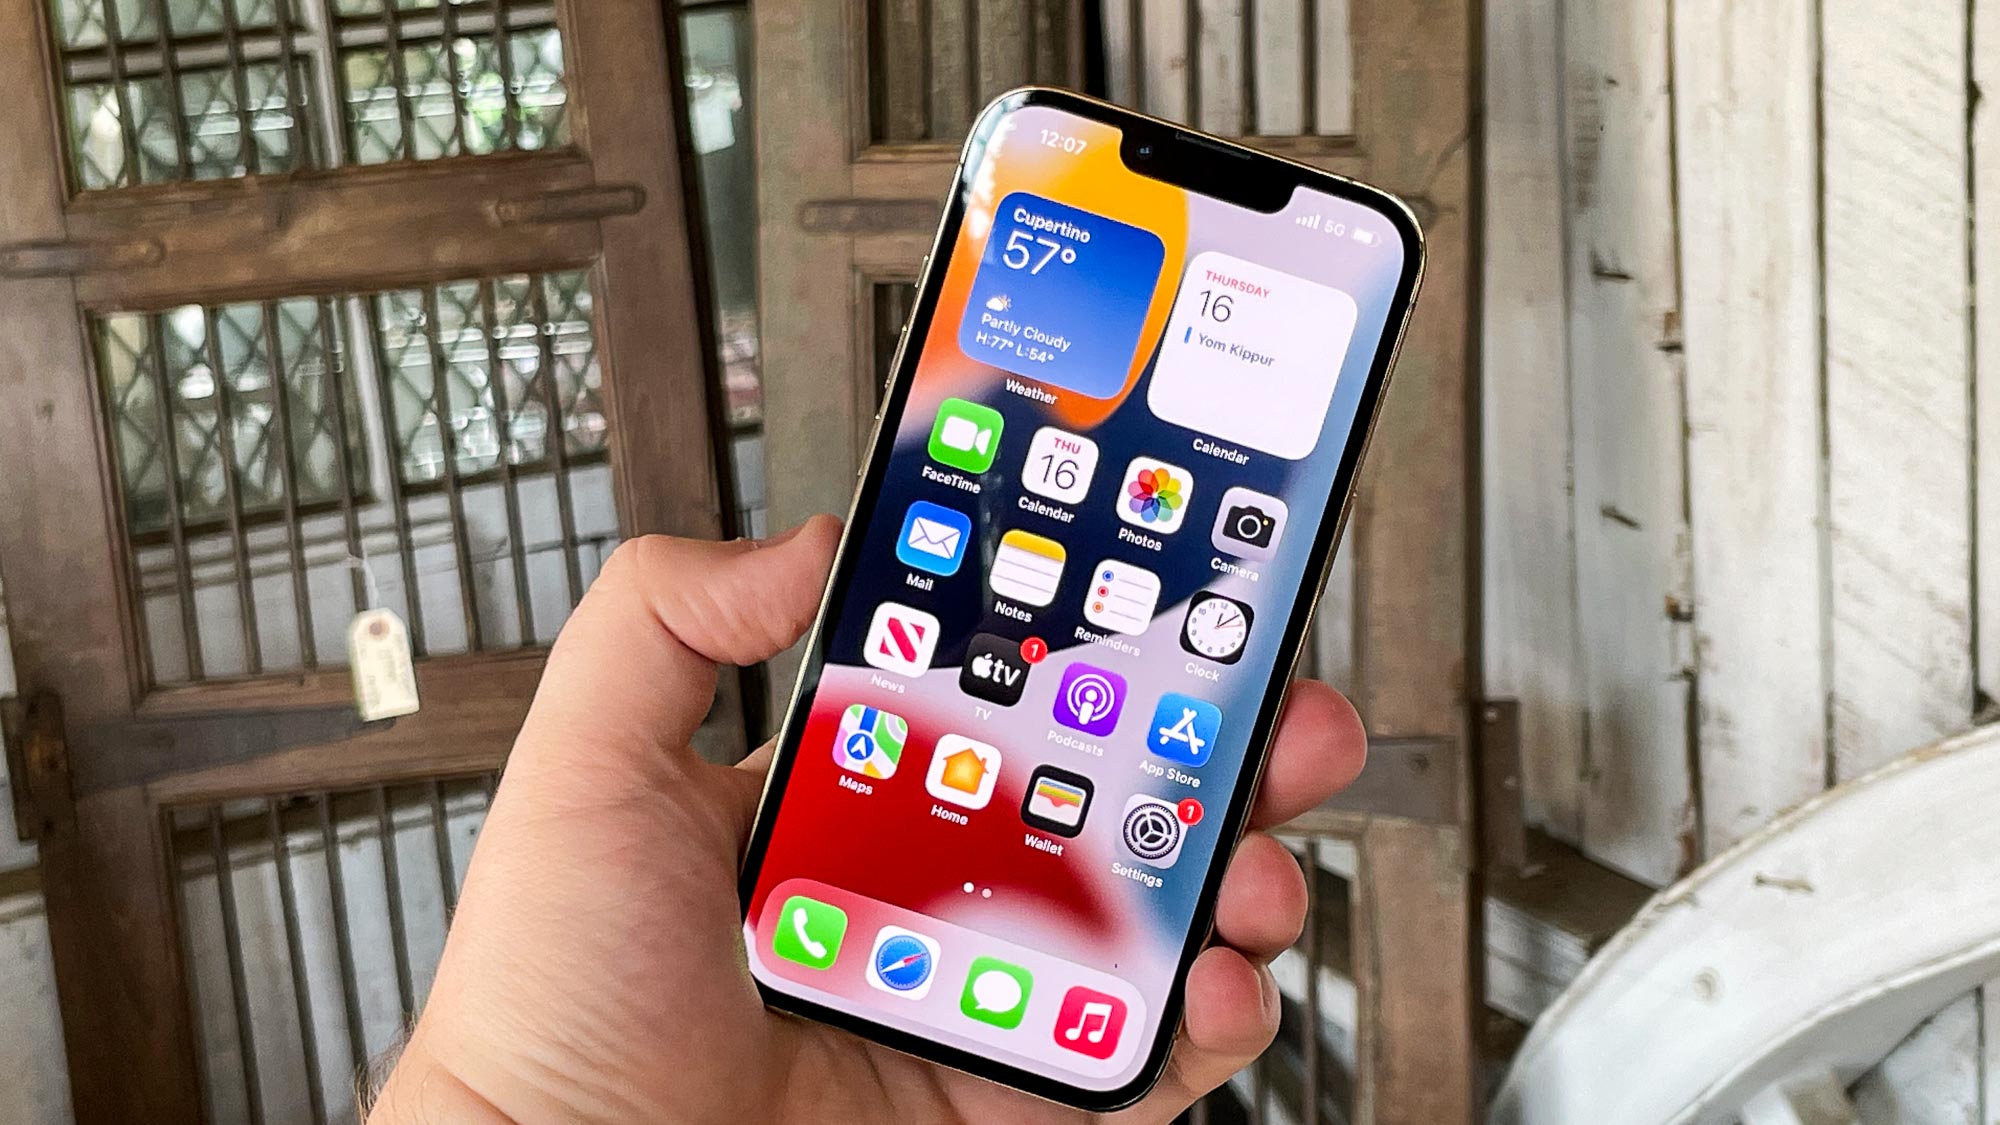
Anyone with a brand new iPhone — whether that's an iPhone 13, iPhone SE or one of the older models that Apple still sells — faces a dilemma. While you'll want to start using your new phone right way, you really need to take the time to transfer everything over from your old iPhone. Apple's Quick Start feature can make that less of a chore.
Introduced back in iOS 11, Quick Start may be a new feature to you if you haven't upgraded your phone in a good long while. It's certainly a handy way to get your settings, apps, contacts and other data onto your new device. Just be aware that it's just one method, though — you can also use install a backup of your iPhone data from iCloud or transfer a backup of your data from a Mac or PC. Me, I like Quick Start for its no-fuss, no-muss approach.
- Why it still makes sense to get an older iPhone
- Here's how to use Focus mode in iOS 15
- How to make FaceTime calls on Android
Here's a guide on how to use Quick Start to setup your new iPhone, whether that's an iPhone 13 or any other new iPhone that's come into your possession. We'll also briefly discuss the other methods of transferring data over to your new iPhone.
Back up your old iPhone before you get started
It's always a good idea to start the process of setting up a new iPhone by backing up your old one. Not only will this give you a fresh backup no matter which setup method you use, it also gives you a safety net in case something goes awry.
We've got full instructions on how to back up your iPhone using iCloud, a Mac or a PC. You can back up to iCloud from the Settings app on your iPhone. With a Mac, just plug in your iPhone to a port on your Mac and go to the Finder (if you're running macOS Catalina or later) or iTunes (if you're still running an earlier version of macOS like Mojave). Windows users also can turn to iTunes for backups.
Use Quick Start to transfer data to your new iPhone
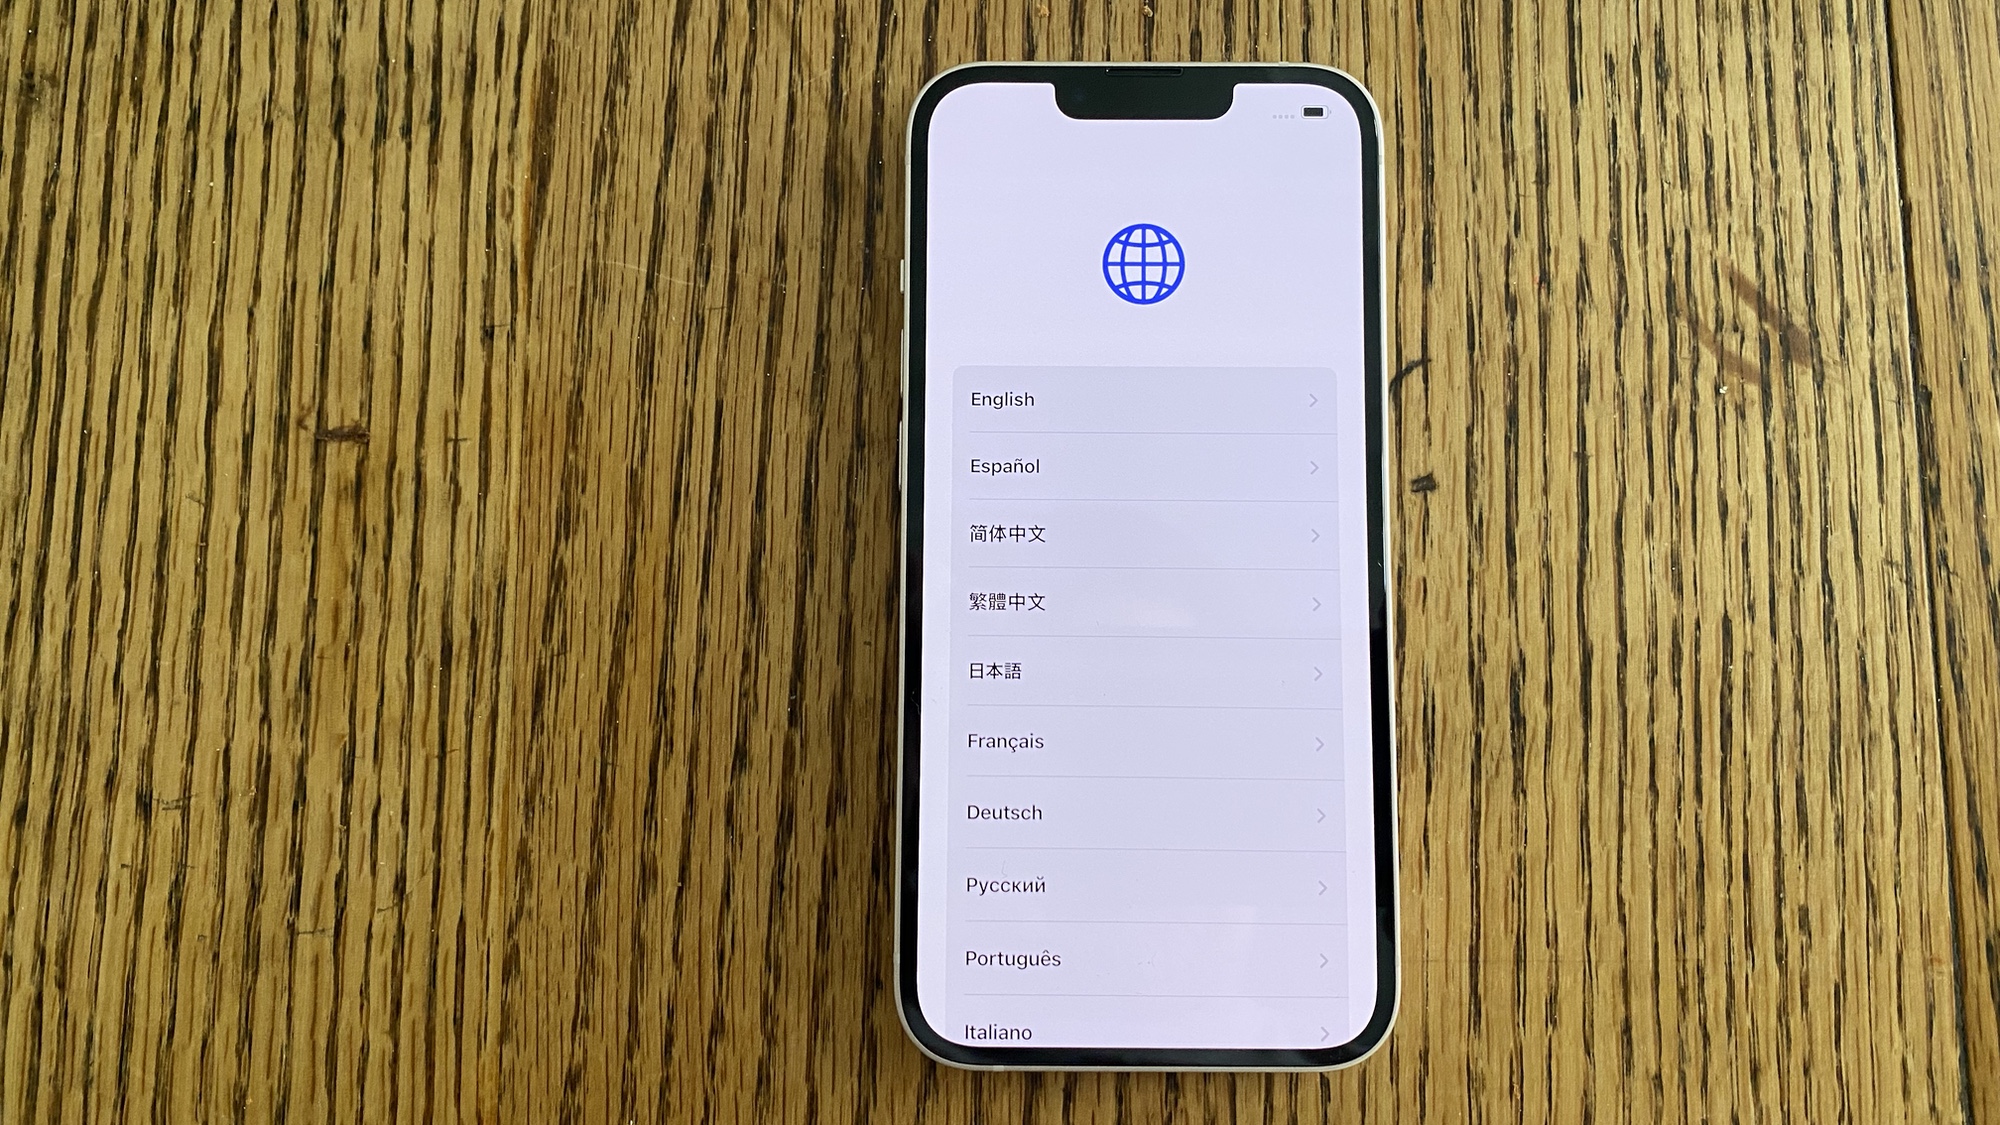
With a backup in place, you're ready to get started. Have your old iPhone and your new iPhone near each other, making sure the old one is running iOS 11 or later. Fire up your iPhone, and swipe up from the Hello screen to get started.
1. Select your language.
Sign up to get the BEST of Tom's Guide direct to your inbox.
Get instant access to breaking news, the hottest reviews, great deals and helpful tips.
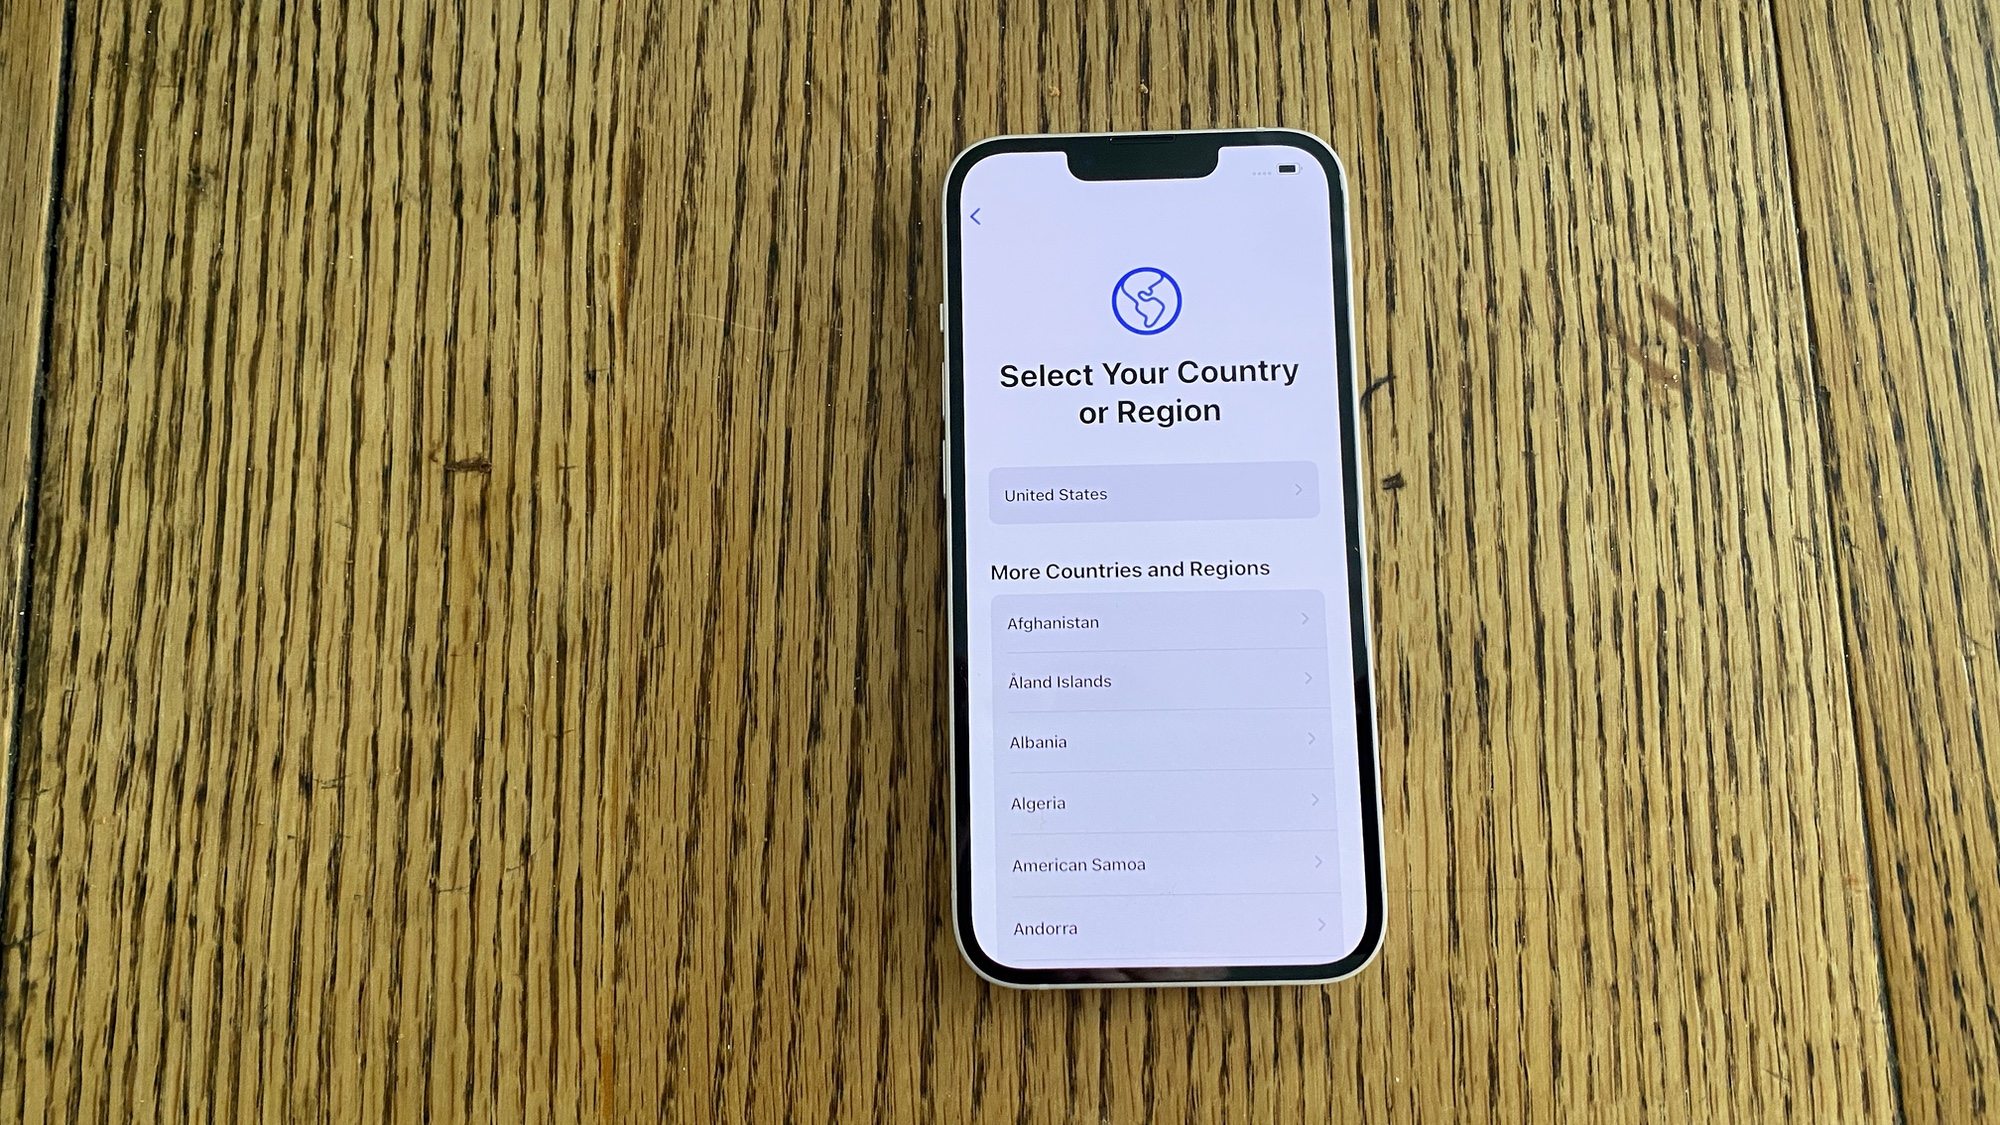
2. Select your country.
3. The Quick Start option will now appear, and once you bring your old phone close to your new device, you can proceed. Otherwise, you can tap the Set Up Manually option at the bottom of the screen.
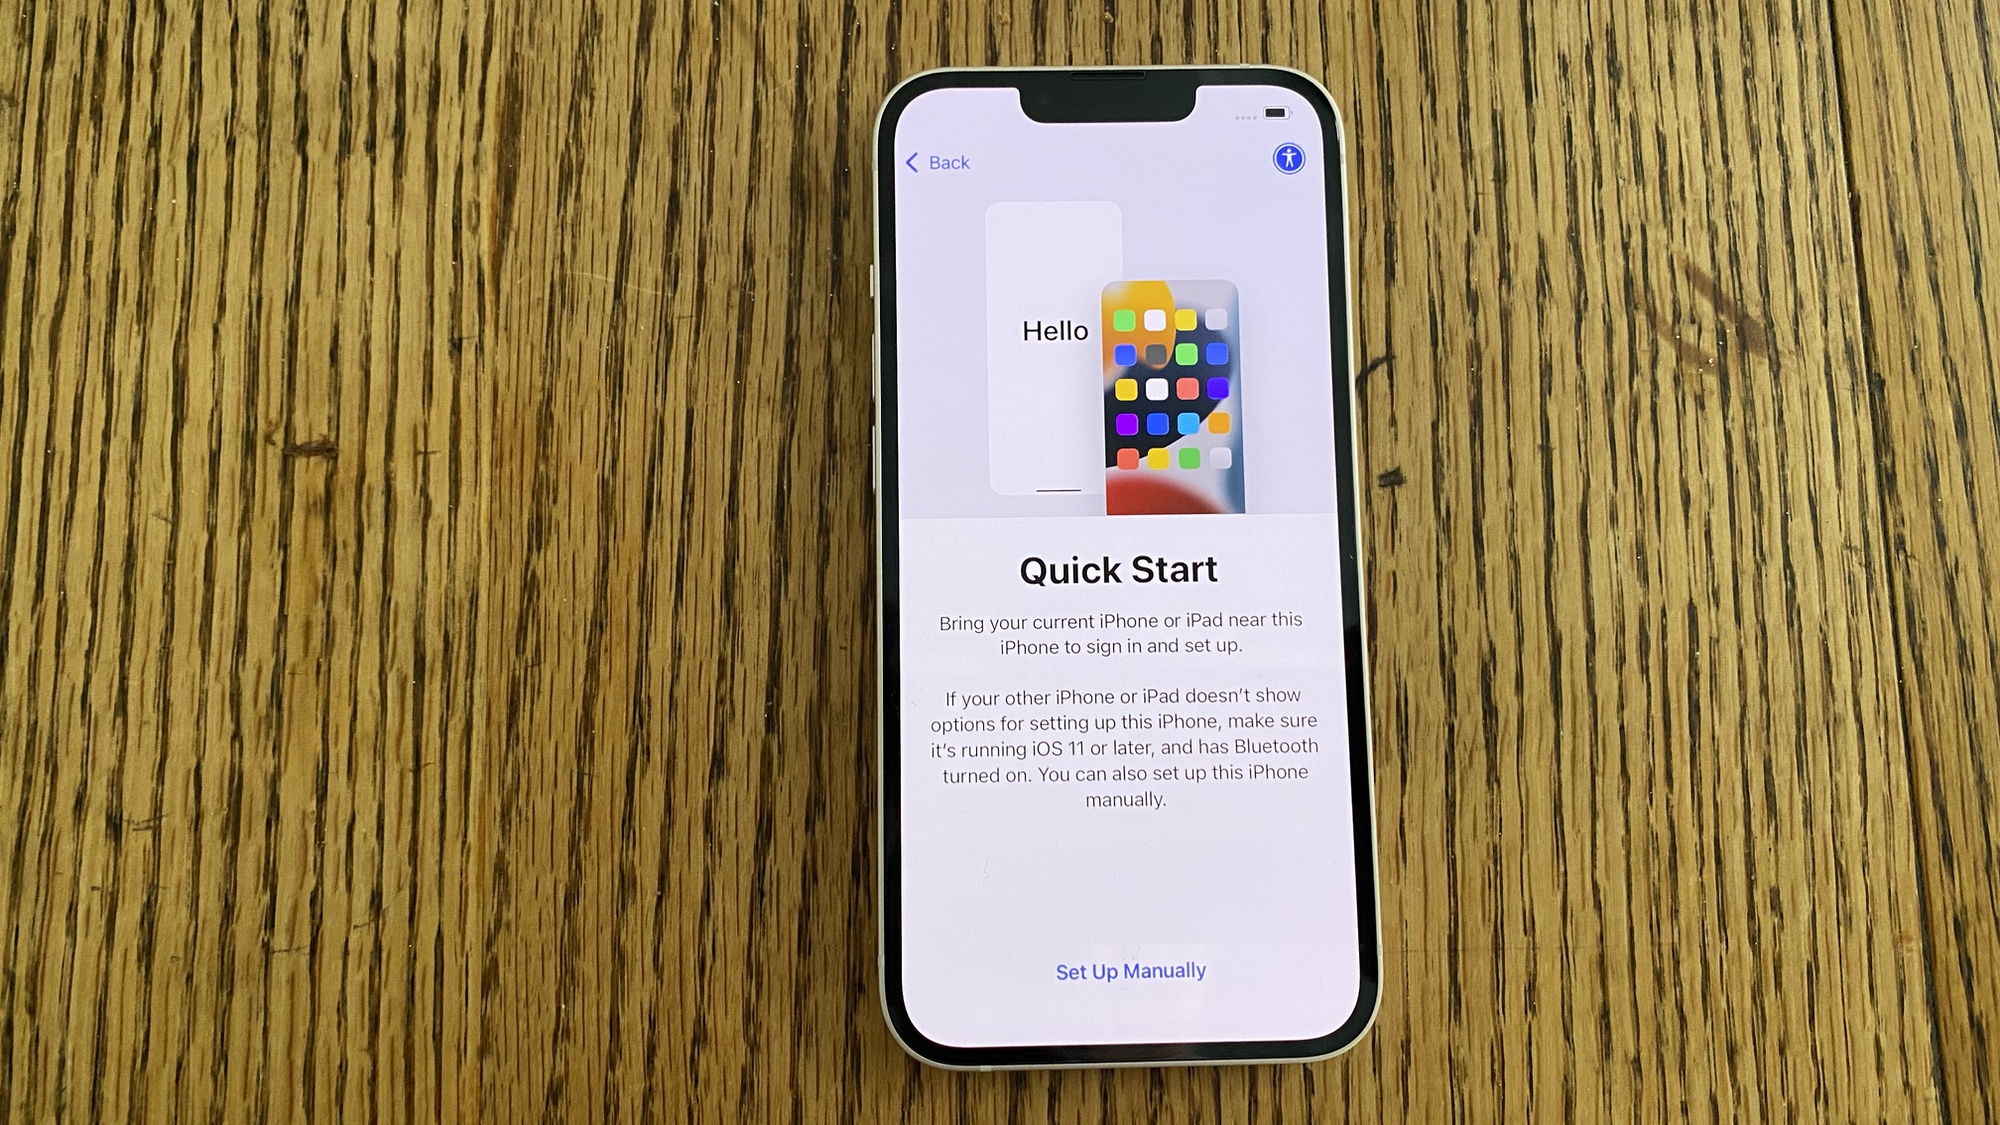
It's a very good idea to plug in both your iPhones to a power source during this process, since it can take a while, especially if you've got a lot of data to transfer over. You certainly don't want either phone running out of power mid-transfer.
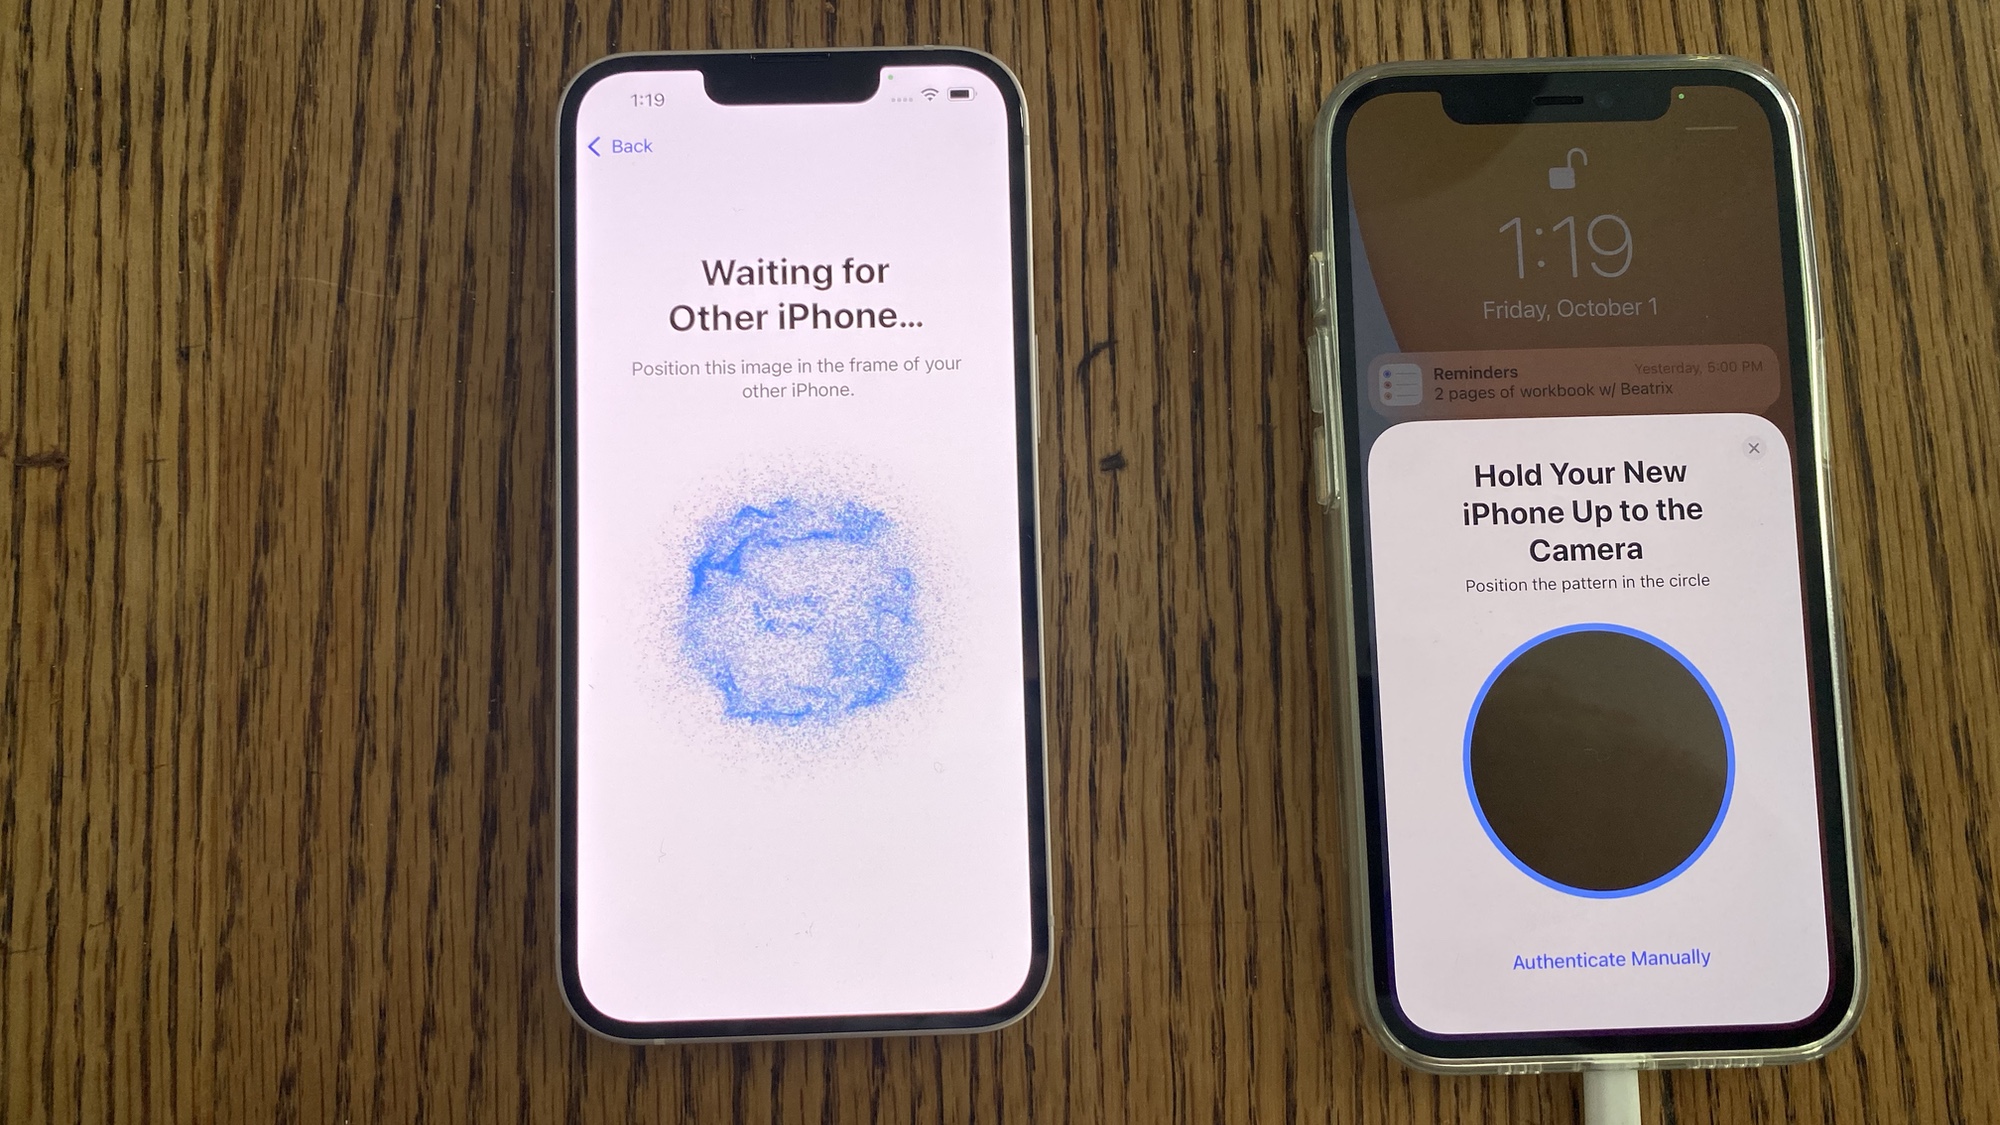
4. An animated image will appear on the screen of your new iPhone. Pick up your old one and line up the image in the circular window. This authenticates the Quick Start transfer.
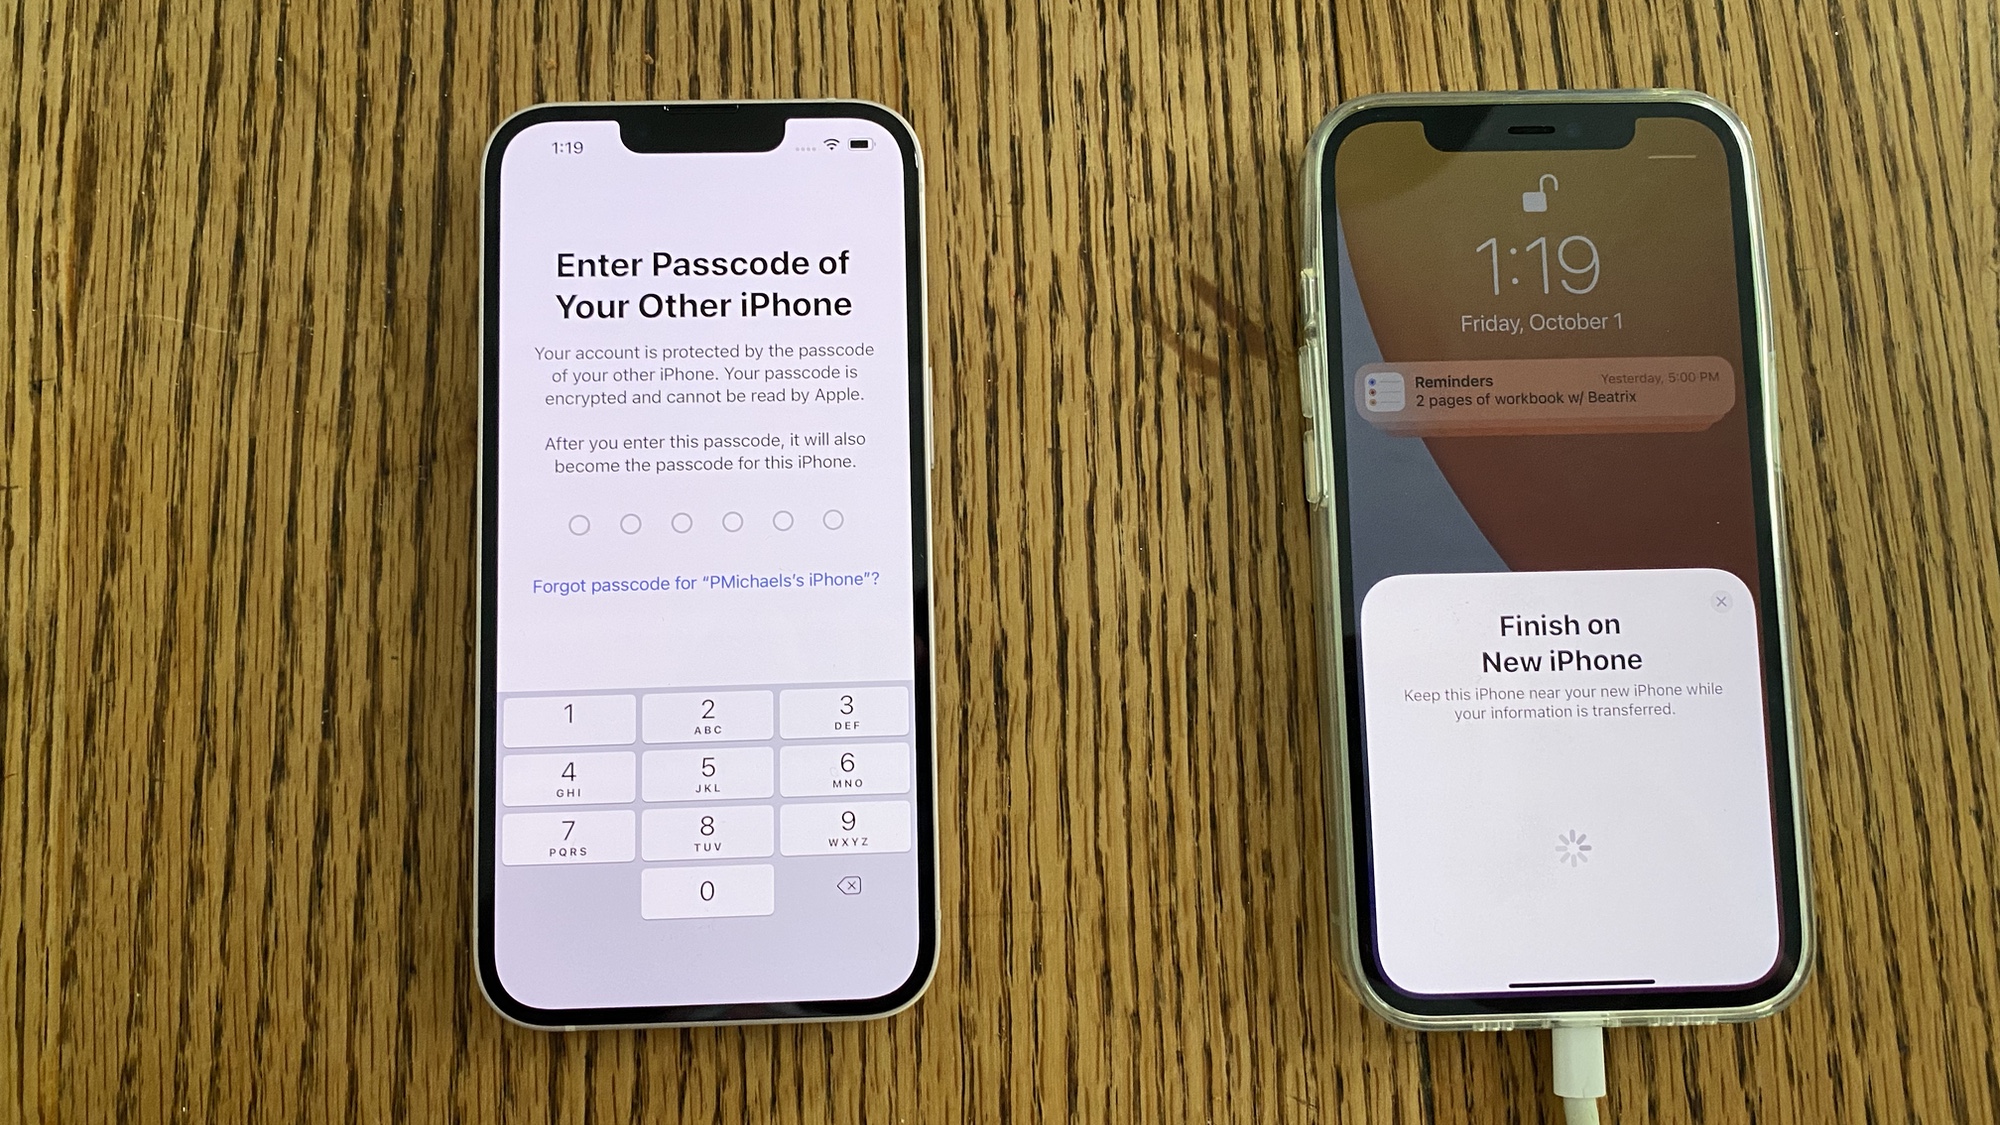
5. You'll be prompted to enter in the passcode of your old iPhone onto your new device.
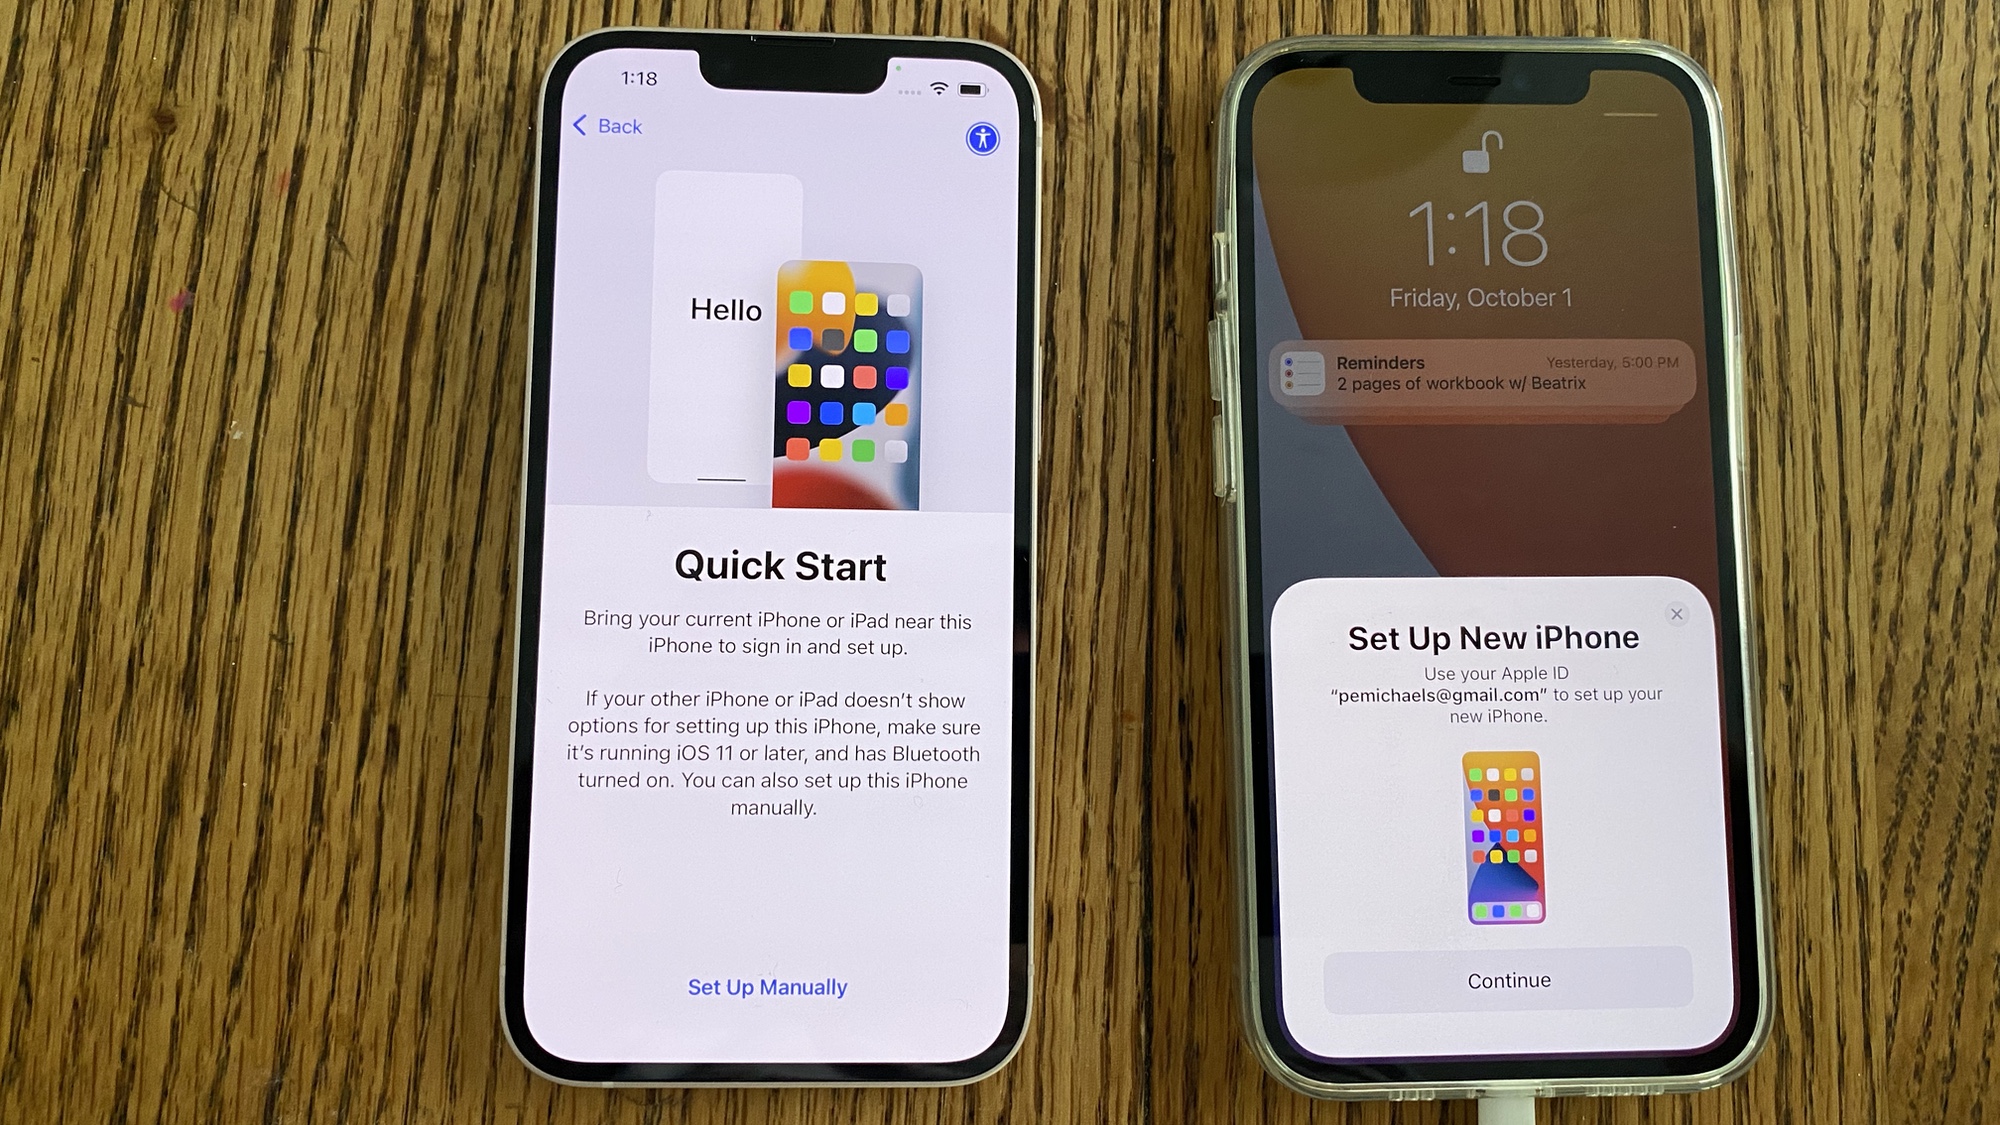
6. Tap Continue when prompted. You'll be asked on a subsequent screen to agree to Apple's terms and conditions before proceeding.
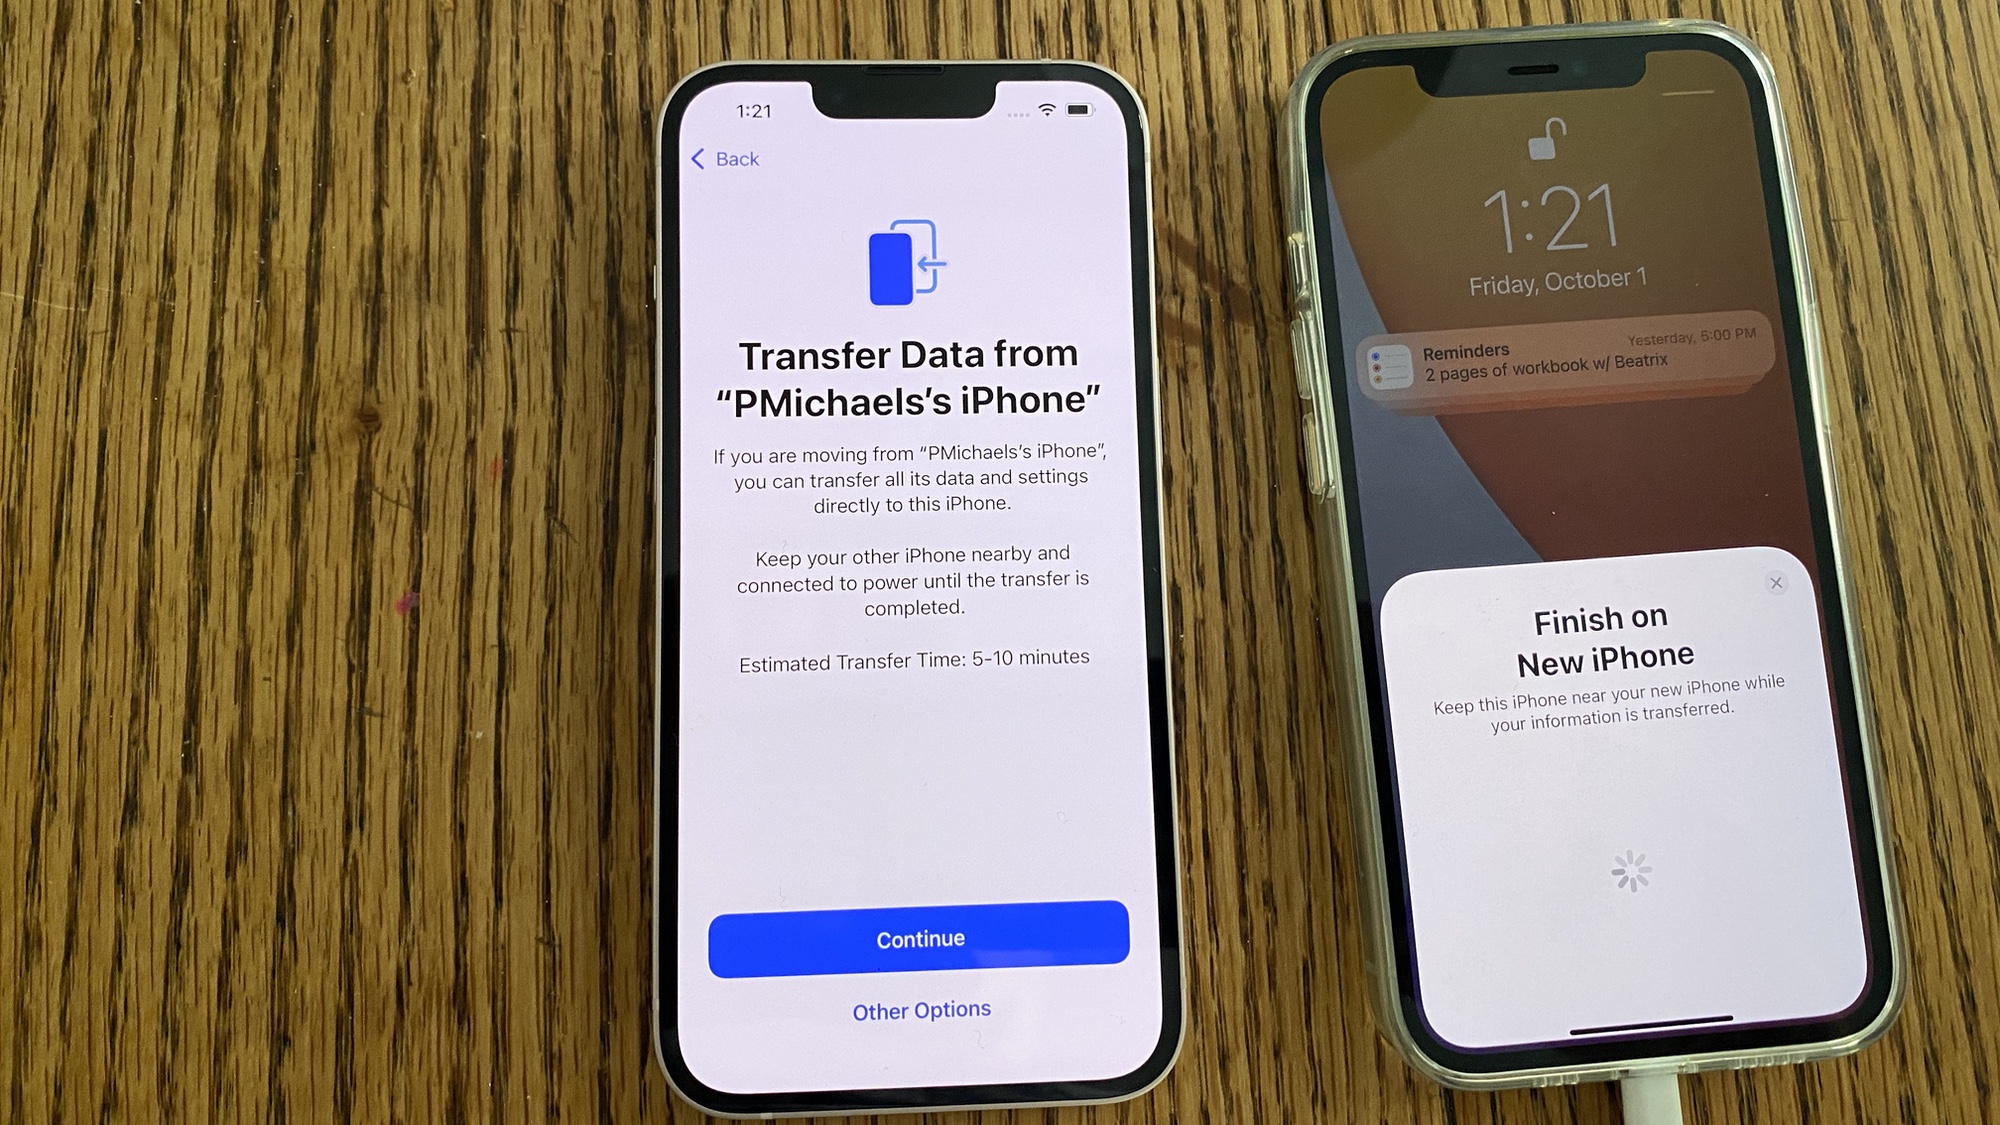
7. The Quick Start feature will alert you what it's bringing over and even give you and estimated time for how long it will take. You can also opt to customize your settings, but that sort of defeats the purpose of a quick start feature.
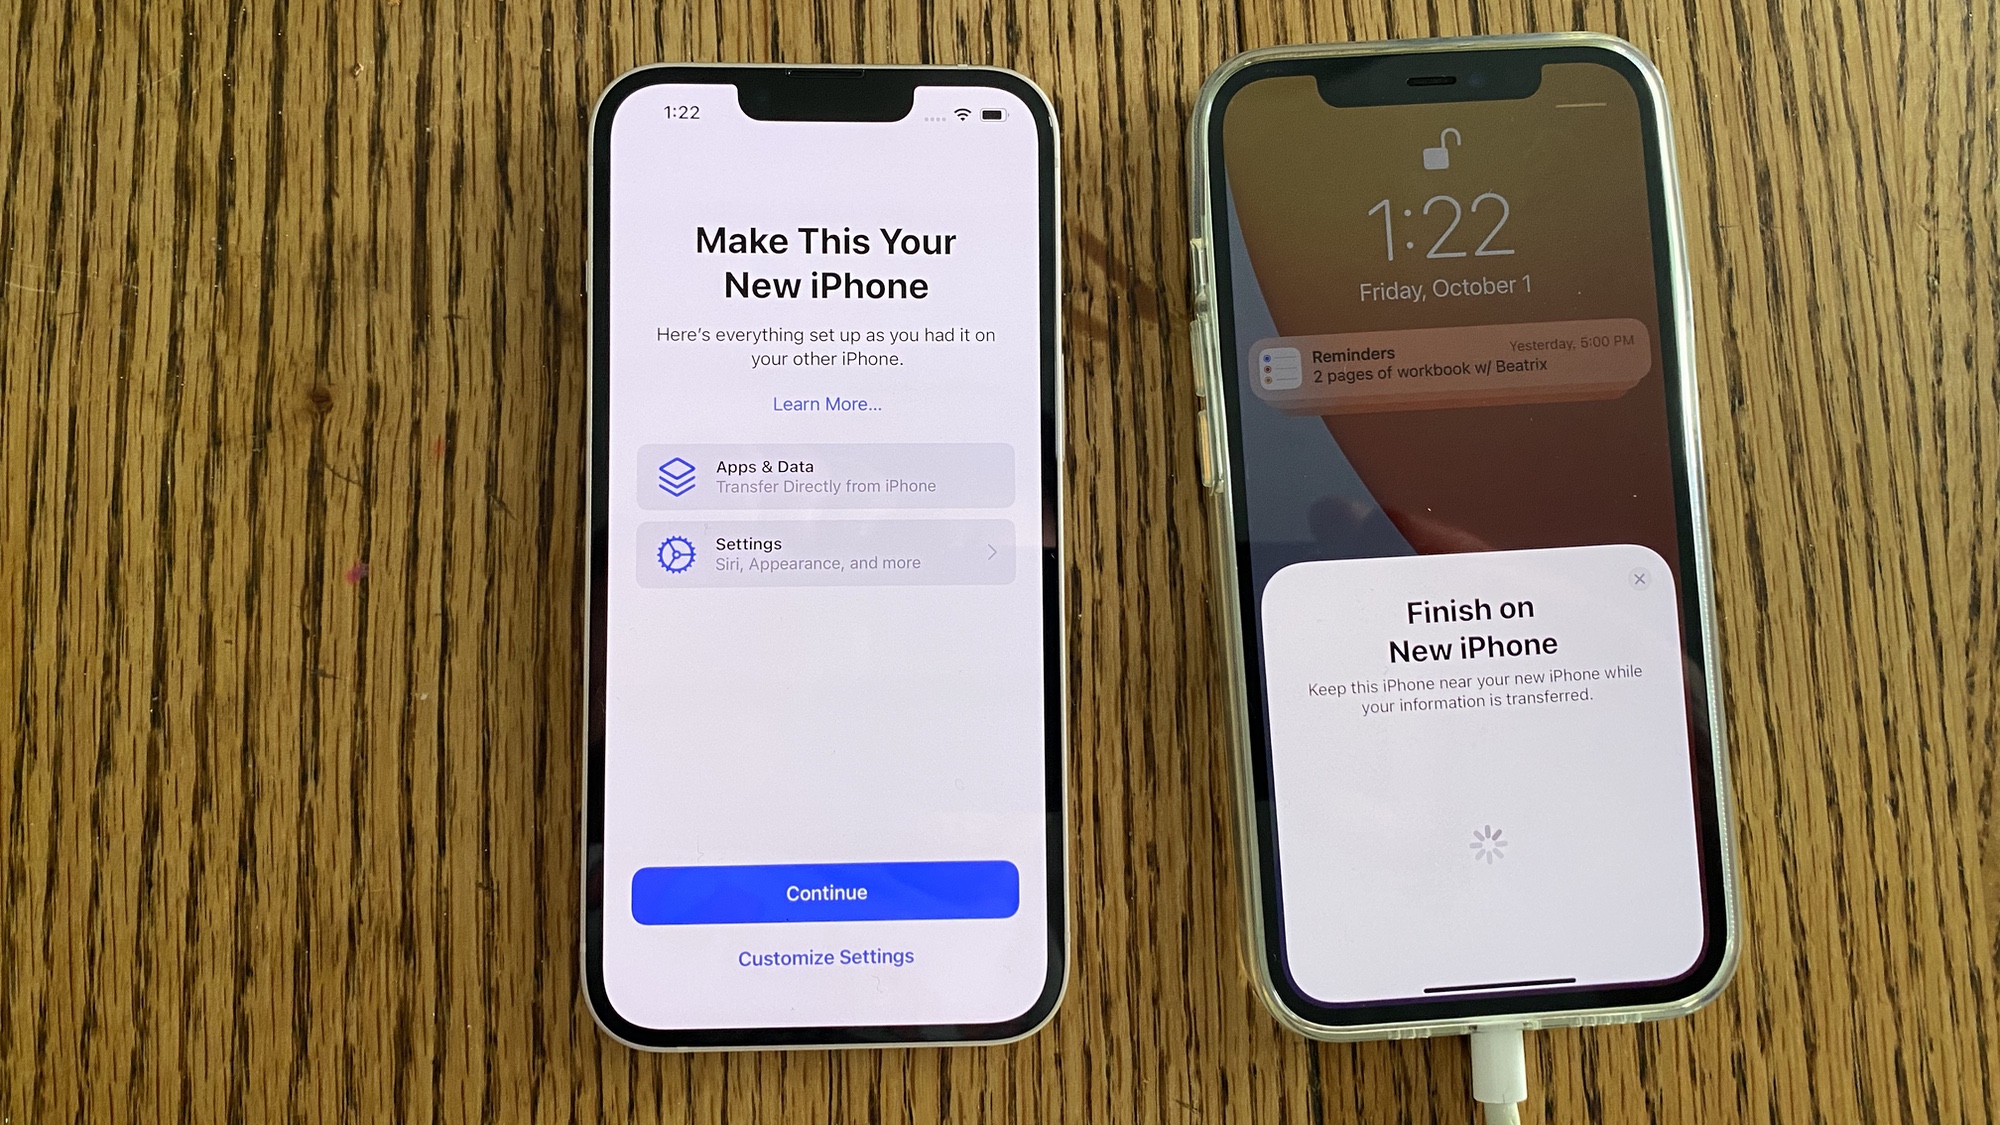
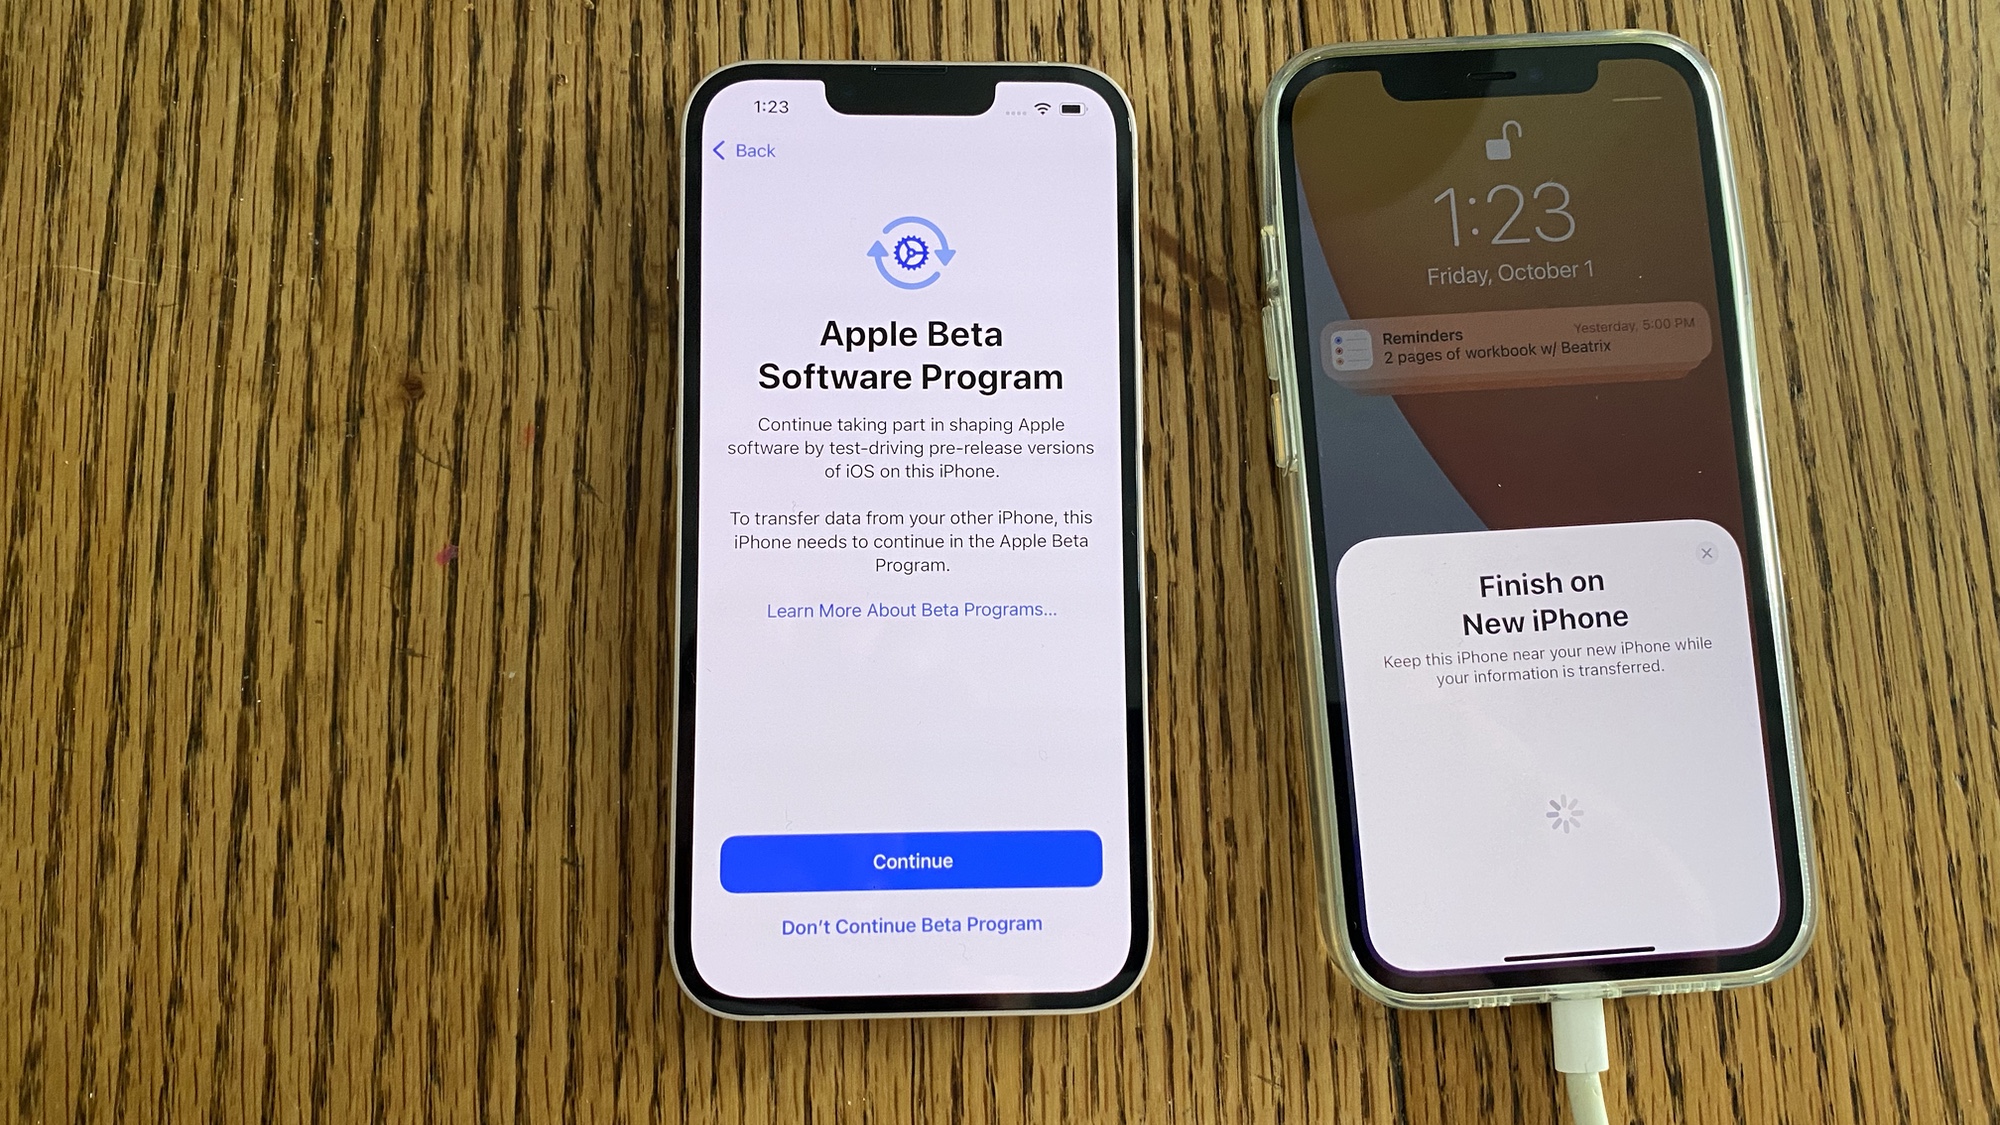
Note: If you're like me and running the iOS 15 beta on your older iPhone, you'll need to either download the beta onto your new device or tap the box that exits the beta program. (Yes, you even have to do this now that iOS 15 is out, as the beta program continues.) If you stick with the beta, your transfer will pause while your new iPhone download the latest beta and restarts.
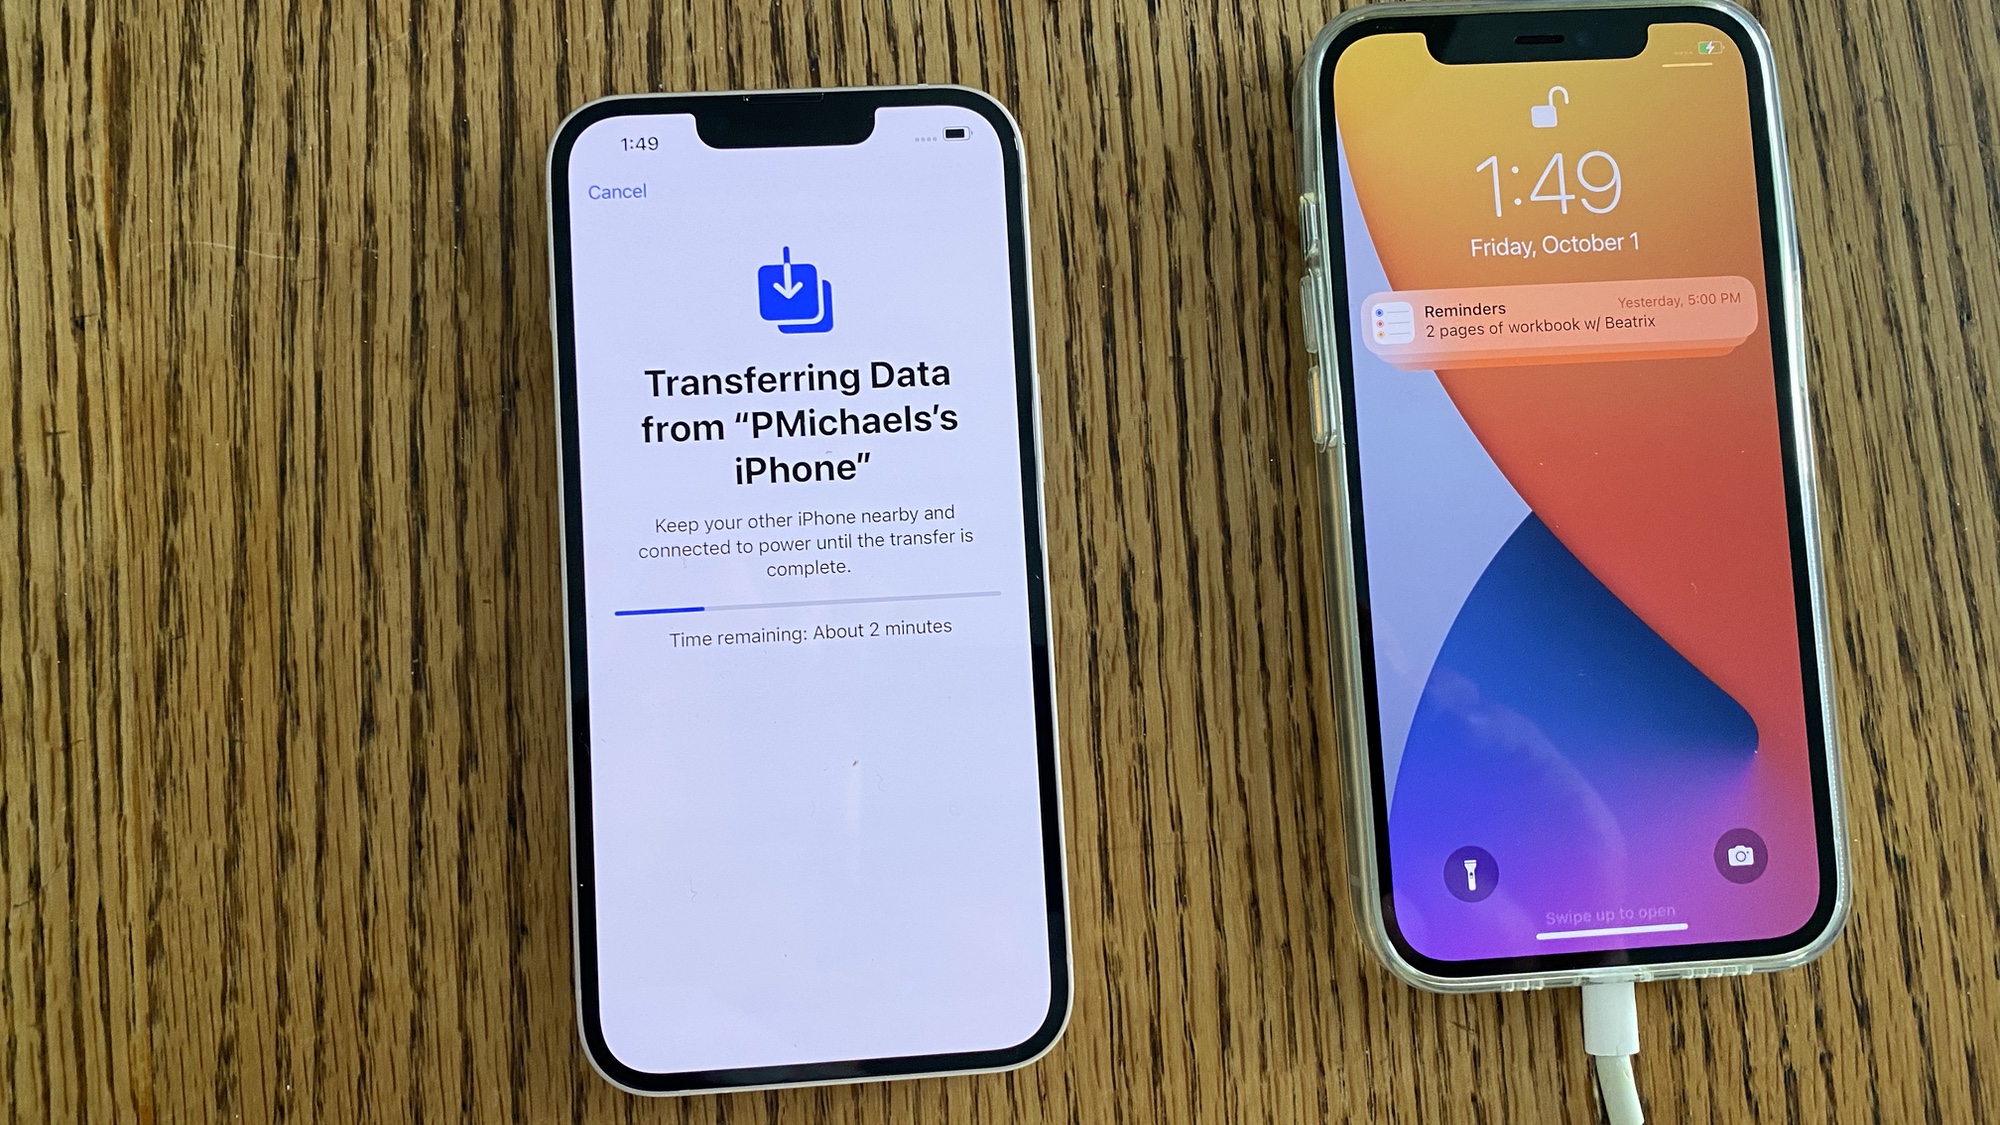
8. And now the transfer can begin. A progress bar shows you how much estimated time is left in the process.
Set up your new iPhone with an iCloud backup or a backup from your computer
What if QuickStart's not for you? No problem. If you opt to Set Up Manually in step 3 above, you'll be prompted to connect your iPhone to a Wi-Fi network.
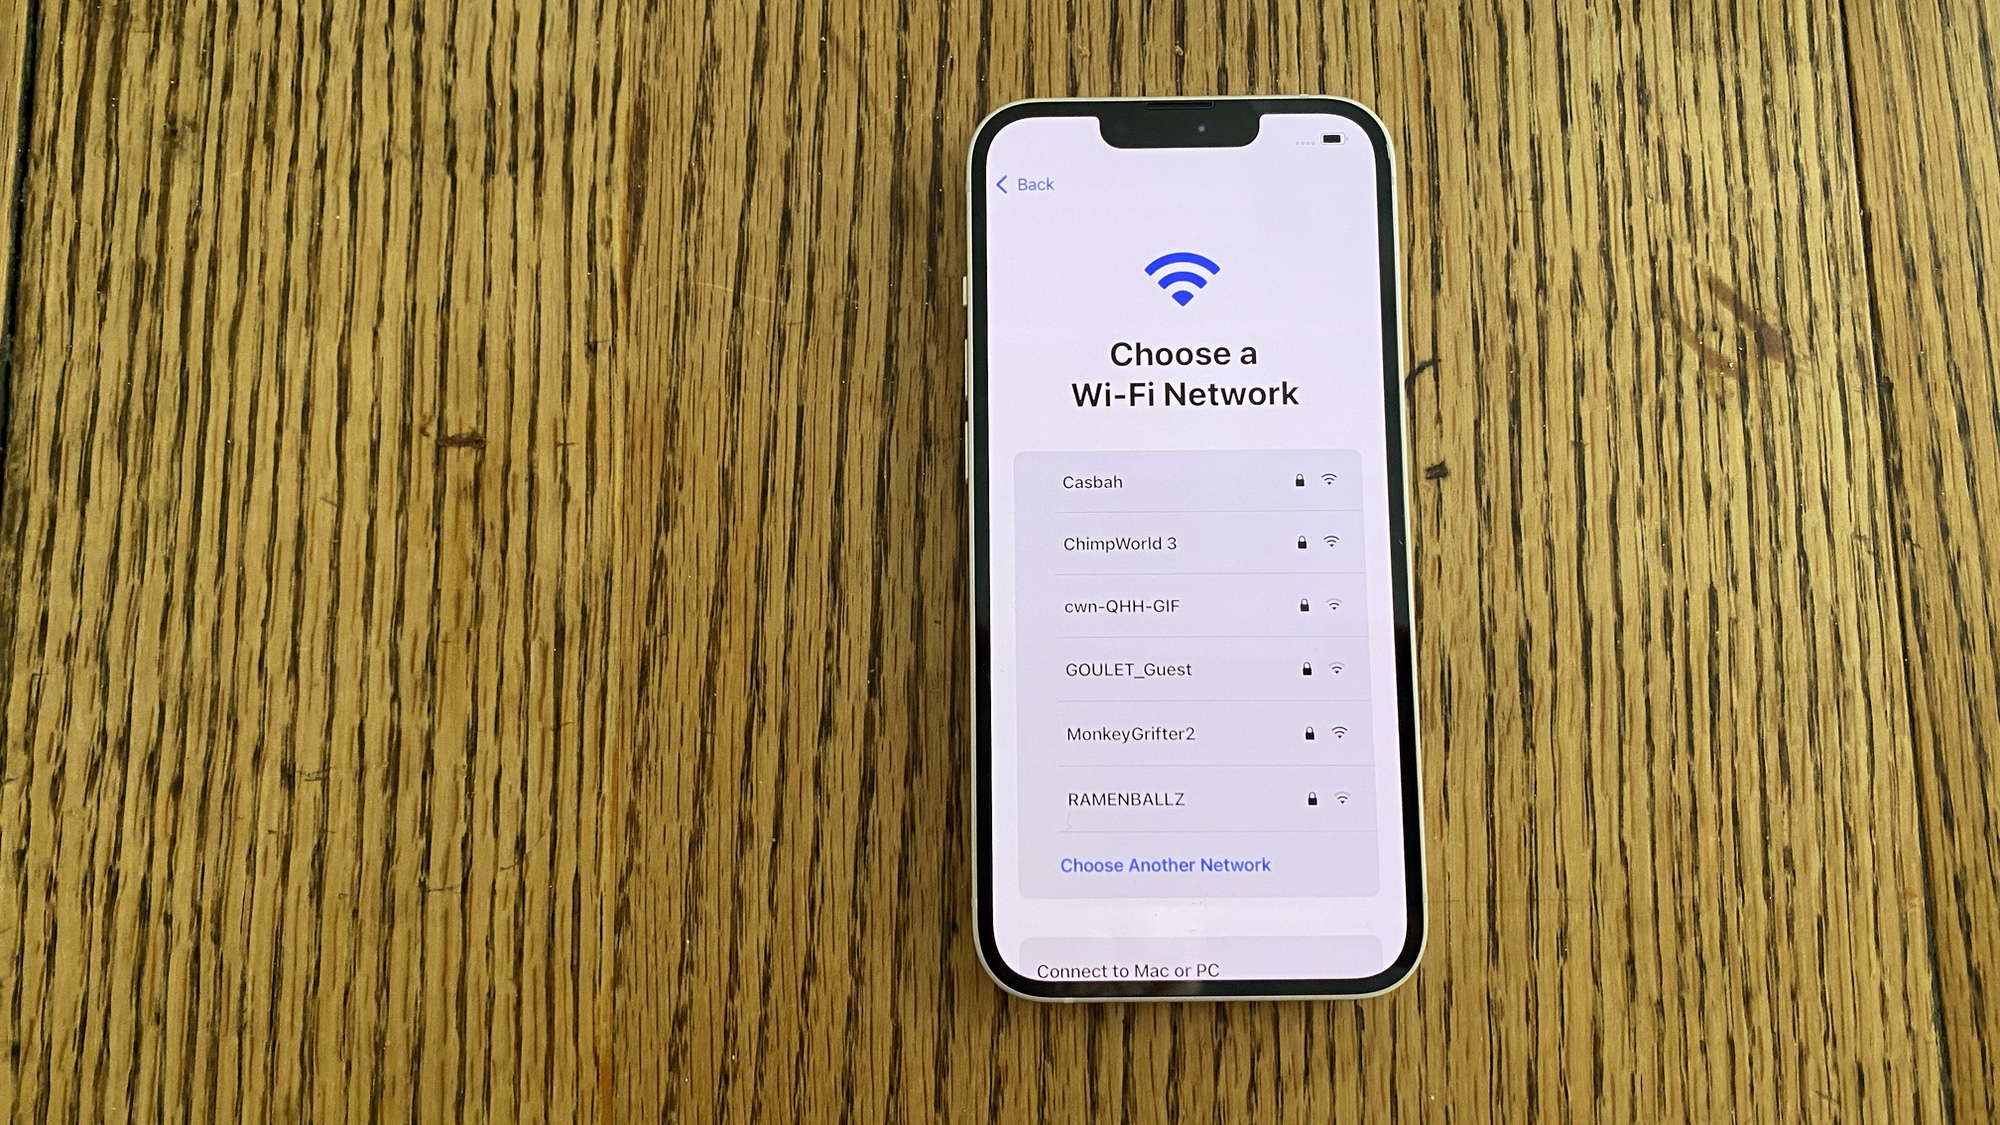
Follow the instructions on the screen until you get to the Apps & Data screen. Choose the option to Restore from an iCloud backup.
If that's your choice, you'll be prompted to sign into iCloud, using your Apple ID and password. Then you'll pick a backup — that's why it pays to back up your old iPhone ahead of time. Follow the onscreen prompts and wait for the process to run its course.
Set up your new iPhone with a backup from a Mac or PC
If you'd prefer to use a backup stored on your computer, just make sure to plug your new iPhone into one of the computer's ports. Follow the setup process through Step 3 above, where you'll opt to Set Up Manually. From there, follow the onscreen prompts until you reach the Apps & Data screen, at which time you'll select Restore from Mac or PC.
In iTunes or Finder, you'll select your new device. Then you'll select Restore Backup, choosing the backup you want (ideally, the one you made right before beginning this process). From there, it's a matter of biding your time, until all your data is moved over.
More iOS 15 tips and tricks
Now your iPhone 13 is ready to go, check out how to make your experience even better by taking a look at some essential tips and tricks for your iPhone. And once you're familiar with your new iPhone, take a look at how to get full-screen Caller ID on iOS 15 and how to activate a hidden trackpad that makes editing a breeze.
Philip Michaels is a Managing Editor at Tom's Guide. He's been covering personal technology since 1999 and was in the building when Steve Jobs showed off the iPhone for the first time. He's been evaluating smartphones since that first iPhone debuted in 2007, and he's been following phone carriers and smartphone plans since 2015. He has strong opinions about Apple, the Oakland Athletics, old movies and proper butchery techniques. Follow him at @PhilipMichaels.

