Kill passwords forever — here’s how to set up passkeys on iPhone, iPad and Mac
It's time to ditch passwords and learn how to set up passkeys on iPhone, iPad and Mac instead
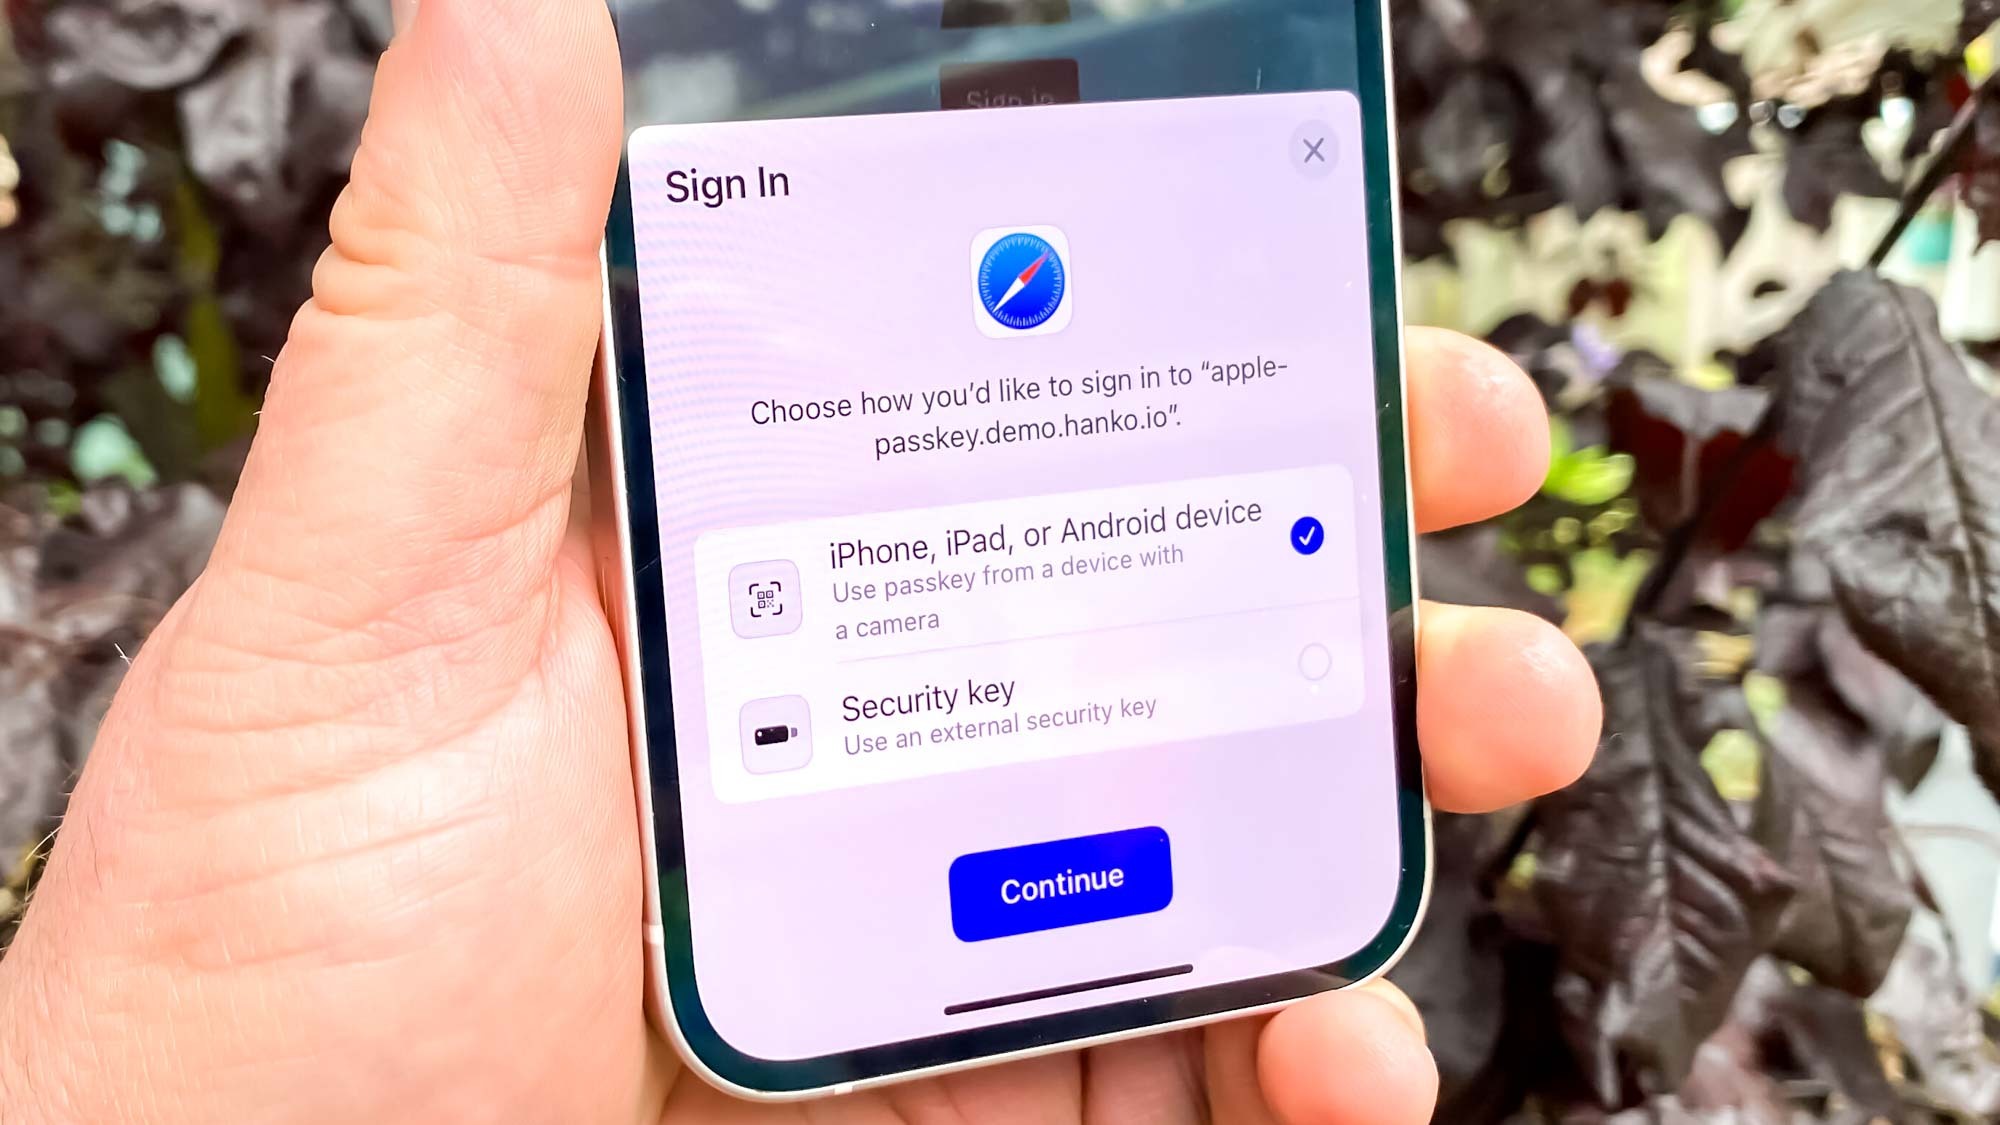
Passwords have their place but knowing how to set up passkeys on iPhone, iPad and Mac will make accessing online services so much more secure. Although iOS and macOS will suggest complex, one-off passwords for you when you sign up to websites and apps or seek to make changes, a passkey takes security to another level.
When you generate a passkey, two keys are effectively created. One ends up stored on your device and another is stored by the website or app. The one that is on your device — an iPhone, iPad or Mac — does not leave that device. But when you subsequently log in (passkeys make use of TouchID and FaceID to authorise), the two keys are paired. Once there's a match, you're let in.
This enhances security in a number of ways. First, you've got the security layer of TouchID and FaceID. Second, hackers can never access the passkey stored on your device. Third, the passkeys are encrypted. Fourth, each passkey is unique to a specific account. Nobody could figure one passkey and apply it to another. So let's take a look at how to set up passkeys on iPhone, iPad and Mac.
Note: before we start, ensure your devices are up to date. See our guides on how to update an iPhone, how to update an iPad or how to update a Mac.
How to set up passkeys on iPhone, iPad and Mac
Setting up passkeys takes two steps. First you need to activate passkeys, then you need to generate passkeys. Doing so is different on iPhones/iPads versus Macs, but we'll cover everything here. The first step is to activate passkeys.
1a. Activate passkeys on iPhone or iPad
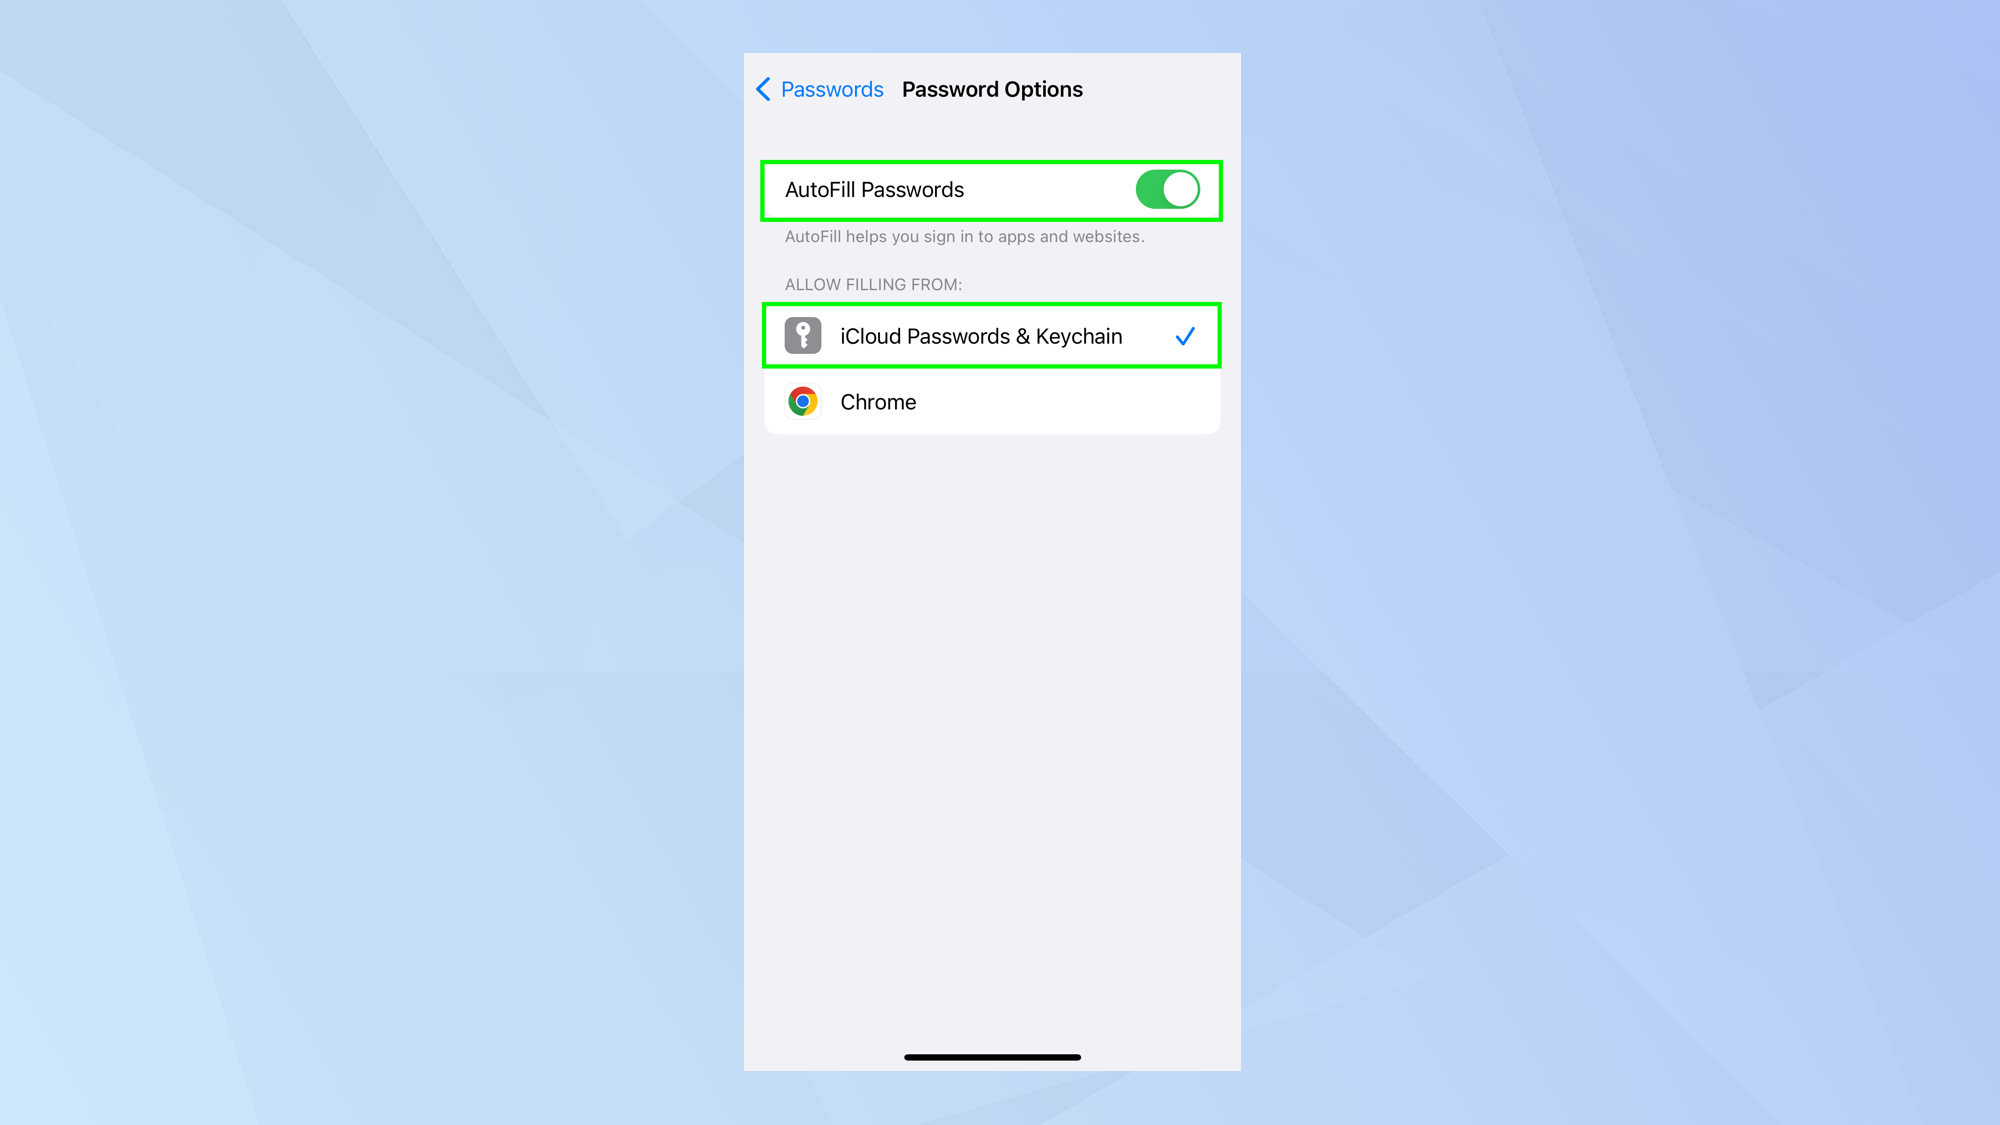
1. Launch the Settings app and select Passwords.
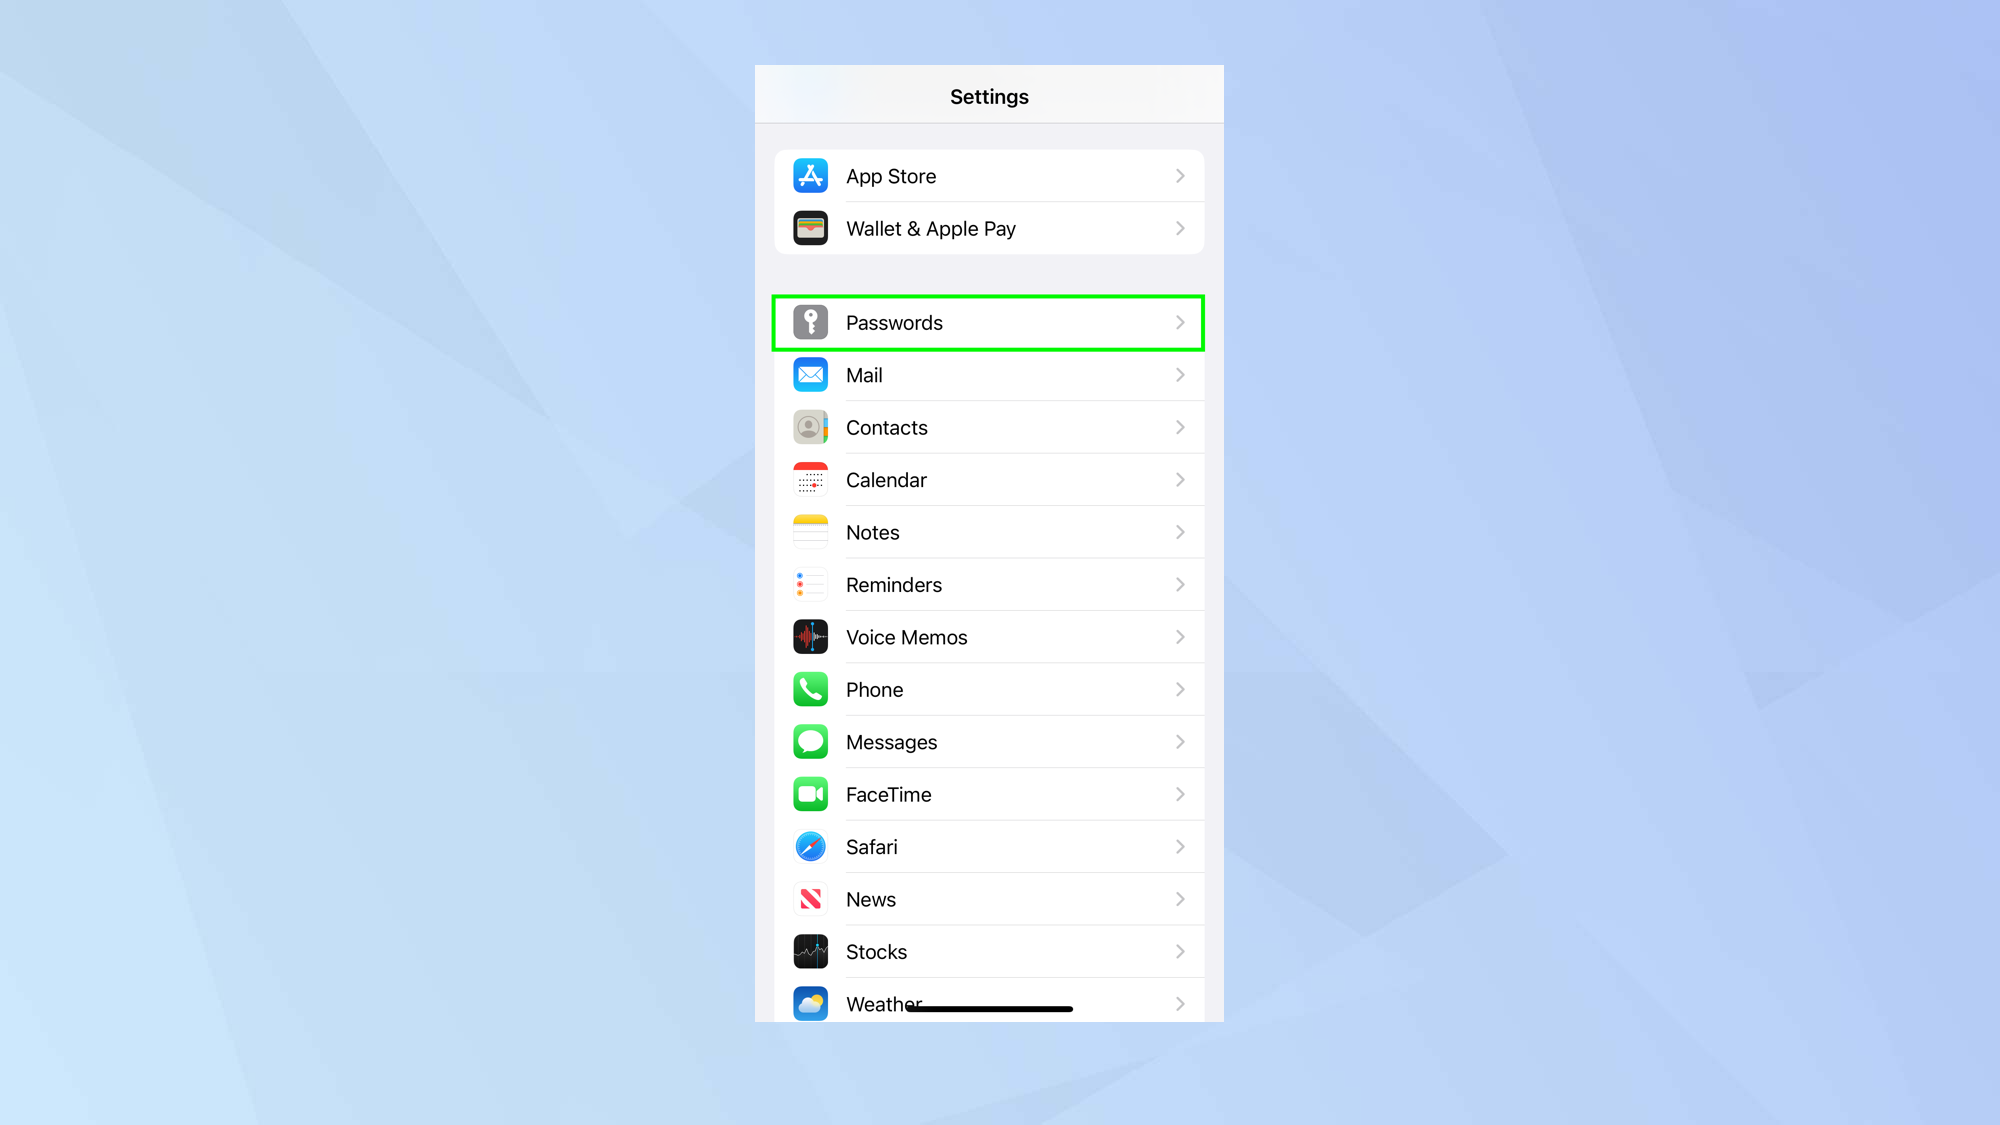
2. Select Password Options.
Sign up to get the BEST of Tom's Guide direct to your inbox.
Get instant access to breaking news, the hottest reviews, great deals and helpful tips.
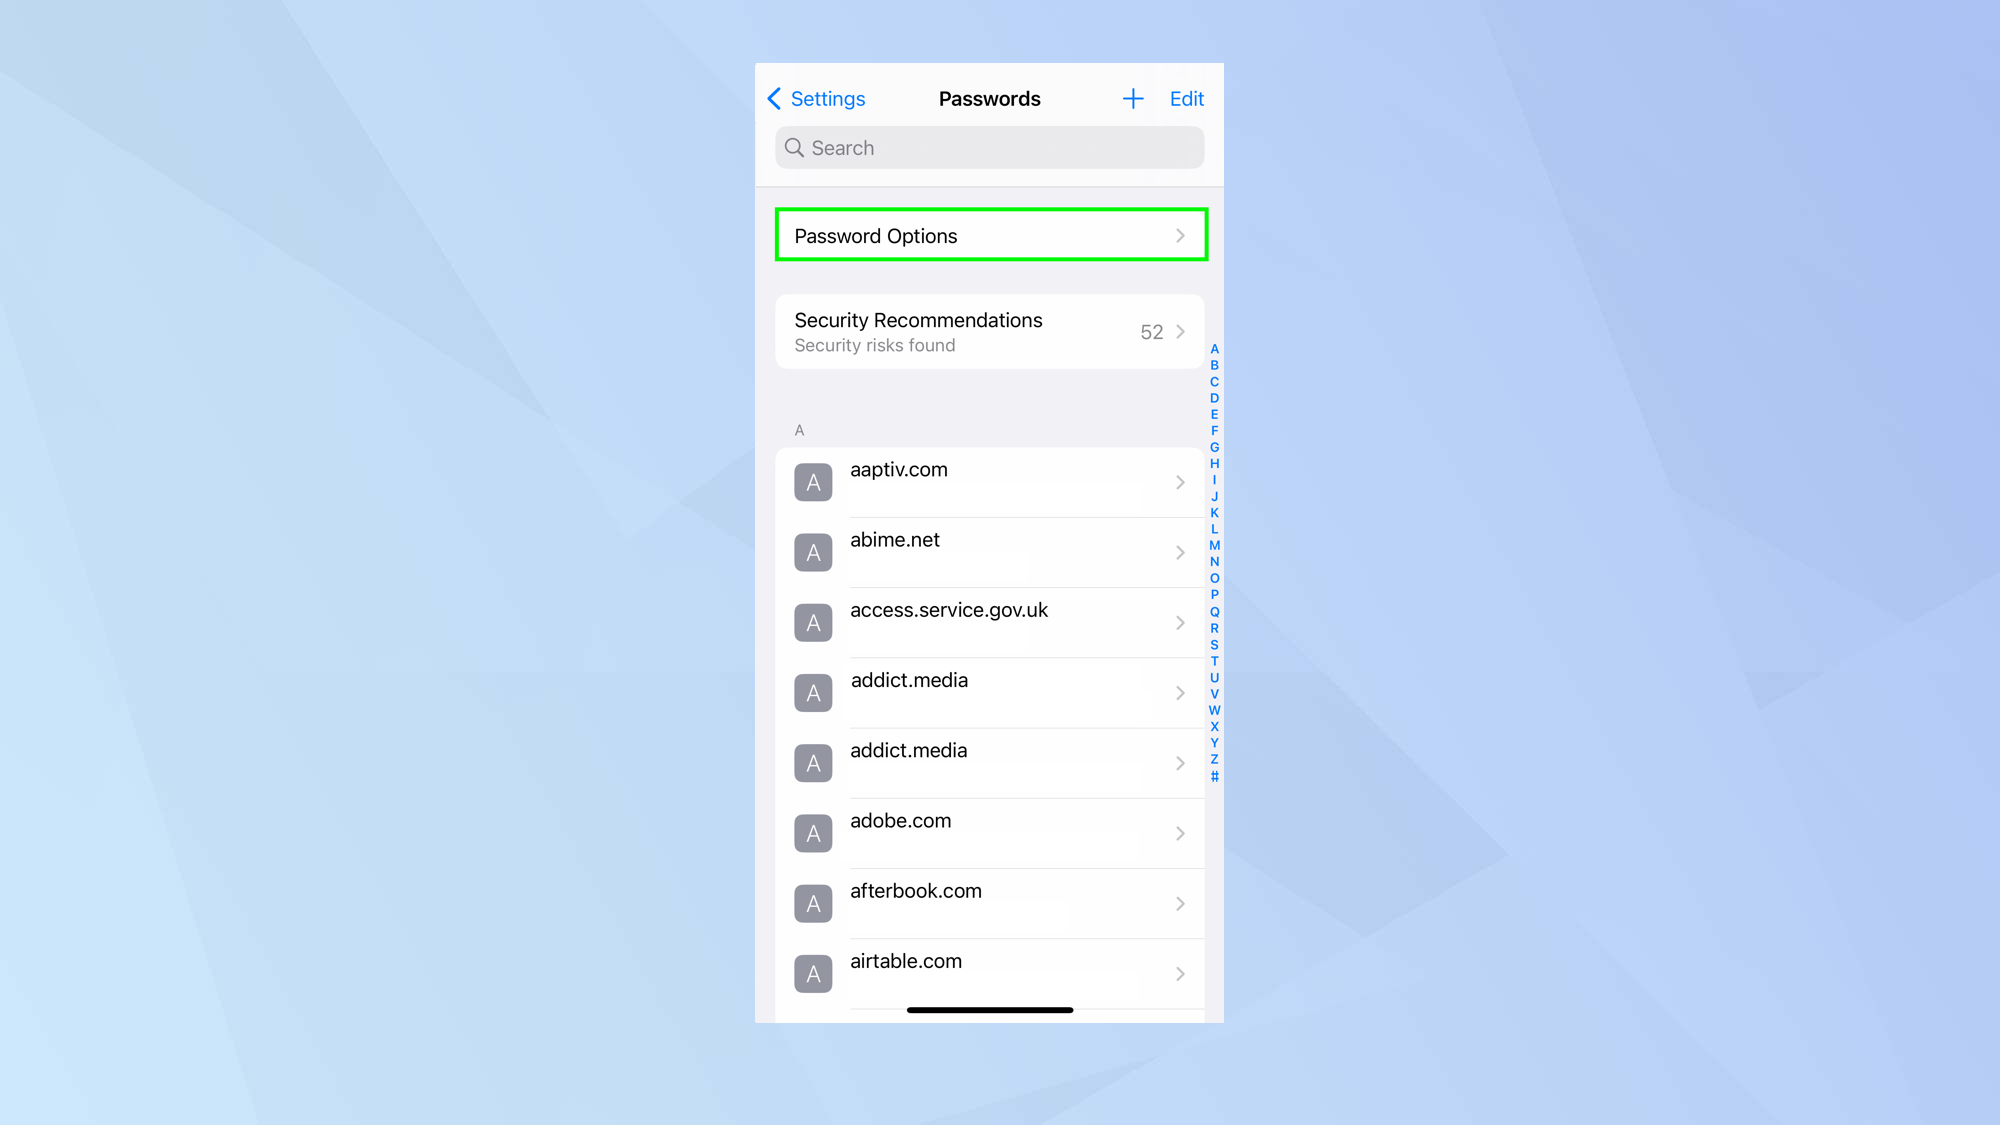
3. Toggle on Autofill Passwords, then tap iCloud Passwords & Keychain (so a blue tick appears). This will allow iOS to fill in the password field.
1b. Activate passkeys on a Mac
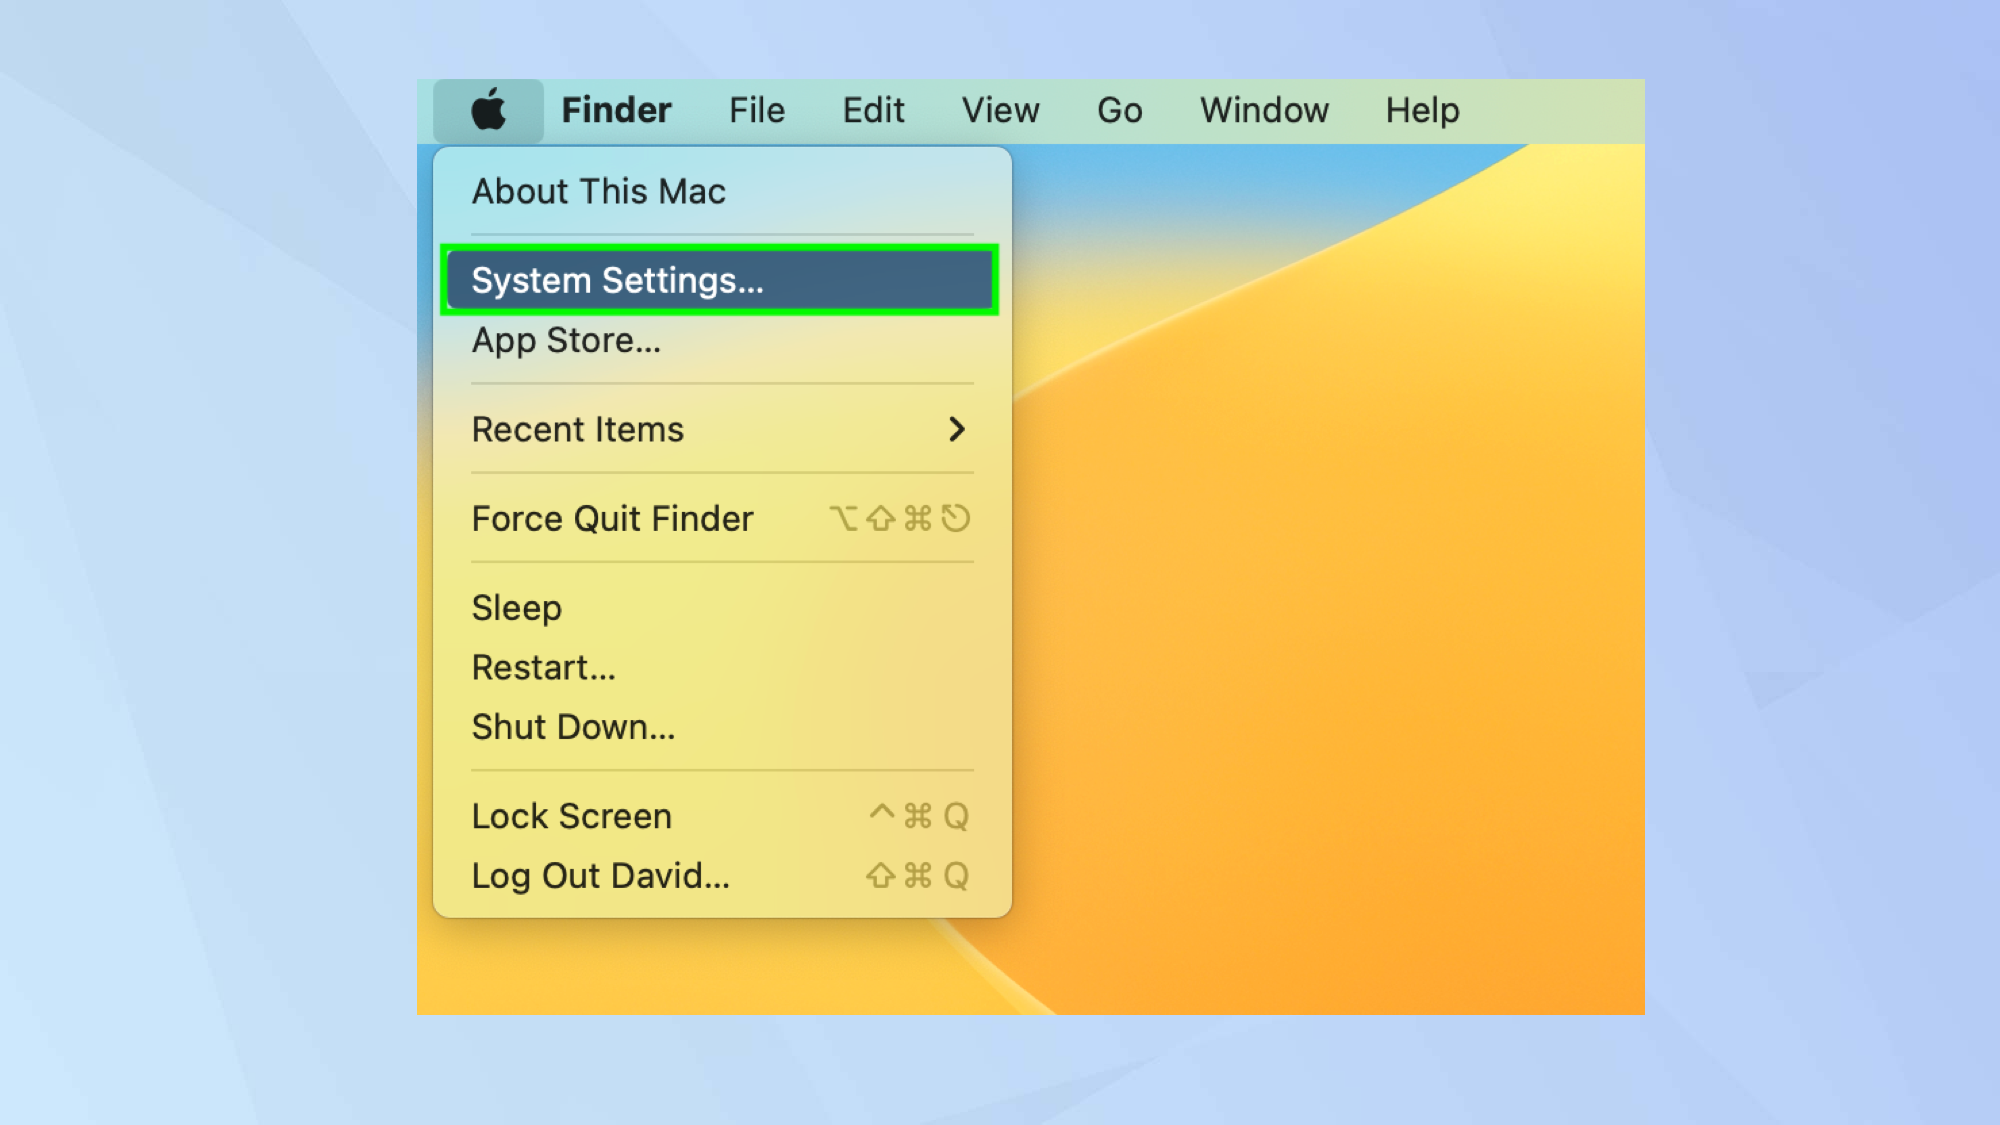
1. Click the Apple logo, top left and select System Settings.
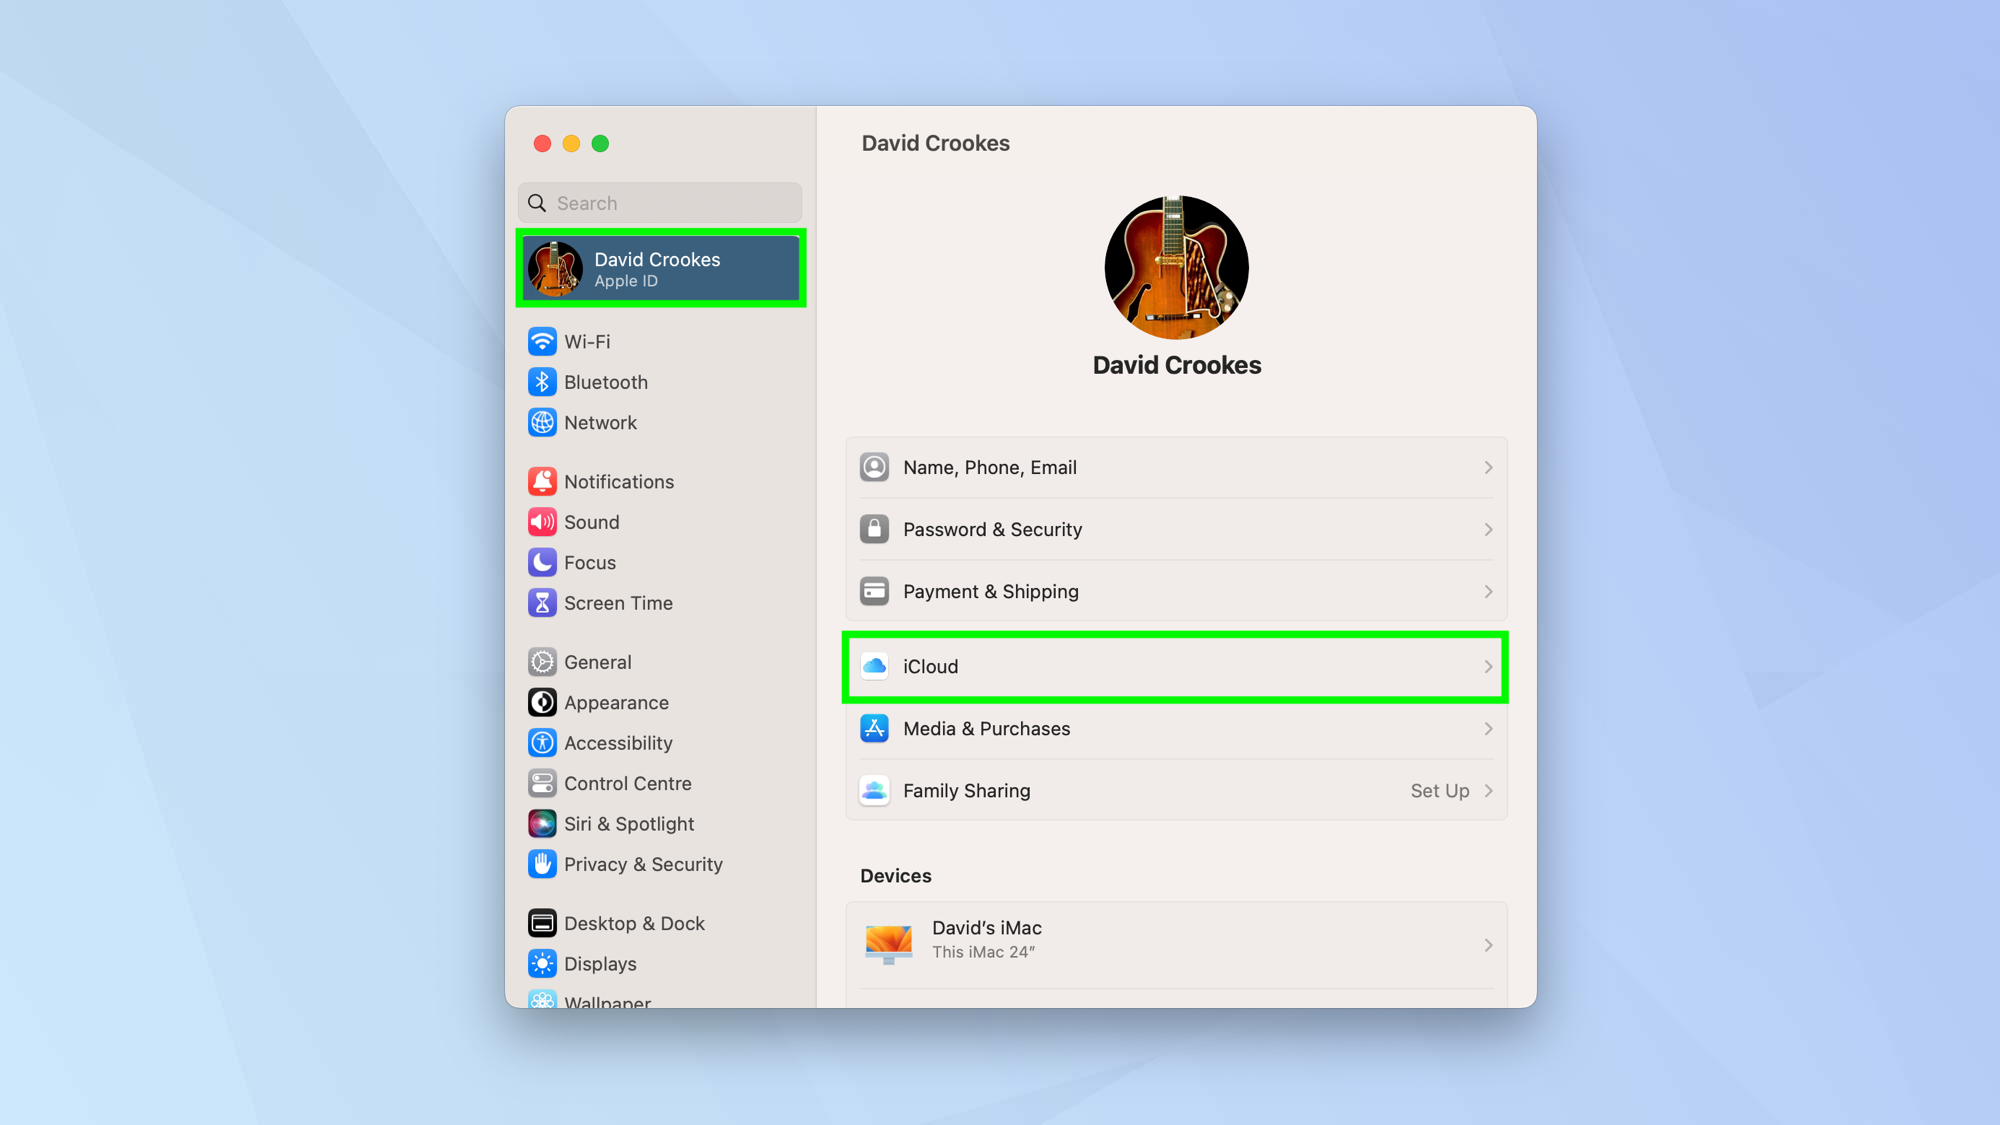
2. Click your name at the top of the sidebar and select iCloud.
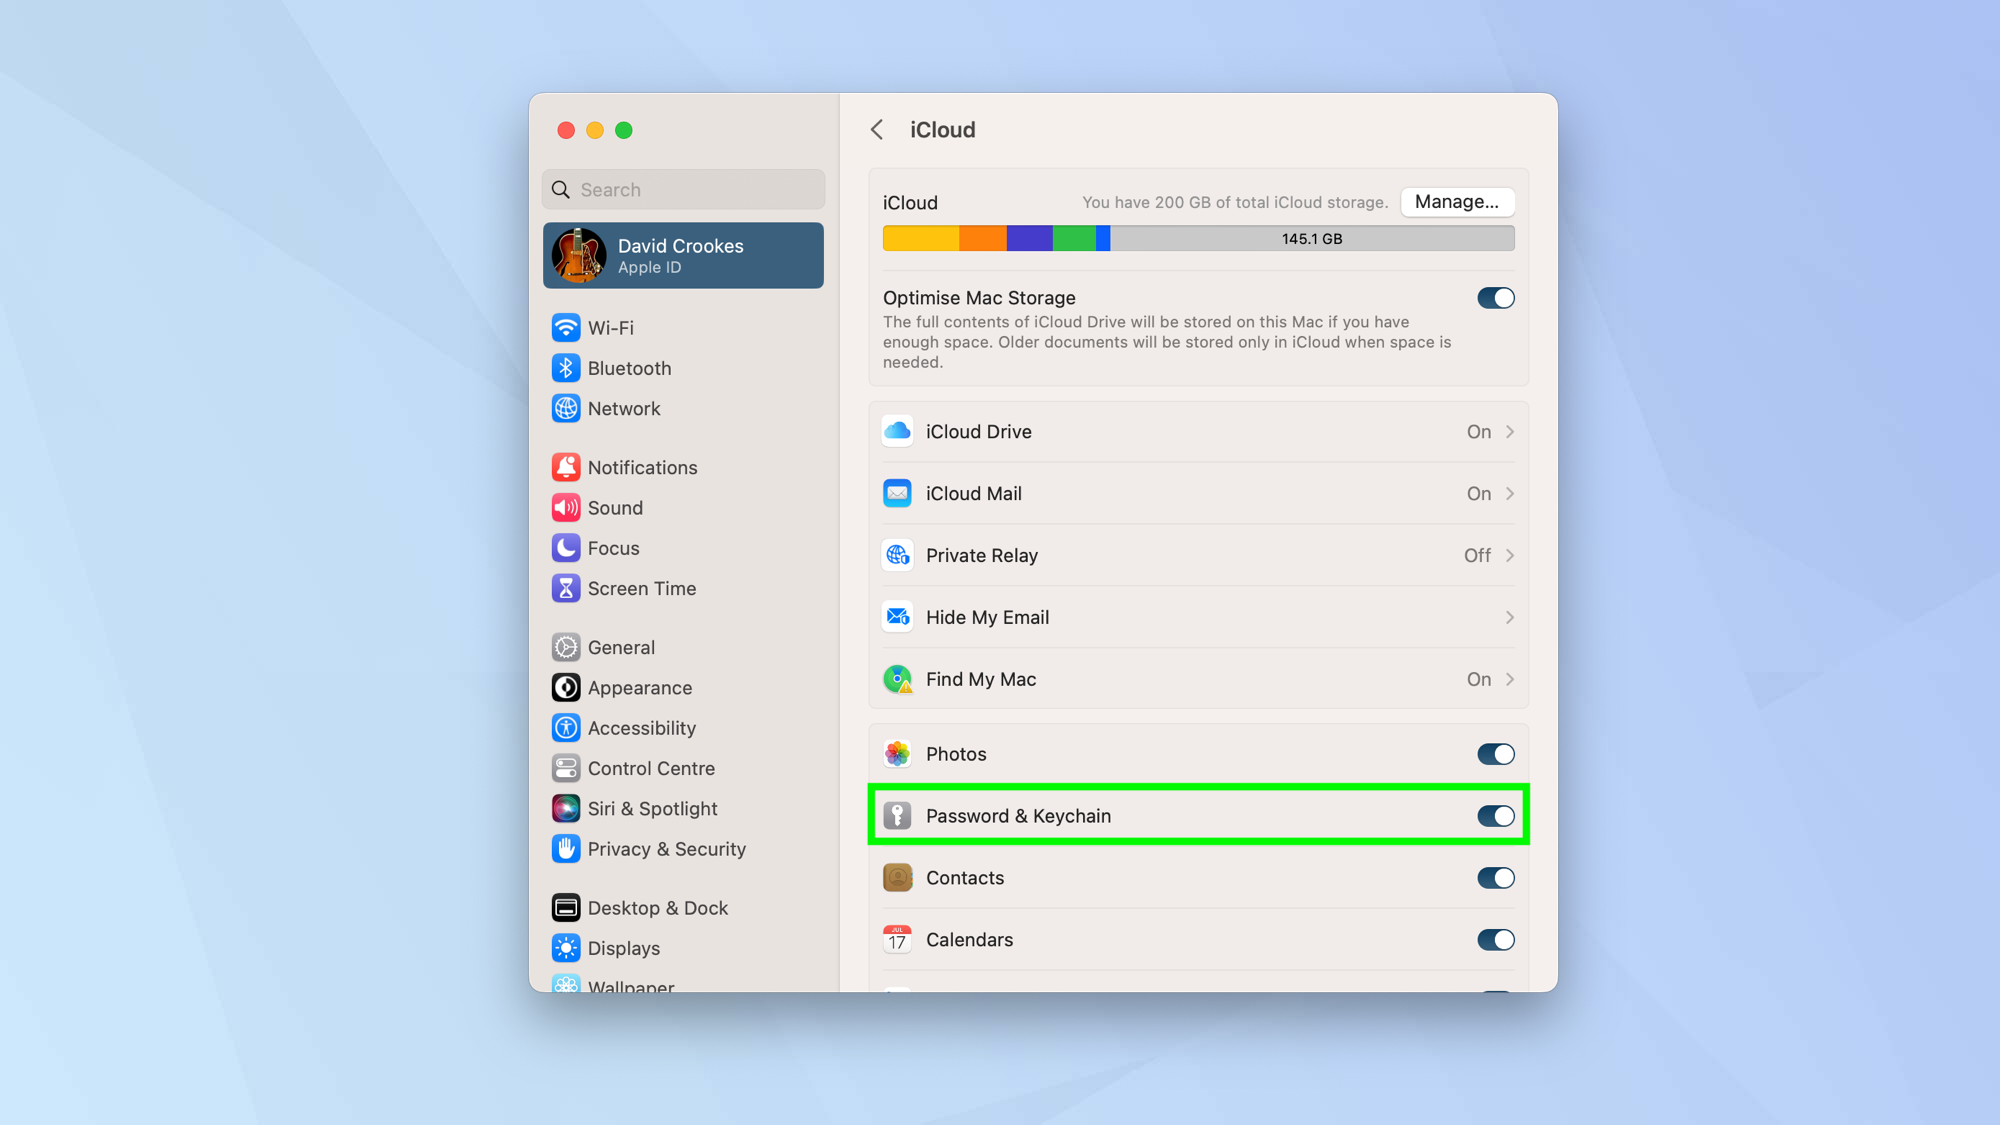
3. Toggle on Password & Keychain.
2a. Create a new passkey on iPhone and iPad
In order to create a passkey, you will need to be using a supporting website or app. More and more of them will be making use of this feature but you'll only really know if you check a service's account or look to sign up to one.
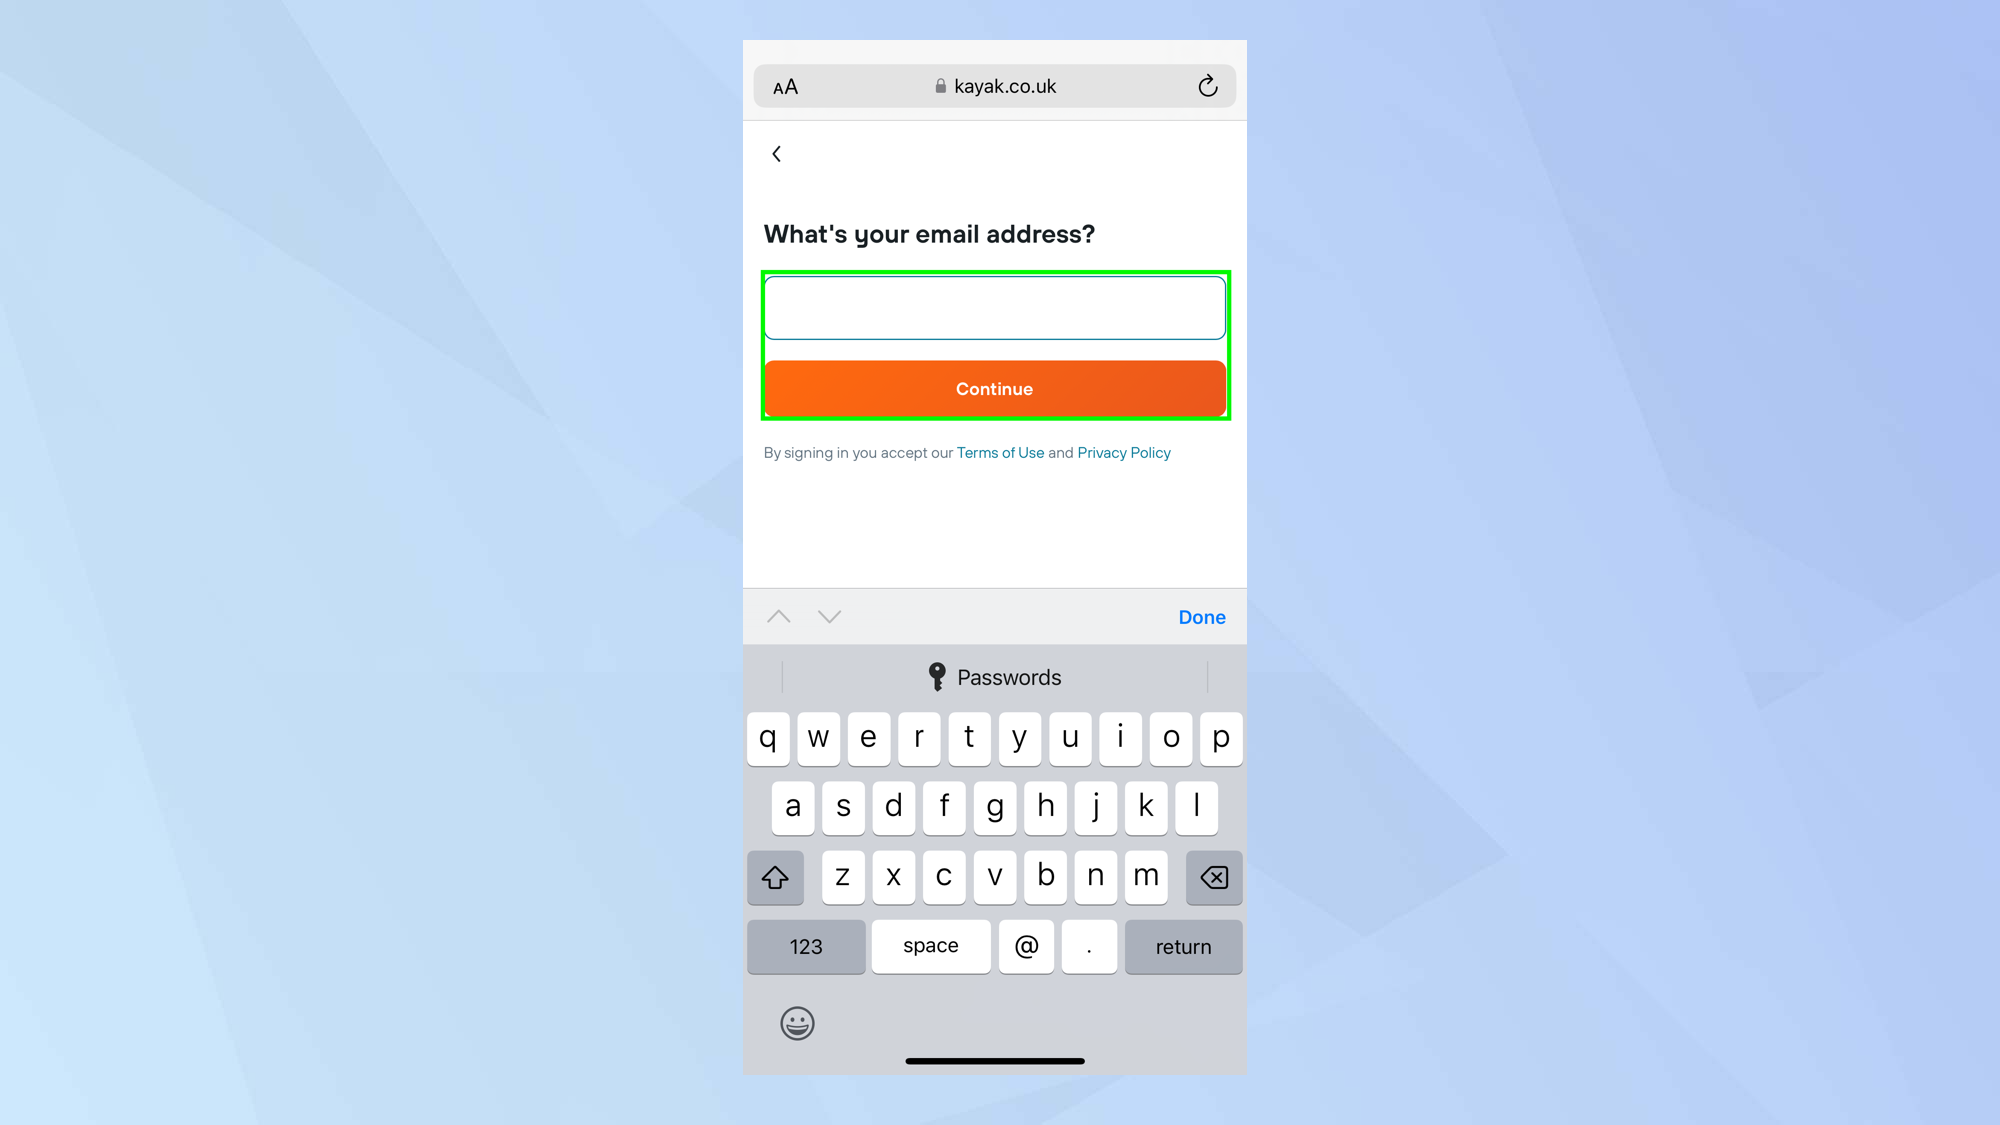
1. Visit a supporting website or app and look to create an account. Here we are using kayak.co.uk so the process starts thus: visit the website, select to sign in via email, enter your email address and tap Continue.
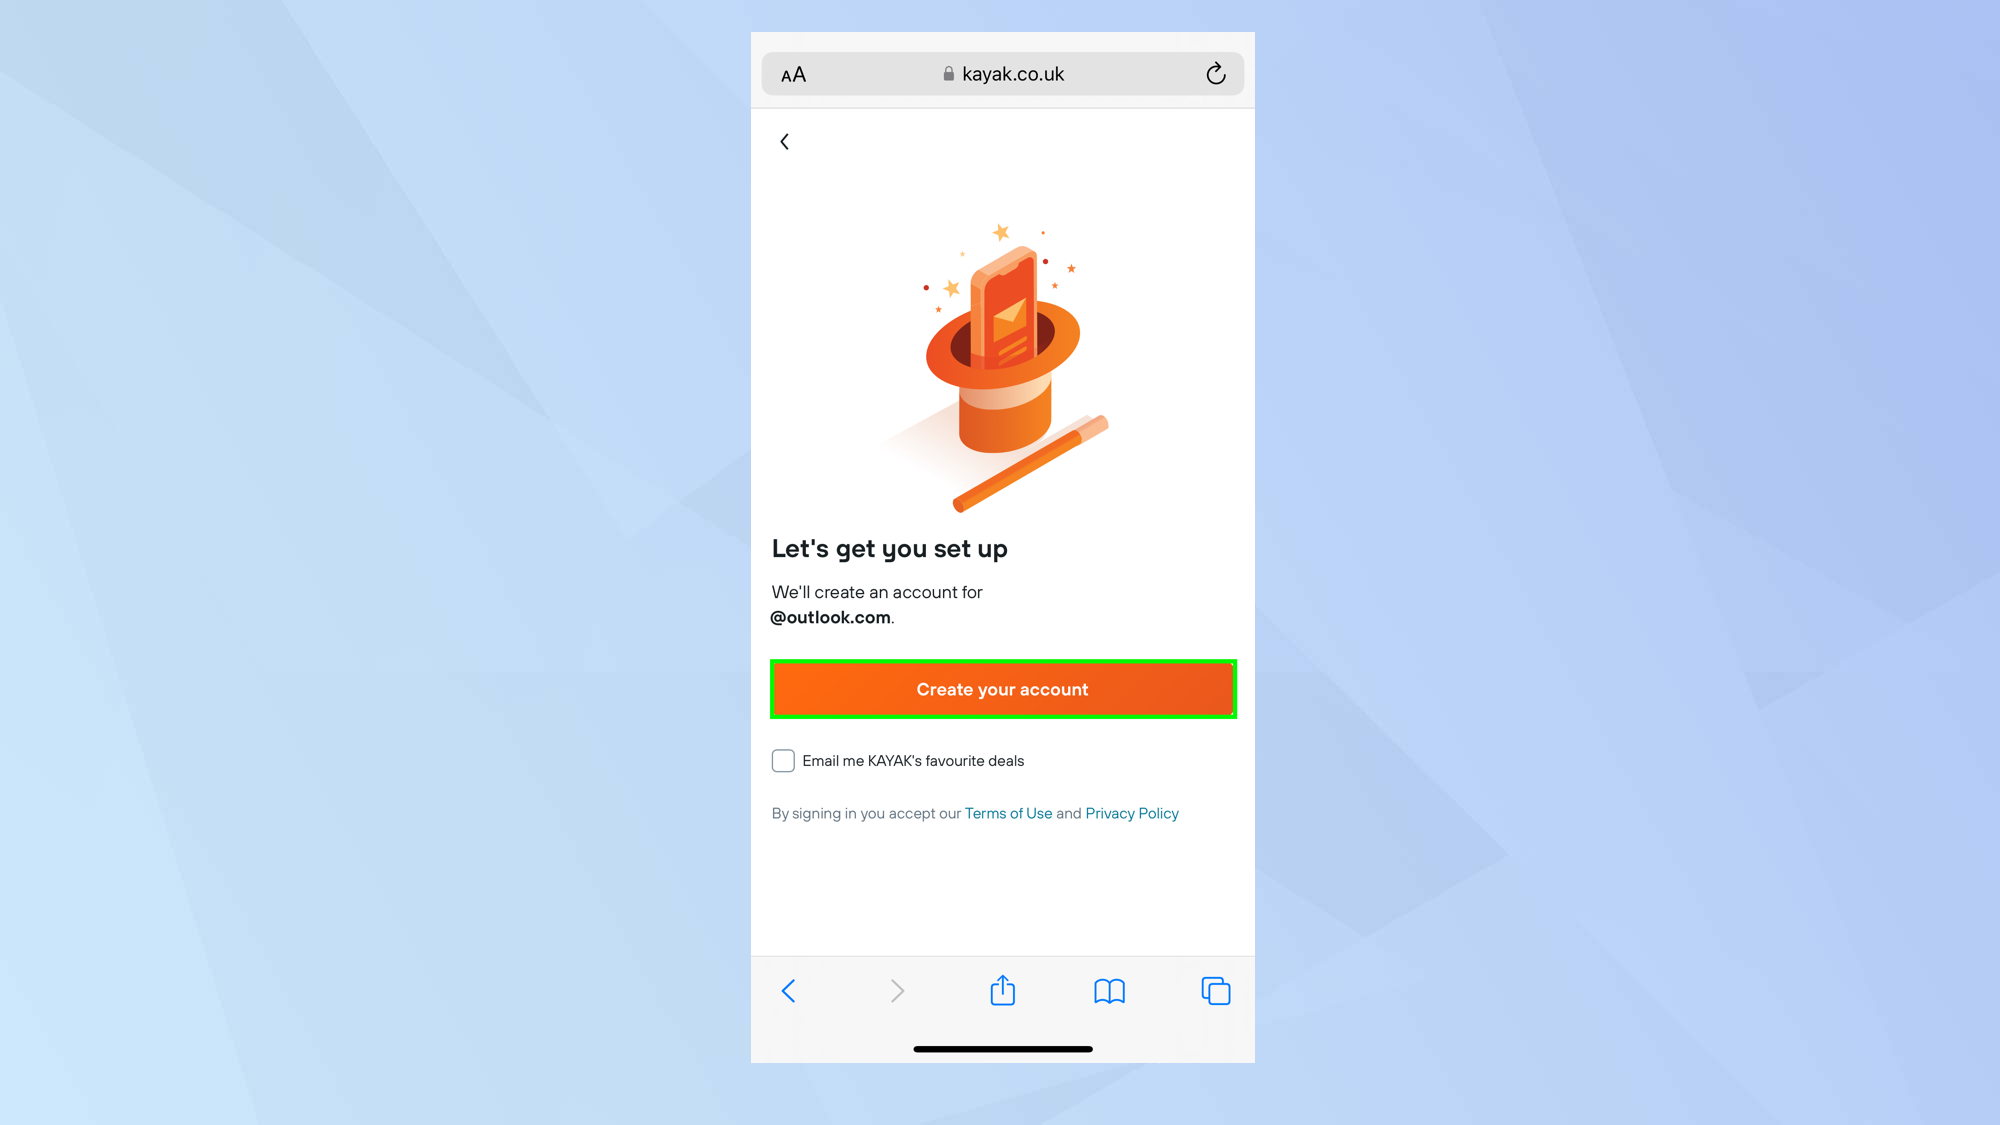
2. Again, in the case of Kayak, you would need to tap Create your account.
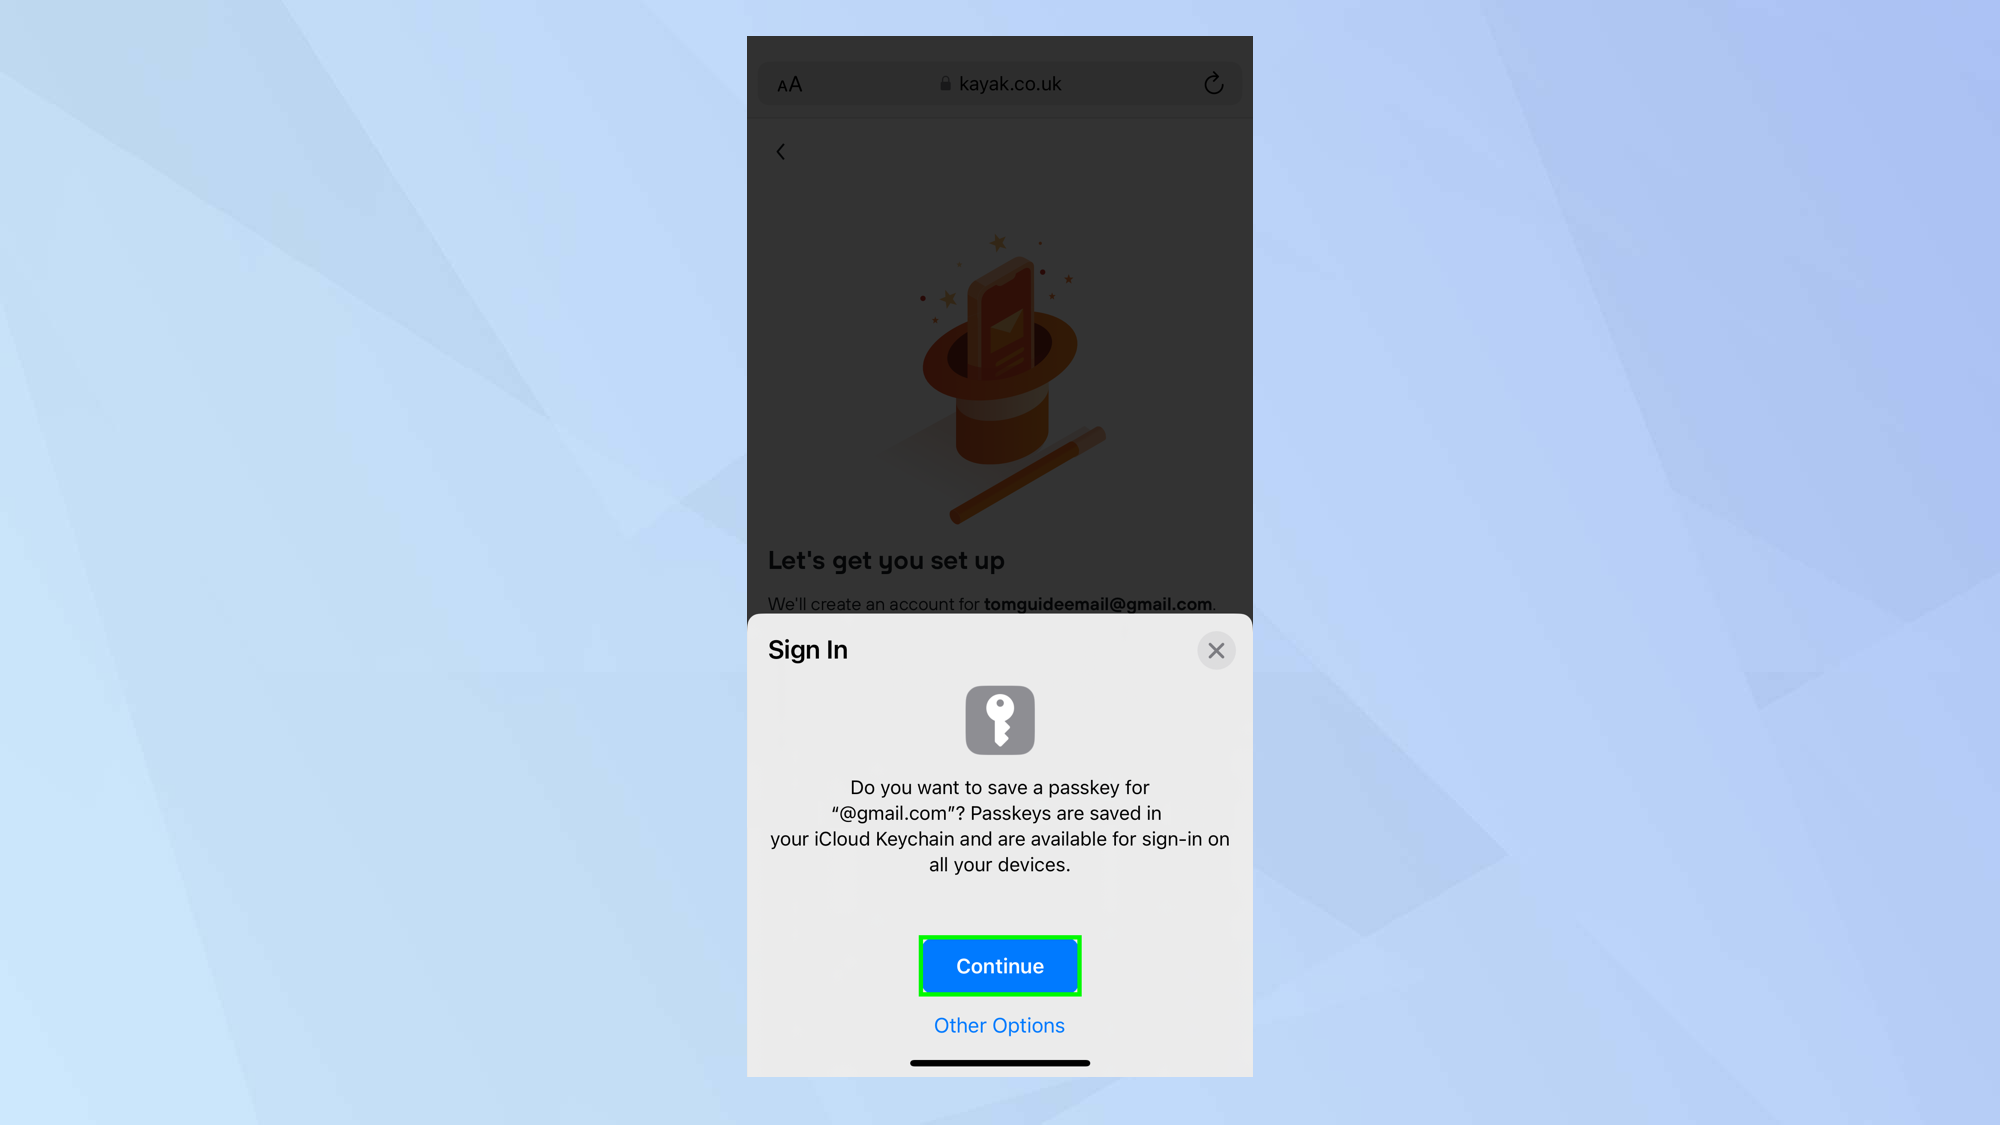
3. When you are prompted to save a passkey for your email address, just tap Continue. The passkey will be created and you will be signed in.
2b. Create a new passkey on Mac
As with the iPhone and iPad, you will need to be using a supporting website or app.
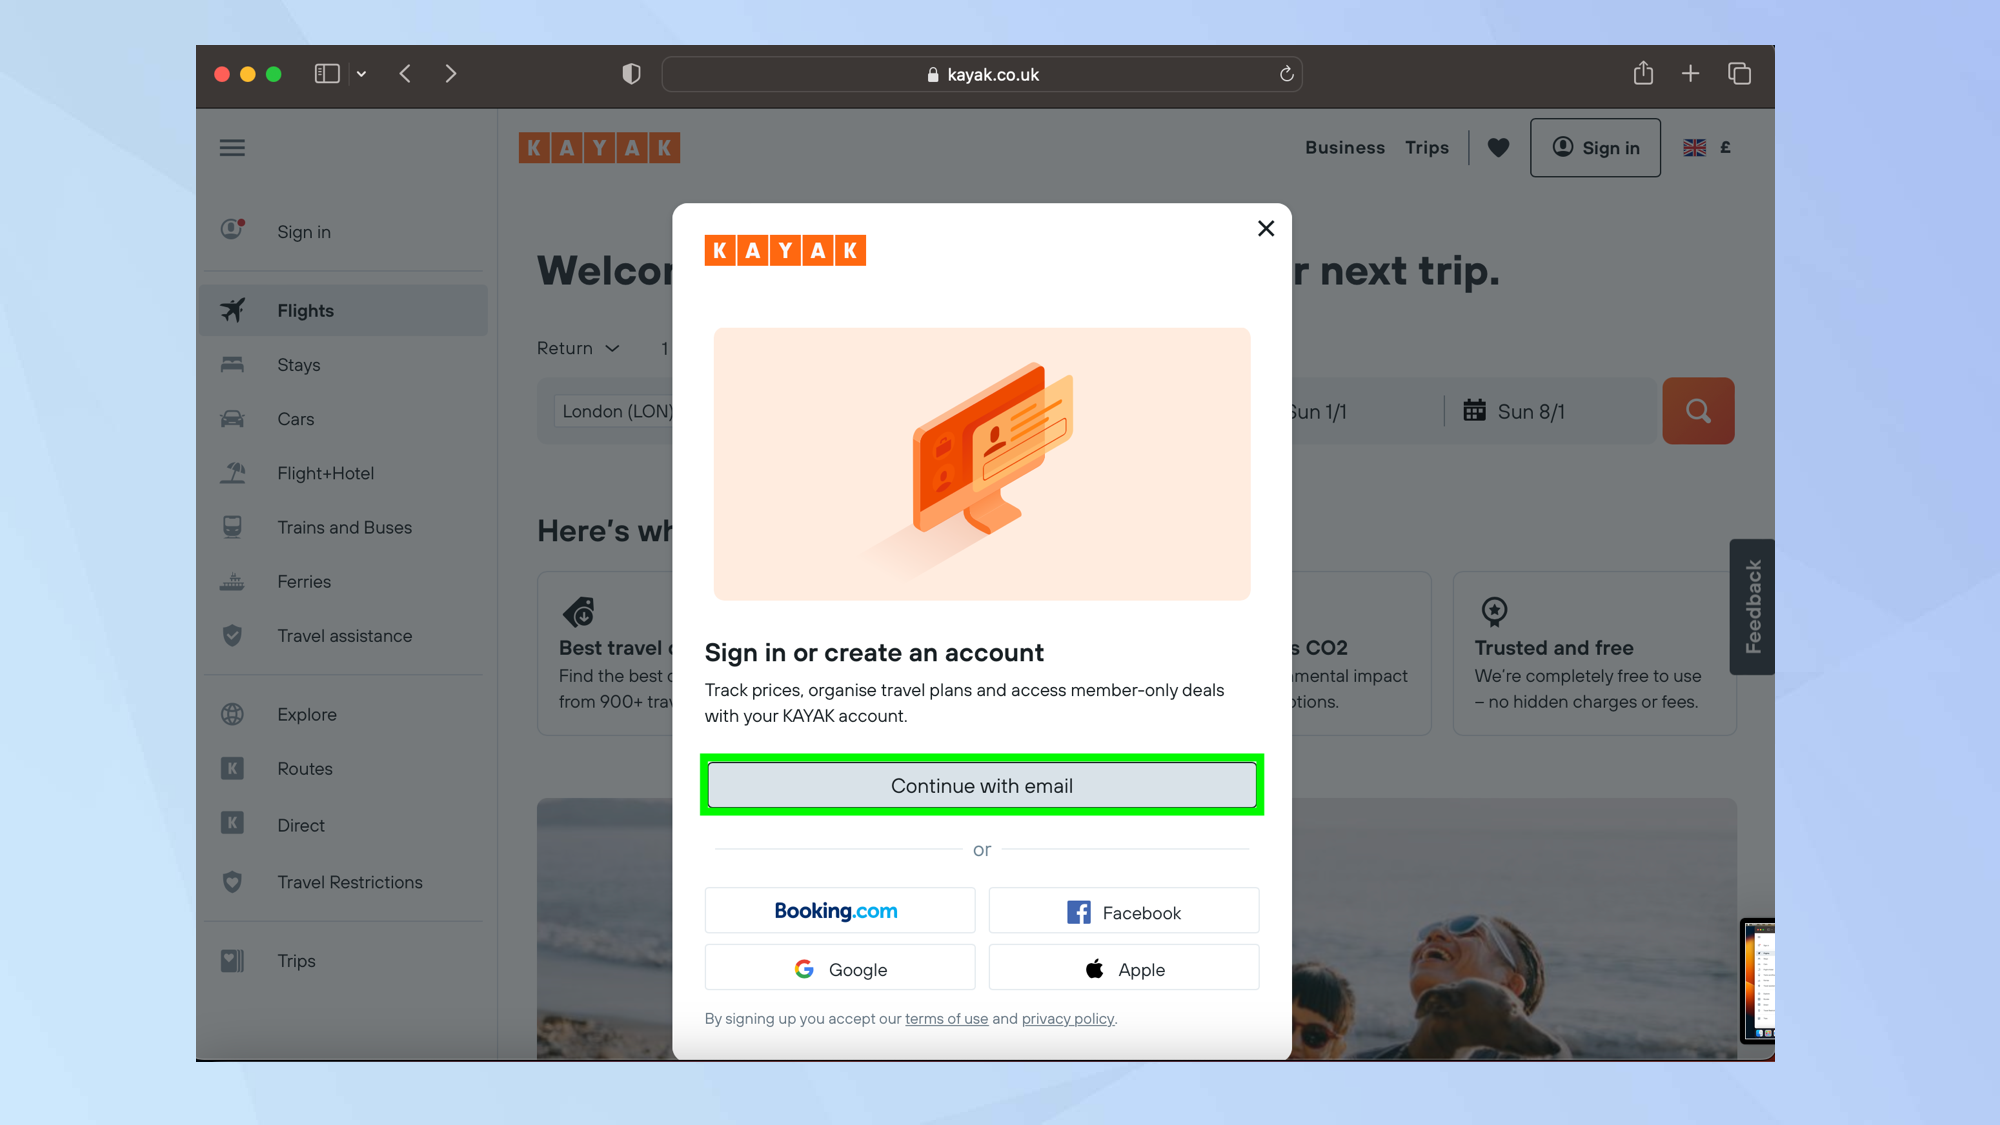
1. Visit a supporting website or app and look to create an account. As on the iPhone and iPad here we are using kayak.co.uk so visit the website, select to sign in via email.
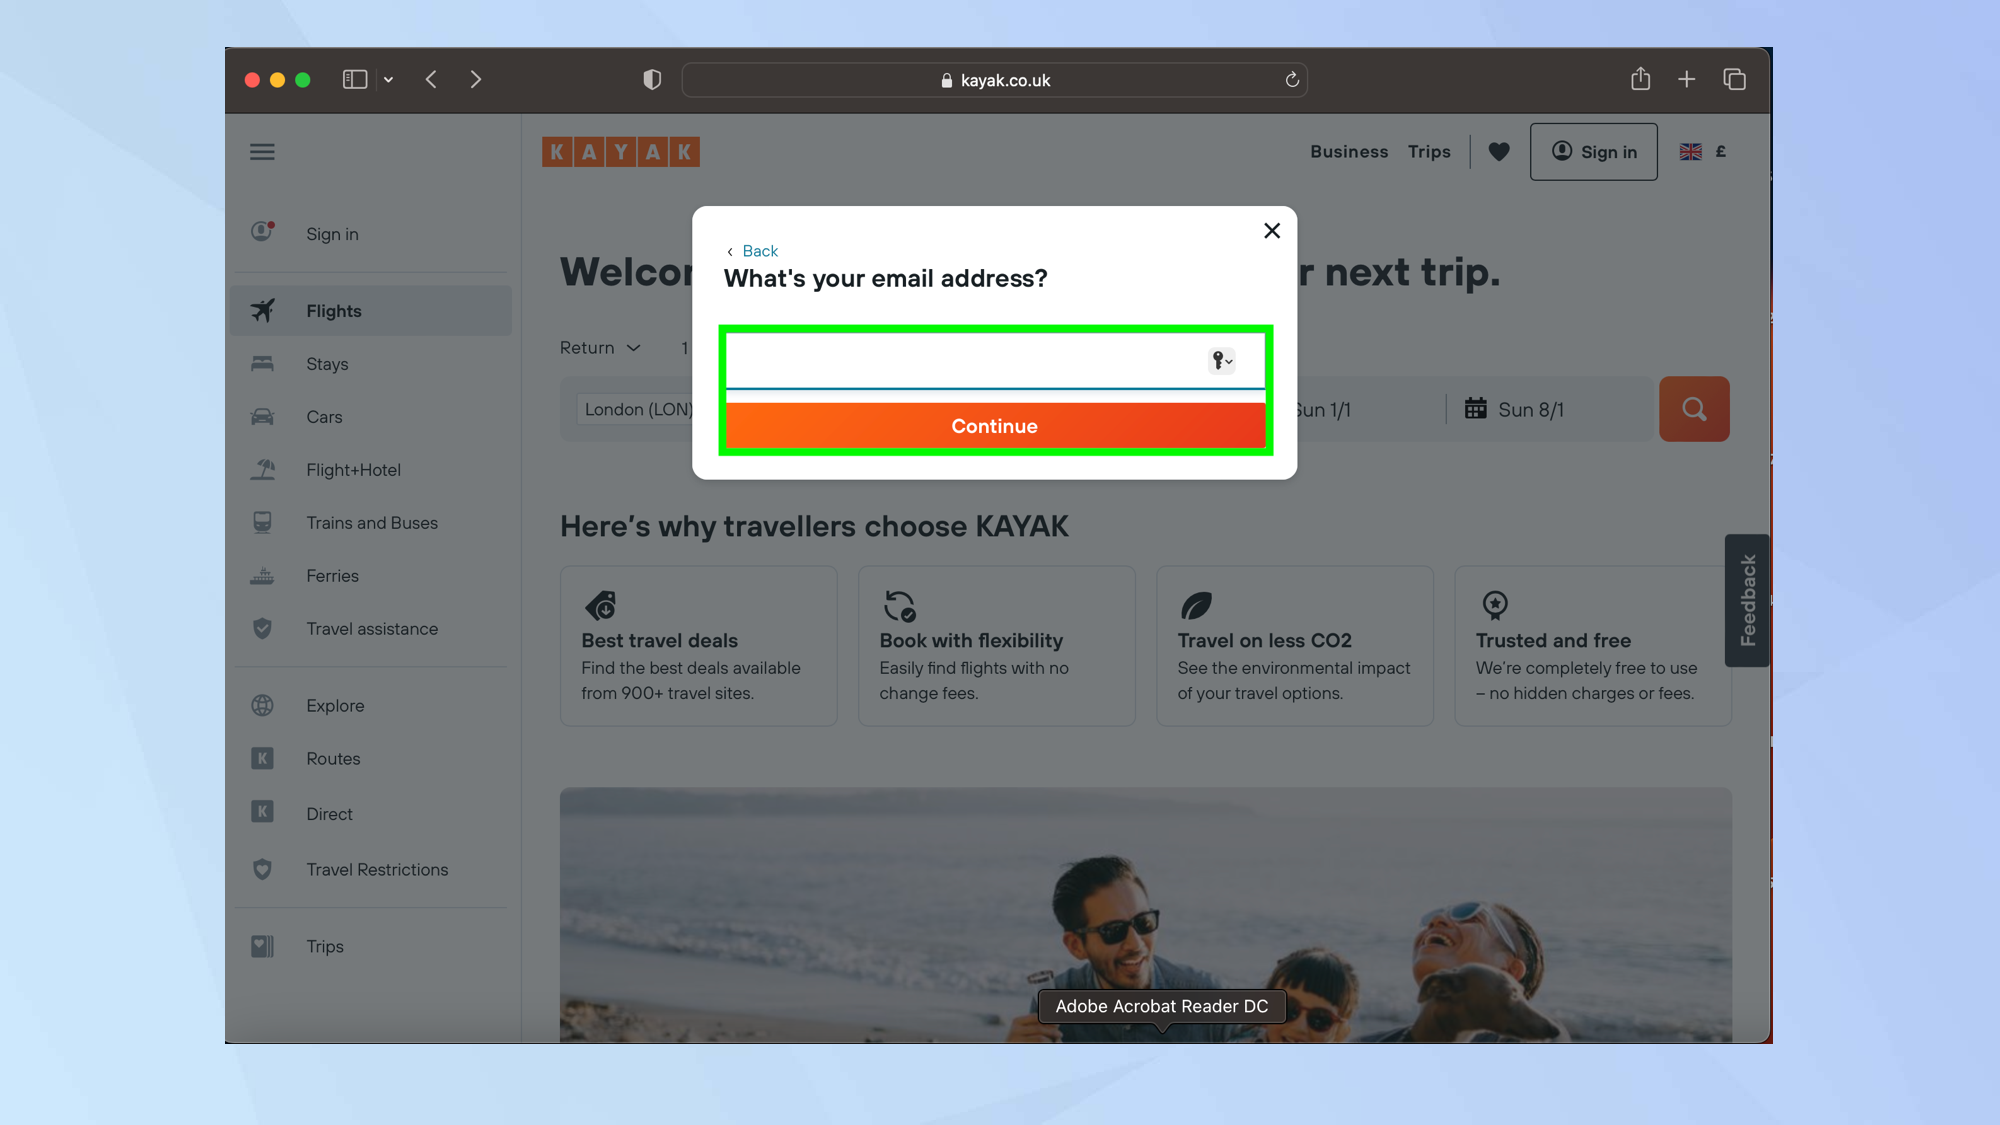
2. Now enter your email address and tap Continue.
3. Here you would need to tap Create your account.
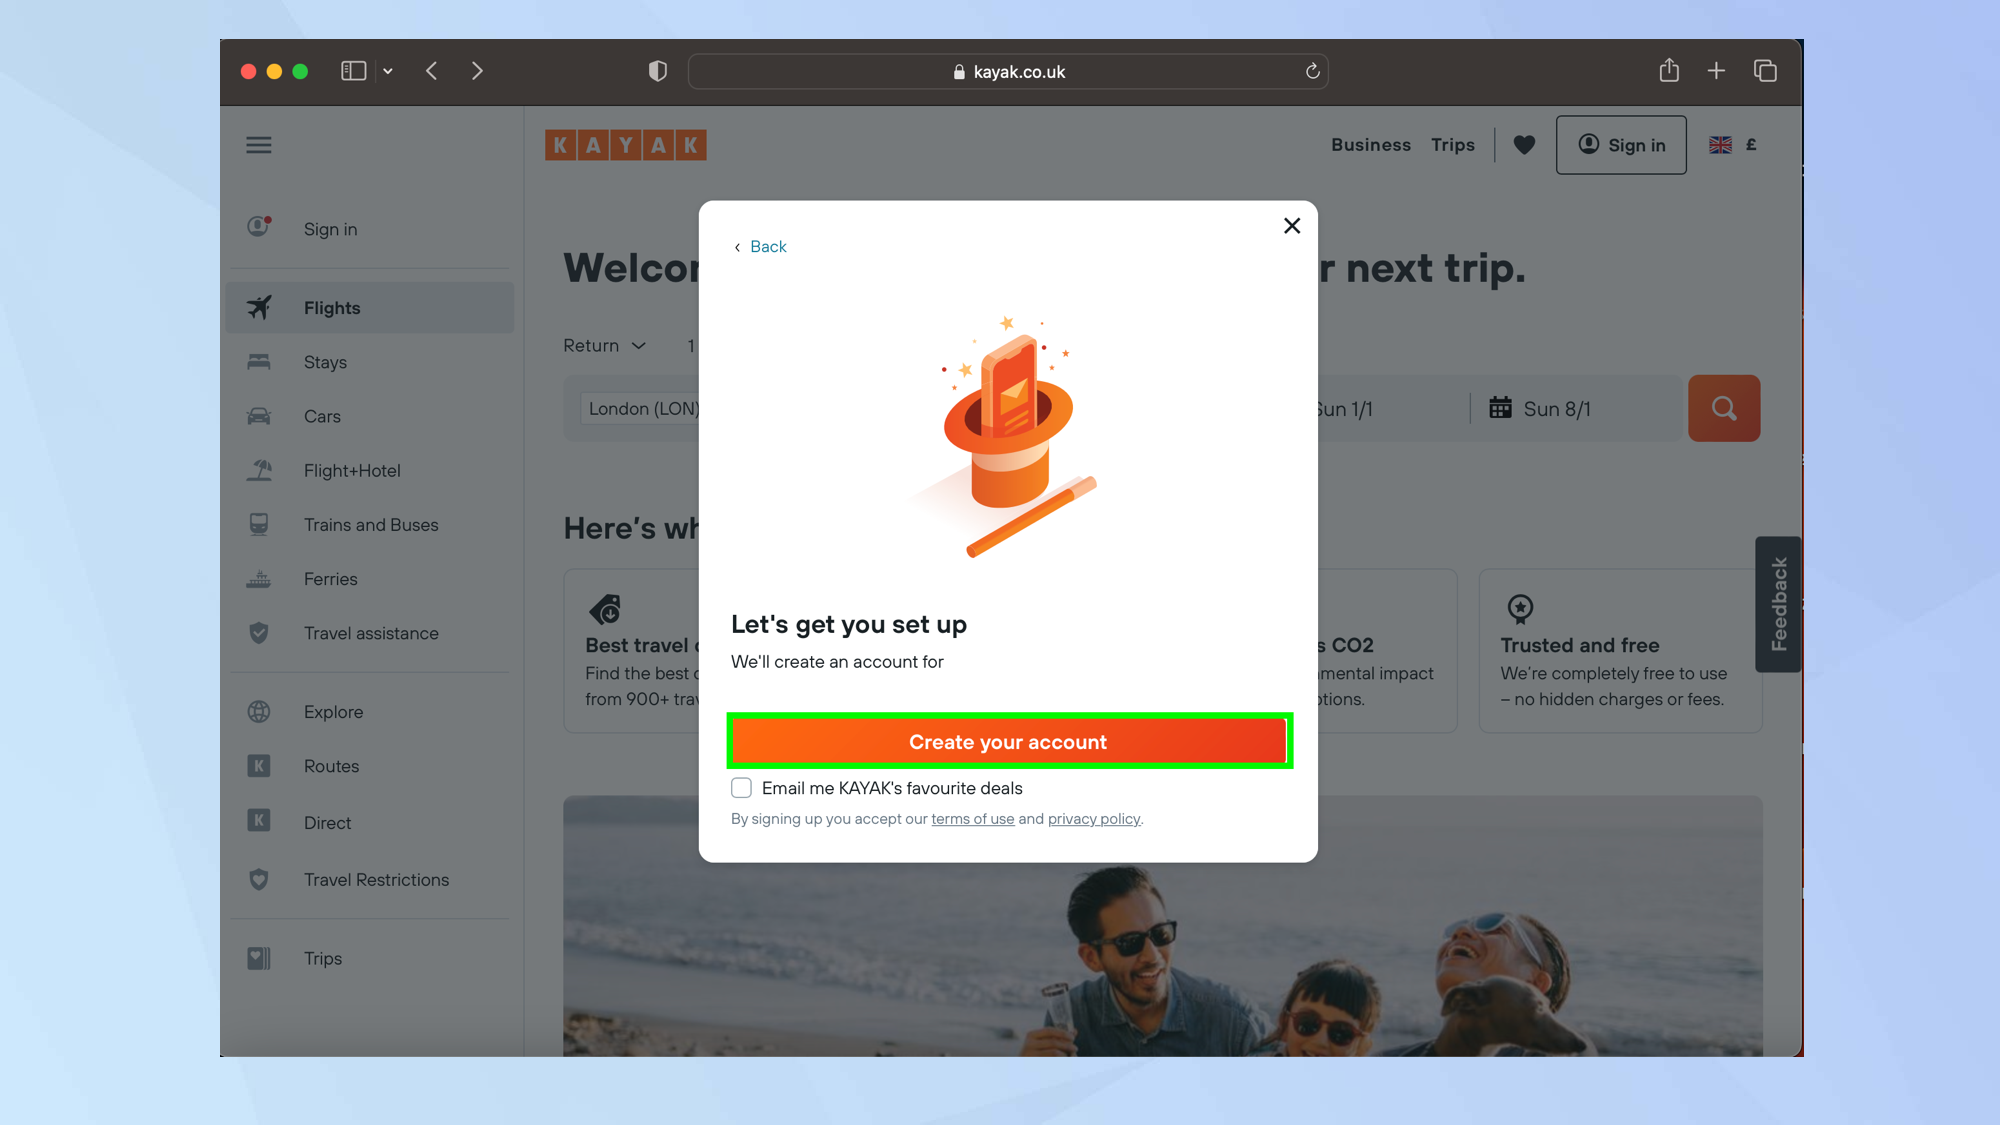
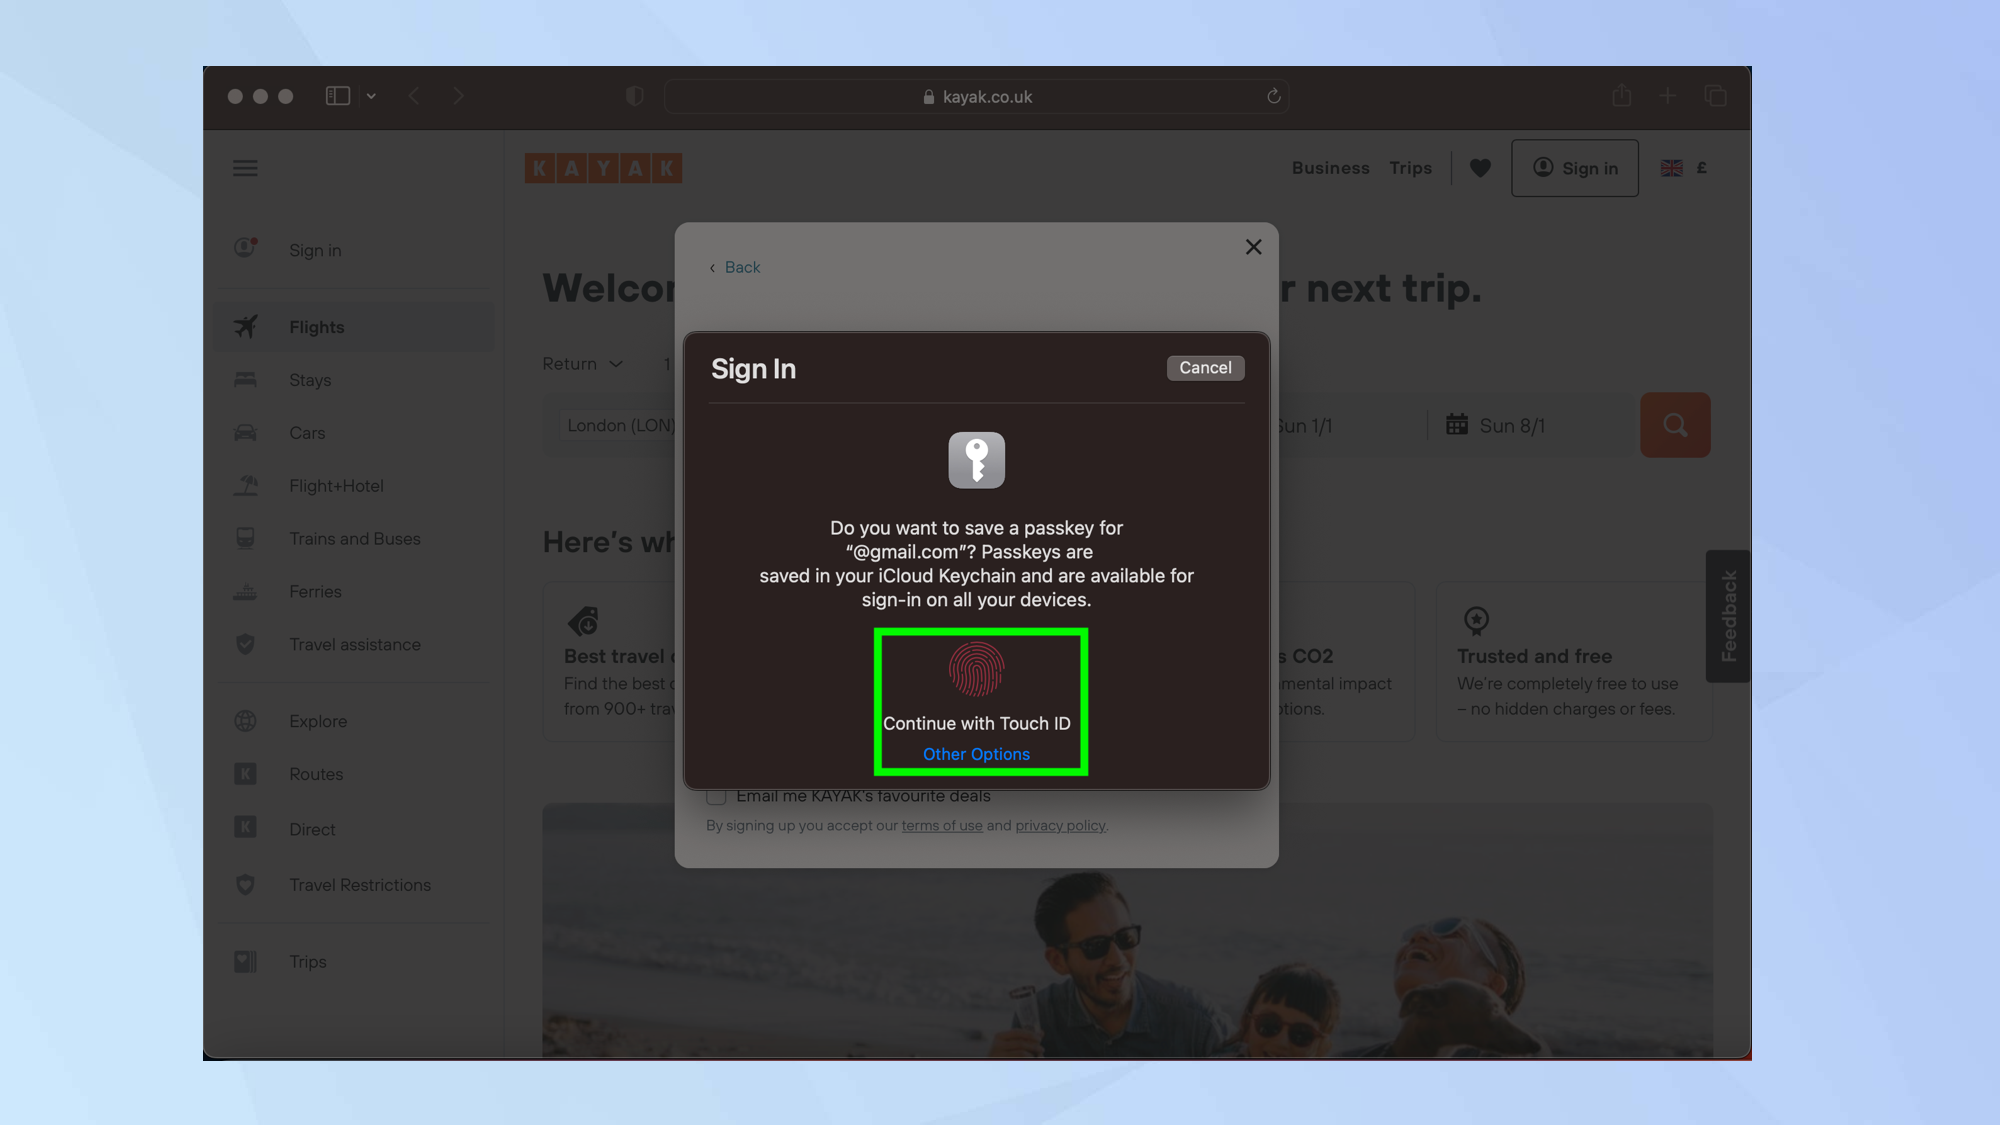
4. When prompted, enter your device passcode or place your finder on the TouchID sensor and the passkey is generated.
Change a password to a passkey
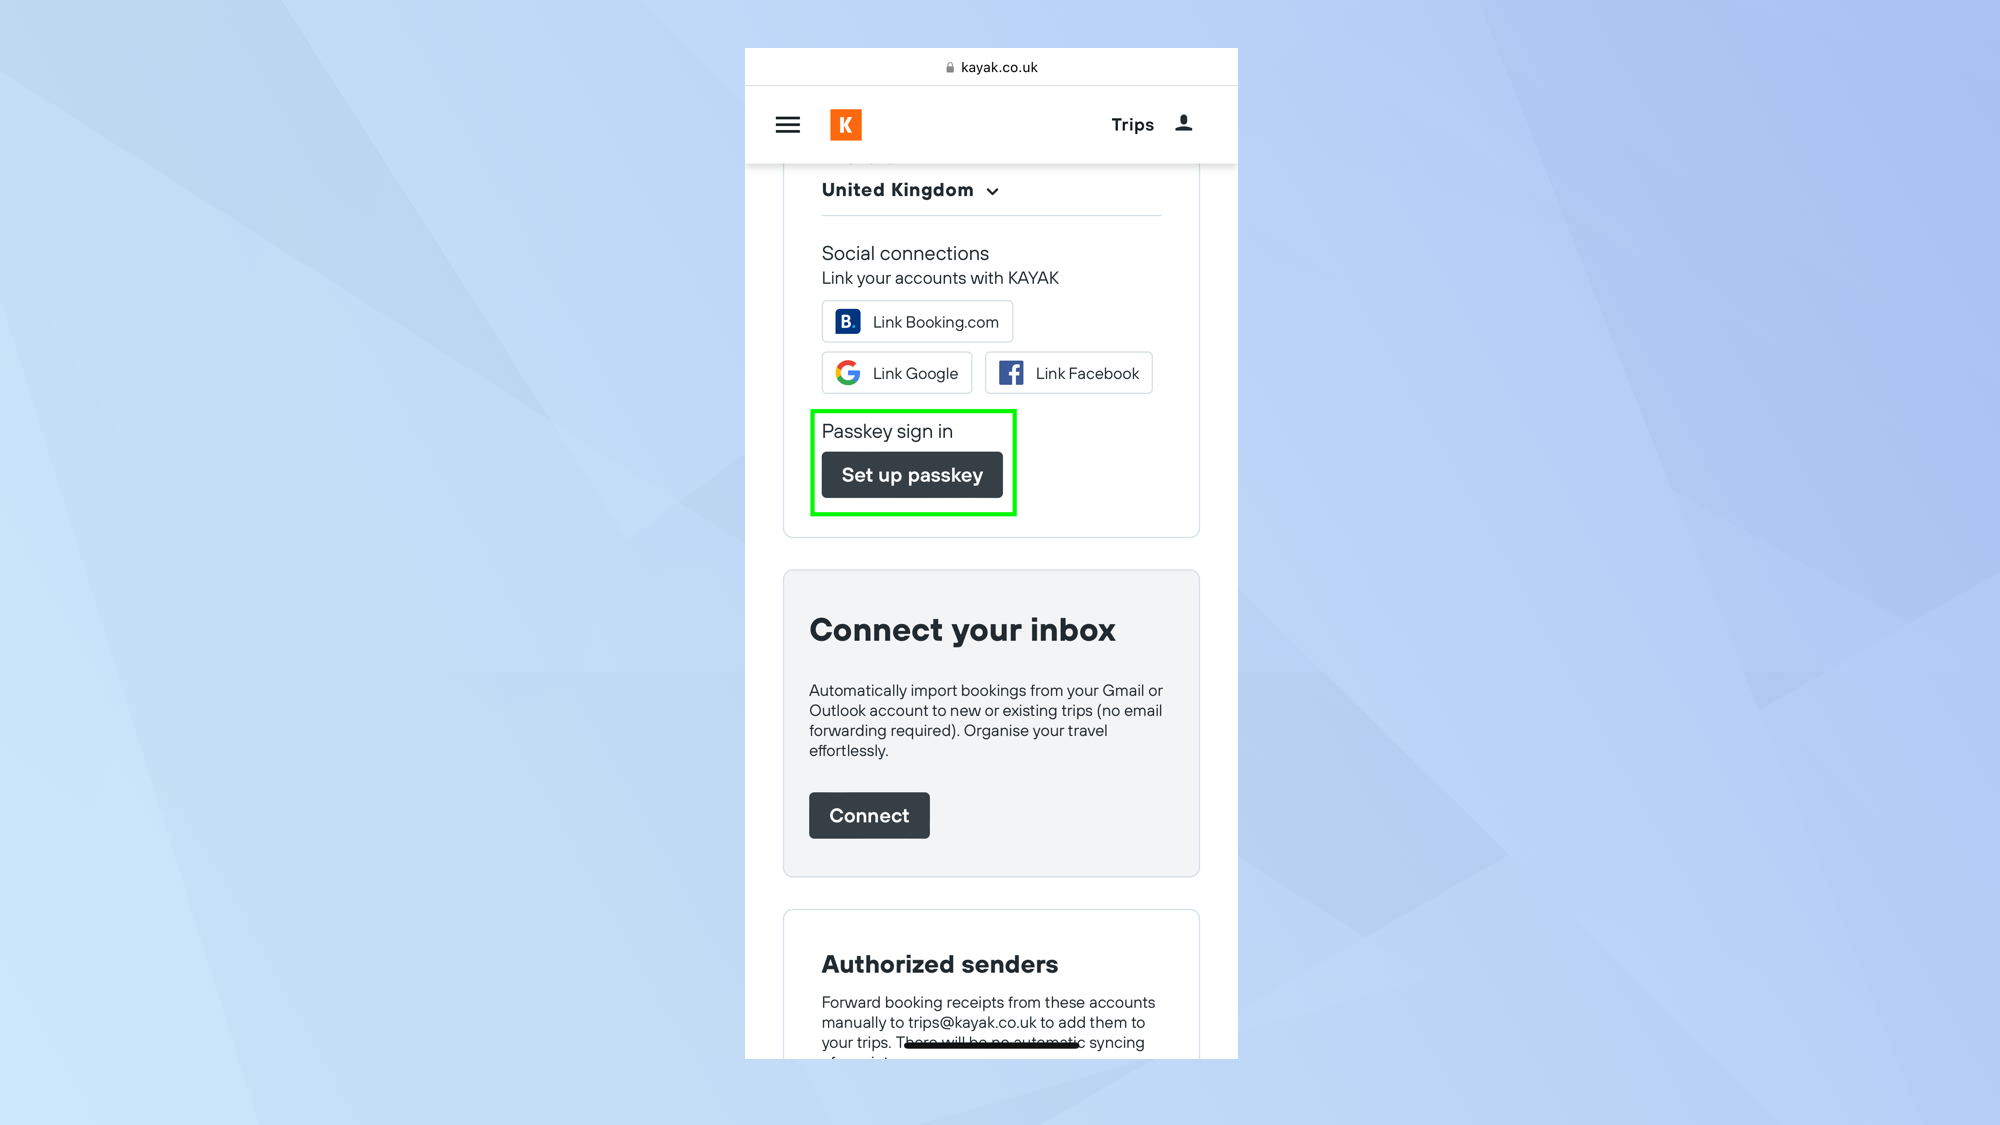
What if you already have an account with a website or app and you'd like to make use of a passkey instead of a password?
Simply go into the account area of that service and you should see an option called Set up passkey. Tap Set up passkey and you will be prompted to save a passkey as in the cases above.
And there you go. You now know how to set up passkeys on an iPhone, iPad and Mac. Apple is not the only company making use of them, so you should see this technology becoming more widespread in the coming years.
If you'd like more help with your tech, you're in luck: we have a huge range of tutorials covering the basics, such as how to transfer data from iPhone to iPhone, to more complicated processes such as how to clear RAM on iPhone, how to change the screenshot location on Mac, and how to clear cache on Mac. Just got a new iPhone 14? Learn how to enable Action Mode on iPhone 14. Windows user? Find out how to enable the Windows 11 Privacy Camera warning.

David Crookes is a freelance writer, reporter, editor and author. He has written for technology and gaming magazines including Retro Gamer, Web User, Micro Mart, MagPi, Android, iCreate, Total PC Gaming, T3 and Macworld. He has also covered crime, history, politics, education, health, sport, film, music and more, and been a producer for BBC Radio 5 Live.
