How to scan on Mac using Preview
To get a paper document on to the screen, you should know how to scan on Mac using Preview

Scanners used to be awkward devices but knowing how to scan on Mac using Preview takes the sting out of the whole process. In fact, Preview makes scanning really easy and it comes with a wealth of built-in options that ensure documents are perfectly replicated on your Mac's display.
Here we're going to take a look at how it all works, assuming that you already know how to connect your scanner to your computer (check the instructions which came with the device but it's often as simple as plugging it in via the USB port).
Of course, this process also works if you have one of the best all-in-one printers which is generally the case for most people who own a scanner. So without further ado, let's take a look at how to scan on Mac using Preview.
Scan documents on a Mac using Preview
Preview is an app built into macOS so you don't need to download any extra software.
1. Grab a document
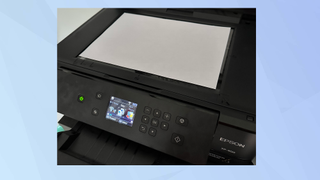
Once you've identified something you want to scan, be it a letter, receipt, magazine page and so on, place the document on to the scanner bed (or into a scanner's document feeder, depending on the type of device you own).
2. Launch the Preview app
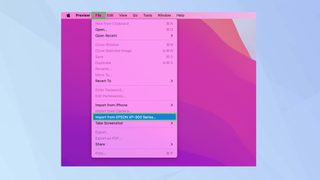
Now open the Preview app and select File. Select Import from Scanner. You may find that your scanner's name is displayed instead (for example, our scanner is the Epson XP-900).
3. Show more details
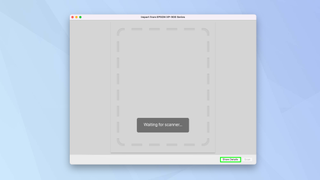
While the scanner is getting ready (which shouldn't take all that long), you can click Show Details. This will display a range of options, giving you more control over your scan.
4. Select the options
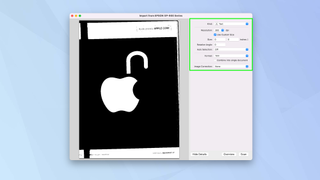
The scanner automatically kicks into action and scans your document as a preview. This will display to the left of the import window. Look to the right, however, and you will be able to fine-tune the scan.
5. Choose the document type
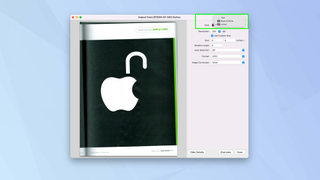
One of the most important options to pay attention to is Kind. Click the Kind drop-down menu and you can select Text (perfect for documents that are predominantly made up of words), select Black & White if you're after a grayscale image or select Color for colour images.
6. Make your amends
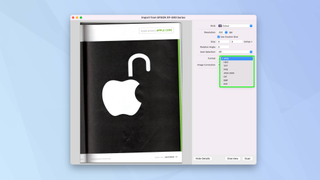
You can then continue down the list.
Select Resolution if you want your scan to less or more sharp (the DPI stands for dots per inch and the more dots there are, the higher quality your image is going to be – higher quality images also have larger file sizes).
You can also alter the size in inches, centimetres or pixels. And you can choose a file format (including JPEG, HEIC, TIFF, PNG, JPEG 2000, GID, BMP and PDF).
7. Correct the image
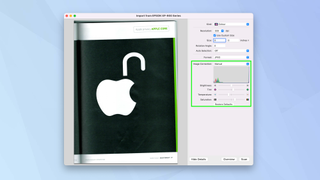
It is also possible to manually alter an image. Although Image Correction is turned on by default, change Image Correction to Manual for more options. You can alter the brightness, tint, temperature and saturation of an image. If you make a mistake, click Restore Defaults.
8. Scan your document
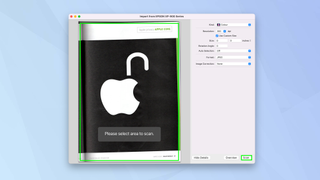
Once you are satisfied with your amendments, click Scan. Preview will ask you to select an area you wish to scan so use your mouse or a trackpad to draw a box around the part of the image you want to retain.
9. See the completed result.
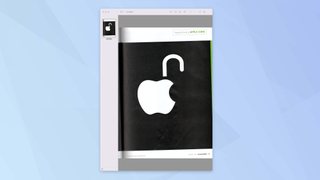
Once done, click Scan again and an image will be created to your specifications which you can then save.
And there you go. You now know how to scan on Mac using Preview but there are many things you could do with your scanned images from this point. You could learn how to edit photos on Mac using macOS Photos or maybe figure out how to resize an image for sharing online. If you've scanned a document, then discover how to edit a PDF on Mac. But what if you don't have a scanner? Well, here's how to use your iPhone's hidden document scanner instead. In fact, why not check out these 17 hidden iPhone features that will make your life easier?
Sign up to get the BEST of Tom's Guide direct to your inbox.
Get instant access to breaking news, the hottest reviews, great deals and helpful tips.

David Crookes is a freelance writer, reporter, editor and author. He has written for technology and gaming magazines including Retro Gamer, Web User, Micro Mart, MagPi, Android, iCreate, Total PC Gaming, T3 and Macworld. He has also covered crime, history, politics, education, health, sport, film, music and more, and been a producer for BBC Radio 5 Live.
