How to remap keys on Windows
Remap keys on Windows 11 using Power Toys
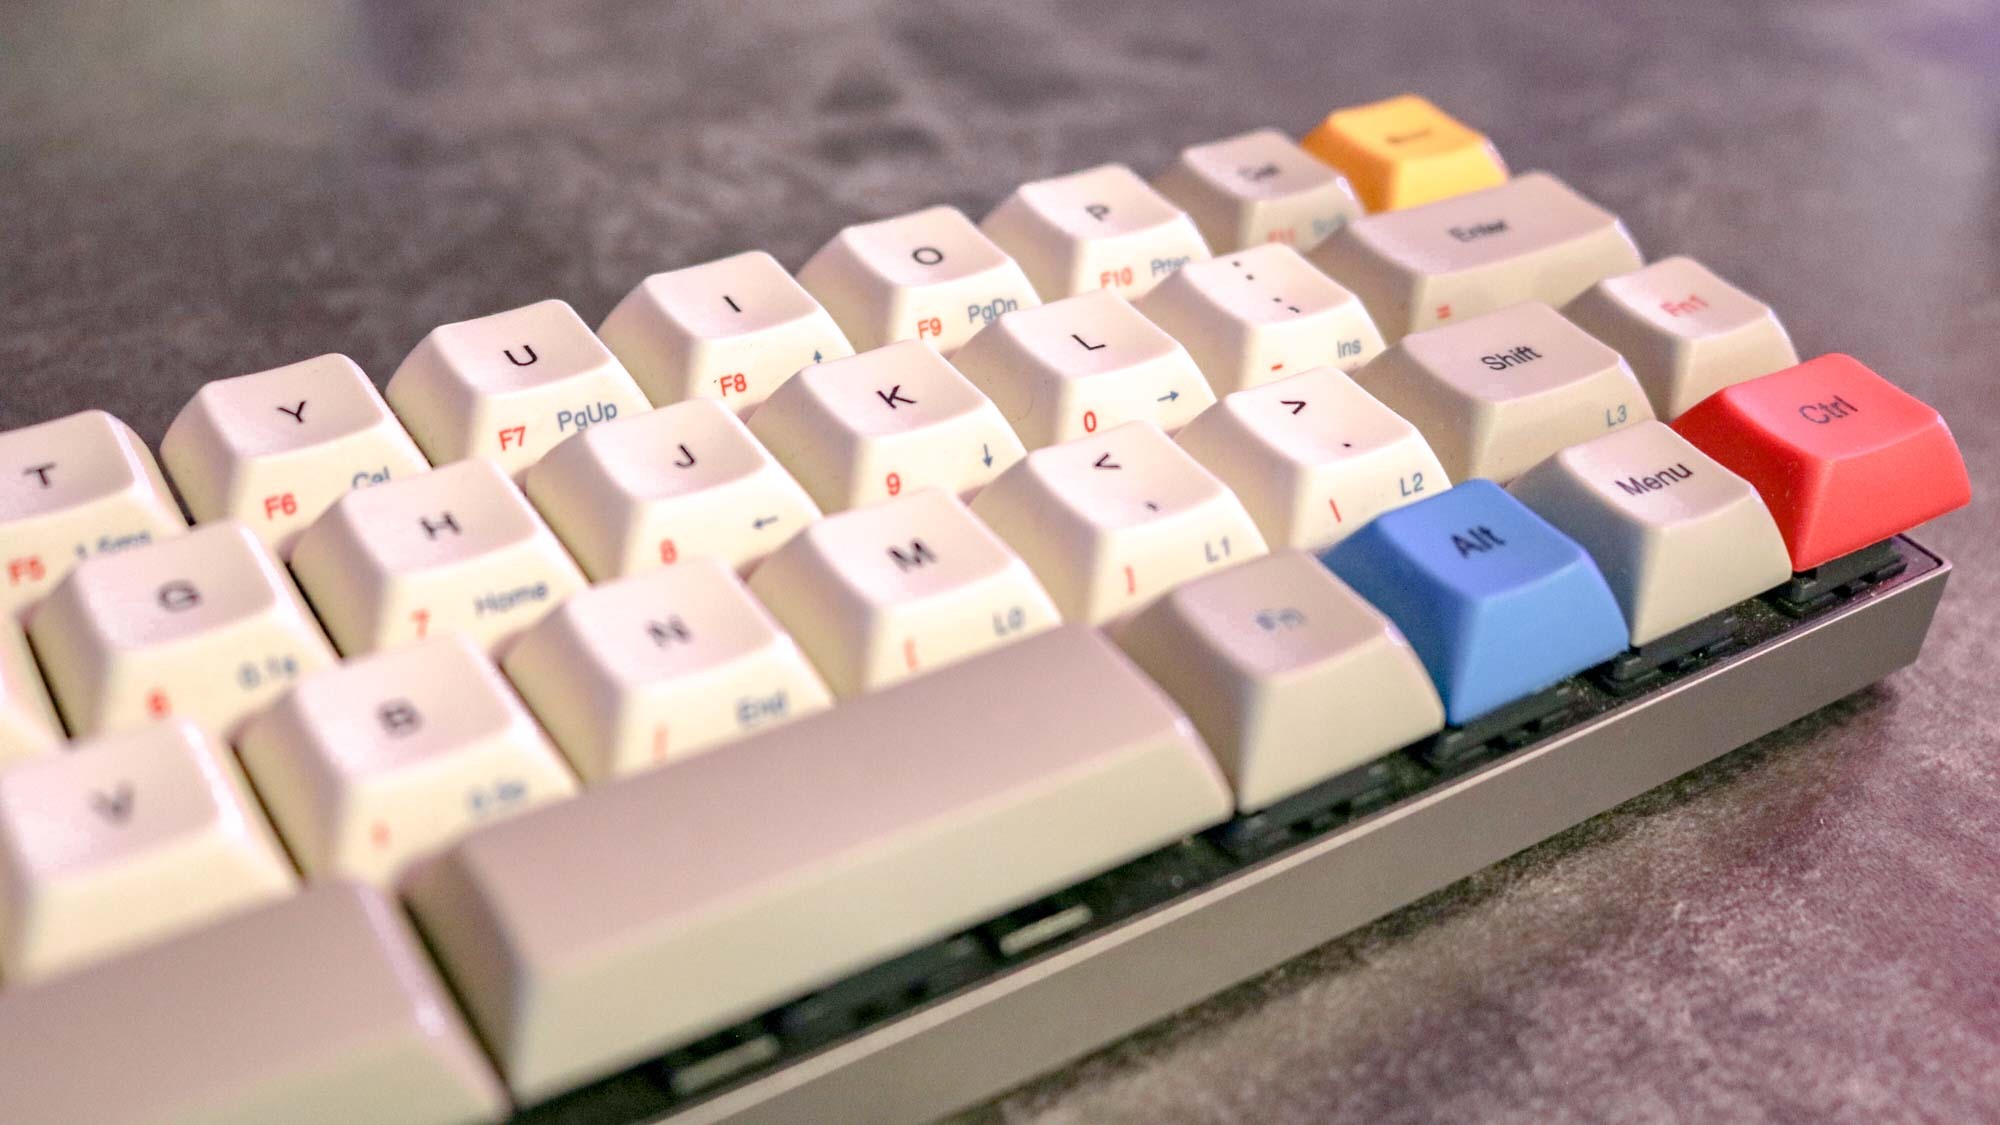
Knowing how to remap keys on Windows 11 is one of those fundamental skills for any PC user. When you learn how to remap the Windows keyboard, you can set up custom shortcuts for quick access to your most-used functions and ensure your inputs do exactly what you want to.
Thankfully, Microsoft has made it easy for you to remap keys on Windows using PowerToys — a set of official Windows tools to give power users full control over their machine. If you've never used or heard of Power Toys before, you'll want to first follow our guide on how to get Power Toys on Windows 11.
If you already have access to PowerToys, let's get on with learning how to remap keyboard keys on Windows.
How to remap keys on Windows 11
Before you start: remap shortcuts with a little bit of caution as it can cause headaches down the line, but don't worry about messing things up permanently. You can always undo the remaps that you apply with a simple click of the trash can in Keyboard Manager.
1. Open Power Toys and enable Keyboard Manager
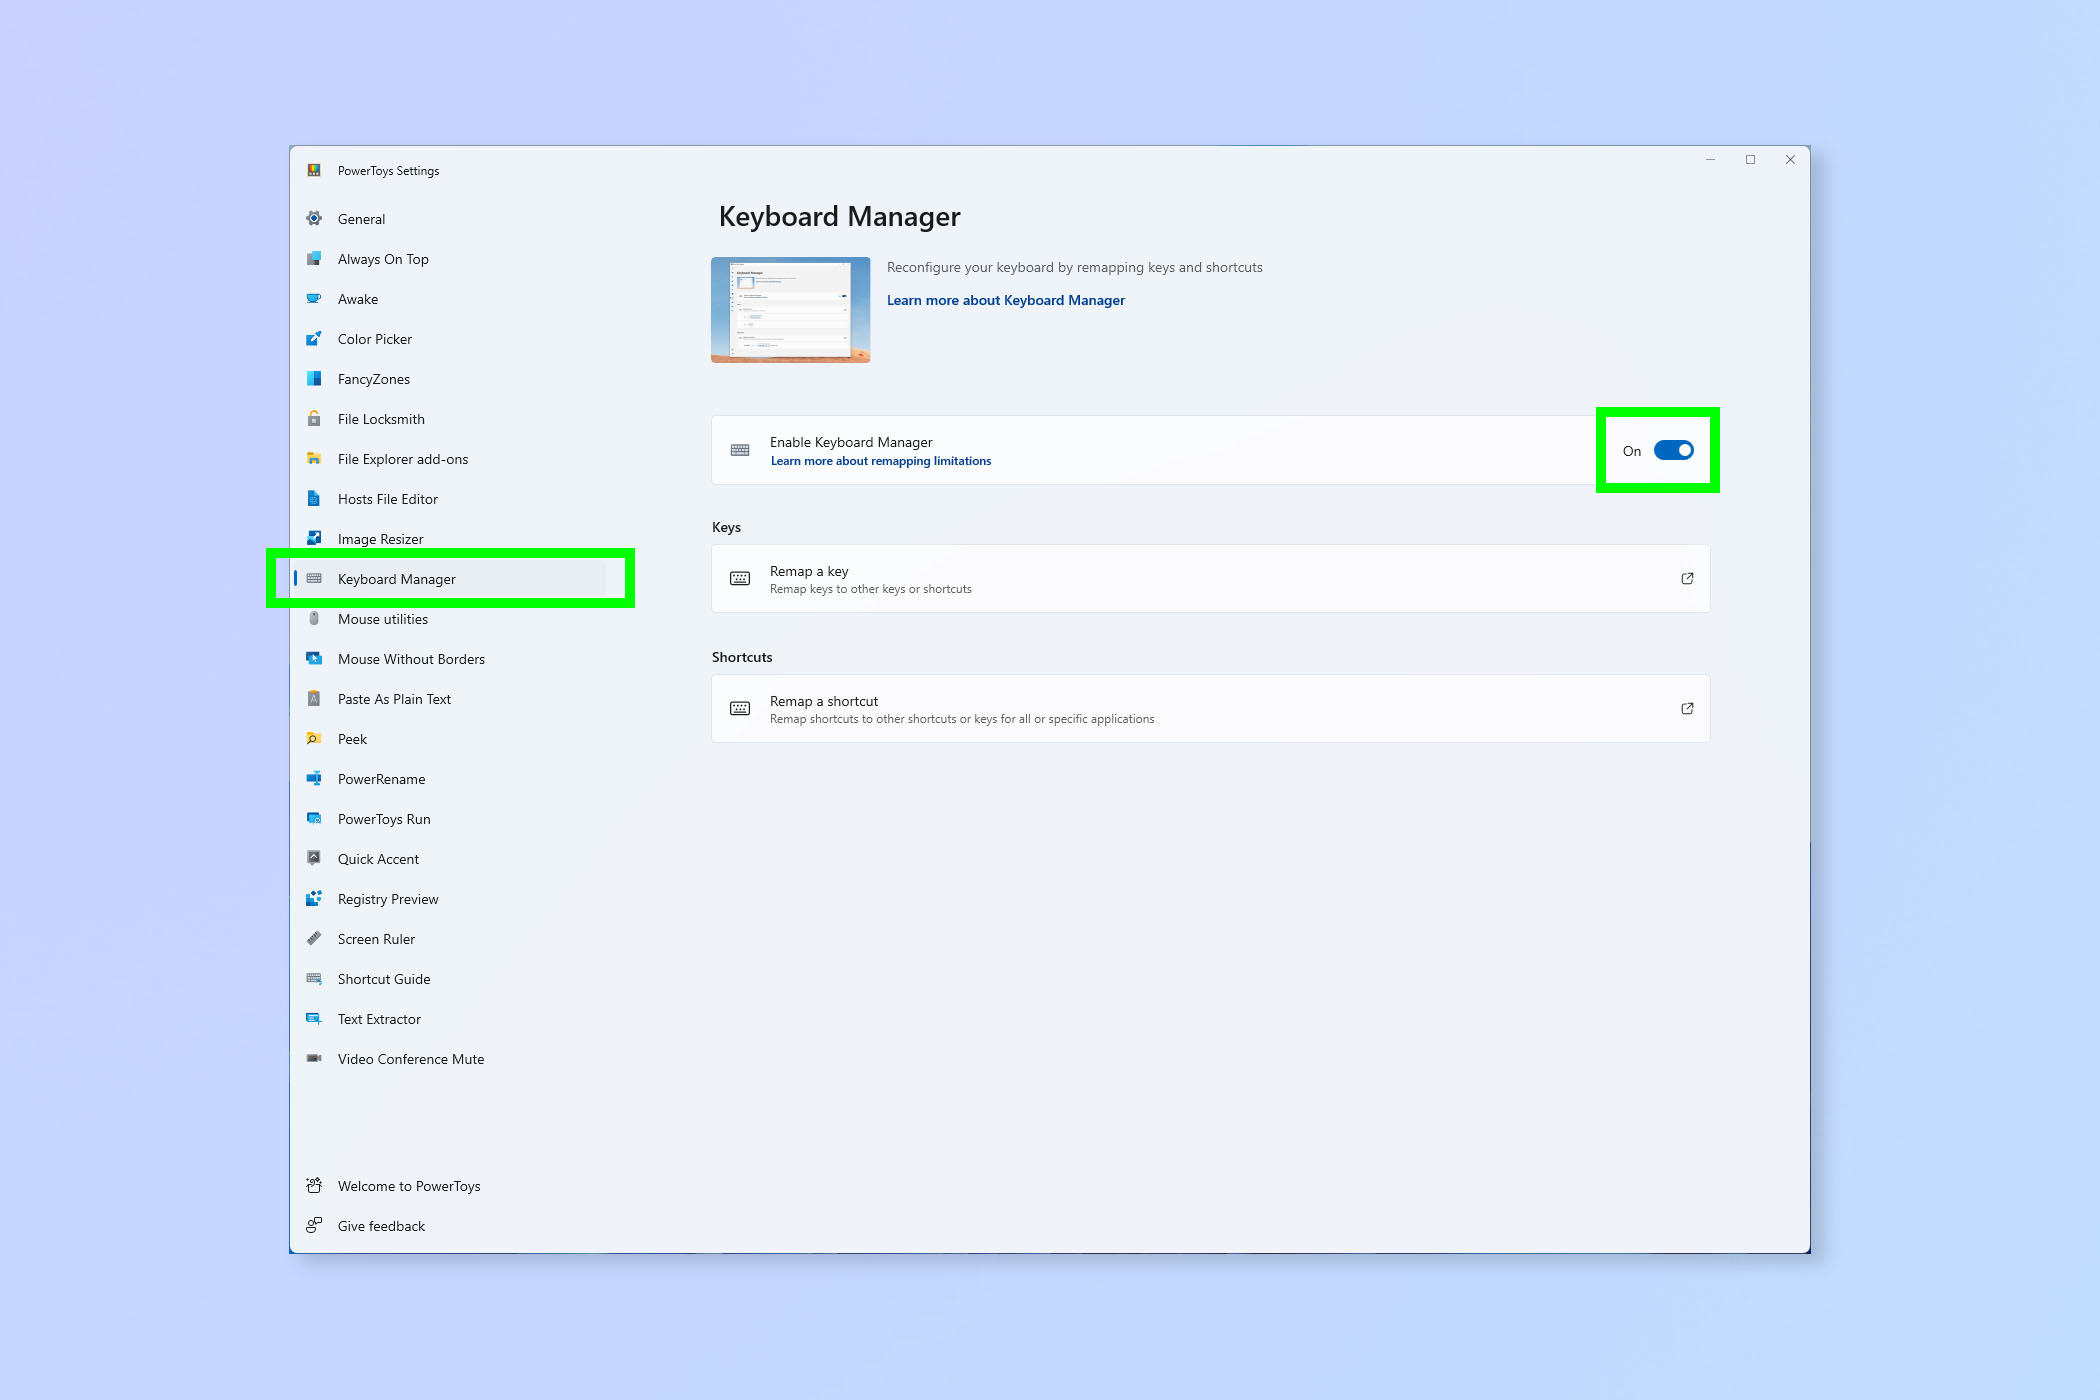
First up, open the PowerToys app and click Keyboard Manager in the left-hand menu. Toggle Keyboard Manager on if it isn't on already.
2. Click Remap a key
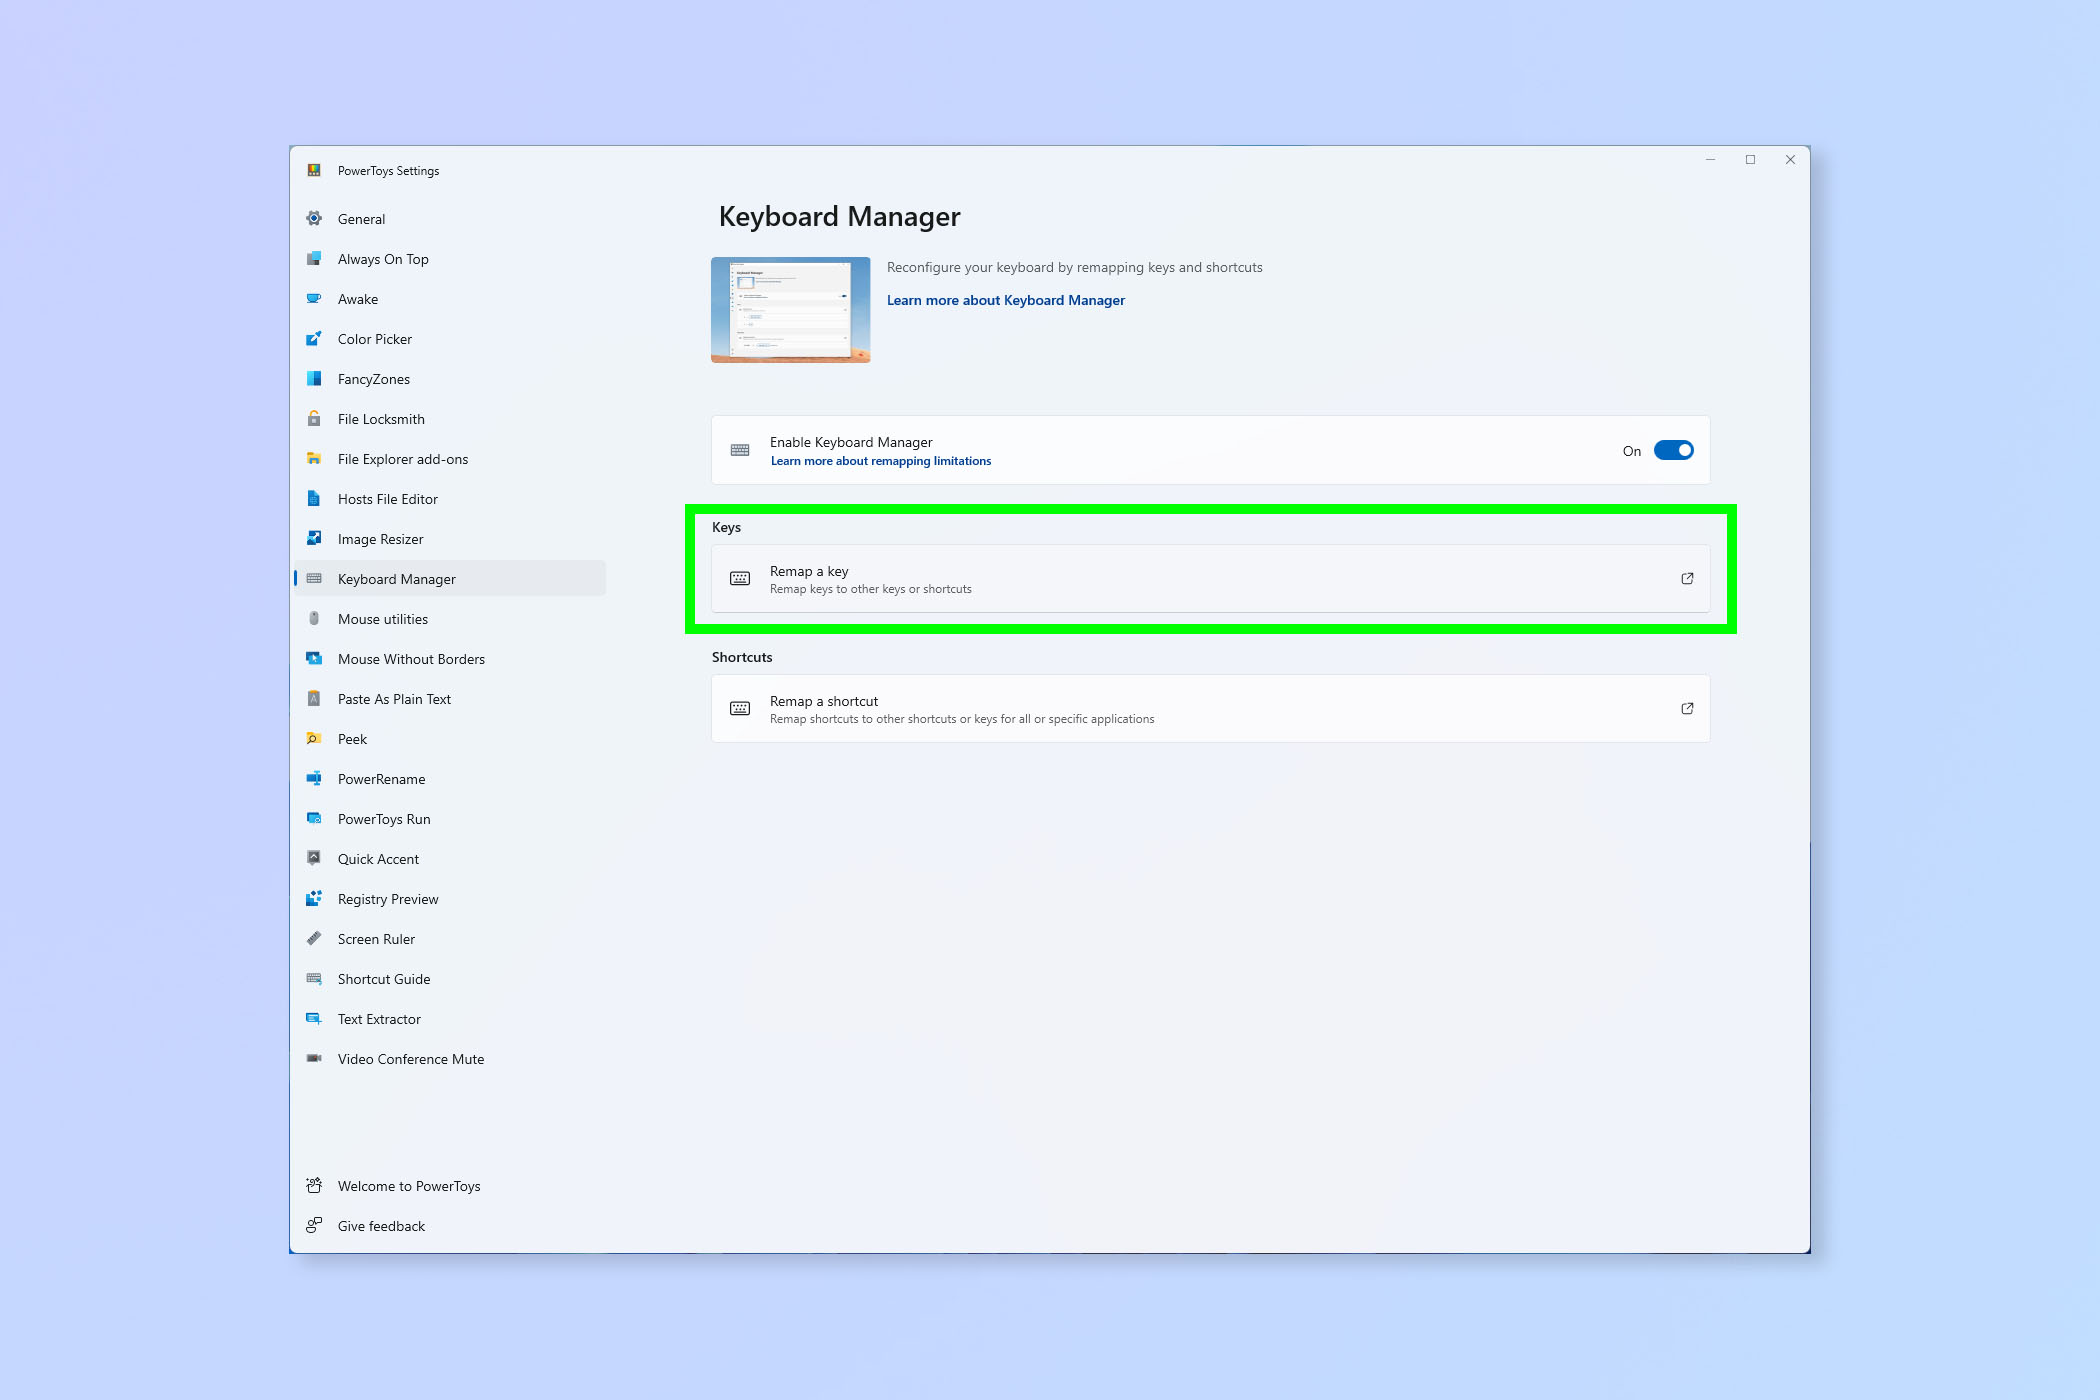
Now select Remap a key.
3. Add a remap
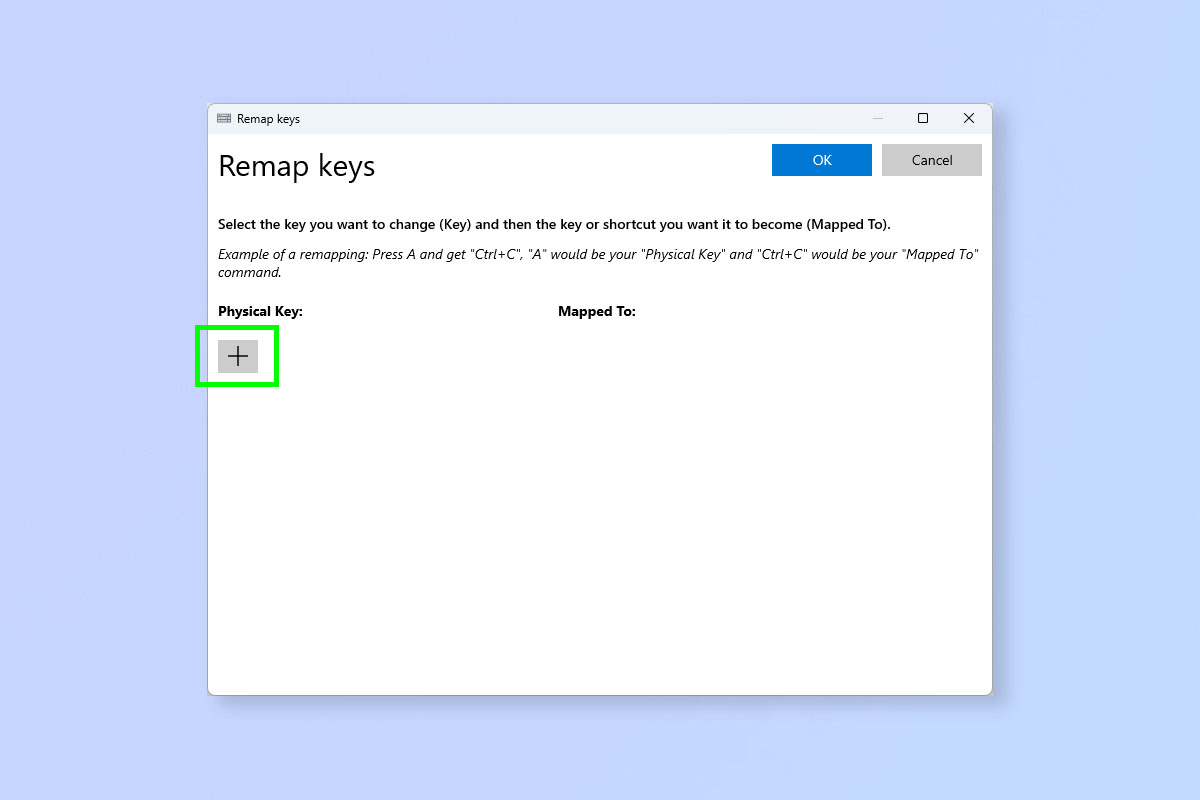
Now click the plus symbol to add a remap.
4. Select or type your keys and maps
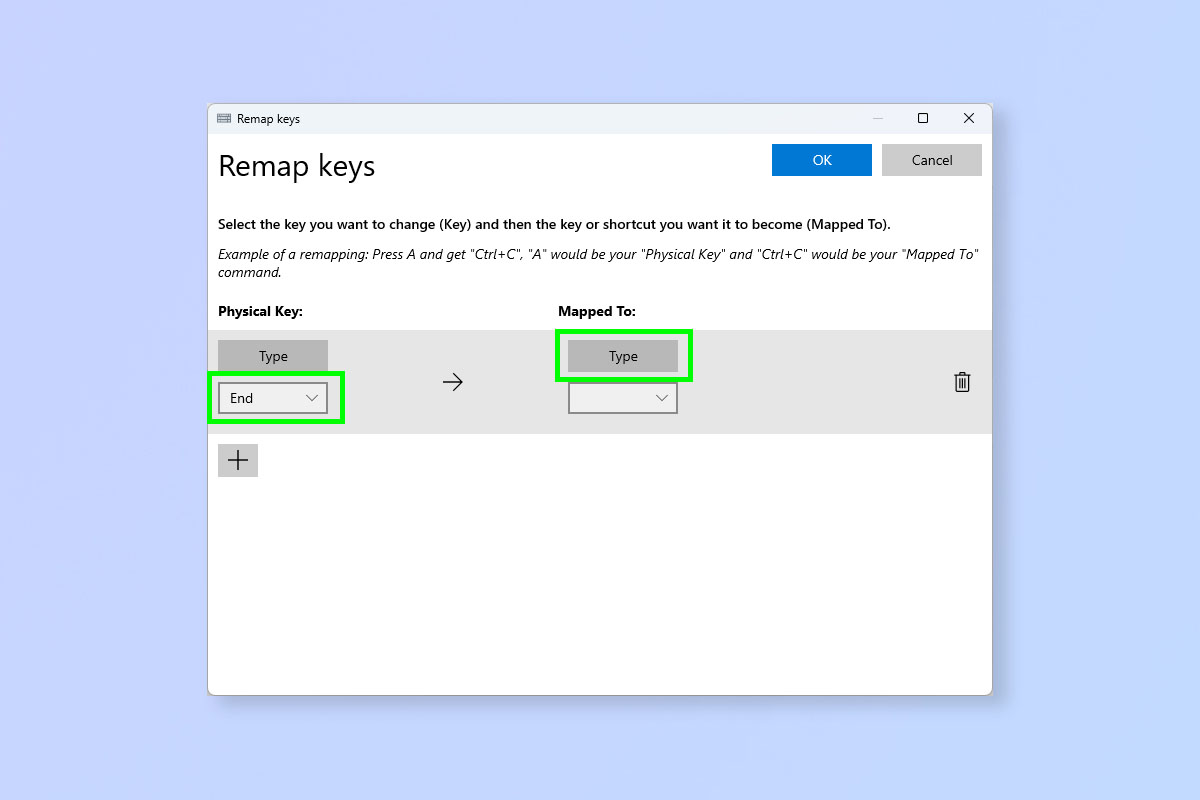
Now select a Physical Key and a Mapped To key or shortcut. When you press the Physical Key, you will instead get the Mapped To key or command.
There are two ways you can do this: you can either click the dropdown menu under each heading and select from a list of key commands; or you can click Type and press the specific keys you want to remap.
5. (If typing) Type your keys or shortcuts
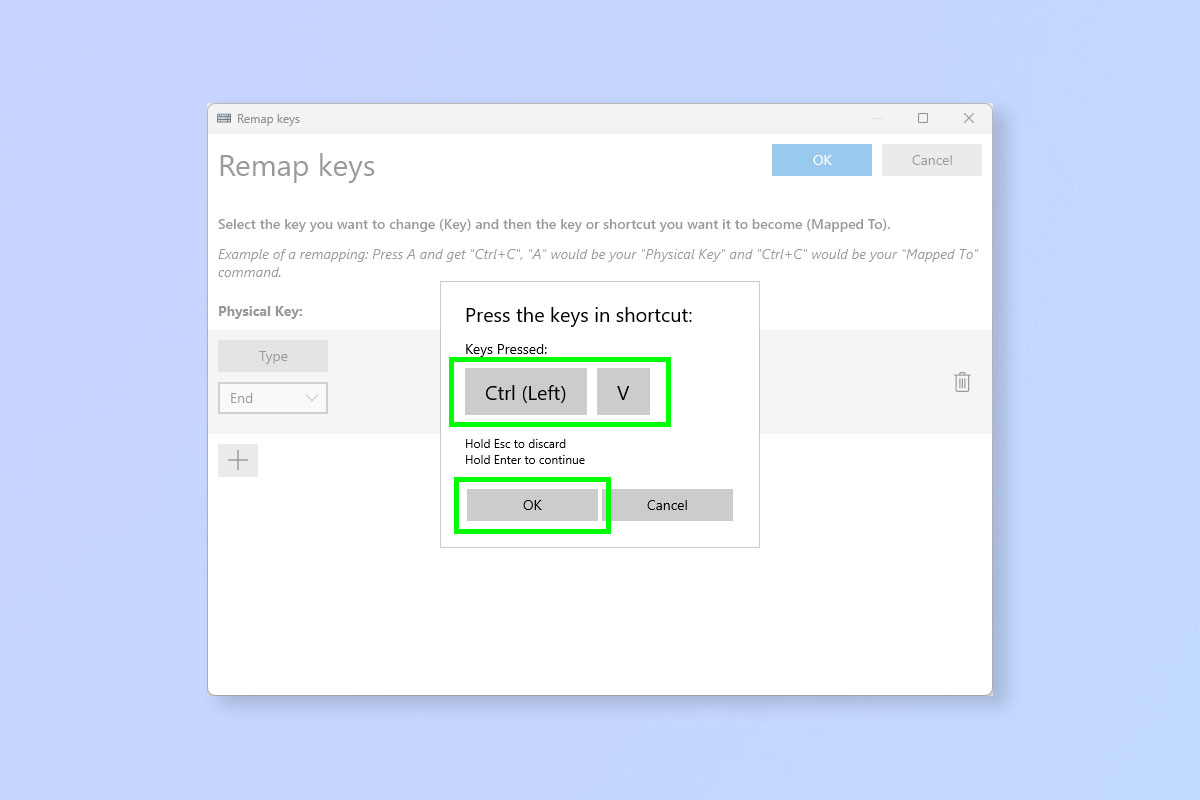
If you're punching in the keys yourself, press the keys you want to use and click OK.
6. Click OK
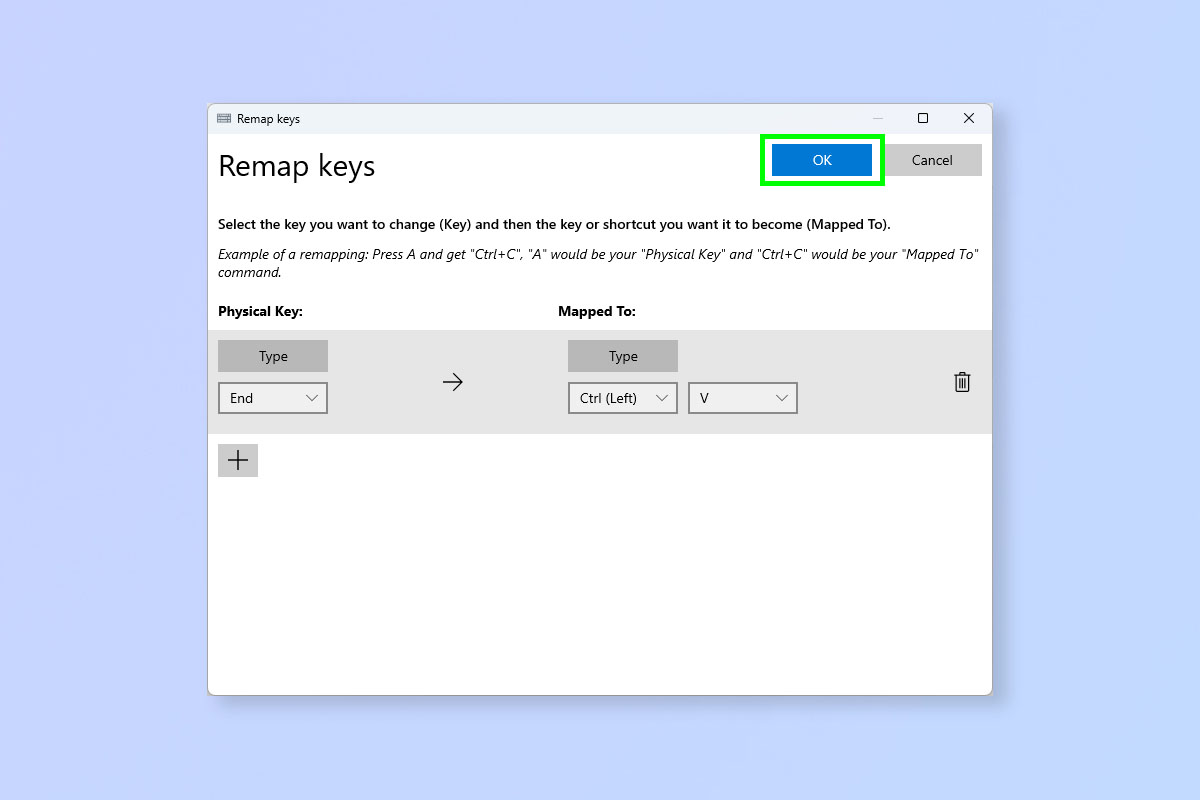
Now just click OK to finalize your changes. You can see that here, when I press the End key, Windows will instead run Ctrl+V, or paste.
Note: to delete a remap, repeat steps 1-2 and click the trash can icon next to the remap you want to remove.
That's all there is to it. If you'd like to read more about the cool ways you can use PowerToys, check out our range of other tutorials. We can show you how to use PowerRename to bulk rename files and how to keep your computer awake with PowerToys Awake. You might also be interested in learning about how to customize the Windows 11 Start menu.
Sign up to get the BEST of Tom's Guide direct to your inbox.
Get instant access to breaking news, the hottest reviews, great deals and helpful tips.

Peter is a Senior Editor at Tom's Guide, heading up the site's Reviews team and Cameras section. As a writer, he covers topics including tech, photography, gaming, hardware, motoring and food & drink. Outside of work, he's an avid photographer, specialising in architectural and portrait photography. When he's not snapping away on his beloved Fujifilm camera, he can usually be found telling everyone about his greyhounds, riding his motorcycle, squeezing as many FPS as possible out of PC games, and perfecting his espresso shots.
