How to quickly convert image files on Mac
Need that .JPG as a .PNG? here's how to quickly convert image files on Mac
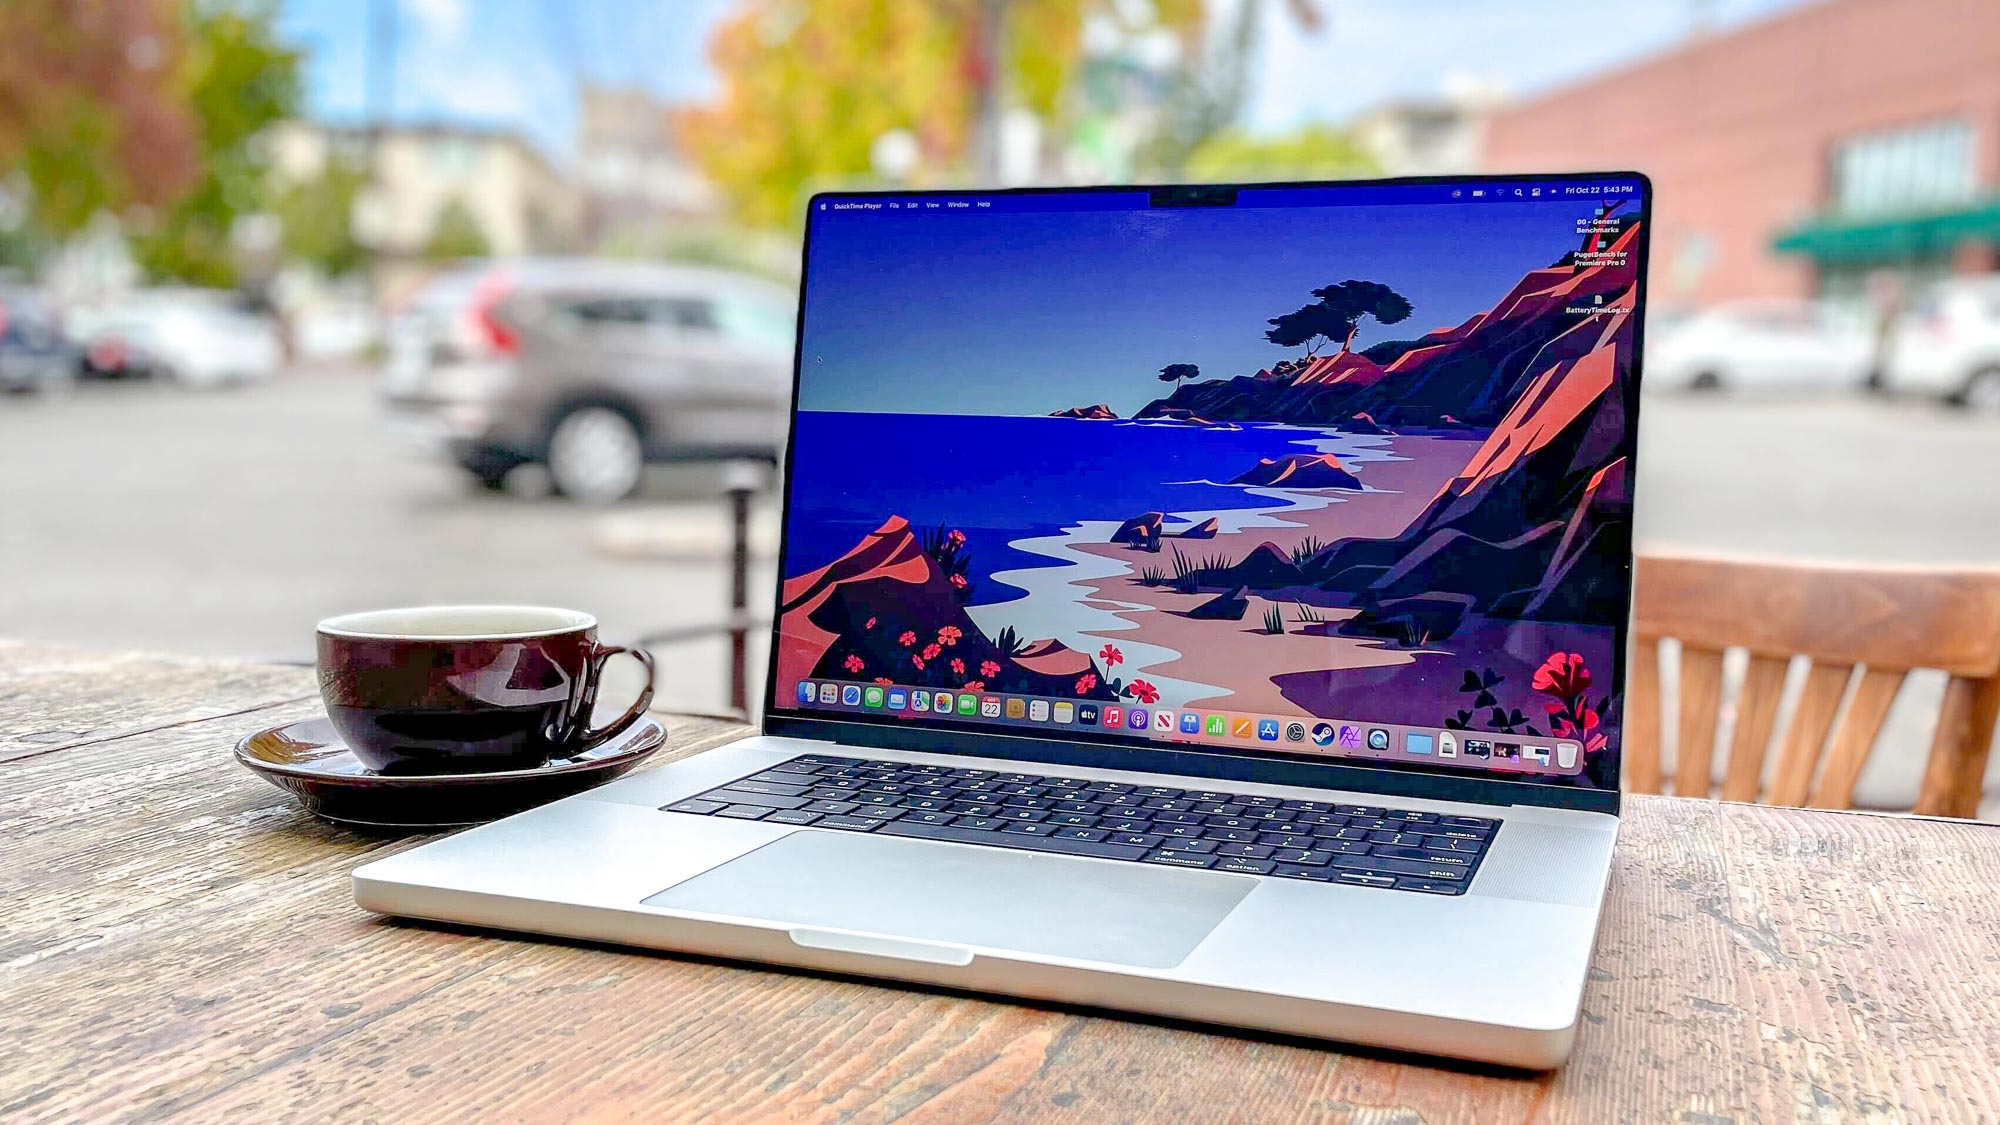
If you need to convert image files on Mac, you're in luck, because macOS comes with a built-in converter to quickly change the file format of common image files.
If you're anything like me, converting image file formats is something you have to do regularly. Mostly, I find myself needing to convert HEIC files to JPEG, so they can be easily used on a wide variety of devices without needing conversion on the devices themselves. I also regularly need to shrink image files sizes down in order to be able to upload them into one of the systems we use here at Tom's Guide.
The image file converter on my MacBook Pro is awesome for doing all of the above quickly. It only lets you convert to JPEG, PNG and HEIF. However, it will allow you to convert from other file formats. For example, I recently used this tool to convert a huge 55MB TIFF file into a more usable sub-10MB JPEG.
While it obviously doesn't give you all the options of the best photo editing software, I love this tool, primarily because it's so useful in everyday usage, where I don't need the full might of Photoshop. This tool gives me a quick and easy solution to a commonly-faced problem. It's thoughtful and practical hacks like this which, for me, make Macs some of the best computers and best laptops out there.
How to convert image files on Mac
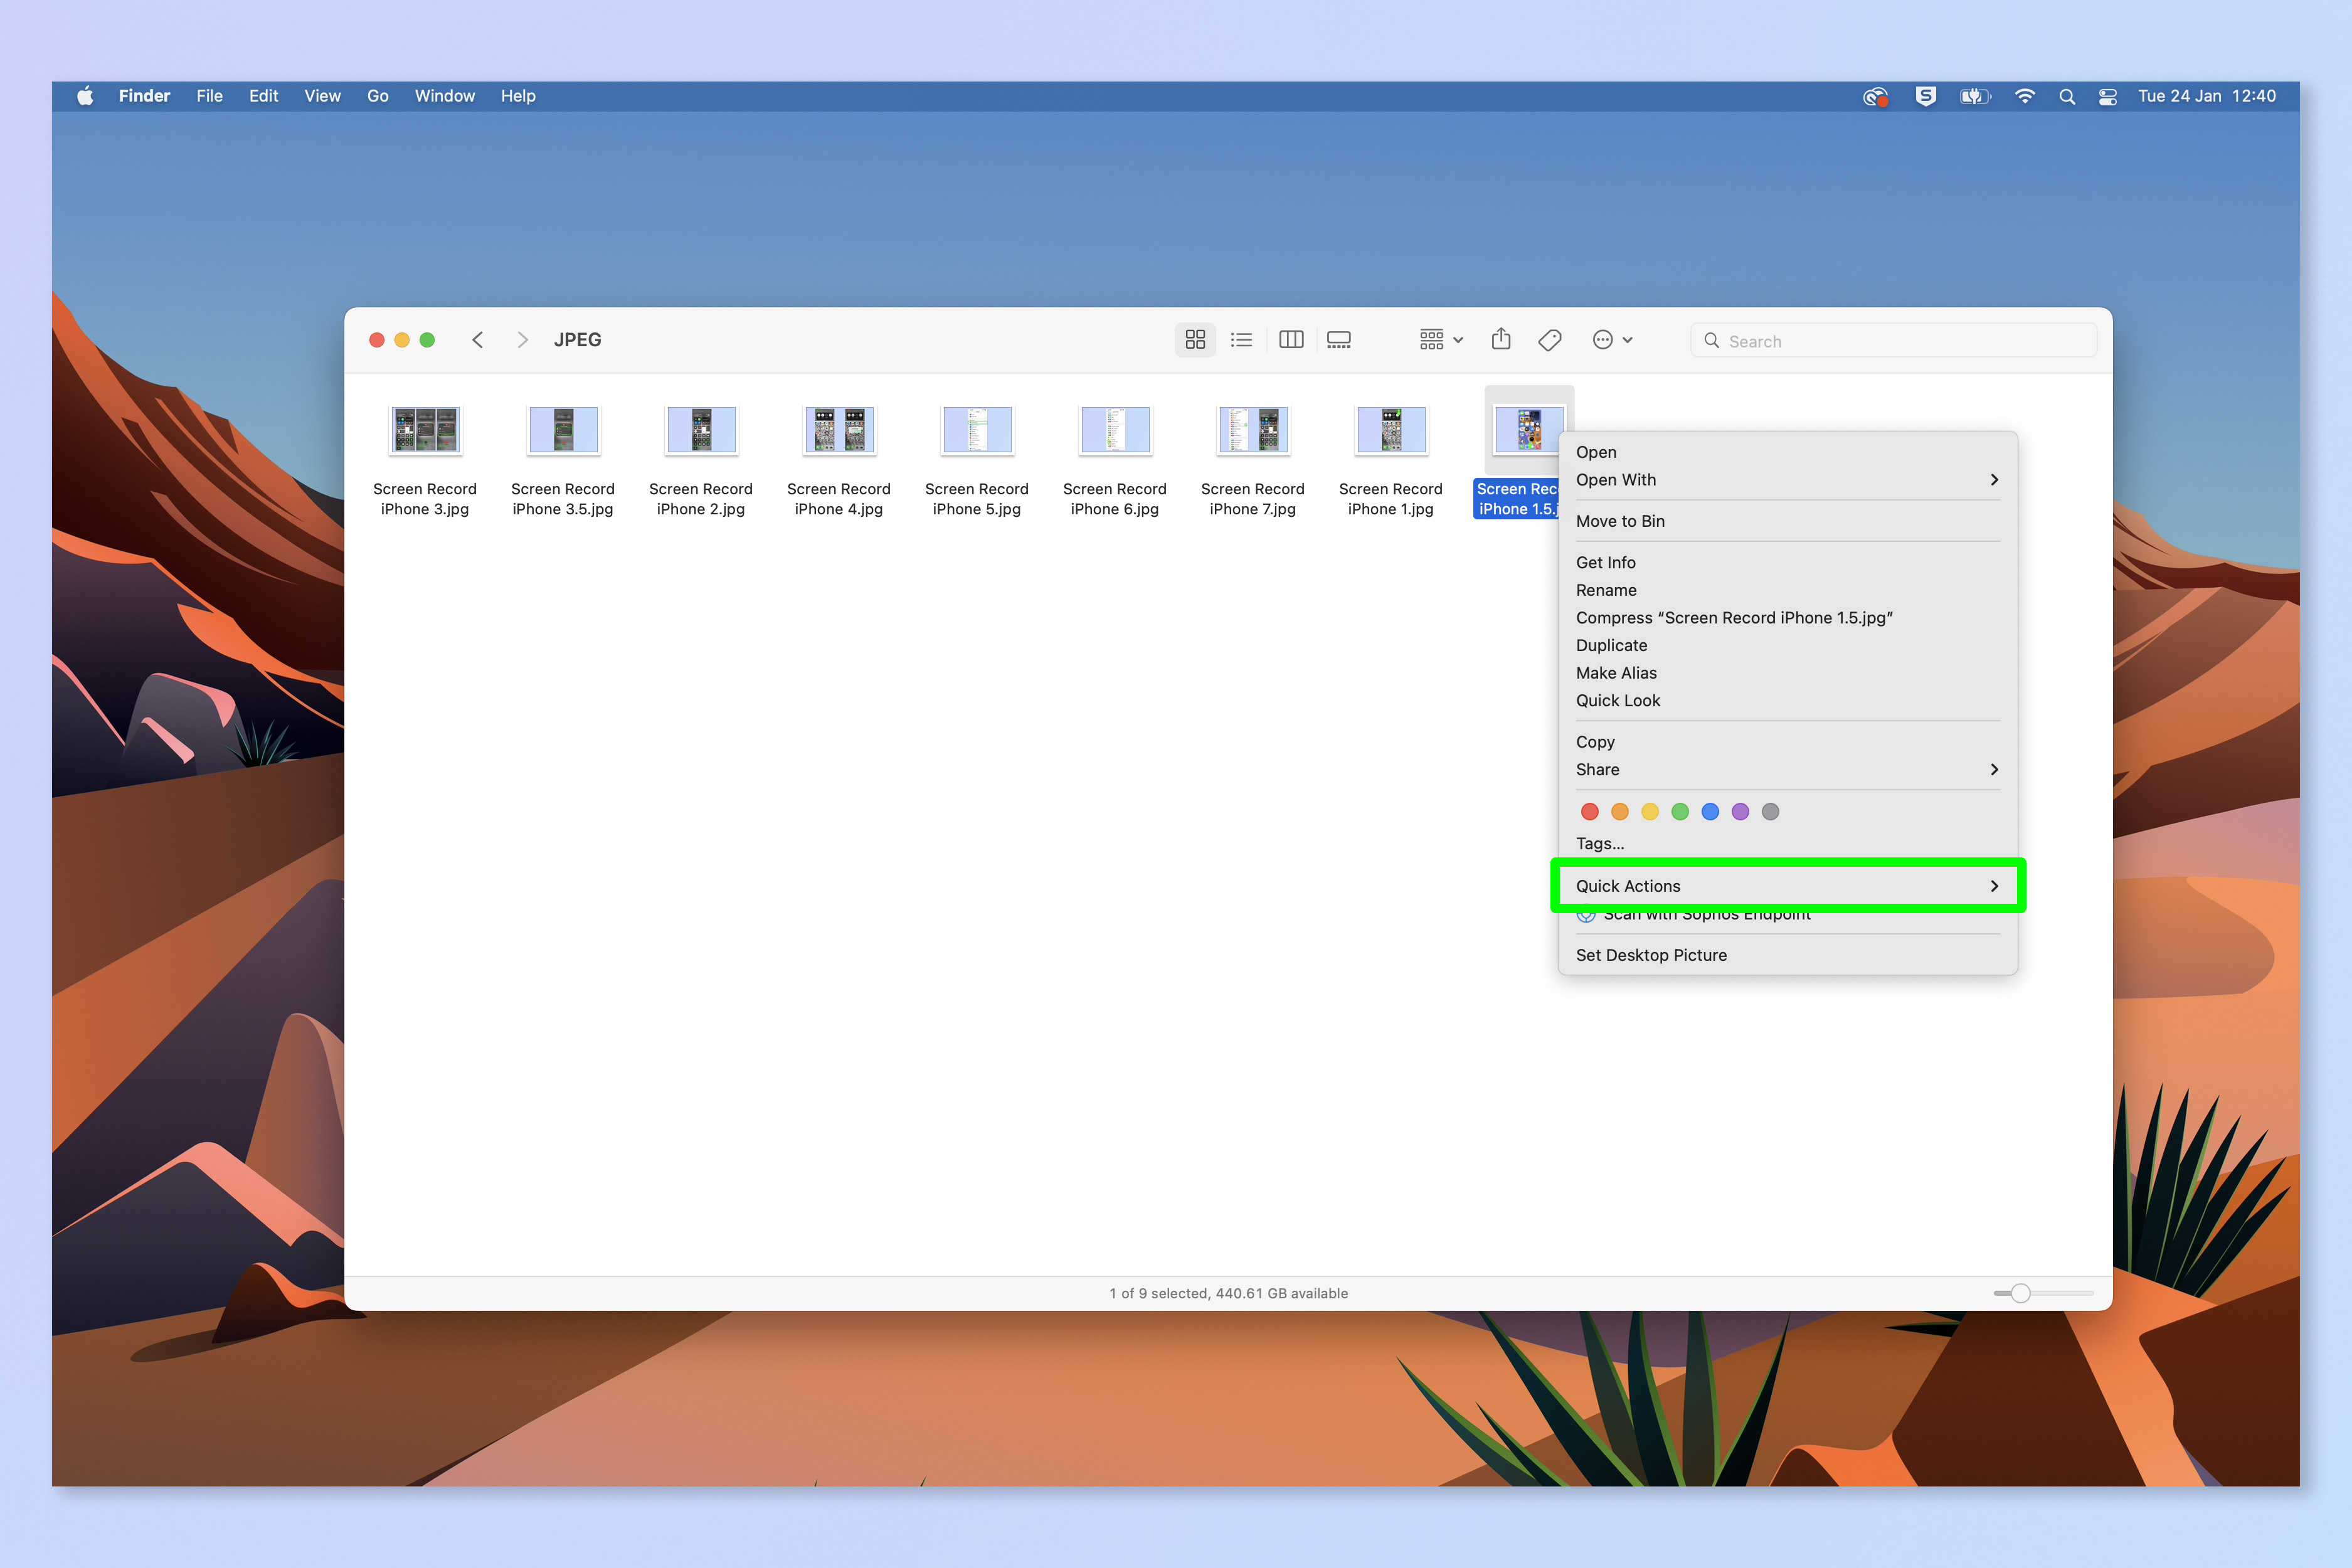
1. In Finder, right click on the image file and hover over Quick Actions.
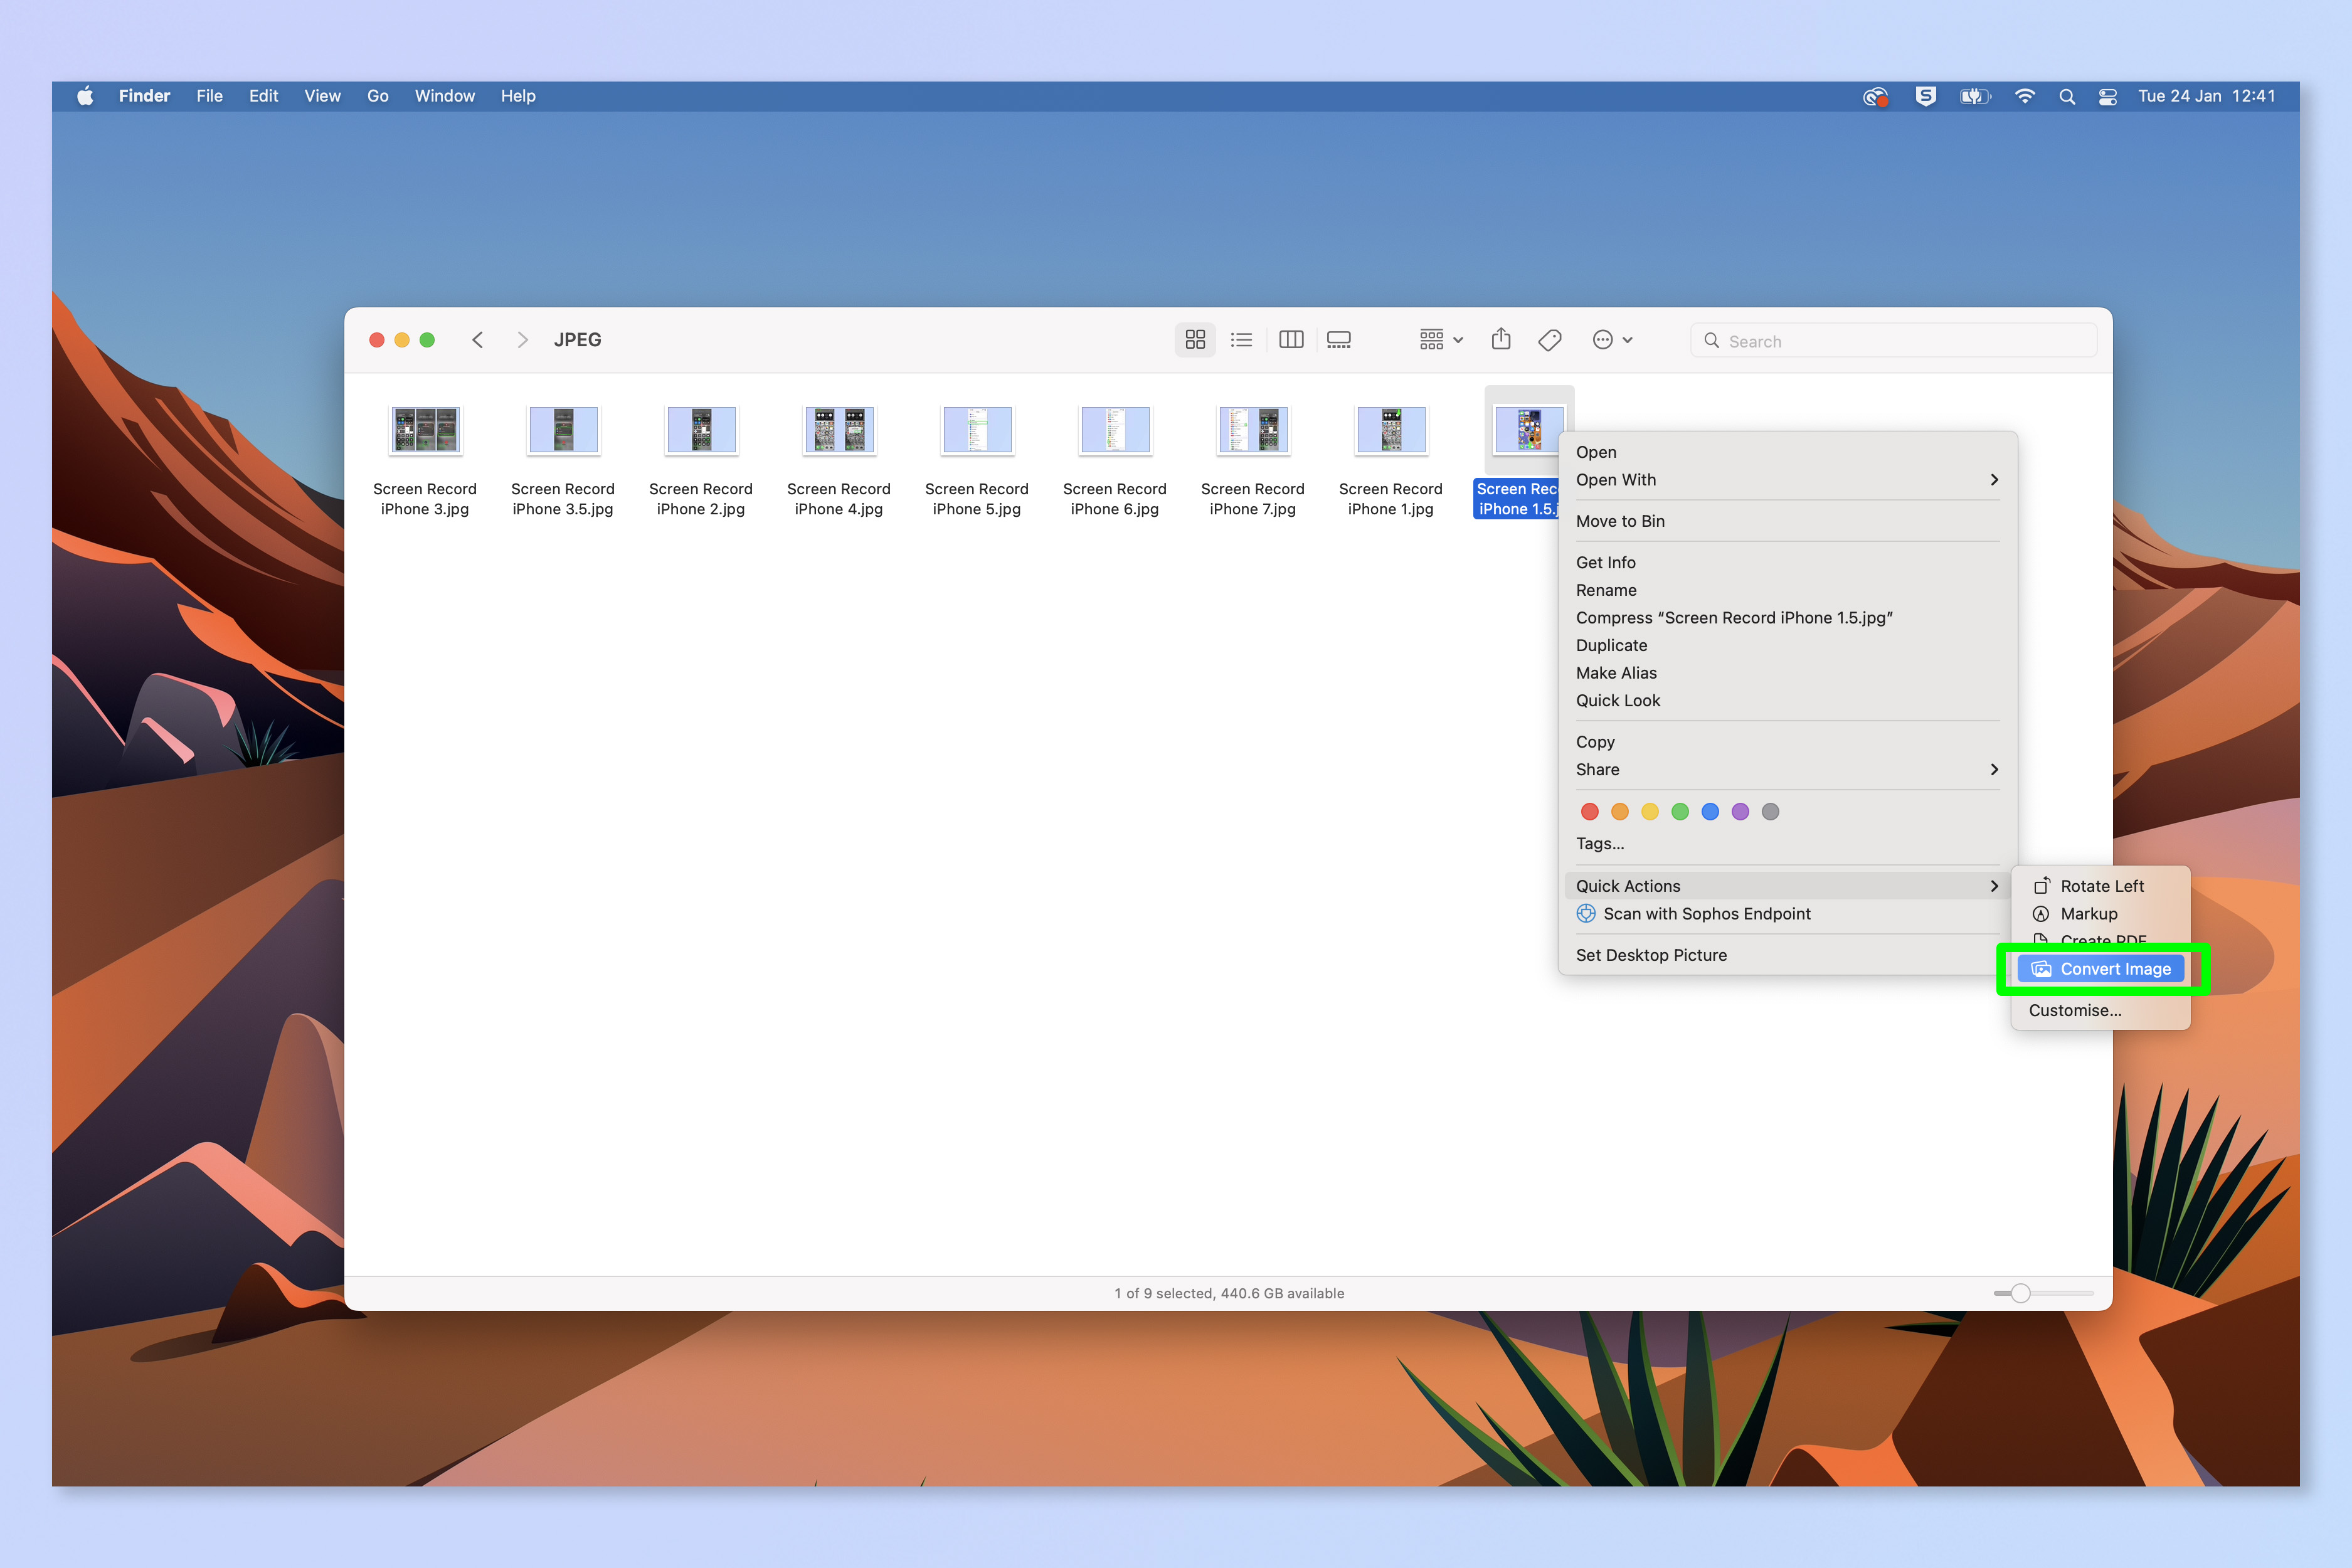
2. Click Convert Image.
A conversion box will pop up.
Sign up to get the BEST of Tom's Guide direct to your inbox.
Get instant access to breaking news, the hottest reviews, great deals and helpful tips.
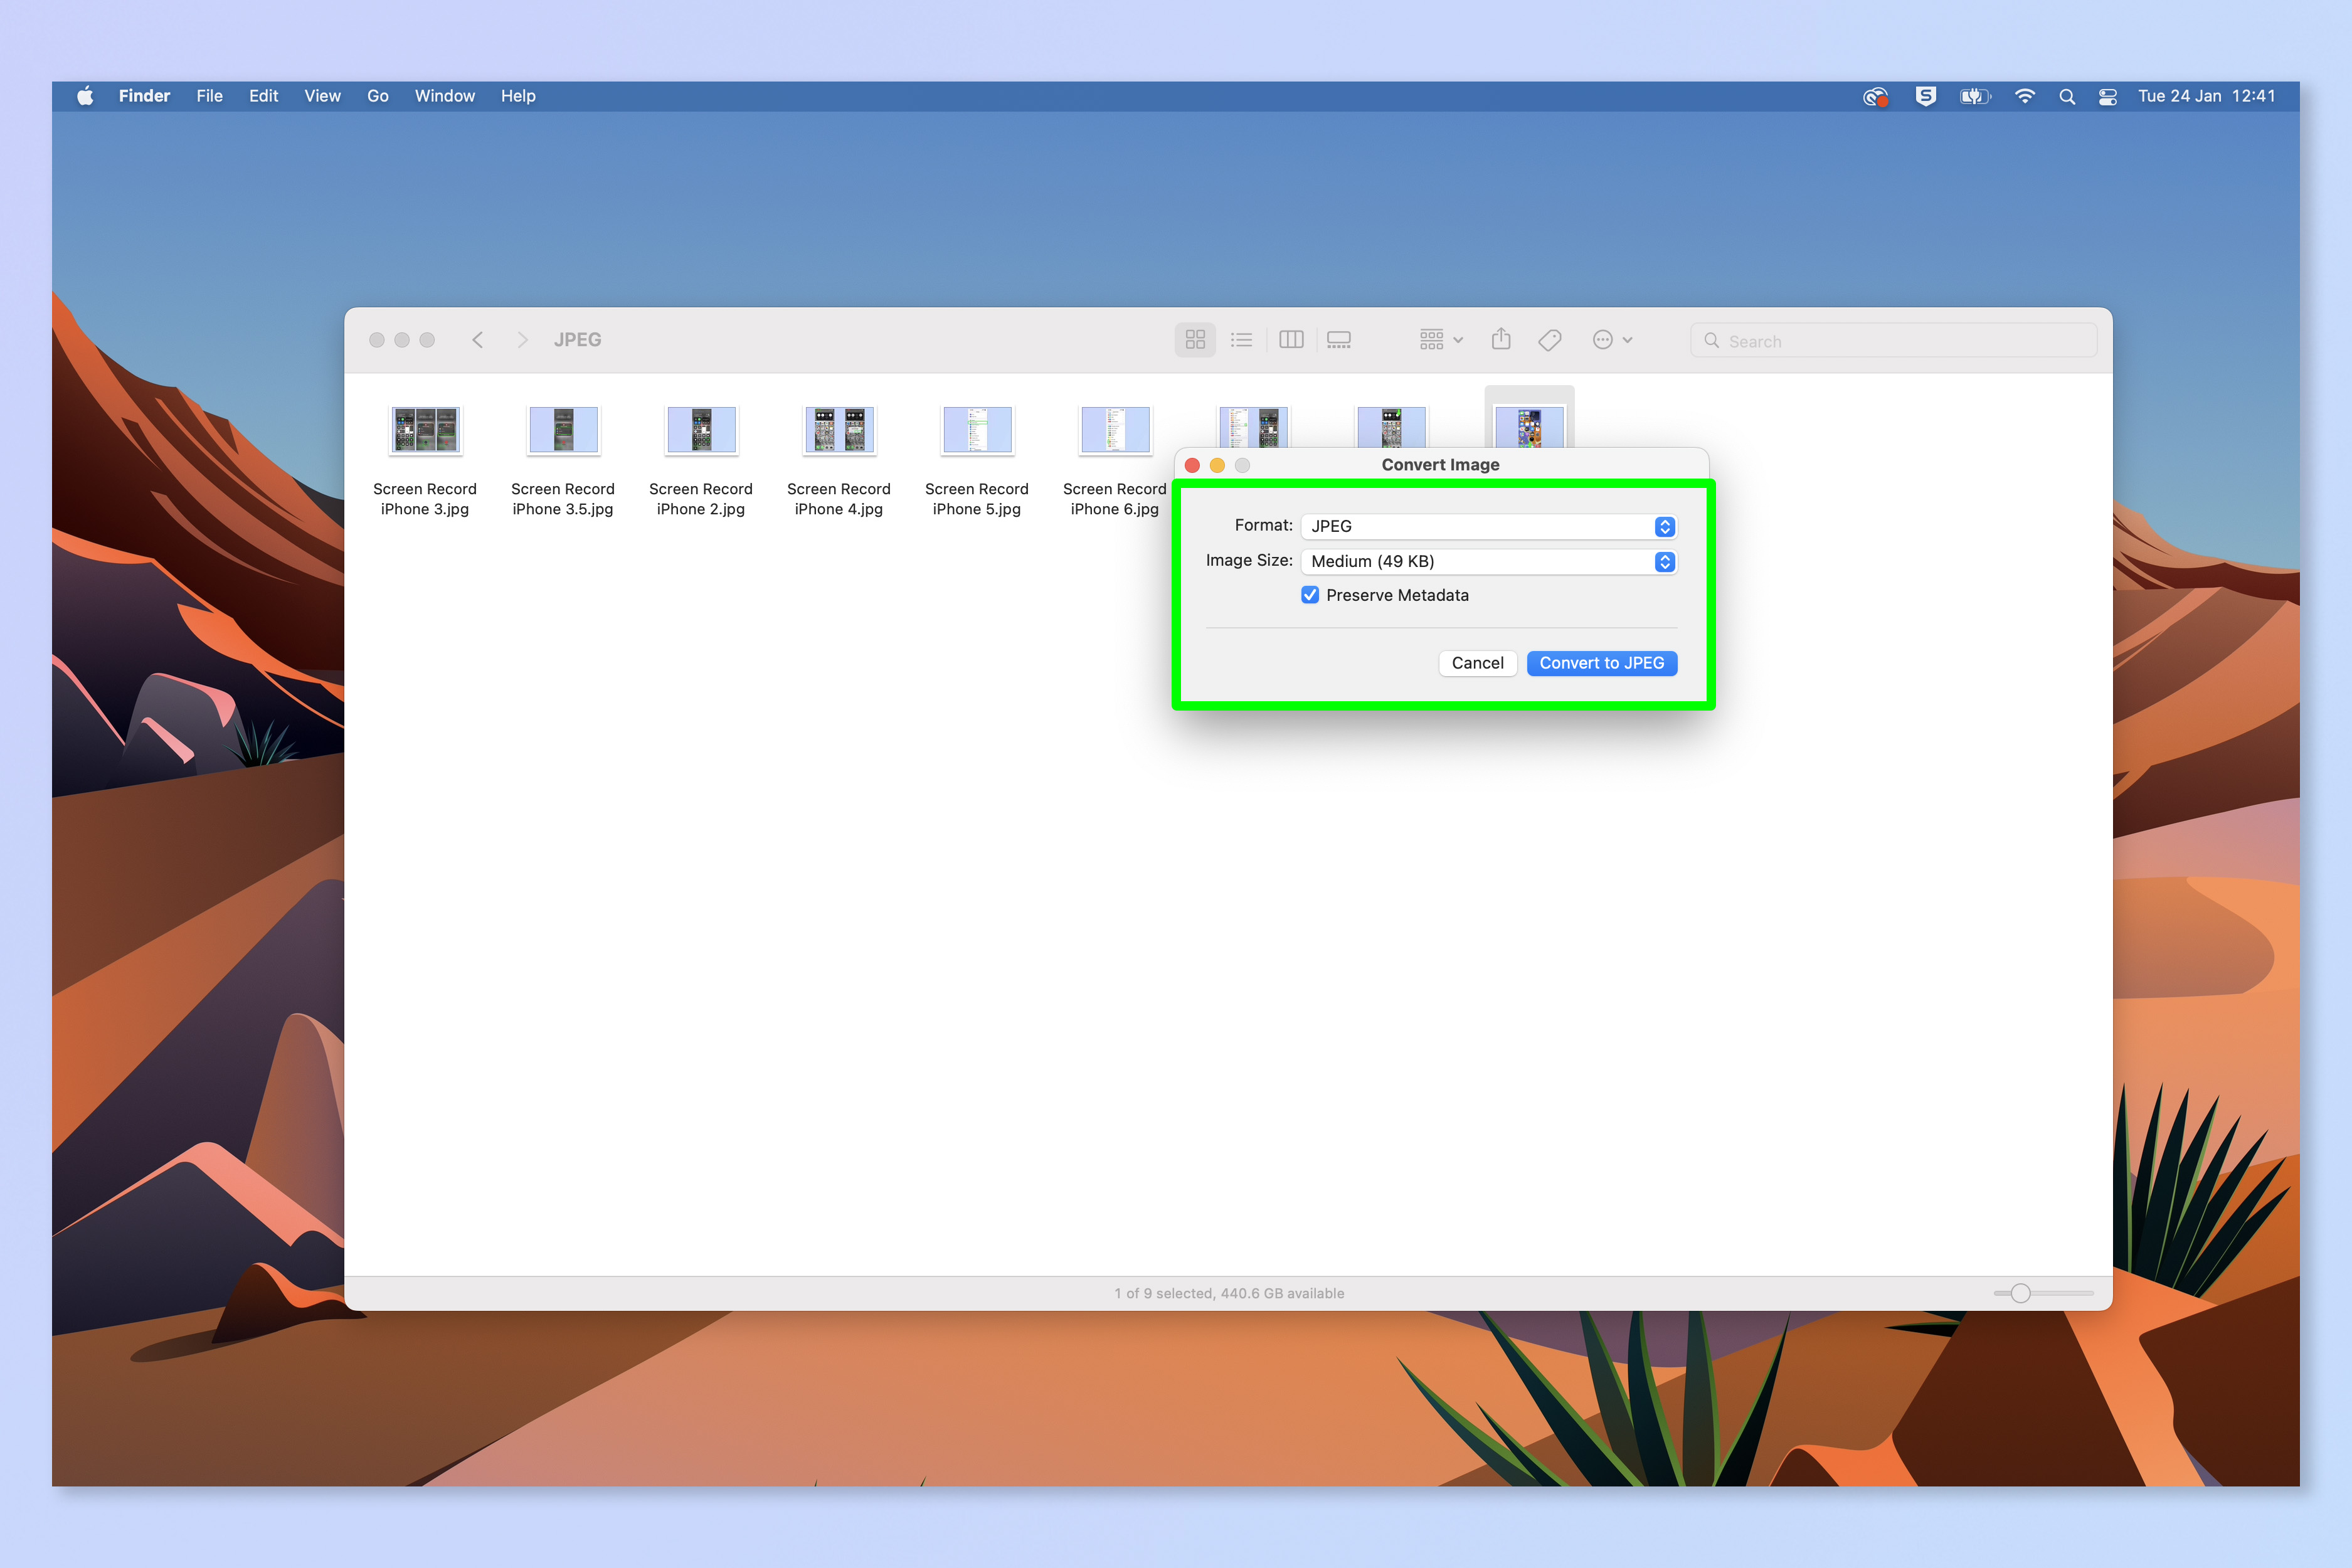
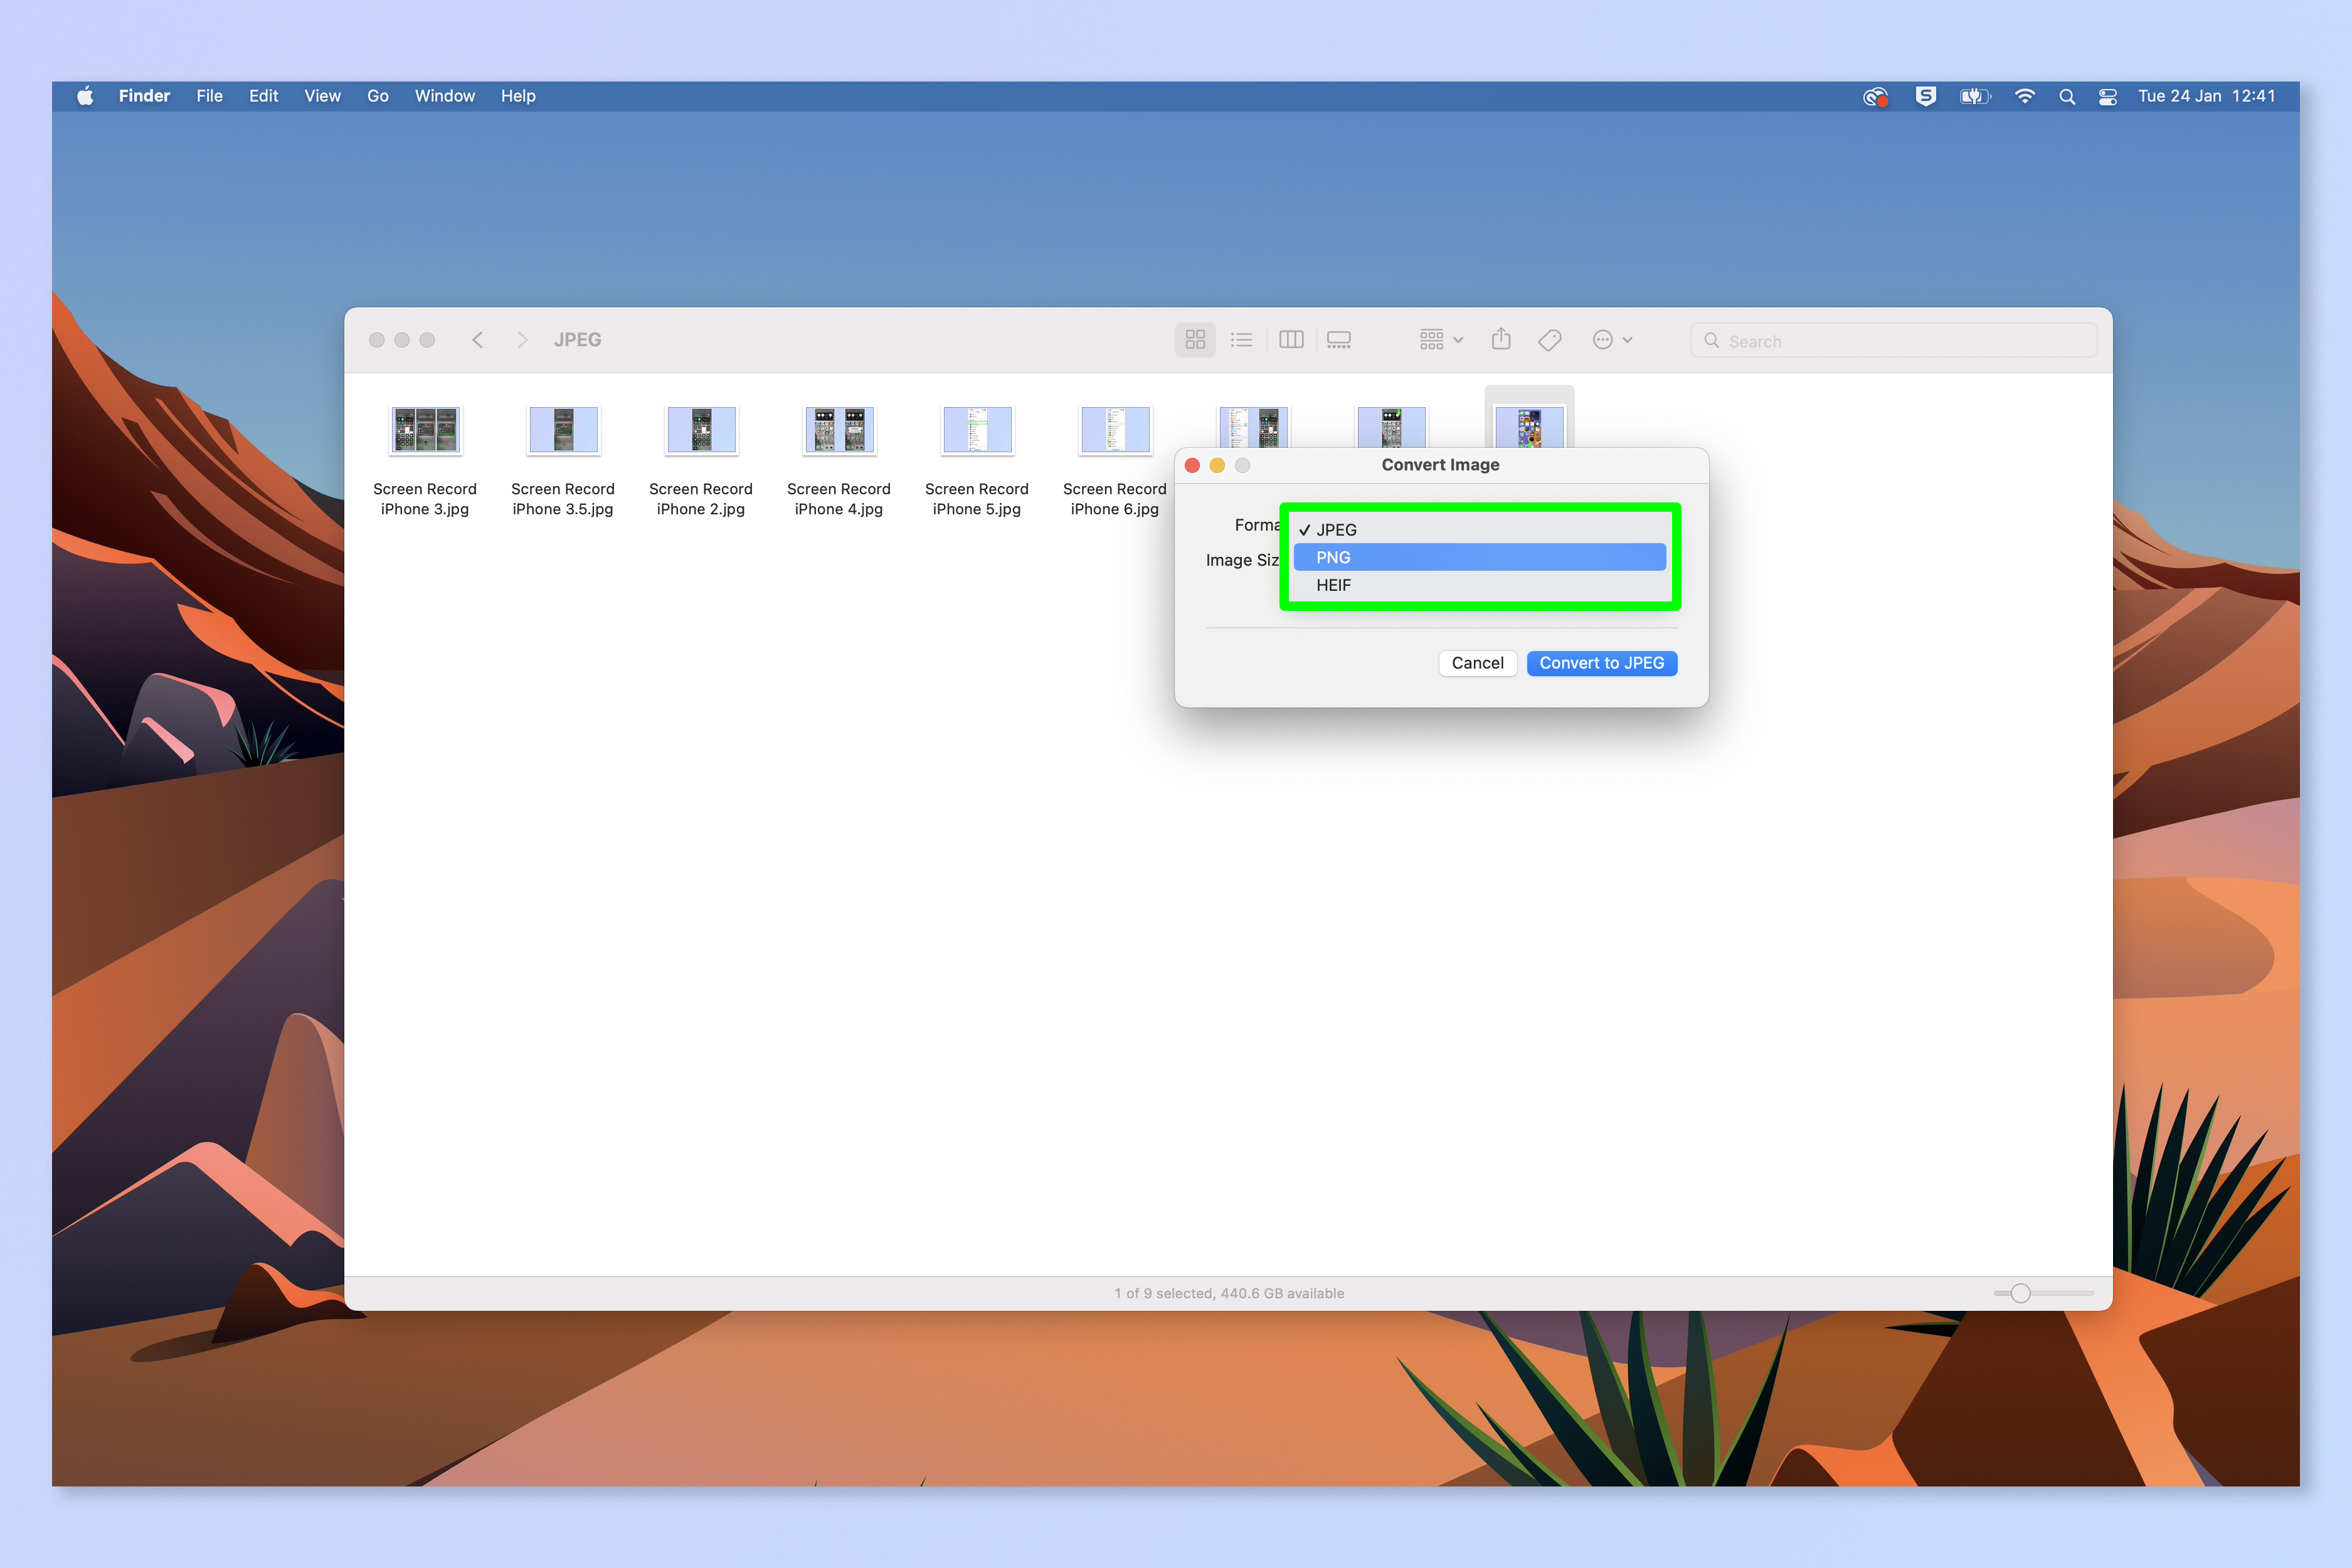
3. Click the Format field and select a format to convert to. You can choose JPEG, PNG or HEIF.
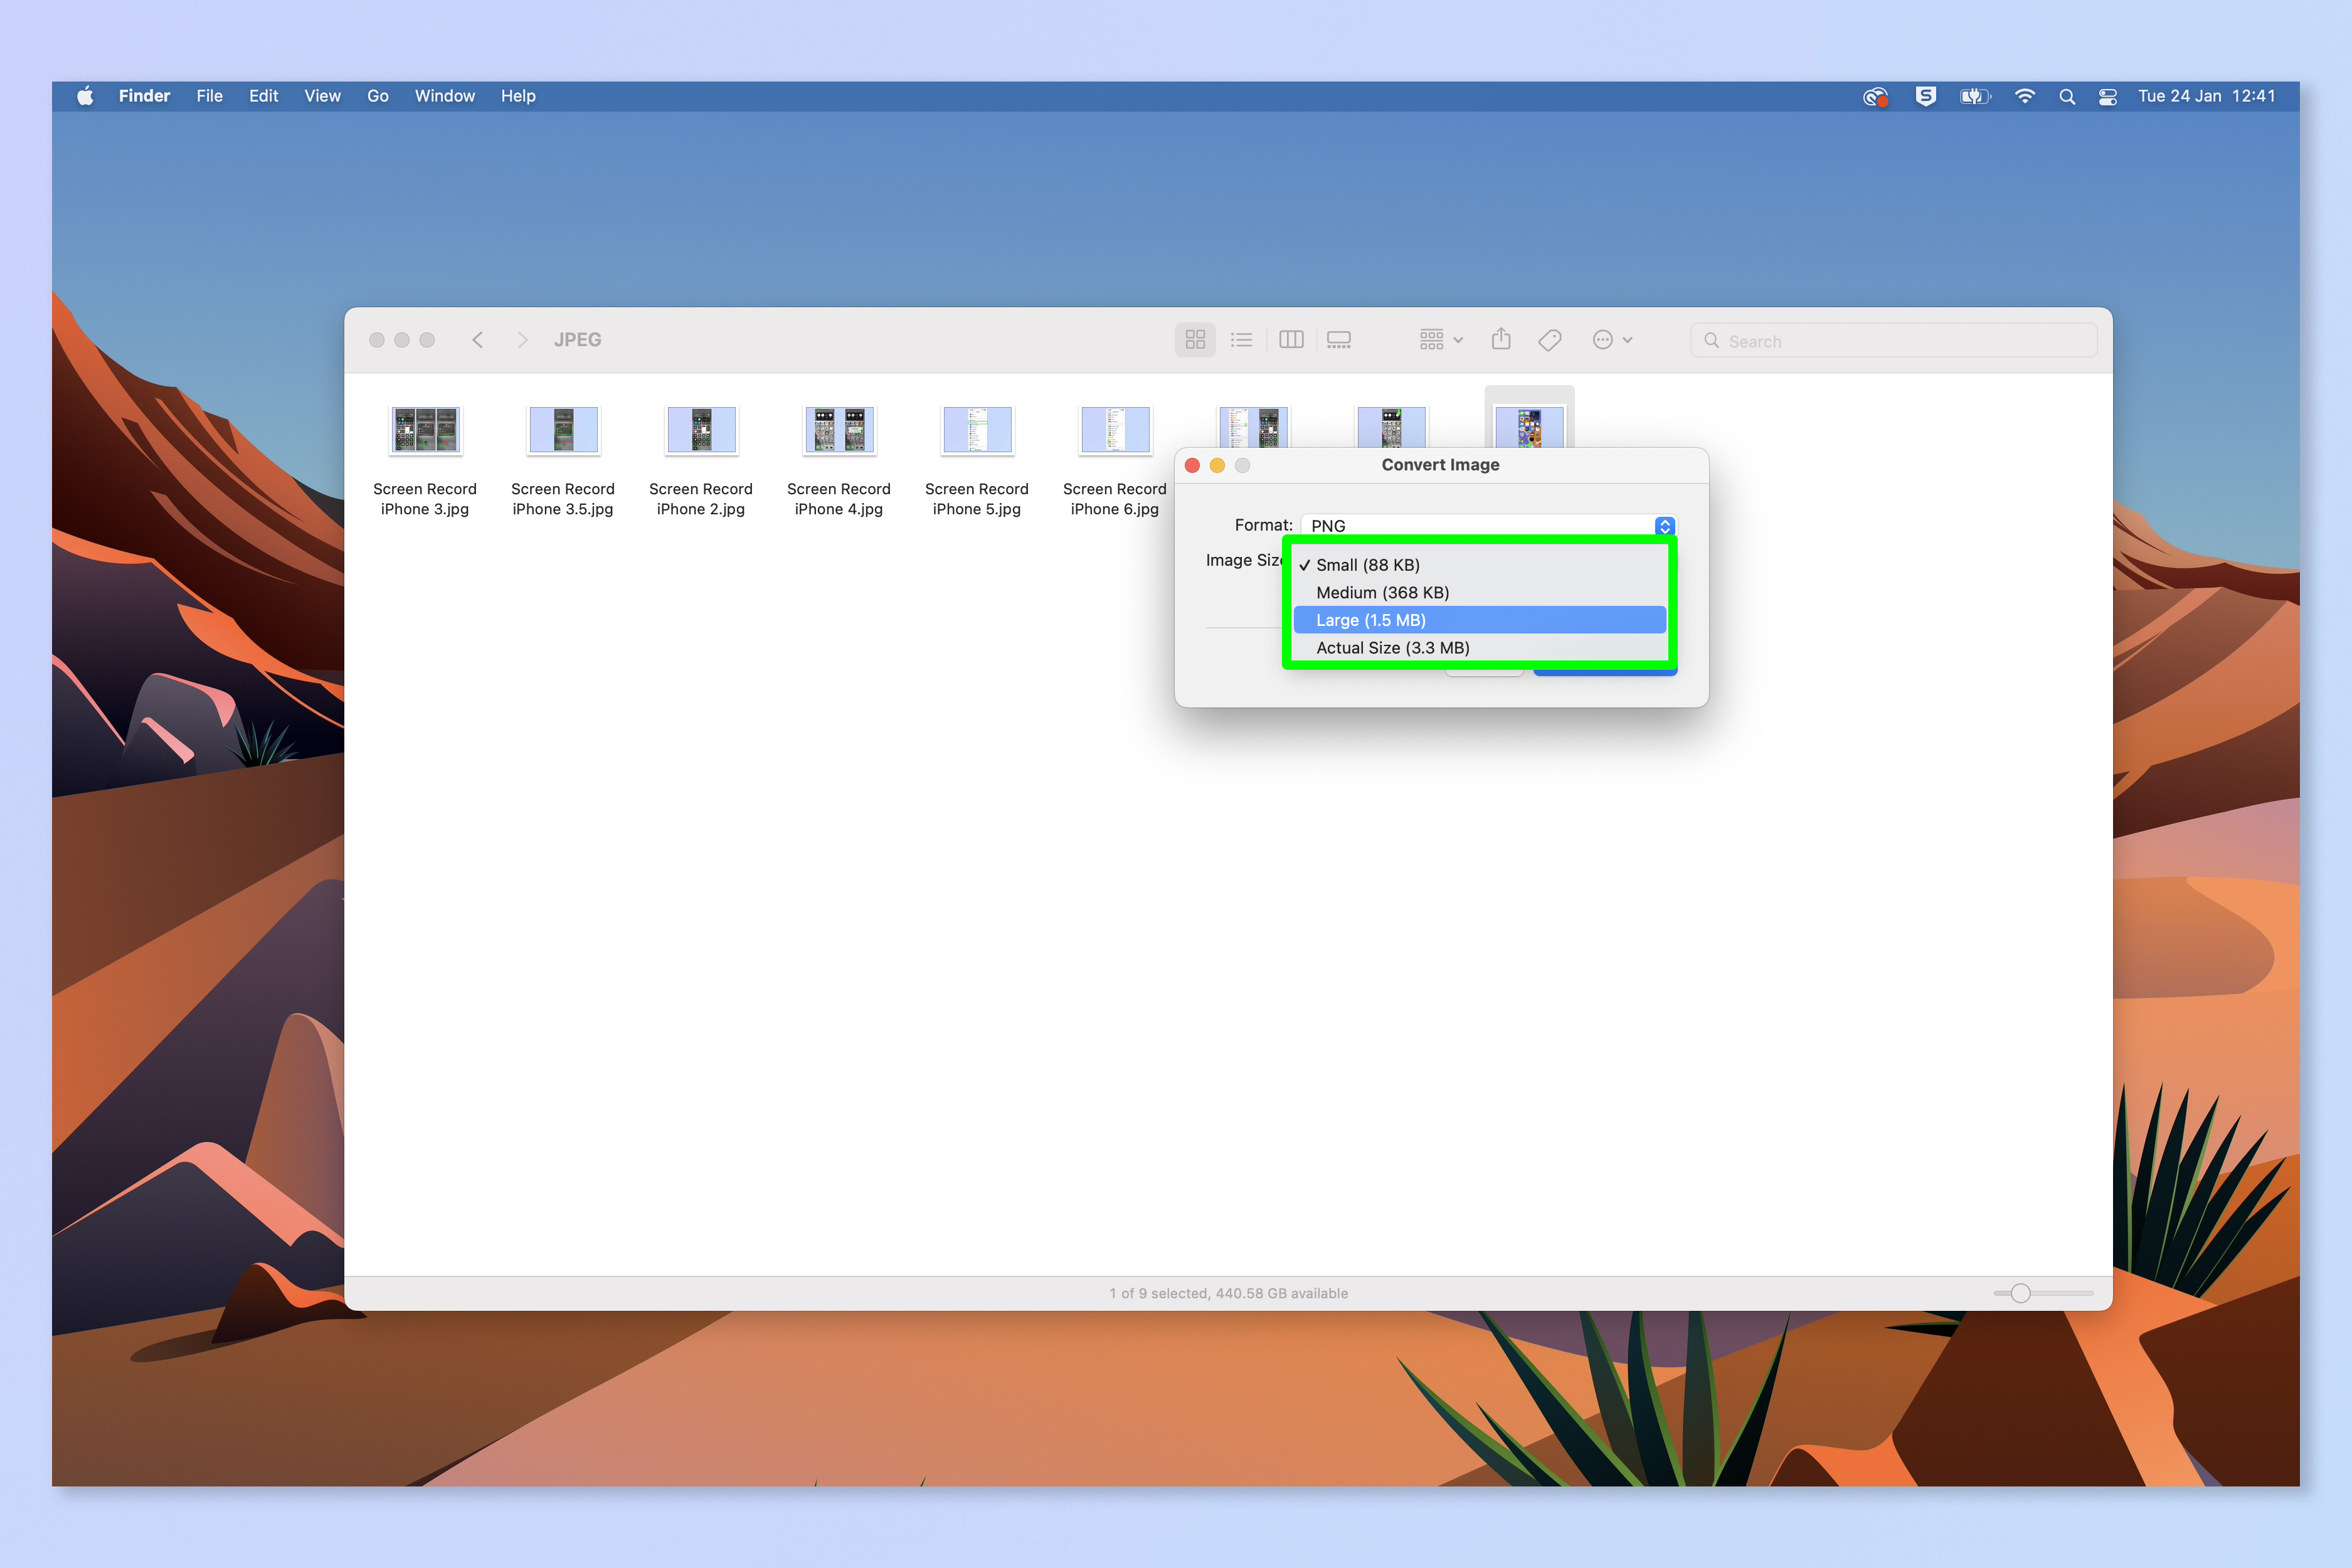
4. Click the Image Size field and select the size of image file you'd like. A smaller file size results in the image taking up less space, but also much lower quality.
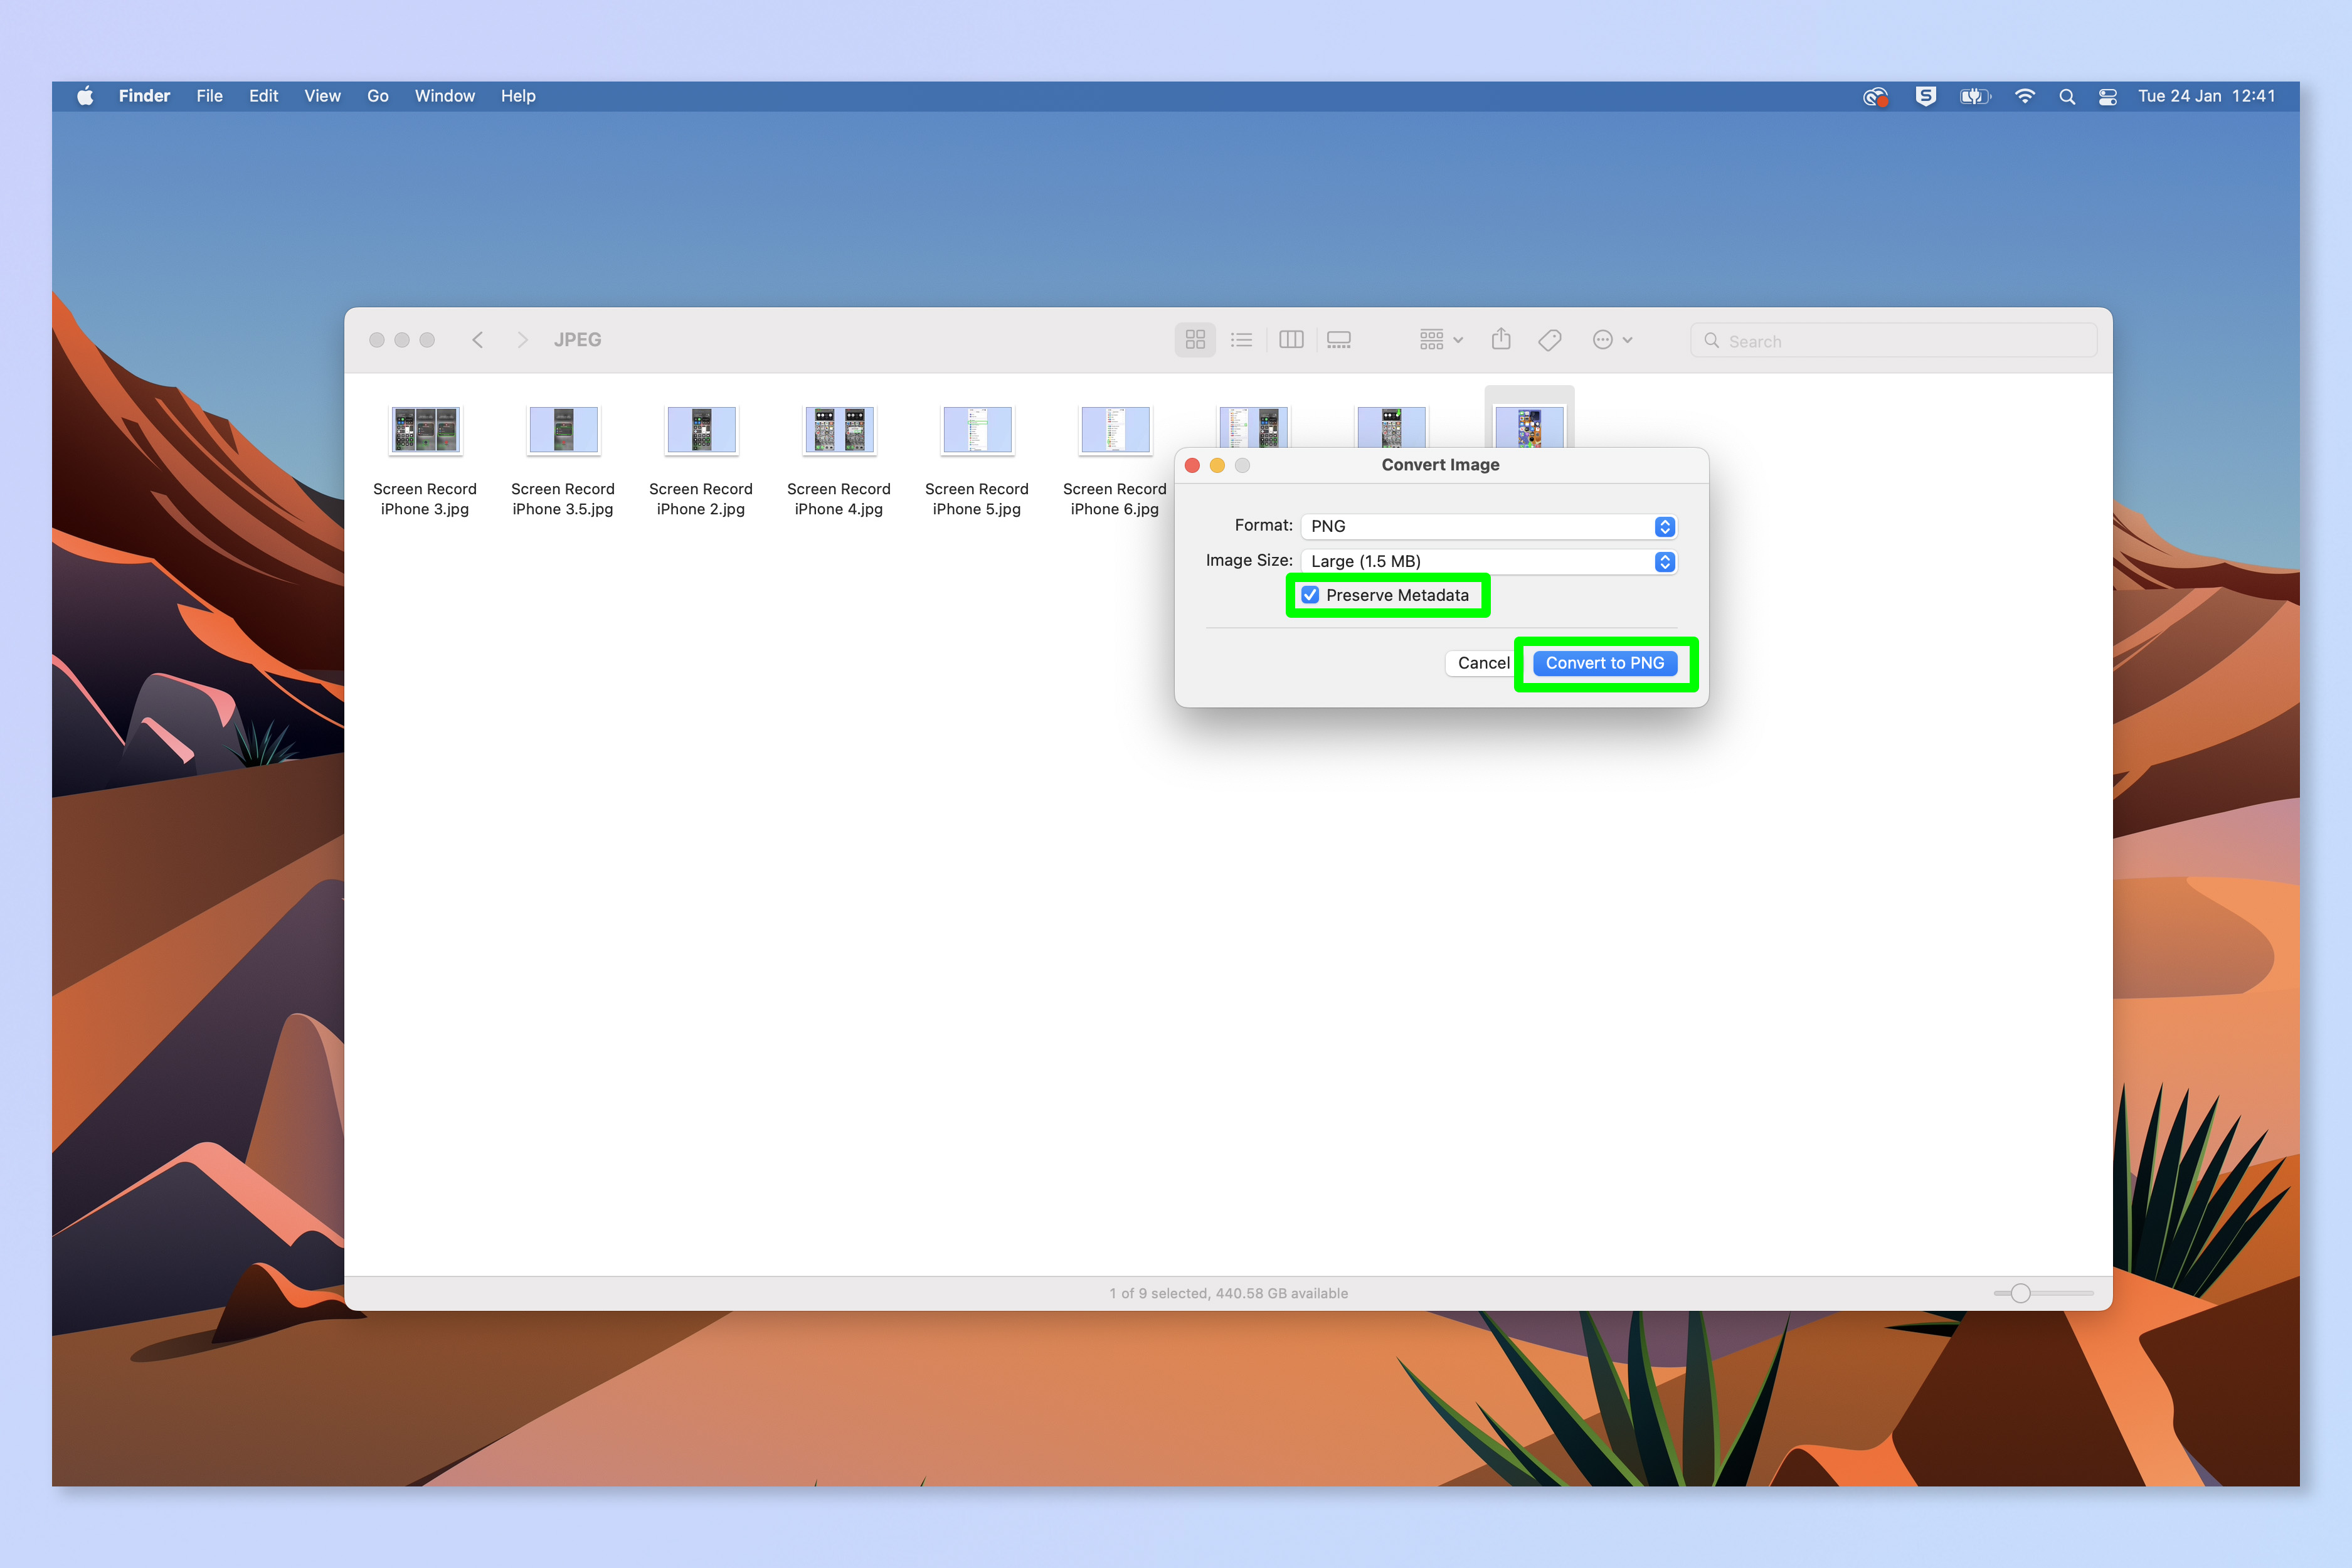
5. If you want to keep the image's metadata, check the Preserve Metadata box, then click Convert to [SELECTED FORMAT] to convert the image file.
And your image file is converted. It will appear next to the original image in Finder. If you'd like to learn more Mac hints and tips, we've got you covered. If you're new to macOS, check out our basics tutorials, such as how to right click on Mac, how to scroll on Mac, how to access the emoji keyboard on Mac and how to turn on the keyboard light on Mac with a backlit keyboard. For more advanced users, we have guides on how to reset the SMC on an Intel-based Mac and how to clear the cache on Mac — both of these can be used to speed up a sluggish machine.
Next up: how to select multiple files on Mac.

Peter is a Senior Editor at Tom's Guide, heading up the site's Reviews team and Cameras section. As a writer, he covers topics including tech, photography, gaming, hardware, motoring and food & drink. Outside of work, he's an avid photographer, specialising in architectural and portrait photography. When he's not snapping away on his beloved Fujifilm camera, he can usually be found telling everyone about his greyhounds, riding his motorcycle, squeezing as many FPS as possible out of PC games, and perfecting his espresso shots.
