How to password protect folders on Windows

Once you know how to password protect folders on Windows, you'll be able to keep all your files safe and secure from prying eyes.
Whether you're running Windows 11 or Windows 10, there's a way to protect any folder by adding a password to it, which is handy if you have some particularly sensitive files on your PC.
This method involves creating a special folder that will "disappear" instantly, requiring a password to be entered to show it again. Granted, it's quite a fiddly process and not as secure as encrypting your files using Microsoft's Bitlocker tool. But unlike Bitlocker, this method should work on any version of Windows 10 or 11, so you're covered even if you don't have one of the best laptops.
It's worth noting that you should test this method out on a dummy folder first, in case things don't go to plan and you end up losing access to your precious files. It's also worth mentioning that if you need more robust protection, you should check out our guide on how to encrypt files on Windows 10.
So, if you want to know how to password protect folders on Windows, follow our guide below.
Note: The screenshots in this guide were taken on Windows 11, though the steps are the same for Windows 10.
How to password protect folders on Windows
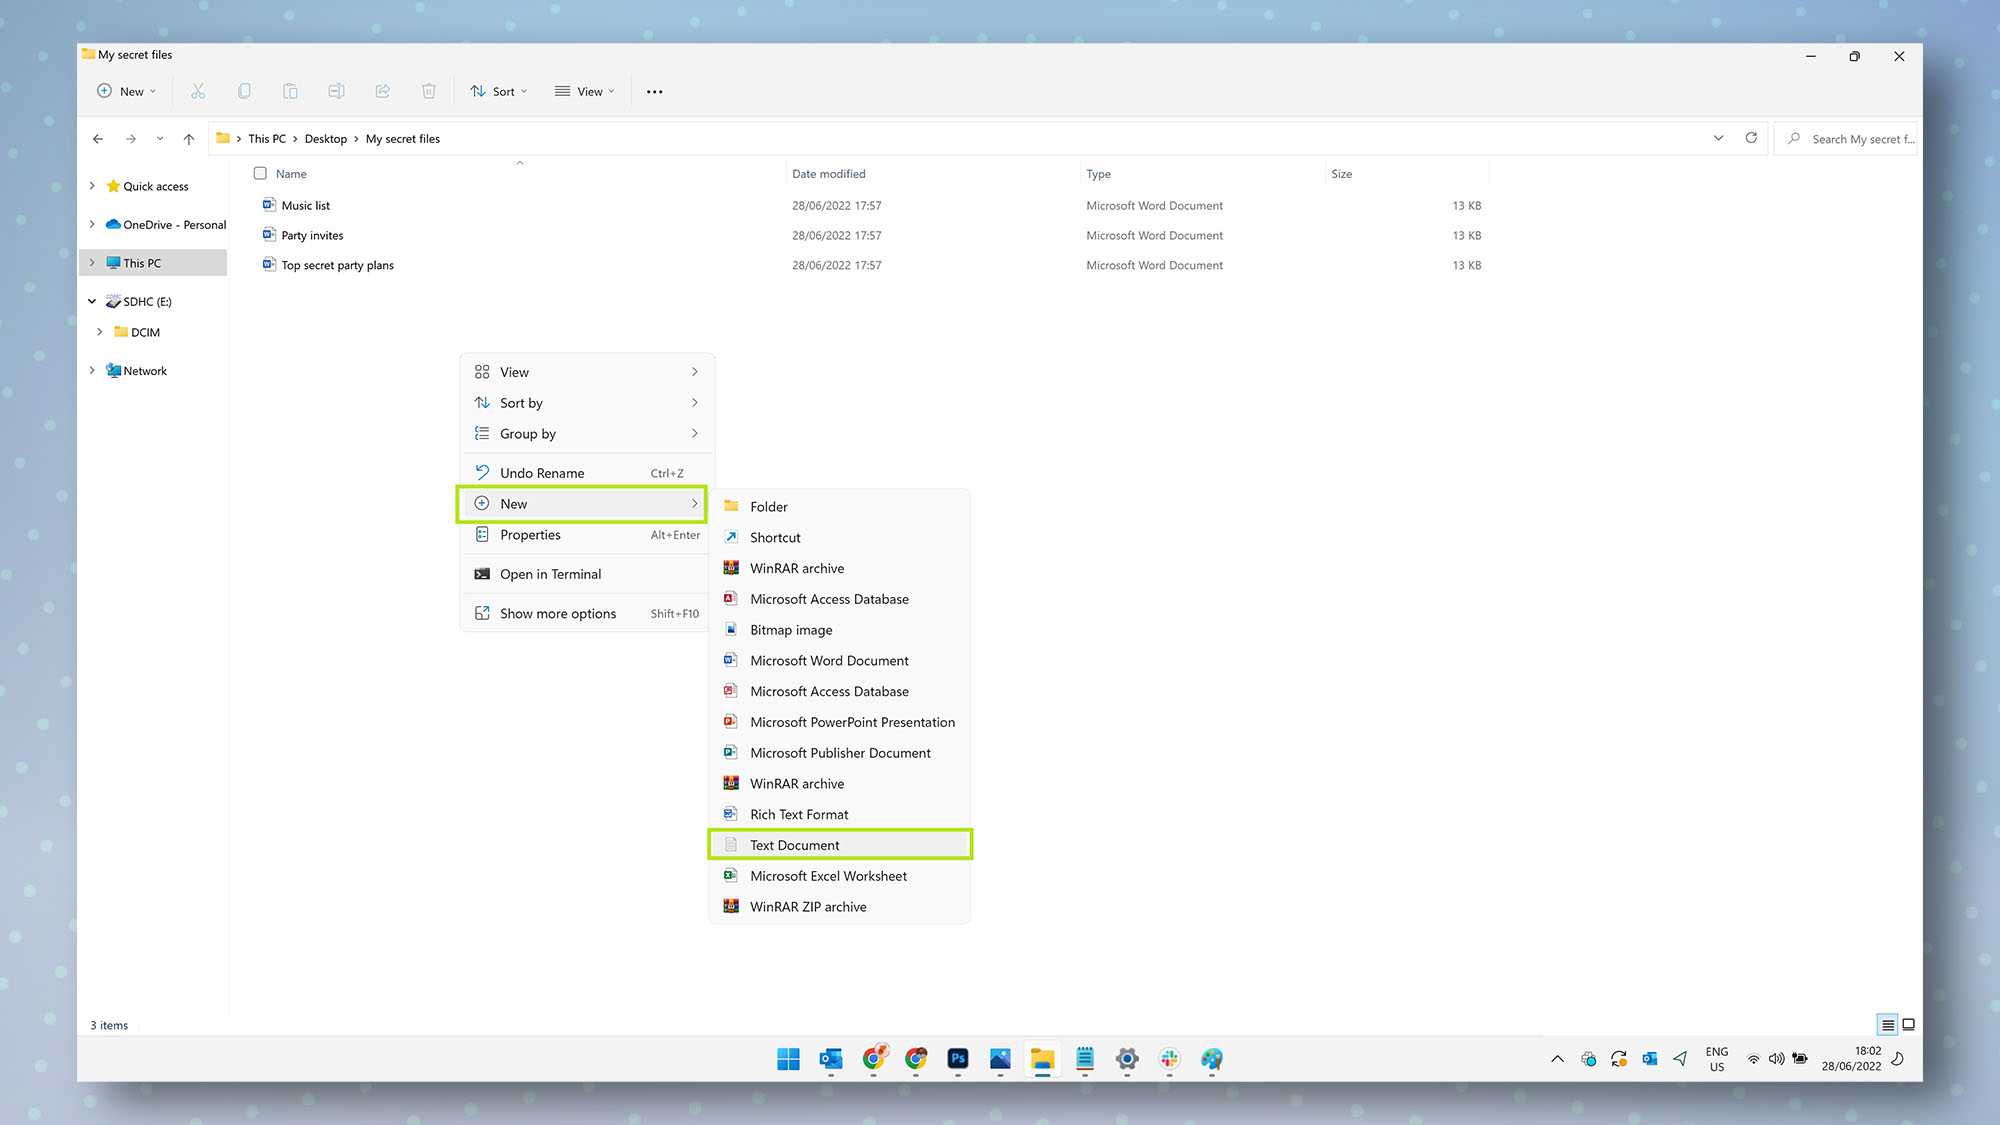
1. Open the folder you want to protect in File Explorer and right-click in an empty space inside it. Next, hover over New, then click Text Document.
Get instant access to breaking news, the hottest reviews, great deals and helpful tips.
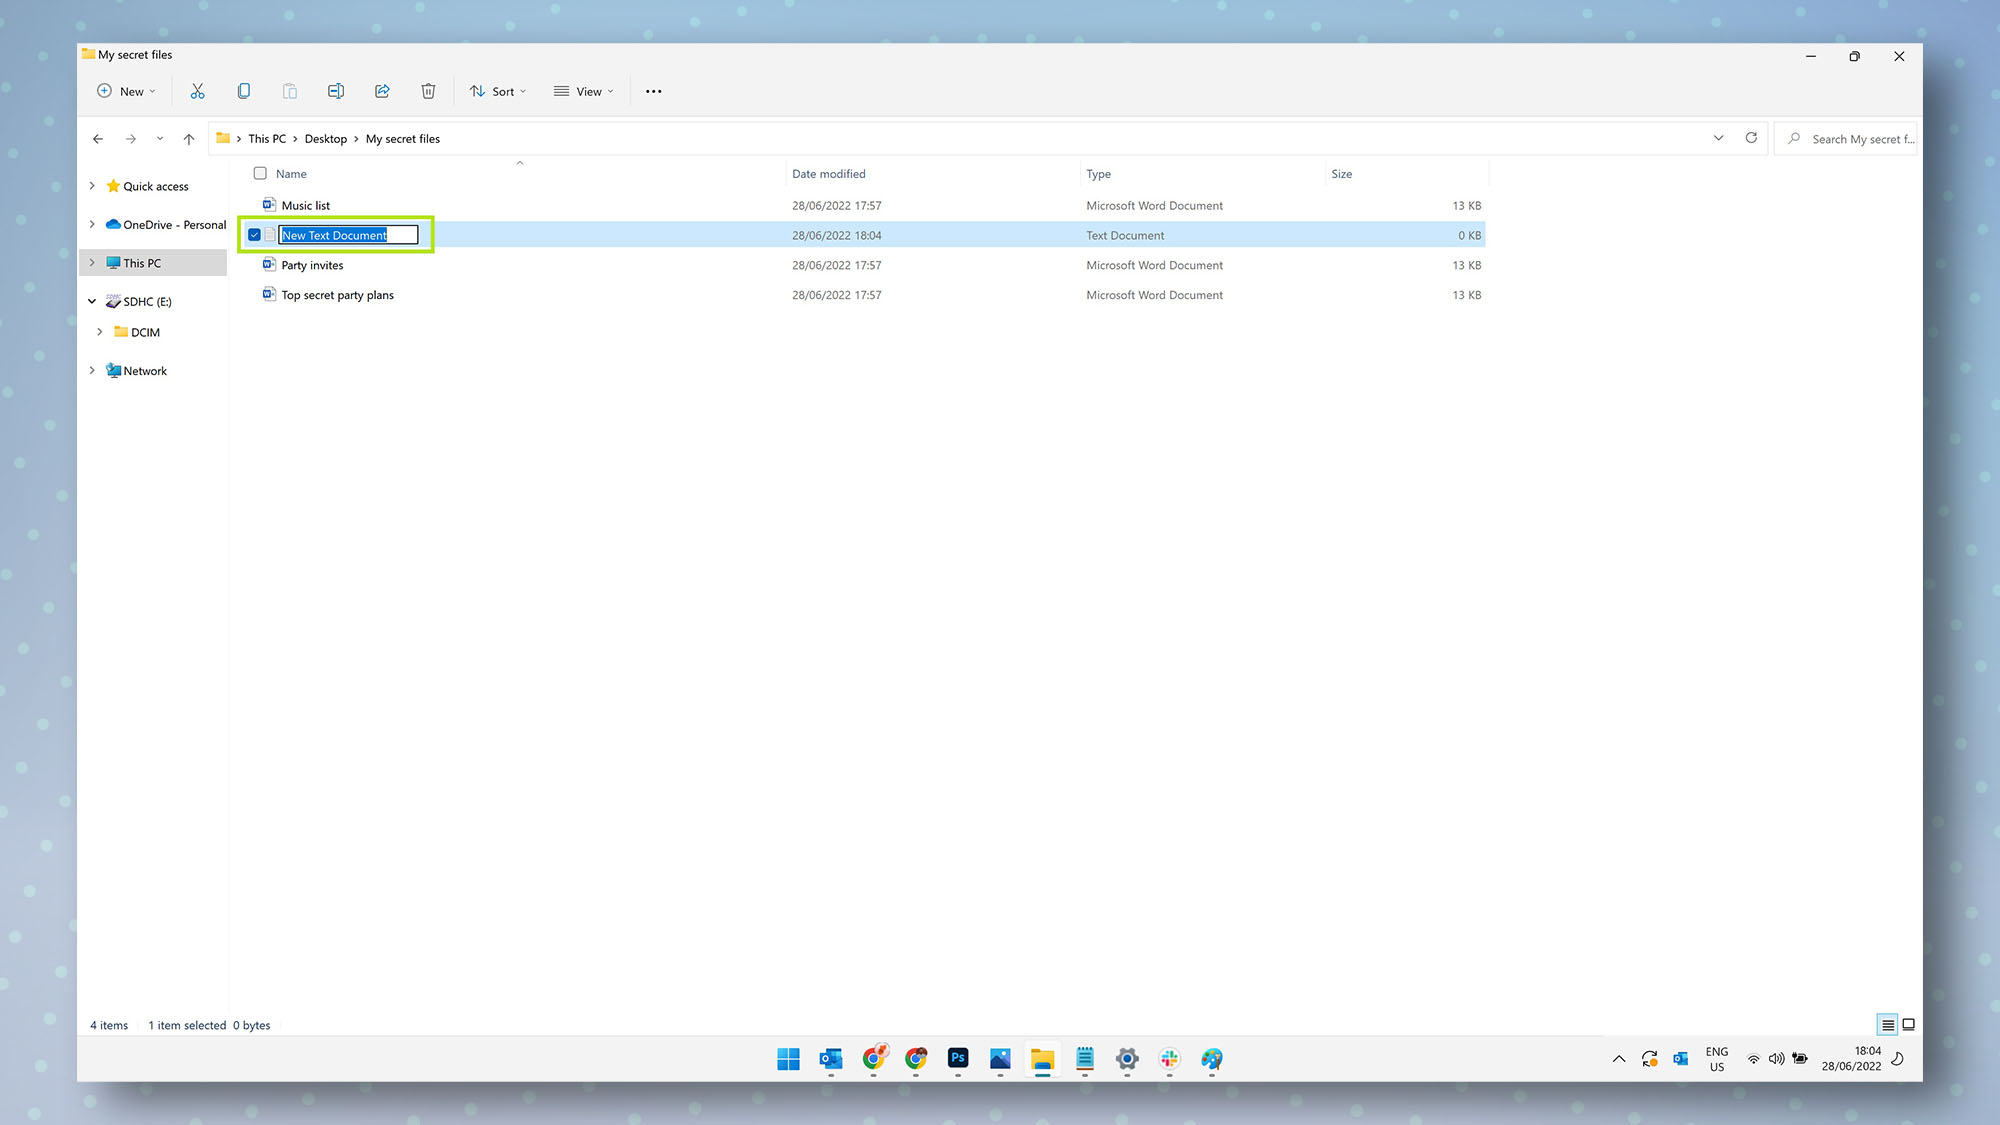
2. Windows wants you to name this text document, but there's no need, as we won't need it for anything else in the later steps. So, simply press enter/return to give this file the default name of New Text Document.
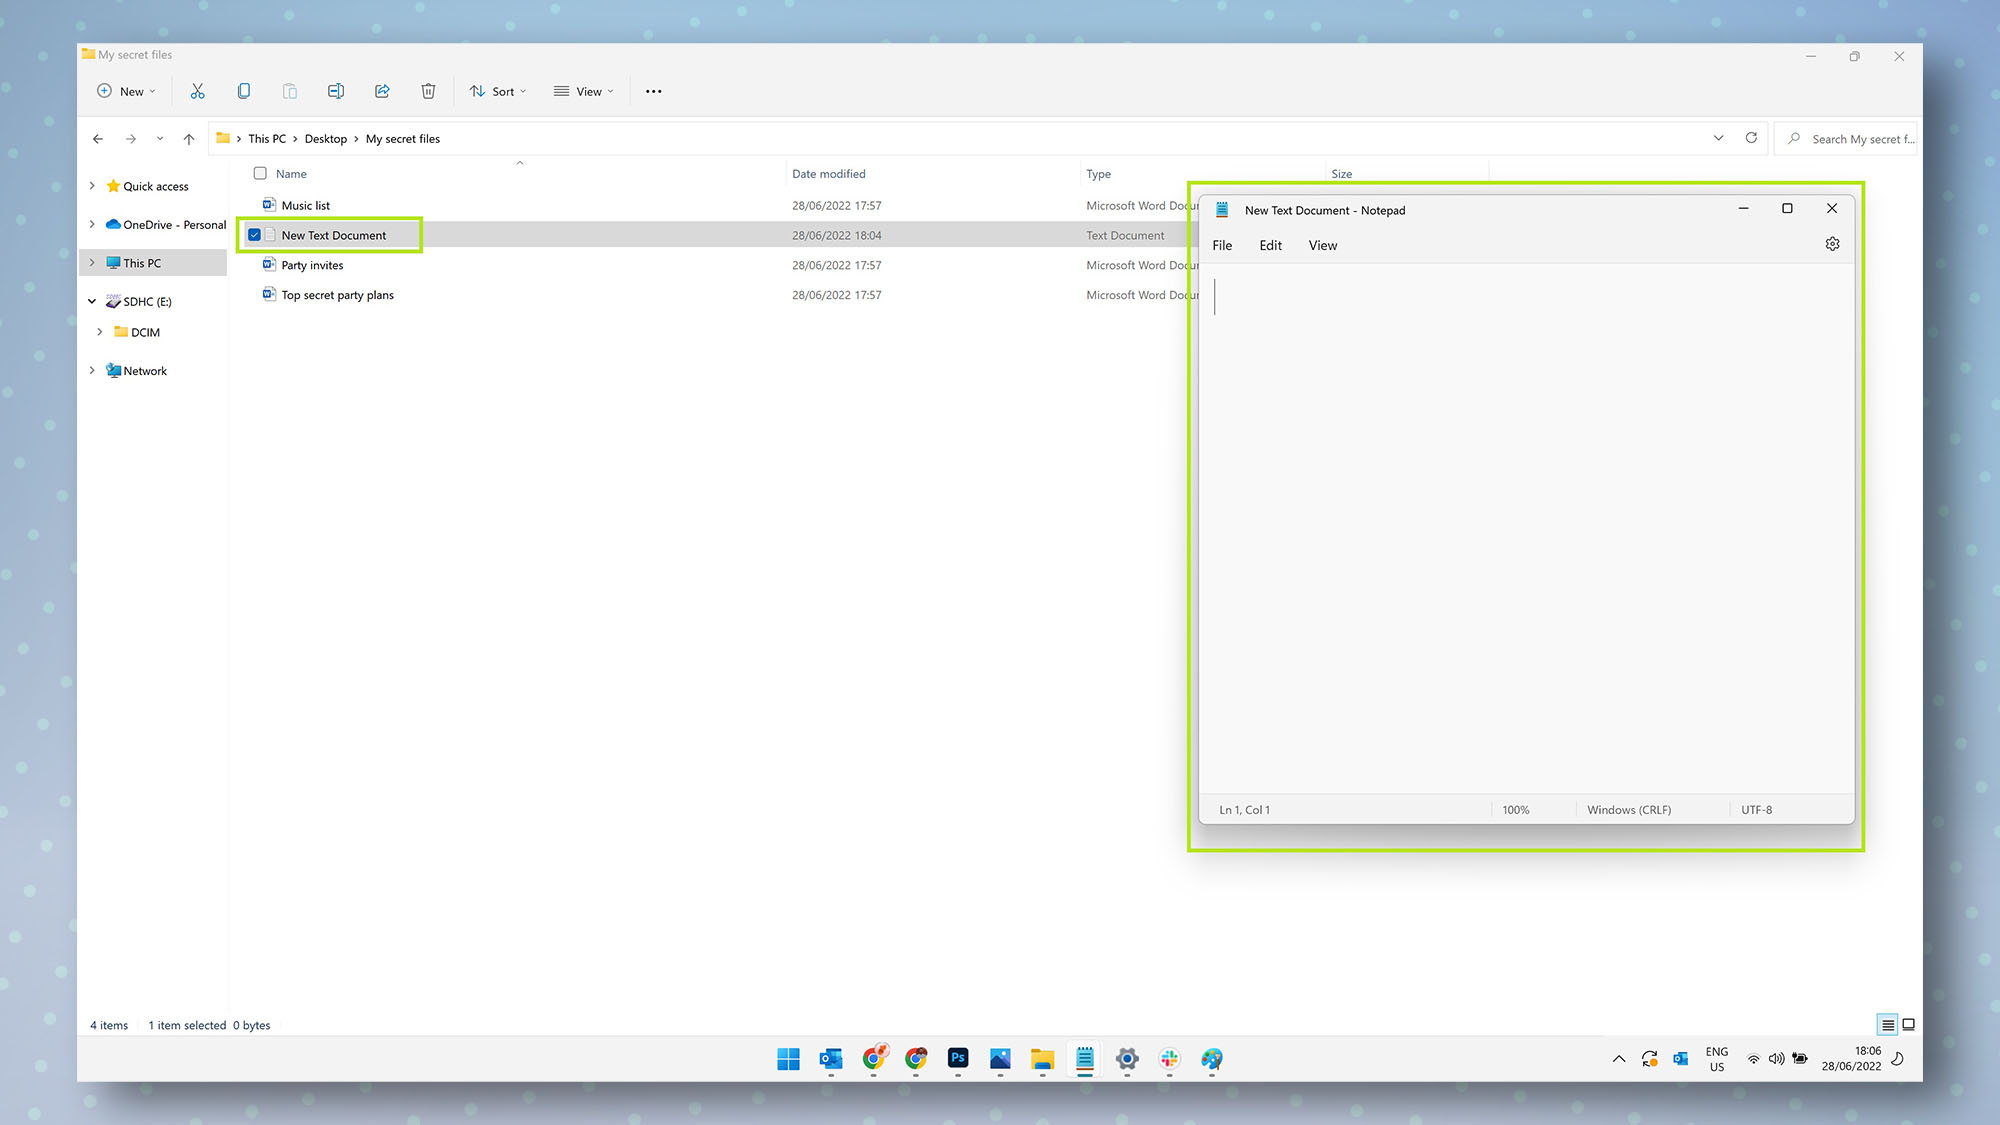
3. Double-click your newly-created text file to open it.
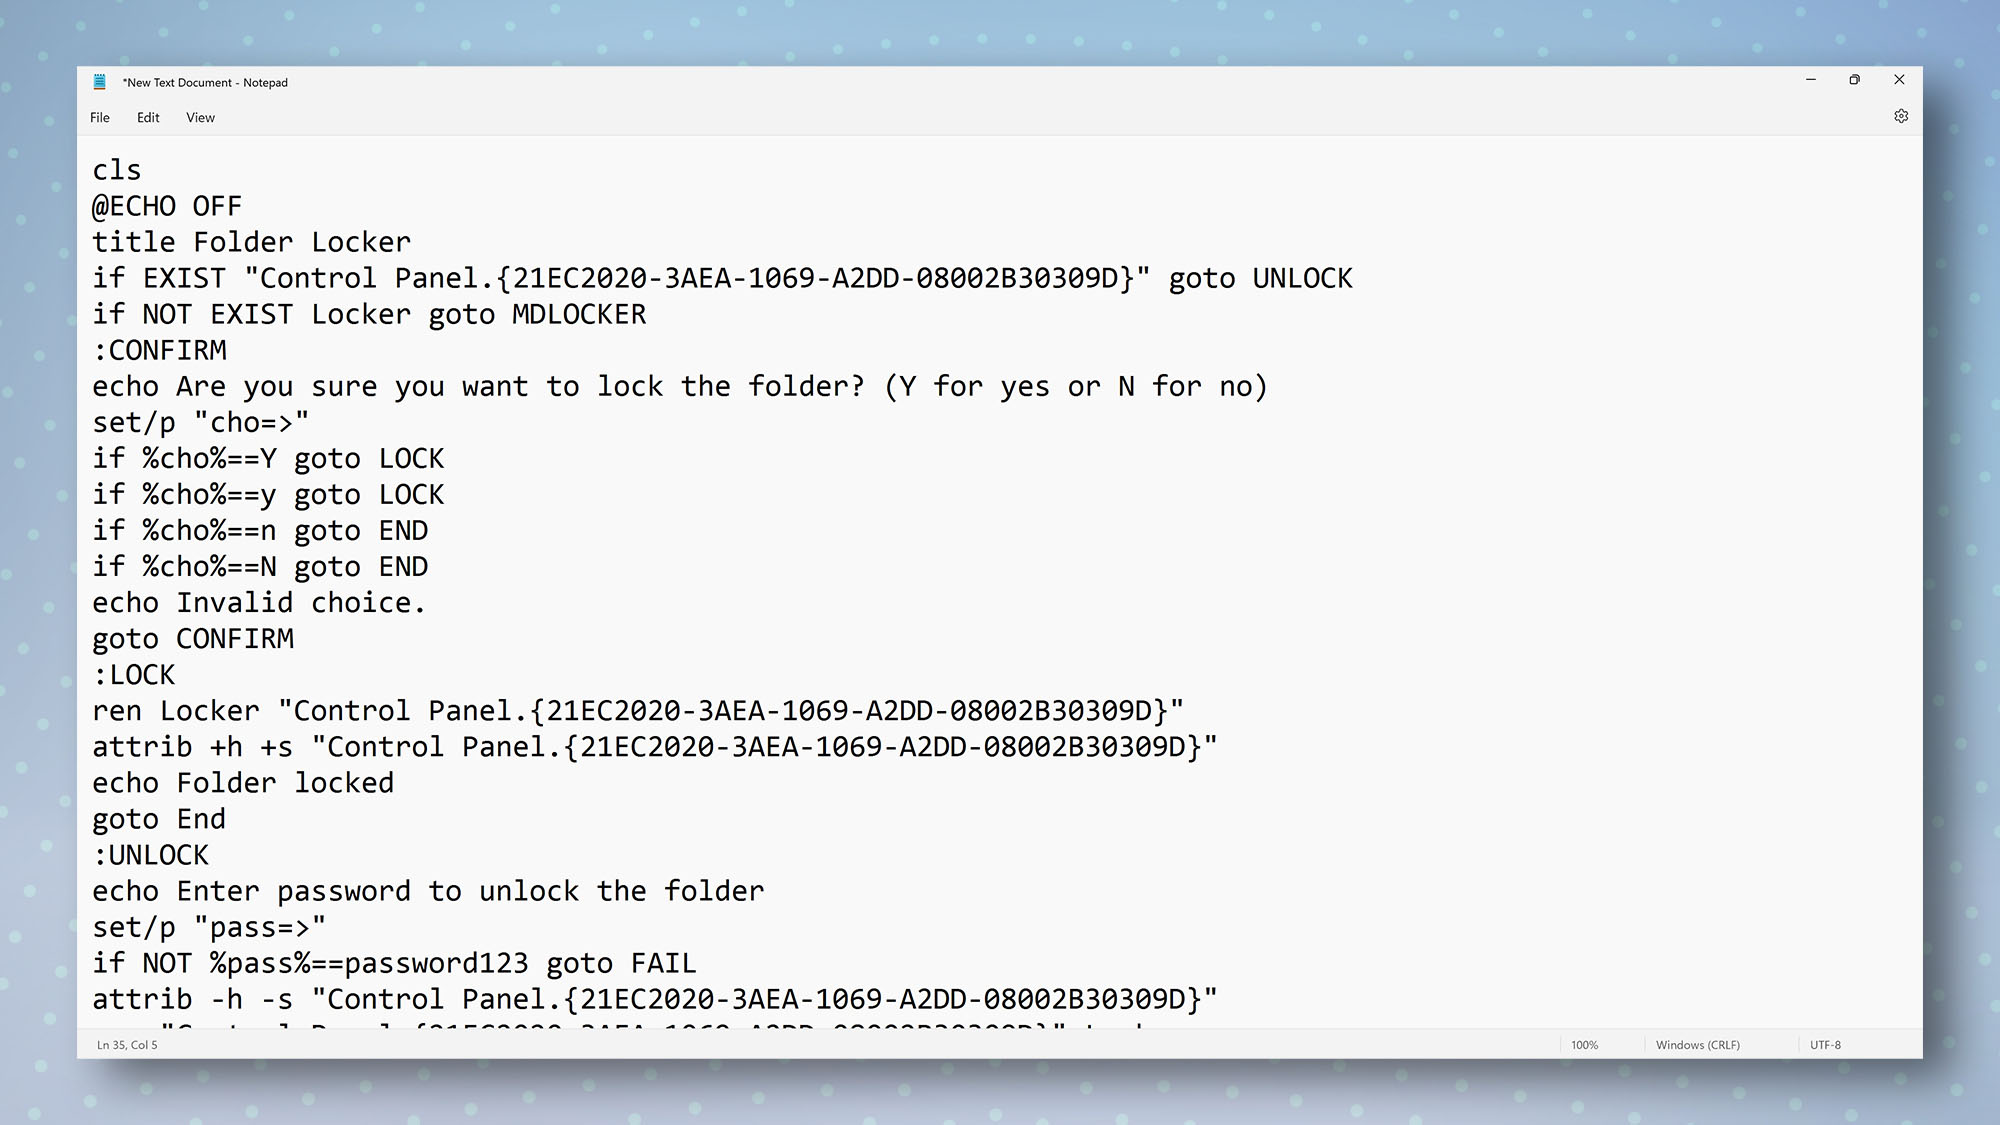
4. Next, copy and paste the text below exactly as it appears into your text file.
cls
@ECHO OFF
title Folder Locker
if EXIST "Control Panel.{21EC2020-3AEA-1069-A2DD-08002B30309D}" goto UNLOCK
if NOT EXIST Locker goto MDLOCKER
:CONFIRM
echo Are you sure you want to lock the folder? (Y for yes or N for no)
set/p "cho=>"
if %cho%==Y goto LOCK
if %cho%==y goto LOCK
if %cho%==n goto END
if %cho%==N goto END
echo Invalid choice.
goto CONFIRM
:LOCK
ren Locker "Control Panel.{21EC2020-3AEA-1069-A2DD-08002B30309D}"
attrib +h +s "Control Panel.{21EC2020-3AEA-1069-A2DD-08002B30309D}"
echo Folder locked
goto End
:UNLOCK
echo Enter password to unlock the folder
set/p "pass=>"
if NOT %pass%==Your-Password-Here goto FAIL
attrib -h -s "Control Panel.{21EC2020-3AEA-1069-A2DD-08002B30309D}"
ren "Control Panel.{21EC2020-3AEA-1069-A2DD-08002B30309D}" Locker
echo Folder unlocked successfully
goto End
:FAIL
echo Invalid password
goto end
:MDLOCKER
md Locker
echo Locker created successfully
goto End
:End
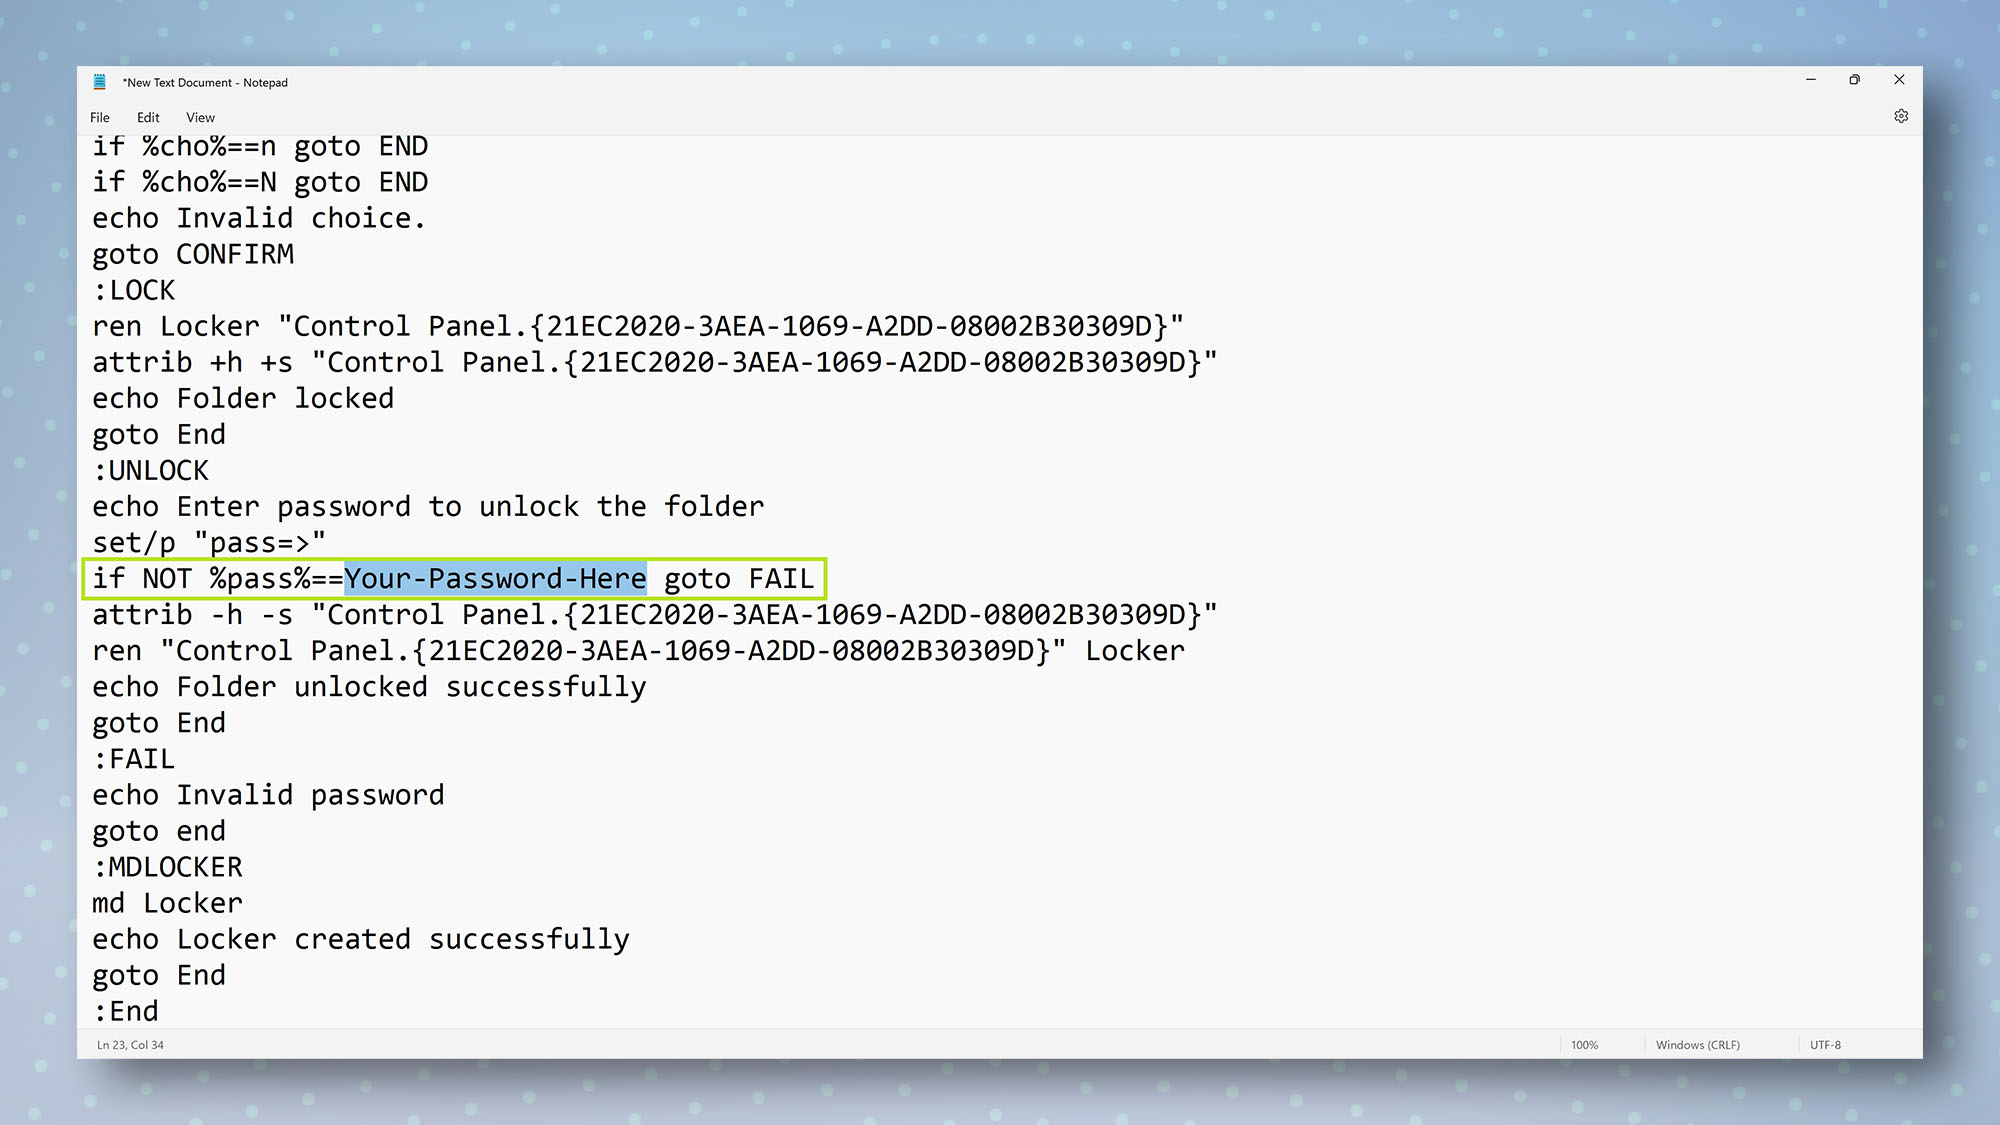
5. You should now see the pasted text inside your file. Locate the line that says "if NOT %pass%==Your-Password-Here" and replace the text "Your-Password-Here" with the password you want to use to lock your folder. For example, if your chosen password is "password123", the line should read "if NOT %pass%==password123".
Note: Make sure you use a password you'll remember, as you may lose access to your hidden folder if you forget it. It's also best to not use any spaces in your password, as this may cause errors.
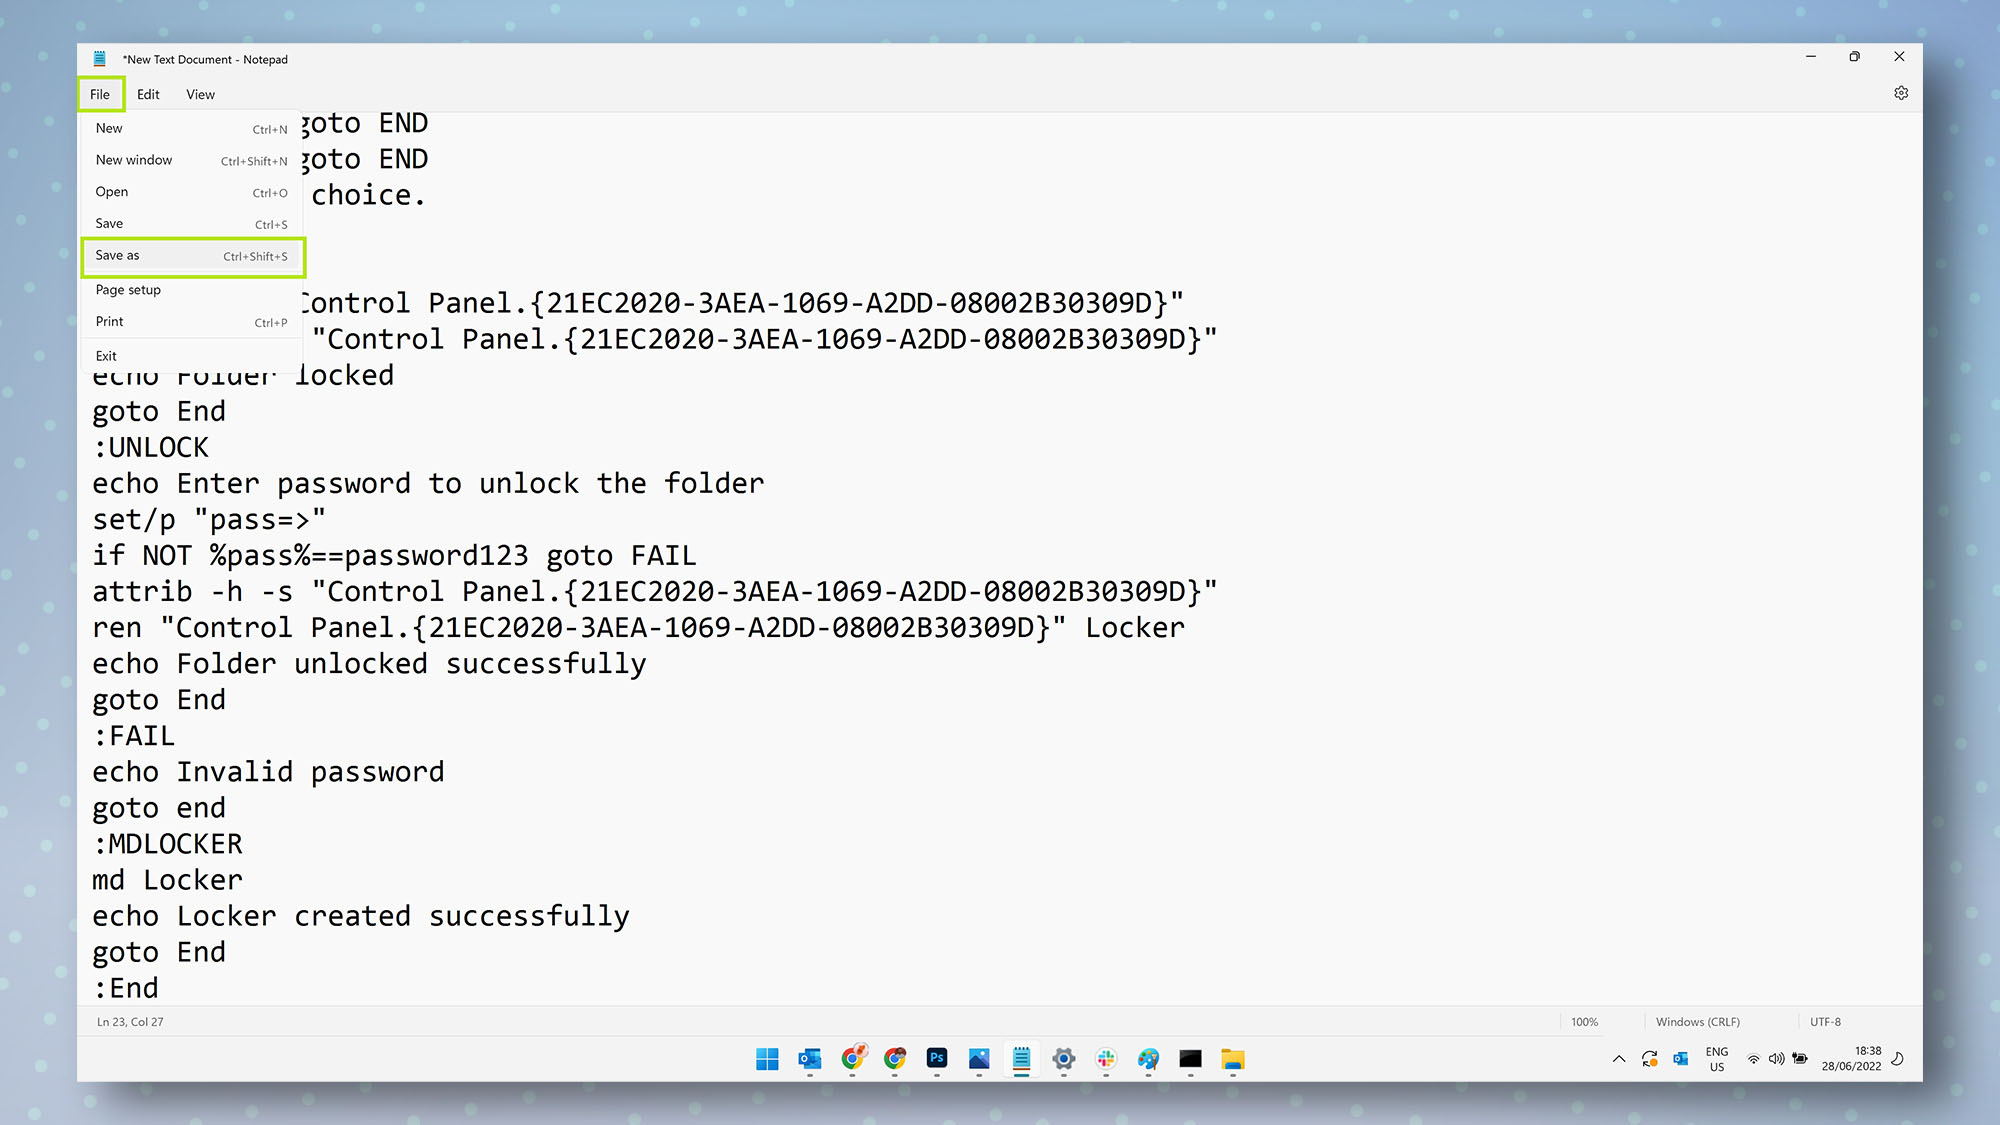
6. Now we need to turn this bunch of text into a folder locking tool. To do this, click File then select Save As...
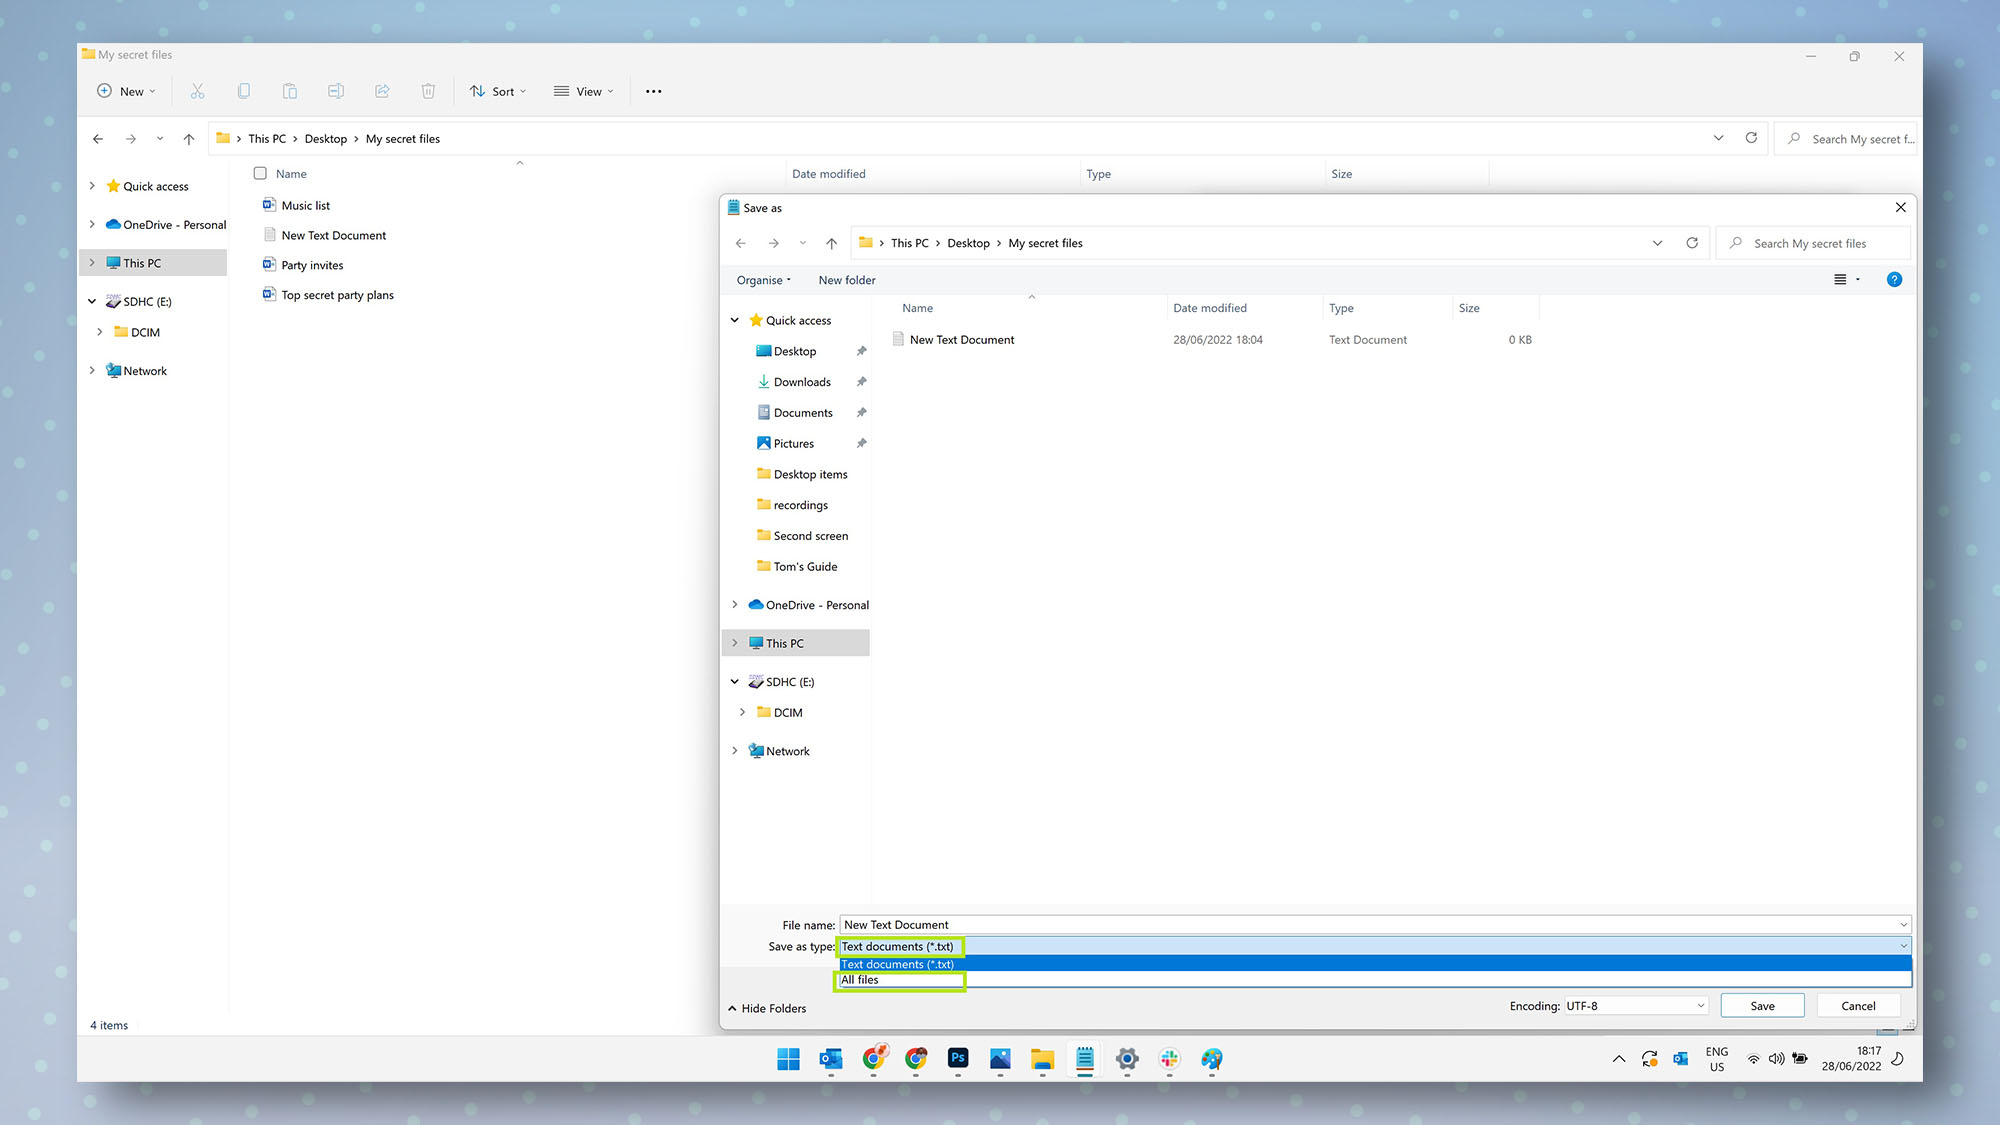
7. Click Text documents in the Save as type field, then click All files.
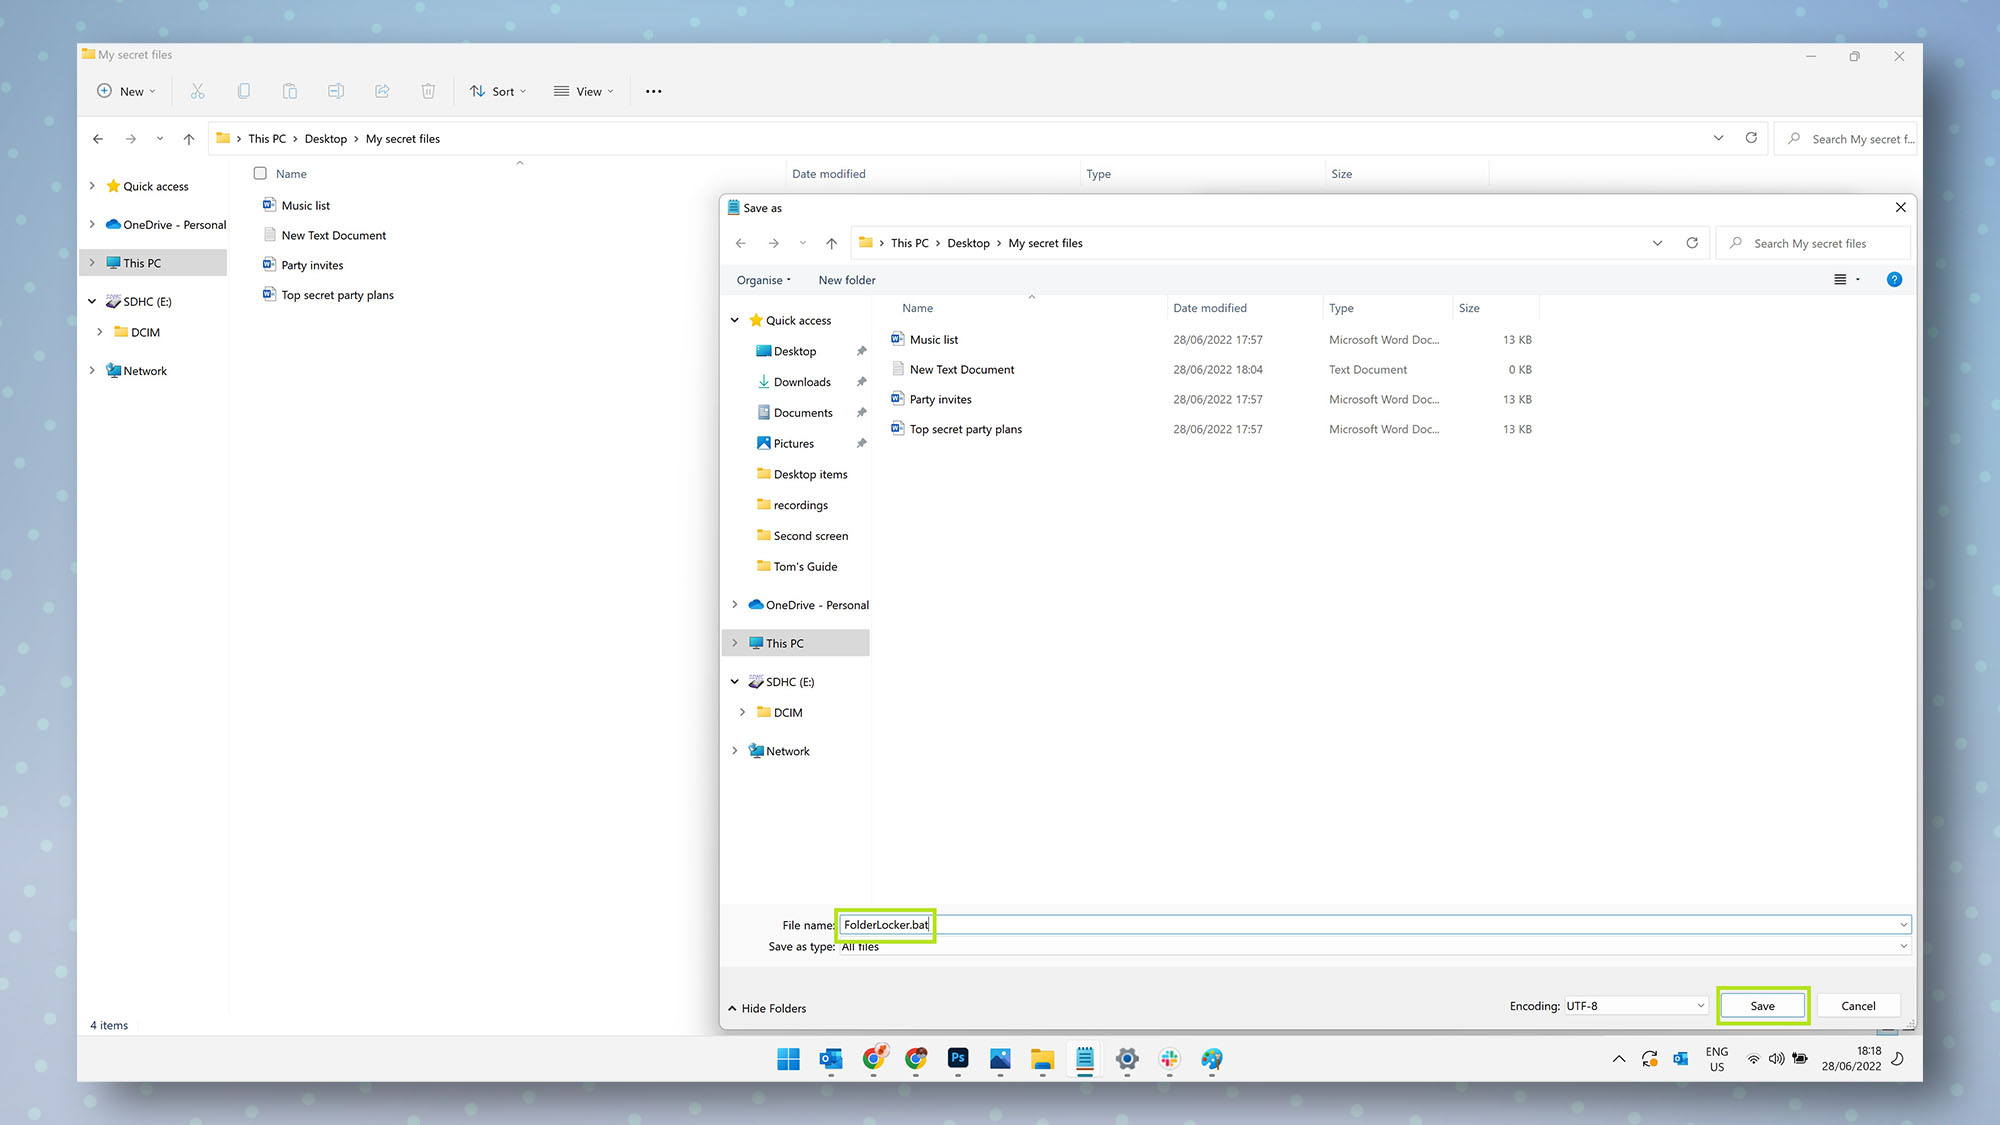
8. In the File name field, enter FolderLocker.bat then click Save.
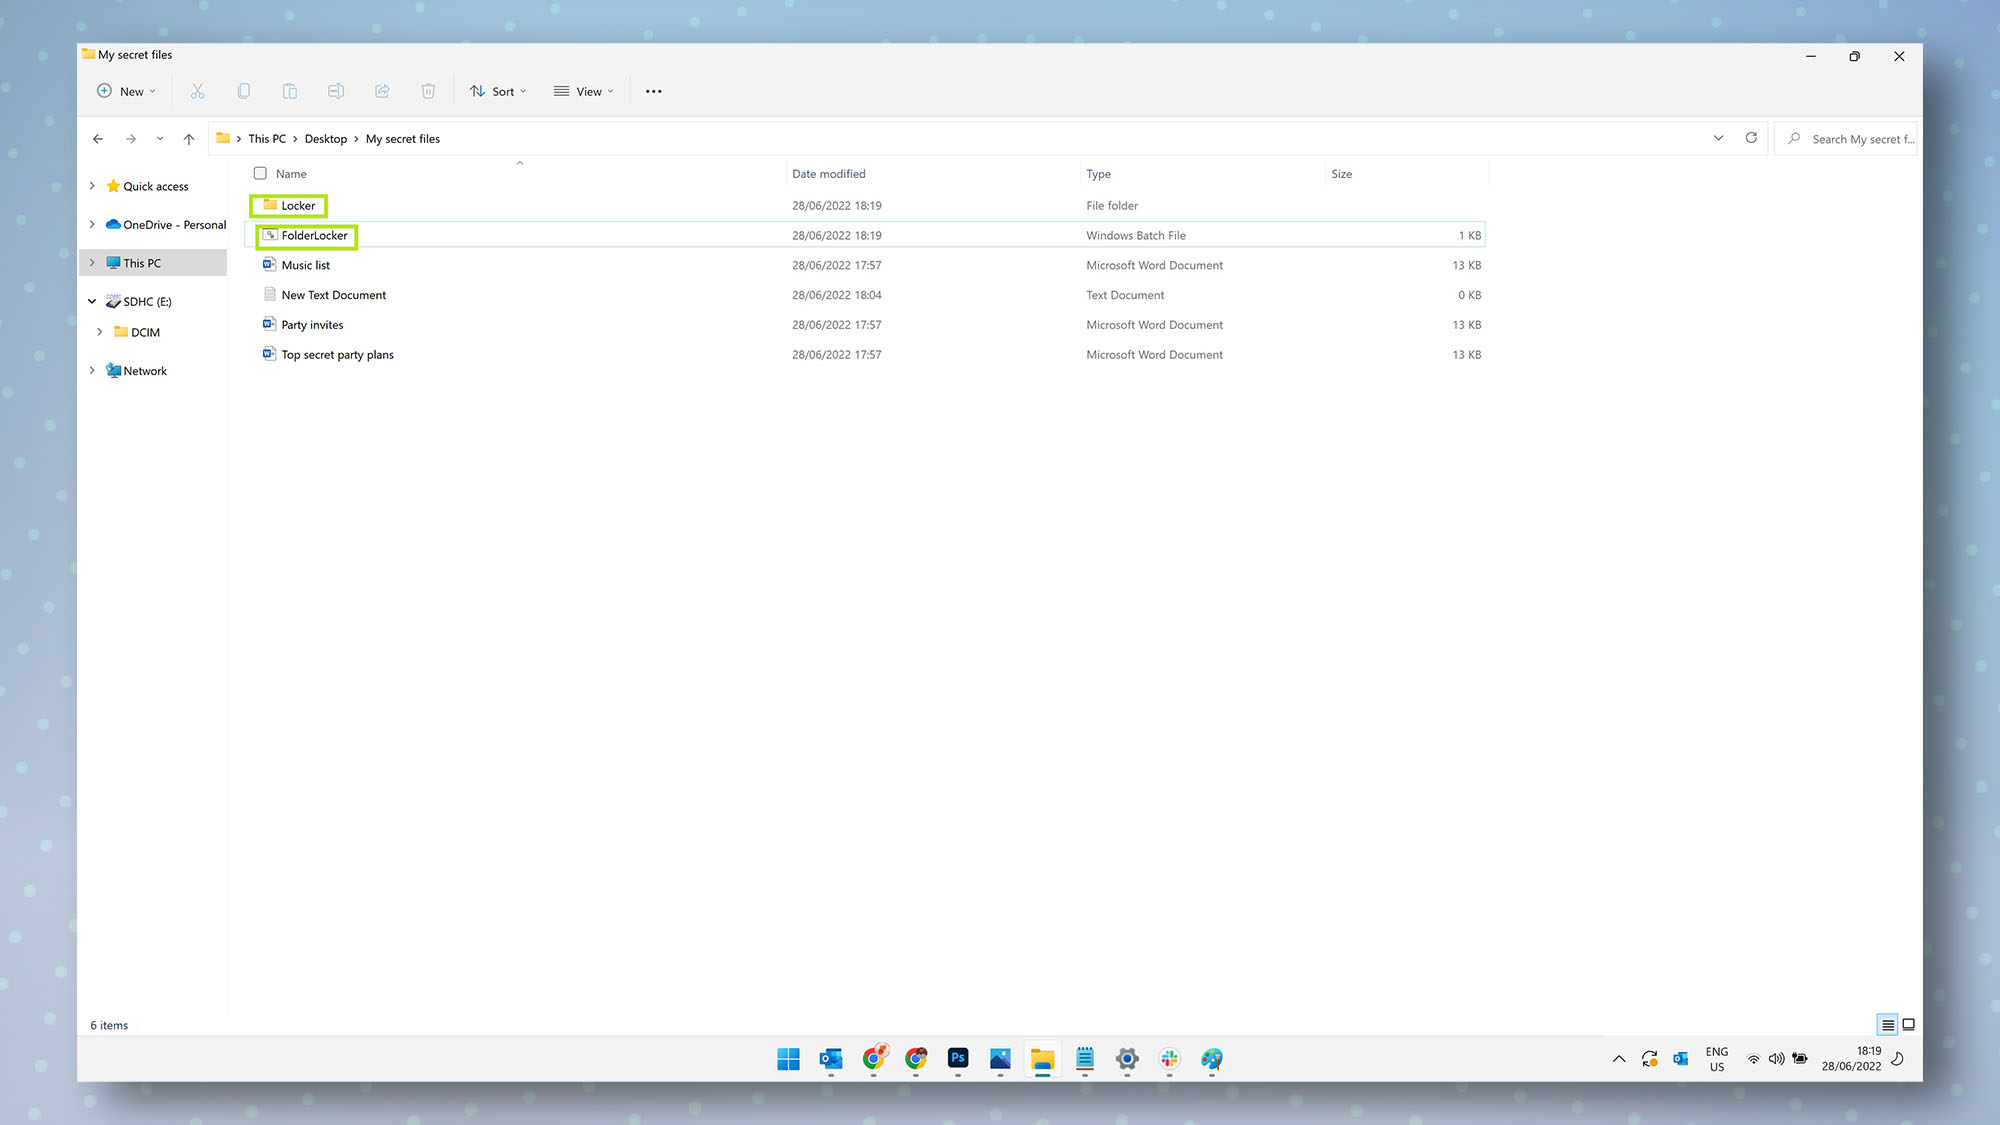
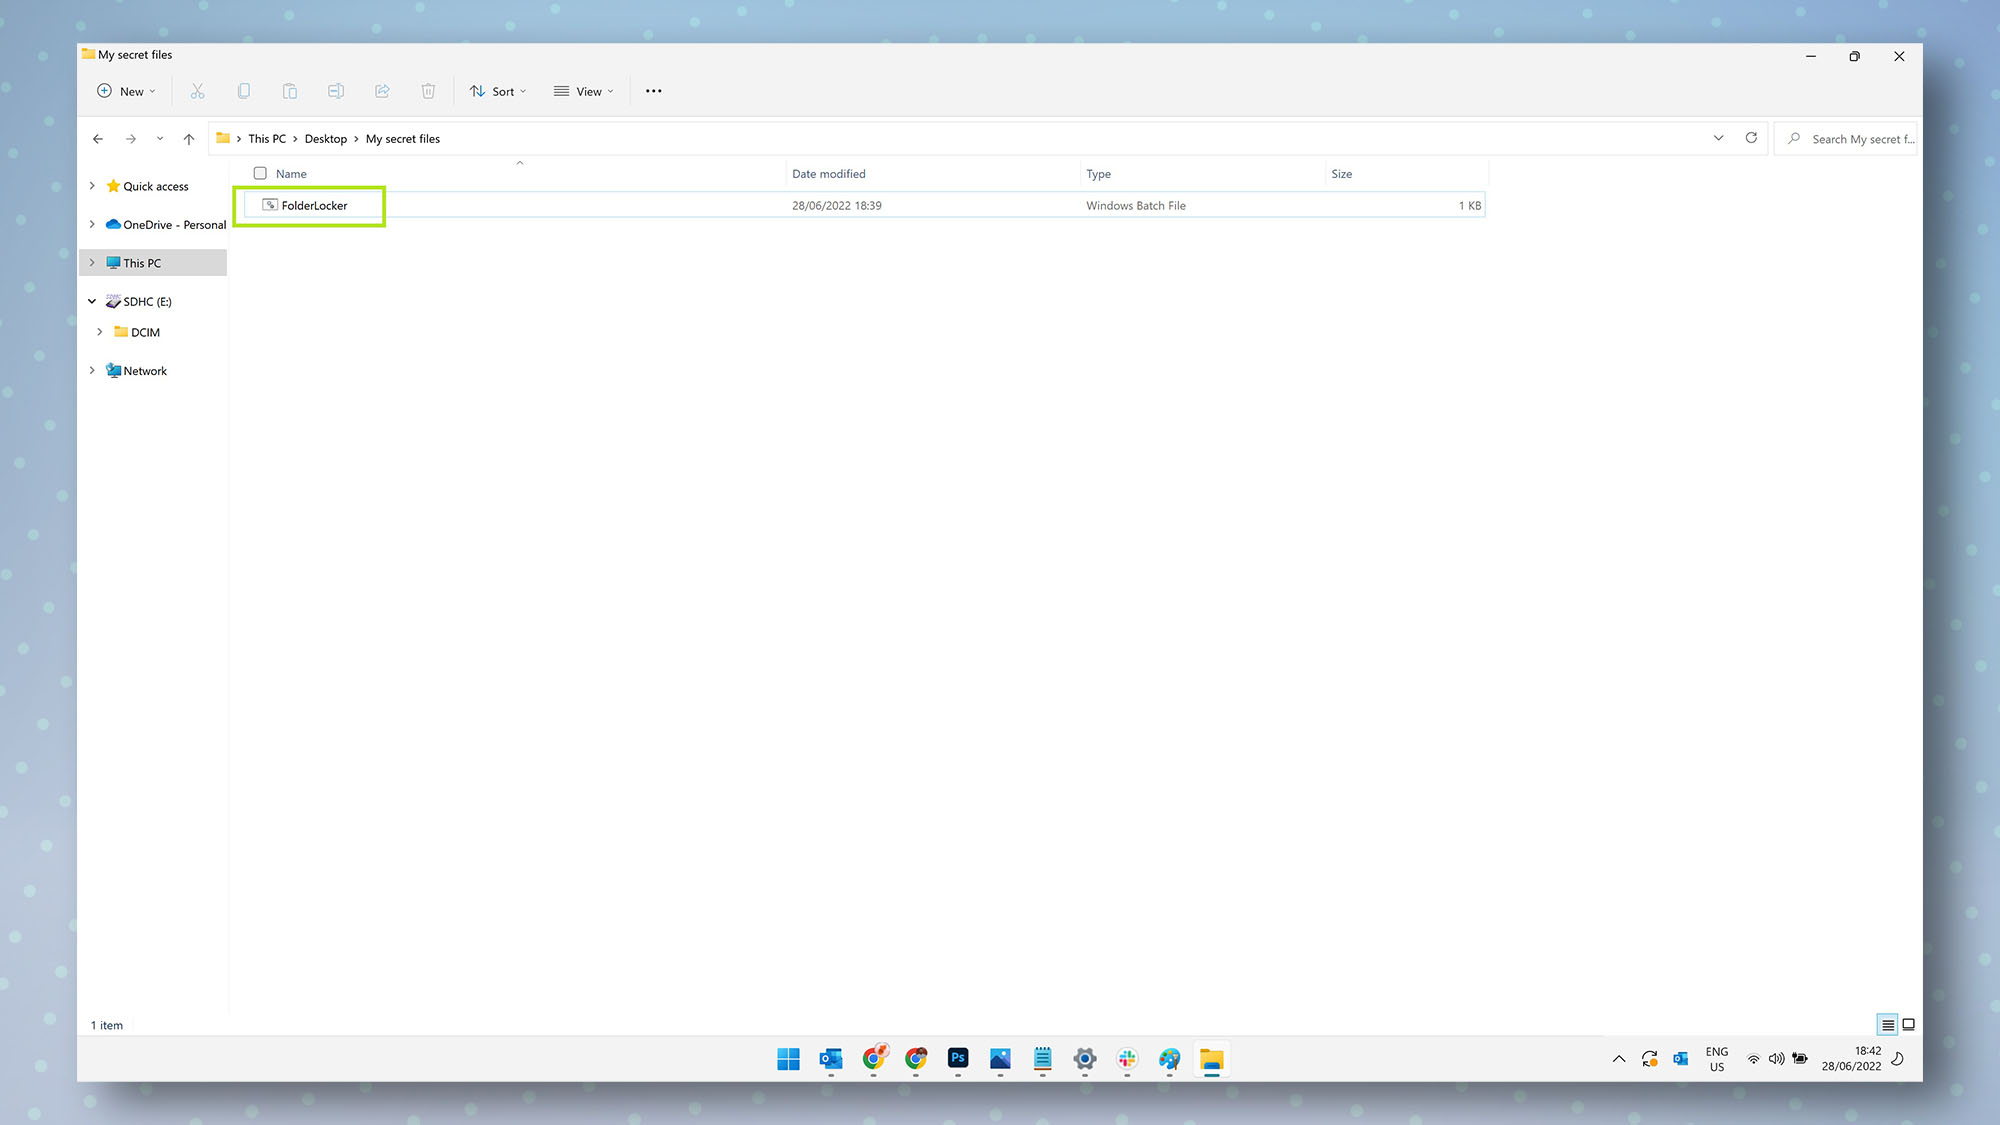
9. You should now see the FolderLocker file appear inside your folder. Double-click the FolderLocker file and the Locker folder will appear. You can now delete the New Text Document file if you wish, since it's no longer needed.
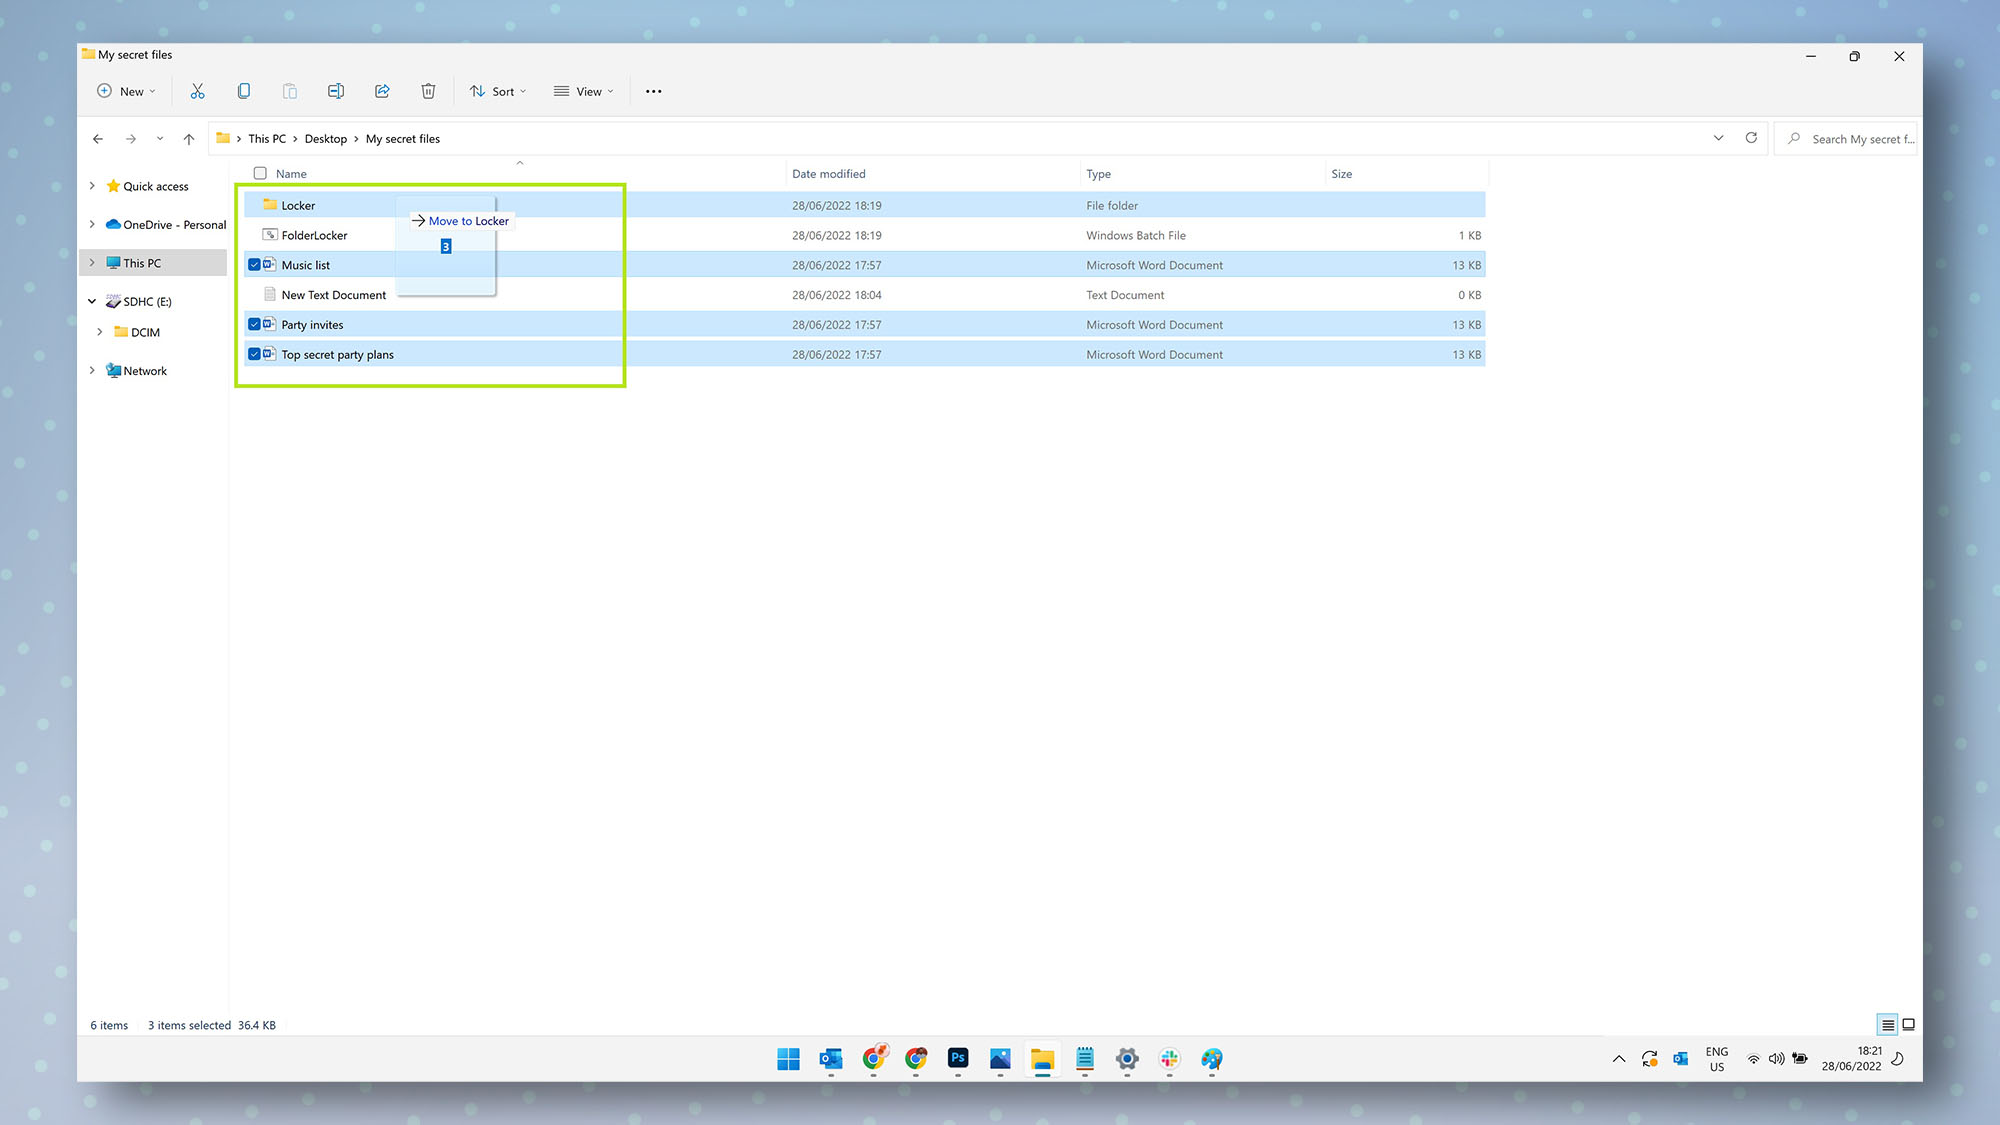
10. The Locker folder is the place where you can hide anything you want to be hidden and password-protected. Place any files you wish to protect inside the Locker folder, by either dragging the files or pasting them into the folder.
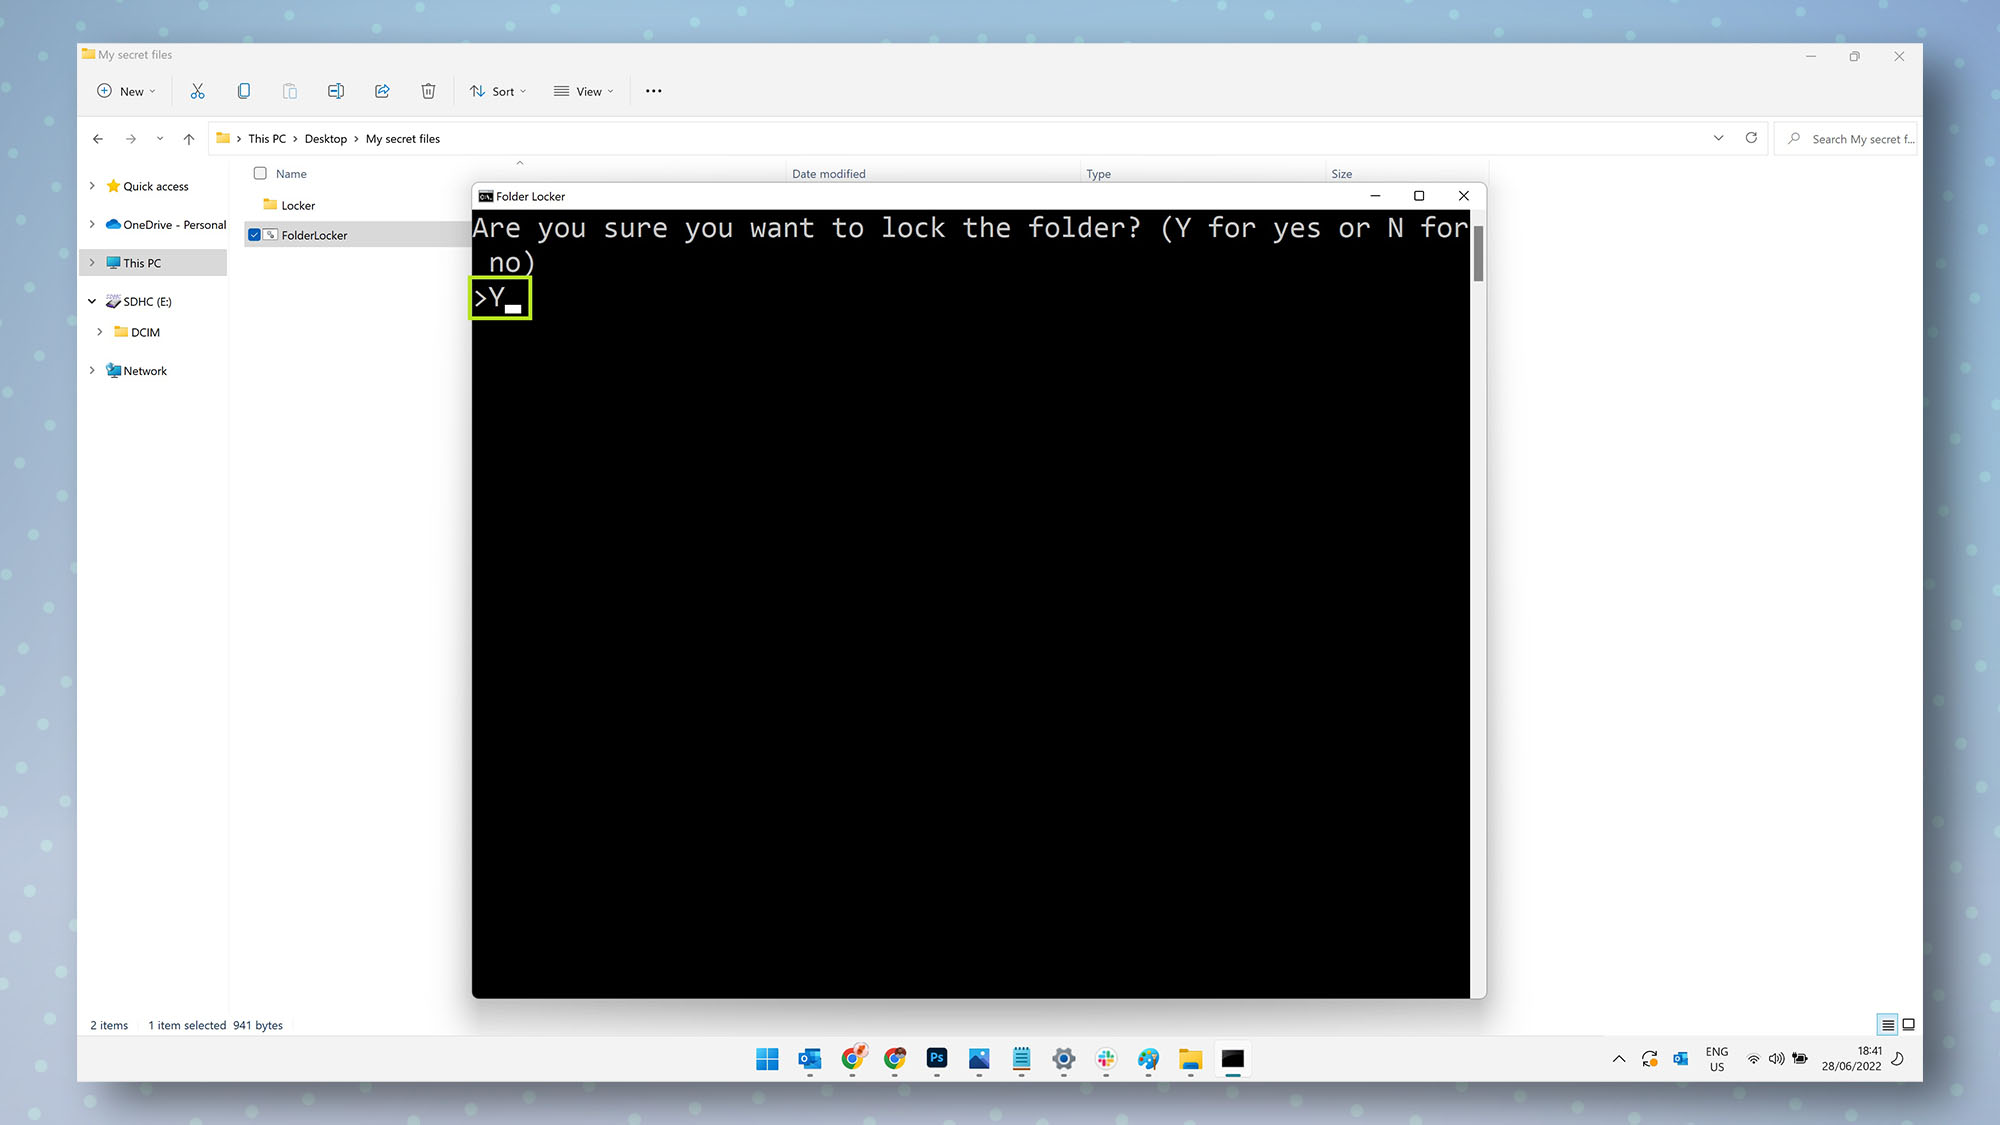
11. Now for the fun part. To hide your Locker folder and protect it with the password you chose earlier, double-click the FolderLocker file inside the folder.
12. On the prompt that appears, type "Y" then press enter/return.
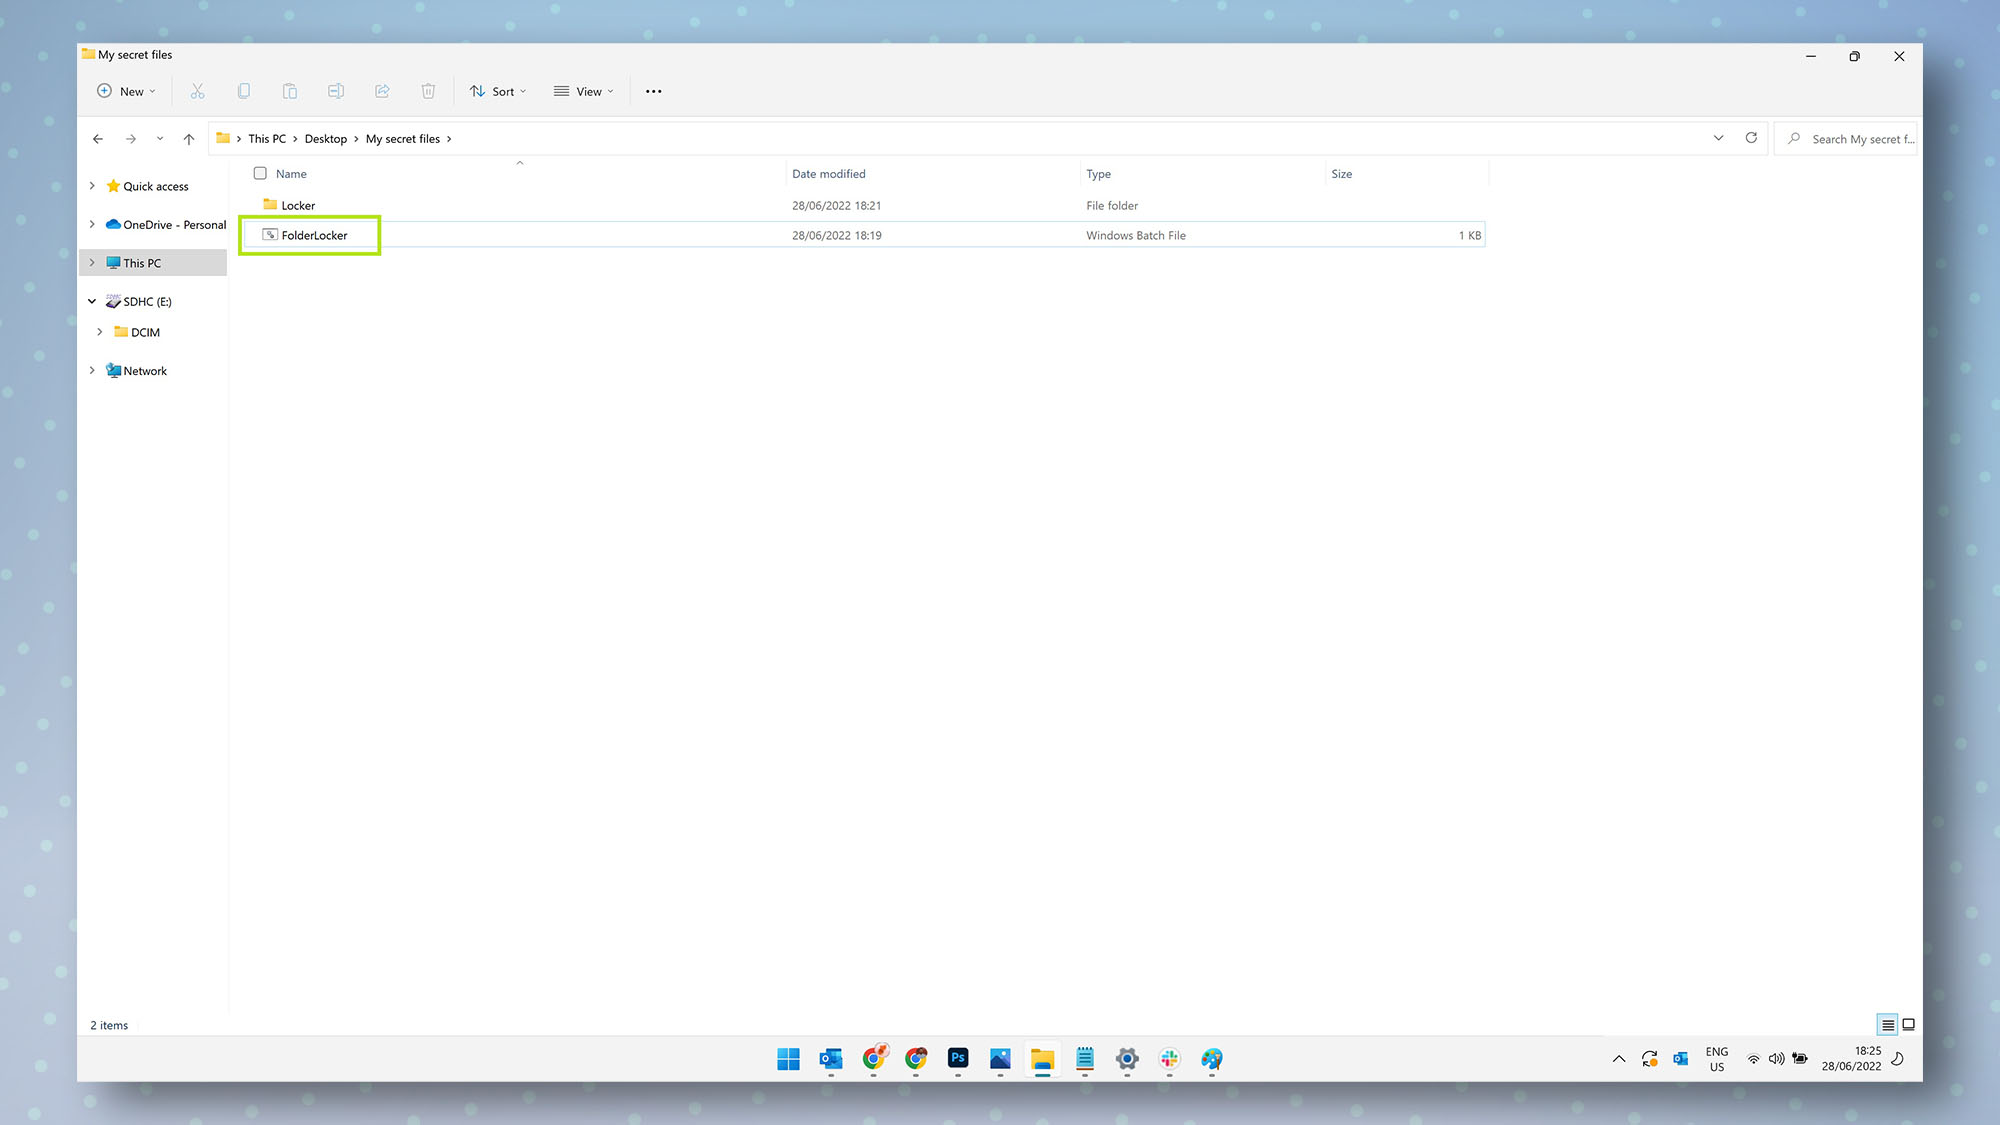
13. Your Locker folder should now disappear, protecting its contents along with it. To make the Locker folder and its contents reappear, double-click the FolderLocker tool.
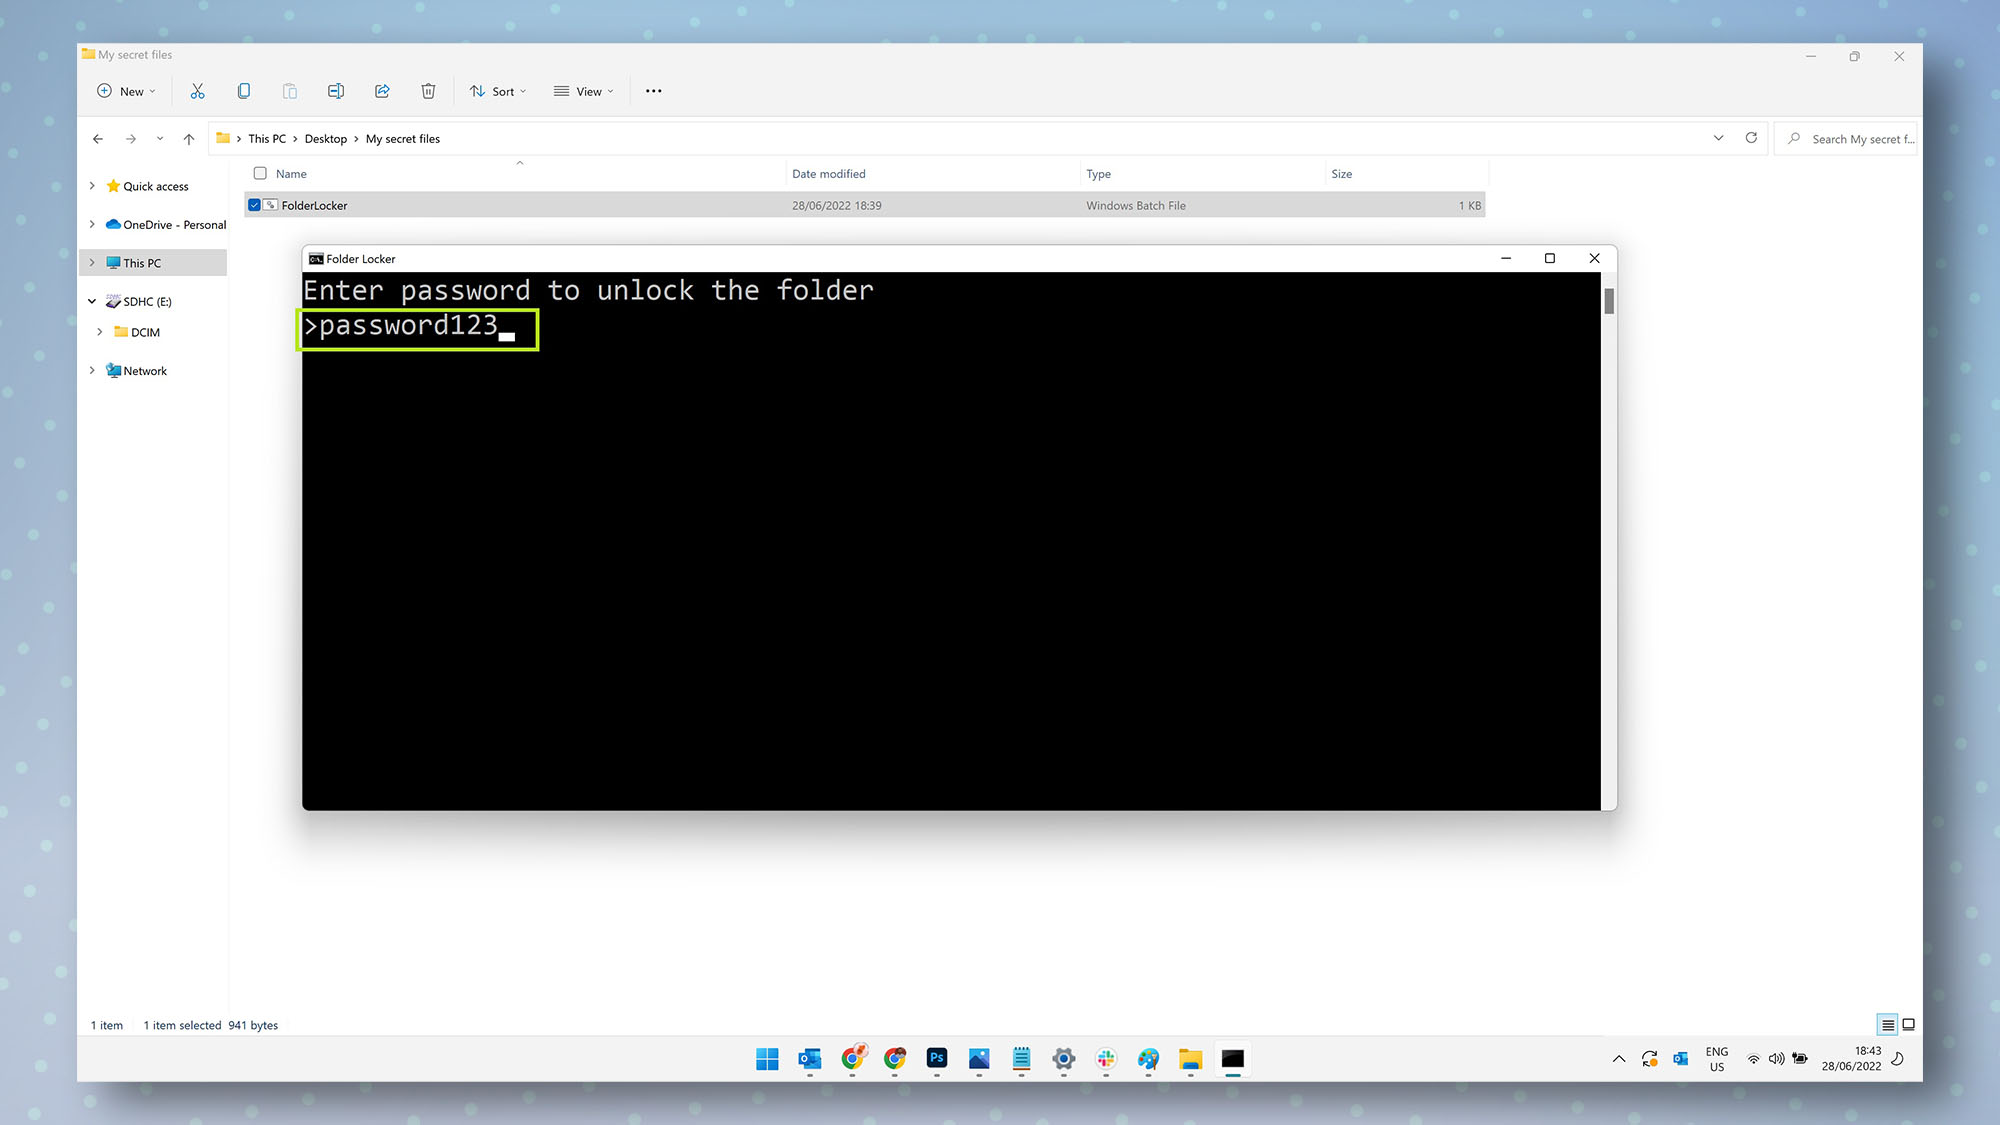
14. In the prompt that appears, input the password you chose earlier, then hit enter/return.
15. Your Locker folder and its contents should now reappear. To hide your Locker folder again, simply double-click the FolderLocker file and input Y, then hit enter/return in the prompt, just like before.
Now you know how to password protect folders on Windows, make sure to check out some more of our Windows guides, including how to type emoji on Windows, how to change the Windows 11 Start menu back to Windows 10, how to install Android apps on Windows 11 and how to enable clipboard history on Windows.
If you'd like to shore up your Apple computer's security, read our guides on how to password protect folders on Mac, how to password protect a PDF on Mac and how to encrypt files on Mac. You can also check out how to find the Home folder on Mac and add it to Finder.

Dale Fox is a freelance journalist based in the UK. He's been a tech nerd ever since childhood, when he used the money from his first job as a paperboy to buy a subscription to GamesMaster magazine. Dale was previously a presenter and editor in China, where he also worked as a copywriter for OnePlus at its Shenzhen HQ.
