This hidden Android camera feature instantly improves your selfies — use it now
Learn how to mirror your selfies on Android in a few simple steps
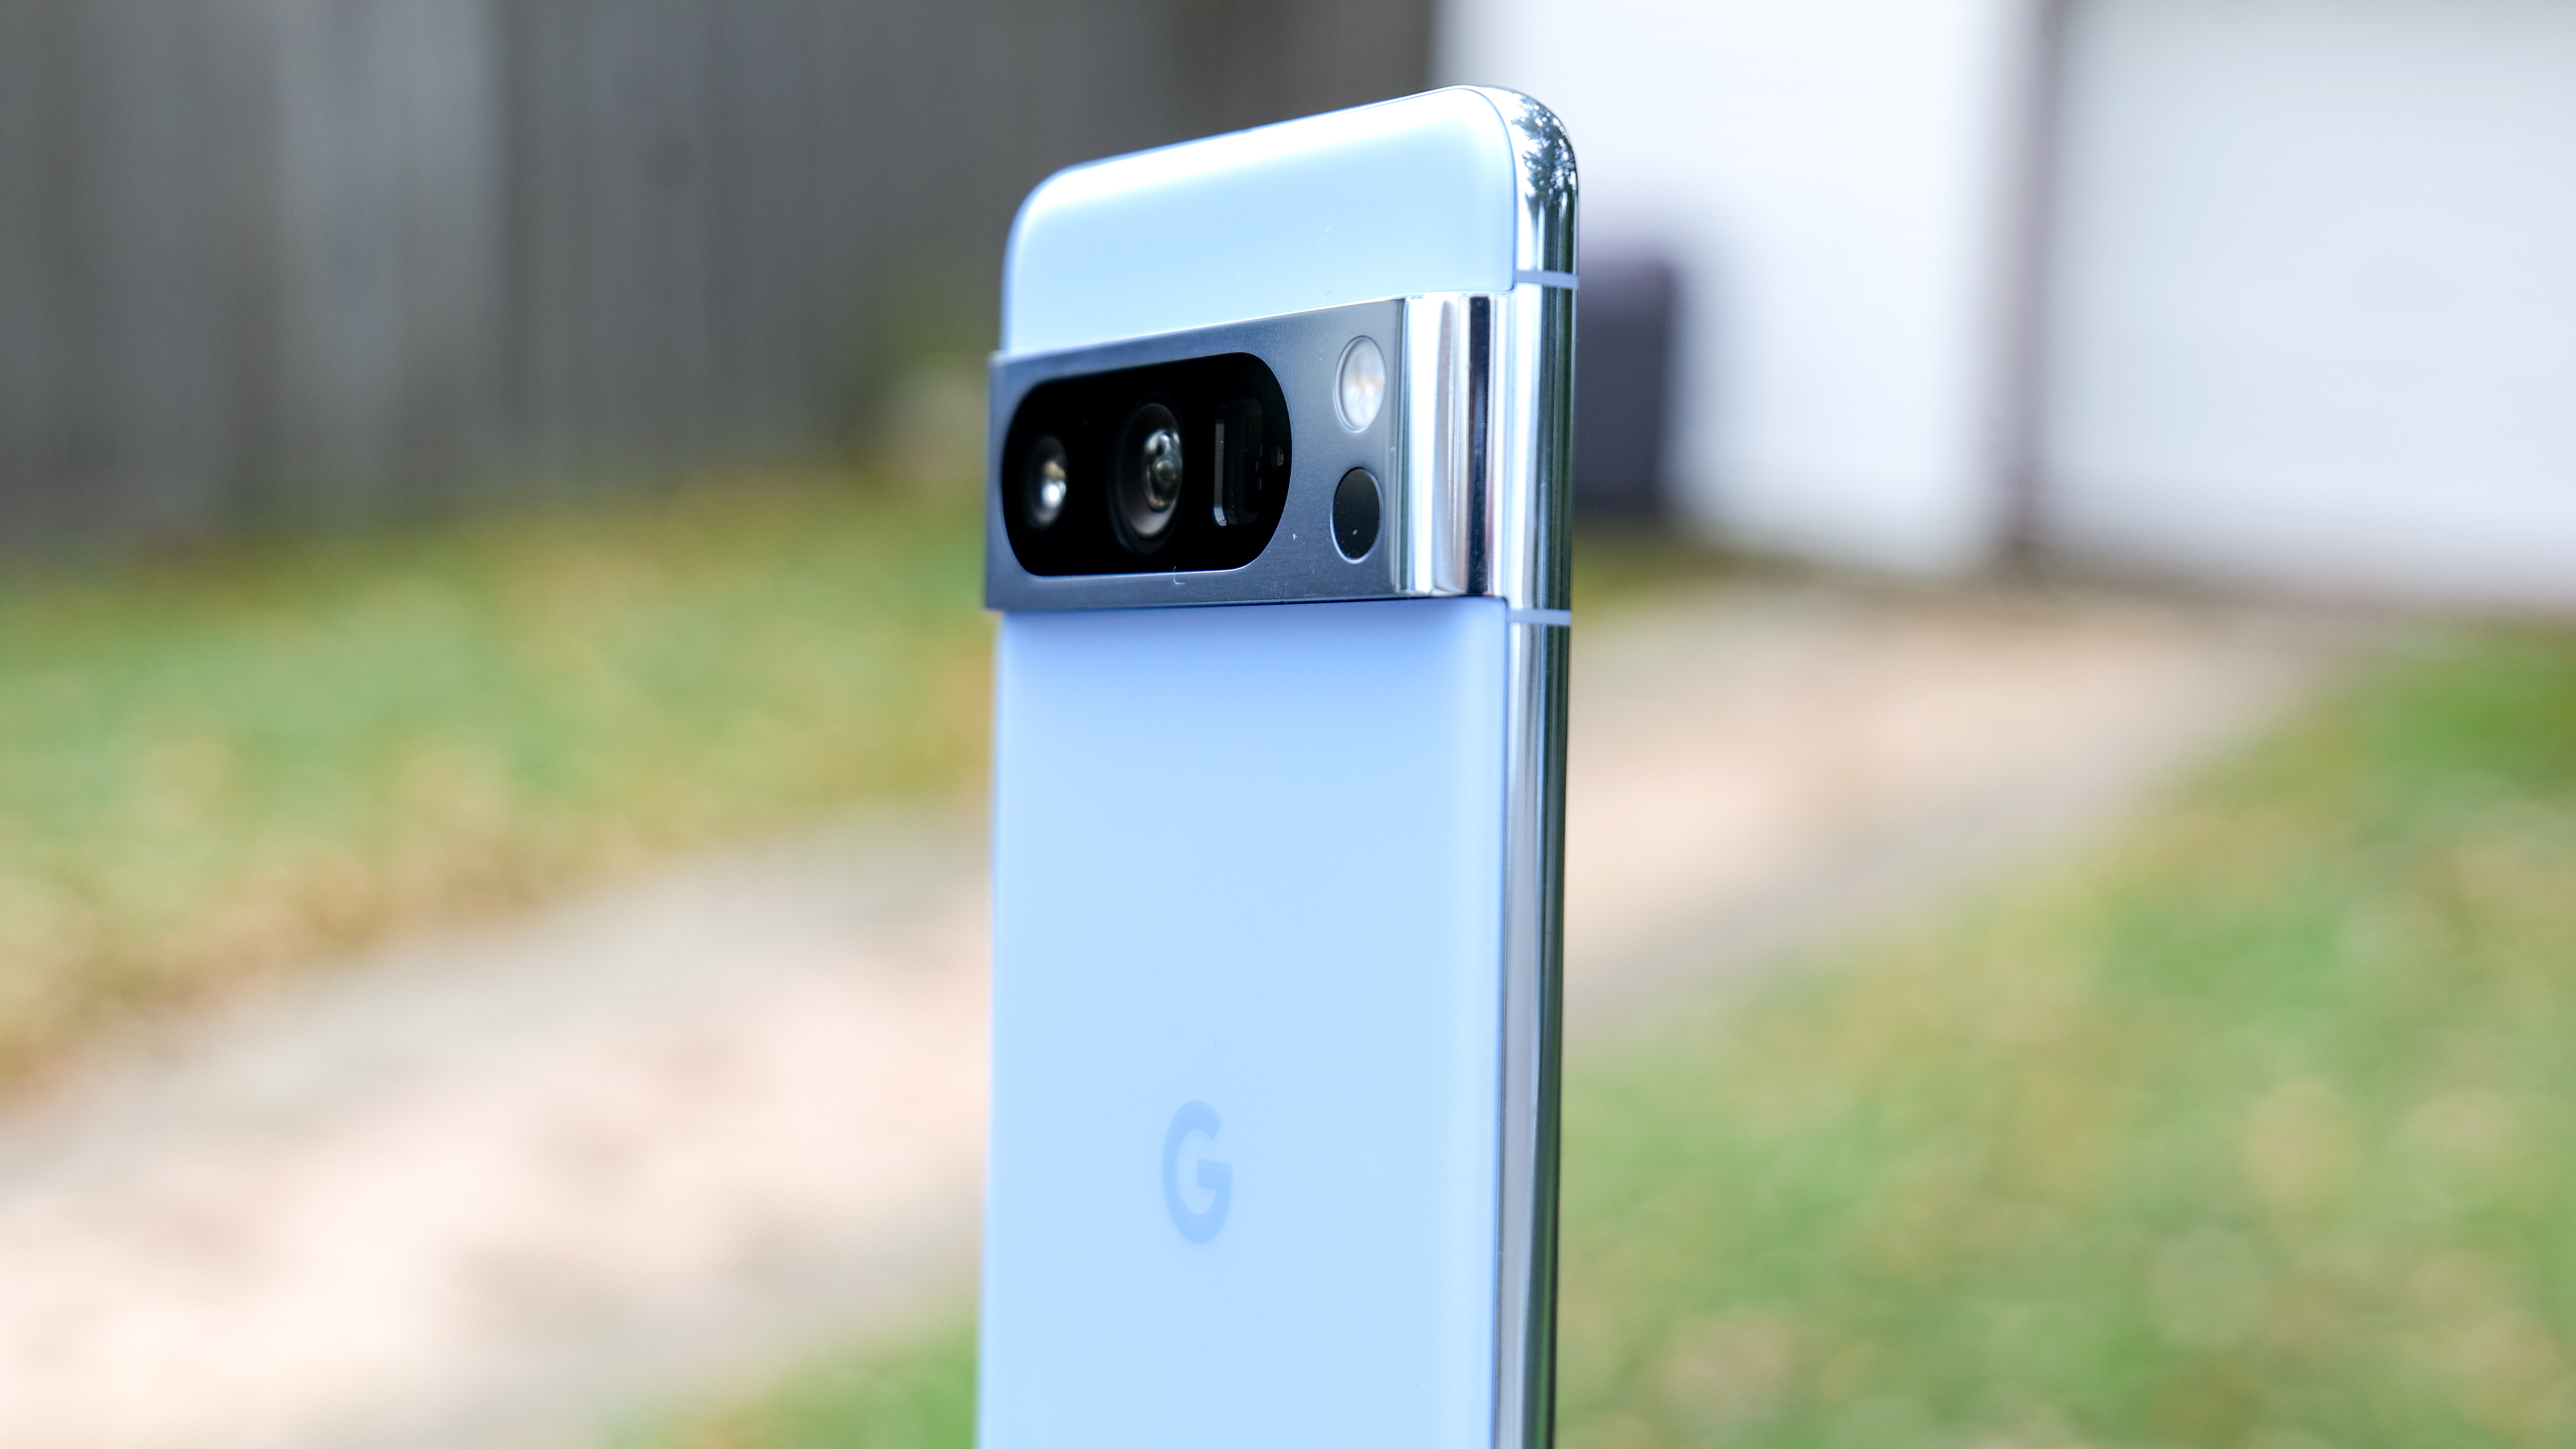
Have you noticed that when you look at your selfies, your face looks a bit, well, weird? This is because what you see on the screen when you take a selfie is the mirror image of what you actually look like — that is to say, it's what you see when you look in the mirror. But, by default, your phone will produce a non-mirrored version of you in your final photo.
Nobody's face is exactly symmetrical. You might part your hair on one side, or have a mole on one side of your face, or have a slightly lopsided smile. We're so used to seeing the mirror-image version of ourselves every time we brush our teeth that our brains think that's the correct version of our appearance. There's even a scientific term for this: Mere Exposure. People prefer the look of things they're more familiar with. This is why we often think our faces look "wrong" in photos of ourselves.
The good news is that you can quickly and easily change the settings on your Android phone to ensure that every selfie you take matches the view you saw on your screen when you were taking it.
We'll talk you through how to set up mirroring your selfie photos.
How to mirror a selfie on Android
The screenshots below were taken from a Google Pixel 8 phone, but you can do this on any Android phone using the Google Camera app.
1. Take a photo using default settings
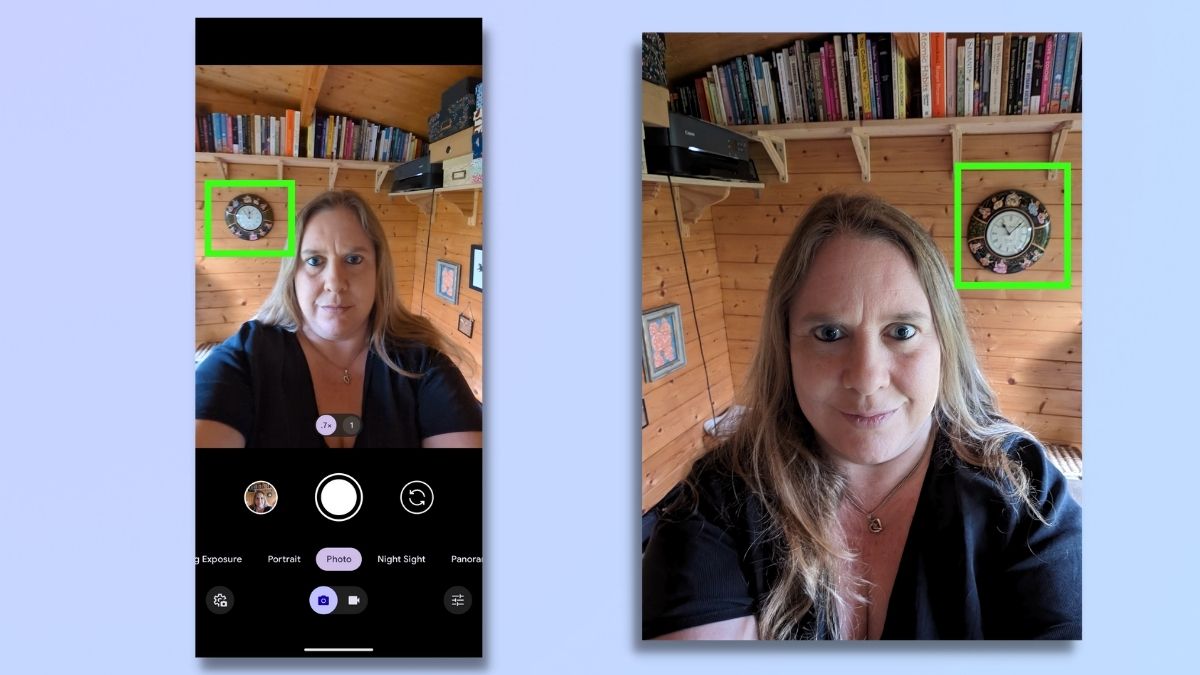
First of all, if you want to understand what we mean about the difference between what you see on your screen and what your photo looks like, try taking a selfie with your phone still set to its default settings.
In the left image, you can see a screenshot of what I saw when taking a selfie, and on the right is the picture that my phone camera took.
My view was a mirror image with a wall clock on my left and some framed pictures on the wall to my right. The photo my phone captured showed the non-mirrored version with the clock on my right and the picture frames on my left.
2. Open Camera settings
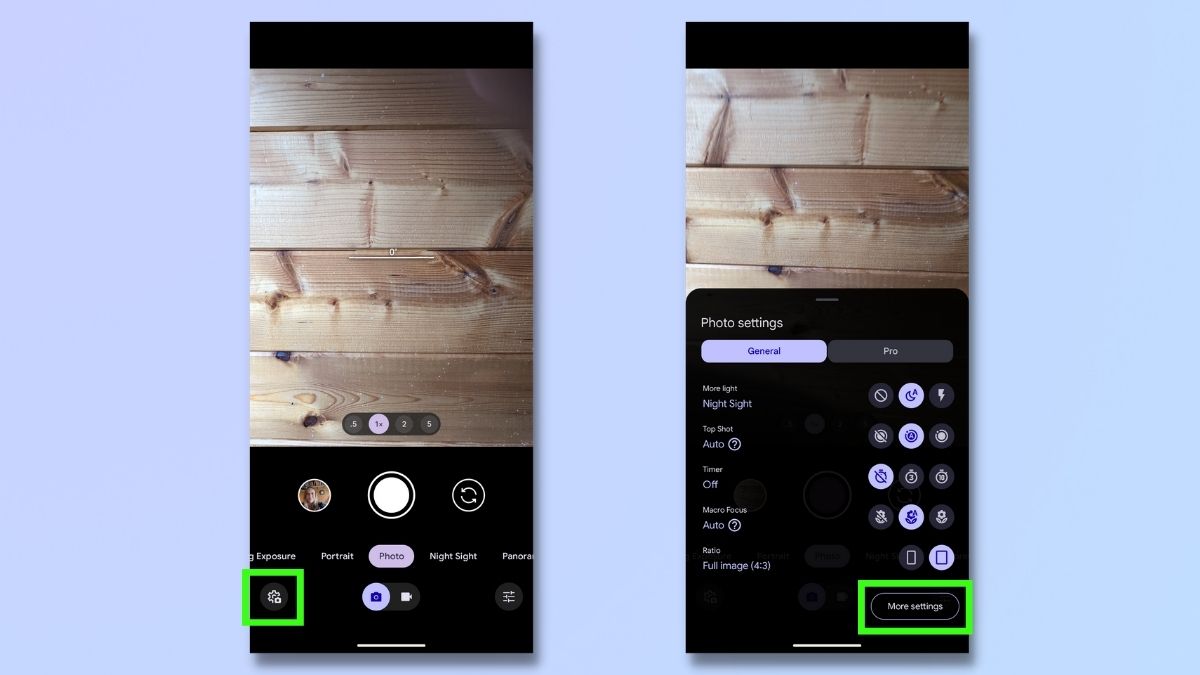
To change the settings so that your picture matches the camera view, select the settings icon on the bottom left of the screen. This brings up a short list of camera settings, but these don't include the mirror selfie option, so tap More settings.
3. Turn on Save selfie as previewed
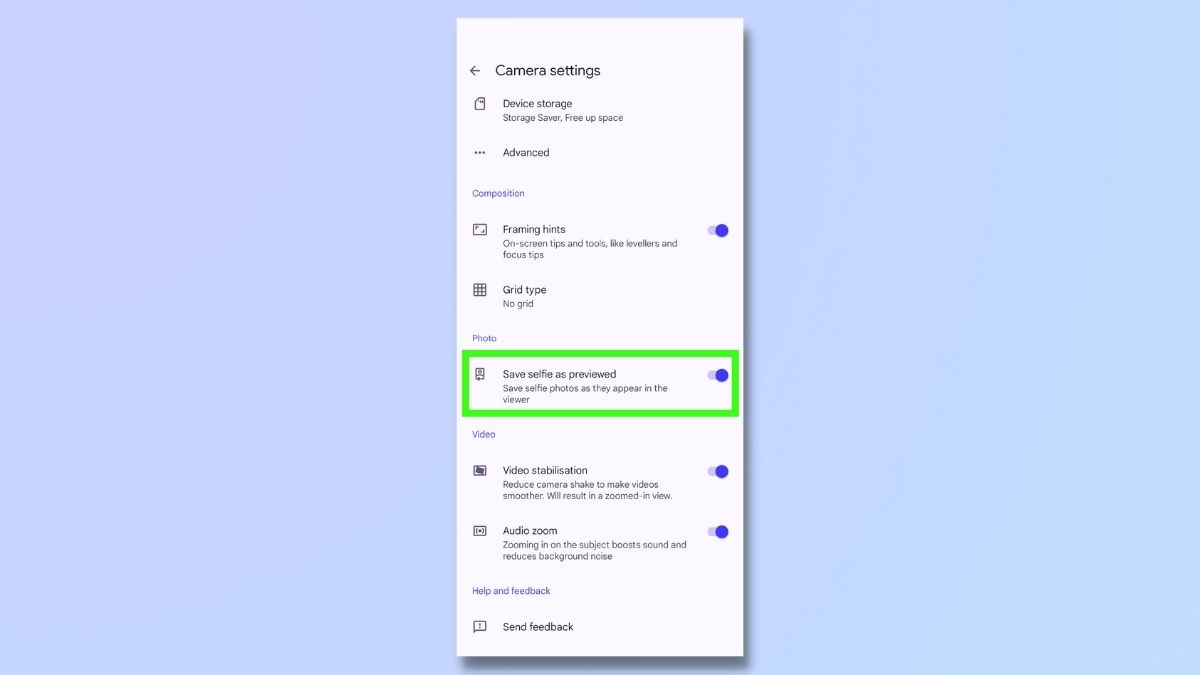
On the settings screen, scroll down to Photo and turn on Save selfie as previewed.
4. Take a photo with the new settings
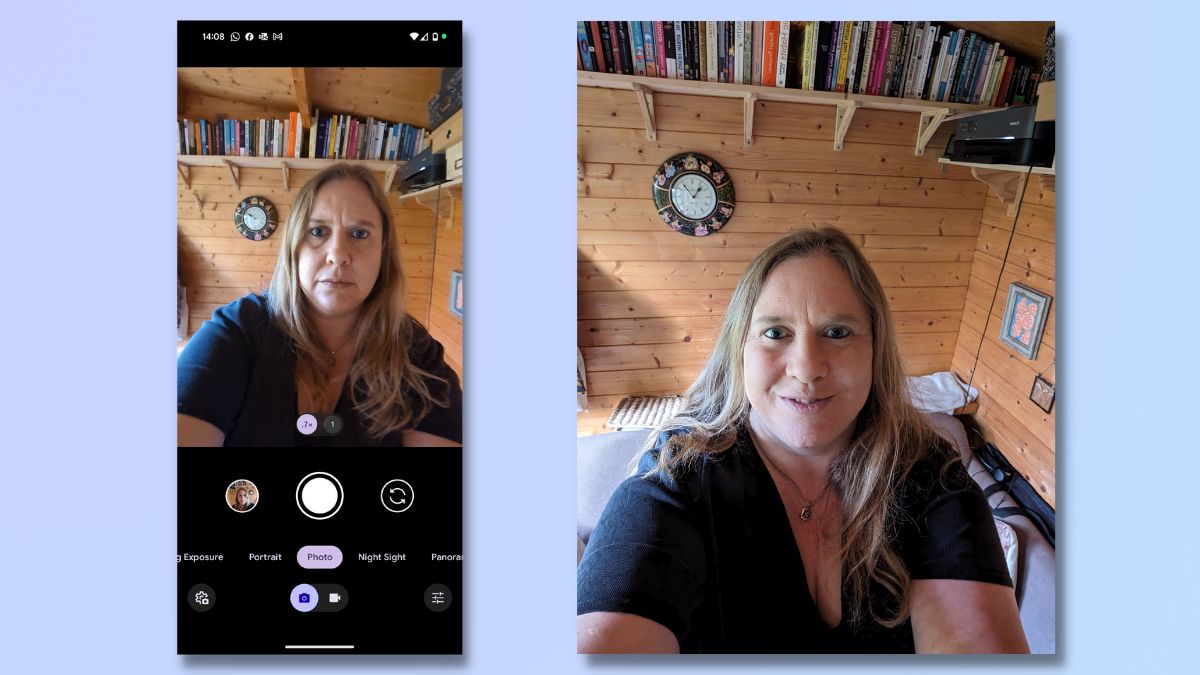
Now, take another selfie. I took another selfie in the same spot as before. As you can see from the images above, the photo I took now matches what I saw on my screen, with the clock on my left and the picture frames to my right.
Now you know how to set up mirrored selfies in just a few easy steps. Of course, there will be occasions when you don't want a mirrored version of yourself. If you're standing by a road sign or holding a book, then your resulting photo will have mirror-image text, which will be difficult for others to read. In those cases, you can simply turn off the mirror selfie settings before taking a picture or flip the image afterward.
But sometimes, you just want your selfie to look exactly like the version you saw when you were taking it. And saving your selfie as previewed enables you to do just that.
Sign up to get the BEST of Tom's Guide direct to your inbox.
Get instant access to breaking news, the hottest reviews, great deals and helpful tips.
To discover more nifty tricks you didn't know you could do on your Android phone, check out our guides to enabling Android 14's monochrome theme, learning about Google Pixel Emergency SOS, and using Google Pixel 8 Magic Editor.

Emma Street is a freelance content writer who contributes technology and finance articles to a range of websites, including Tom's Guide, Top10.com, and BestMoney. She has over 15 years of experience working in technical development within the fintech industry. When not writing about tech, Emma can be found writing romantic fiction, reviewing films, and updating her tea blog.
