How to make an image backup in Windows 11

To effectively safeguard your system and files, you’ll want to learn how to make an image backup in Windows 11.
An image back up is different from a file back up in that it creates a full snapshot of the entire system, including the operating system, applications, system settings, and files, providing a comprehensive recovery solution. In contrast, a file backup’s limited to copying individual files and folders.
In this guide, we'll walk you through the process of making an image backup so you can easily restore your system in case of unexpected issues. And if you’re in need of storage, we’ve also compiled the best external hard drives.
How to make an image backup in Windows 11
Note: Ensure you’ve connected an external hard drive or a reliable storage solution with sufficient space to store the image backup.
1. Open Control Panel
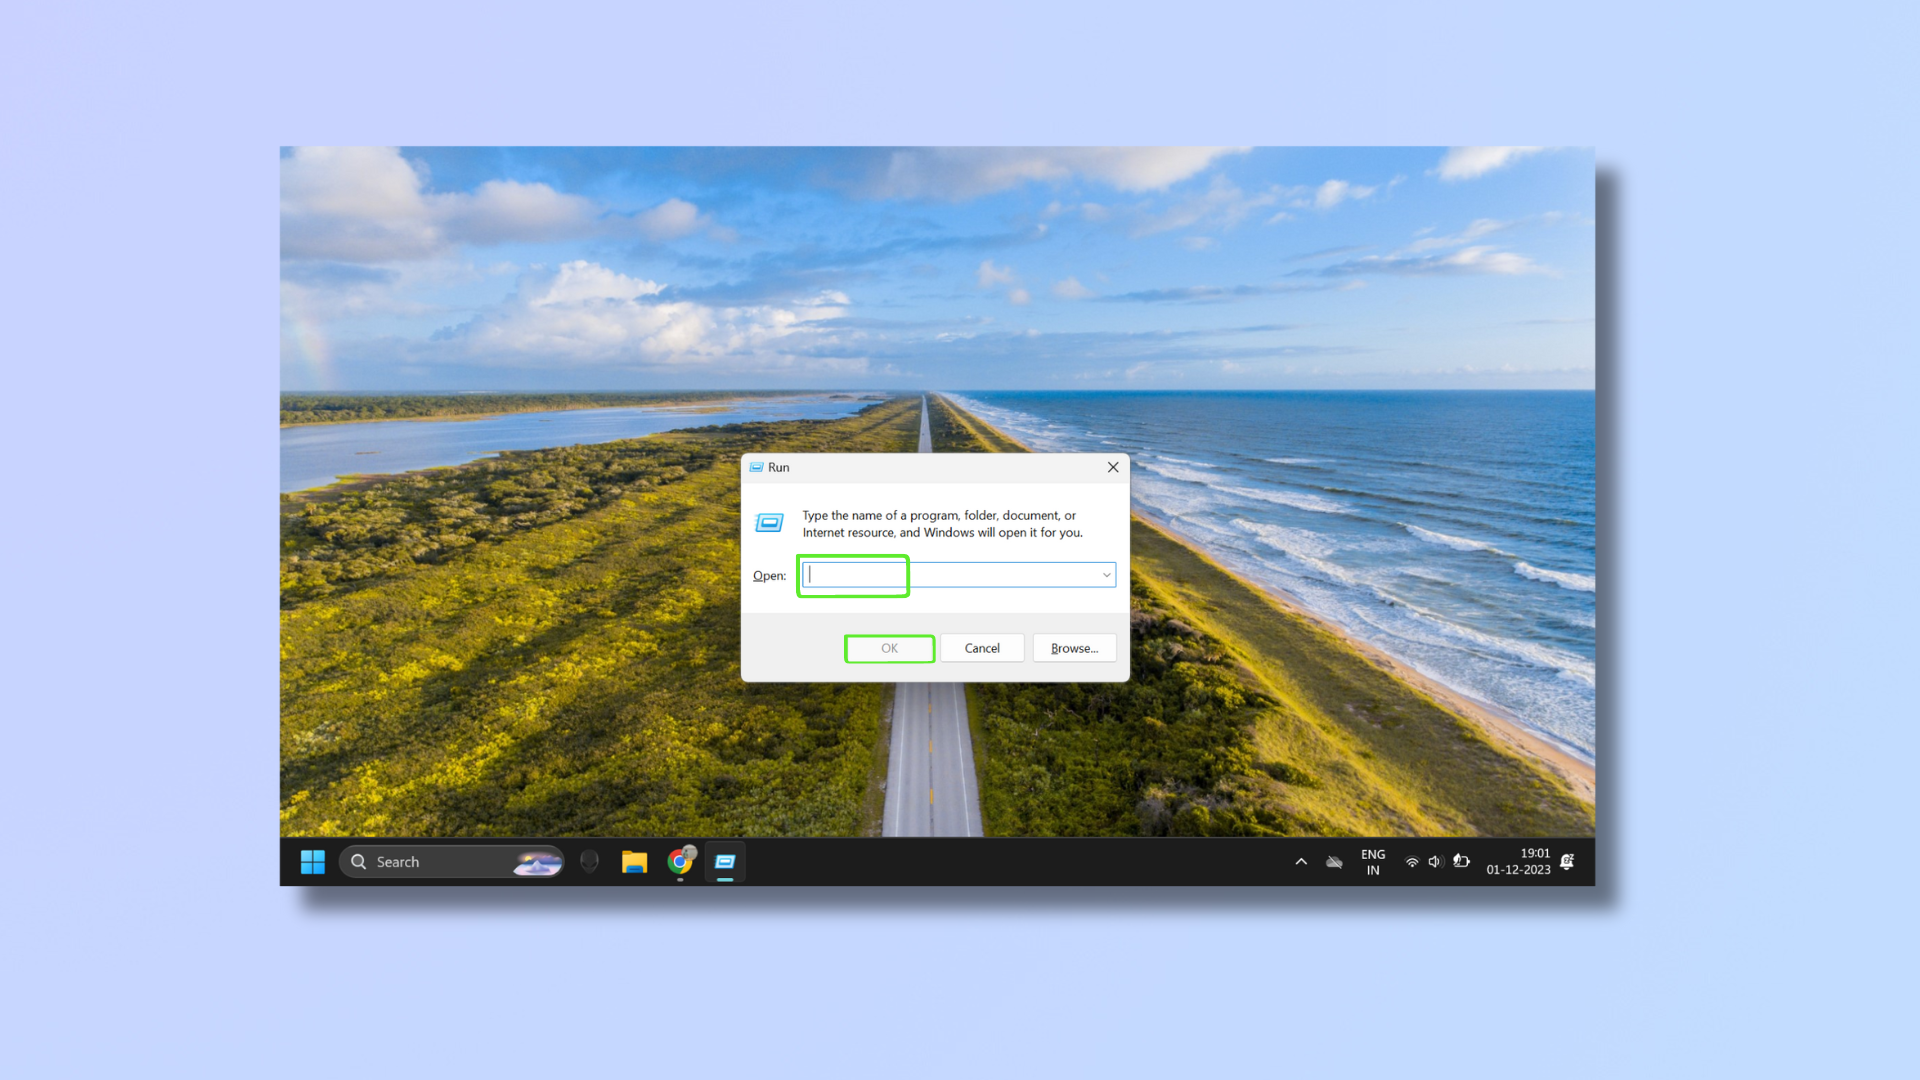
Press Windows + R to open the Run dialog box. Type “control” in the text box and press Enter or click OK.
2. Go to Backup and Restore
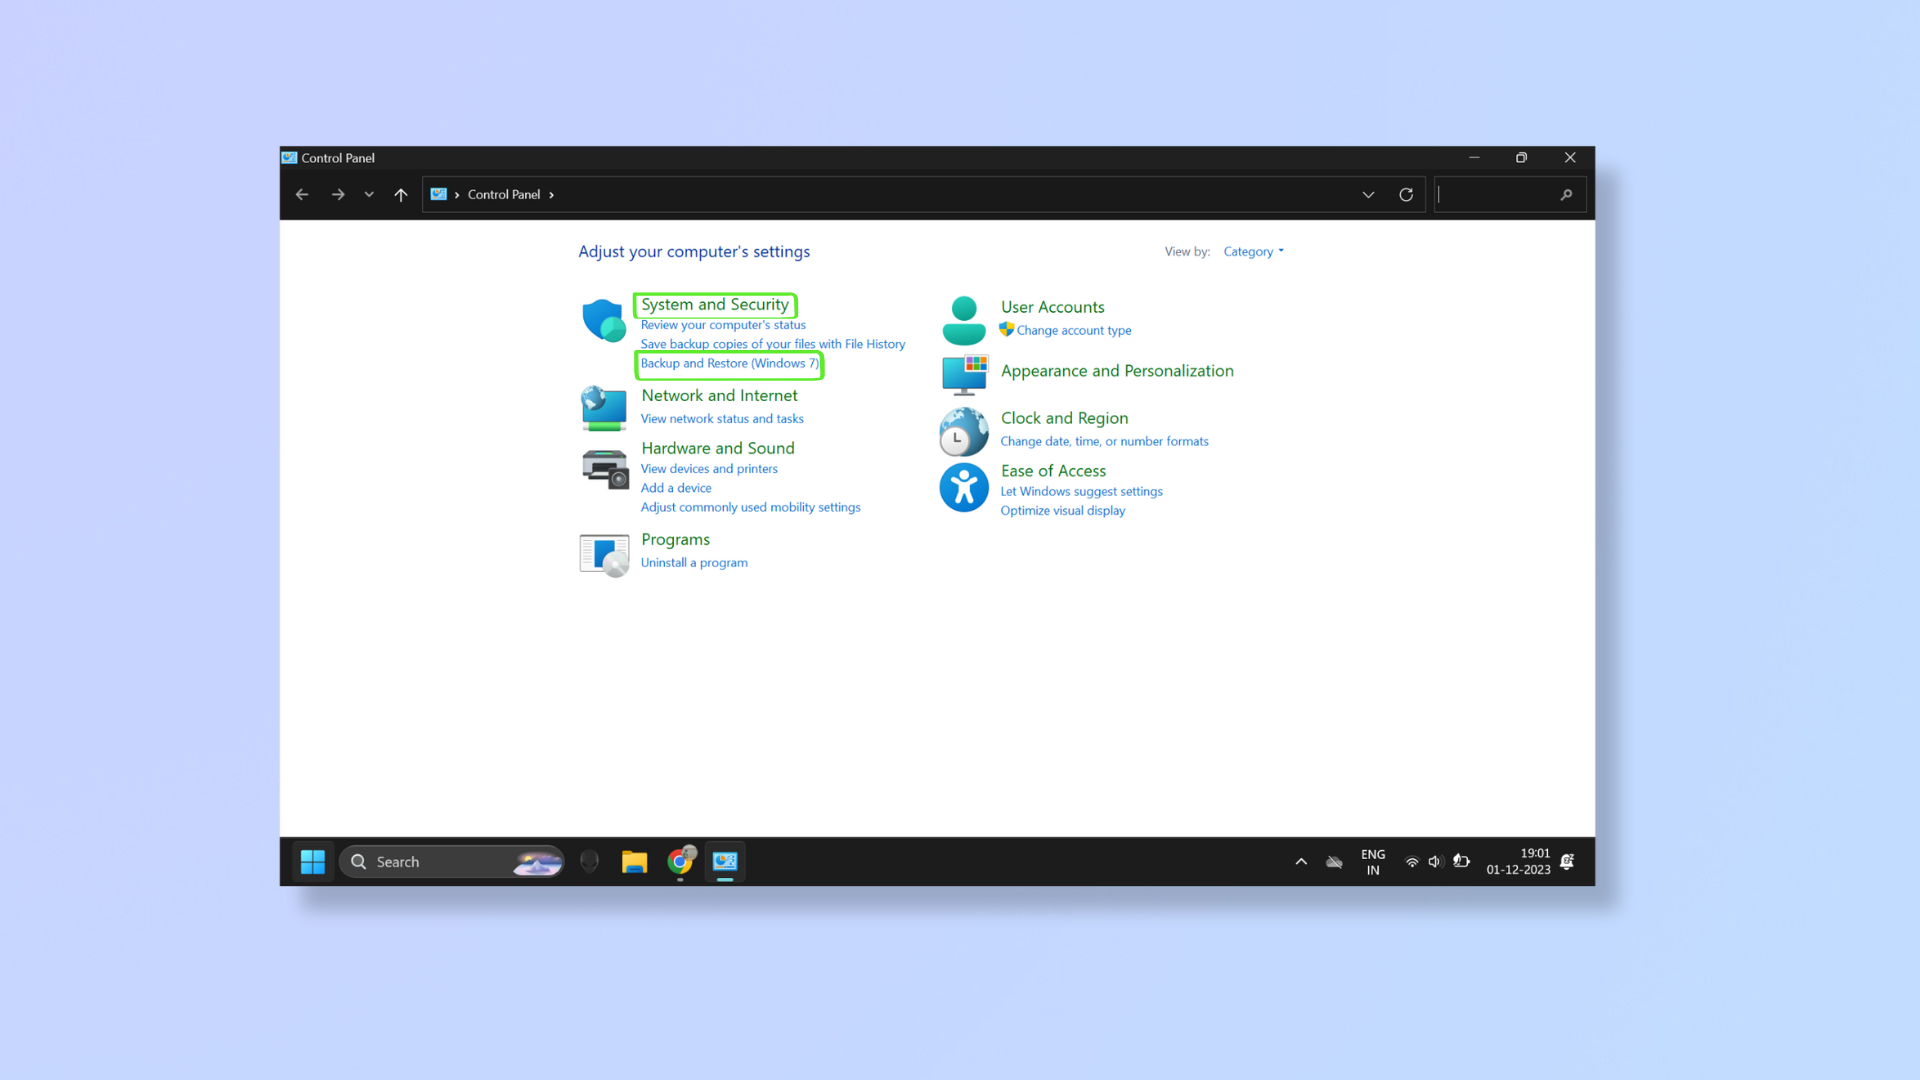
Click Backup and Restore, which is under System and Security.
3. Create a system image
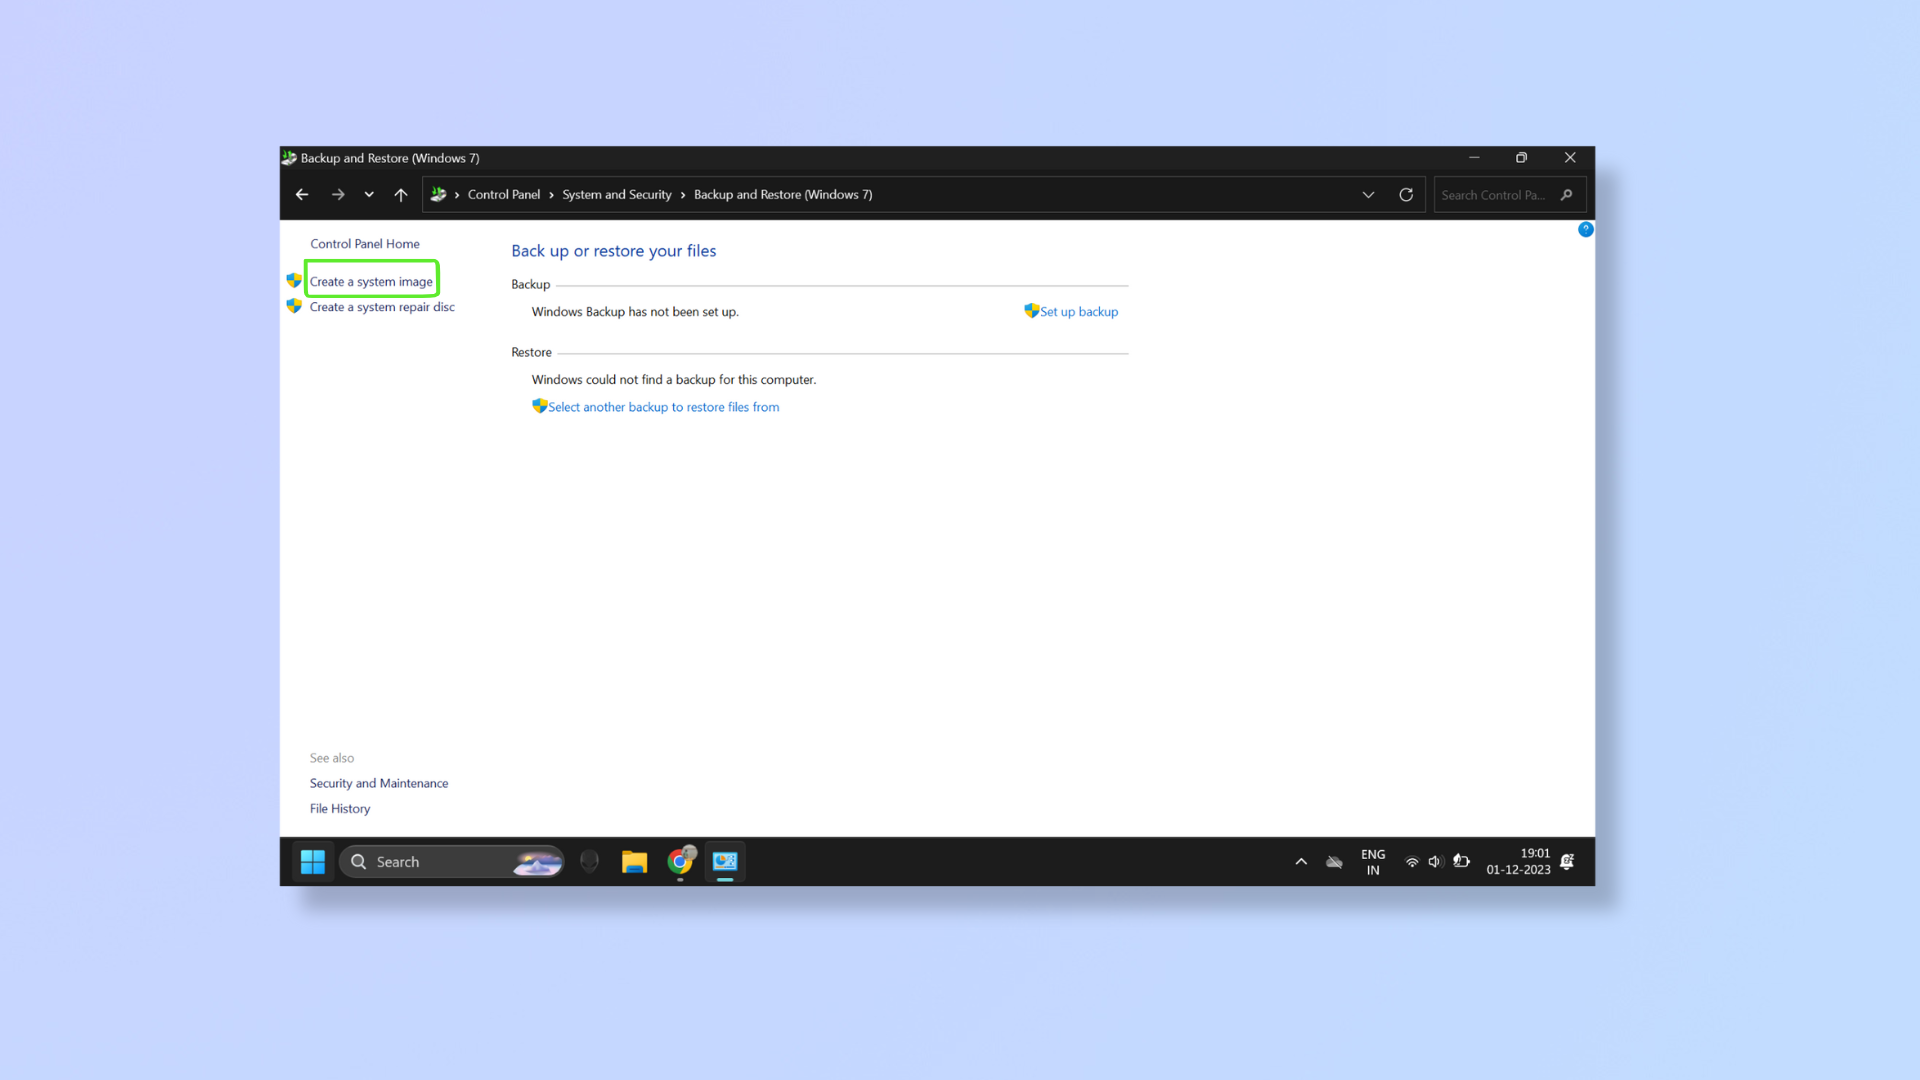
Click Create a system image.
4. Choose where to save the backup
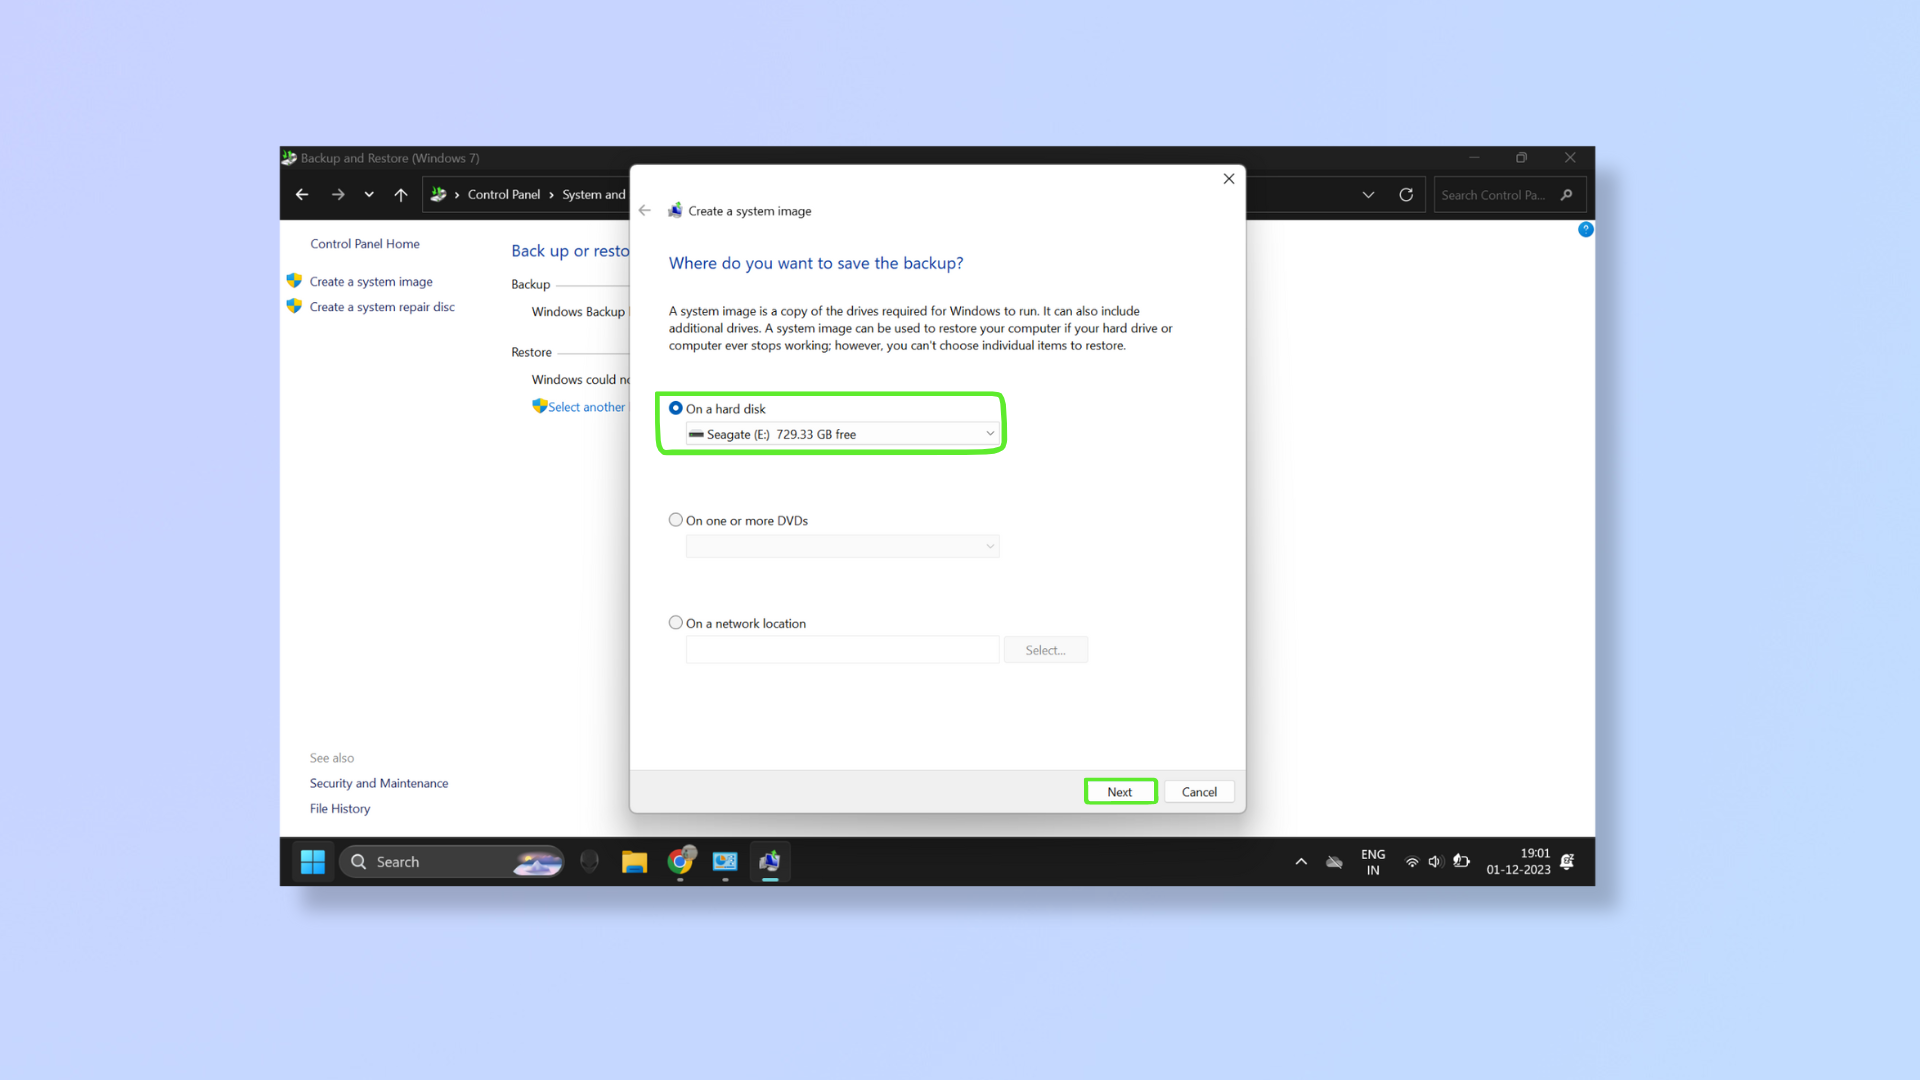
Choose where you want to save the backup. If you’re storing it on a hard disk, click the On a hard disk dropdown and select a drive. Click Next once ready.
5. Select the drives you want to include in the backup
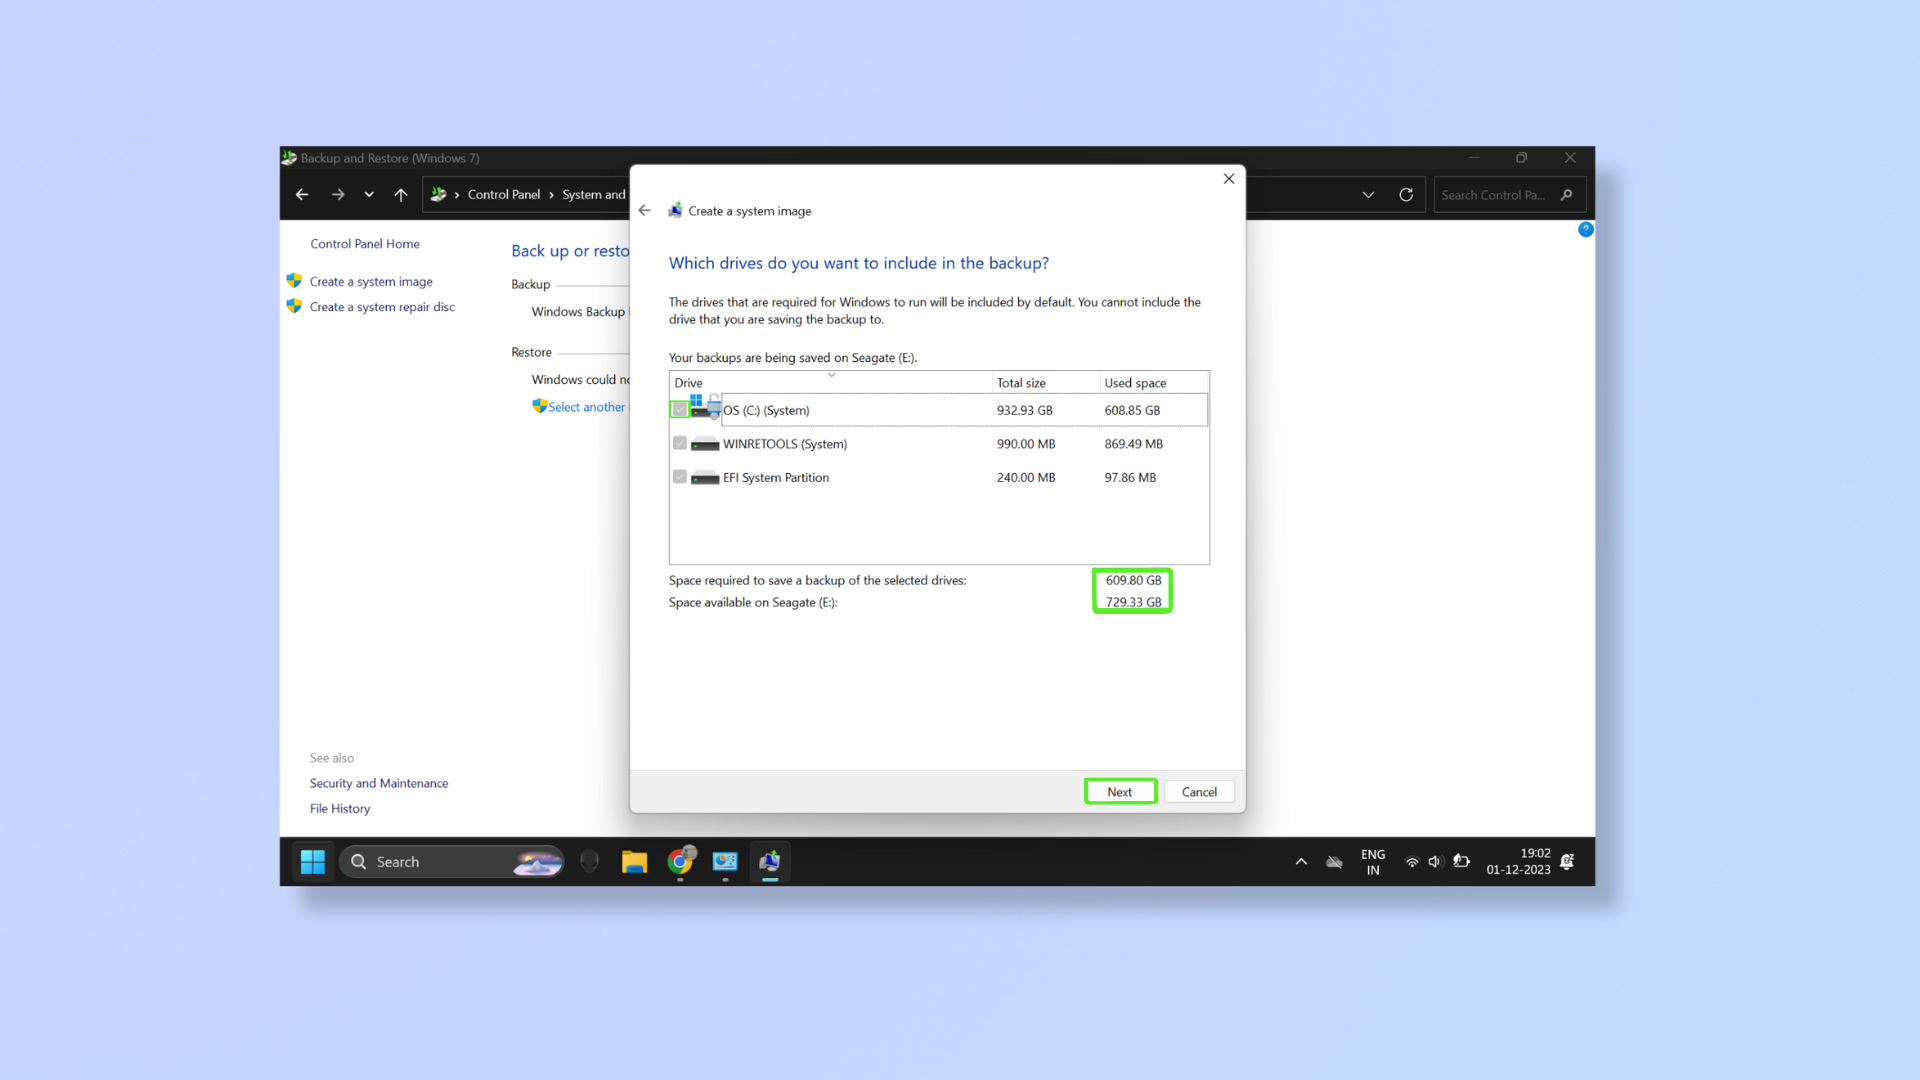
This section will show you all the drives that will be backed up, which by default includes the drives that are essential for Windows to run. Tick the checkboxes to include more drives in the backup.
You’ll also see how much storage is required to save a backup. Click Next once done.
If the drive you’re backing up is encrypted, you’ll get a notification about the backup location not being encrypted and to keep the backup in a physically secure location. Click OK to close the notification.
6. Confirm your backup settings
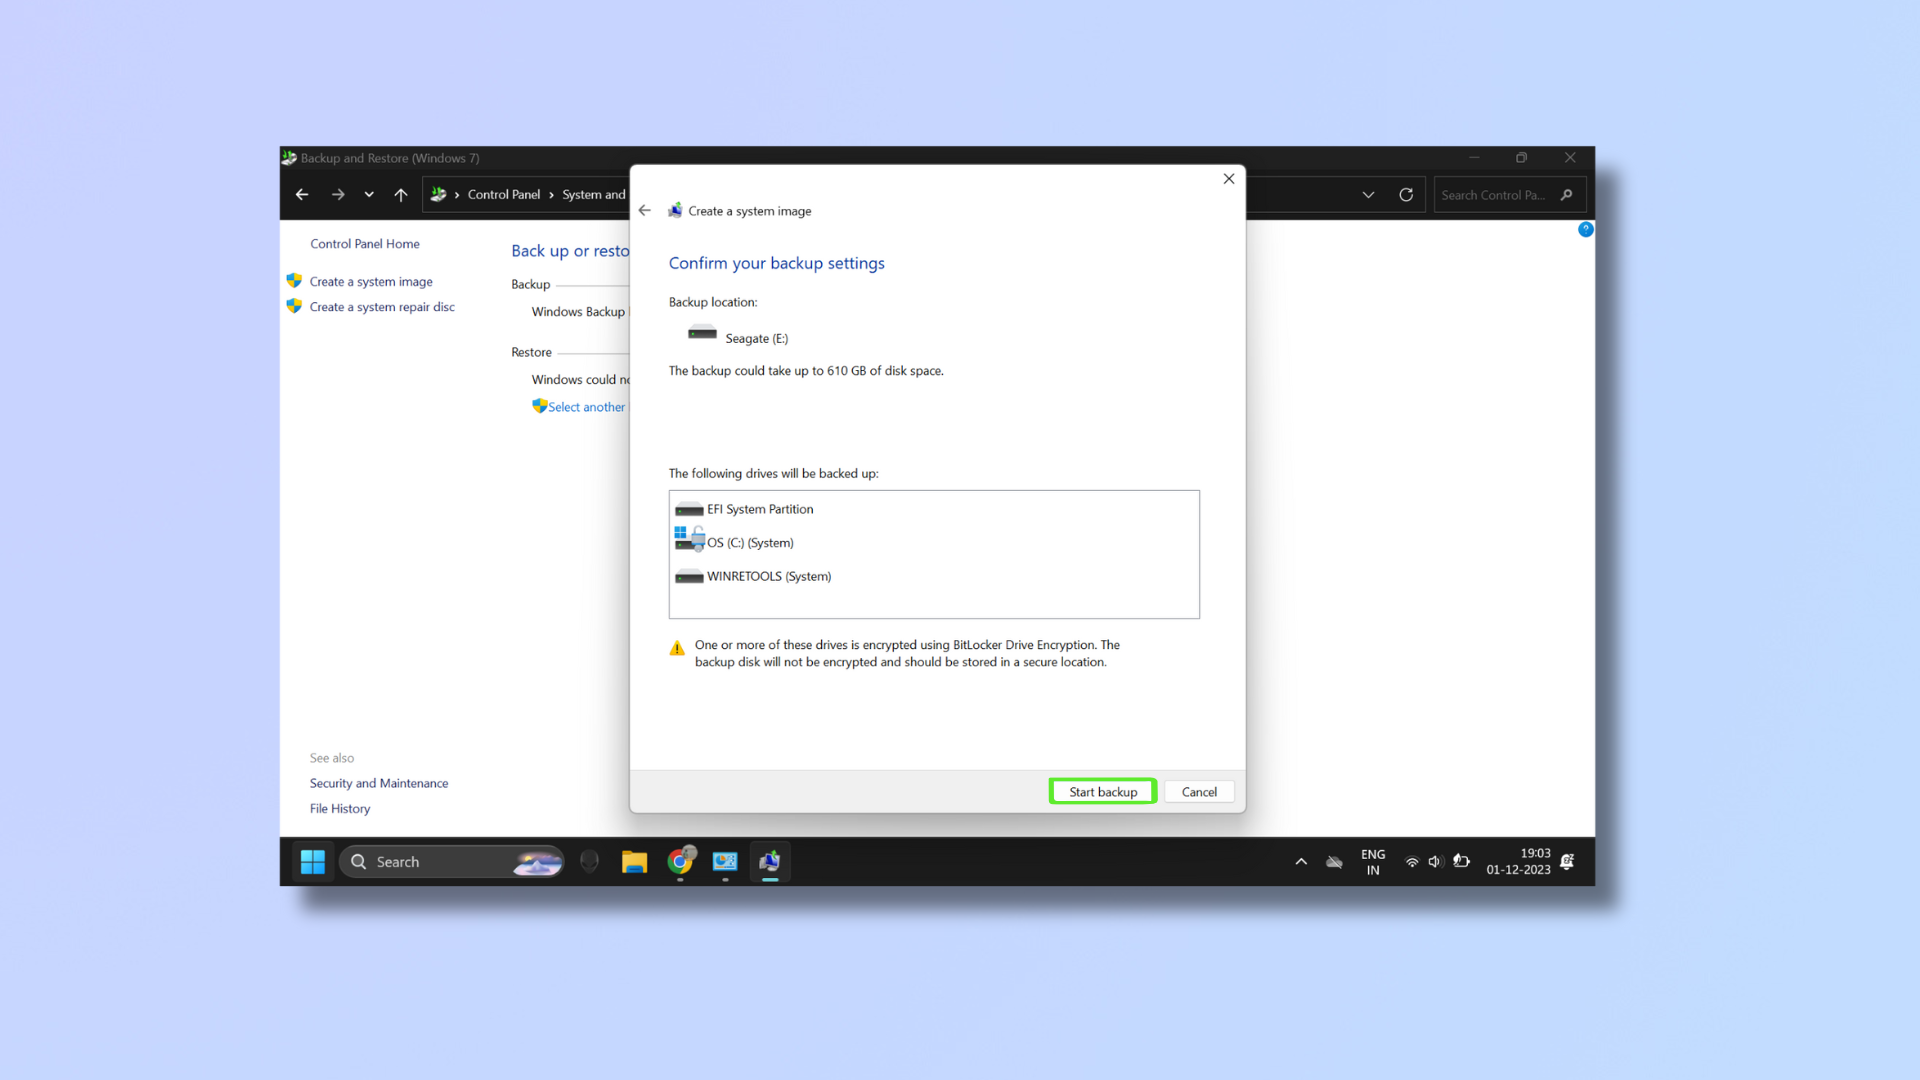
Here, you’ll see which drive your image backup will be stored in, the backup space, and the drives that will be backed up. If any of the drives are encrypted, you’ll get a notification saying, “The backup disk will not be encrypted and should be stored in a secure location.”
Click Start backup to confirm and Windows will begin saving the backup. Once the backup is completed, click Close.
Now that you’ve successfully made an image backup, you have a safety net for your system and data. For more Windows 11 insights, read our guides on how to use Windows 11 PowerToys Peek, how to use Windows 11 PowerToys Shortcut Guide, and how to customize the Windows 11 Start menu.
Get instant access to breaking news, the hottest reviews, great deals and helpful tips.

Nikshep Myle is a freelance writer covering tech, health, and wellbeing. He has written for popular tech blogs like TechRadar, GadgetReview, SlashGear, and Creative Bloq, and has extensively reviewed consumer gadgets. When he’s not writing, you’ll find him meditating, gaming, discovering new music, and indulging in adventurous and creative pursuits.
