How to install Rosetta on Mac
If you know how to install Rosetta on Mac, you can run apps created for Intel chips on computers with Apple Silicon inside
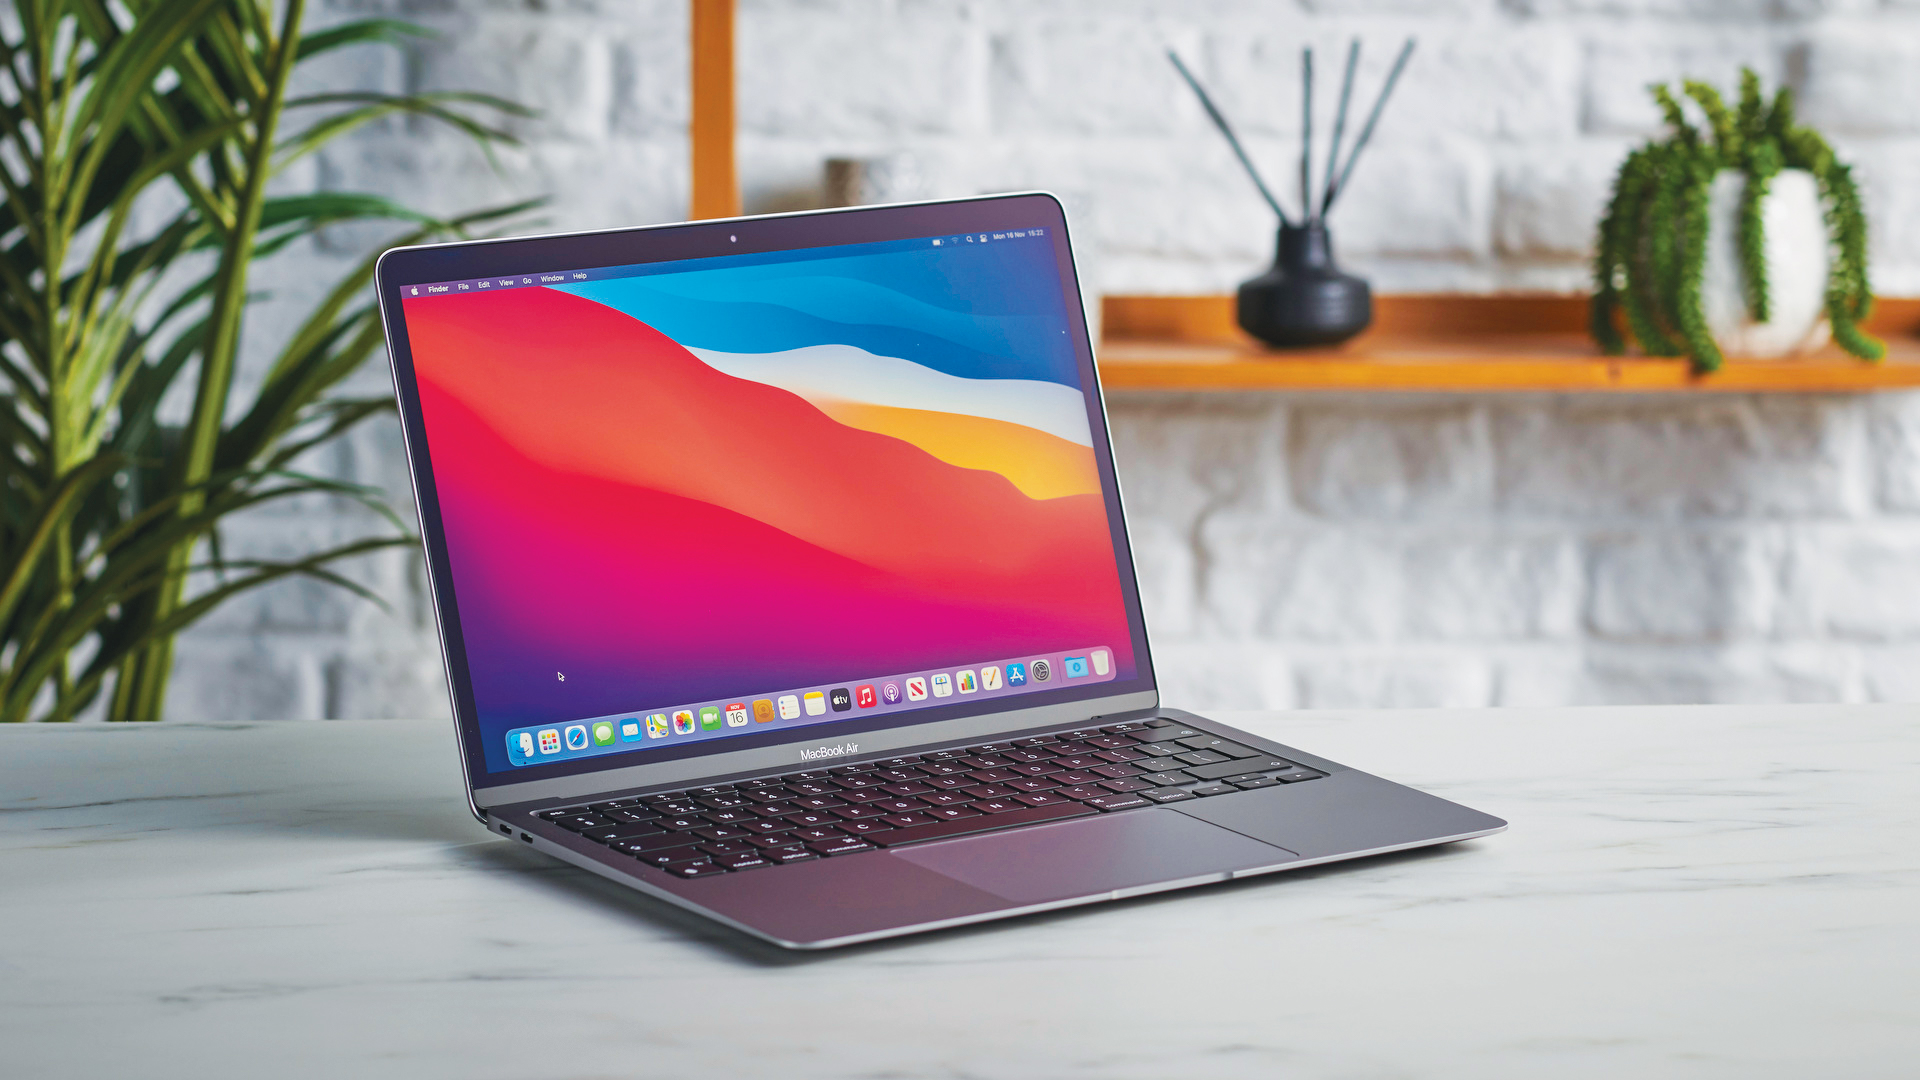
Learning how to install Rosetta on Mac is important for anyone who has recently switched to a computer using Apple Silicon. When Apple decided to bid farewell to Intel by introducing their own chips (Apple Silicon) on new Macs, many users were concerned that apps created for the older computers would fail to work on the latest machines.
But the tech giant had an ace up its sleeve called Rosetta 2 – a translation layer which runs in the background and allows Intel-based apps to run. It has provided a perfect stop-gap fix until developers get around to updating them.
Rosetta 2 works well, performing ahead-of-time translations from Intel x86_64 to Arm64 code which means using a Mac with a M1 or M2 chip in the best MacBooks can continue to tap into a wealth of past apps. Sure, there can be a slight drop in performance, but you will hardly notice it. And if you really need to run a particular app, then you really have no other choice.
Not every app needs Rosetta, as some are developed to work on Apple Silicon or to be universal, but it's worth installing on your machine anyway, even if you don't think you'll use it much. You'll be prompted to install Rosetta the first time you try and run an app that needs it, so don't worry about finding it before that. When you need Rosetta, it'll come, but do install it as soon as you are prompted using this guide, even if the app you're trying to open isn't very important. This will simply avoid you having to do it later down the line when you really need it quickly.
Here's how to install Rosetta on Mac.
How to install Rosetta on Macs with Apple Silicon
To make use of Rosetta, you simply need to launch an app which requires it. If it is the first time that you have opened an app requiring Rosetta, you will be prompted to install it. To find an app that needs Rosetta, see the second part of this article, where we cover how to identify apps that need it.
1. To install Rosetta, just click Install when prompted.
Sign up to get the BEST of Tom's Guide direct to your inbox.
Get instant access to breaking news, the hottest reviews, great deals and helpful tips.
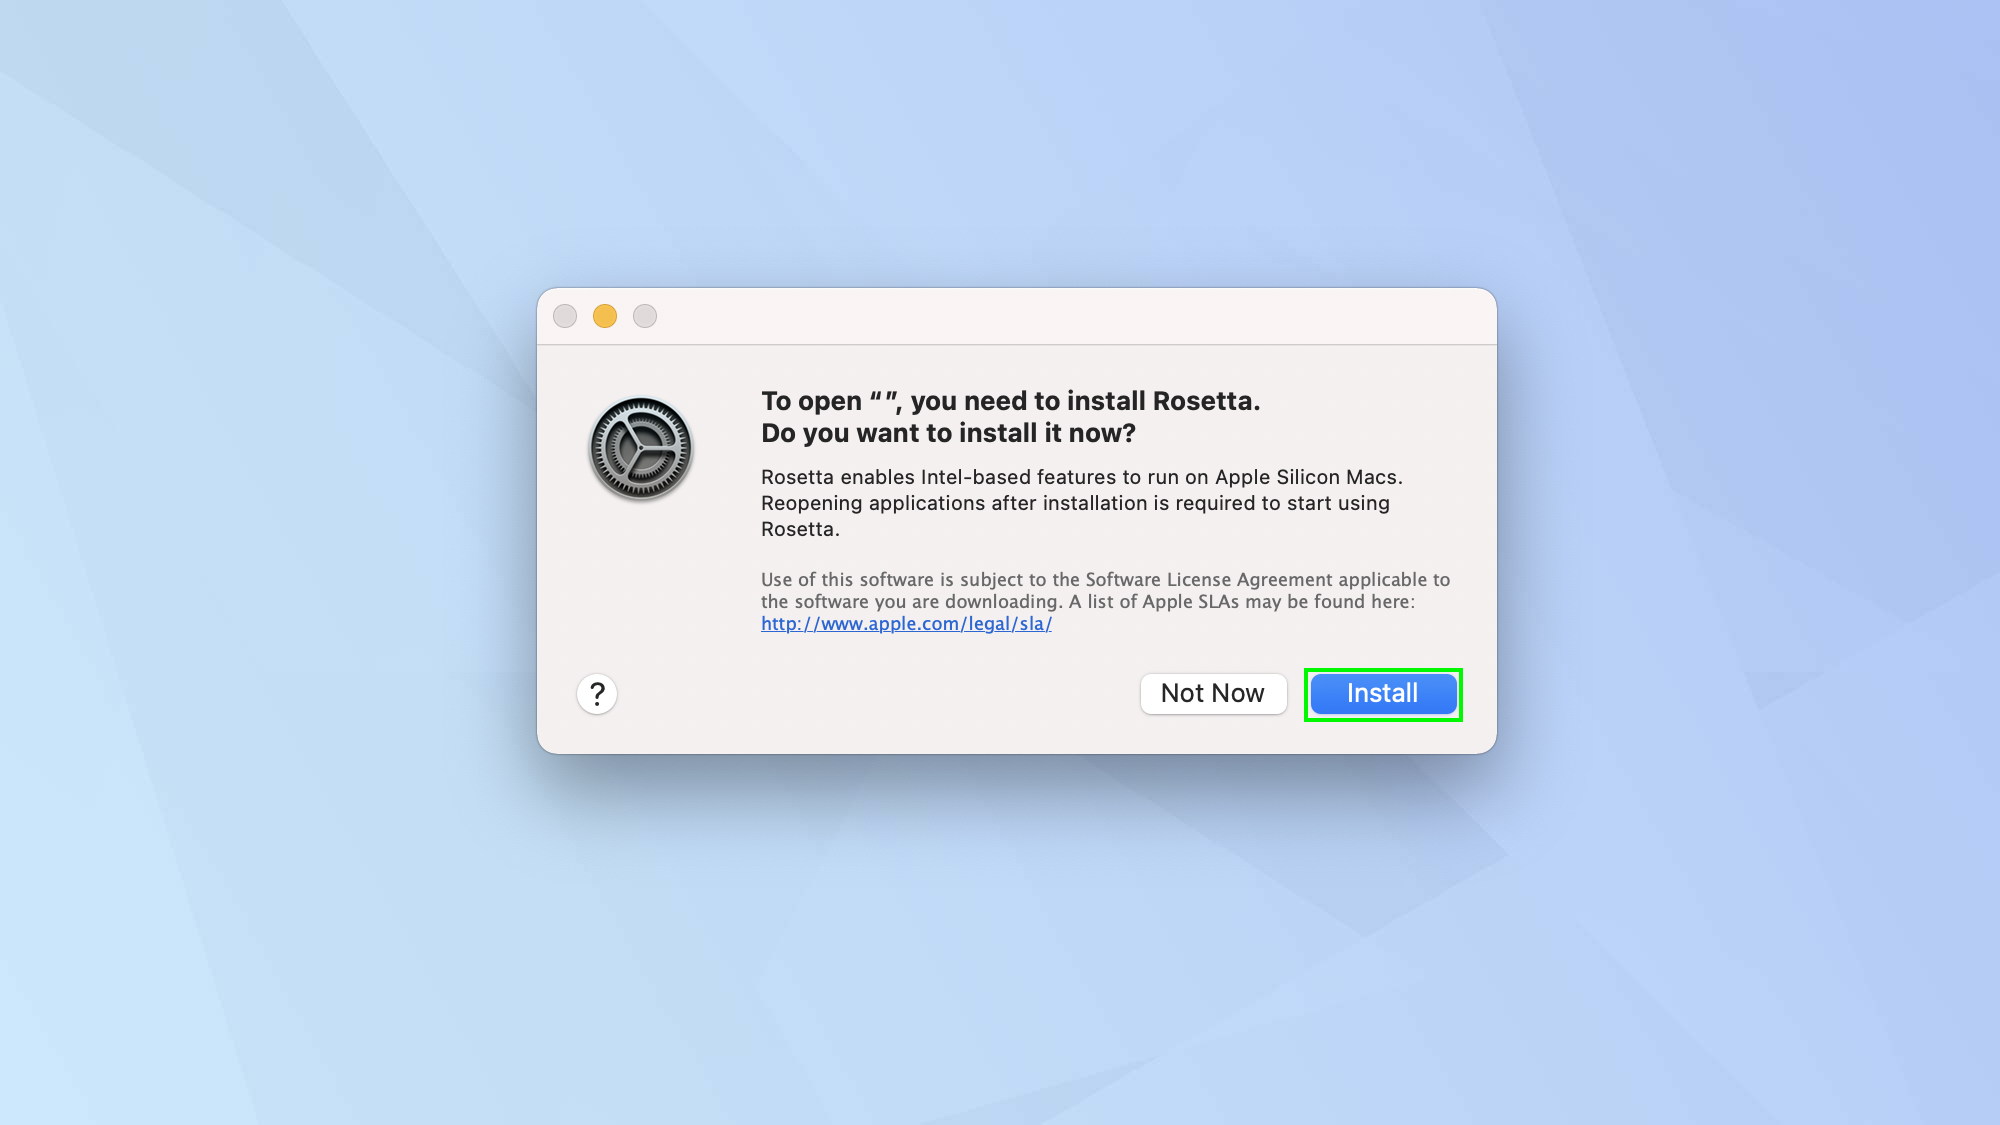
2. When prompted, enter your username and password to give your machine the permission to install the software. Wait for the install to complete and you're done.
That's really all there is to it. You might find it useful to check which apps needs Rosetta, either ahead of installing or afterwards out of interest, so we'll show you how to do that now.
Check which apps will need Rosetta
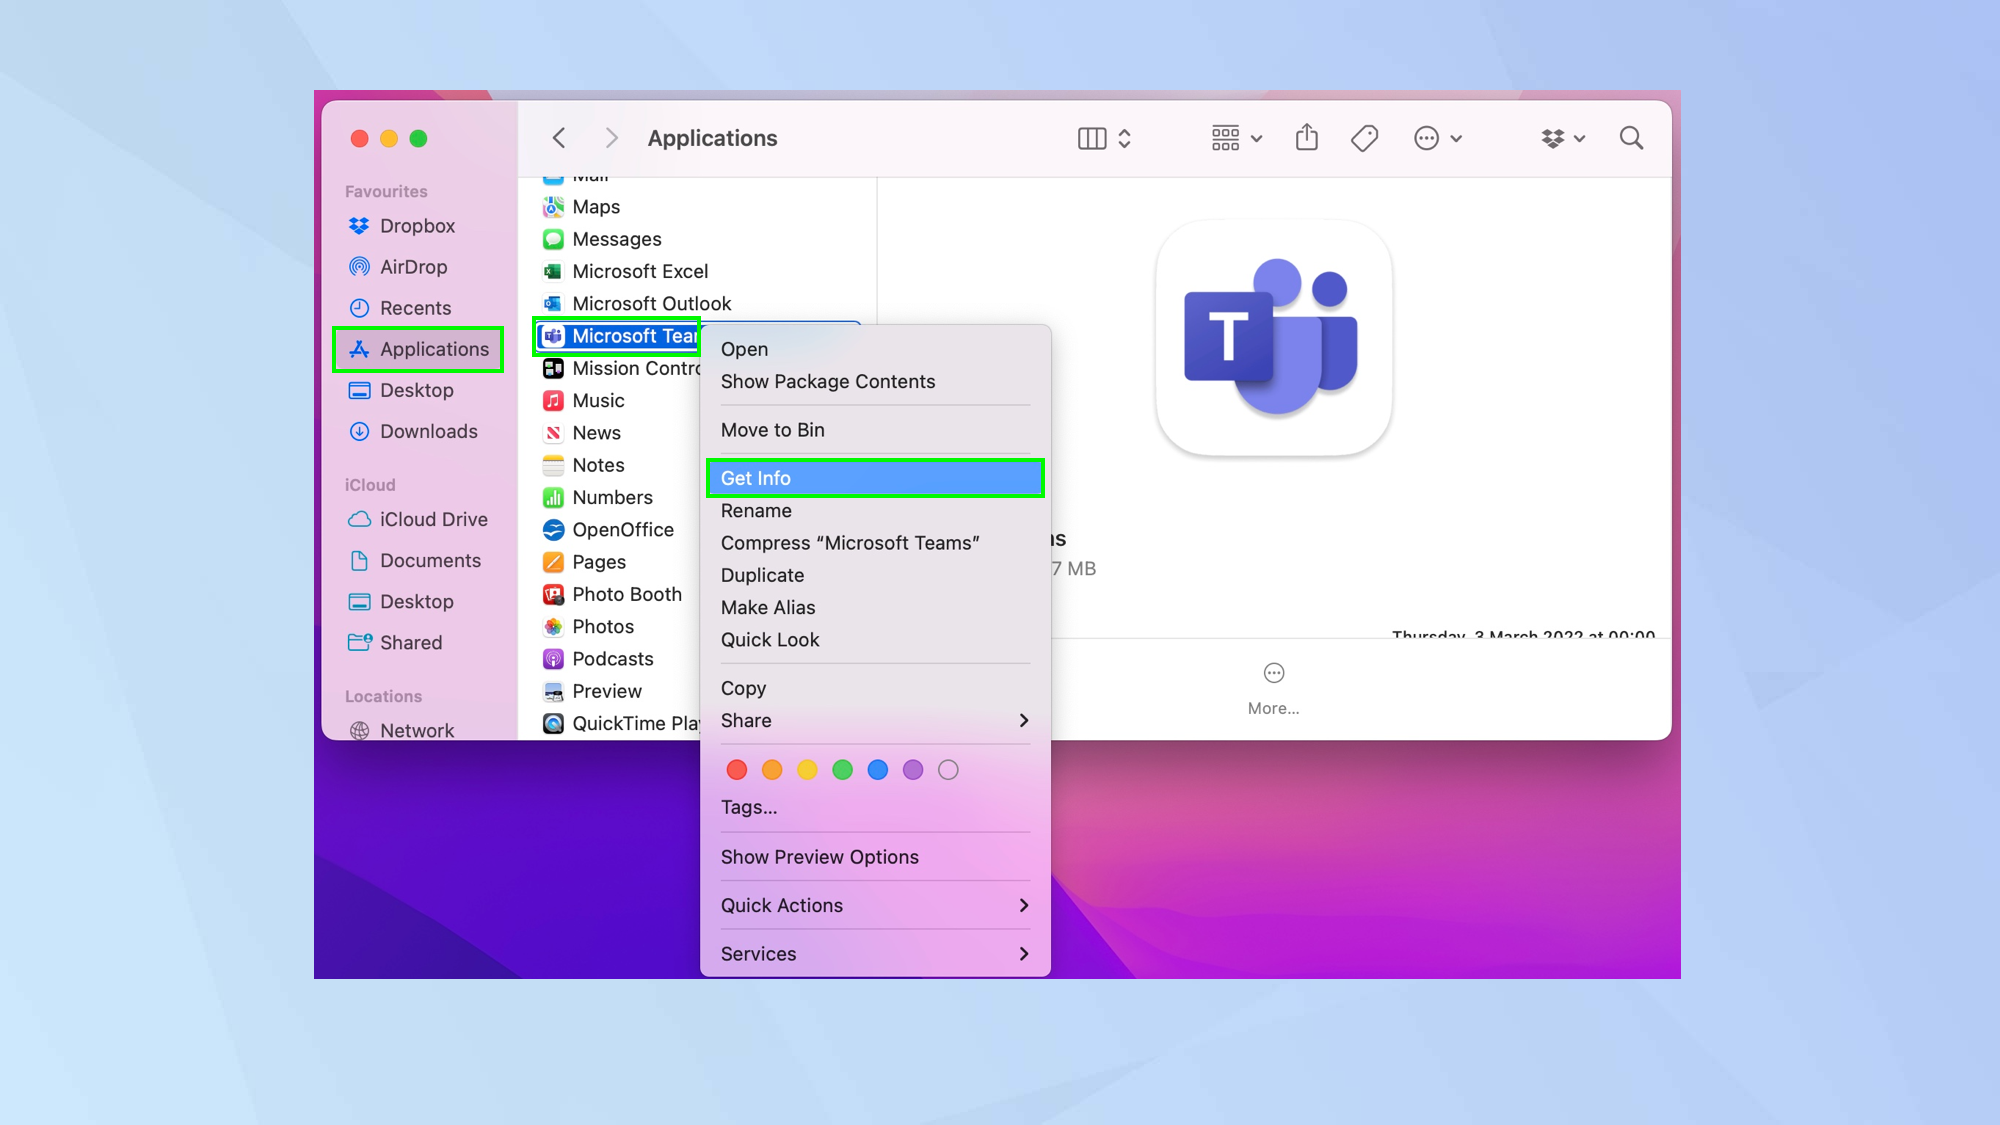
1. Some apps have been developed to run on Macs with an Intel processor.
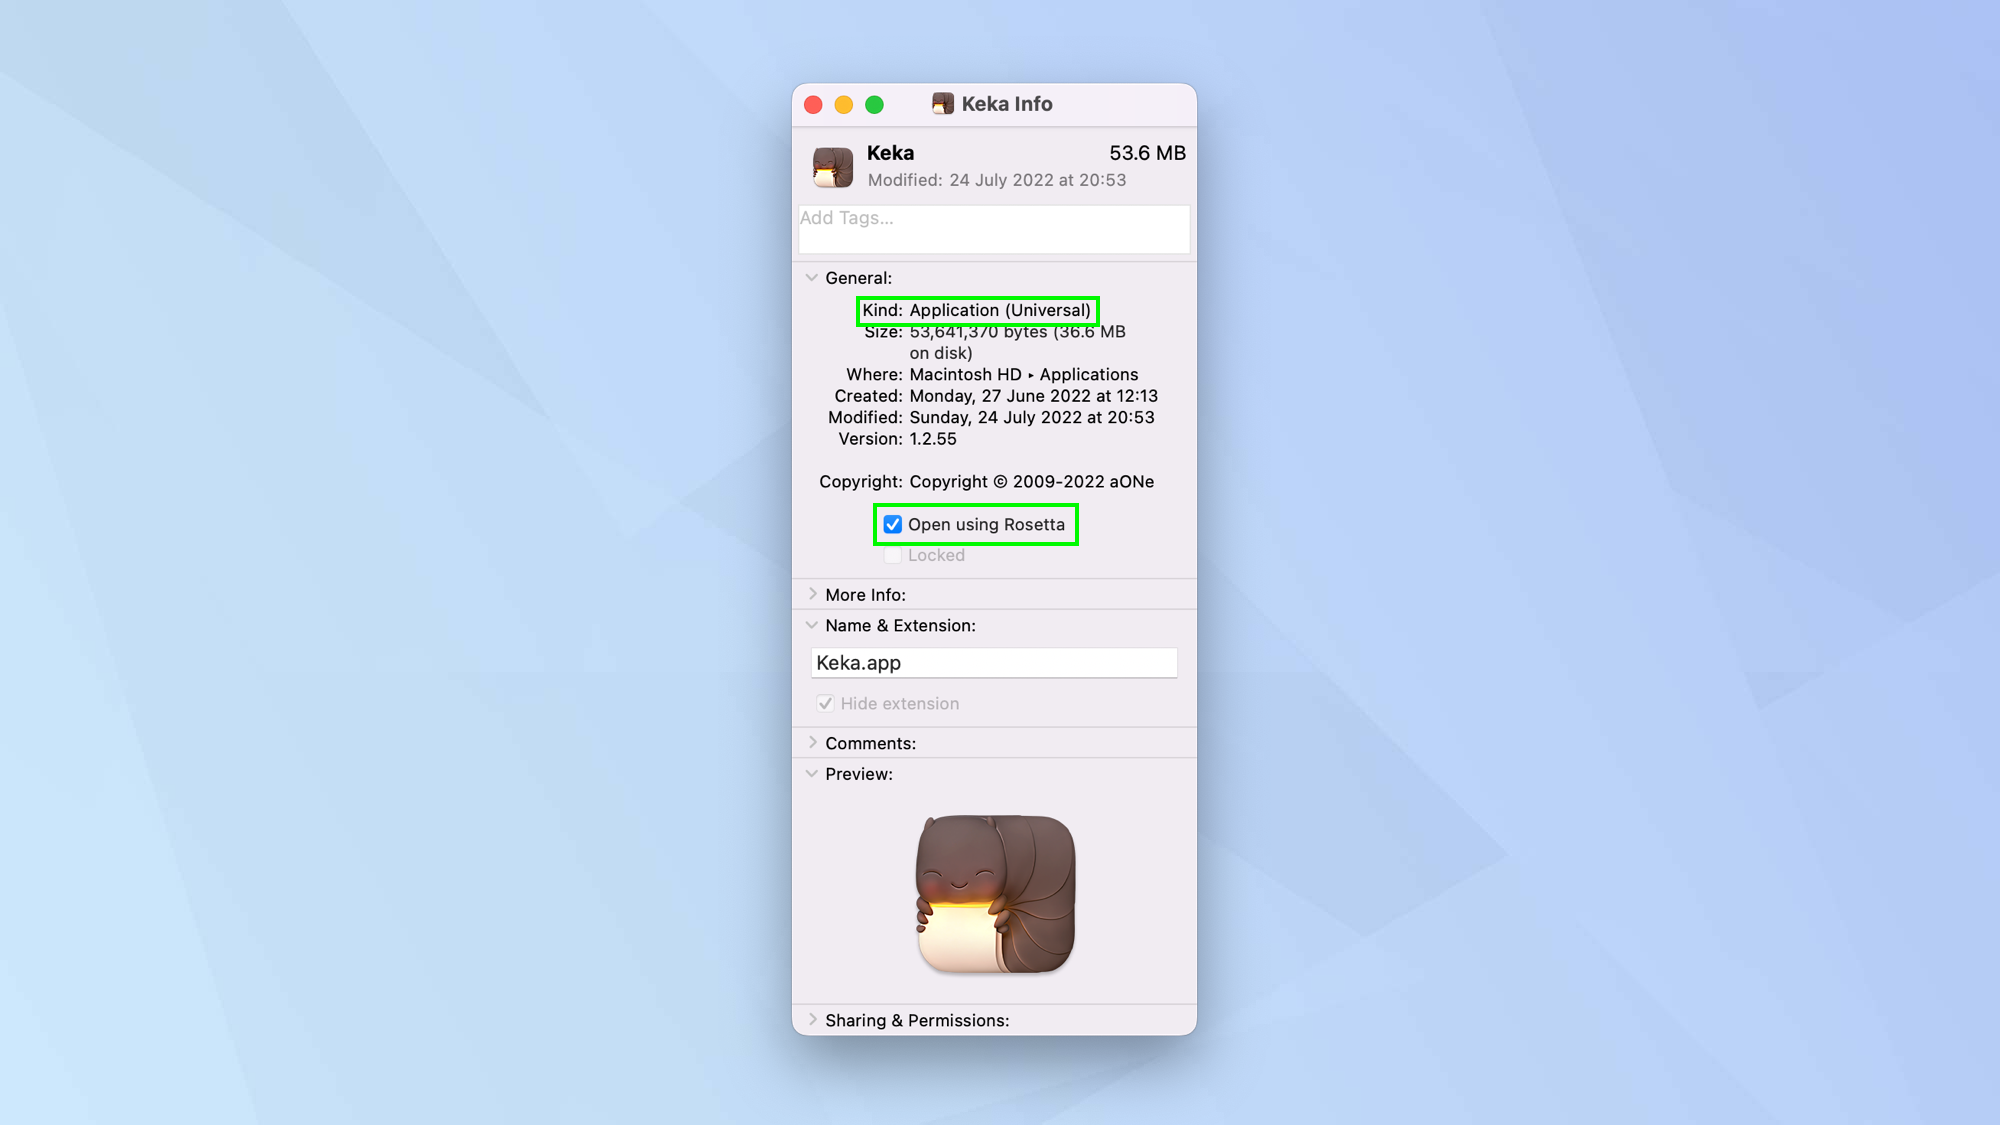
To check for these apps, open Finder, right-click an app icon and select Get Info.
2. Look at the information next to 'Kind'. If it says 'Intel' then the app will need Rosetta.
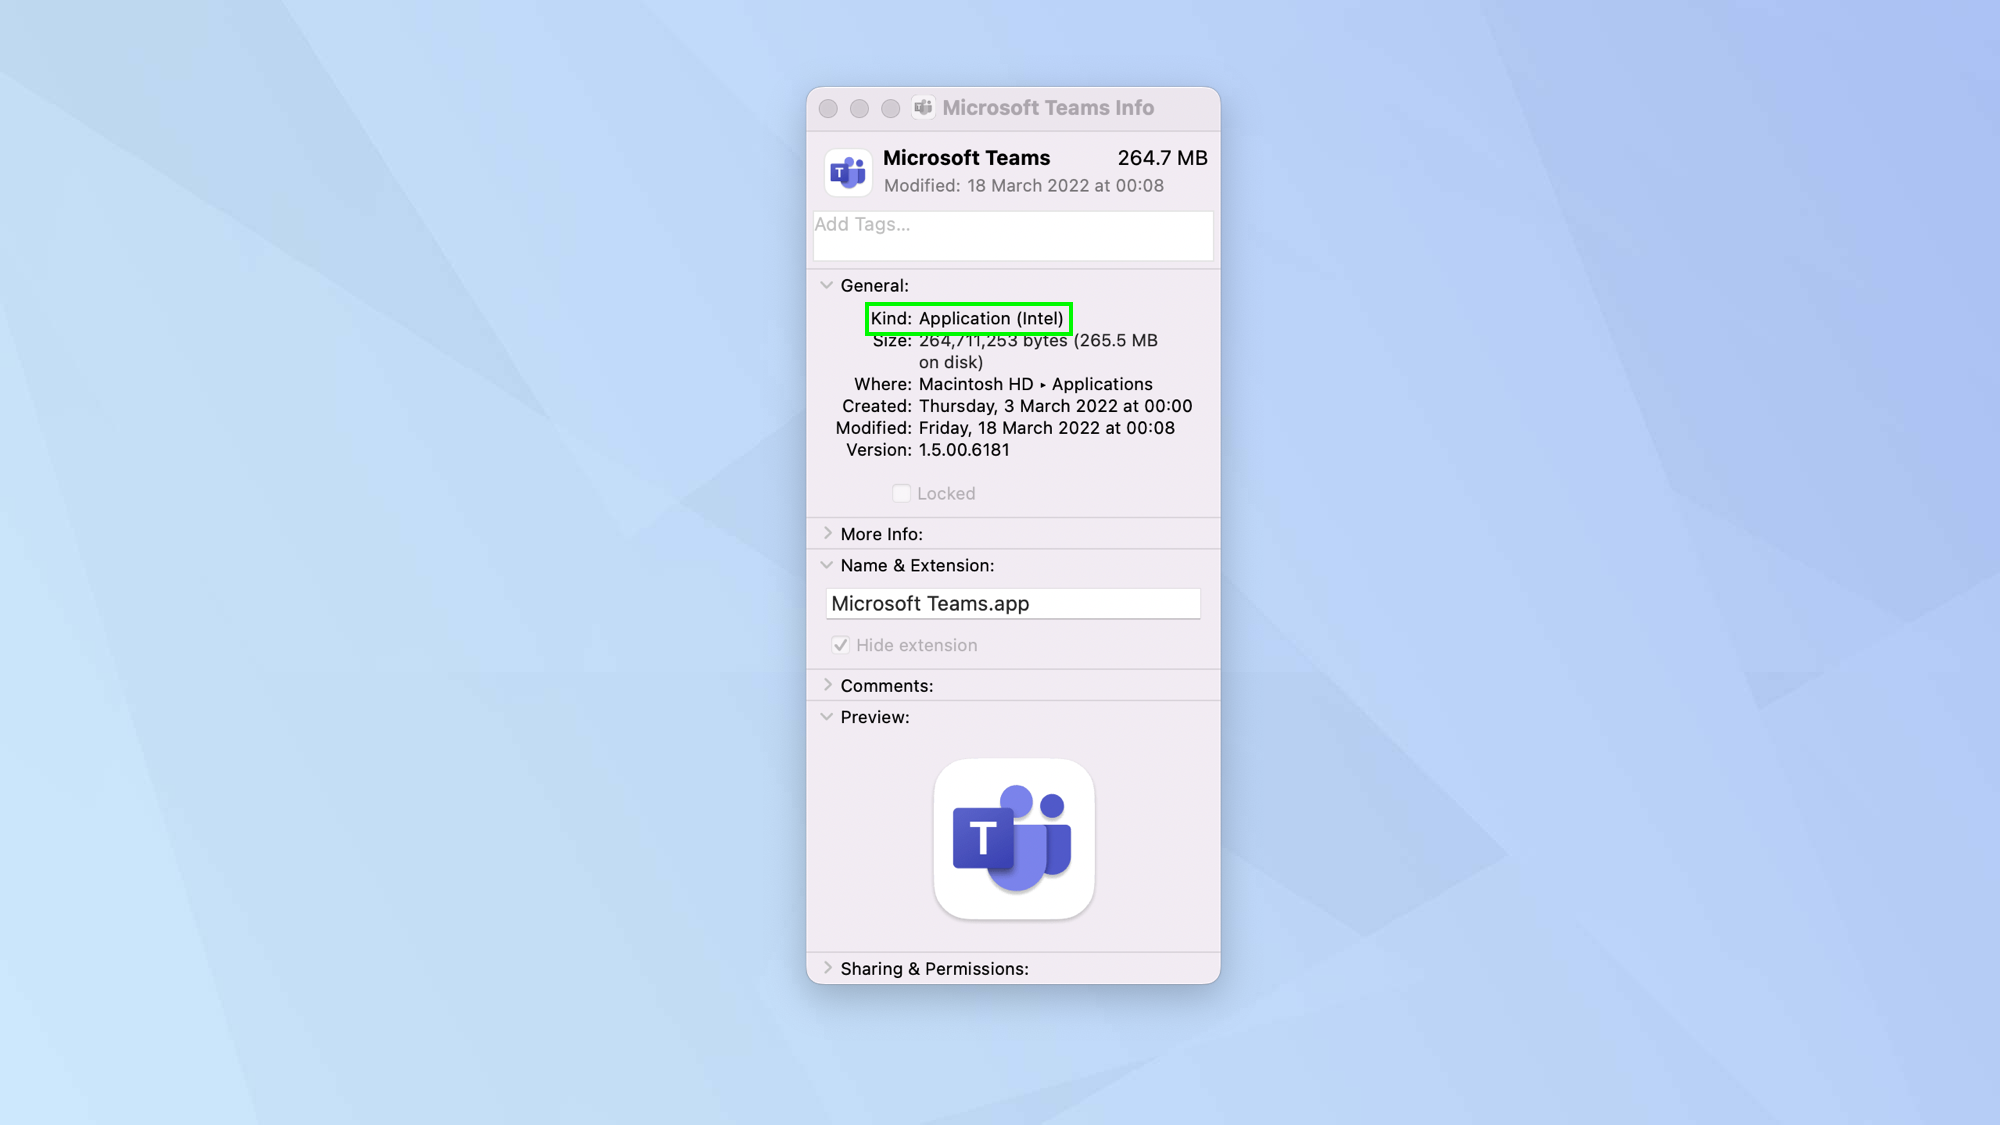
3. In some cases, you may see the word 'Universal'. This means the app will run on both Intel and Apple silicon Macs.
You can choose to click Open using Rosetta if you want to make use of extensions, plug-ins or other add-ons that have not been developed to support Apple silicon.
You now know how to install Rosetta on Mac. But why not check out nine MacBook Pro tips everyone needs to know or make use of Rosetta by playing Apple's rich catalogue of games including the 25 best Mac games to play right now? If you'd like to learn more Mac-related tricks, make sure you read how to install Safari extensions on Mac, how to use hot corners on Mac, how to split your screen on Mac and how to use Universal Control on Macs and iPads.

David Crookes is a freelance writer, reporter, editor and author. He has written for technology and gaming magazines including Retro Gamer, Web User, Micro Mart, MagPi, Android, iCreate, Total PC Gaming, T3 and Macworld. He has also covered crime, history, politics, education, health, sport, film, music and more, and been a producer for BBC Radio 5 Live.
