How to enable the performance overlay on the Steam Deck
This simple guide shows you how to enable the performance overlay on the Steam Deck
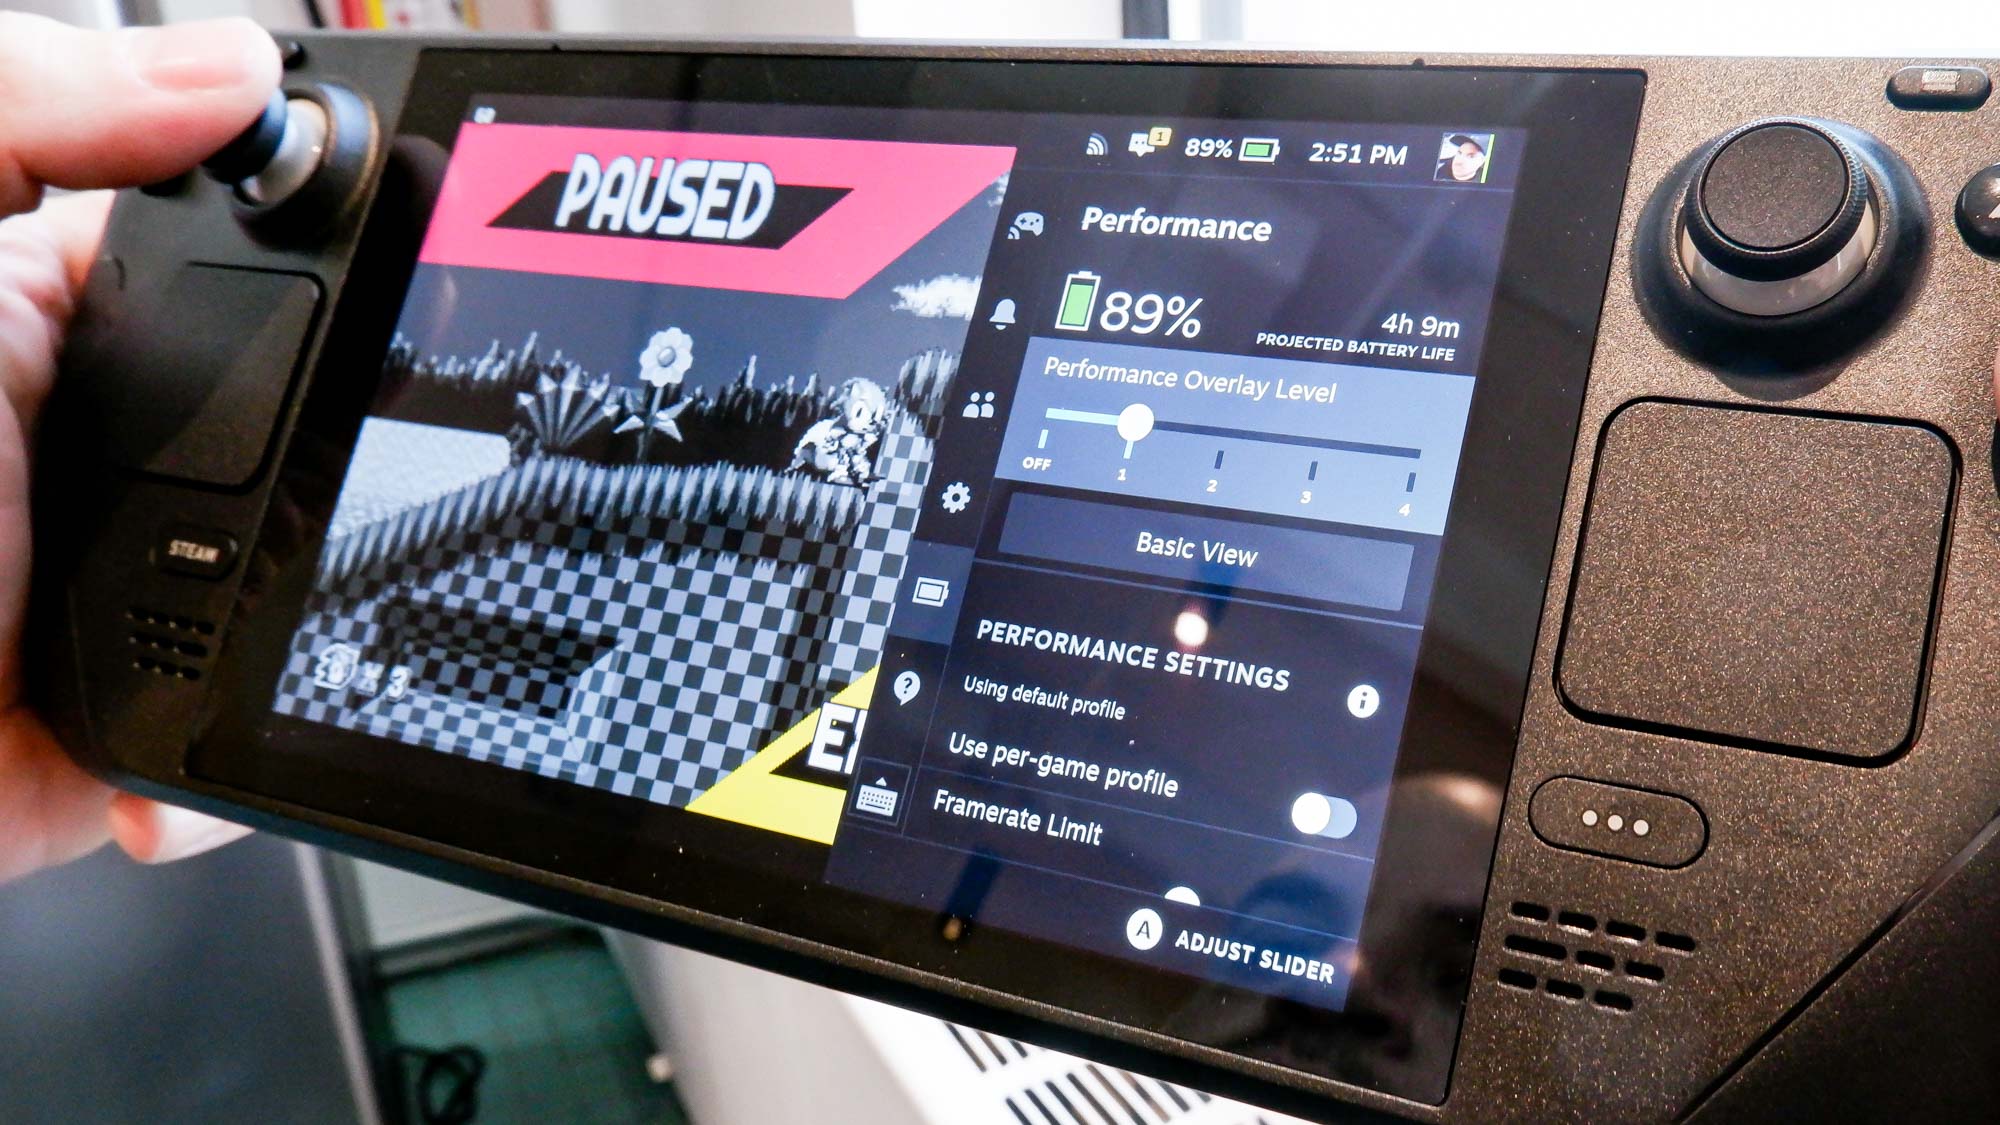
Knowing how to enable the performance overlay on the Steam Deck will help you get the most out of your deck immediately.
Astonishingly, given its a handheld, the Steam Deck has all of the functionality found in the desktop version of Valve’s game launcher and marketplace. That means you’re able to enable the performance overlay to see a game’s frame rate. This is important if you want to see how well a game performs at different graphical settings. The Steam Deck even provides additional metrics beyond frame rate that could be useful to some people, and both of these can help you figure out whether you've got the flexibility to tweak certain settings on the deck to maximise performance or battery life.
But how do you enable the performance overlay on Steam Deck? As with the desktop version, this feature is somewhat hidden. Below, we’ll show you how to turn the performance overlay on and go over what it shows.
How to enable the performance overlay on the Steam Deck
Turning the performance on is easier on Steam Deck than on the desktop version. That’s because you can easily bring it up by pressing the Quick Access Menu (QAM) button. Within the performance section, you’ll see a slider with four levels. Moving to a higher level will show more performance metrics. It’s a neat feature that does an excellent job of displaying how well (or perhaps poorly) a game runs on Steam Deck.
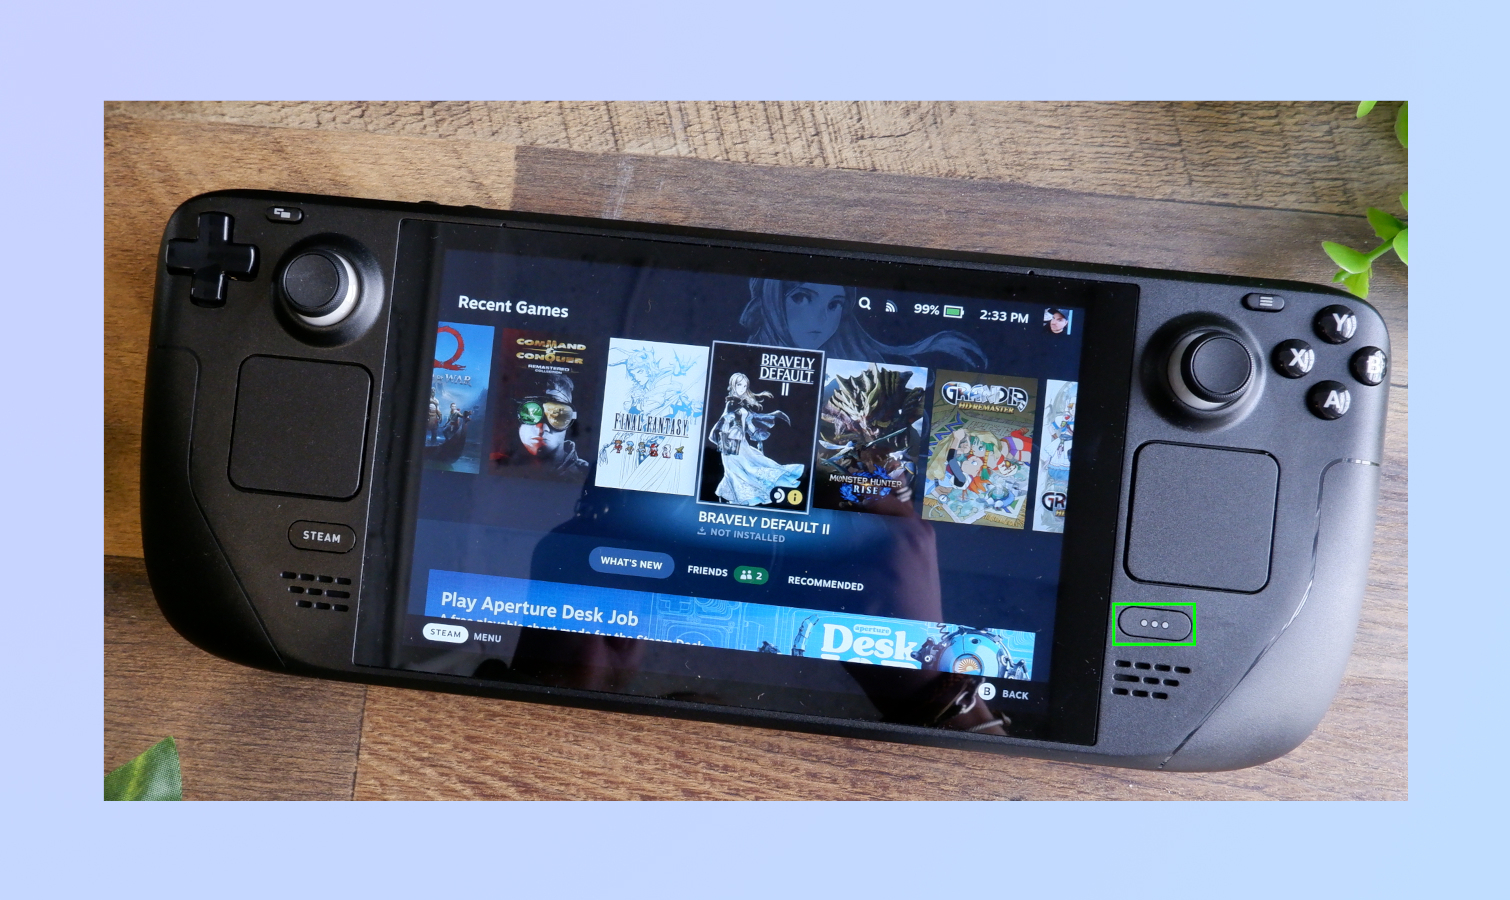
1. To start, click the QAM button, which is located on the right-hand side of the screen and beneath the right touchpad.
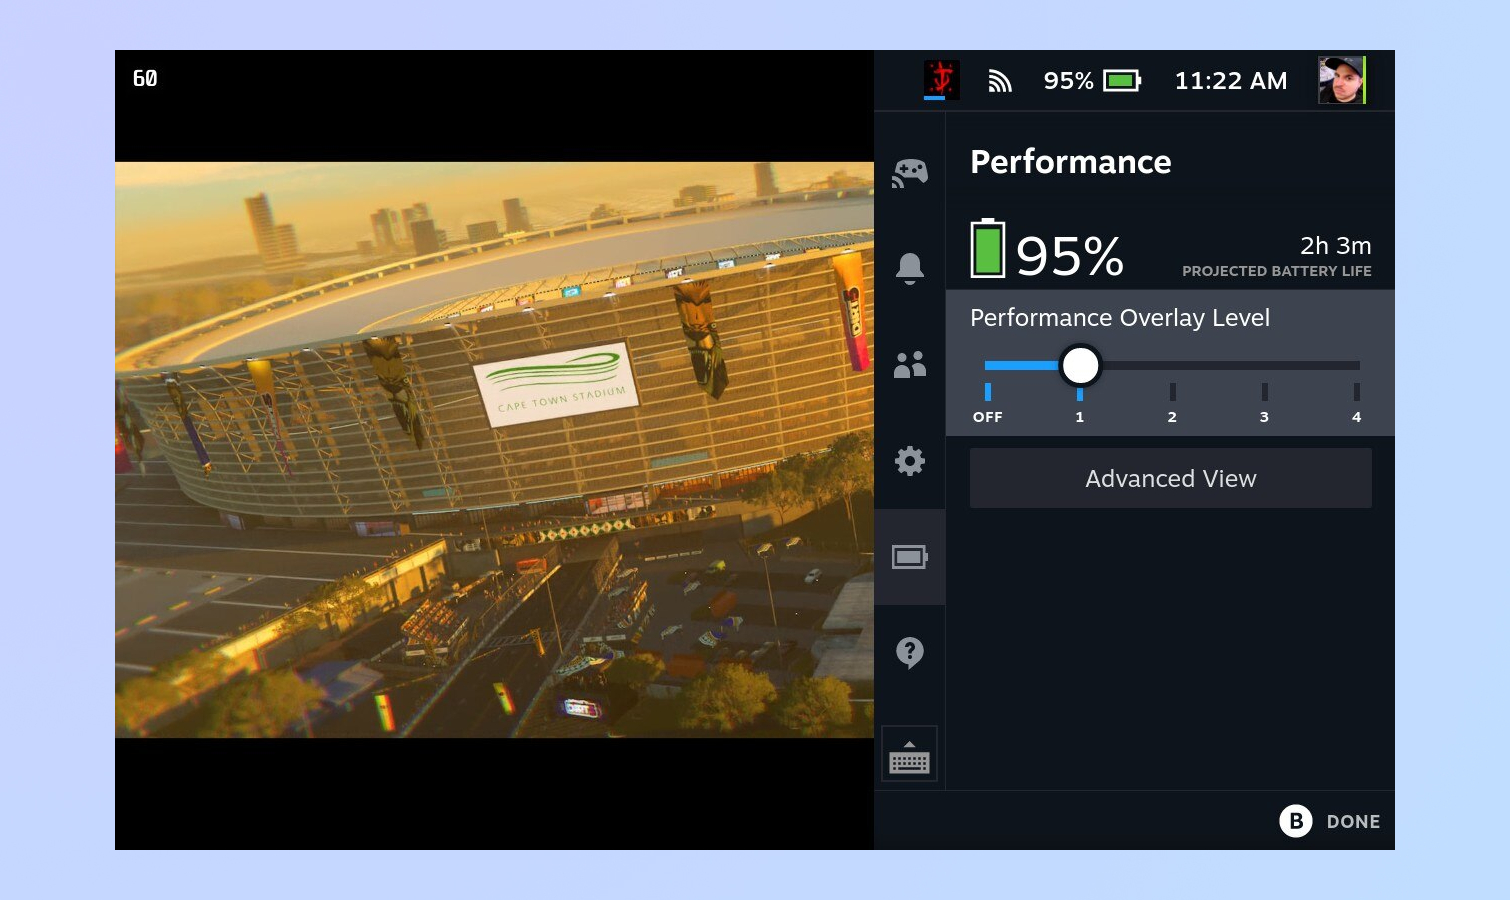
2. Within the QAM, you’ll see five different tabs. Scroll down to the battery icon, which represents the performance tab and press A to enter this menu. You’ll find the performance overlay level beneath the battery life counter. Head to Performance Overlay Level and press A to enter this sub menu.
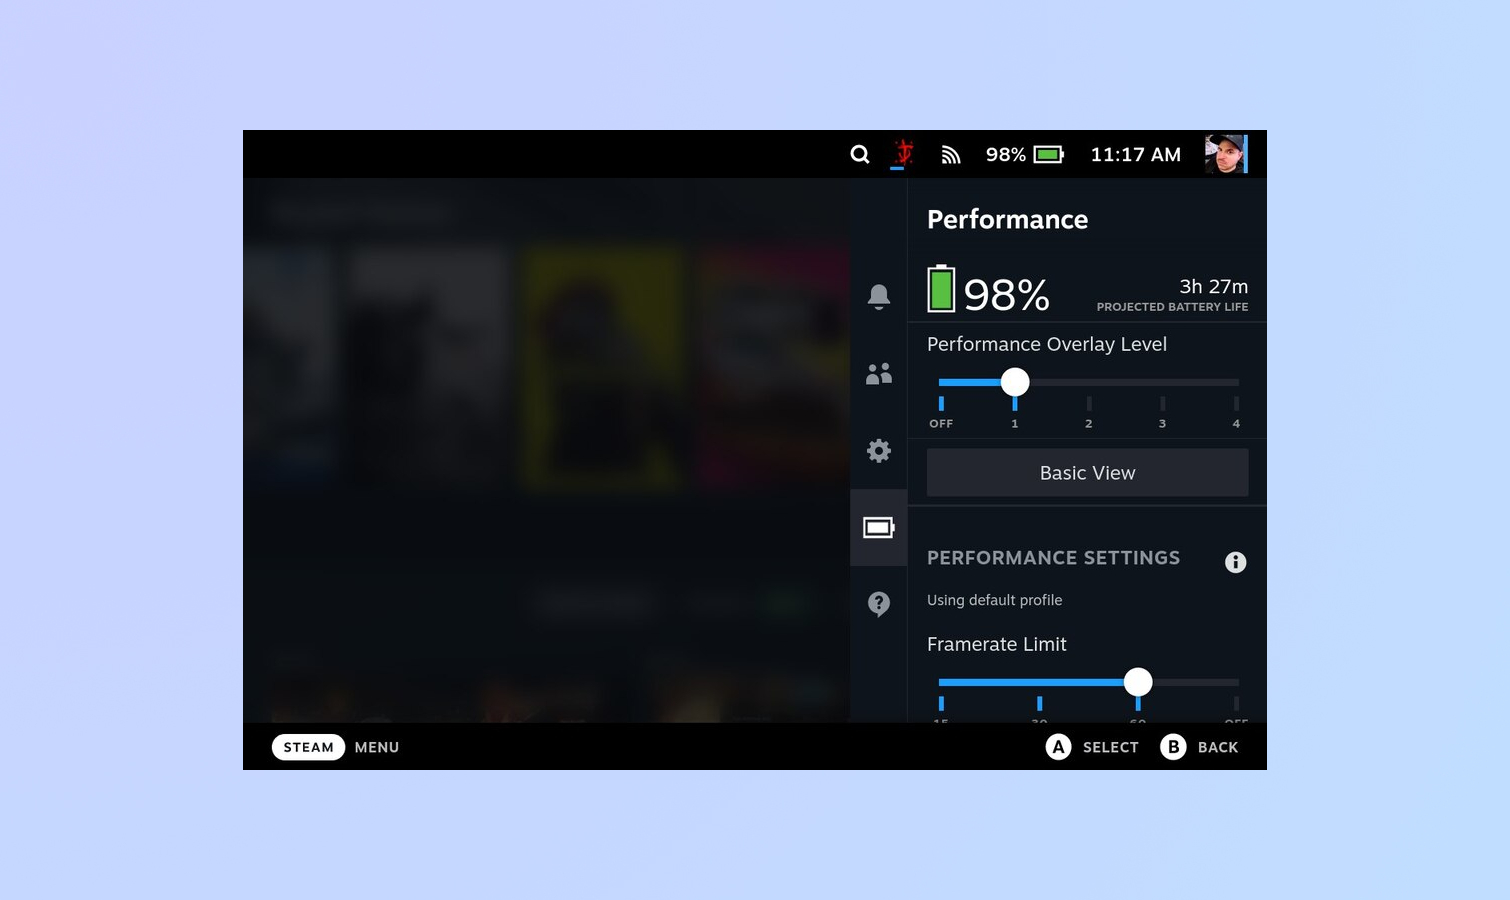
3. You’ll see four performance overlay levels along a slider. Move the slider right or left to select different performance levels. The first level simply shows a game’s current frames per second. Higher levels display things like GPU and CPU performance percentages, fan speed and more.
Sign up to get the BEST of Tom's Guide direct to your inbox.
Get instant access to breaking news, the hottest reviews, great deals and helpful tips.
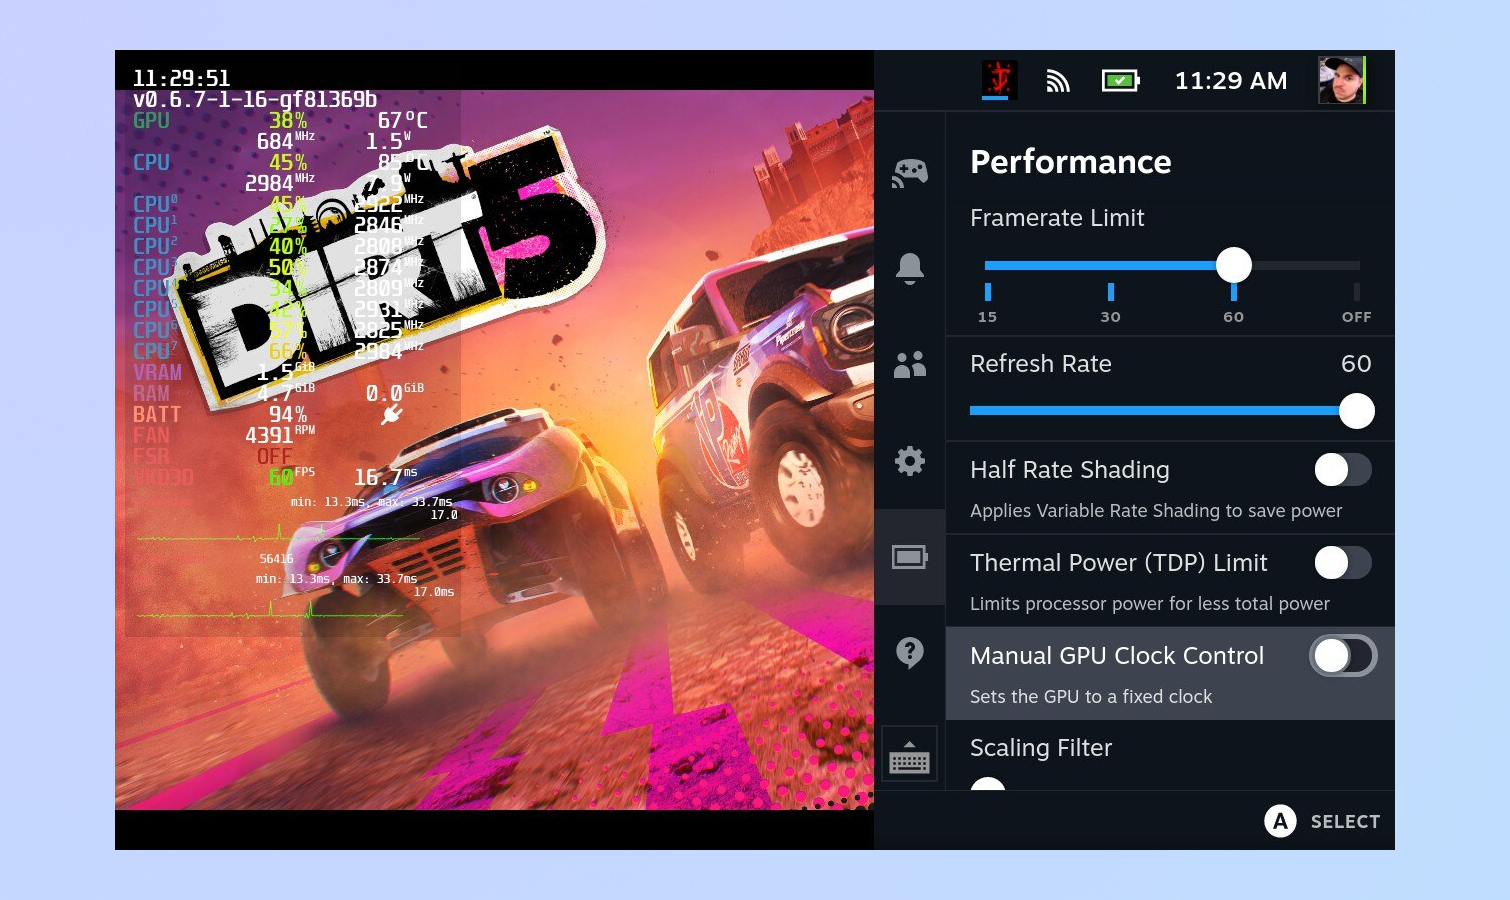
4. If you want, you can click on Advanced View to see a list of additional settings. You can set frame rate limit, refresh rate, thermal power (TDP) limit, manual GPU clock control and more. It can get pretty granular, but this is one of Steam Deck’s main selling points – it’s extremely customizable.
5. That’s it! Click the B button a couple of times to hide the QAM screen to exit. And if you want to disable metrics altogether, follow the previous steps.
If you'd like to read more gaming tutorials, make sure you check out how to take a screenshot on Steam Deck, how to change the keyboard theme on Steam Deck, how to enable Desktop Mode on the Steam Deck, how to update a Steam Deck and how to format an SD card on the Steam Deck. Fancy PC gaming too? Learn how to download Steam on Windows.
We also have other gaming guides, so consider reading how to share Switch games with your family, how to set up parental controls on Switch and how to stream on Twitch next.

Tony is a computing writer at Tom’s Guide covering laptops, tablets, Windows, and iOS. During his off-hours, Tony enjoys reading comic books, playing video games, reading speculative fiction novels, and spending too much time on X/Twitter. His non-nerdy pursuits involve attending Hard Rock/Heavy Metal concerts and going to NYC bars with friends and colleagues. His work has appeared in publications such as Laptop Mag, PC Mag, and various independent gaming sites.
