Android 14 makes entering your PIN easier and more secure — here's how
Android 14's new PIN security settings make it easier to hide your code and enter your phone
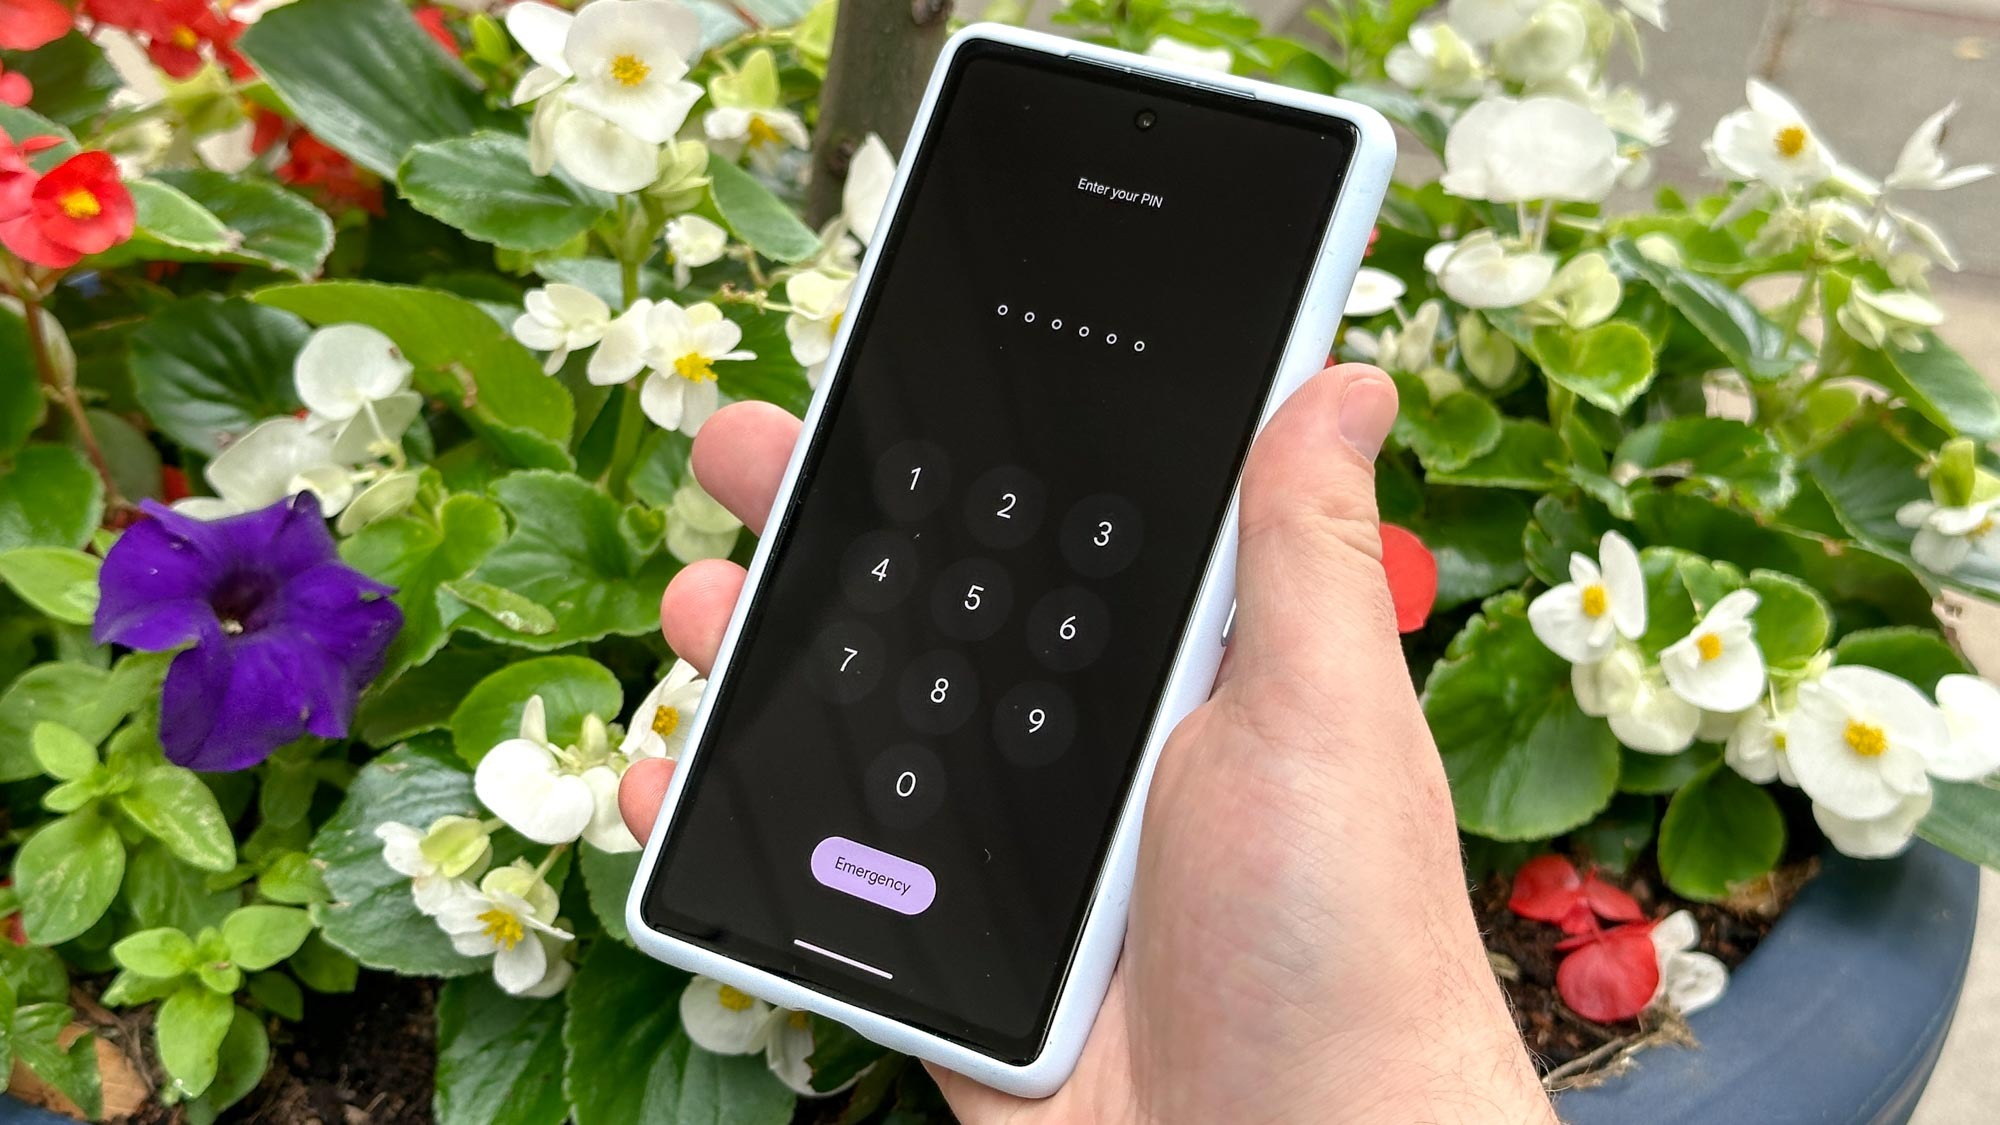
Android 14 brings new options for entering your PIN among its many upgrades. You'll still be typing in your digits as usual, but you can now enable iPhone-style automatic confirmation — or hide your button presses to make it easier for you to enter your password, but harder for any suspicious characters to try and figure out your PIN.
This may differ on other flavors of Android, but for Google Pixel owners, this is definitely the method you'll need to use if you install the Android 14 beta or get the stable version later in 2023. The only issue is that the auto-confirm option is limited to users with longer PINs, so be prepared to choose a new PIN if you want to try both of the options in this how-to.
Using your fingerprint and/or face to unlock your phone is still a secure and speedy entry method, but all smartphones will make you enter your PIN every now and then as a random security check. So, if you want to be as prepared as possible for the next time you need to enter your PIN, follow the steps below on how to enable auto-confirm unlock and Enhanced PIN privacy in Android 14.
How to enable Auto-confirm unlock and Enhanced PIN privacy in Android 14
- In the Settings app, open the Security and Privacy settings, then tap Device unlock
- Tap the settings cog next to the Screen lock heading
- Toggle Auto-confirm unlock to make your phone open by itself when entering your correct PIN, or to make it require a manual entry
- Toggle Enhanced PIN privacy to switch off the button tap confirmation animations when entering your PIN
Read on for illustrations and more detailed instructions
1. In the Settings app, open the Security and Privacy settings, then tap Device unlock
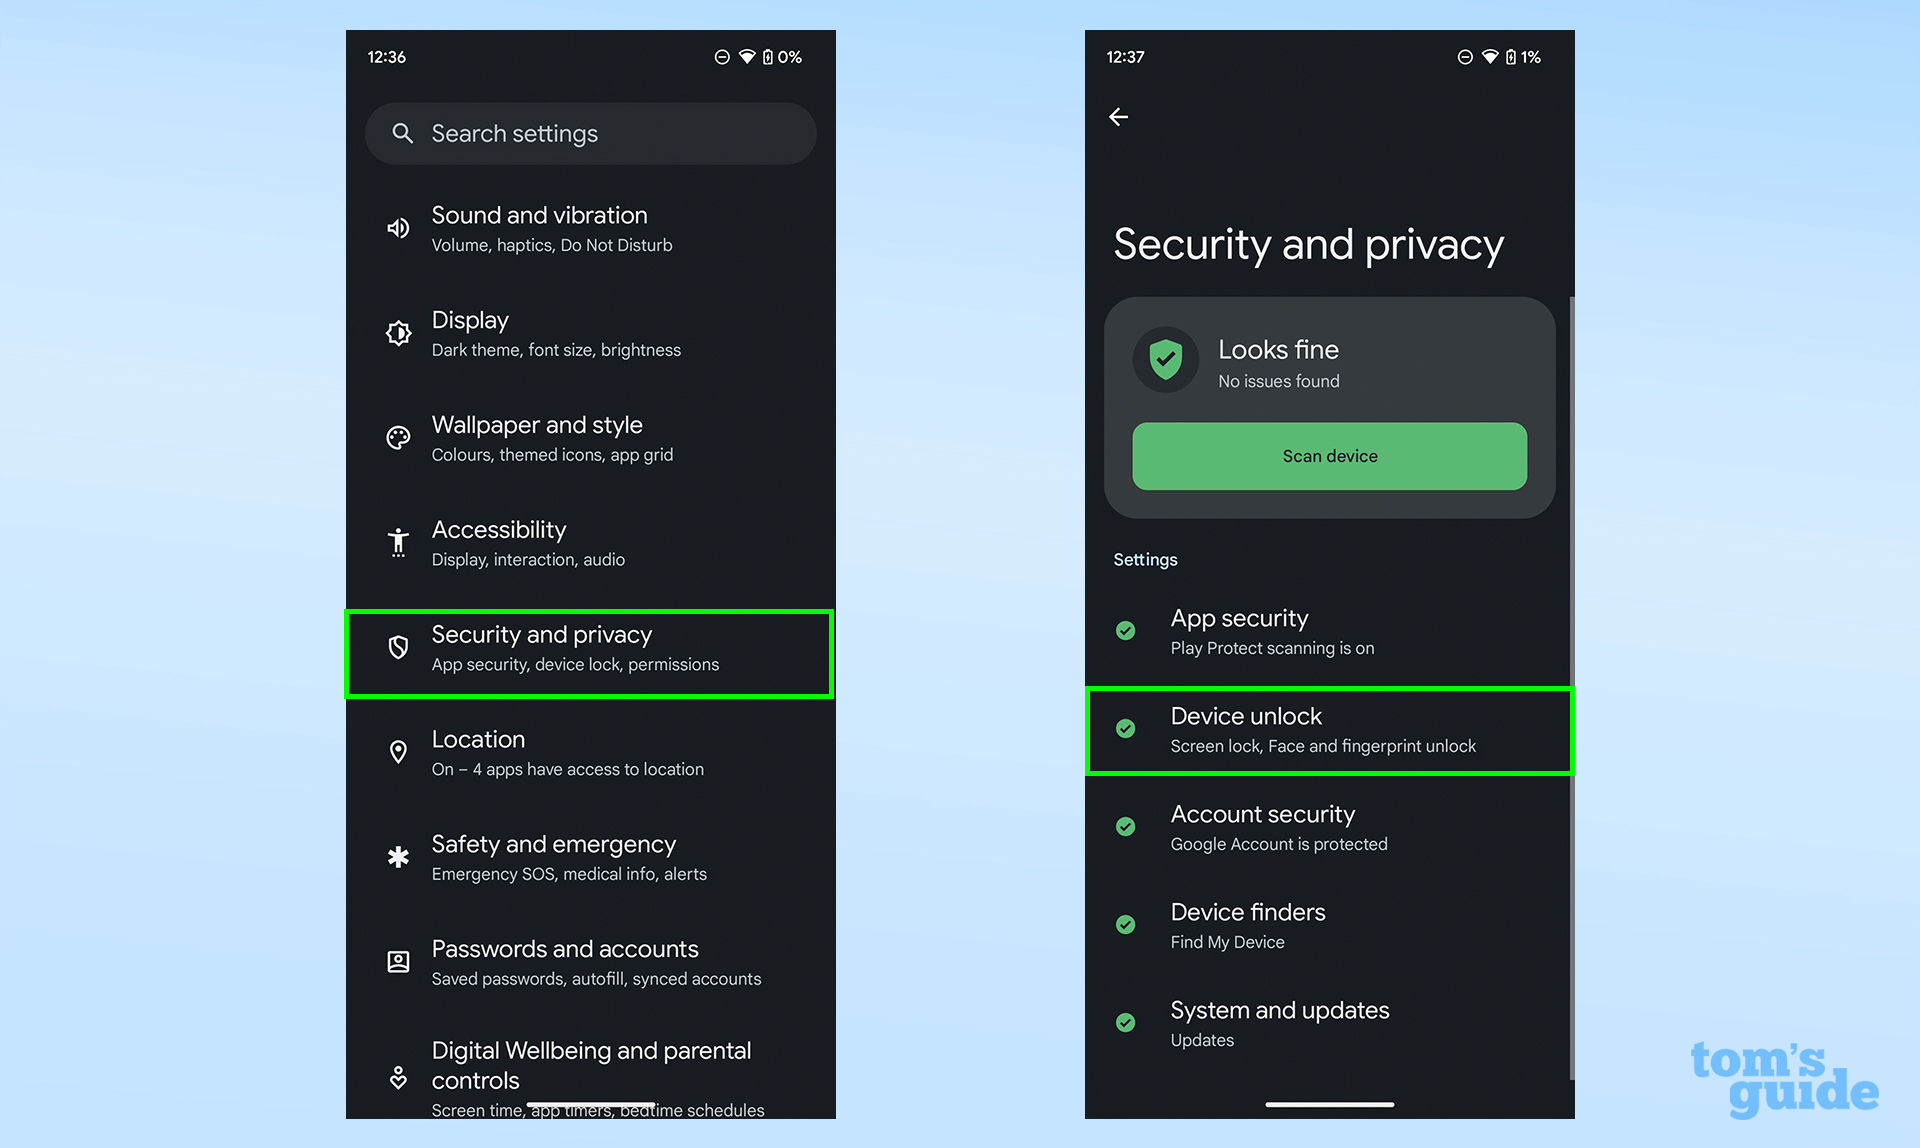
You'll find both headings about midway down their respective pages.
2. Tap the settings cog next to the Screen lock heading
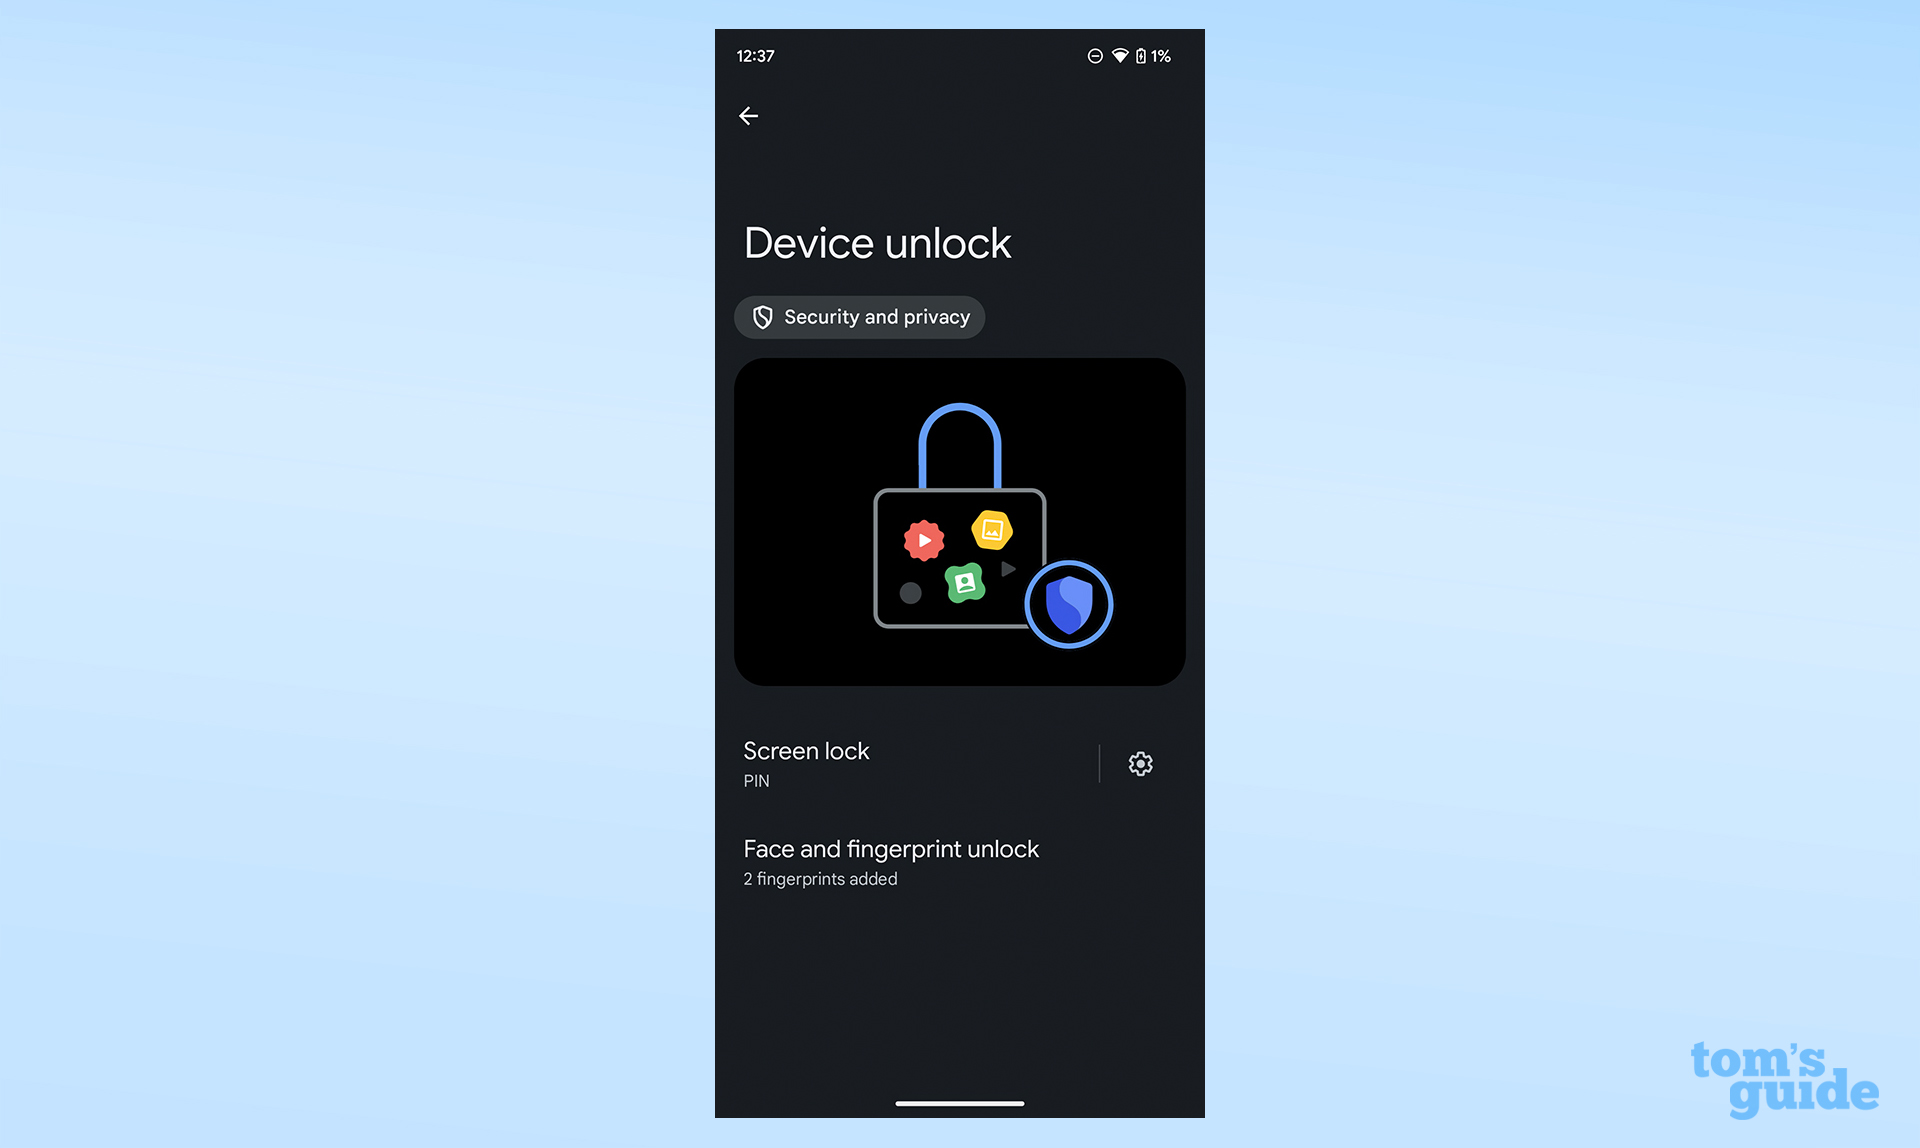
Make sure to hit the cog and not the Screen lock heading itself. Otherwise you'll be taken to the section where you can switch your PIN or choose another locking option.
3. Toggle Auto-confirm unlock to make your phone open by itself when entering your correct PIN, or to make it require a manual entry
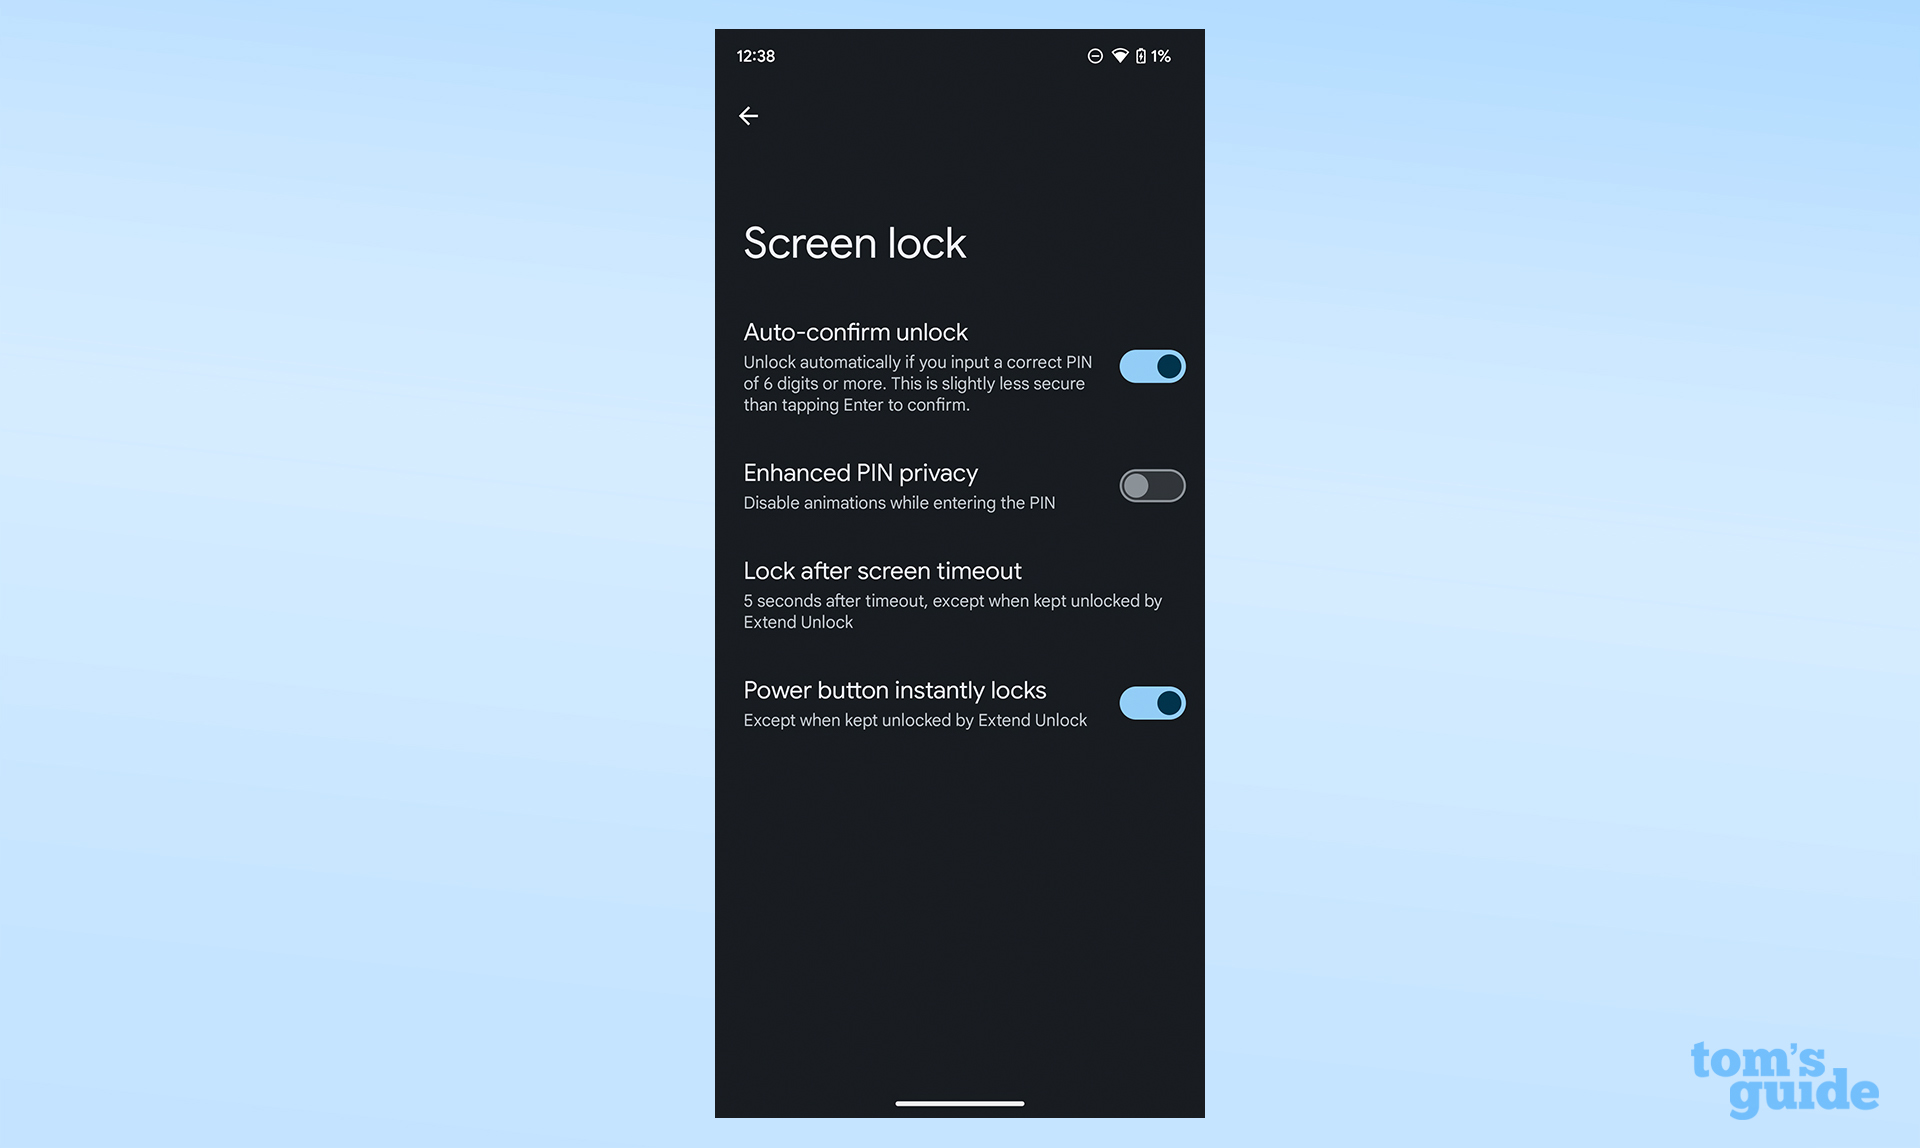
Auto-confirm unlock is only available if your PIN has six or more digits. If you need to change your PIN to make it longer, head back a step and open the Screen lock menu, then change your PIN.
As Google says though, auto-confirm unlock is is less secure than having a manual confirmation, which is why we'd assume Google limits this to longer PINs, actively recommending users pick a 6-digit code or longer when setting up.
Without an enter key, your phone will accept the first complete string of digits that equal the length of your PIN as a log-in attempt. You can still use backspace if you make a mistake in the middle of typing your PIN, but make sure not to get that last number wrong, otherwise you'll have to start all over again!
4. Toggle Enhanced PIN privacy to switch off the button tap confirmation animations when entering your PIN
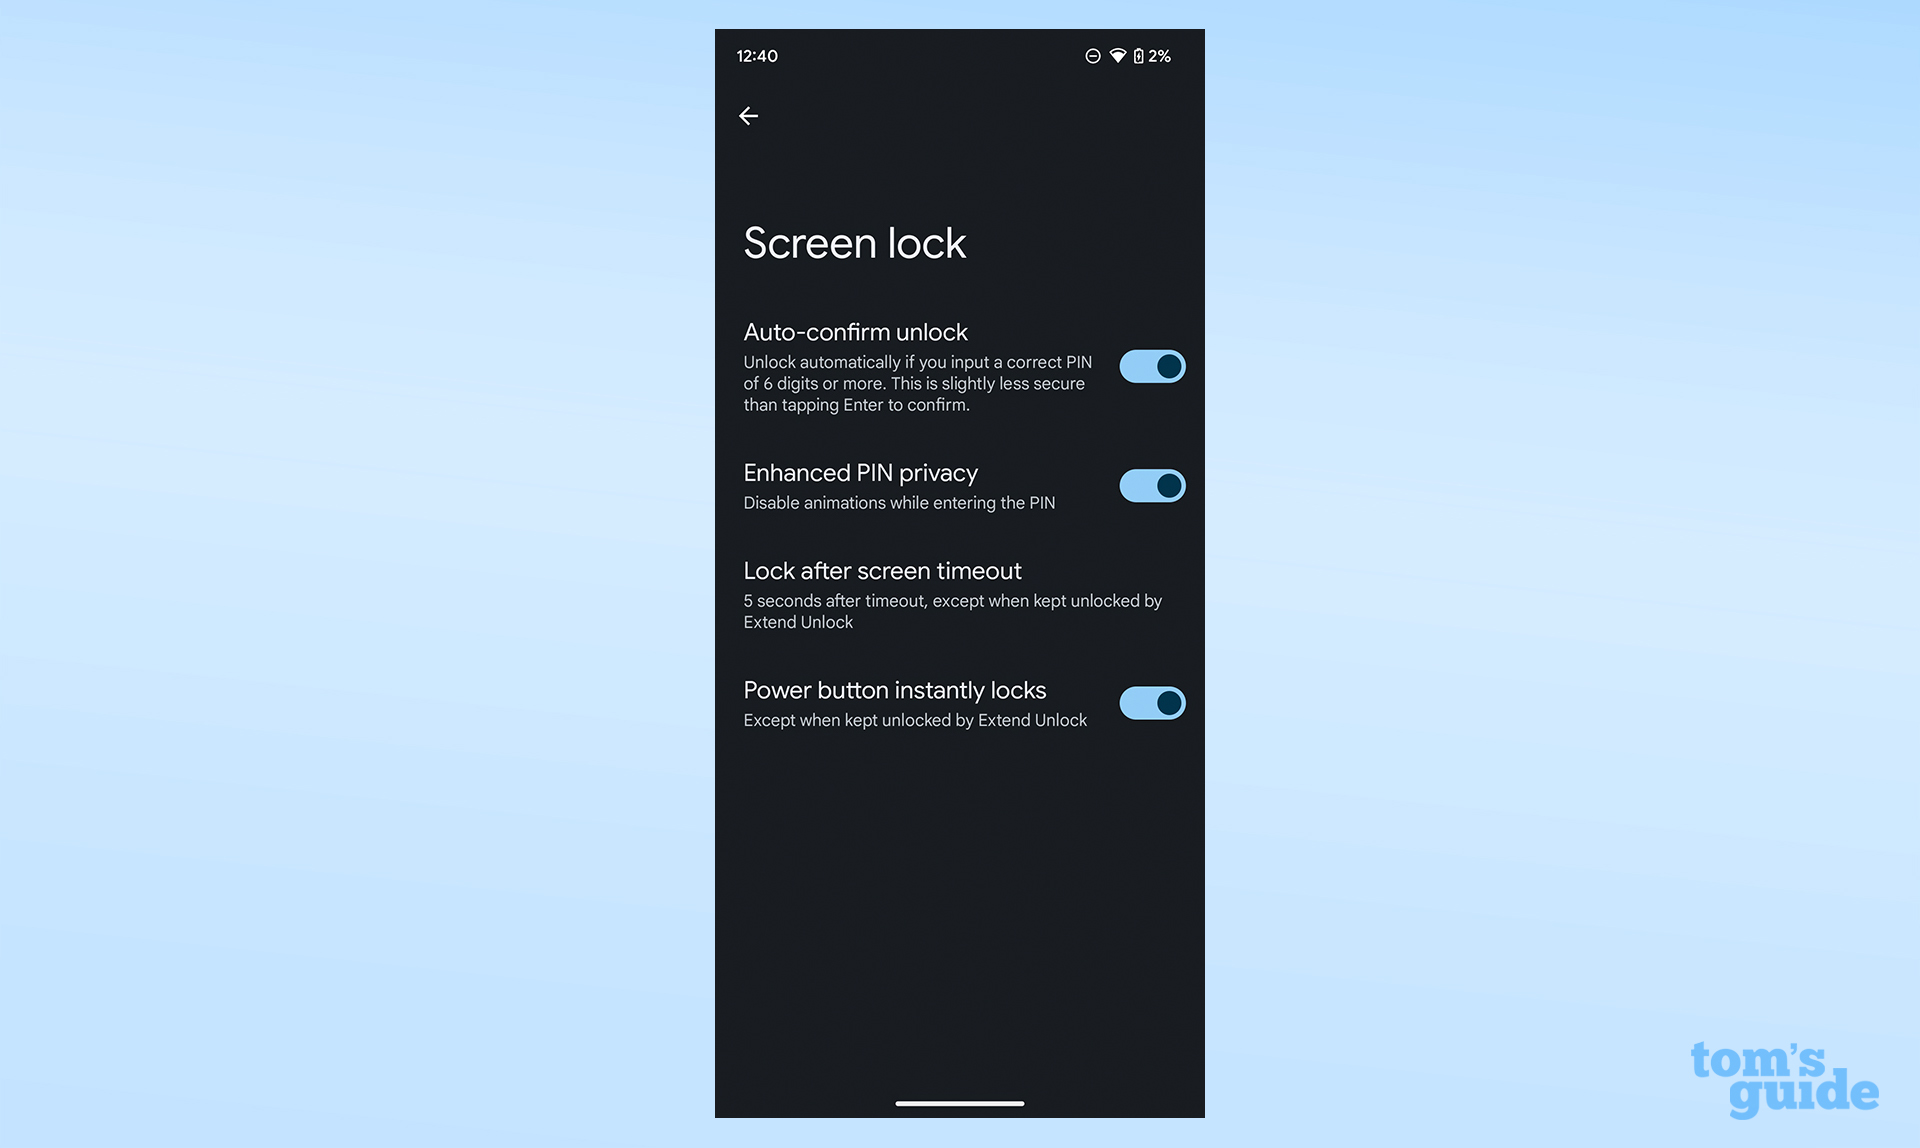
This toggle stops the virtual keys you tap from flashing as you hit them. It means you get a little less feedback as you enter the PIN, which could mean you make mistakes without realising, but it does make what you’re typing less obvious to anyone trying to shoulder-surf your password.
Below is a GIF of what this looks like in practice. Be aware that the number of digits in your PIN is still visible to onlookers.
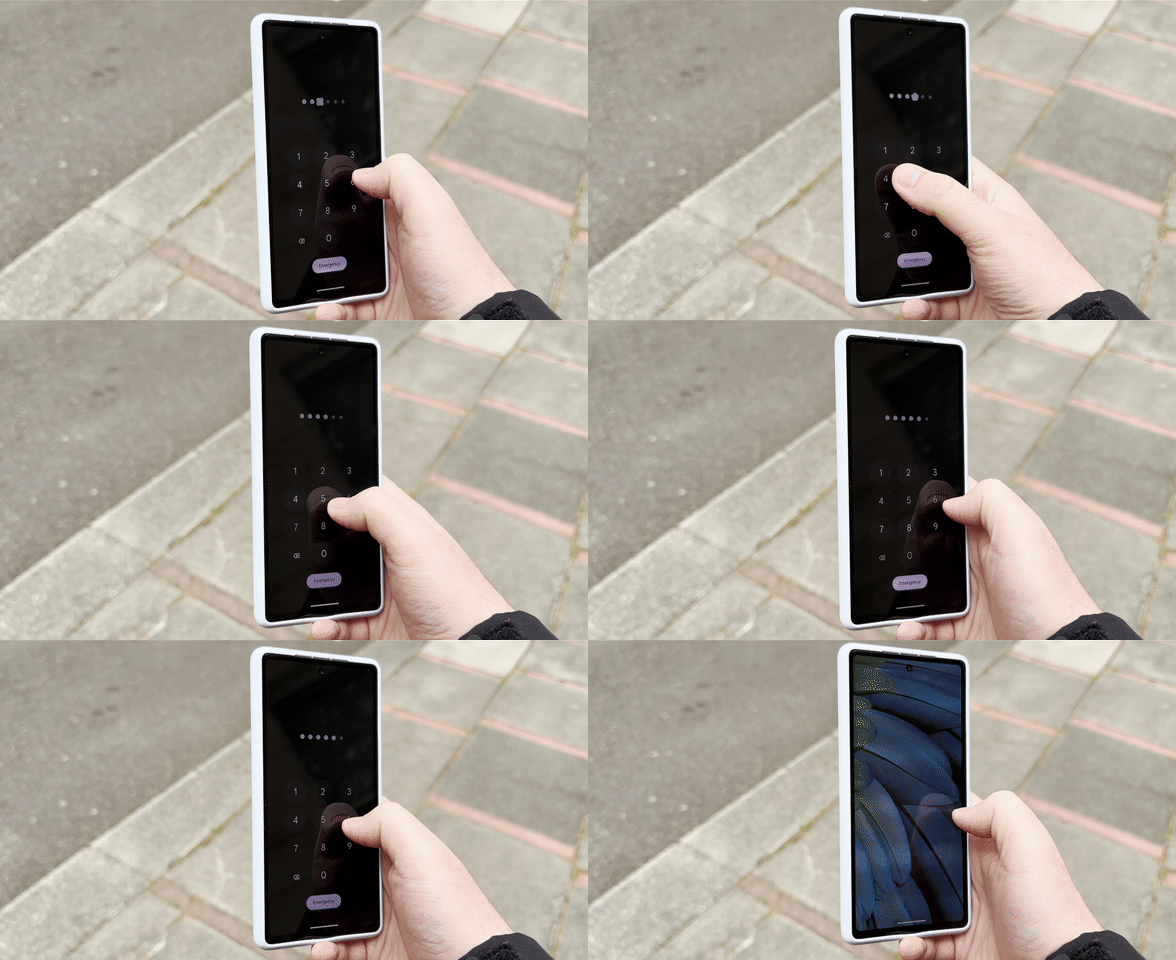
To try this feature yourself, you'll need to install the latest beta version of Android. Assuming your phone is compatible, here's how to download the Android 14 beta.
There are still fun and interesting features to try out on your Android phone without the beta though. Perhaps you could take a look at how to sync Fitbit with an Android phone for when you need to set up a new fitness tracker, how to check screen time on Android to help you keep on top of your smartphone usage, or how to screen record on Android if you want to share some step-by-step instructions of your own.
More from Tom's Guide
- Google Maps new upgrade is a massive time-saver
- Samsung Galaxy Z Flip 5 vs Motorola Razr+: Which foldable phone wins?
- Major YouTube TV upgrade is rolling out now to more sports fans
Sign up to get the BEST of Tom's Guide direct to your inbox.
Get instant access to breaking news, the hottest reviews, great deals and helpful tips.

Richard is based in London, covering news, reviews and how-tos for phones, tablets, gaming, and whatever else people need advice on. Following on from his MA in Magazine Journalism at the University of Sheffield, he's also written for WIRED U.K., The Register and Creative Bloq. When not at work, he's likely thinking about how to brew the perfect cup of specialty coffee.
-
sycoreaper Like I said in the past, Google eventually implements what Samsung did for years (among many other brands).Reply
Be nice if Google let others have some of their features.
