How to edit videos on YouTube
Here’s how to edit videos on YouTube, add music and link to your other videos
Knowing how to edit videos on YouTube is very useful if you ever upload a video to the site and decide afterwards it could use a few tweaks.
YouTube's built-in tools aren’t as powerful as those of the best video editing software, but they're all free, relatively easy to use, and can give your uploads a more professional touch through the addition of high-quality music and end screen links to your other content. In this guide, we’ll show you how.
- The best free video editing software right now
- Here’s how to download YouTube videos in Chrome
Strictly speaking, you’ll need to edit your uploaded videos in YouTube Studio, not YouTube itself — though your account is shared, and you’ll still be editing the YouTube videos on your usual channel.
The four main types of editing in YouTube Studio are trimming, adding music, adding blur — if you want to blur out someone’s face or sensitive information, say — and adding an end screen. Read on to learn how to tackle each one.
How to edit videos on YouTube: Trim and cut videos
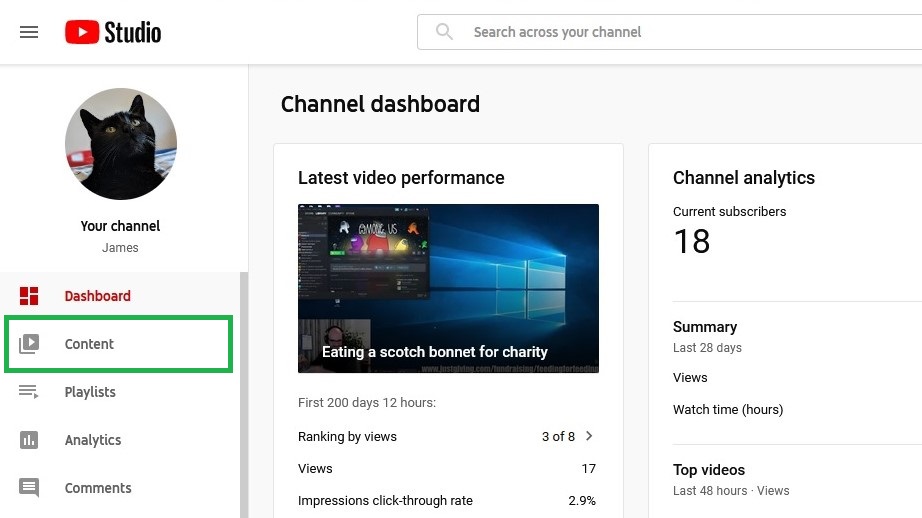
1. Sign into YouTube Studio and click “Content” in the left sidebar.
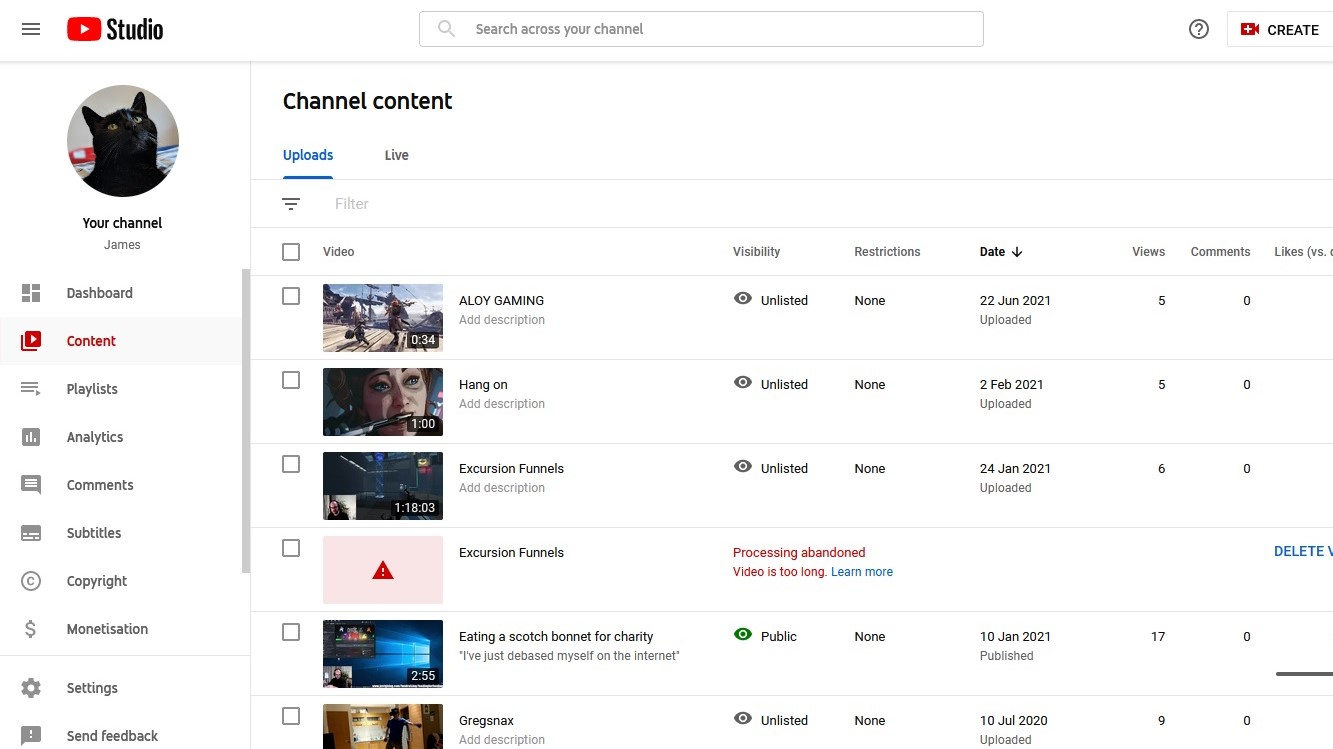
2. You’ll be presented with a list of your uploaded videos. Click the thumbnail of the video you want to edit.
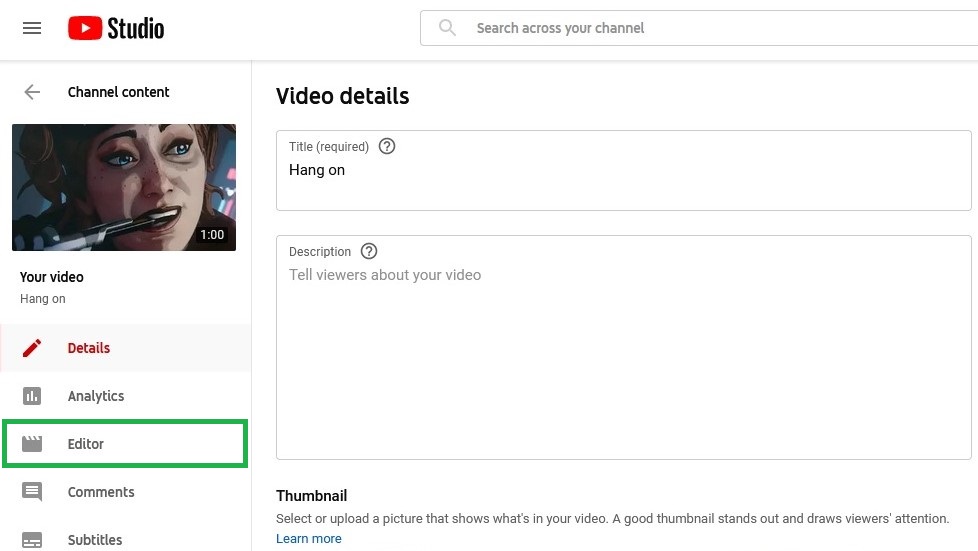
3. Click “Editor” in the left sidebar to open the editing tools.
Sign up to get the BEST of Tom's Guide direct to your inbox.
Get instant access to breaking news, the hottest reviews, great deals and helpful tips.
4. To trim the beginning and/or end of your video, start by clicking “Trim” just above the video timeline.
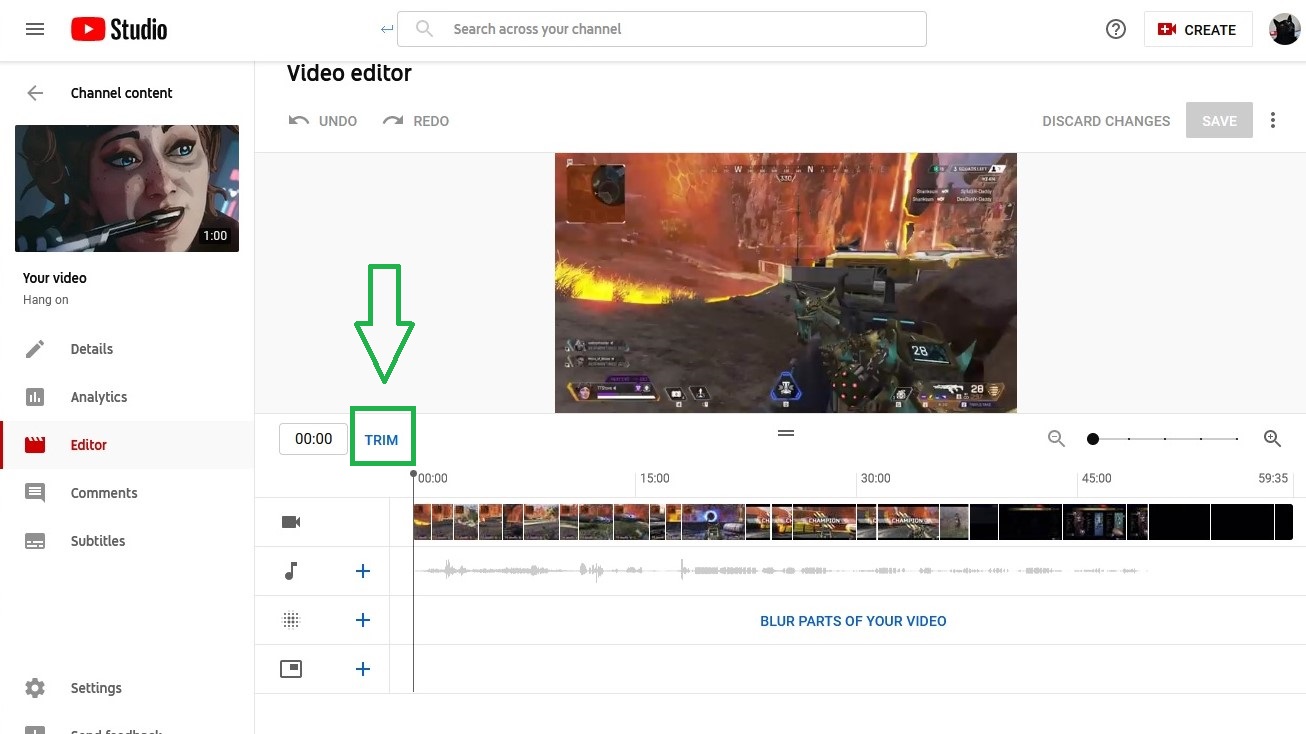
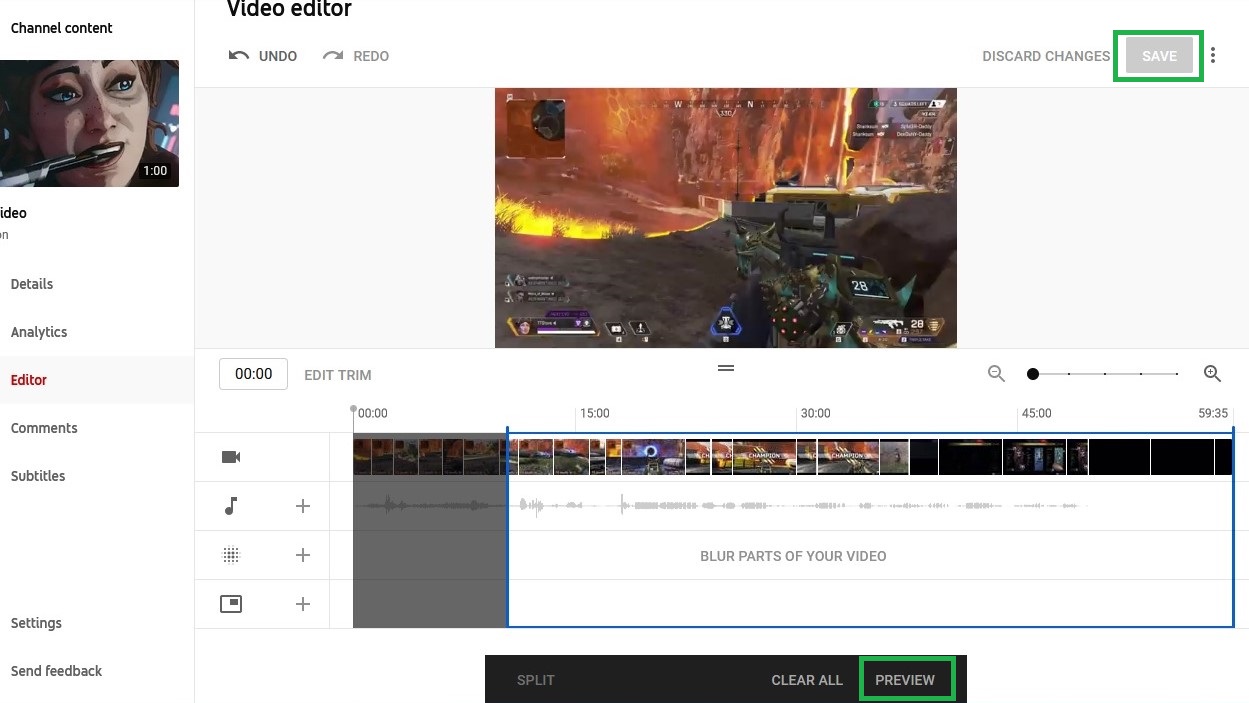
5. This creates a blue box around the video timeline; click and drag the left or right edges to trim the length of your video as desired.
Click “Preview” to review your changes, then click either “Save” to make the edit or “Discard changes” to start over.
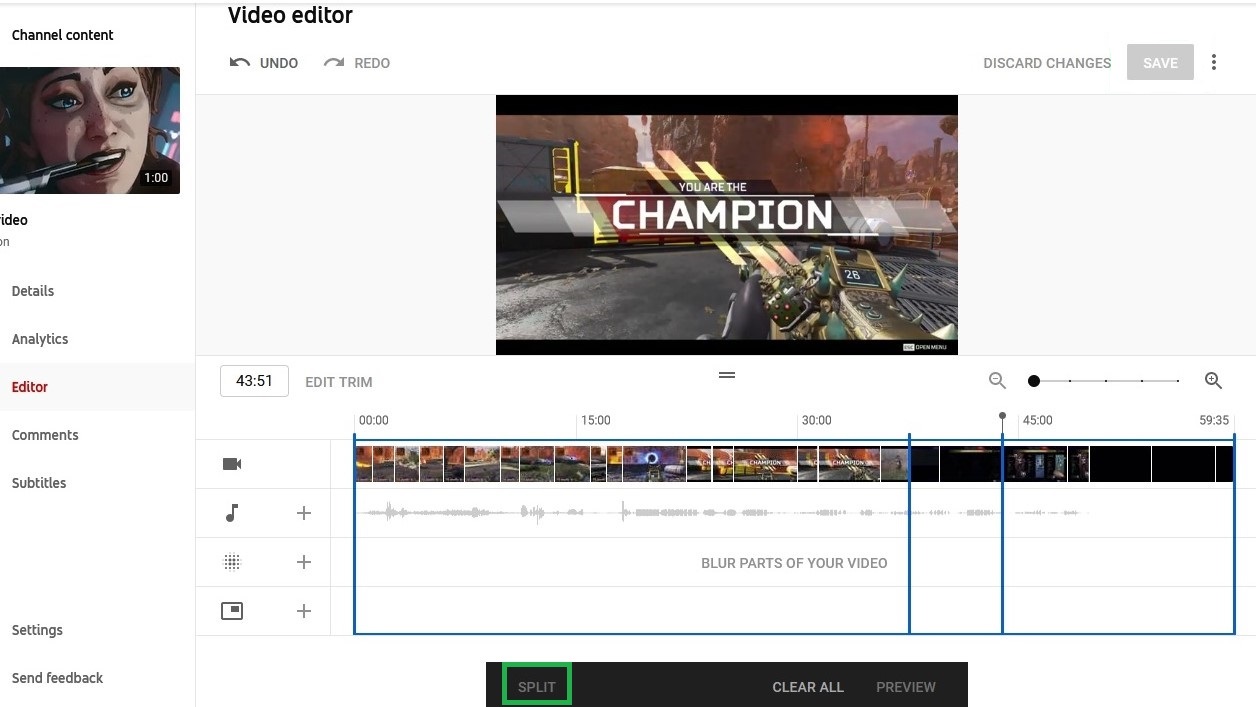
6. To cut out a section partway into your video, click “Trim,” then in the video timeline click the start of the portion you want to cut out. Click “Split.”
Repeat this with the end of the portion: click your desired end point on the video timeline, then click “Split.”
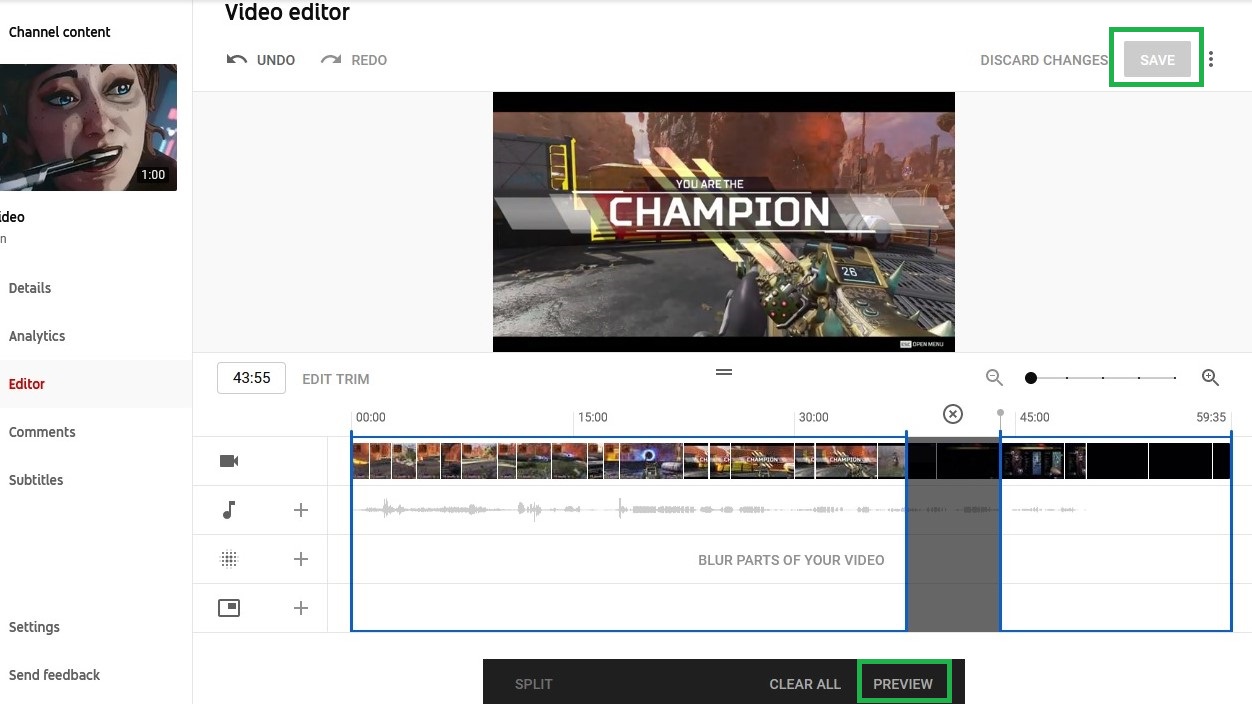
7. You should now have two blue vertical lines inside the timeline. Click one of them, then drag towards the other until the section is covered grey. Finally, click “Preview” then “Save” to cut it out.
How to edit videos on YouTube: Add music to videos
YouTube Studio makes it easy to add royalty-free music to your music, and even provides its own library of tracks you can use. However, it won’t let you trim a video once you’ve added this music, and doing so will also mute the video’s pre-existing audio.
As such, you should only add music once you’re finished with any trimming, and if you won’t want to use the video’s original audio (if there was any.)
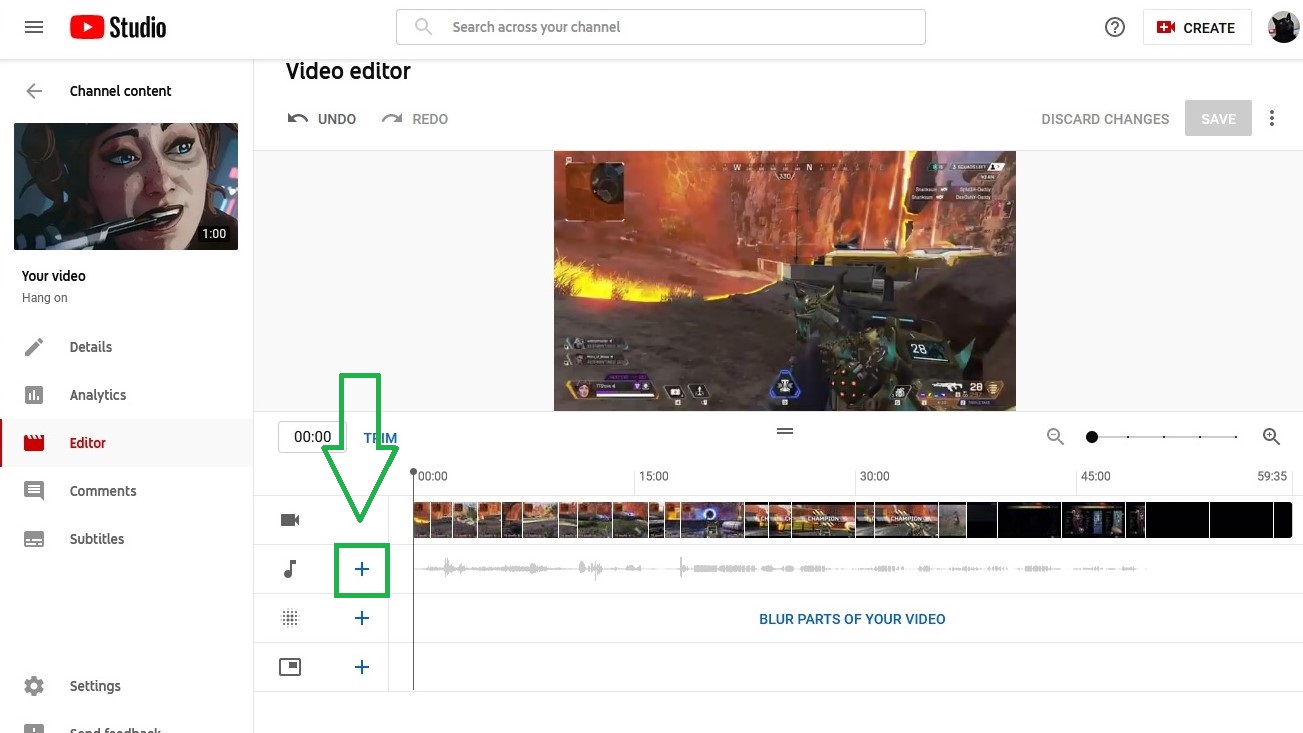
1. Click the “+” symbol in the video timeline’s Audio section.
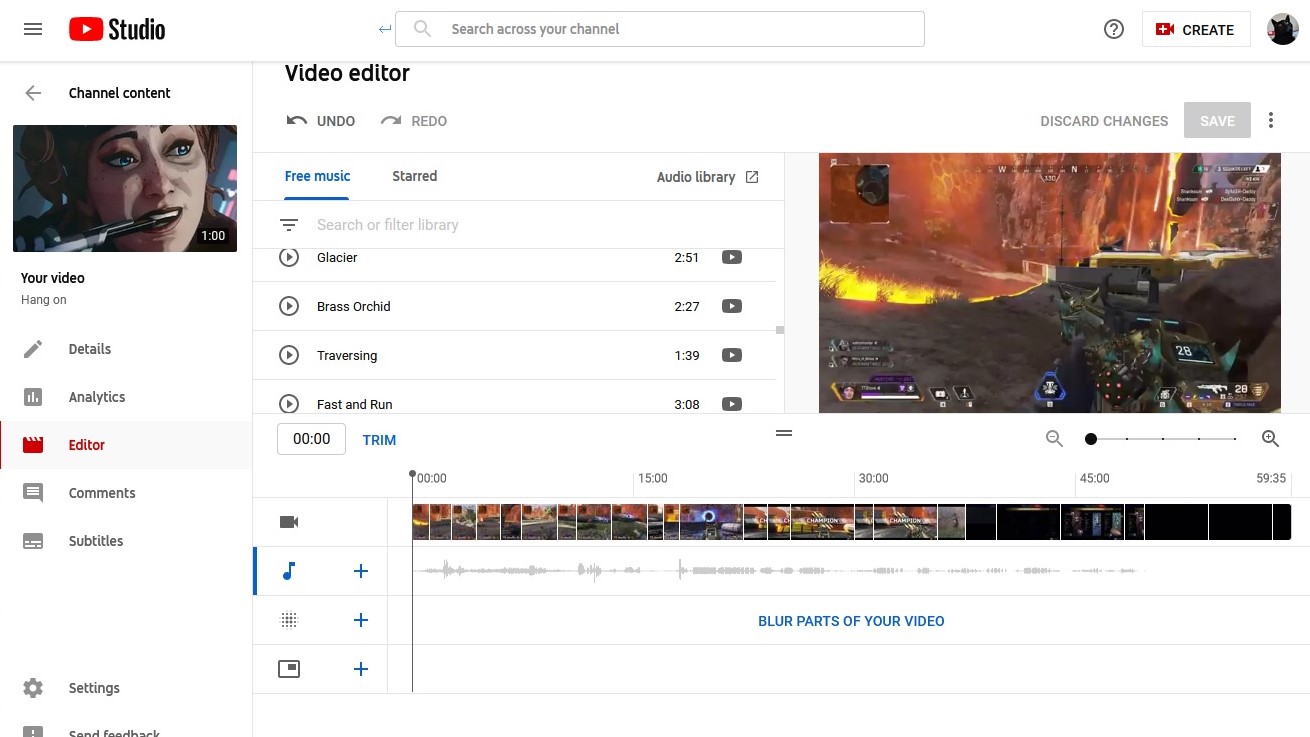
2. You’ll see a list of audio tracks, which are free to use without attribution, even in monetized videos. Click the “Play” symbol to preview a track, and click “Add” to insert it into you video.
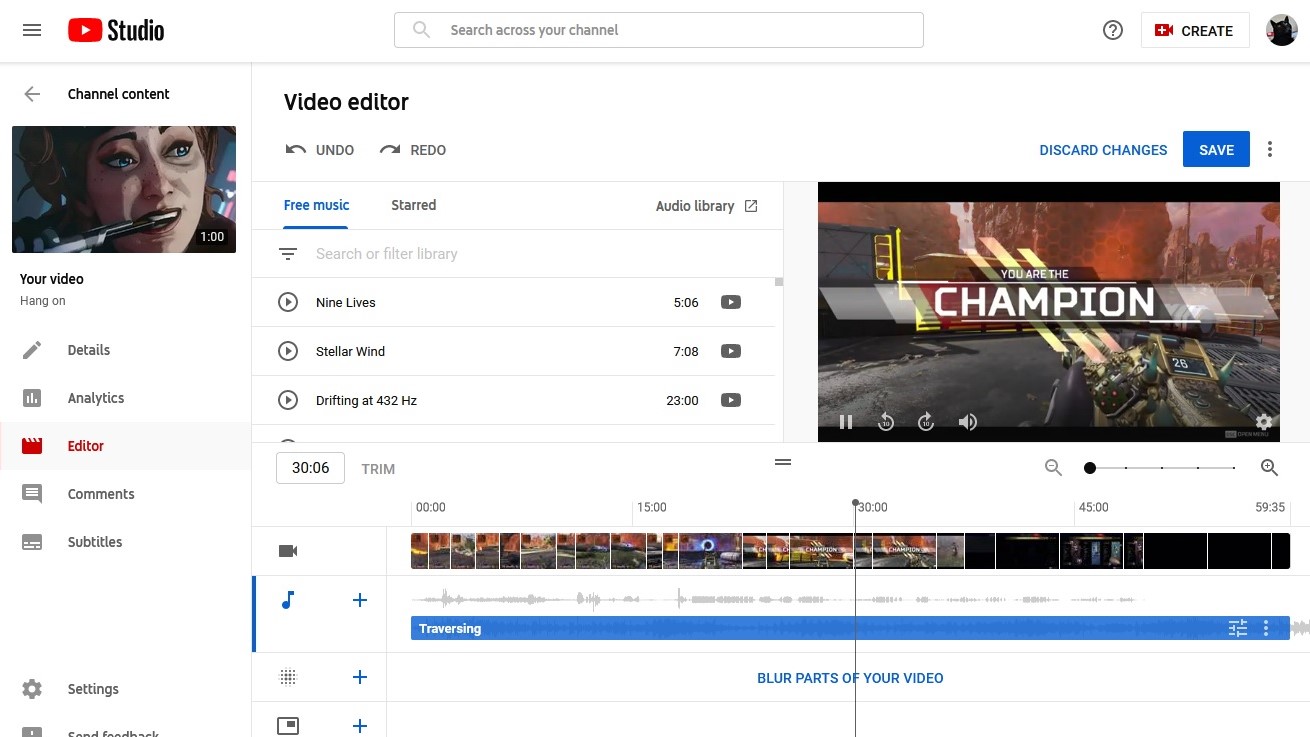
3. Wait a few moments for the video to process, then click “Save.”
How to edit videos on YouTube: Add blur to videos
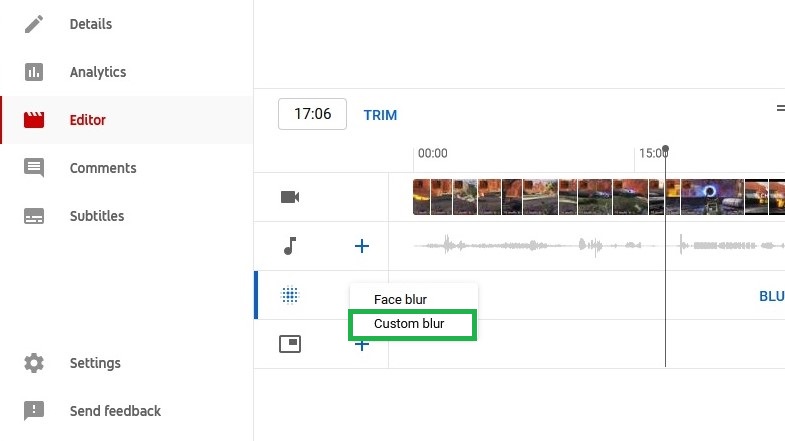
1. Click either “Blur parts of your video” or the “+” symbol within the same row. Then, click “Custom blur.”
2. You’ll see a blue bar within the Blur section of the timeline. Click and drag the edges to choose when the blur effect appears.
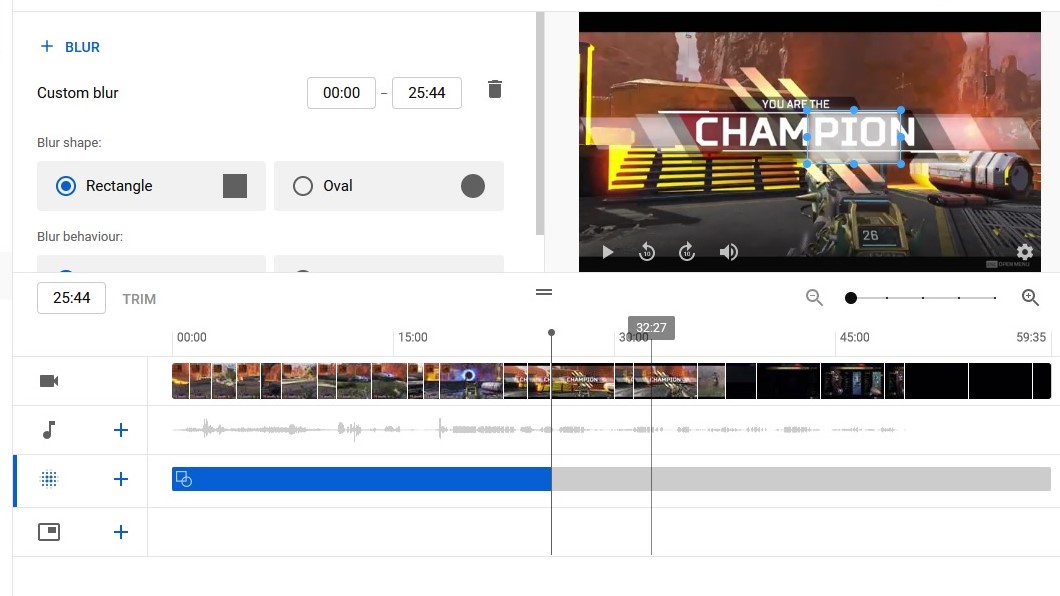
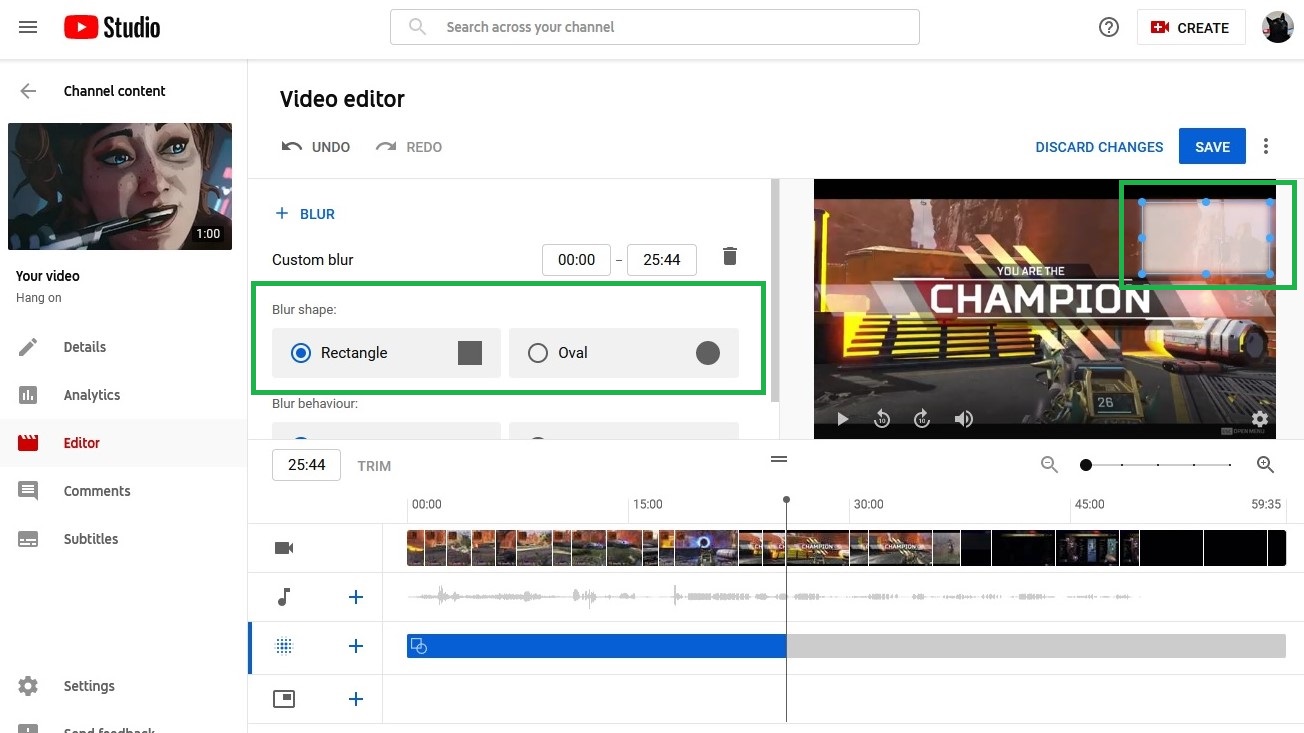
3. Select the blur effect shape — it can be rectangular or an oval — and click and drag it within the video preview pane to position it. To blur the whole screen, extend the box so it covers the entire pane.
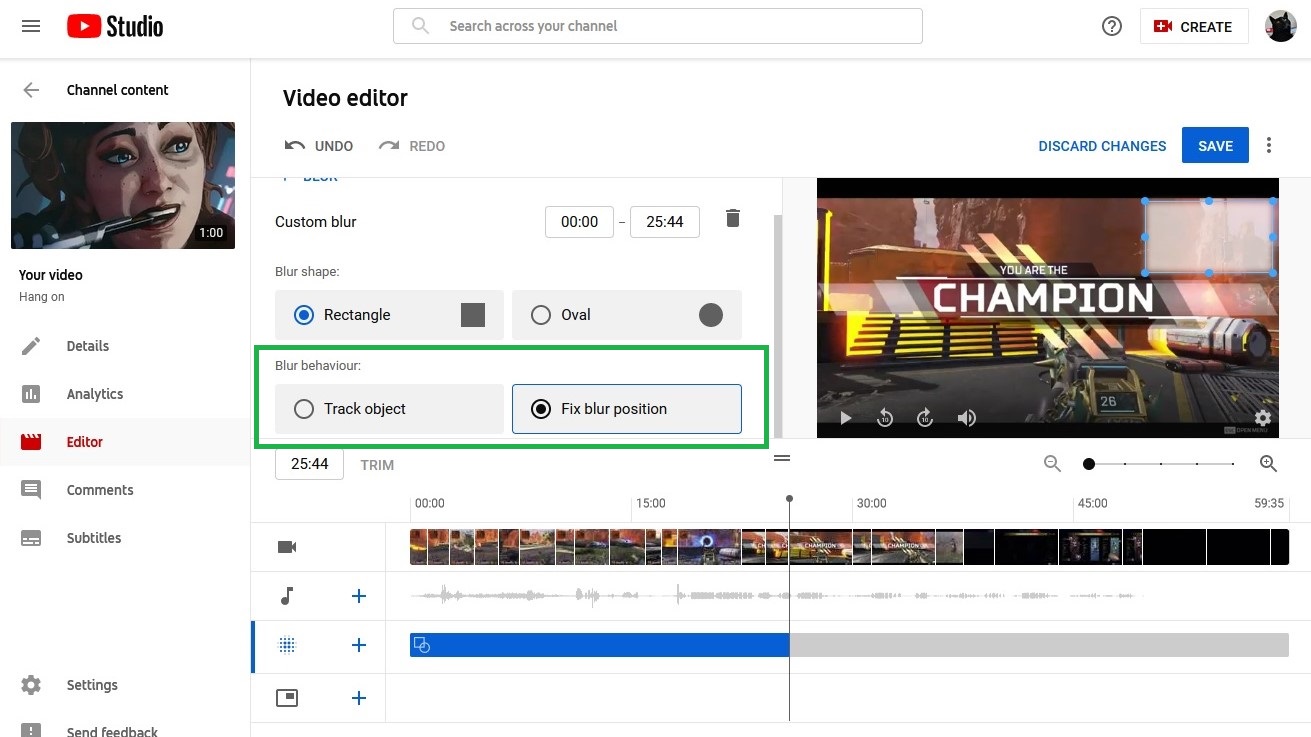
4. Under “Blur behaviour,” you can either click “Fix blur position” to keep the blurred area in a set place, or click “Track object,” which have attempt to track moving objects that you’ve covered with the blur area. Click “Save” when finished.
How to edit videos on YouTube: Add an end screen
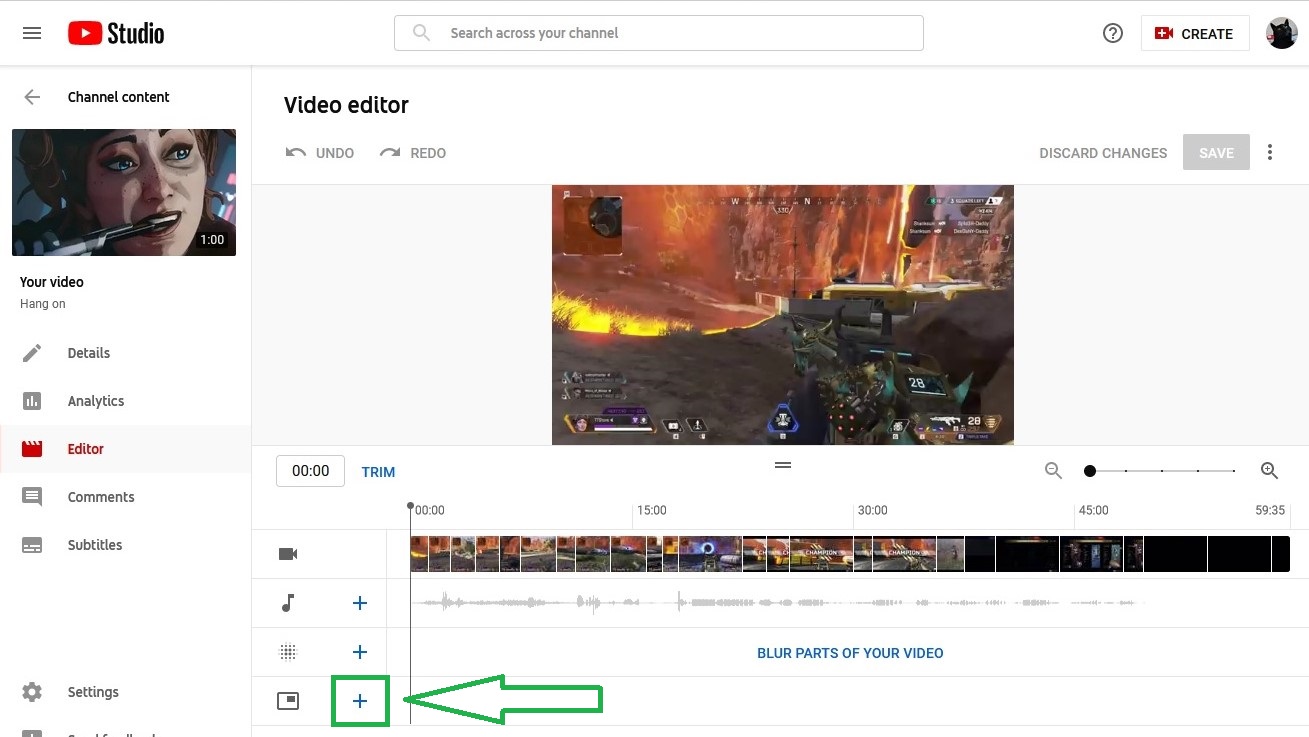
1. Click the “+” symbol in the video timeline’s End screen section; it’s the lowest one down.
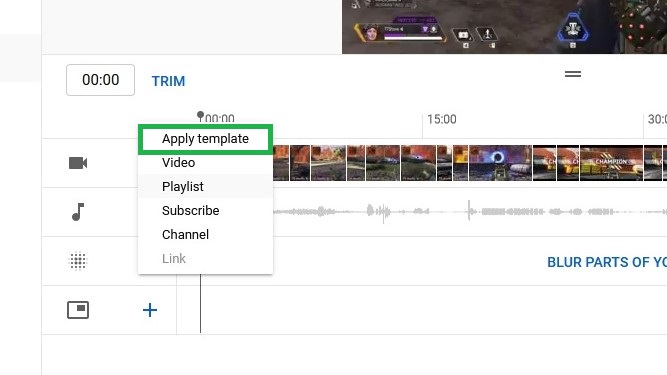
2. Click on “Video” “Playlist,” “Subscribe” or “Channel” to insert a single element; you can select which video or playlist specifically, or set it to show your latest upload.
However, we’d suggest that you click “Apply template,” as this lets you add multiple links at once.
3. Select a template from the list. In this instance, we’ve chosen the “2 videos” template.
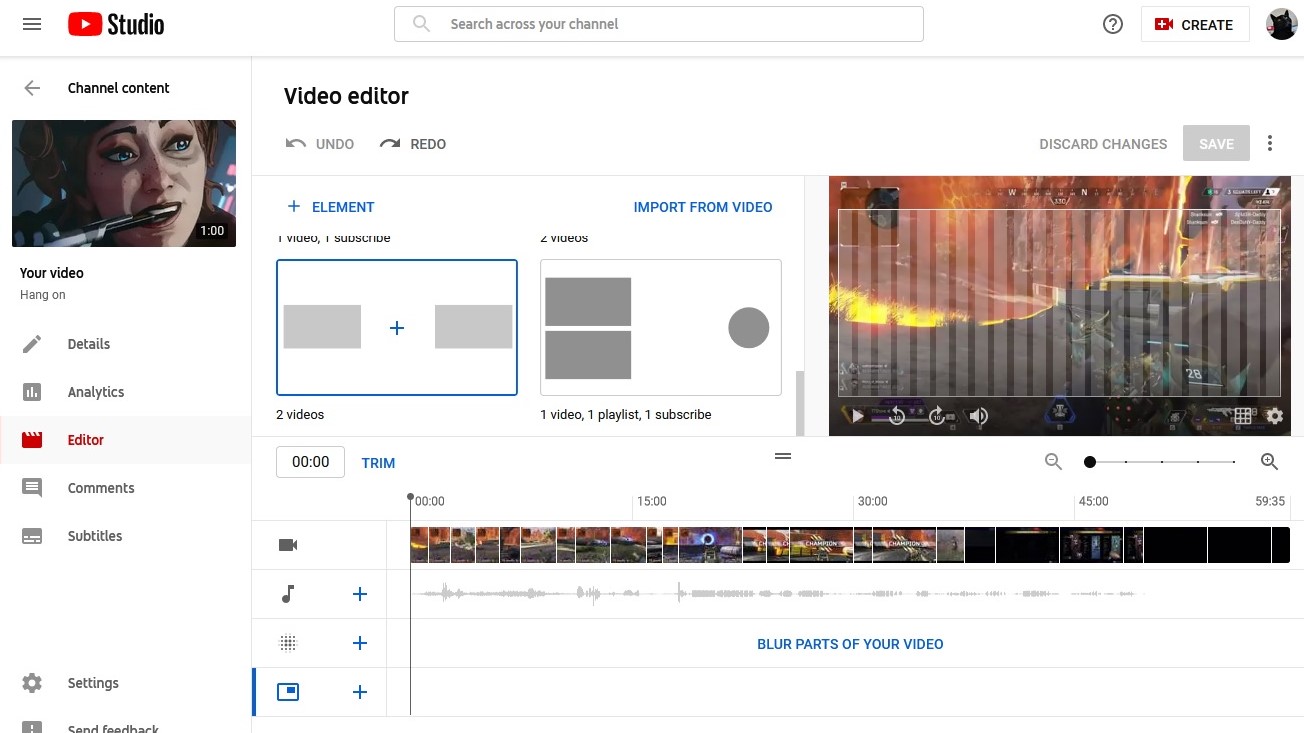
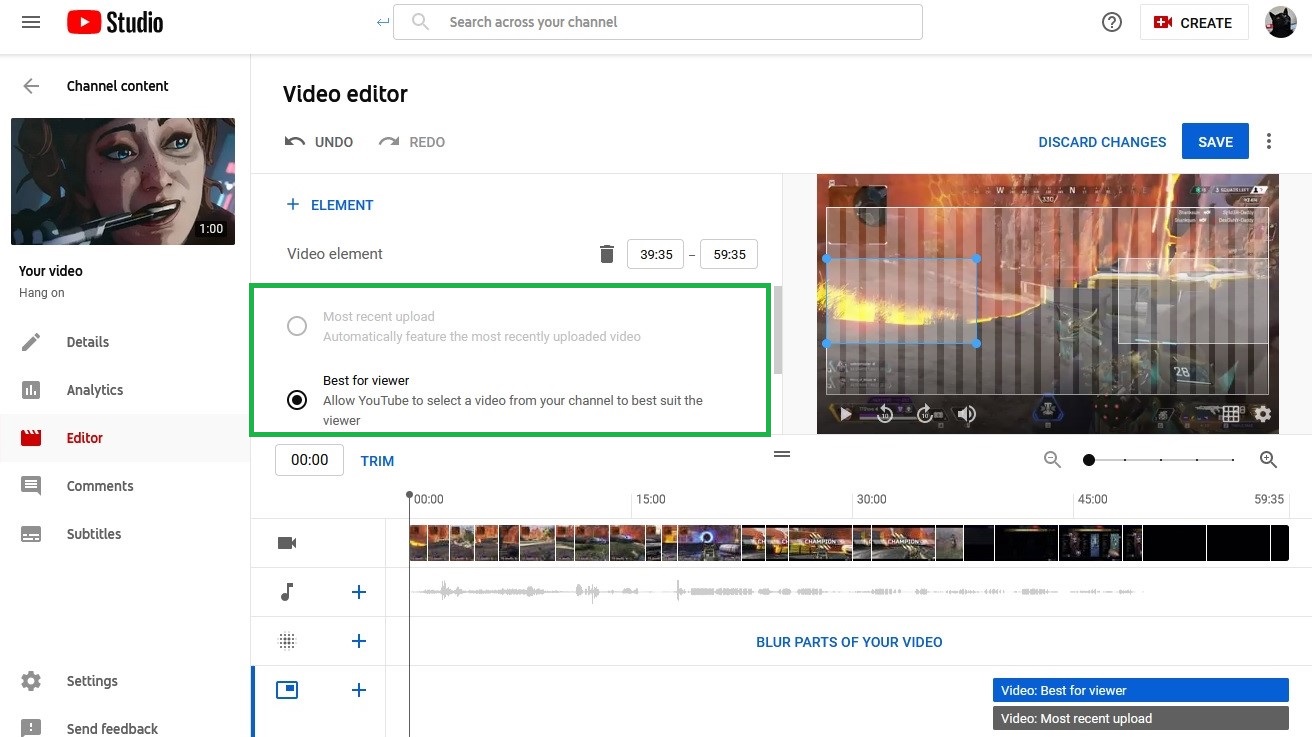
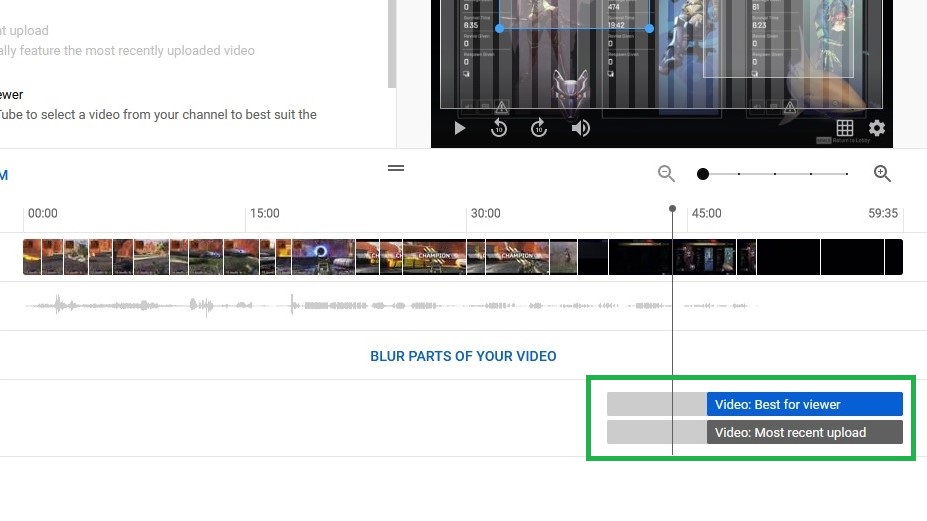
4. When adding videos to your end screen, you can choose to select “Best for viewer” or “Choose specific video” — the former will let YouTube pick one of your videos, while the latter lets you select a specific video.
Unless you’re editing your most recently uploaded video, you can also select “Most recent upload” to always show your latest video. There are similar options for adding playlists too.
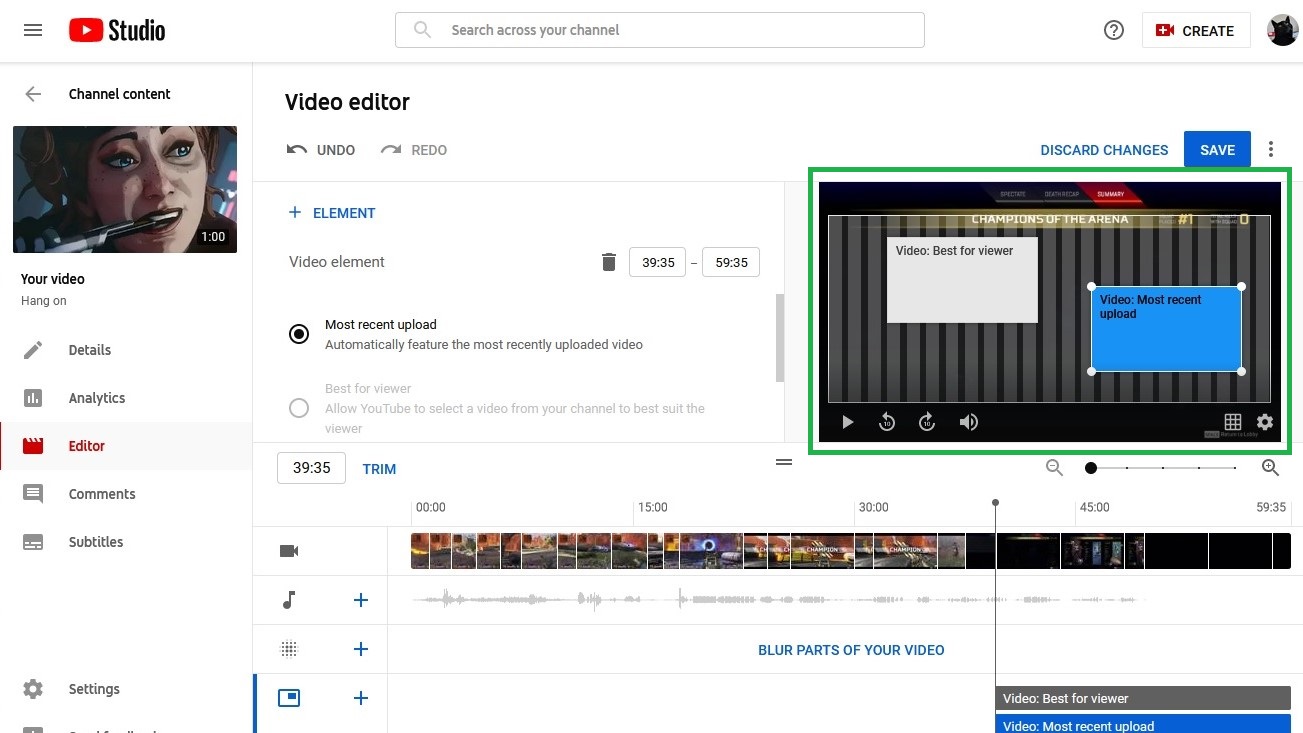
5. To move where the video, playlist, subscription or channel links appear in the frame, click and drag the colored boxes in the preview pane.
6. You can control how long the links appear for. In the video timeline, click and drag the sizes of the labelled elements to trim their length. You can also click and drag the elements to move them up and down the timeline
You can’t move elements further than 20 seconds beyond the end of the video, but if you’ve trimmed them, you can move them anywhere within that 20-second window. Click “Save” once all your End screen elements are in place.
- More: YouTube TV channels and networks: cost, devices, and other useful info
- How to use YouTube picture-in-picture mode
James is currently Hardware Editor at Rock Paper Shotgun, but before that was Audio Editor at Tom’s Guide, where he covered headphones, speakers, soundbars and anything else that intentionally makes noise. A PC enthusiast, he also wrote computing and gaming news for TG, usually relating to how hard it is to find graphics card stock.

