How to do a reverse image search using Google
Learn how to do a reverse image search using Google on your PC, Mac, iPhone or Android phone
Knowing how to do a reverse image search is super useful. Whether you’ve stumbled across an image online, or you’ve taken a photo of something yourself, reverse image search can help you find out what an image is showing, or where it has come from.
There are a few ways of completing a reverse image search. Some of them, like Apple’s Visual Look Up, are restricted to iOS or iPadOS devices. For that reason, we’re going to show you how to do a reverse image search on Google Images or using Google Lens, as these work across most devices: iPhone, iPad, Android, Mac and Windows.
Better yet, it’s as easy as doing a regular search. Read on to see how to do a reverse image search.
How to do a reverse image search using Chrome
If you want to do a reverse image search on a PC or Mac, then the easiest way is to make use of the Google Chrome browser. It's the most popular web browser so you may already have it installed on your computer. If you do not, it's worth discovering how to download Google Chrome because its range of features goes way beyond what we're about to look at.
1. Launch Chrome on your PC or Mac and browse the web until you come across an image that you want to search.
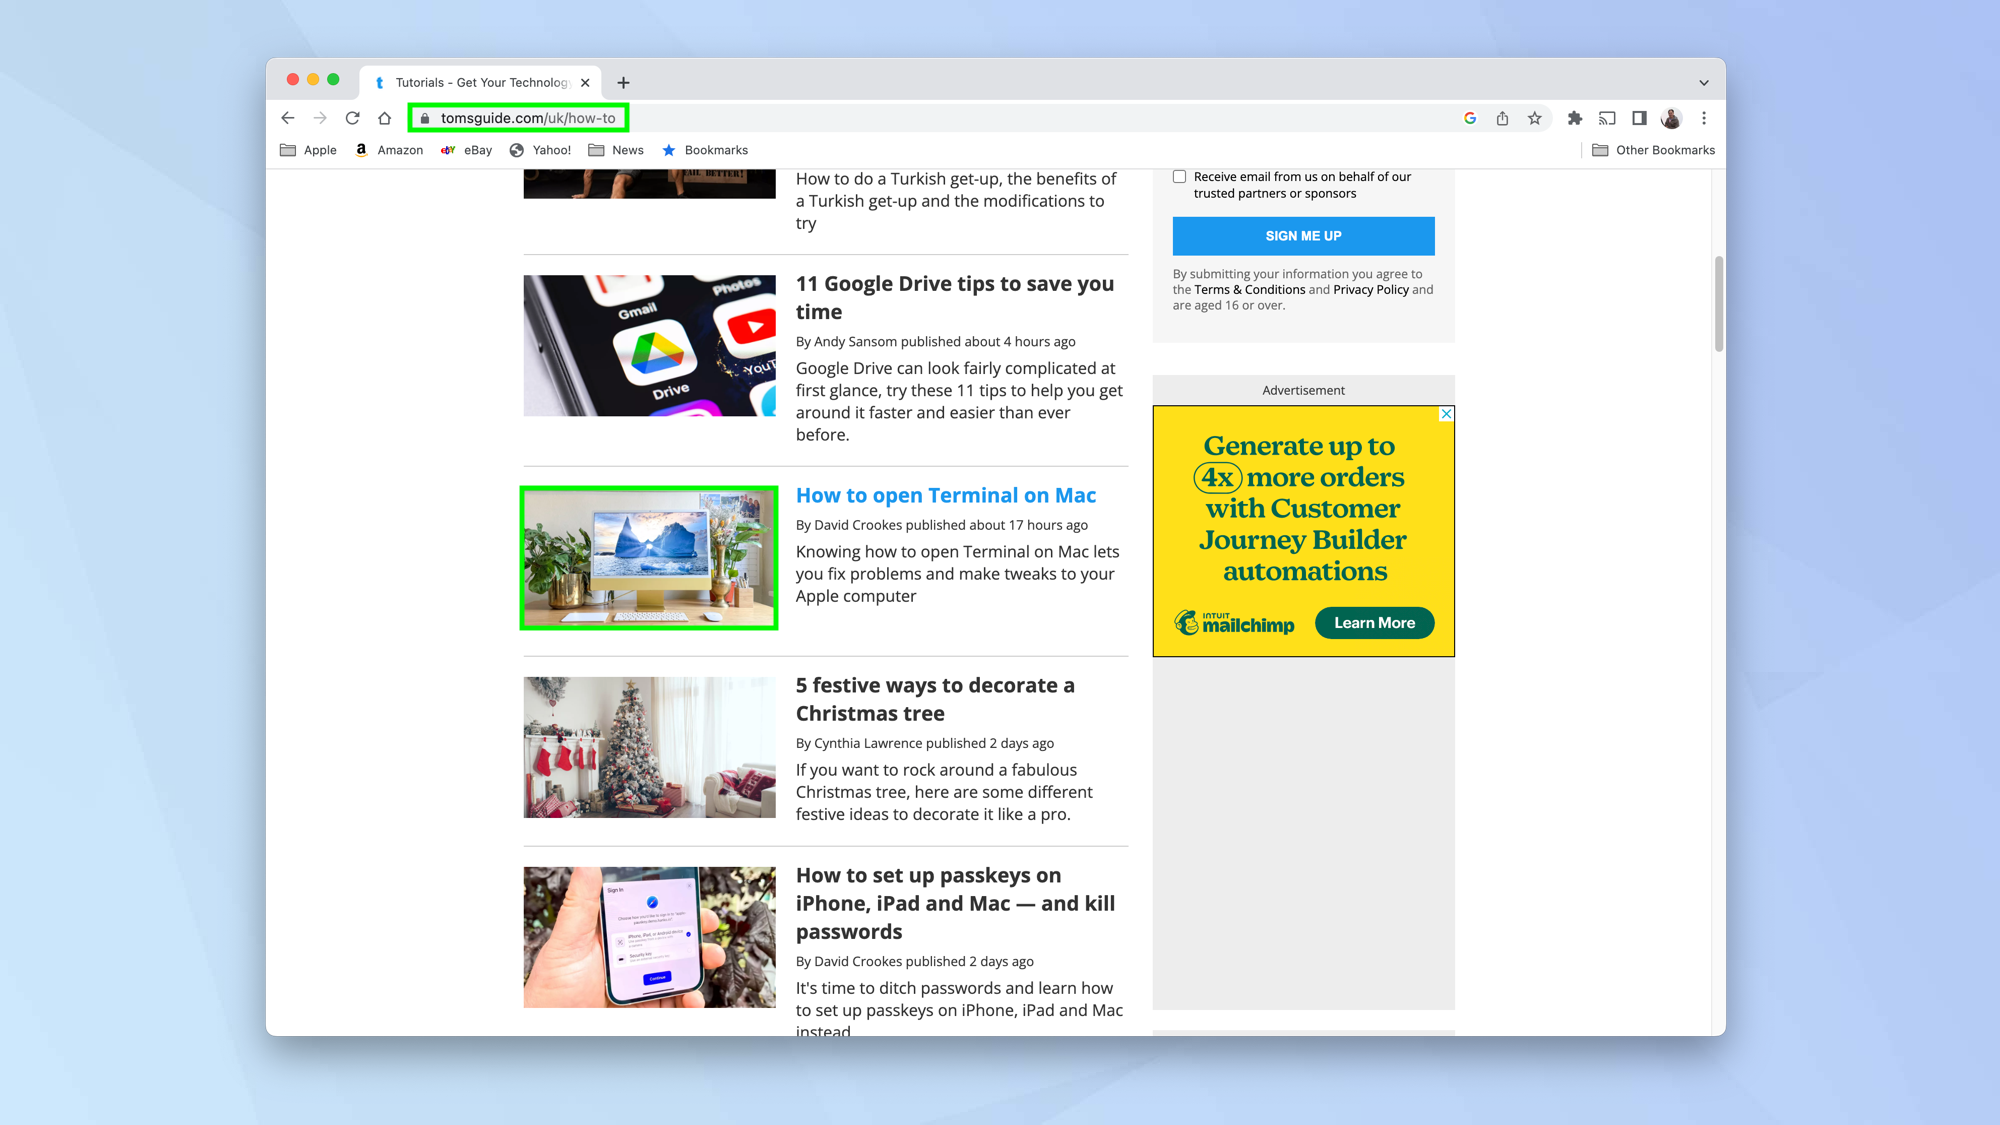
2. Once you've found it, right-click on the image (discover how to right-click on Mac) and select Search image with Google Lens.
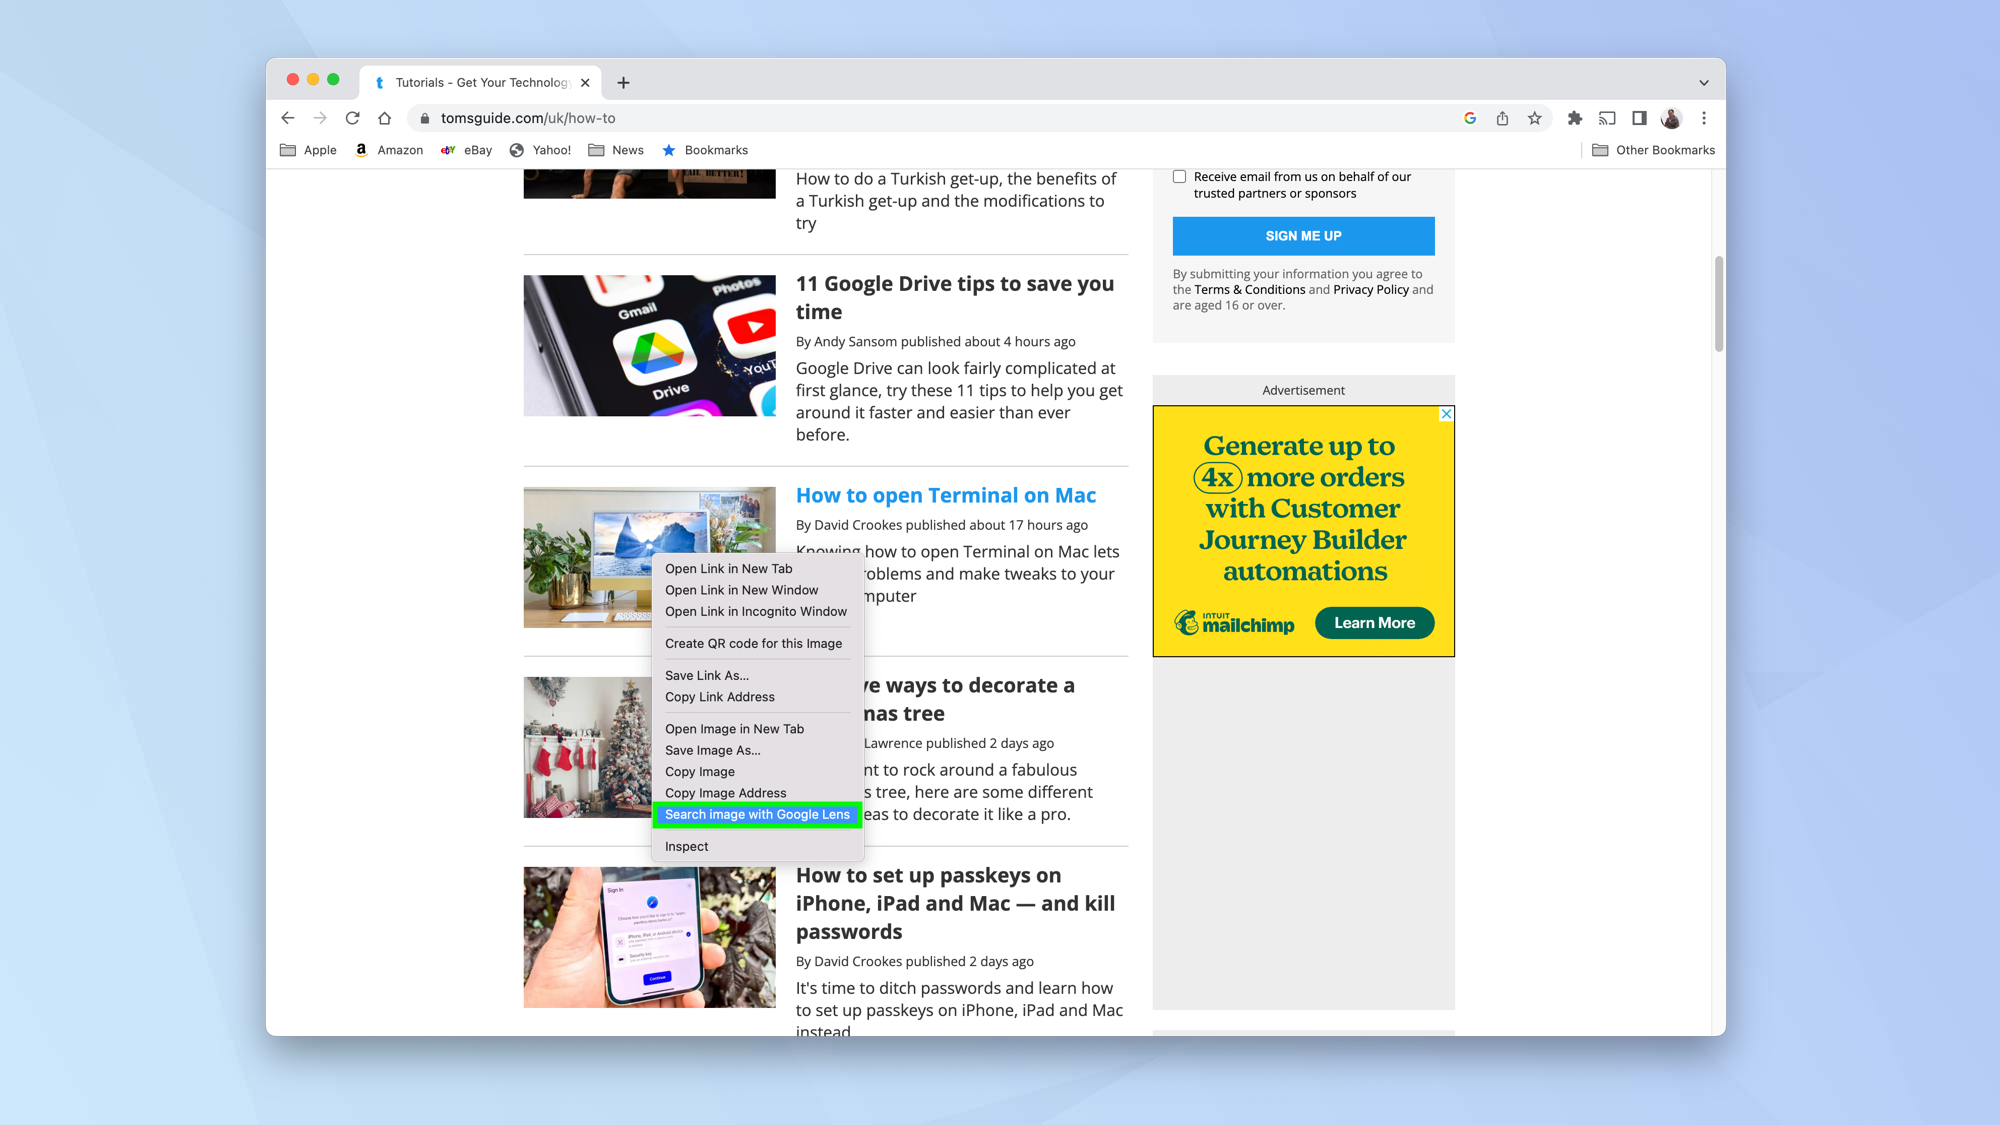
3. Look to the right of the screen and you will see a Google Lens box has appeared. You can scroll down this box to view other instances of the image being used.
Sign up to get the BEST of Tom's Guide direct to your inbox.
Get instant access to breaking news, the hottest reviews, great deals and helpful tips.
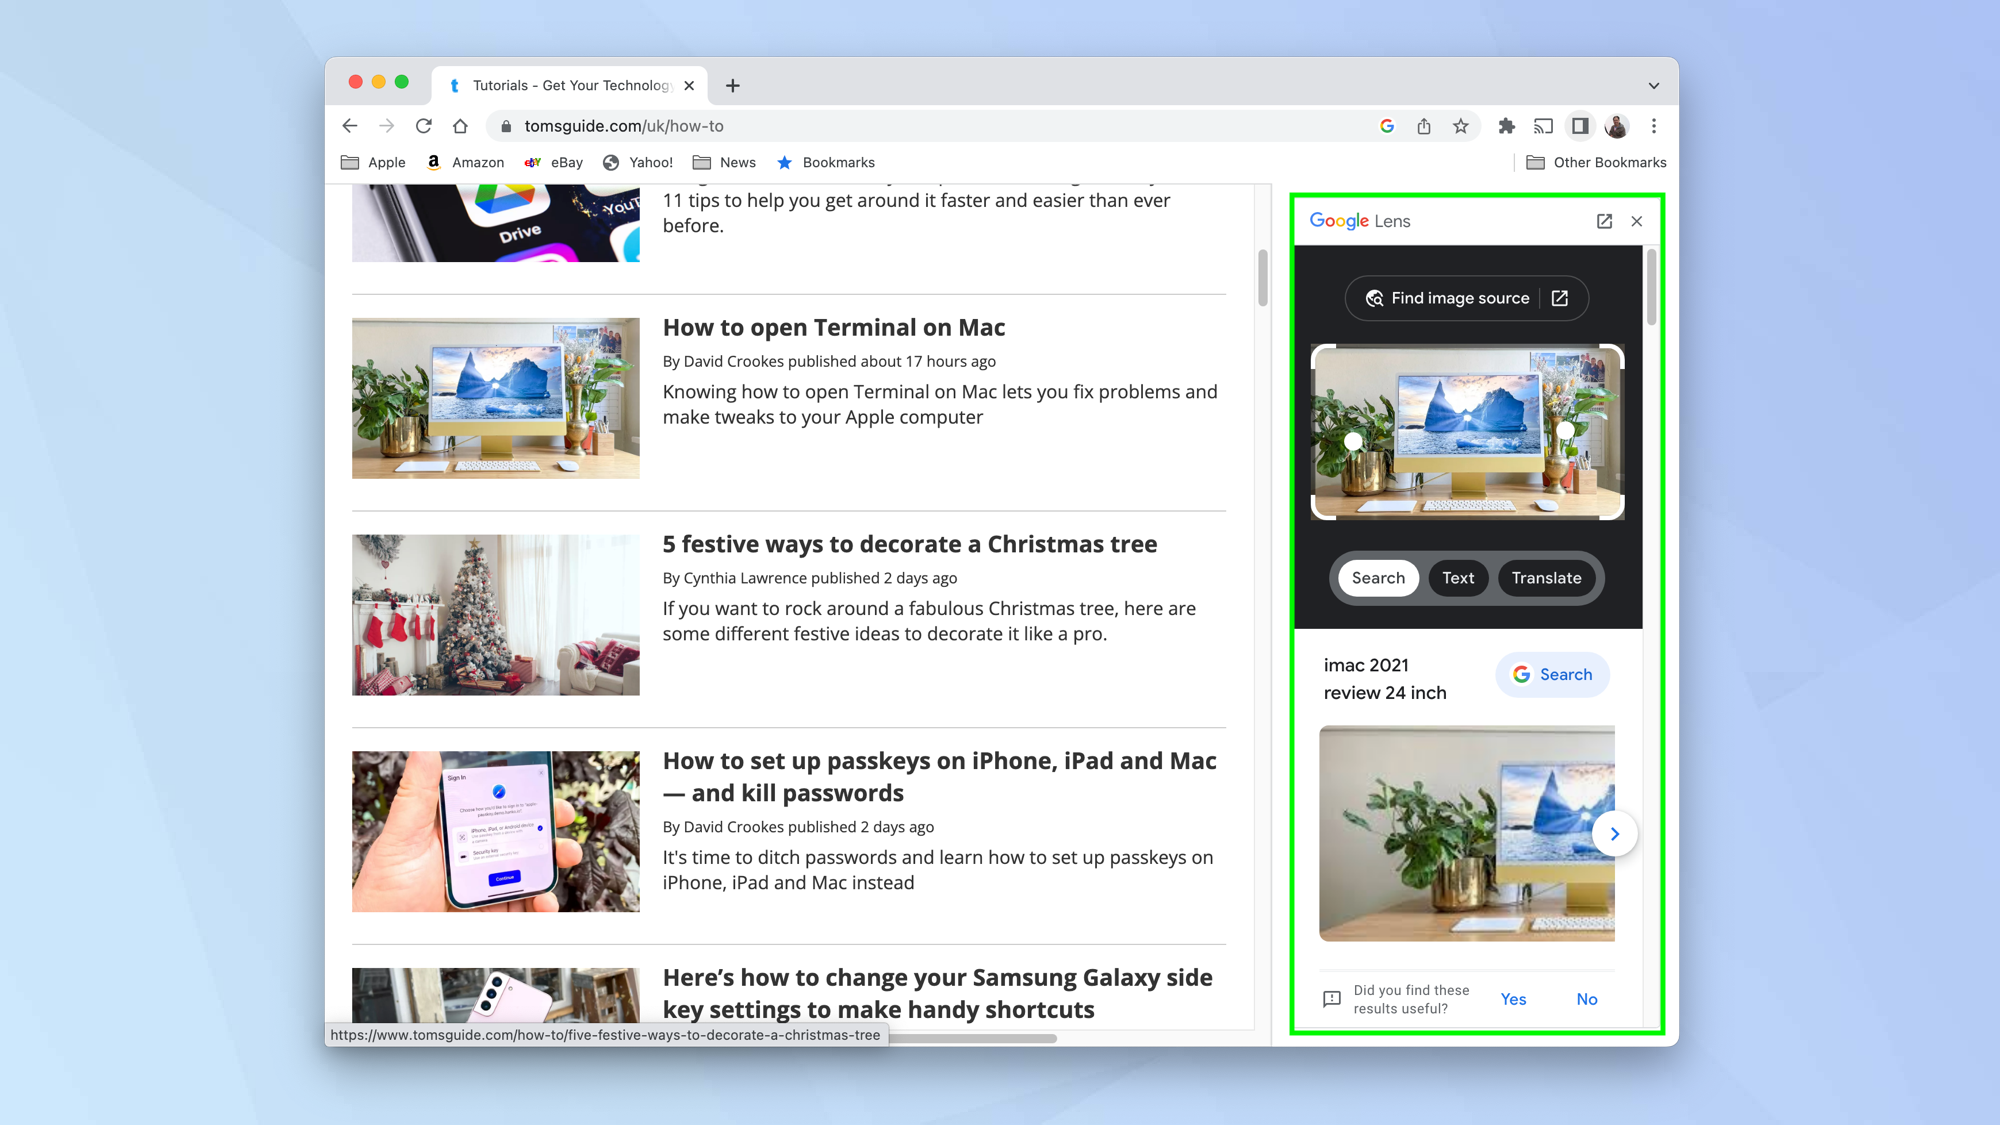
4. Often Google will identify an object in the image. If this is the case, you can click Search using the suggested words. It will open in a new tab.
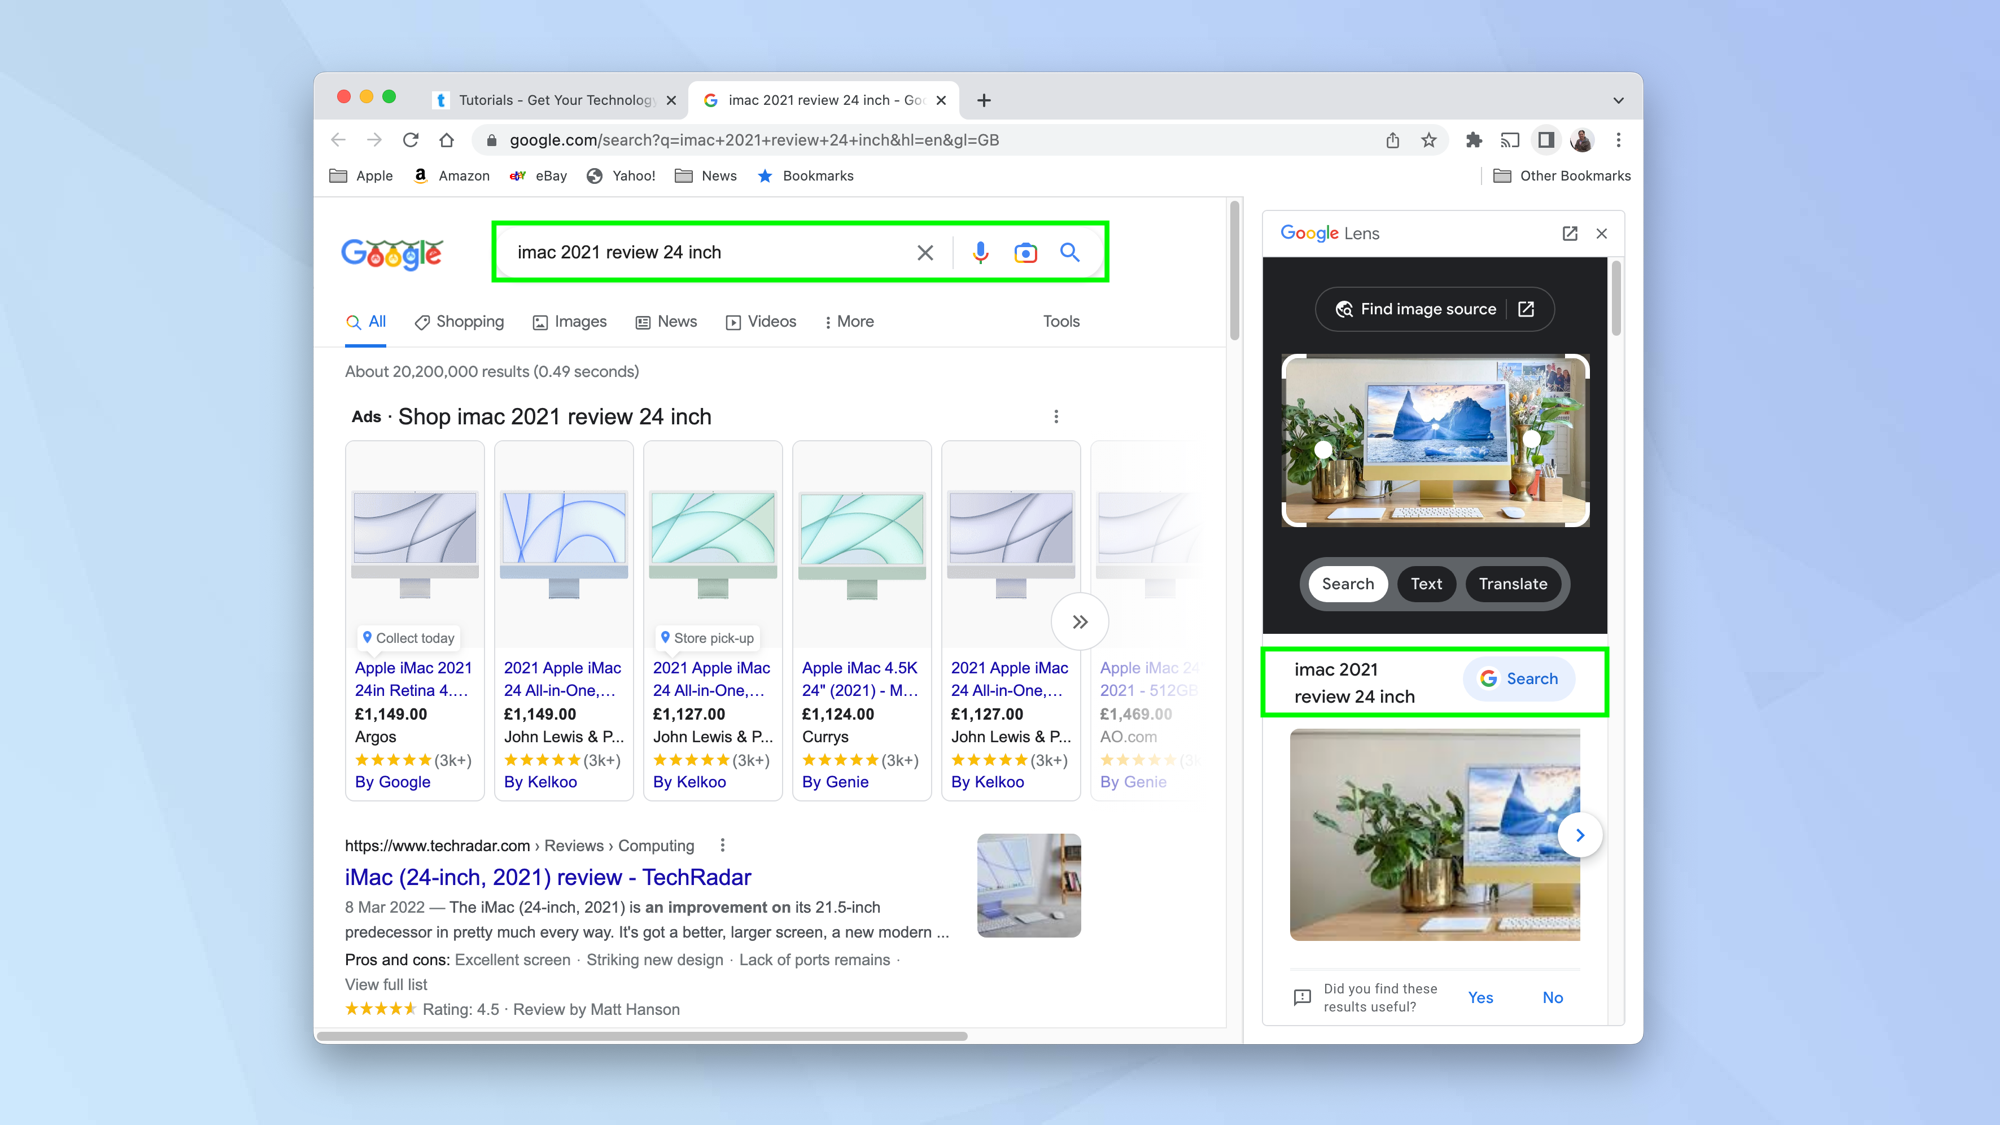
5. You can also find where the image has originally come from. To do this, click Find image source.
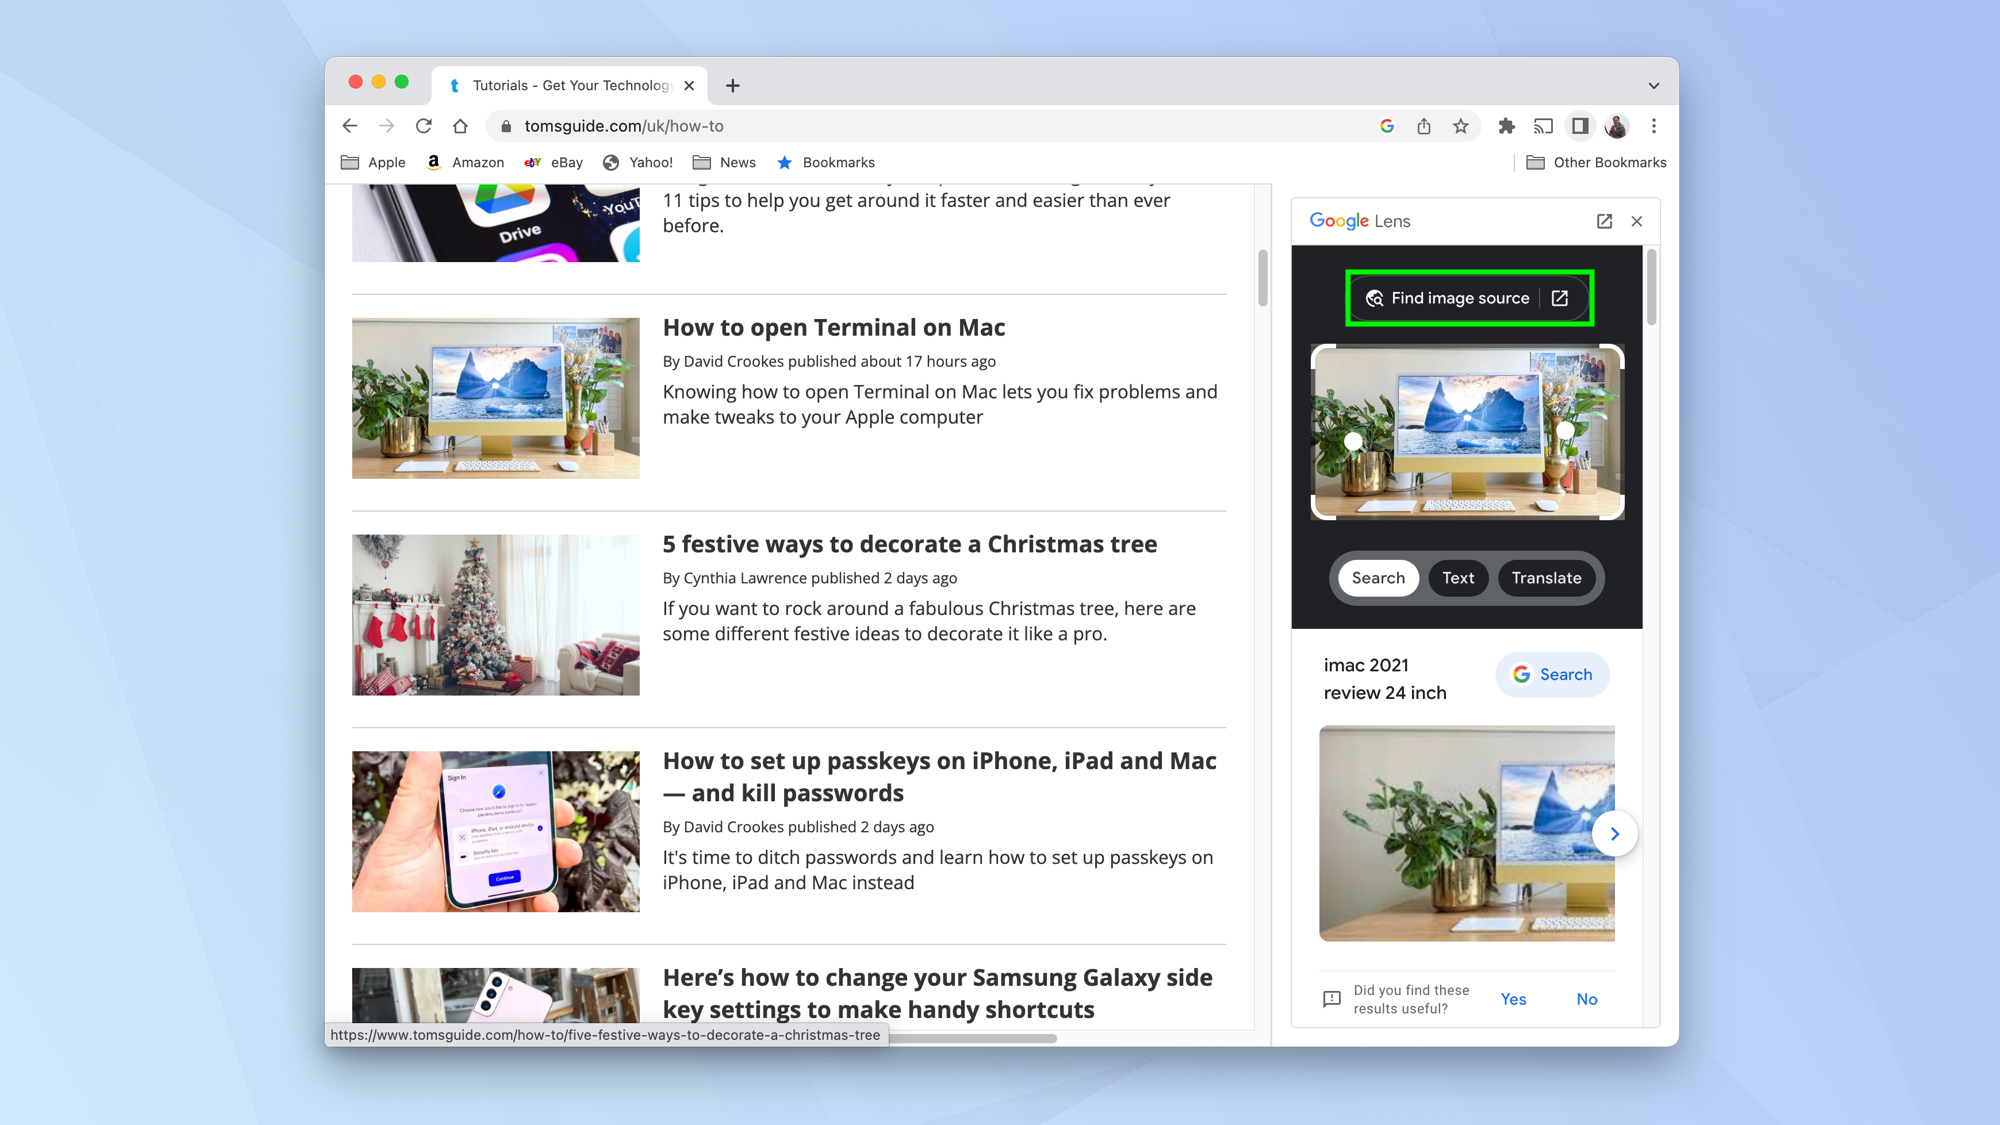
6. A new tab will open and you can see the image size. You can also click to find other sizes of the image or scroll down to see which other websites have used the image and which ones are visually similar.
How to do a reverse image search using another browser
You can also make use of the Google Images website, especially if you are using a browser other than Chrome (it's also worth pointing out that the steps below can be used with Chrome too!).
In this instance, as well as being able to reverse-search images that you find on the web, you can also upload images you have stored on your computer.
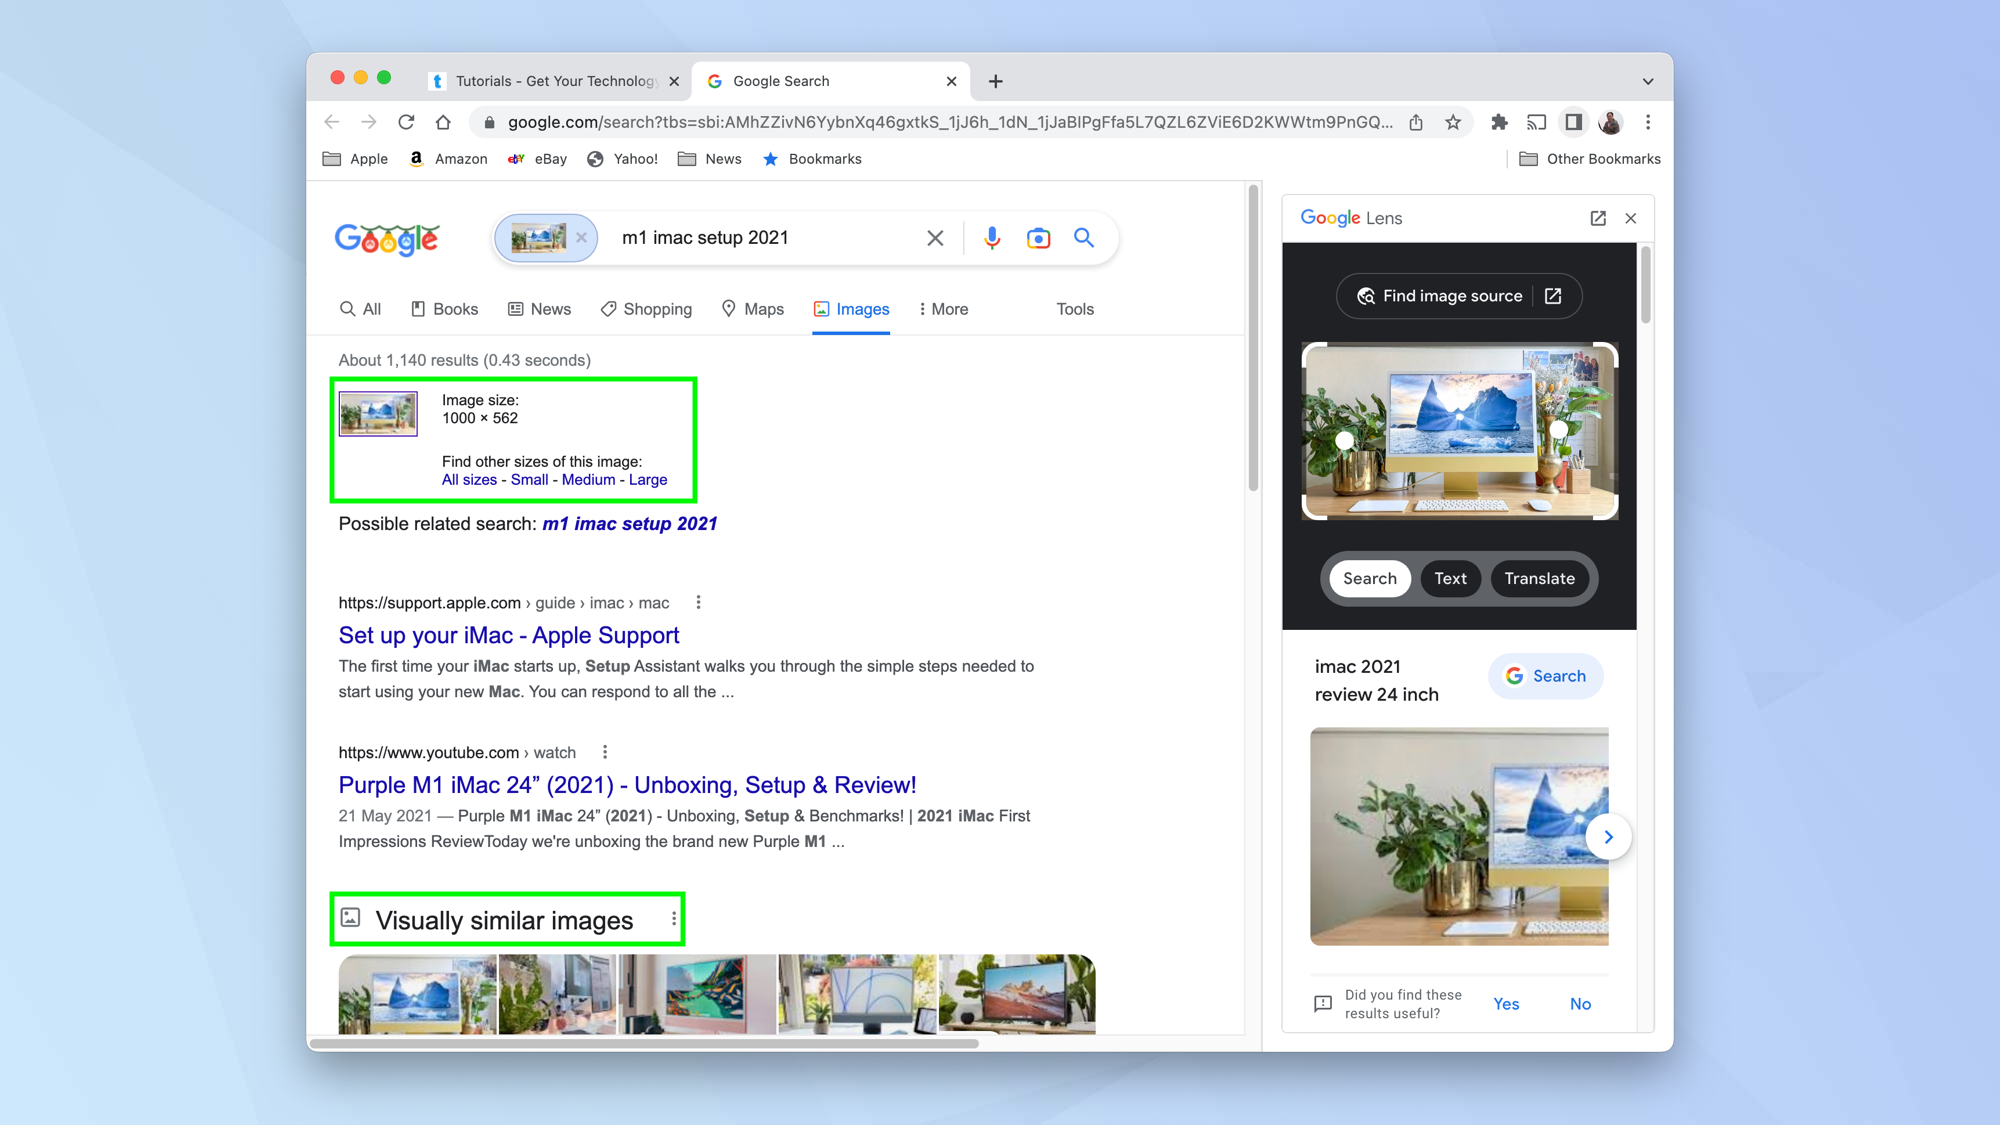
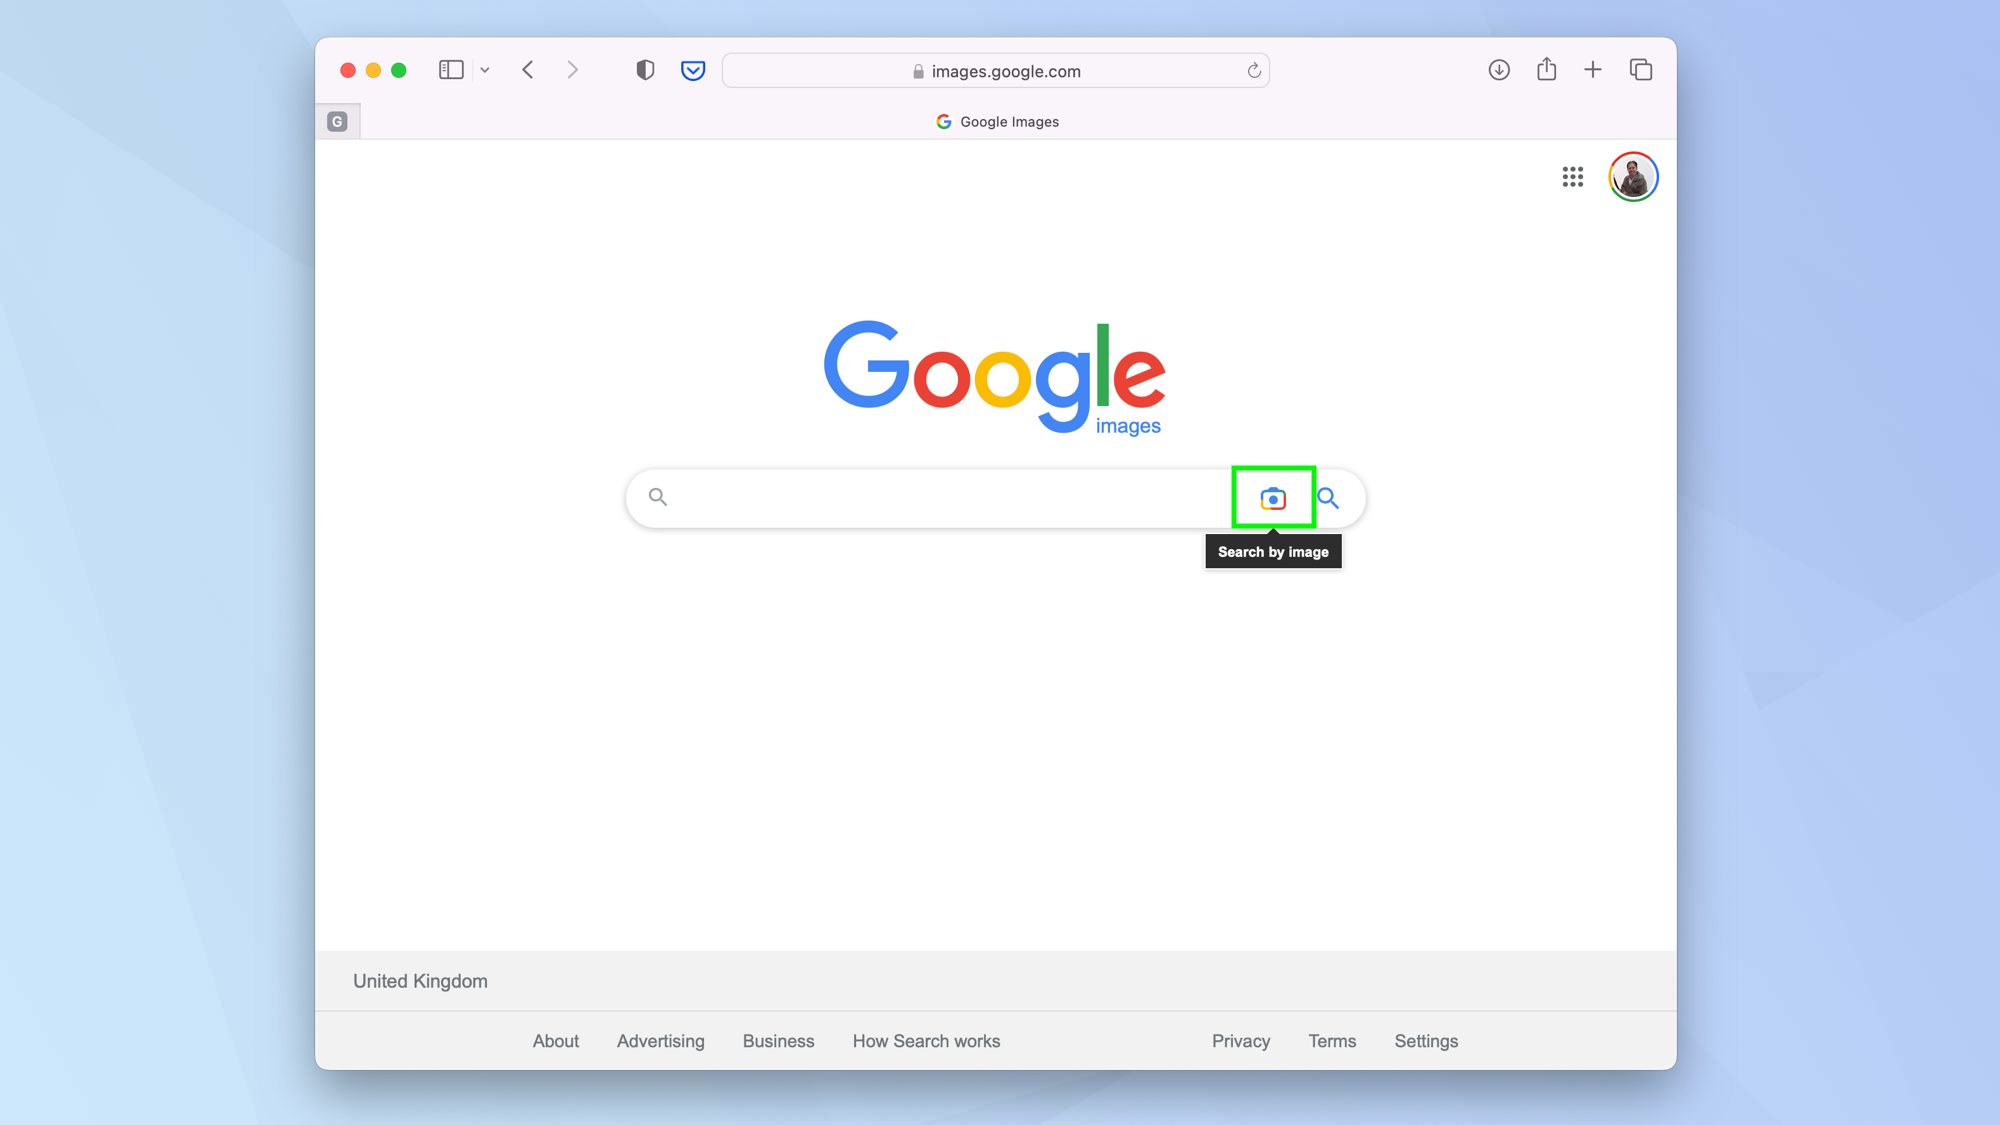
1. Go to https://images.google.com and click the Search by Image icon.
2. You can now find an image on your PC or Mac and drag it into the box or click Upload a file and search for an image on your computer — click Upload when you have found one.
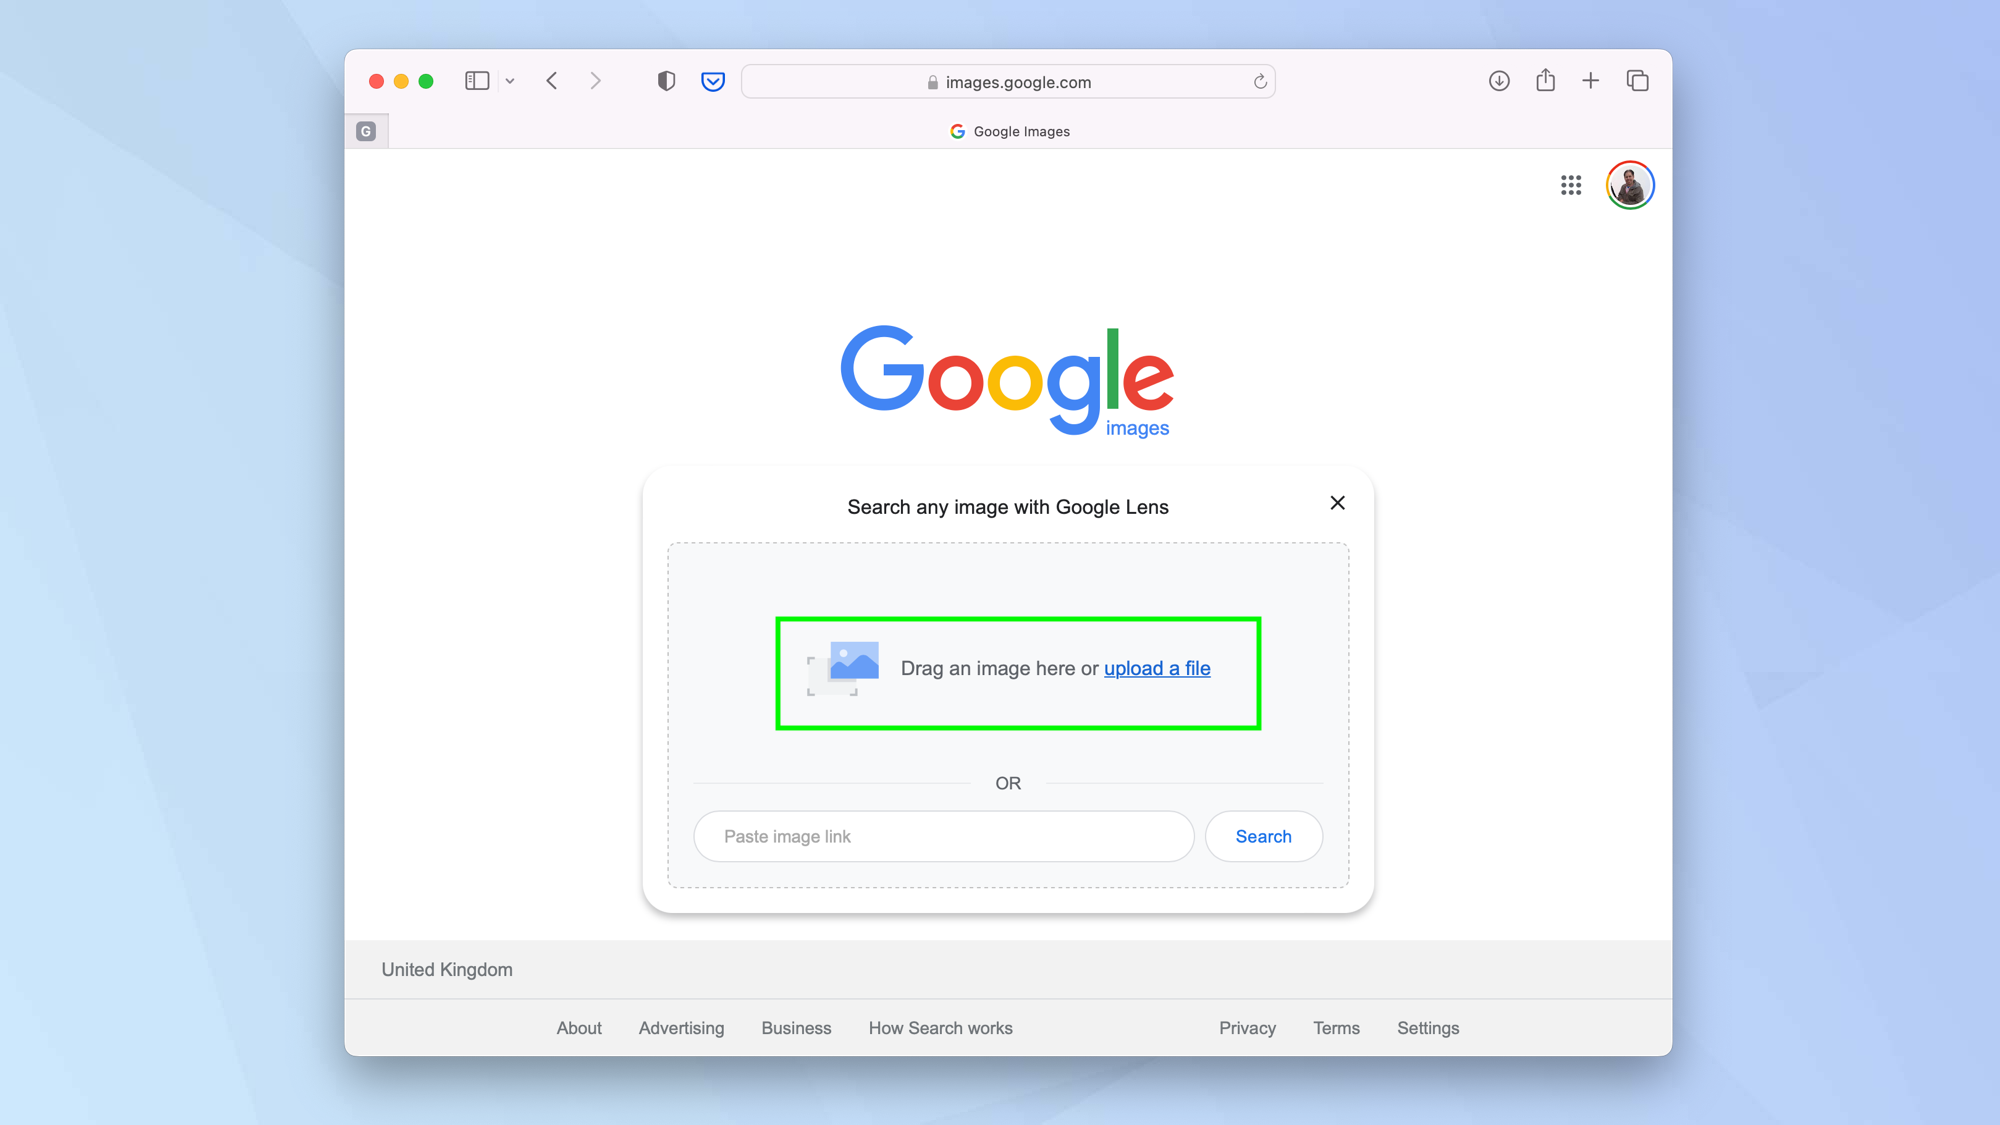
3. It is also possible to paste an image link. To find that link visit another website and right-click on an image. Next, select the option that lets you copy the image address (URL). You could also open the image and copy the URL in the address box.

4. Paste the link into the search box in Google Images. Now click Search.
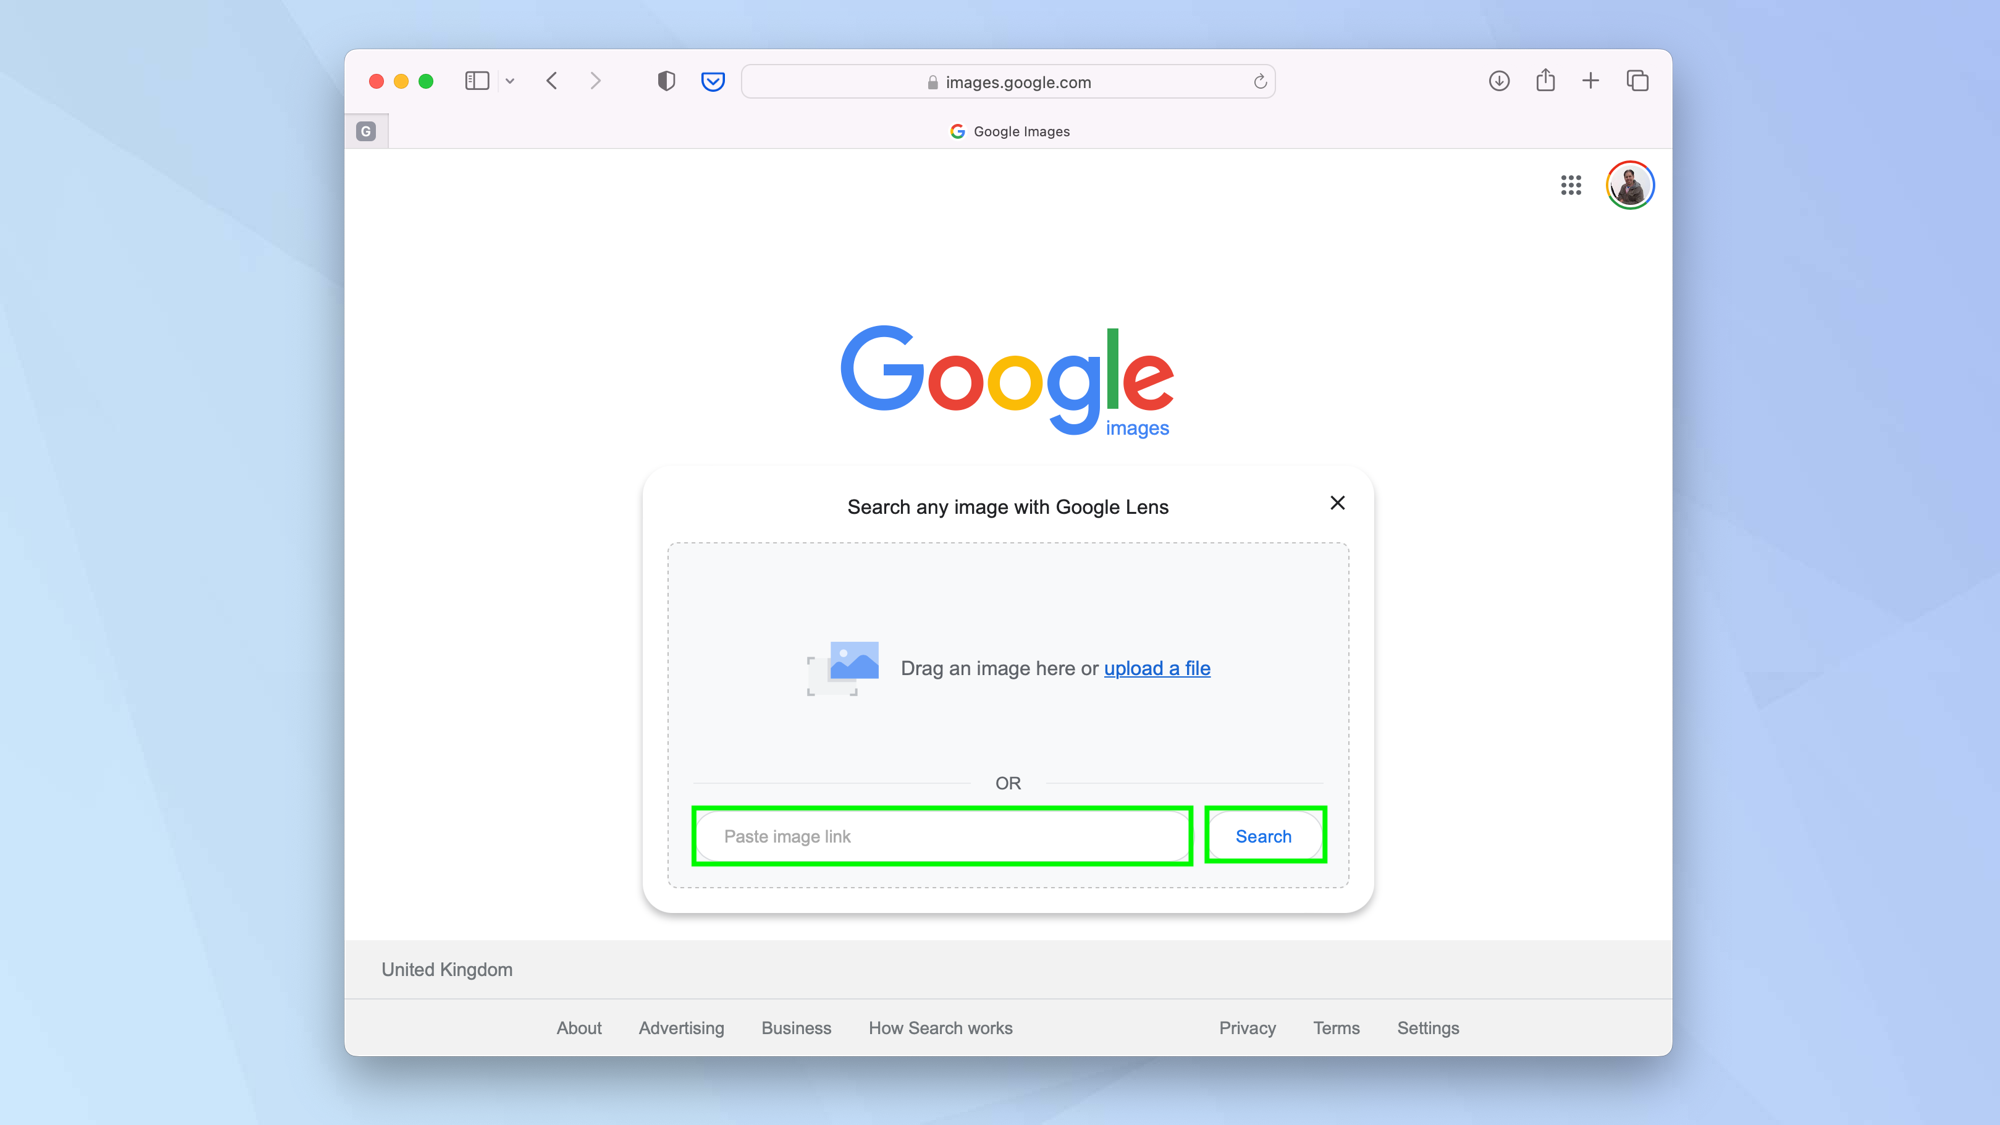
5. You will be taken to Google Lens. Here you can see where an image has come from — just click Find image source.
You can also scroll down to see where the image has been used. If Google has identified any objects in the image, you can click Search to see results related to the suggested words.
How to do a reverse image search on Android
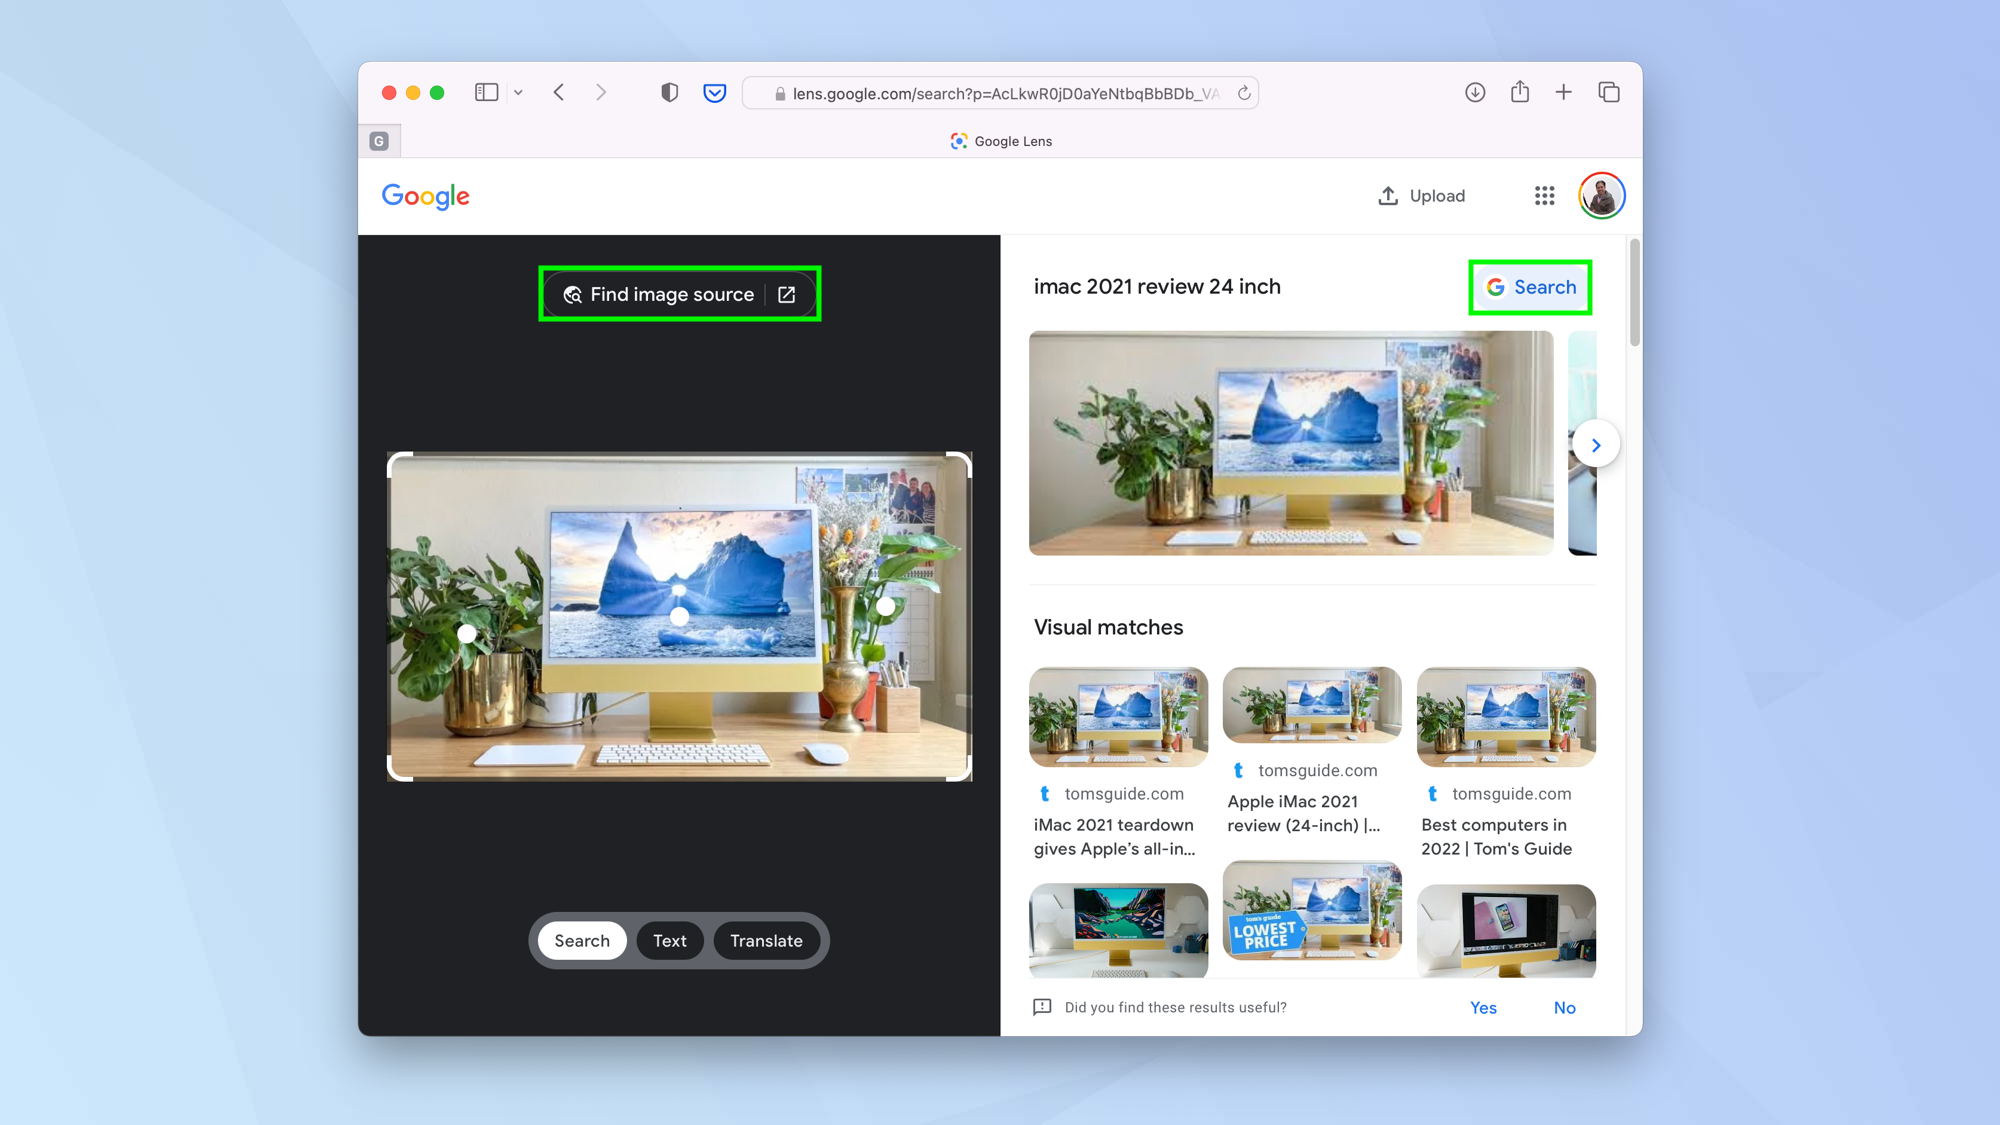
Since Chrome comes with Android, you're ready to go when you start browsing thanks to the addition of Google Lens.
1. Launch Chrome on your Android device and visit a website containing the image you want to use.
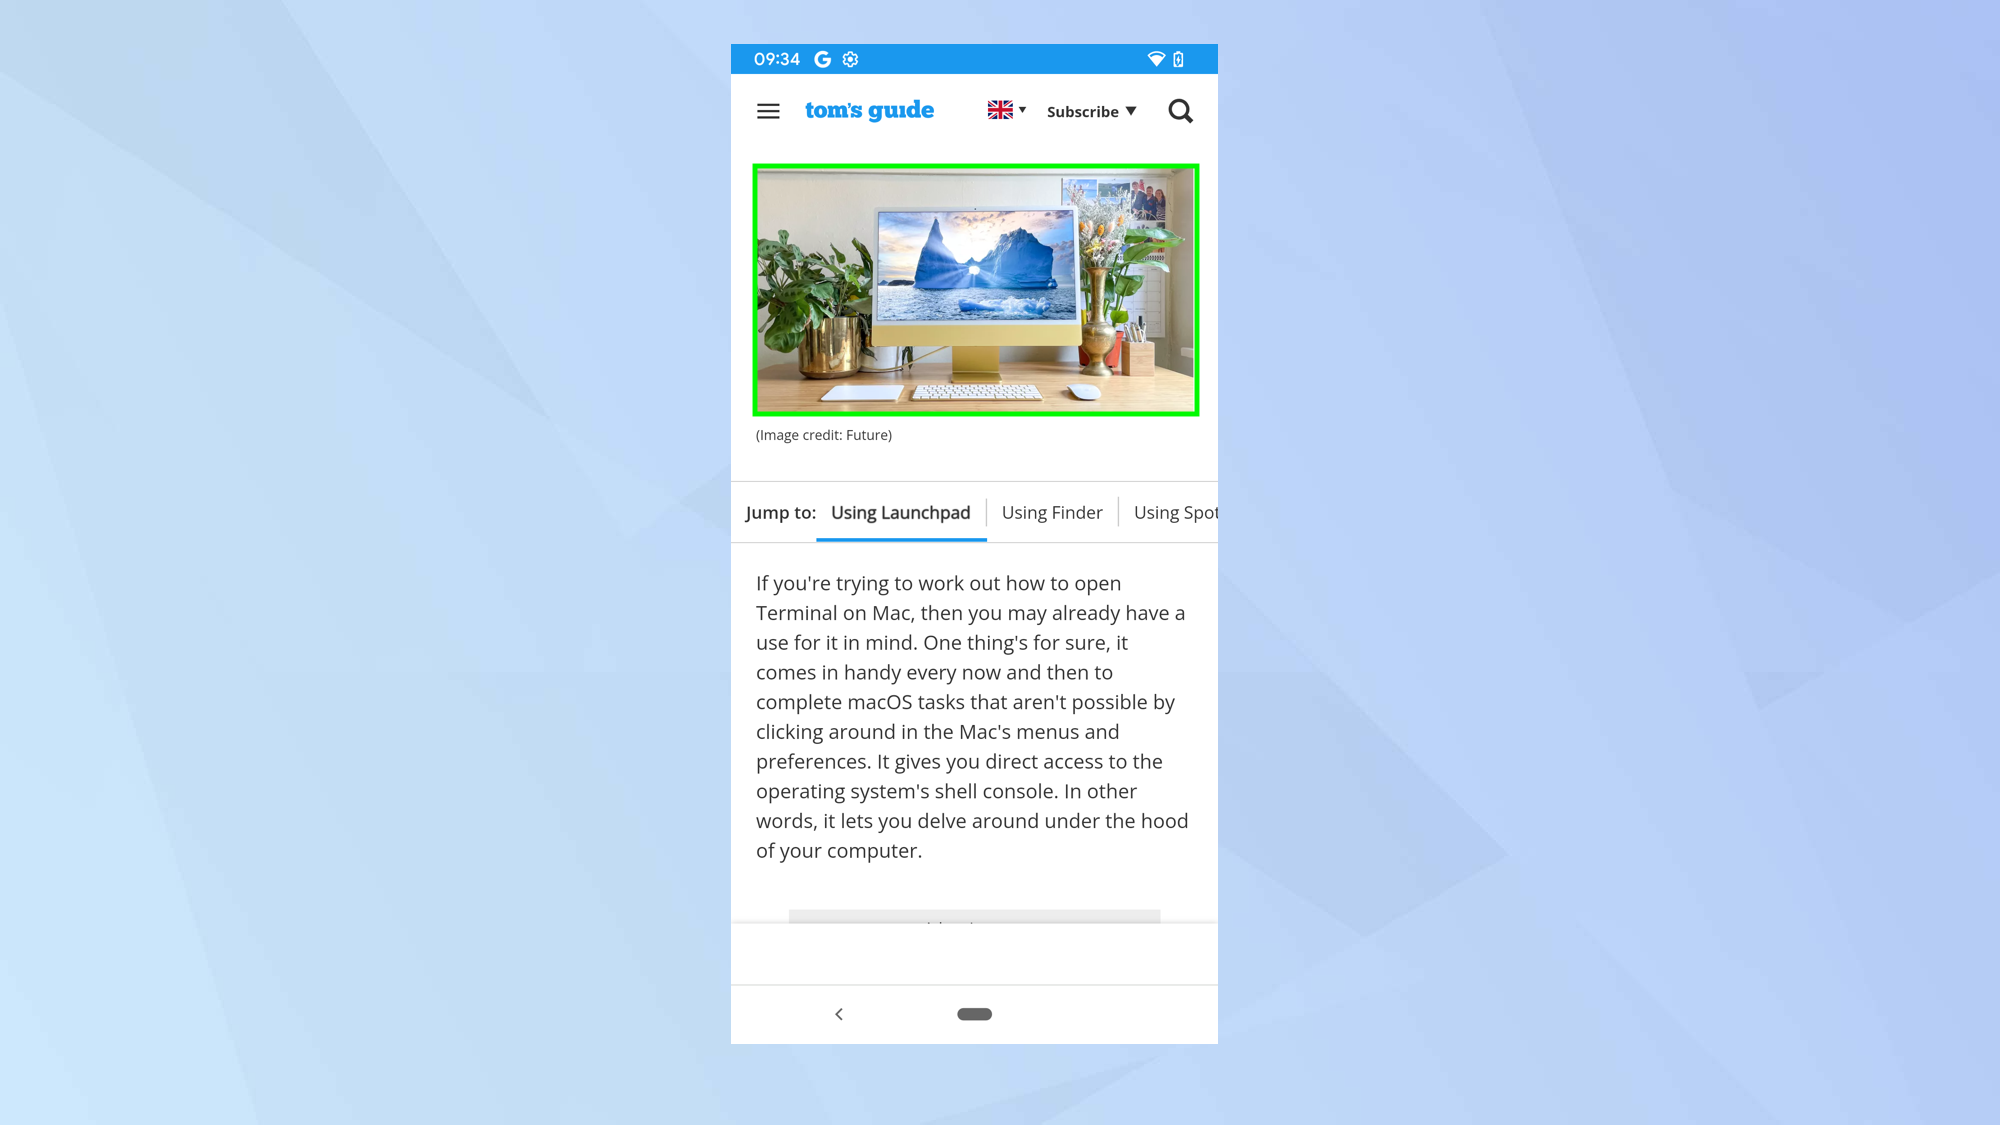
2. Touch and hold the image to show the menu and select Search image with Google Lens.
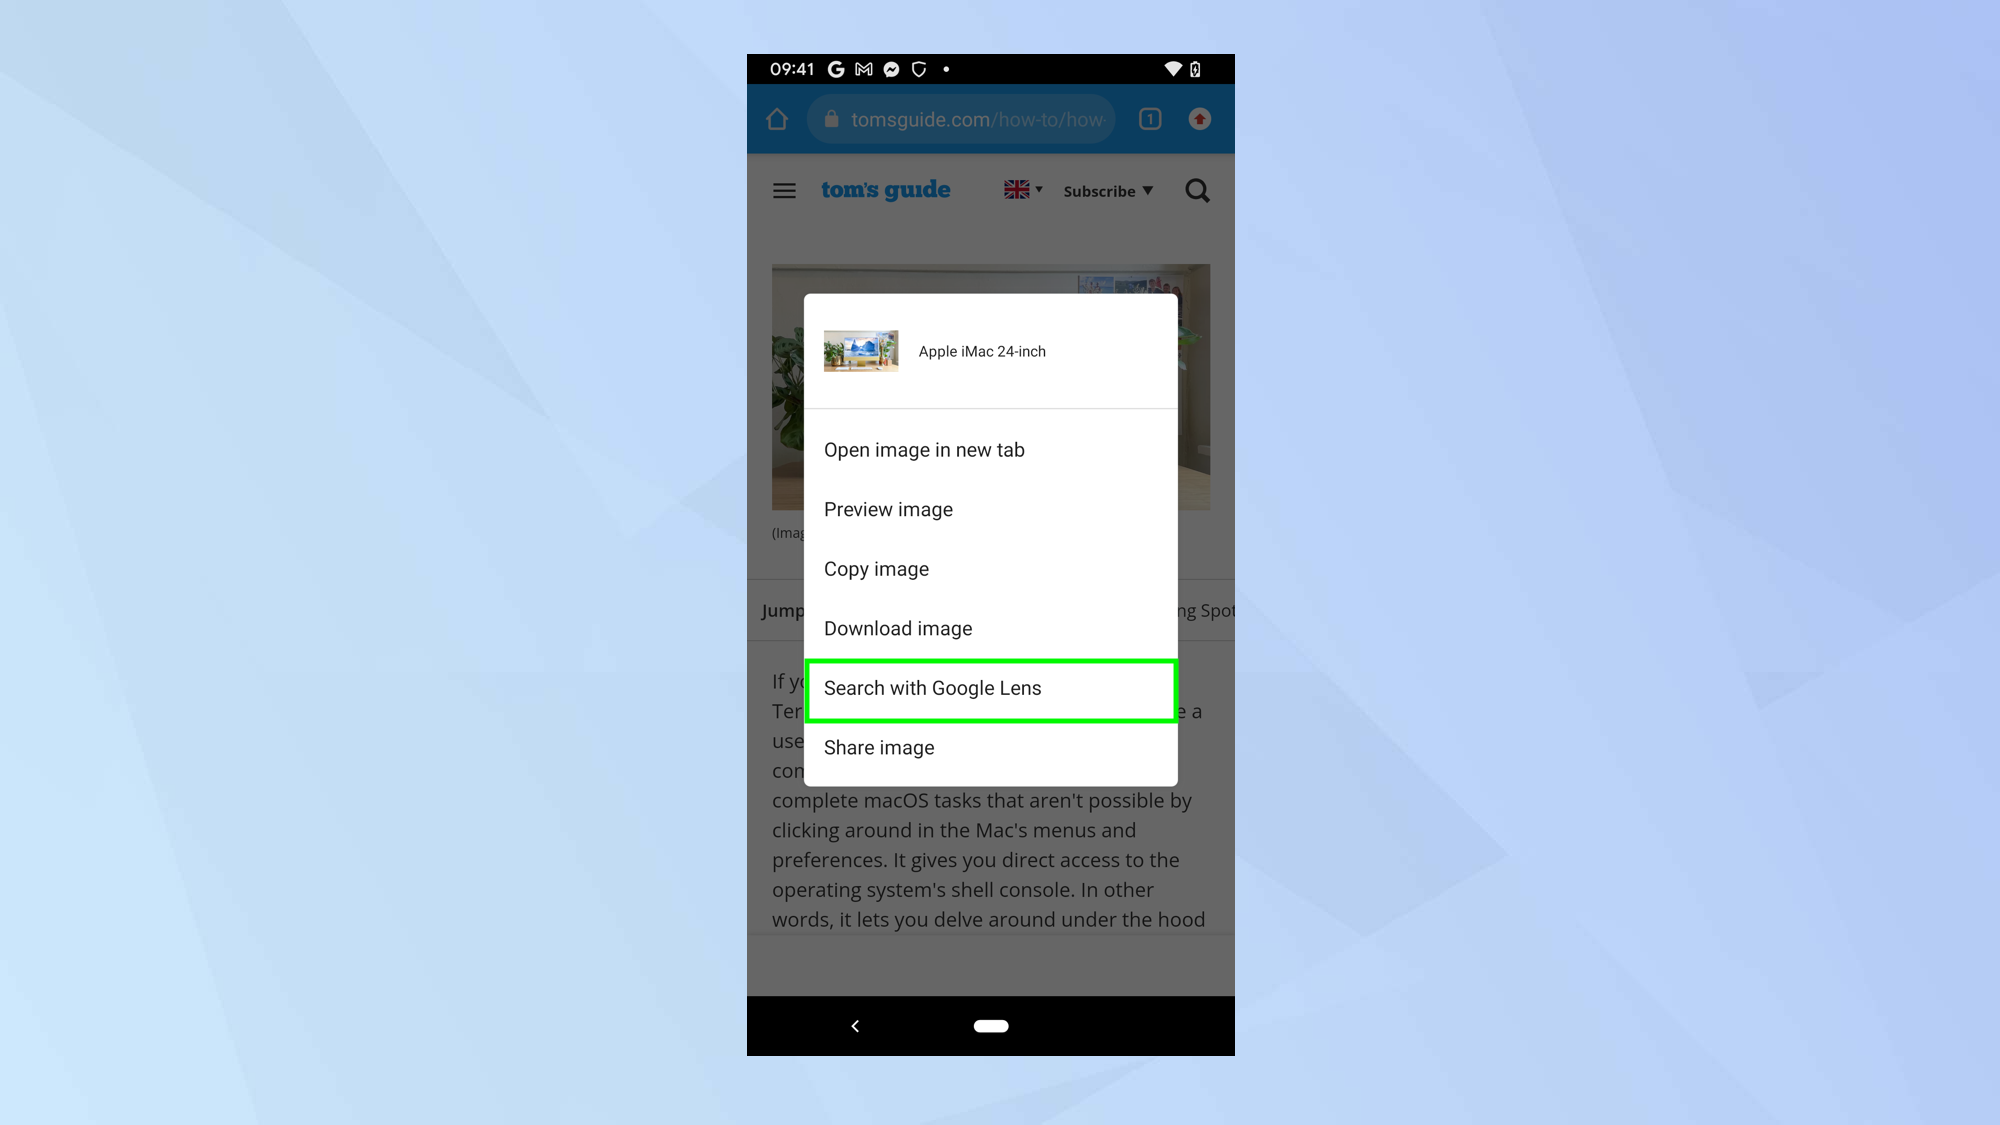
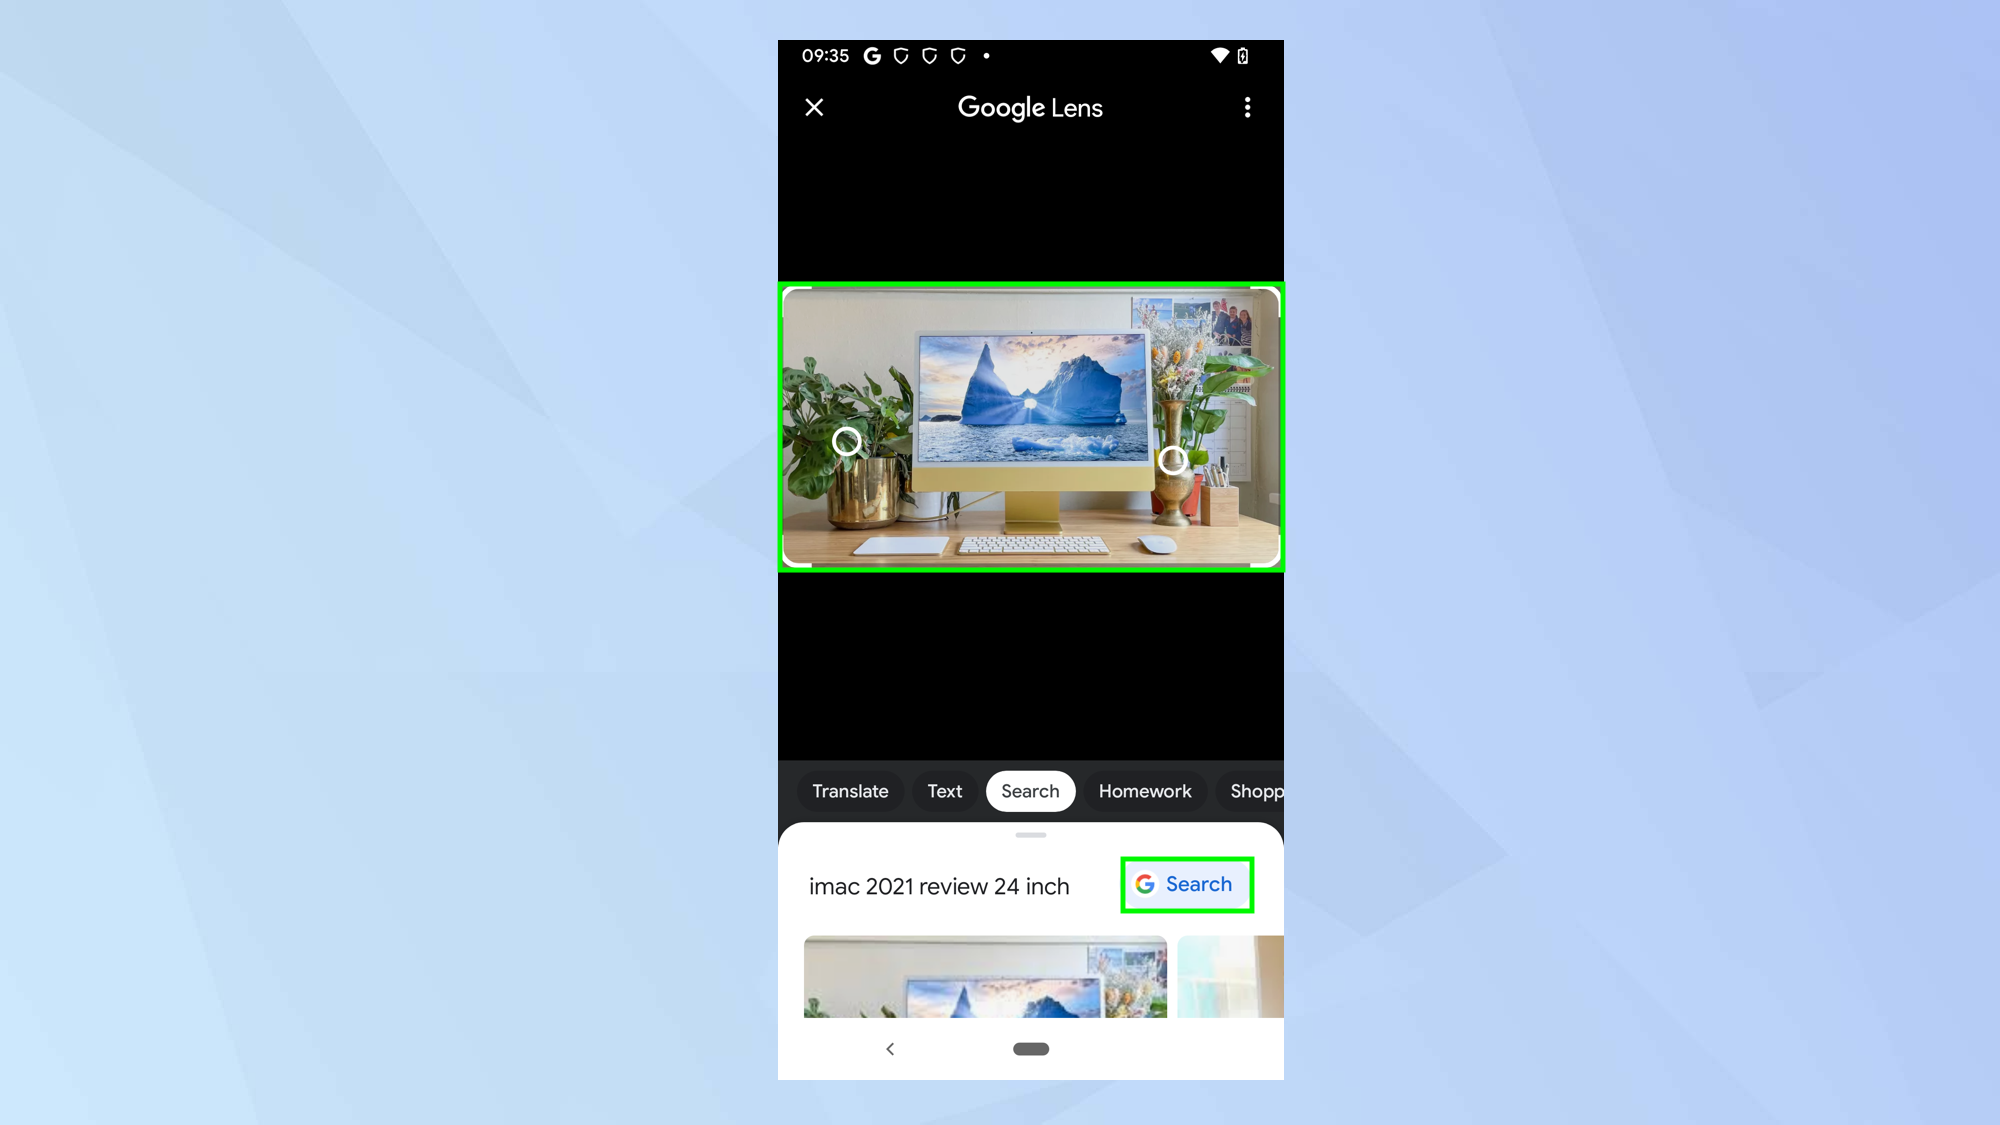
3. This will take you to Google Lens where you can tap the image then scroll to discover where the image has come from or has been used.
It is also possible to tap a part of the image to see if you can find any visually-related results and, if Google has identified any objects in the image, you can click Search to see results related to the suggested words.
How to do a reverse image search on an iPhone
As with a PC or Mac, the easiest way to do a reverse image search on an iPhone is to use the Chrome browser which you can download for free on the App Store. You can, however, use Safari or the Google app.
How to reverse image search on an iPhone using Chrome
1. Launch Chrome on your iPhone and visit a website containing the image you want to use.

2. Touch and hold the image to show the menu and select Search image with Google.
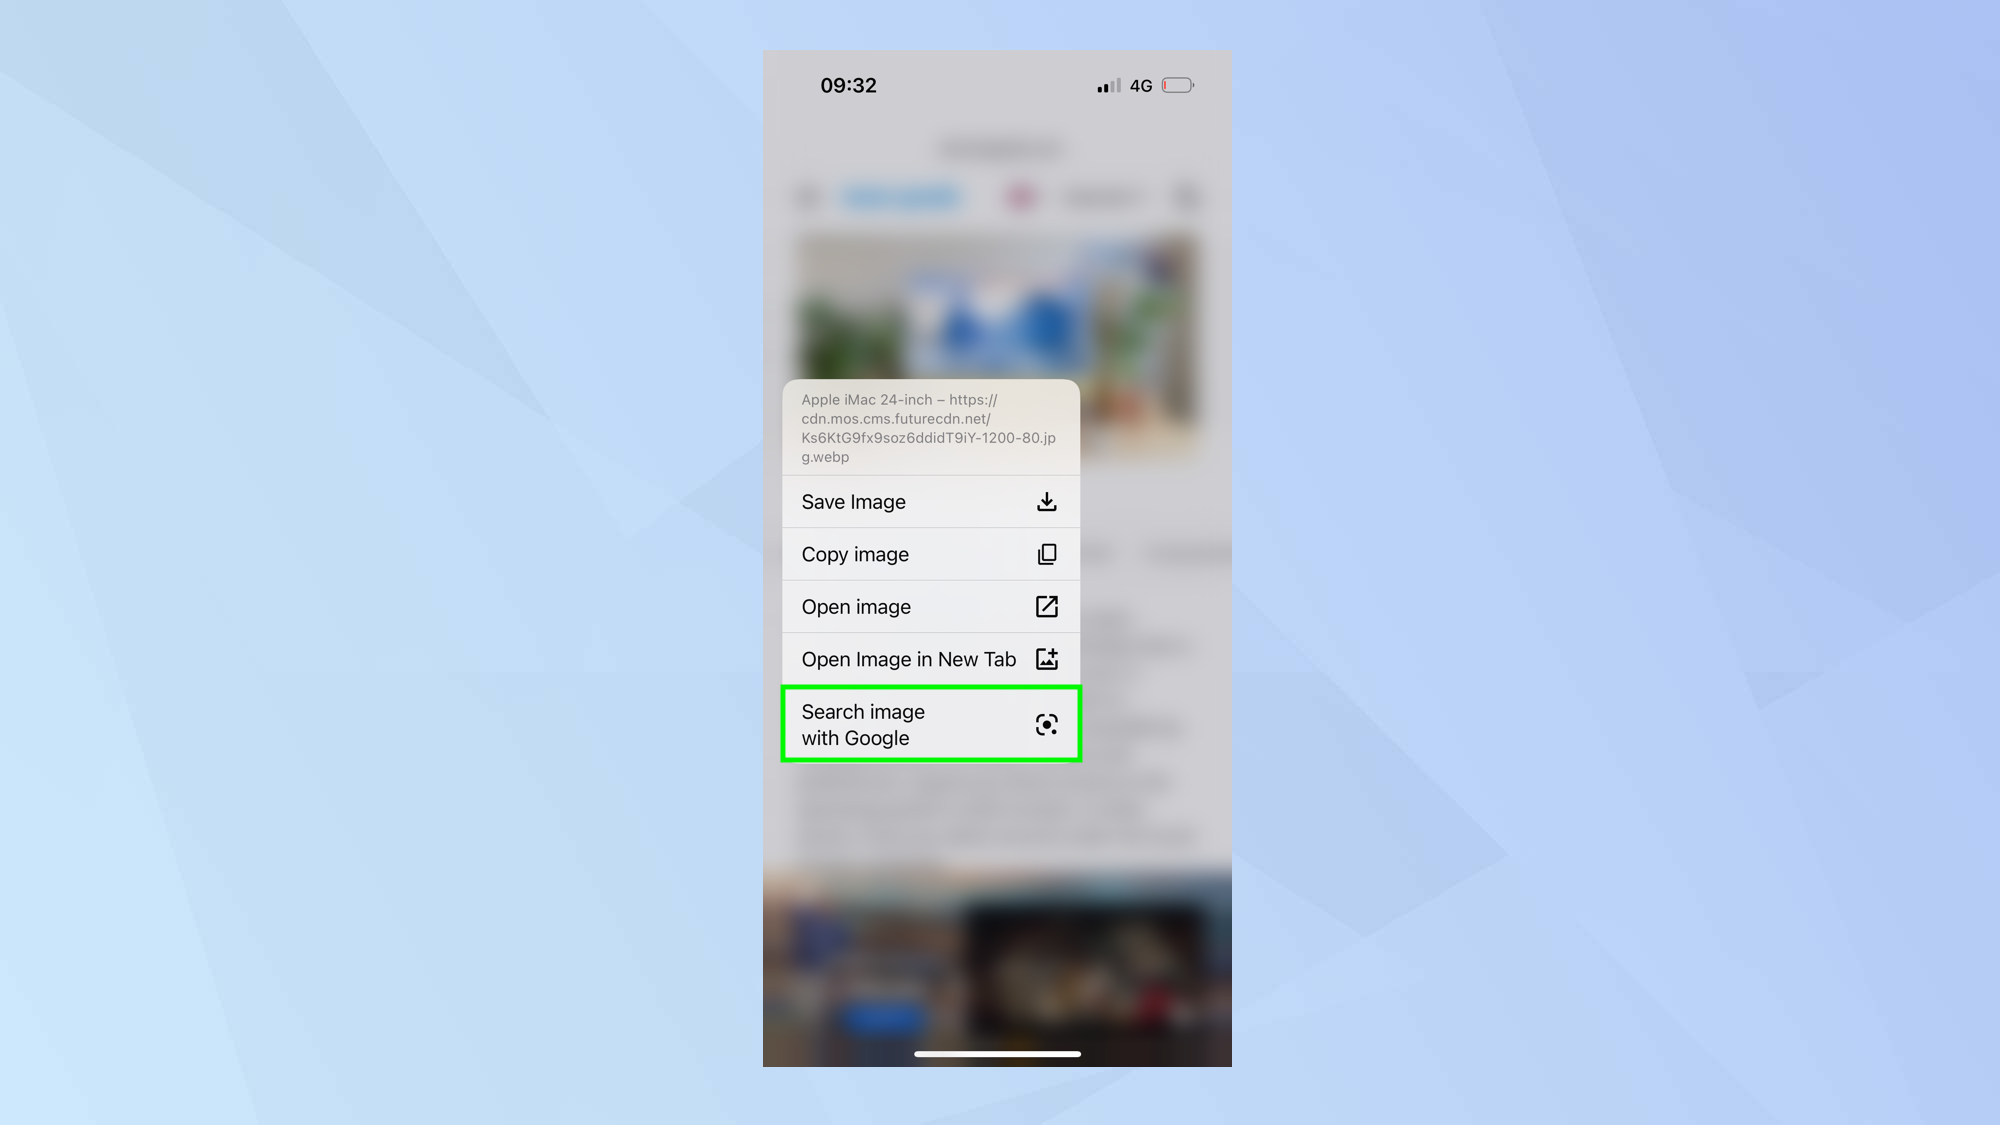
3. This will take you to Google Lens where you can click Find Image Source to discover where the image has come from or been used. If Google has identified any objects in the image, you can click Search to see results related to the suggested words.

How to reverse image search on an iPhone using another browser
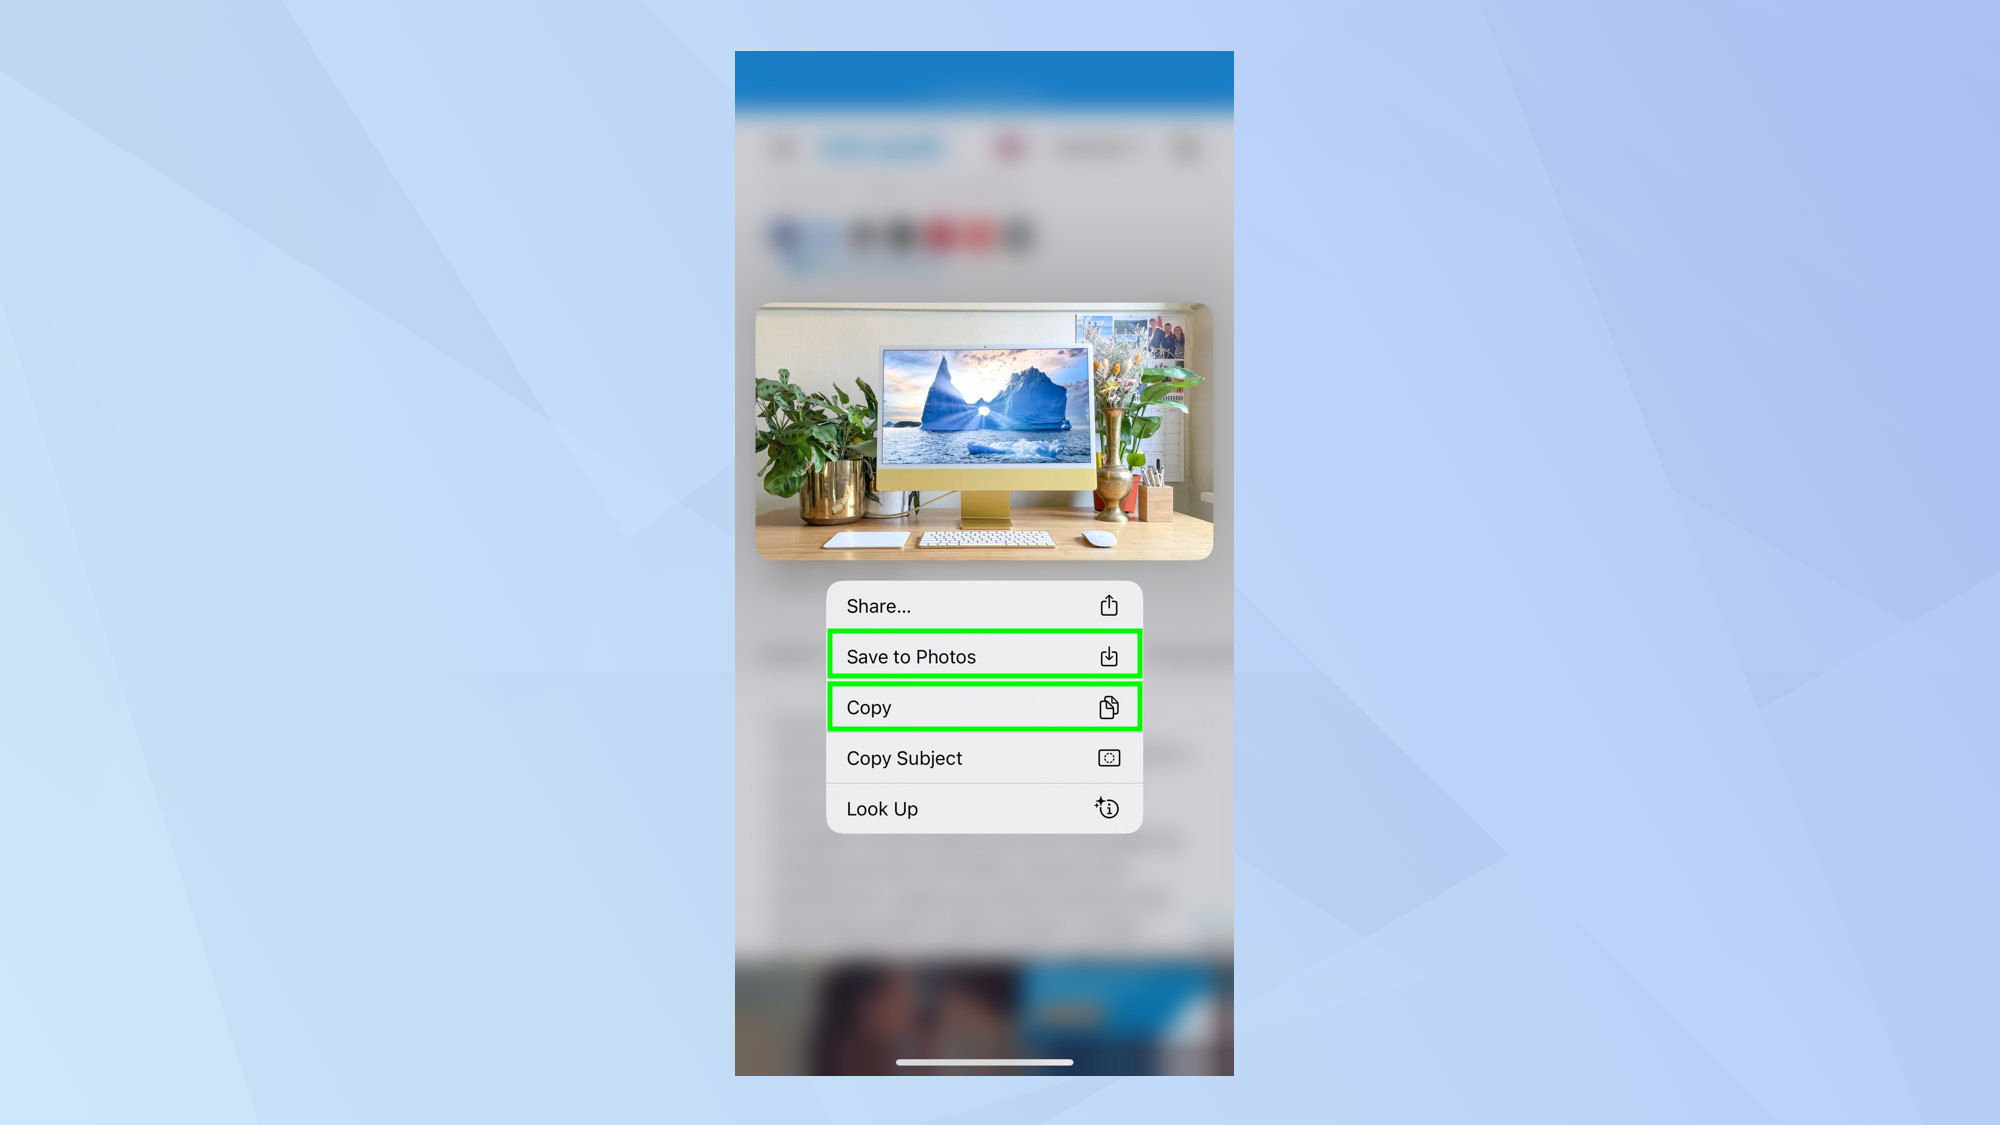
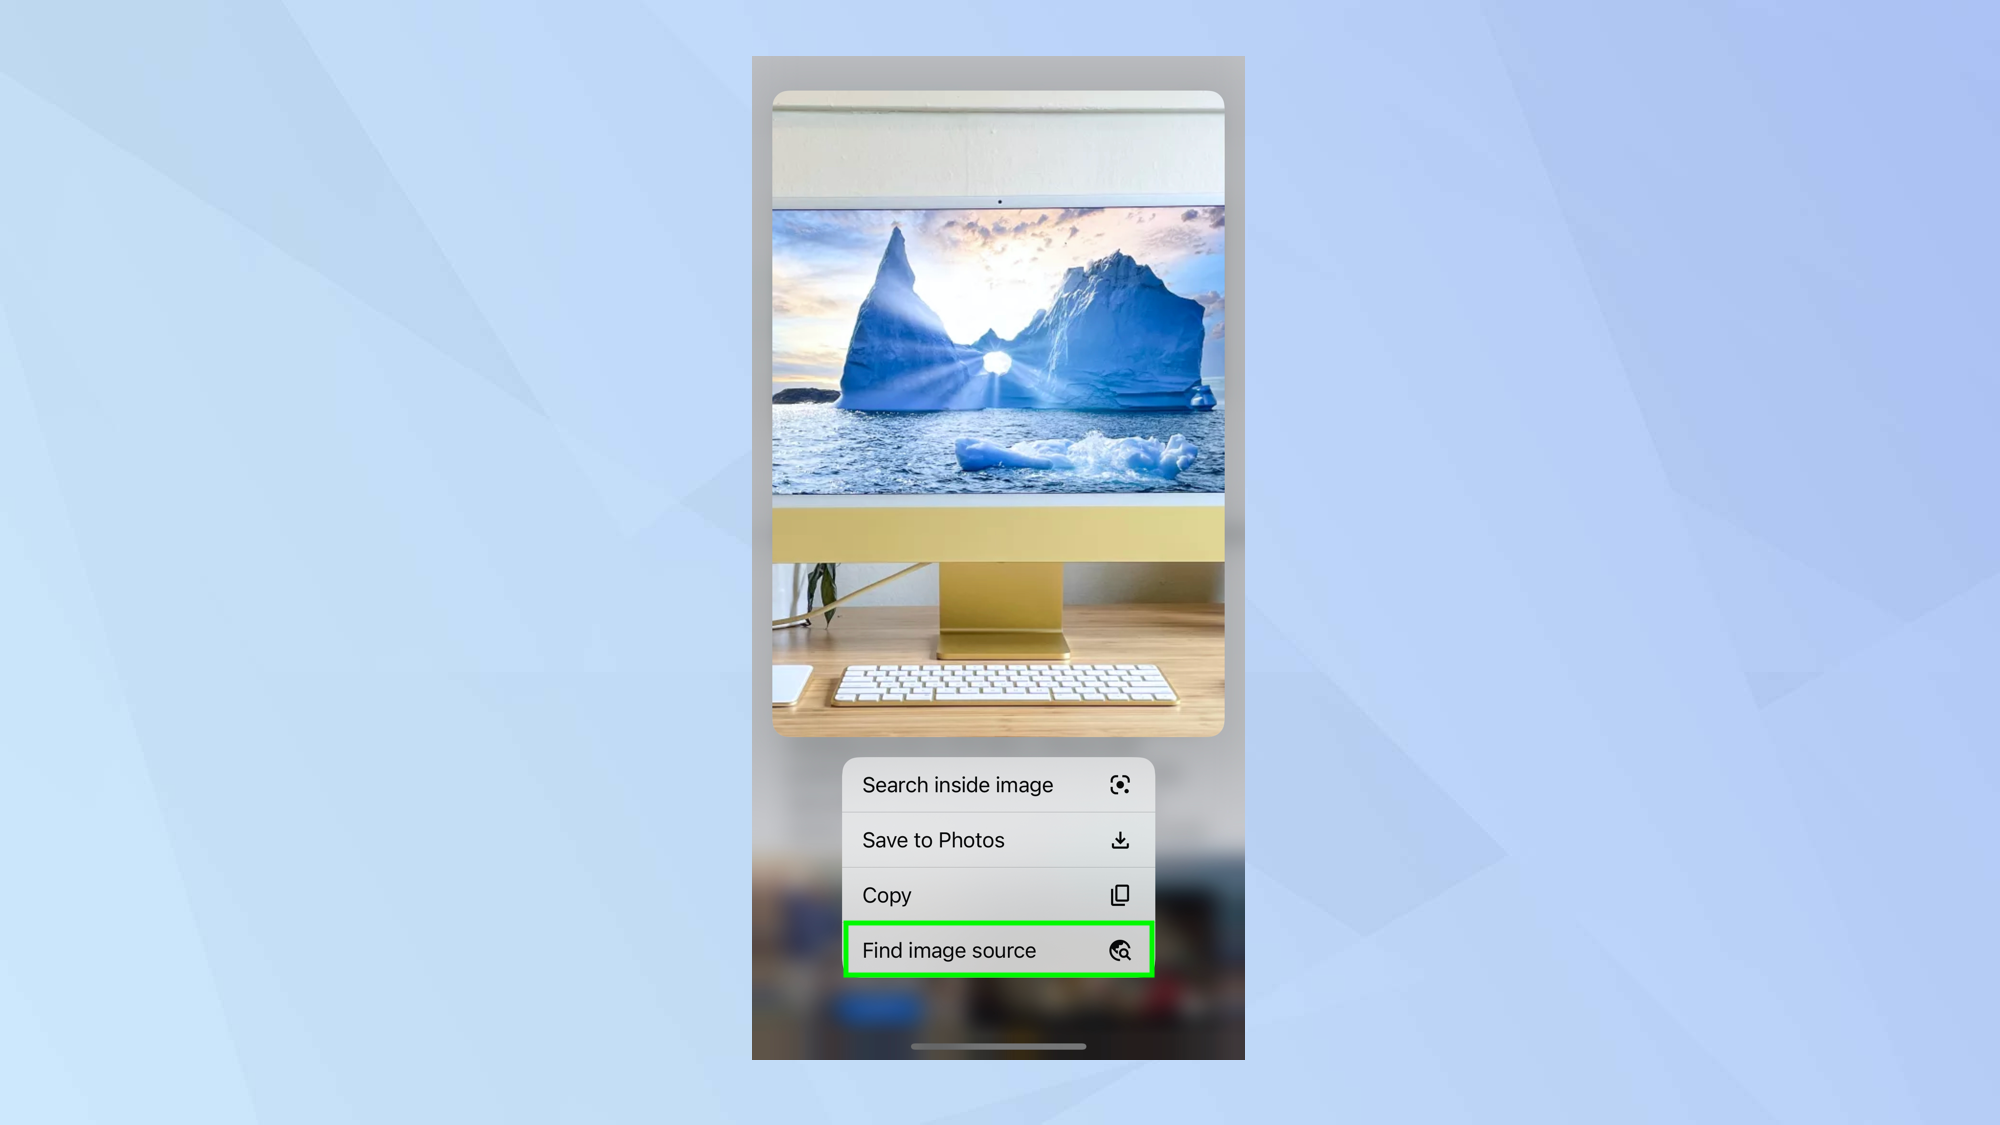
1. If you are using a browser other than Chrome, visit a website containing the image you want to use then press and hold the image. Select Save to Photos. This will save the image to your Photos app. You can also tap Copy if you would rather not save the image.
2. Now go to https://images.google.com and tap the AA icon in the top-left corner. Select Request Desktop Website.
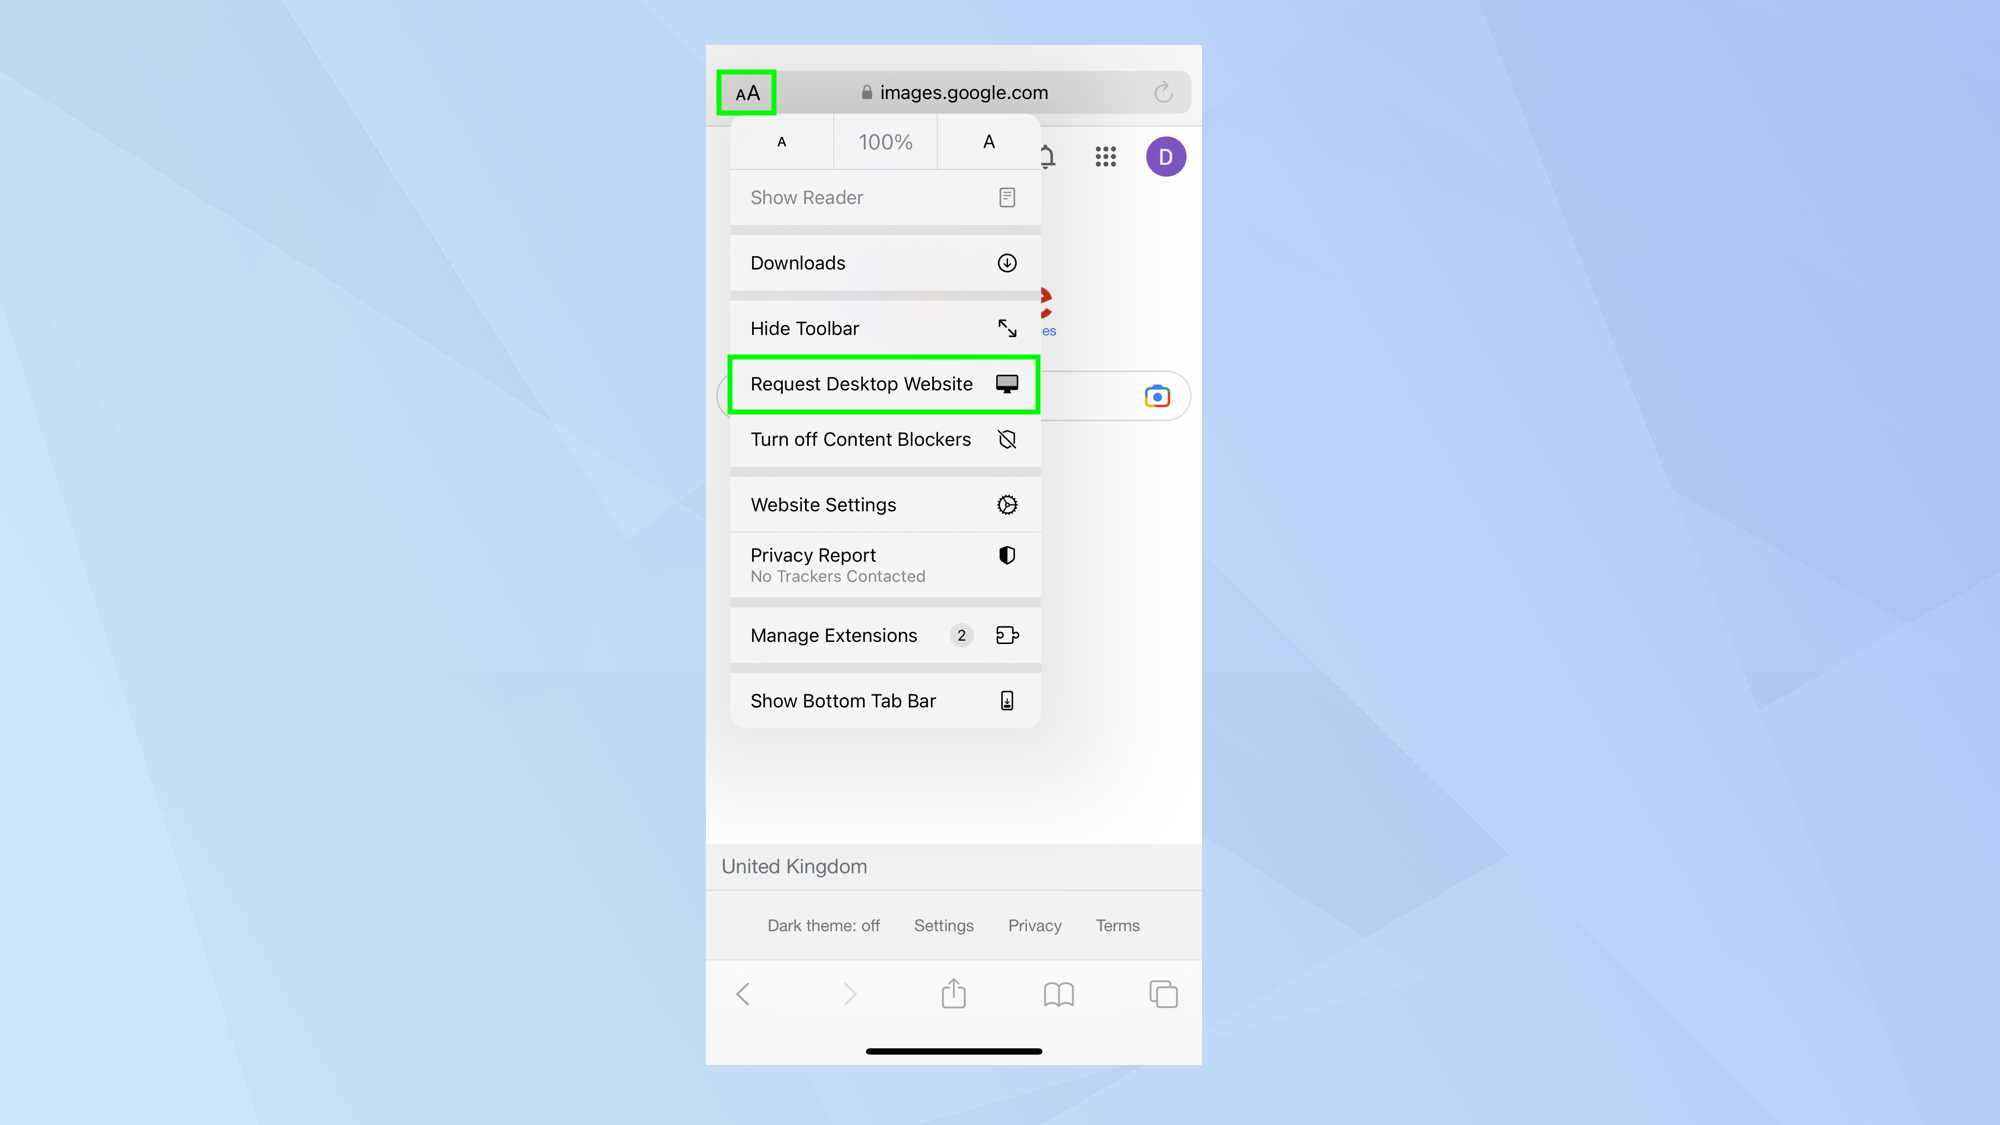
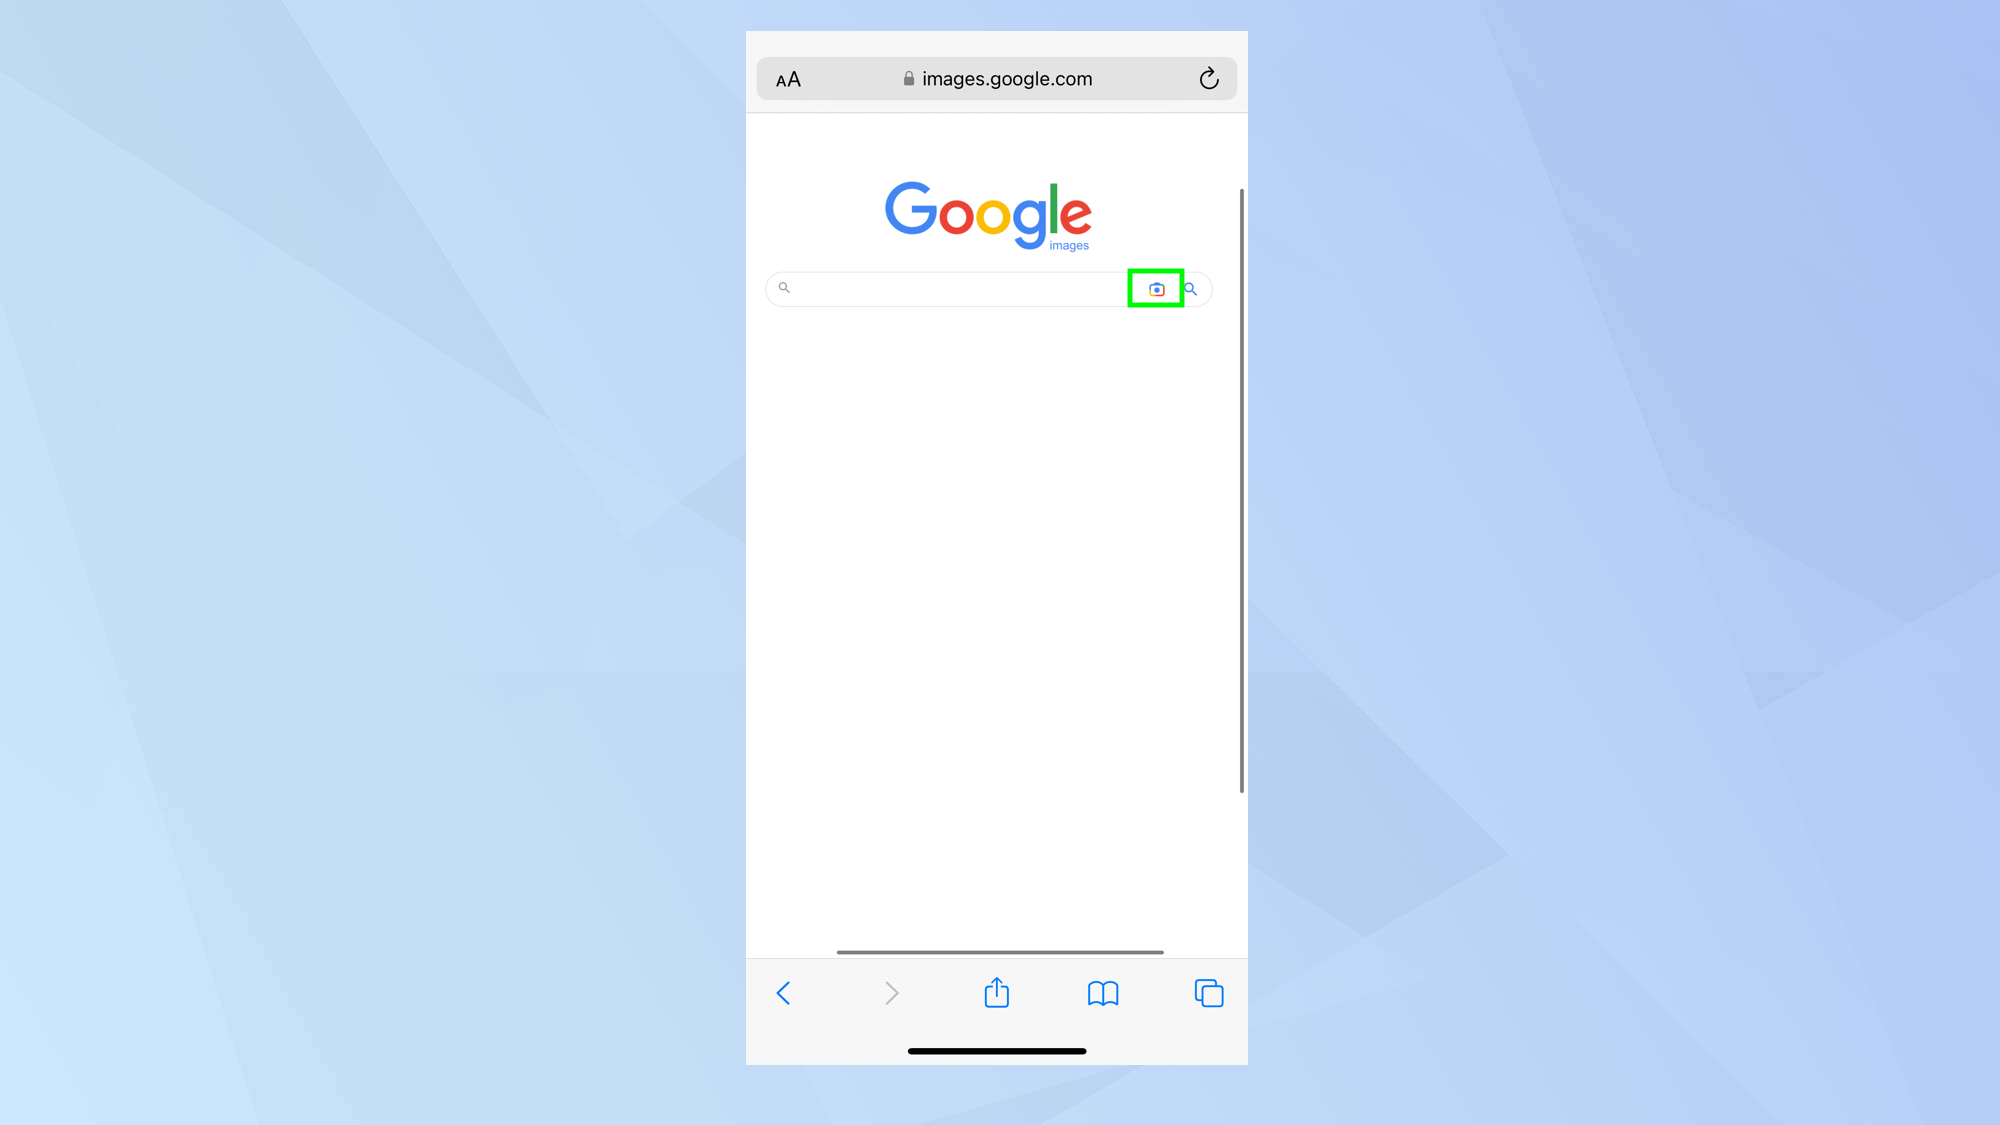
3. Select the Search By Image icon to the right of the search bar. This will allow you to upload an image.
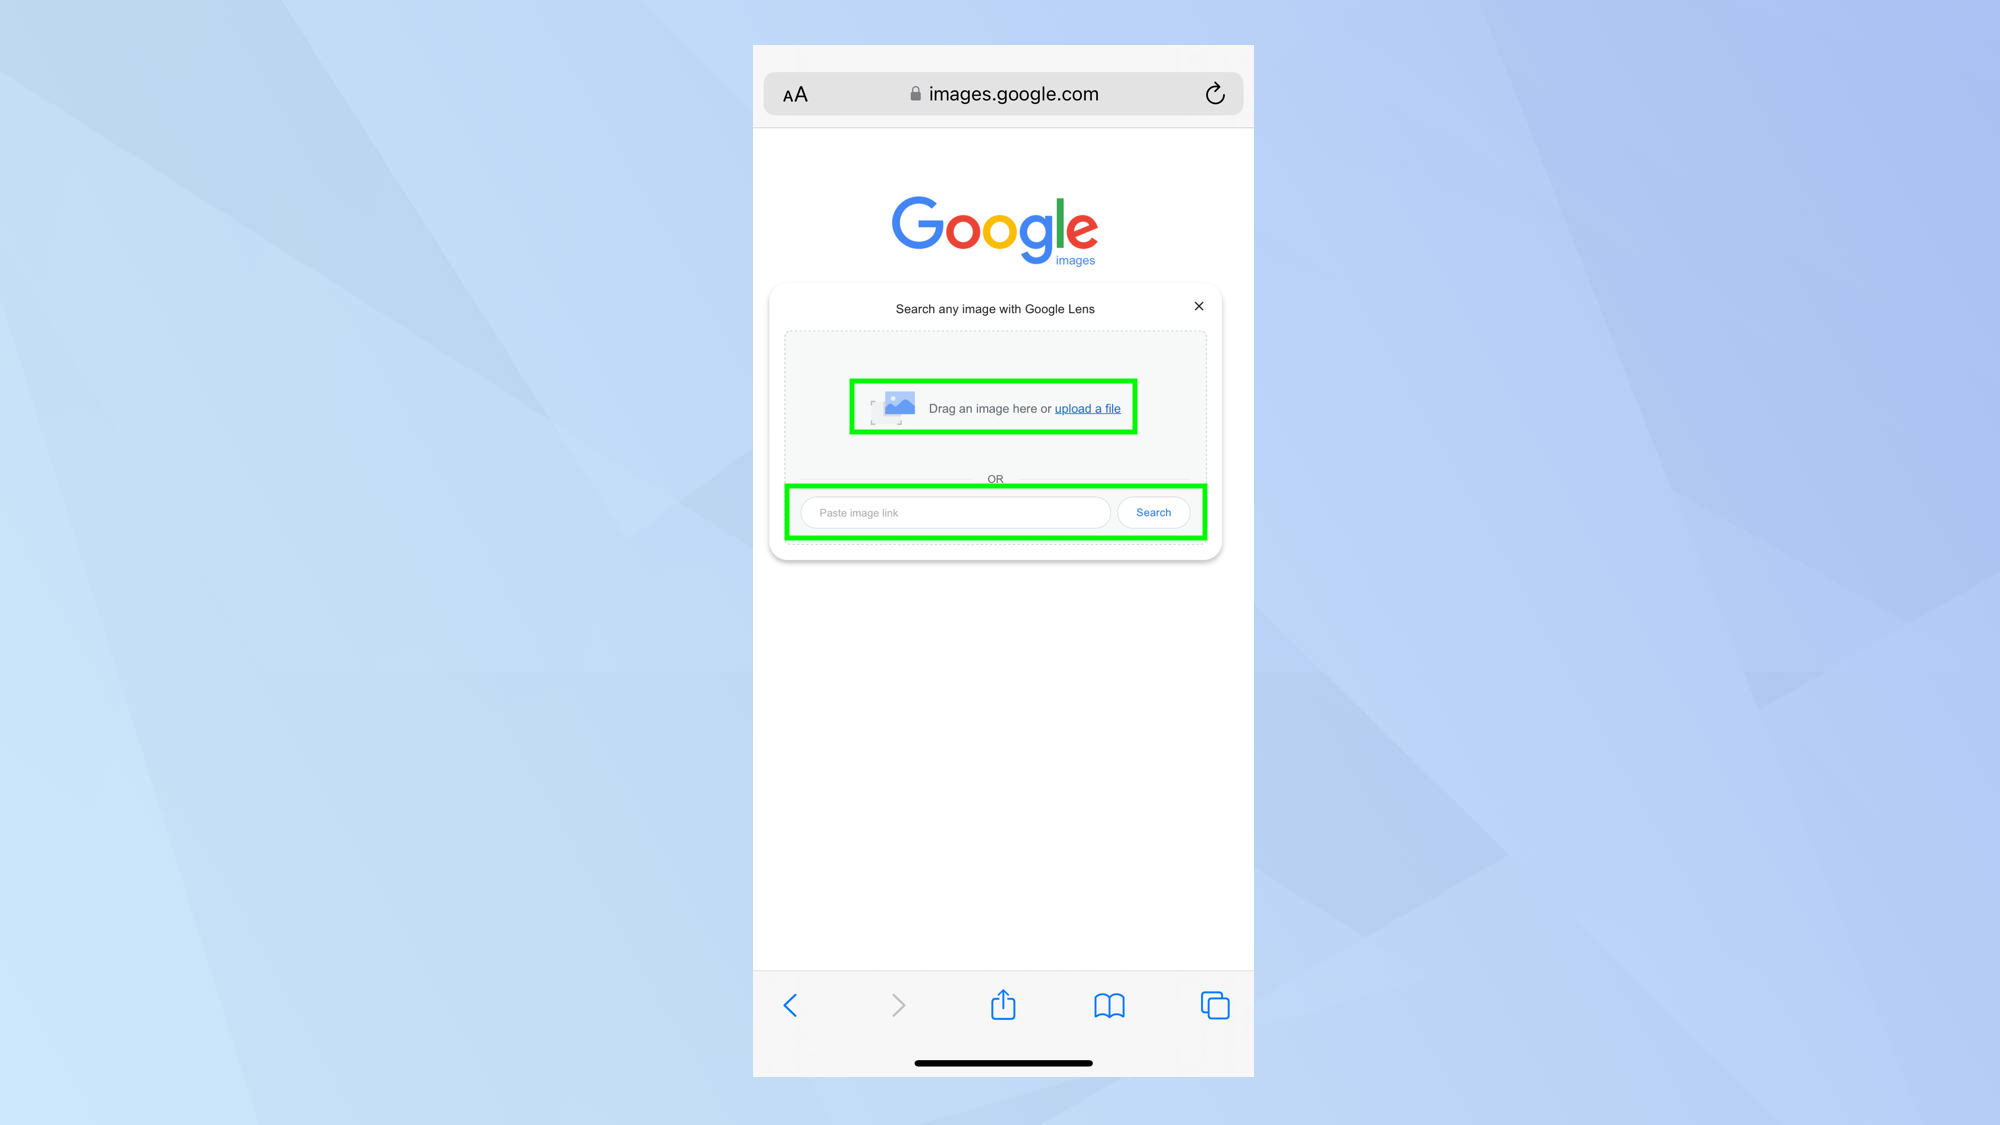
4. You can select Photo Library and find the image you saved or, if you selected Copy earlier, you can paste the link into the Paste Image Link box.
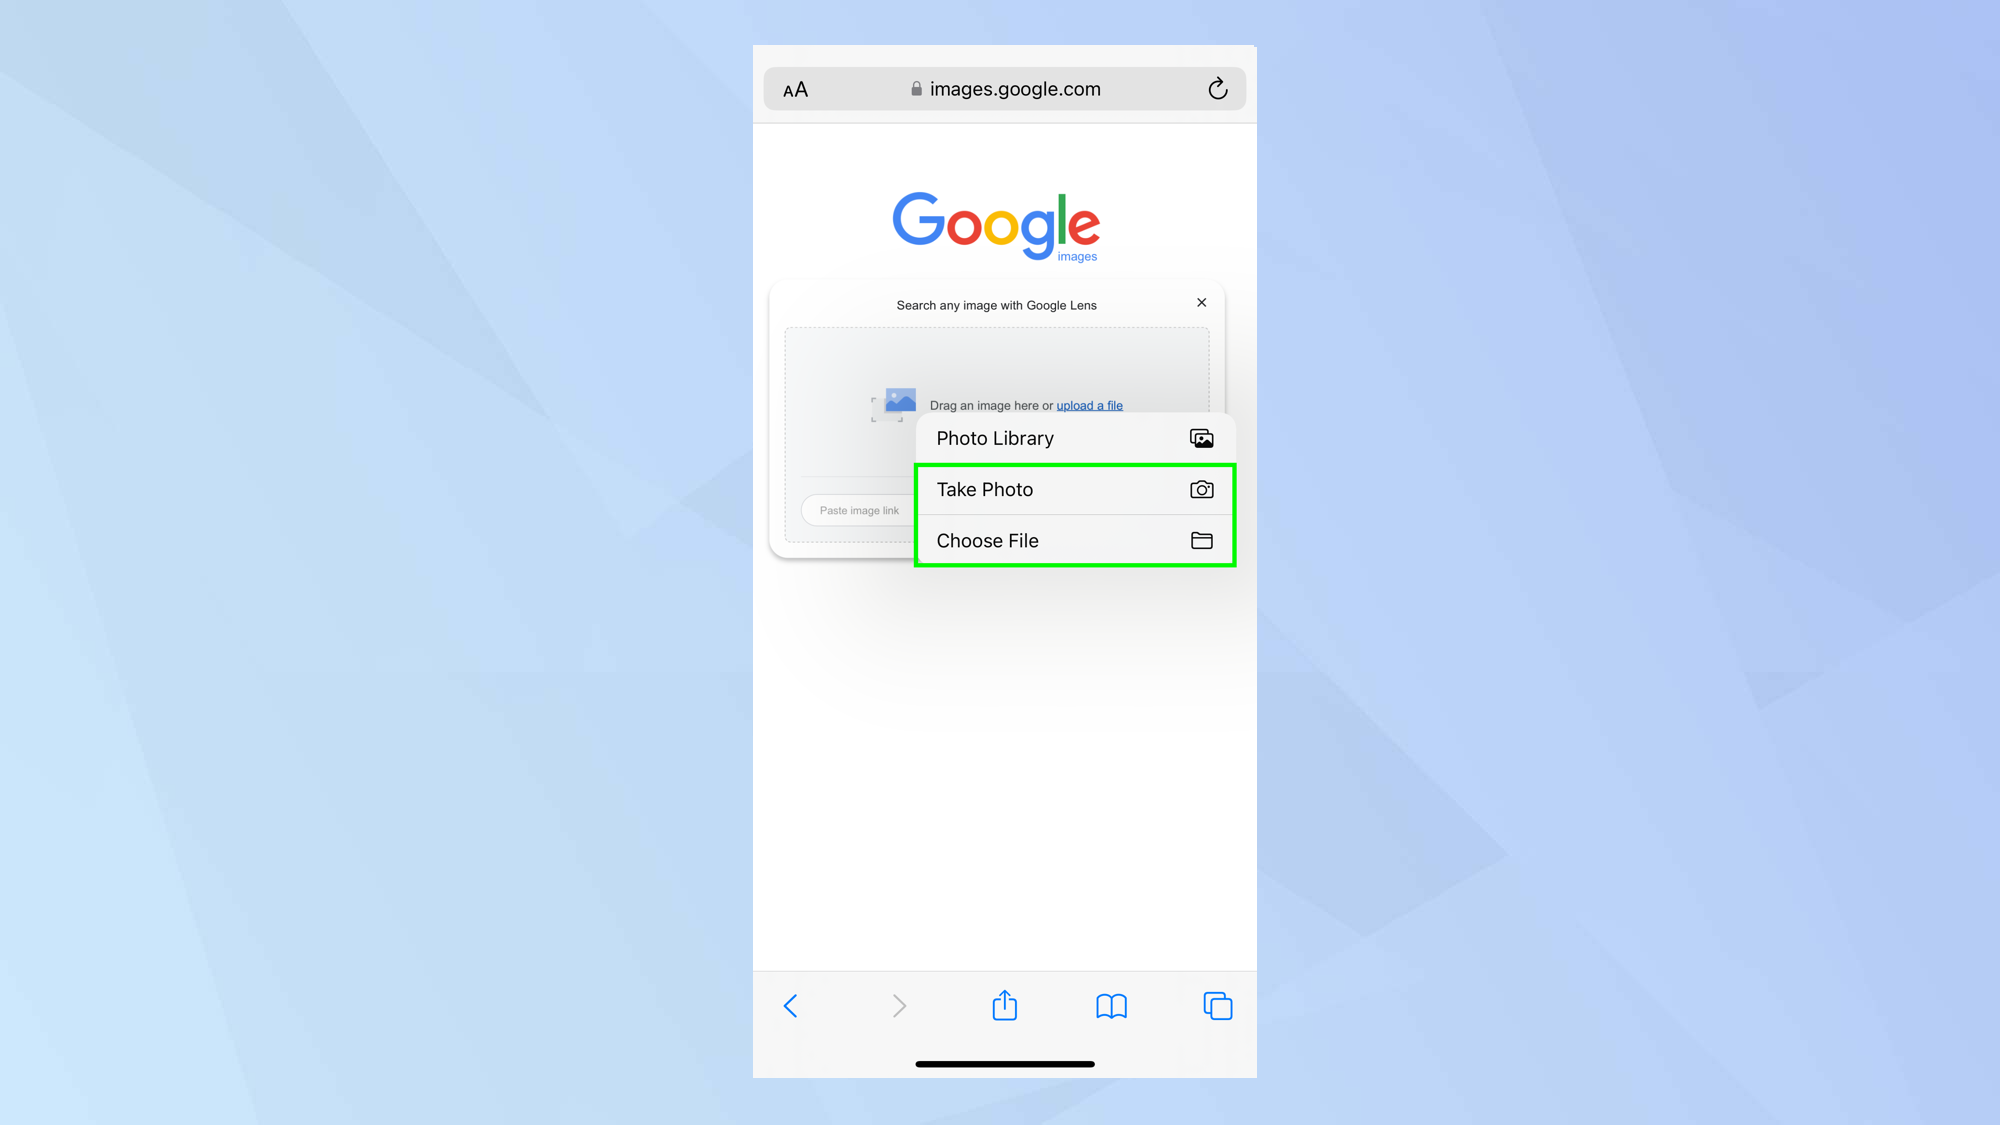
5. You can also take a fresh image and perform a reverse search on it or select Choose File if you have an image saved elsewhere on your iPhone or in iCloud.
6. When ready, tap Search. Again, you will be taken to Google Lens where you can click Find Image Source to discover where the image has come from or been used. If Google has identified any objects in the image, you can click Search to see results related to the suggested words.
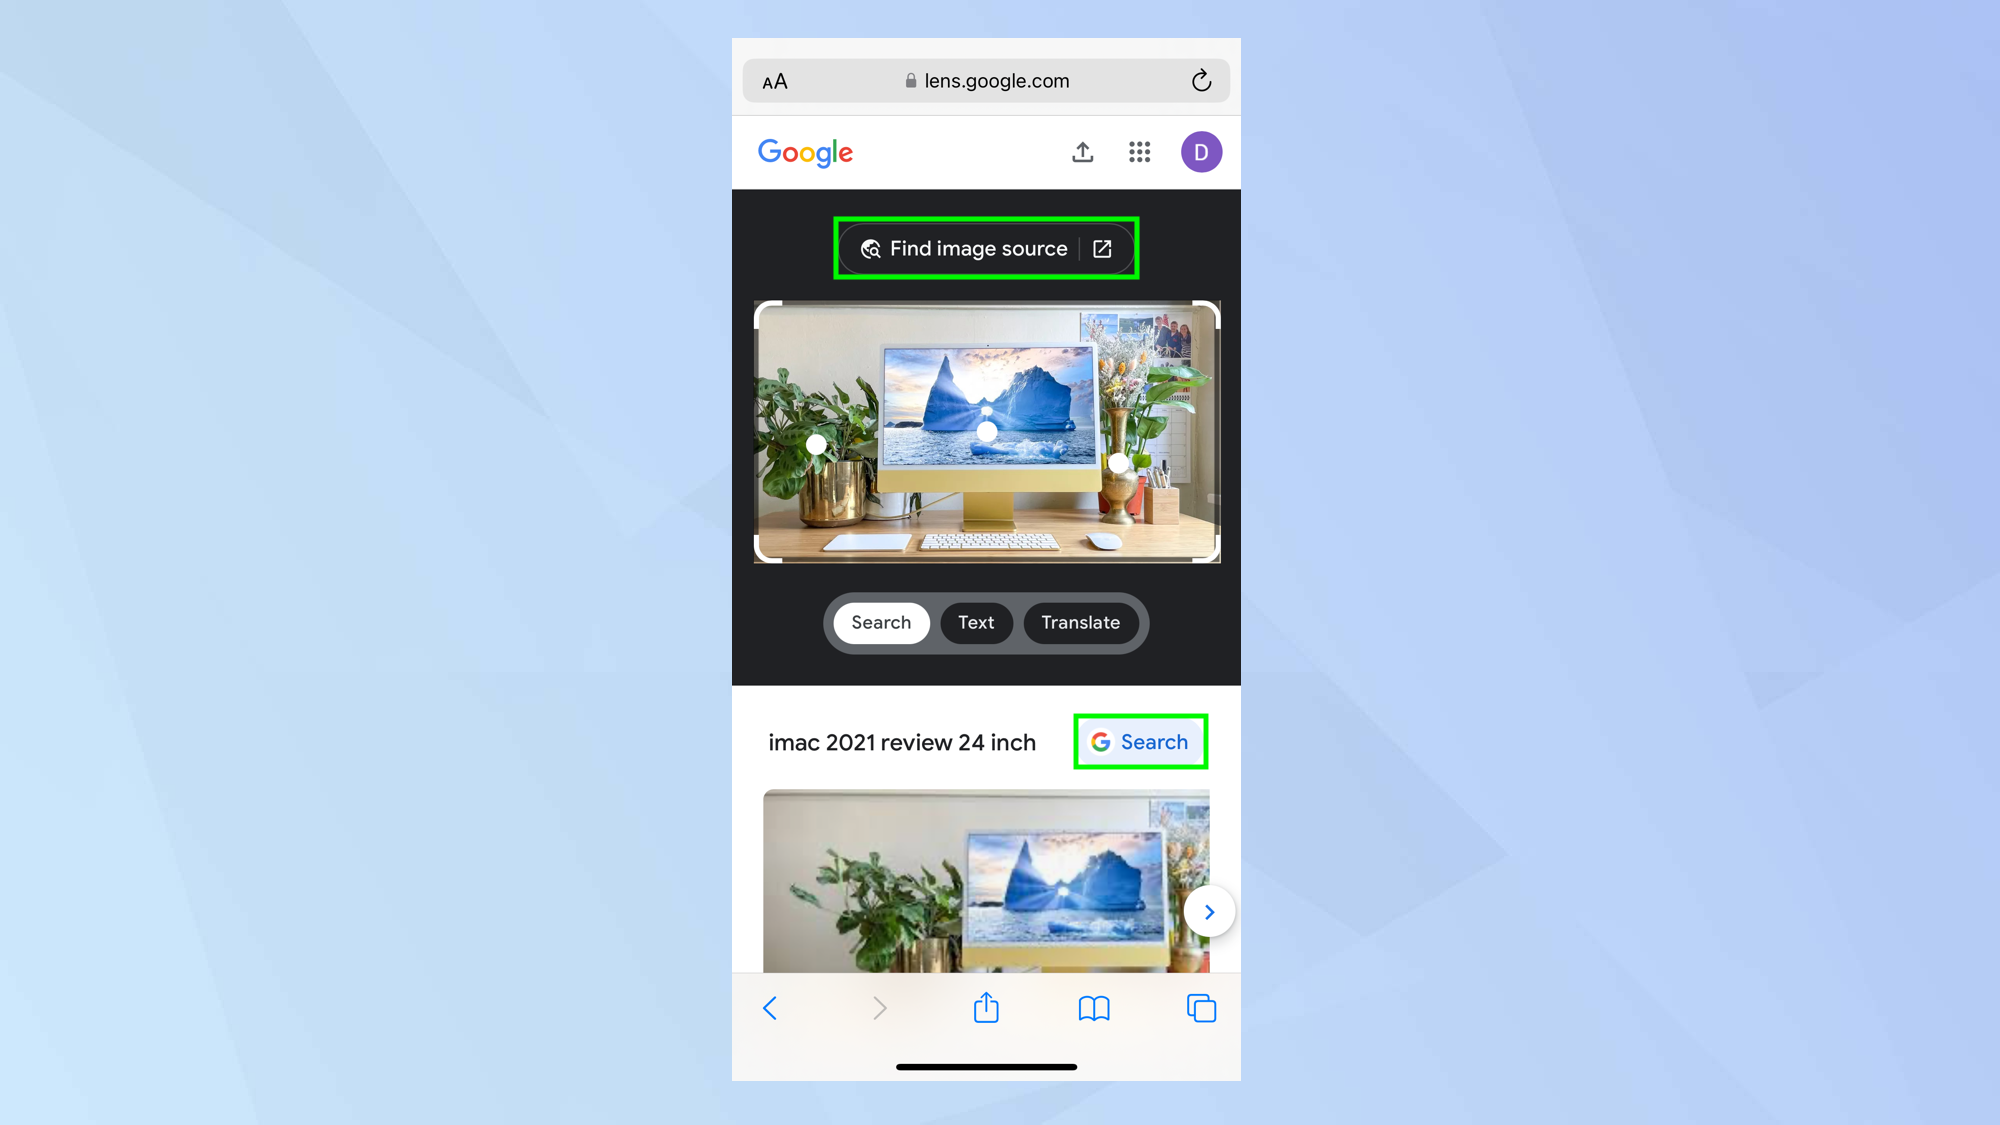
How to reverse image search on an iPhone using the Google app
1. Launch the Google app and use it to navigate to a webpage containing an image you want to search. Tap and hold the image and select Find image source.
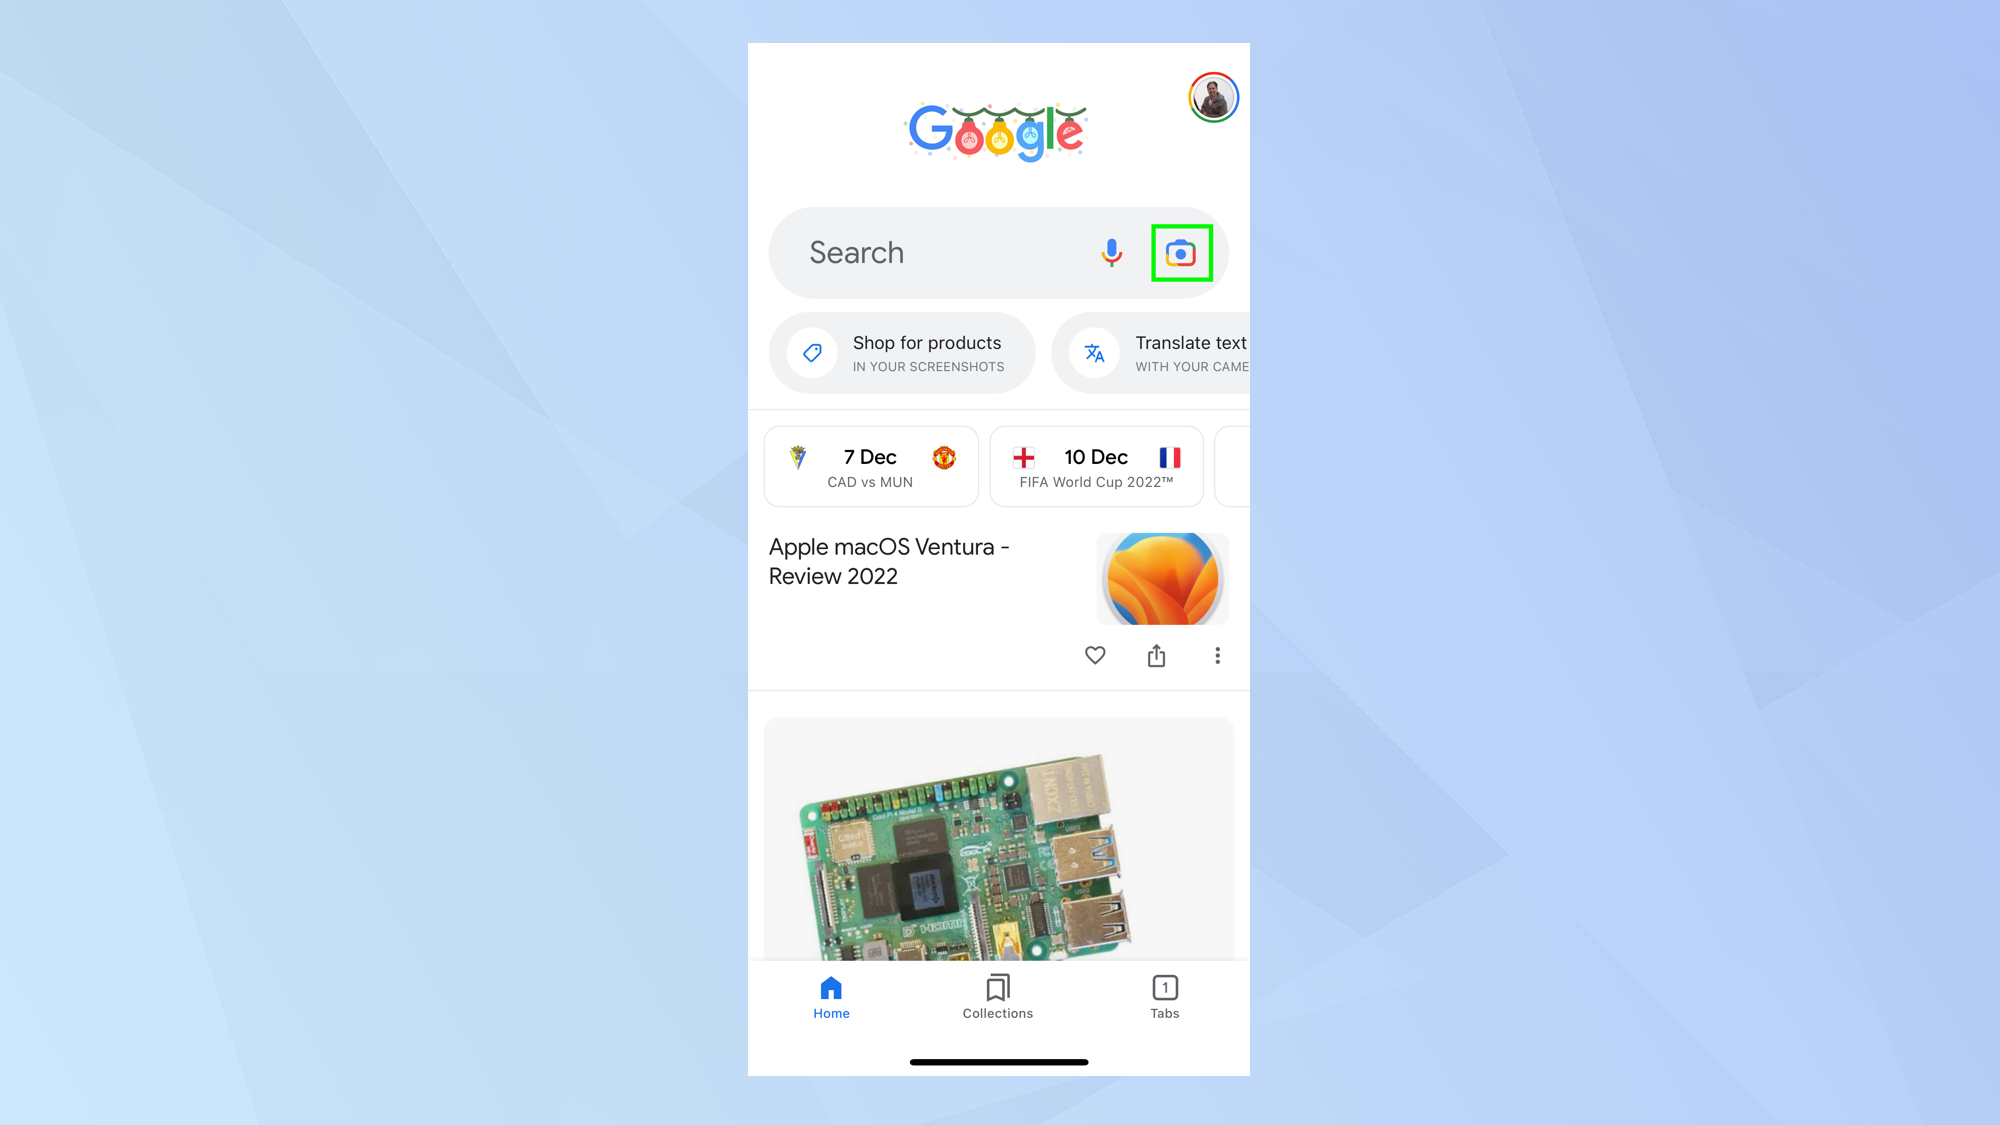
2. You can also tap the Search By Image icon to the right of the search bar.
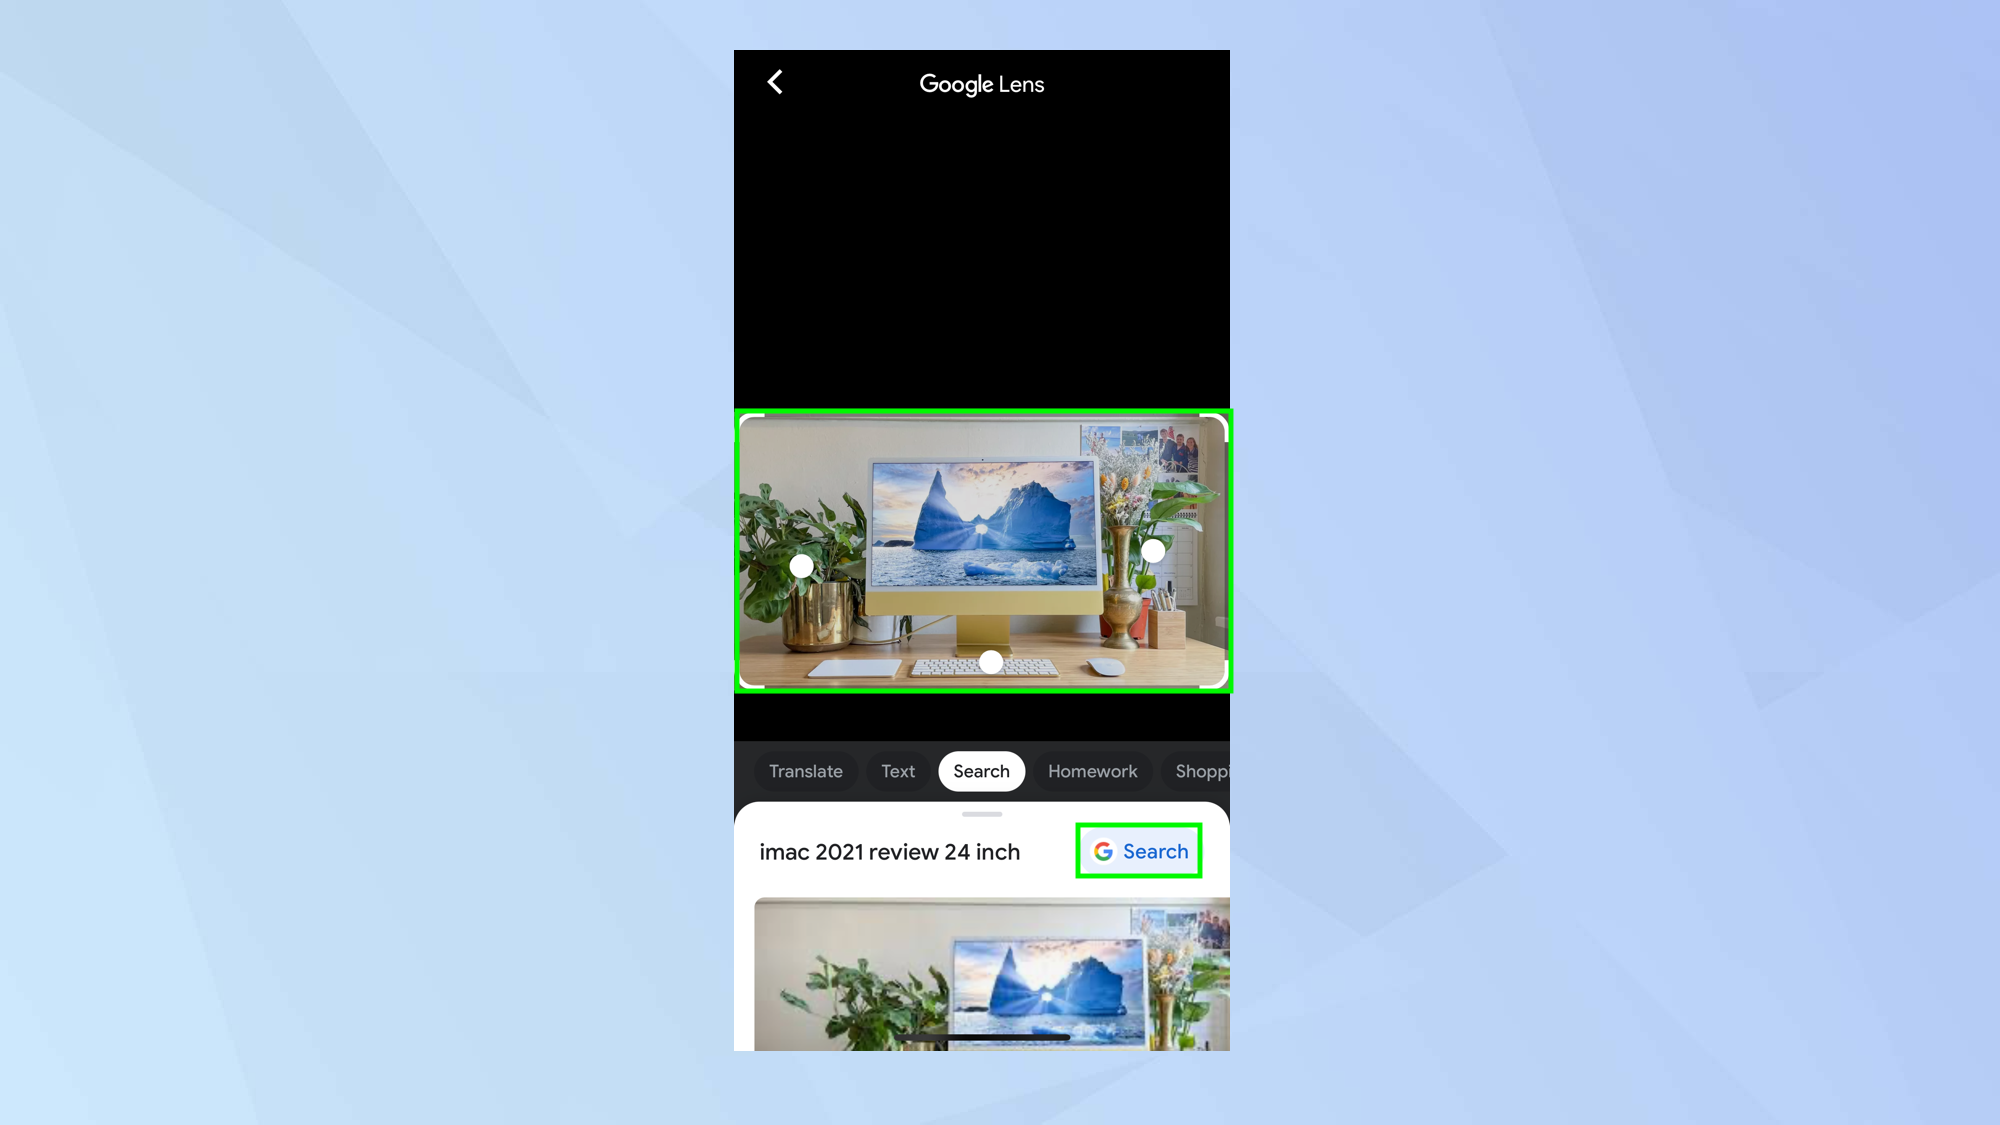
3. Doing so will allow you to select an image from your Photos app. You will be taken to Google Lens where you can tap the image then scroll to discover where the image has come from or been used.
It is also possible to tap a part of the image to see if you can find any visually-related results and, if Google has identified any objects in the image, you can tap Search to see results related to the suggested words.
So now you know how to do a reverse image search. But why stop there? You can also learn how to use Google Photos or learn how to back up to Google Photos from a phone, tablet or computer. You can also check out 11 hidden Google Search features that will make your life easier, how to enable Google package tracking or even understand how to delete Google Search history. Fancy a little Chrome gaming on your break? Learn how to hack the Chrome dinosaur game. Want to experiment with a few new Chrome features? Here's how to set Chrome flags. Fancy talking to nobody? Learn how to use ChatGPT.

David Crookes is a freelance writer, reporter, editor and author. He has written for technology and gaming magazines including Retro Gamer, Web User, Micro Mart, MagPi, Android, iCreate, Total PC Gaming, T3 and Macworld. He has also covered crime, history, politics, education, health, sport, film, music and more, and been a producer for BBC Radio 5 Live.
