How to customize the Windows 11 Start menu
Here's how to customize the Windows 11 Start menu in a few easy ways
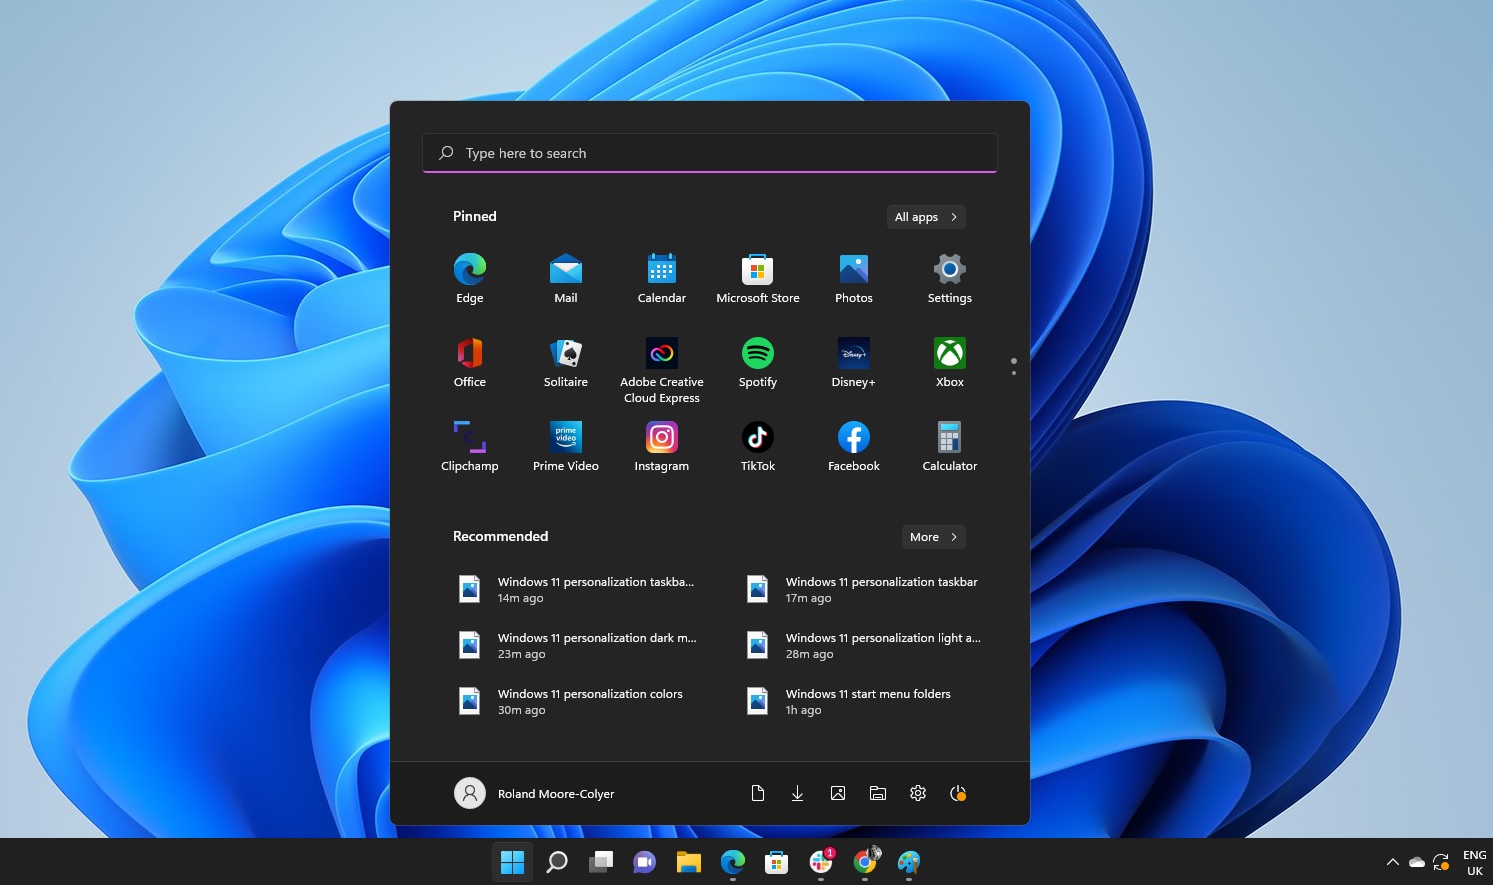
Windows 11 brought in some major changes to the user interface of the operating system many of us know and love, including a big change to the Start menu. If this isn't to your tastes, you can learn how to customize the Windows 11 Start menu so you have the right apps in the right place.
Luckily, Windows 11 is rather intuitive and it only takes a couple of clicks and tweaks to work the new Start menu into something you feel comfortable with using. And doing this will make sure you have all the apps you want rather close to your fingertips, or mouse cursor.
So read on to find out how to customize the Windows 11 Start menu.
How to customize the Windows 11 Start menu
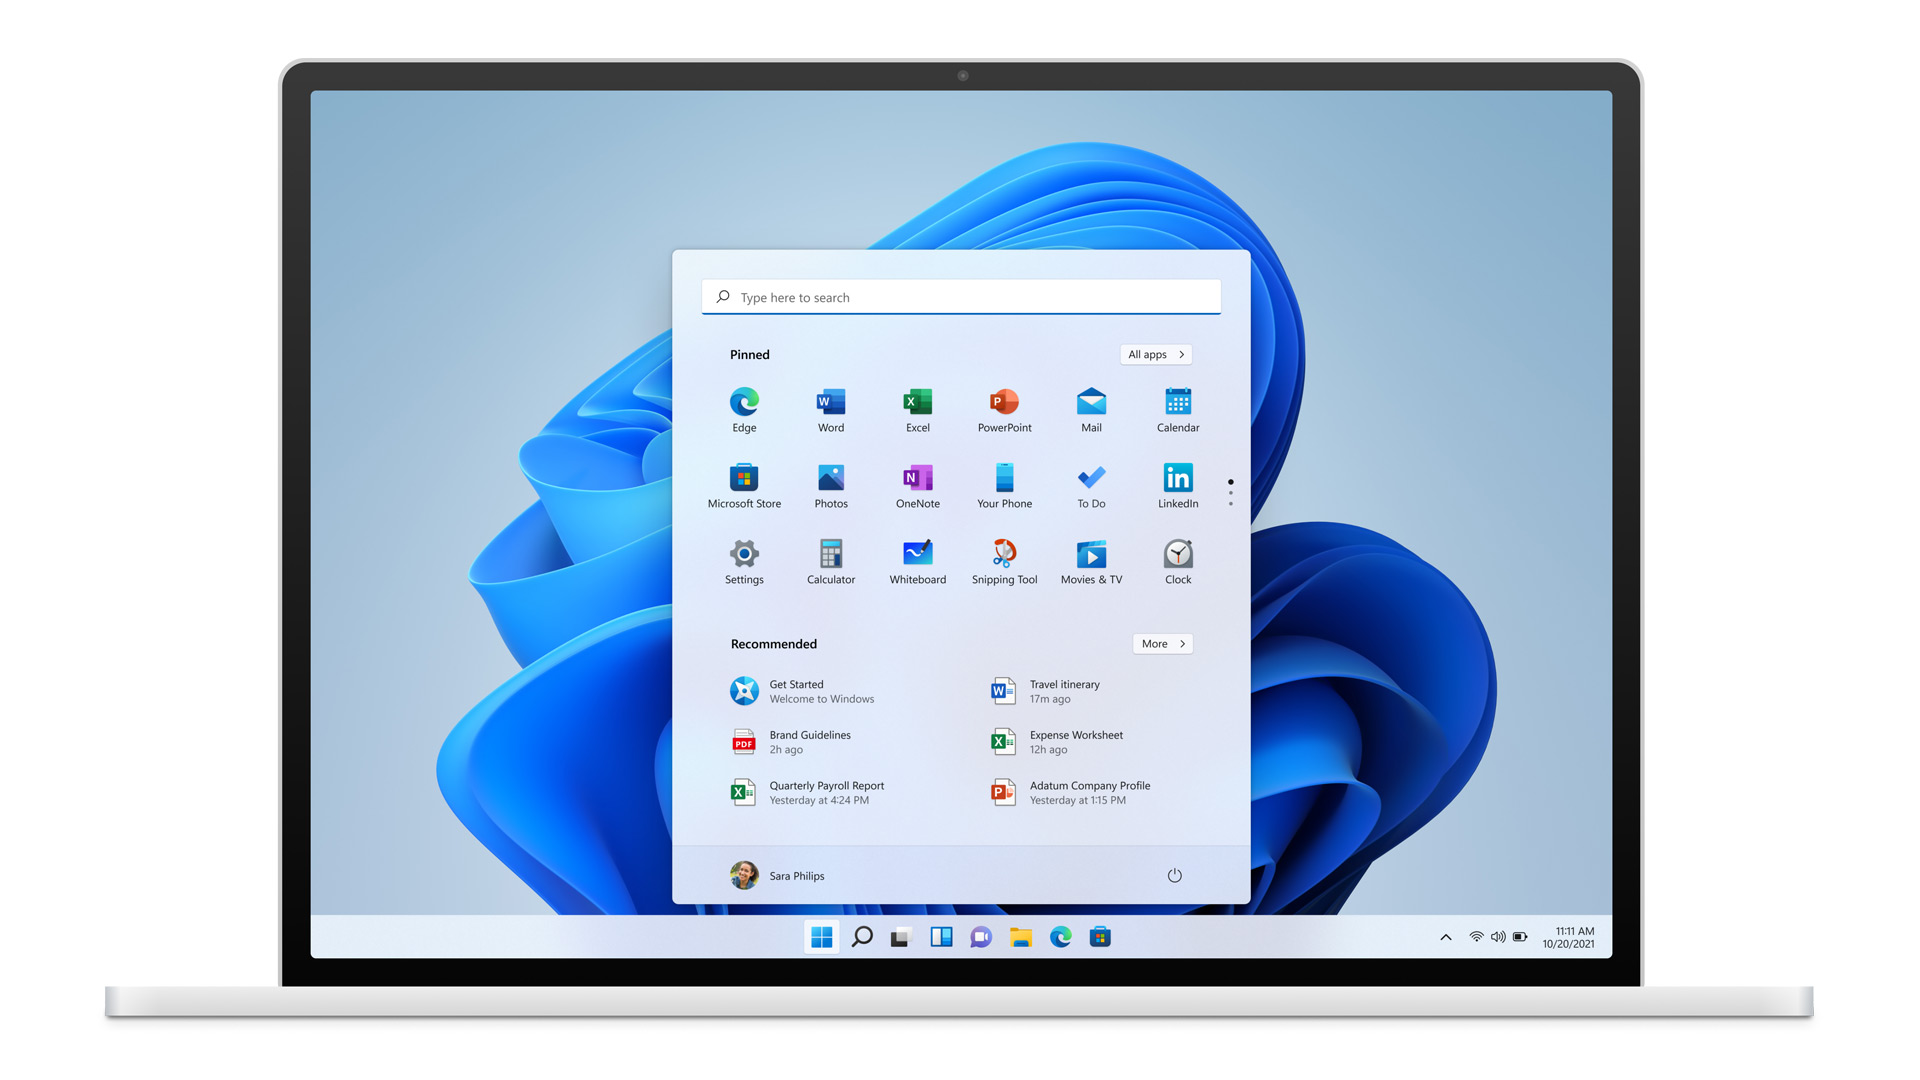
Get to know the Windows 11 Start menu
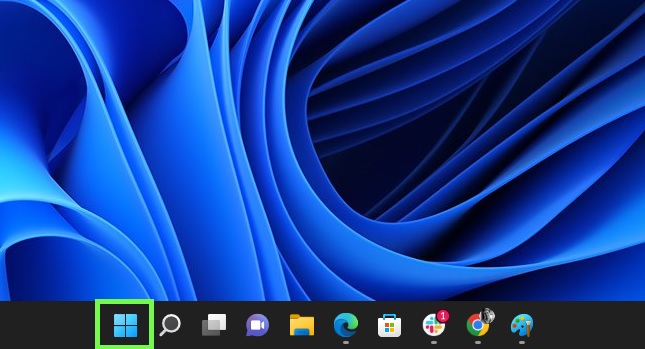
First off, the Start menu is now located in the middle of the desktop taskbar, rather than on the left hand side. Click on the blue Windows icon to bring up the new menu.
The default Start menu tends to serve up a list of pinned apps, seemingly based around what’s on your PC, which can be navigated via the up and down arrows that pop up when you hover a cursor over the two small dots in the middle right hand-edge of the menu. Click on All apps and you can see a full list of apps installed on your PC, listed in alphabetical order.
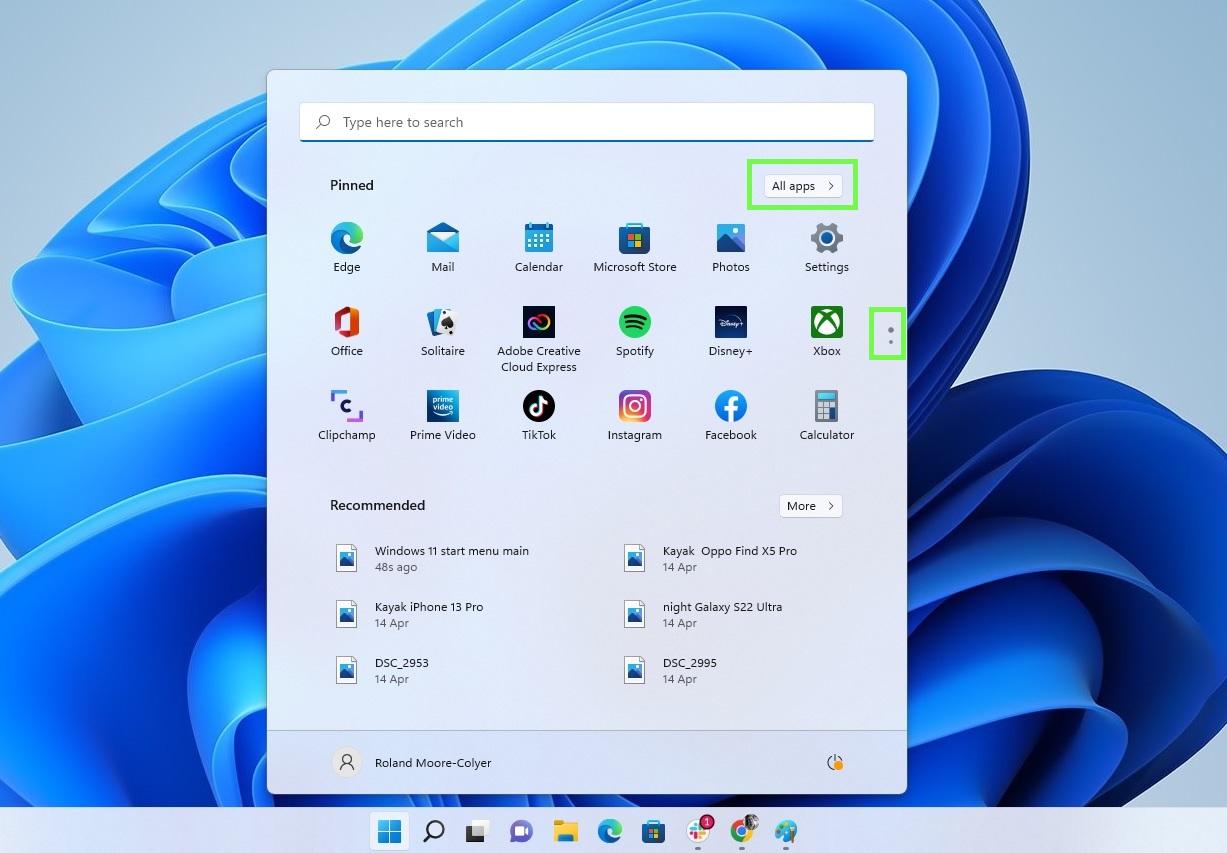
Go back to the main menu, by hitting the back button, and you can see the Recommended section below the pinned apps. These show recently accessed files or installed apps. At the top of the menu you get a search bar that can help you quickly find apps.
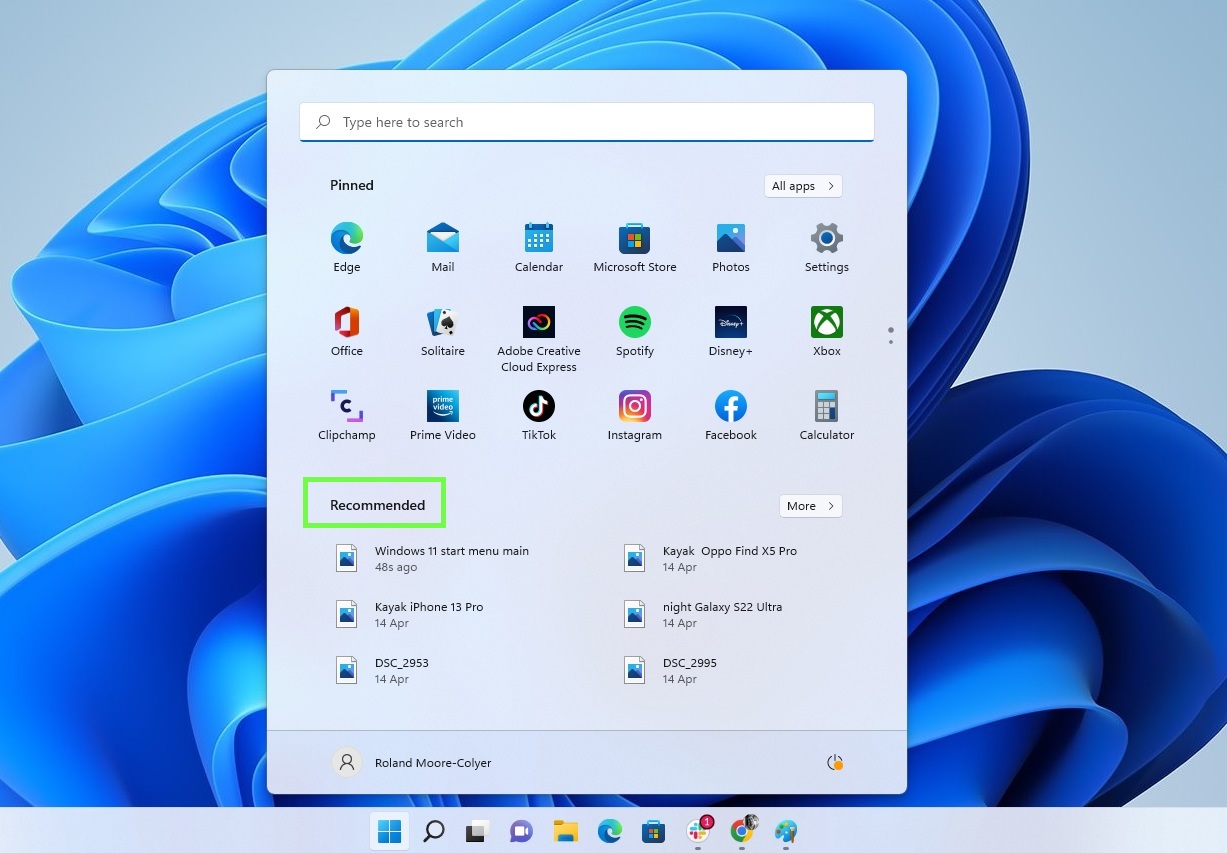
Change the pinned apps in the Windows 11 Start menu
One of the first customizations you might want to do is to change the pinned apps in the Windows 11 Start menu. This is easily done.
Sign up to get the BEST of Tom's Guide direct to your inbox.
Get instant access to breaking news, the hottest reviews, great deals and helpful tips.
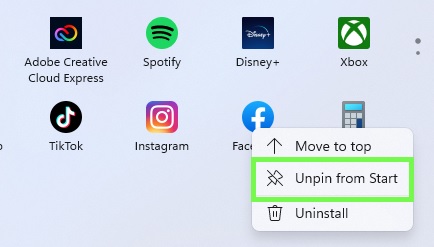
Simply right-click on an app icon and then select the Unpin from Start option in the pop up menu. That’ll remove the app, which can still be found in the All apps menu.
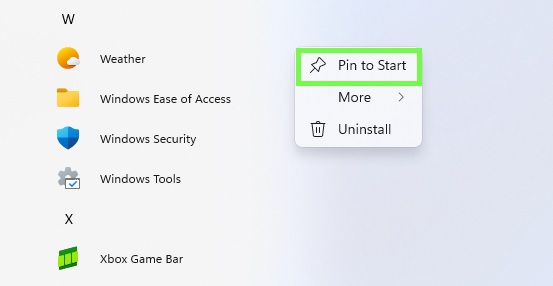
To then pin a new app to the menu, simply navigate to an app you want, right-click on it and then select Pin to Start from the pop-up options.
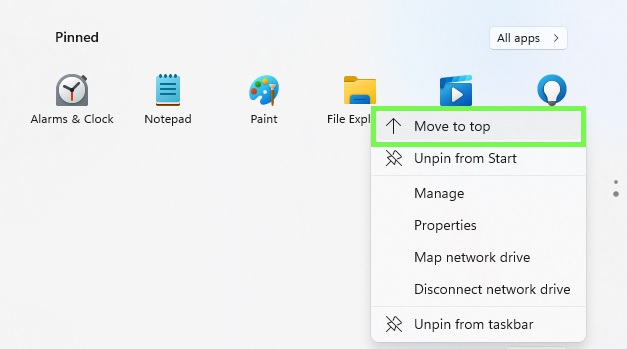
If you want to move an app to the top of the pinned menu, for example if it is sitting out of sight, simply navigate to it, right-click on its icon and select Move to top from the options that pop up.
And for rearranging other apps in the pinned section, simply left-click on them to drag and drop them where you like.
Change the recommended apps and files
The recommended apps and files section can get bothersome if you feel Windows 11 isn't serving you up what you want to see, so you can tweak this.
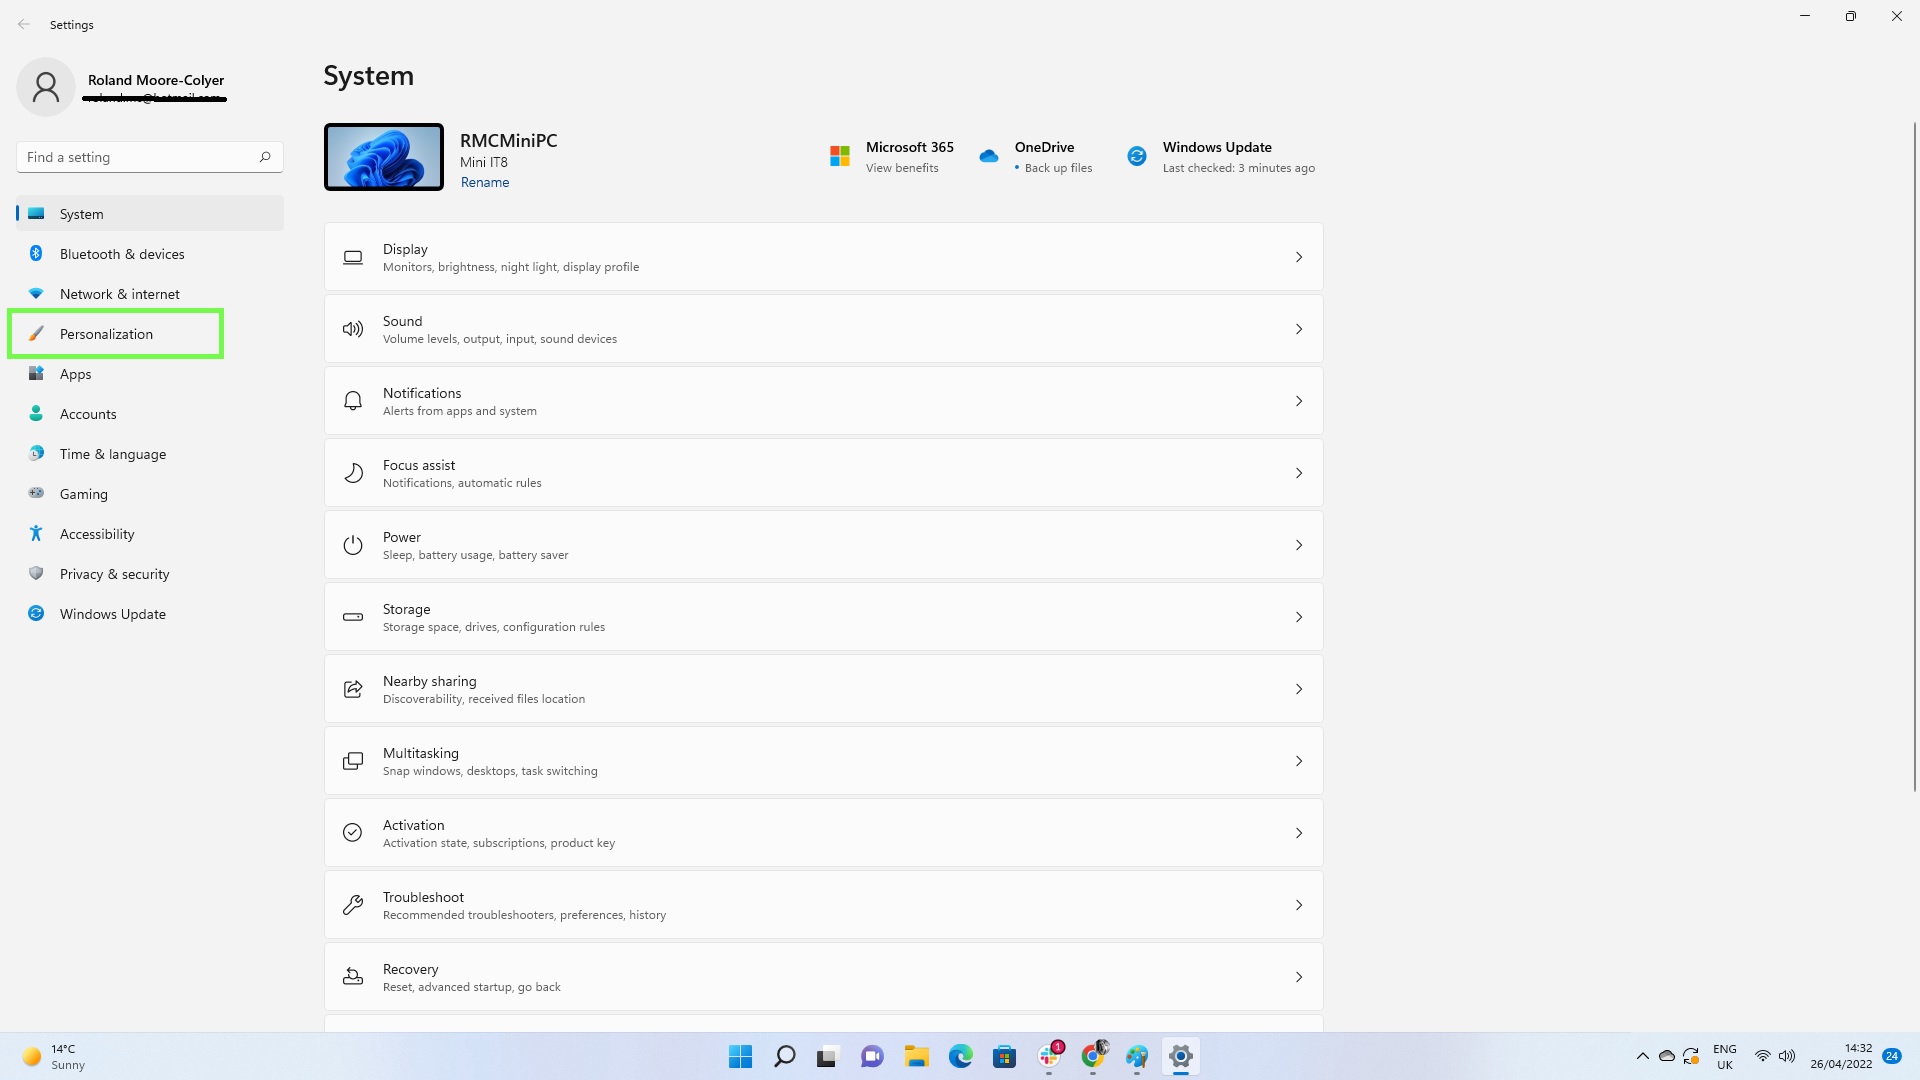
Head to the Settings section of Windows 11. This can be accessed from the Start menu, either as a pinned app, in the all apps section, or simply by searching “Settings.”
Press the Windows key and the “I” key at the same time to bring up the Settings menu.
Once in it, click on Personalization in the left-hand-side menu.
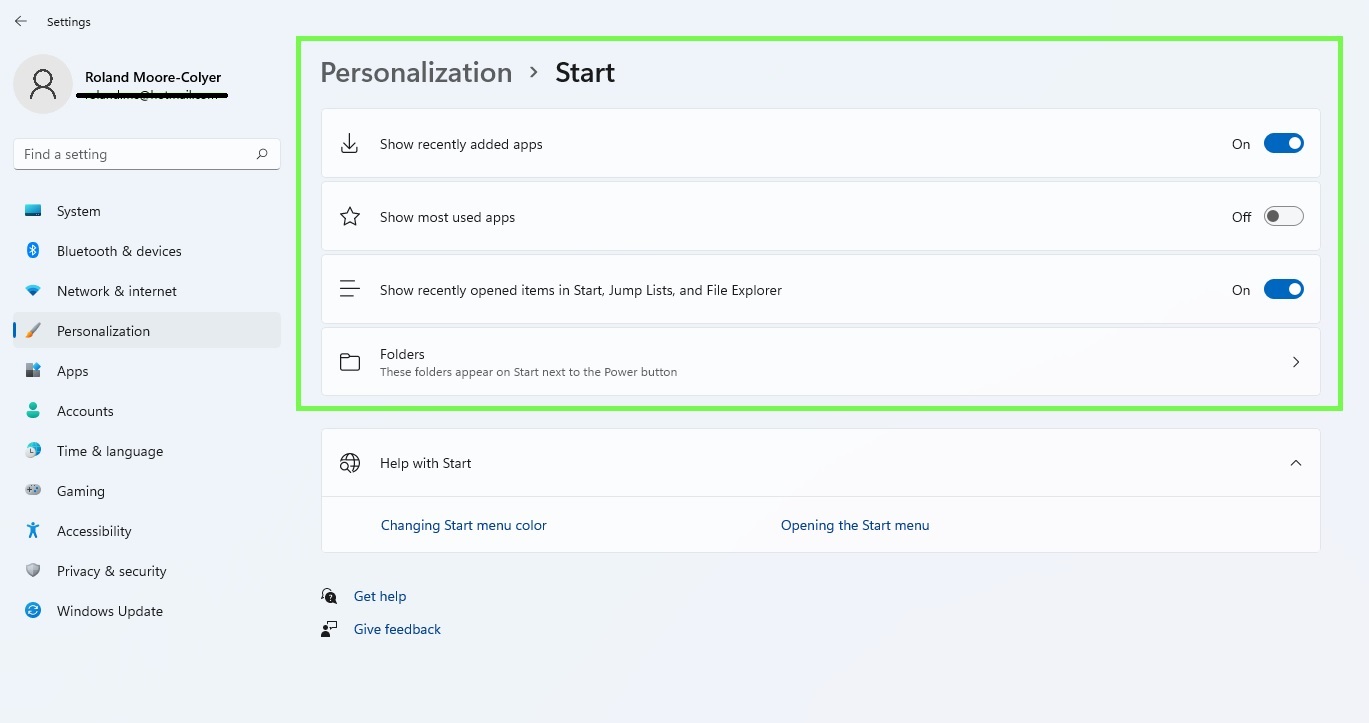
From the options that are served up, navigate to the Start section.

Here you’ll find a host of options to tweak, including the ability to switch off or on the displaying of recently added apps, most used apps, and recently opened items.
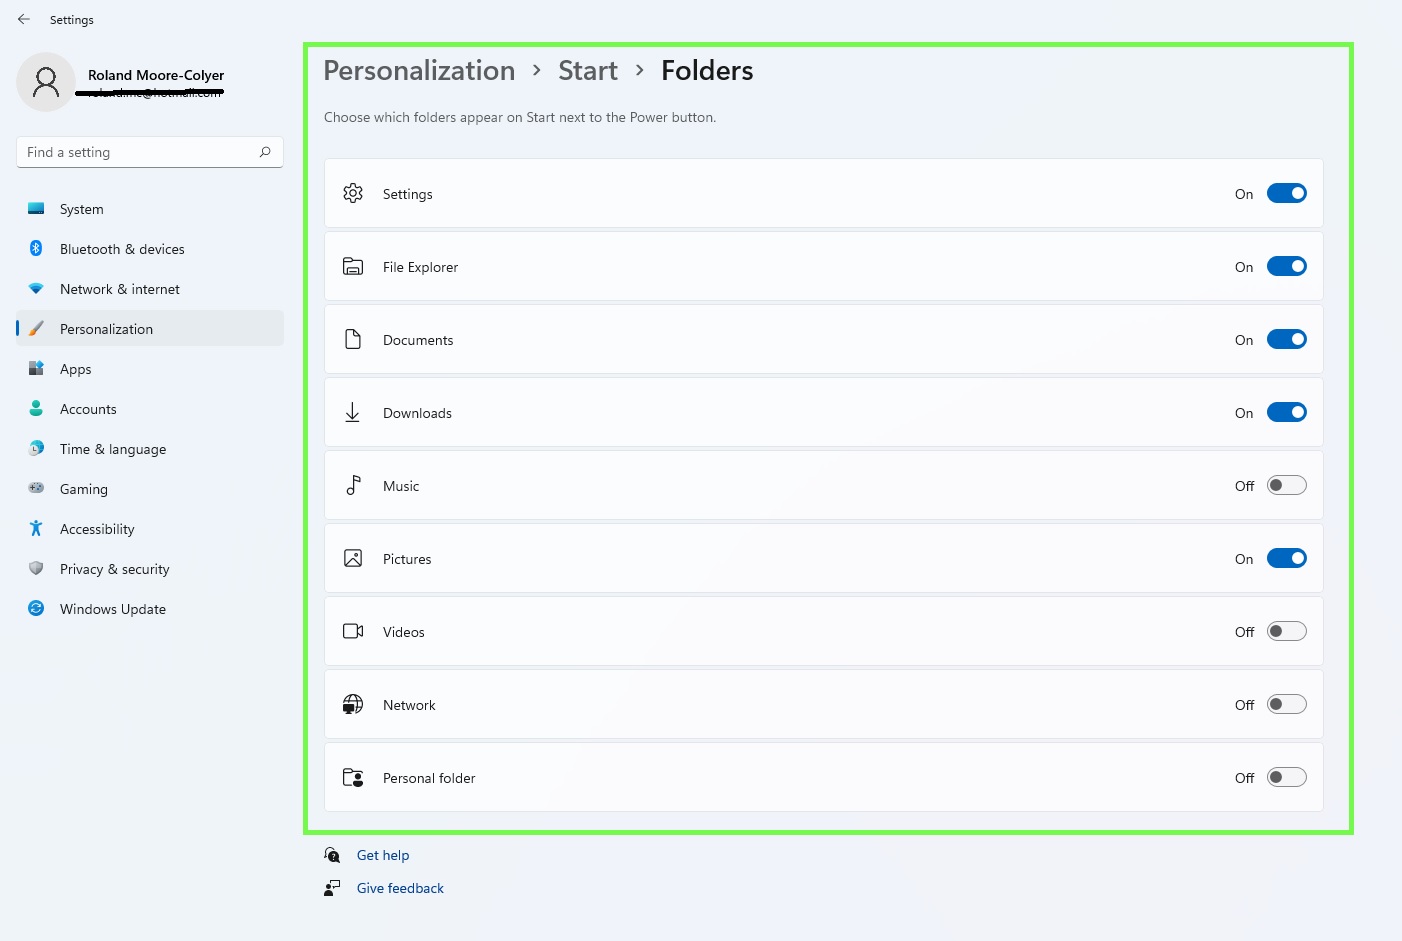
The Folders menu lets you select which folders and tools appear next to the power button in the Start menu.

These range from the standard File Explorer and Settings tools to the Documents, Music, Pictures and Downloads folders. Toggle these on and off as desired.
Change the background color of the Windows 11 Start menu
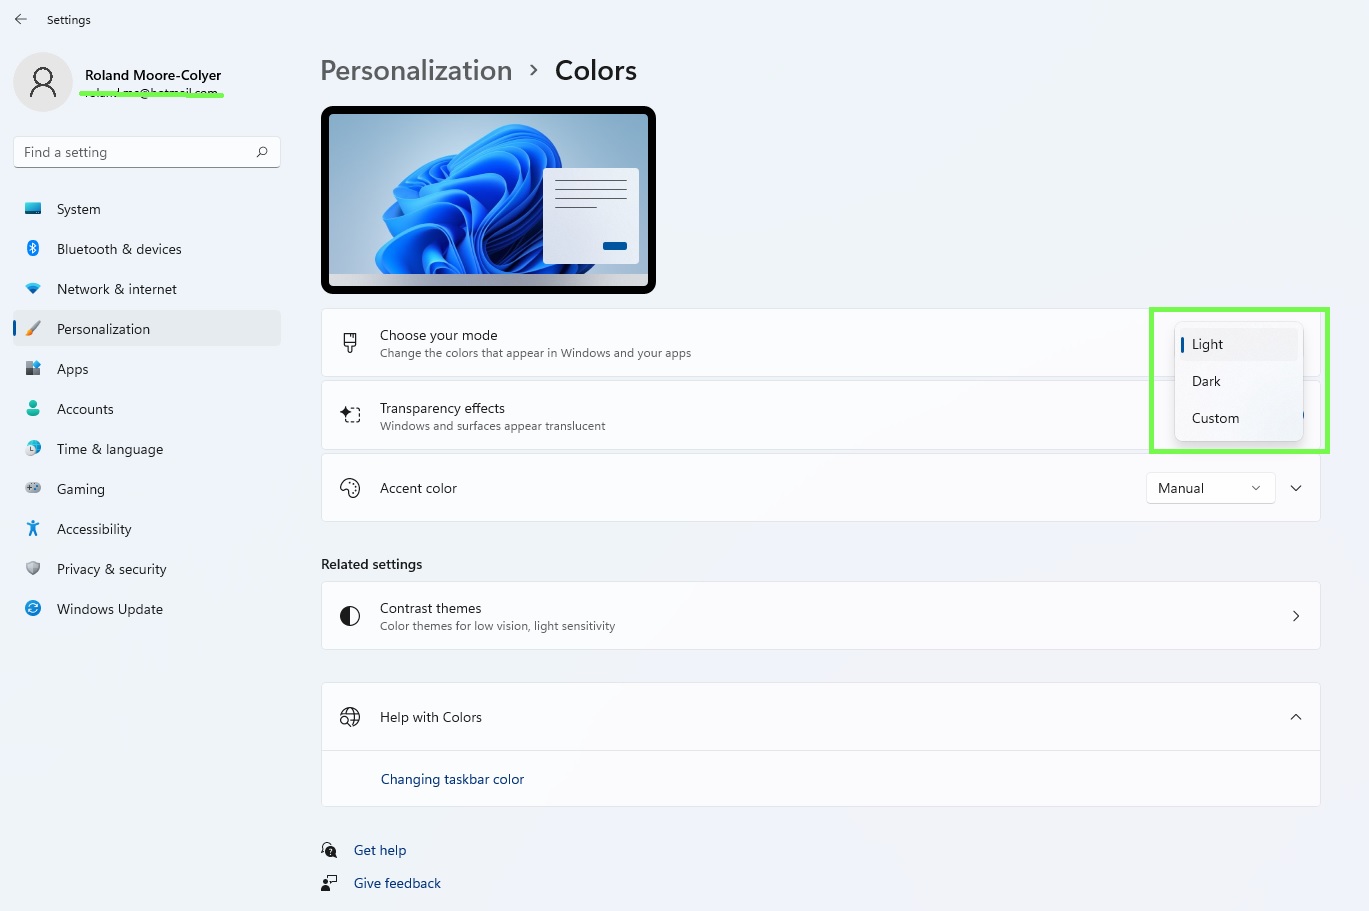
To change the background color of the Windows 11 Start menu, access Settings before heading to Personalization and selecting Colors.
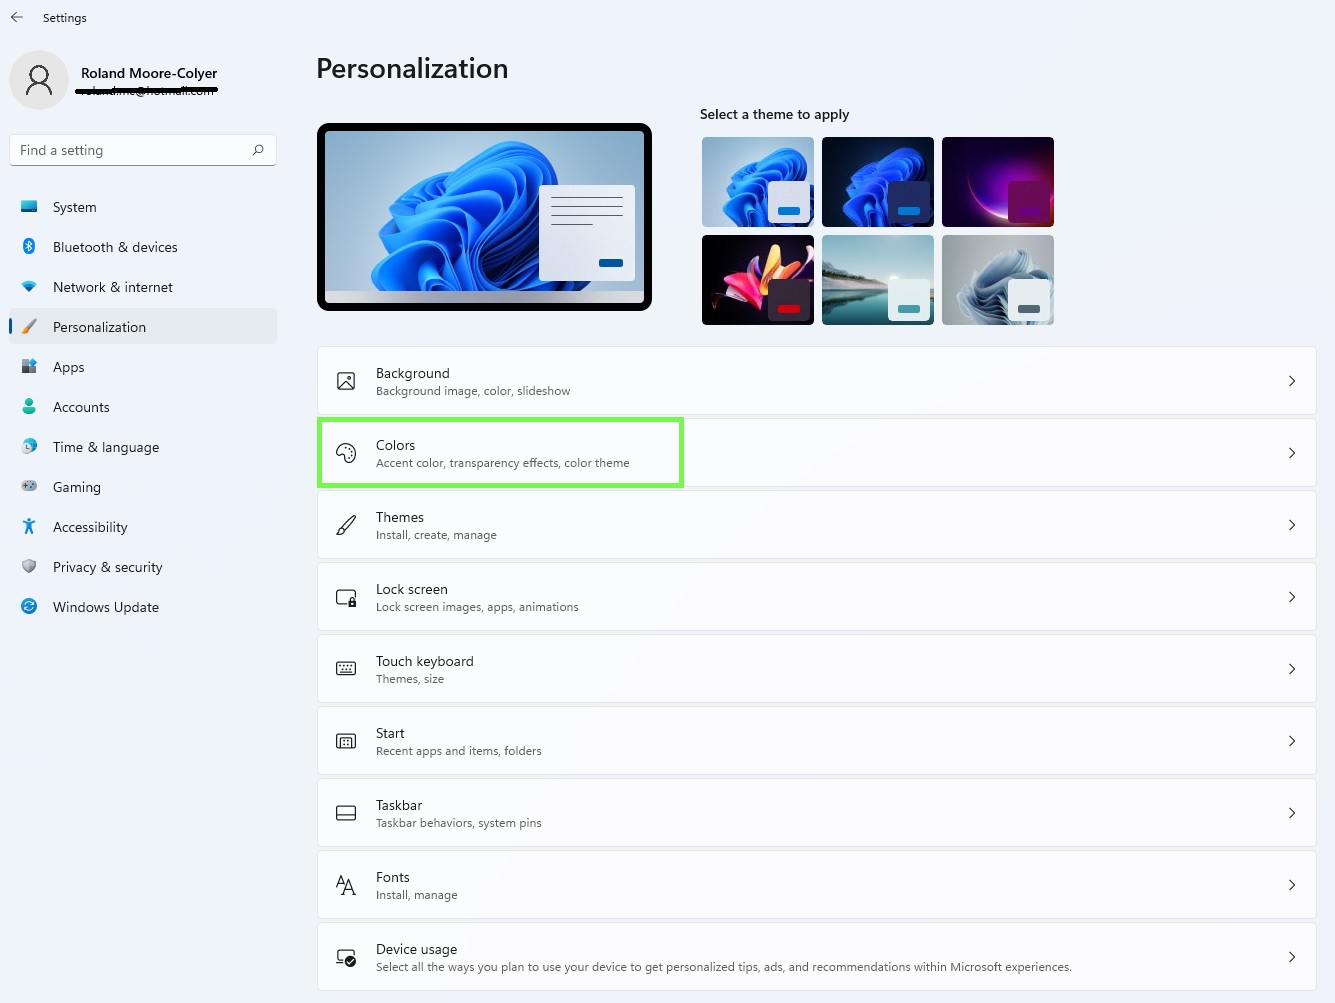
From there you can select a Dark or Light mode, and choose the accent colors of title bars and window borders.
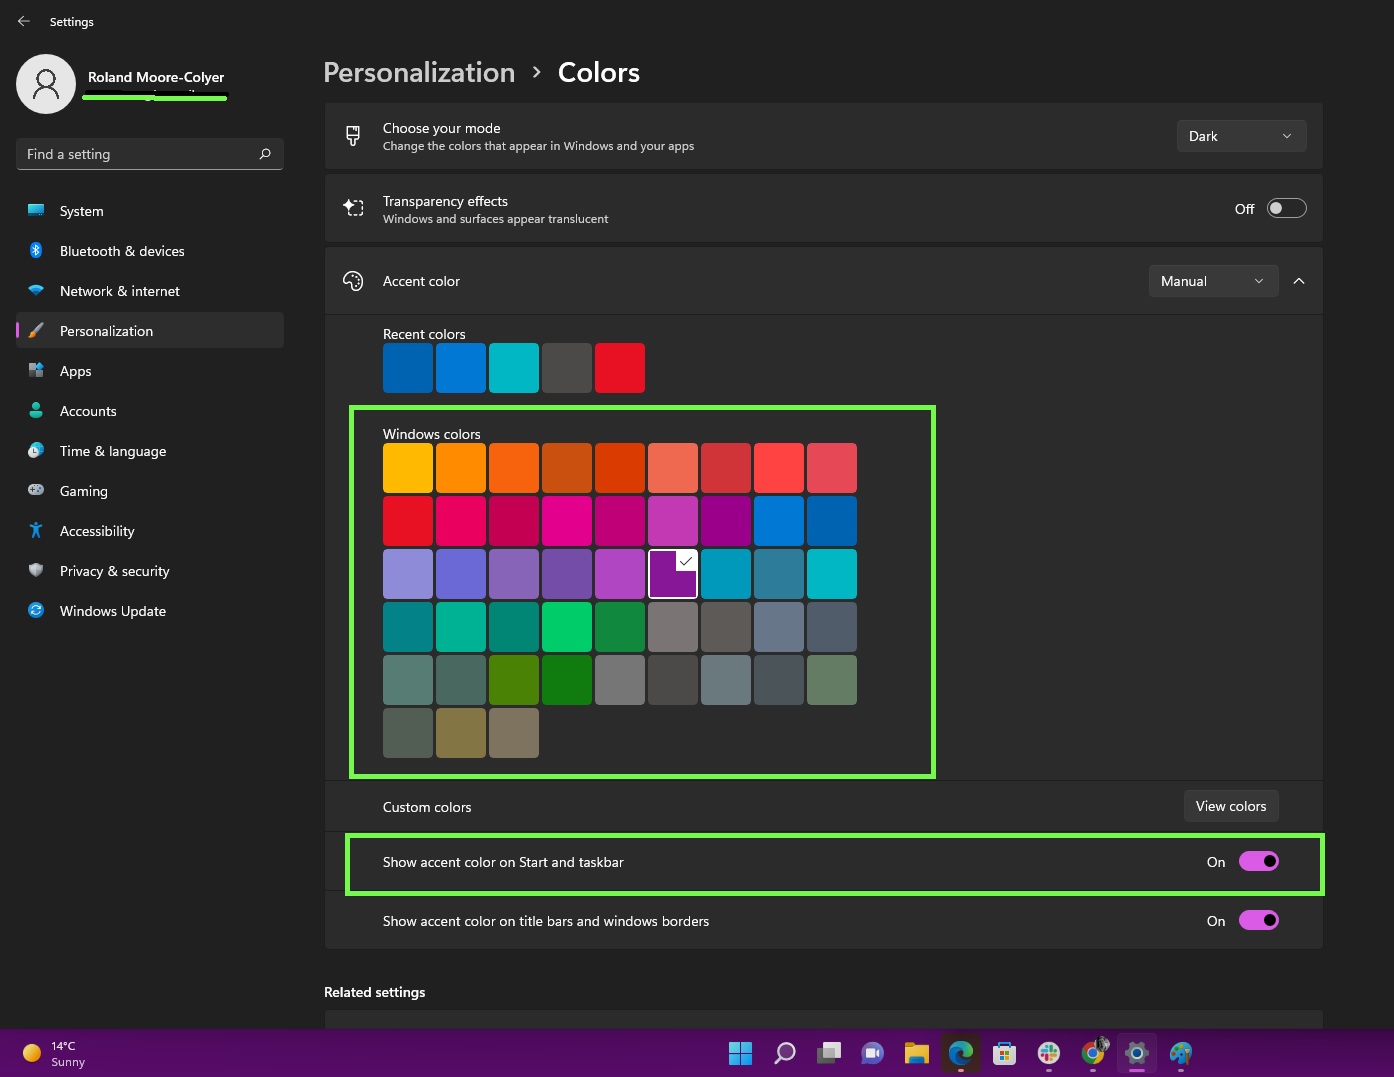
Toggle on Show accent color on Start and taskbar and then select a color of your choice from the Windows colors above.
This’ll apply the color to the Start menu. Just bear in mind this only works in dark mode.
Change the Windows 11 Start menu location
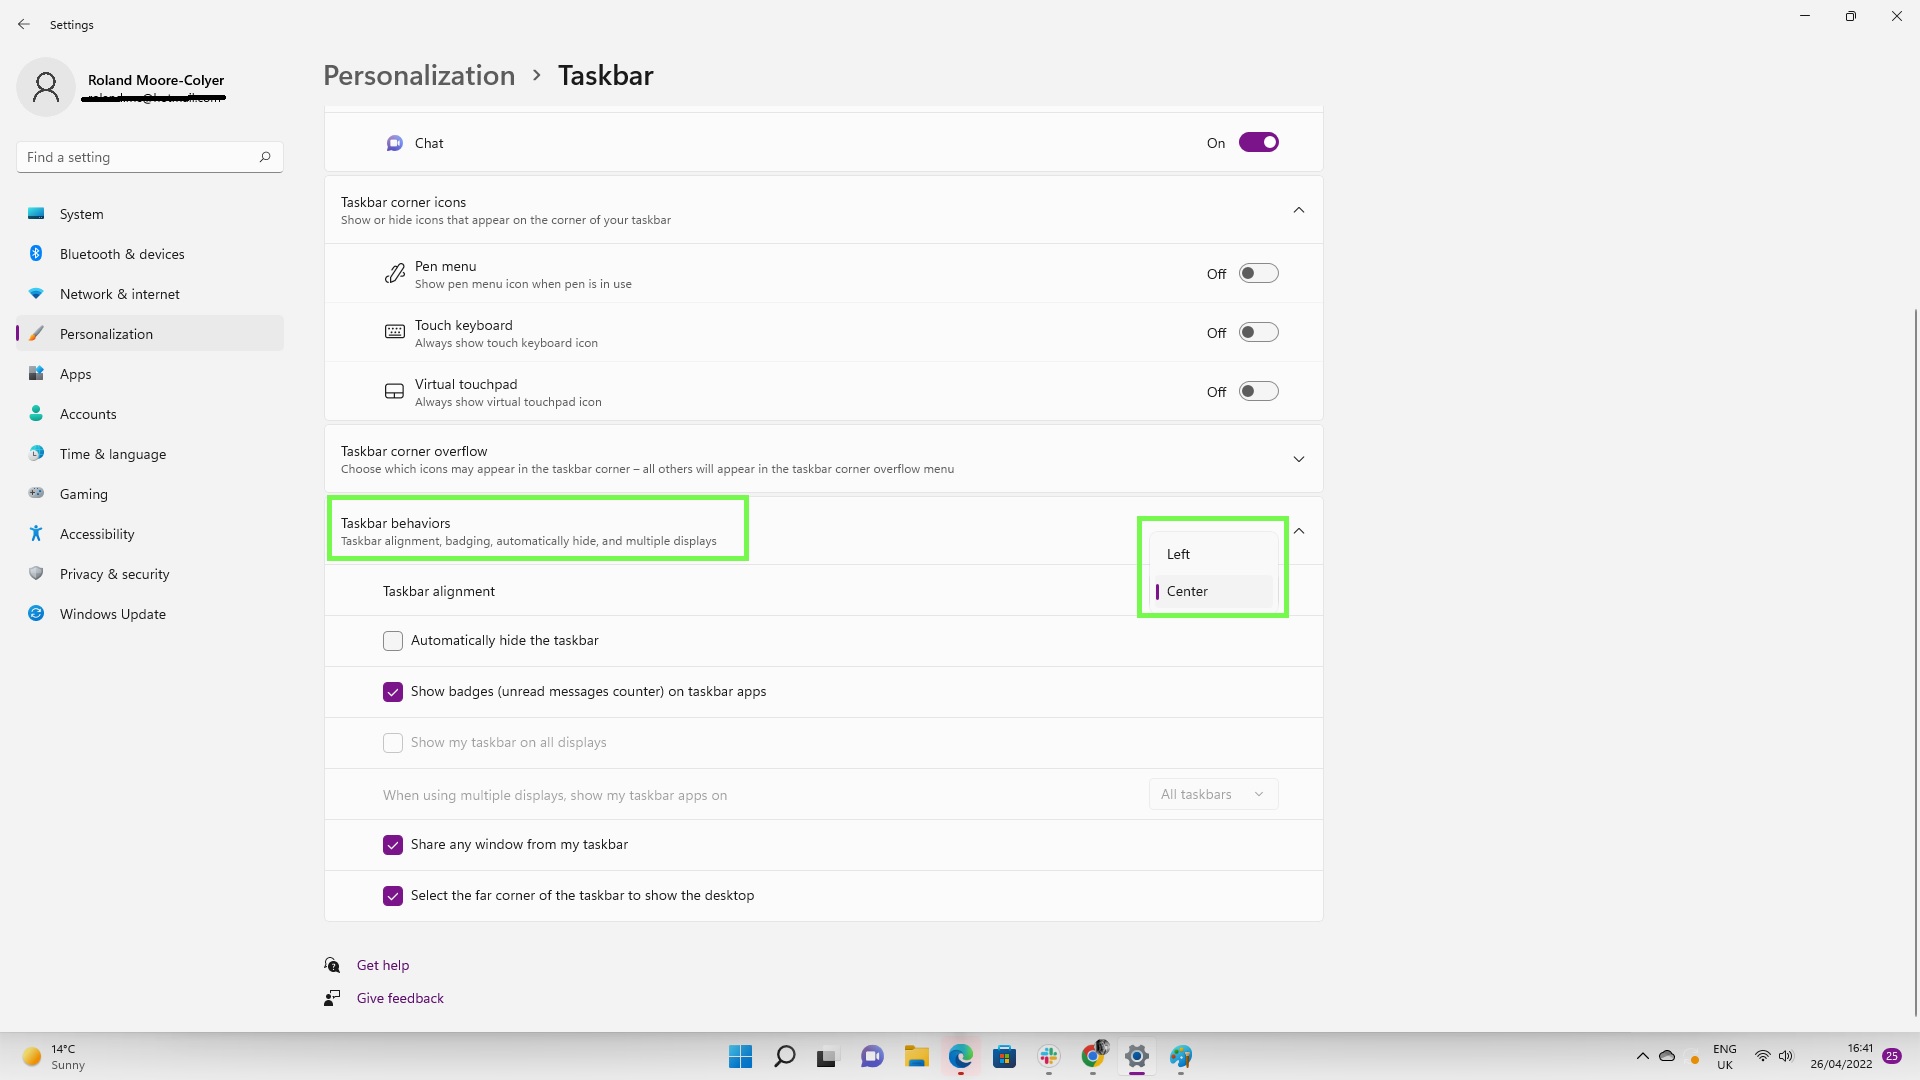
If you can't get used to the central location of the Start menu, then you can move it back to the left side.
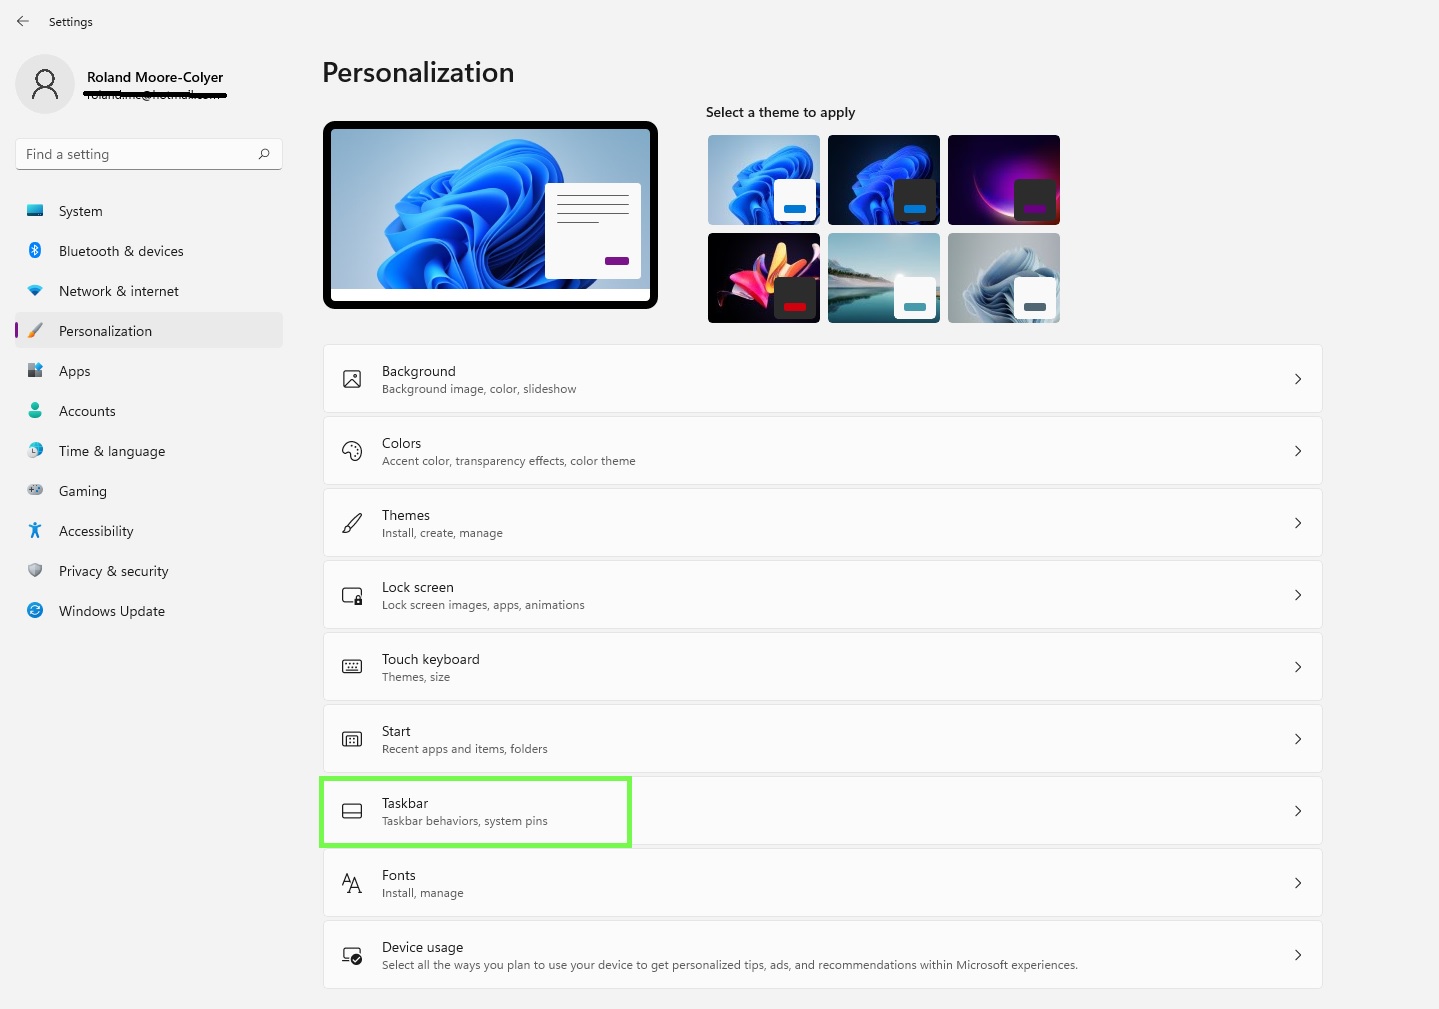
Again, access the Personalization menu, and from there click Taskbar. After that, head to Taskbar behaviors.
Click on Taskbar behaviors and it’ll expand more options, including the top one, which will allow you to align the Start menu to the left, alongside the taskbar. Or if you’ve already moved it, then you can re-center it using these options.
For more Windows 11 tips, check out our guides on how to enable Dark Mode in Windows 11, how to see your Wi-Fi password in Windows 11, how to boot into Windows 11 safe mode, how to set up multiple desktops in Windows 11, how to change the default browser in Windows 11, and how to enable God Mode in Windows 11 or 10.
Roland Moore-Colyer a Managing Editor at Tom’s Guide with a focus on news, features and opinion articles. He often writes about gaming, phones, laptops and other bits of hardware; he’s also got an interest in cars. When not at his desk Roland can be found wandering around London, often with a look of curiosity on his face.
-
mikeypat Nice article thanks. It would be great to know how to customise the right click start menu - or even how to fix it as certain options on mine simply do not work - e.g. Device Manager, Task Manager, File ExplorerReply

